.-| Week 40- The Weekly Hard Surface Challenge |-.

polycounter lvl 17

Hey guys! Looking to get a little better at modeling challenging and complex shapes? Do you frequently have trouble with tricky geometry, and need to up your game? Just bored at work and want to kill some time?
Well, You're in the right place!
In 'The Weekly Hard Surface Challenge' complex and challenging geometry will be posted weekly for poly counters to make along side one another.
____________________________________________________________________
Join us on Skype! Discuss Geo in real time! Just send me a PM with your Skype contact and I will add you to our chat.
____________________________________________________________________

The big idea here is we, as a community, get together and share techniques and approaches on how to best achieve challenging geometry!
All applications and 3d packages are welcome to join in.

Each week I will post a section or peice of geometry to be modeled as proficiently and expertly as possible.
I will post the weeks model on Saturday, Every week. Along with the updated model, I will update the Original post (This!) With tips and trick on how to achieve the prior weeks geometry, Submitted by various other artists!

When posting your take on an Object for the thread PLEASE:
_____________________________________________________________
1. Post at least 1 Shaded image for people to accurately judge the model. A dark diffuse, but Highly specular material tends to work best for this purpose. It's encouraged you provide one of these as well as a render, or beauty shot.
_____________________________________________________________
2. LINK to an image that shows the smoothed and unsmoothed wireframe of the model. DO NOT embed it on open forum, As other people may want the challenge of going into the modeling process without knowing how others did it. Like so:
_____________________________________________________________
3.(Optional) Post a nice render or beauty shot of the geometry(with no wires)! There is nothing to say these small (but challenging) pieces of geometry couldn't go into your portfolio under a "sketch" category! Take pride in your work, Render it out nice, and show it off! Example:
_____________________________________________________________
4.(super optional) Bake it, Texture it! This thread doesn't have to be restricted to just the modeling. We can explore how the high poly modeling process pre-determines material definition and how it affects your asset in the long run!
_____________________________________________________________
Thanks for reading and stopping by!
_____________________________________________________________
_____________________________________________________________
If you want to check out the previous weeks, check out the thread here!
_____________________________________________________________
_____________________________________________________________
Week 9
Reference
_____________________________________________________________
_____________________________________________________________
Week 10 - Team Associated rotary carb
Reference
_____________________________________________________________
_____________________________________________________________
Week 11 - 1930's Electro Voice carbon microphone
Courtesy of Vintage Mike. More references can be found Here
Reference1
Reference2
Reference3
_____________________________________________________________
_____________________________________________________________
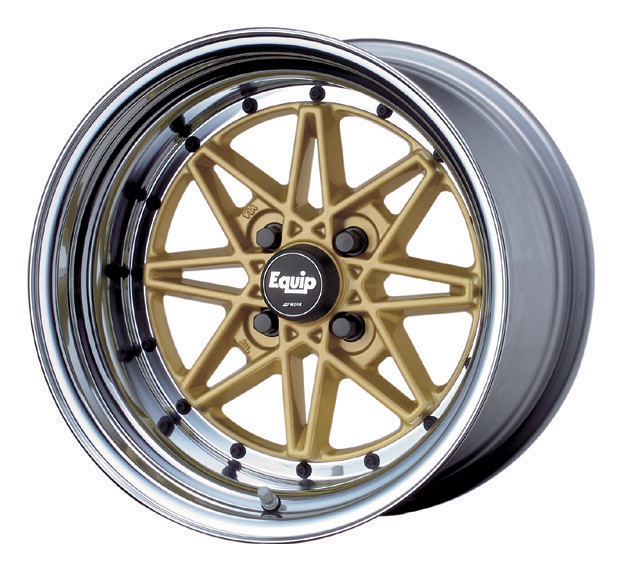
Week 12 - Work Equip 03 Wheel
Reference
_____________________________________________________________
_____________________________________________________________
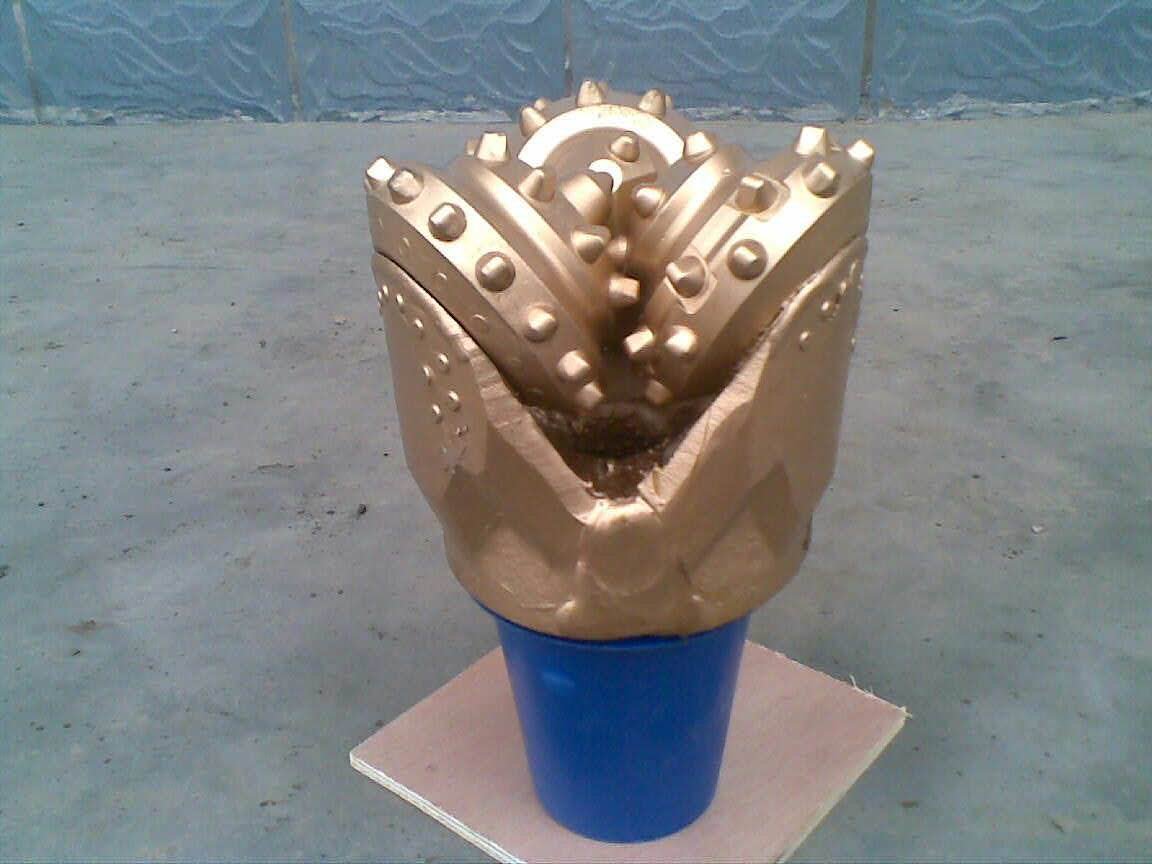
Week 13 - Tricone drill bit
Main Reference
Additional Ref 1
Additional Ref 2
Additional Ref 3
_____________________________________________________________
_____________________________________________________________
Week 14 - bicycle brake caliper
** Search google for "campagnolo super record brake calipers" to get this exact model for additional reference.
Reference
Back side reference provided by AlexRodriguez
_____________________________________________________________
_____________________________________________________________
Week 15 - s2000 HKS header
Reference 1
_____________________________________________________________
_____________________________________________________________
Week 16 - Giro Hex helmet
Reference 1
_____________________________________________________________
_____________________________________________________________
Week 17 - crane control box
Reference 1
_____________________________________________________________
_____________________________________________________________
Week 18 - Halo 4 airlock door
Reference 1
_____________________________________________________________
_____________________________________________________________
Week 19 - Elysium Grenade
Reference 1
_____________________________________________________________
_____________________________________________________________
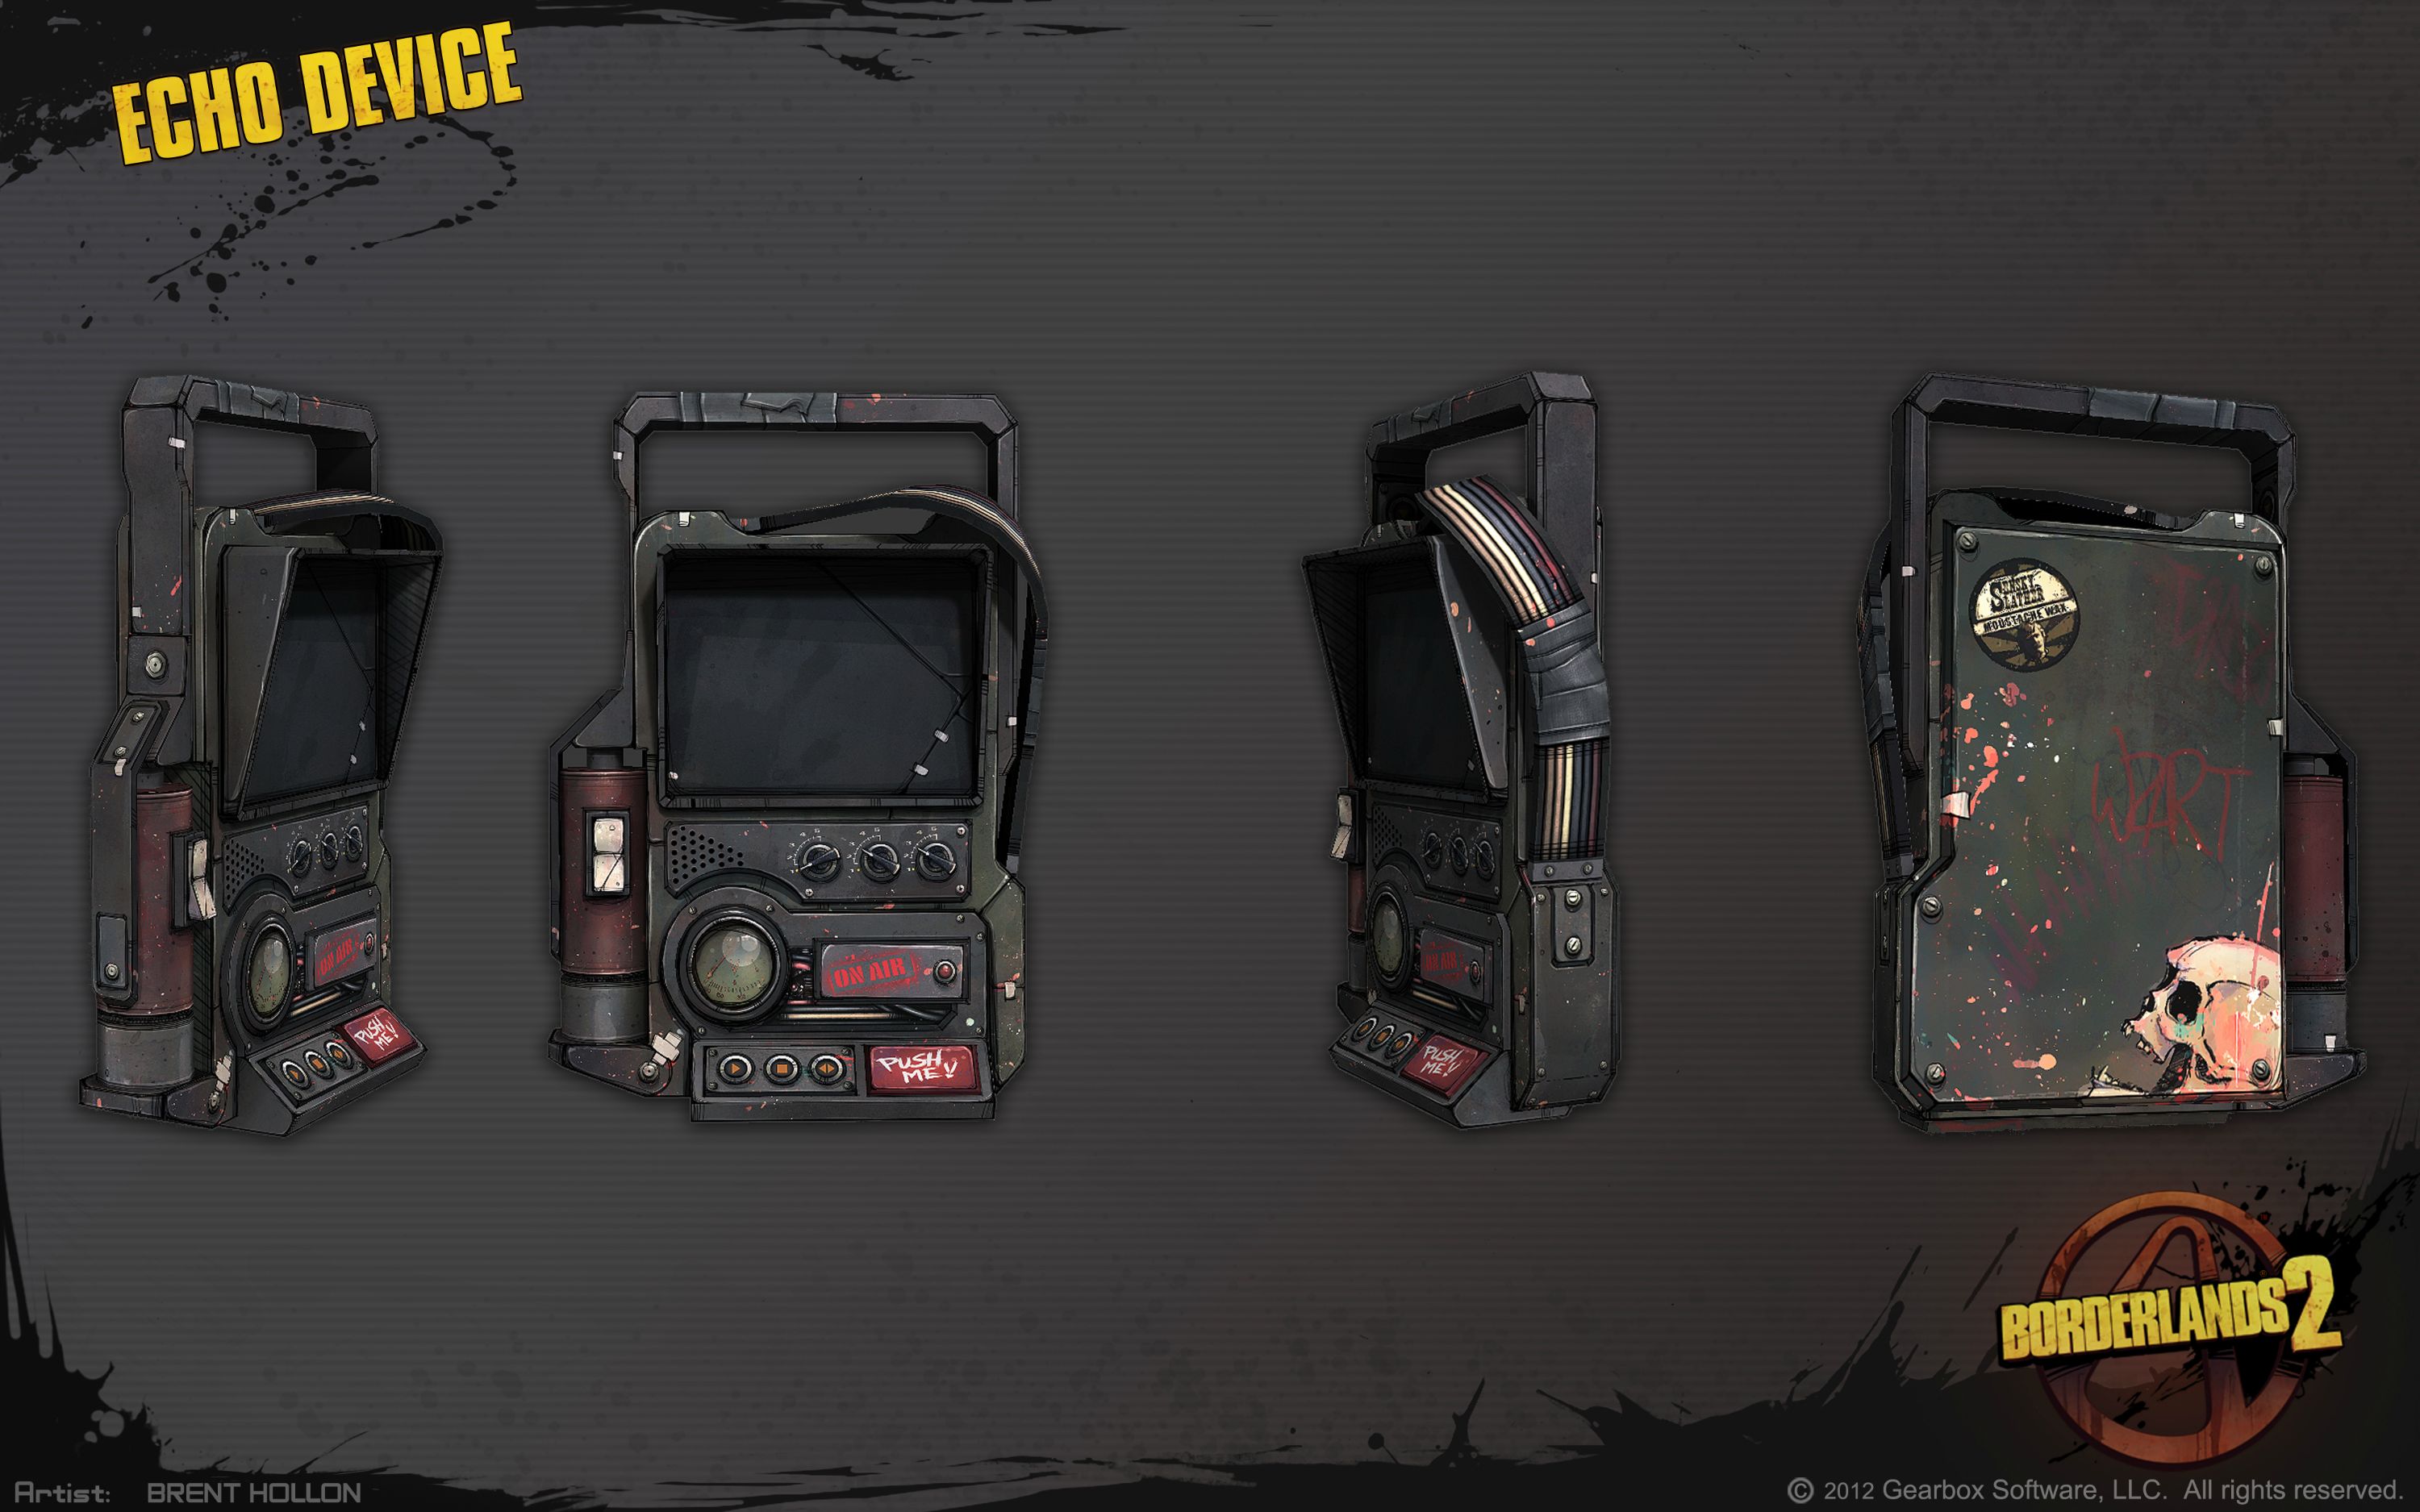
Week 20 - Borderlands Echo Scanner
Reference 1
_____________________________________________________________
_____________________________________________________________
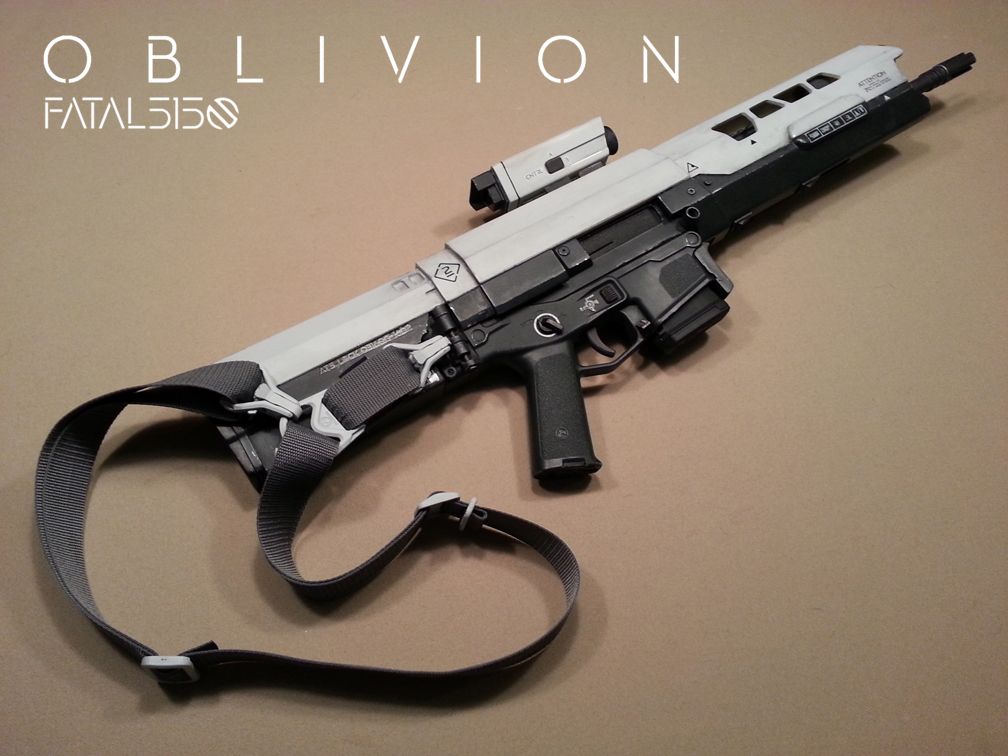
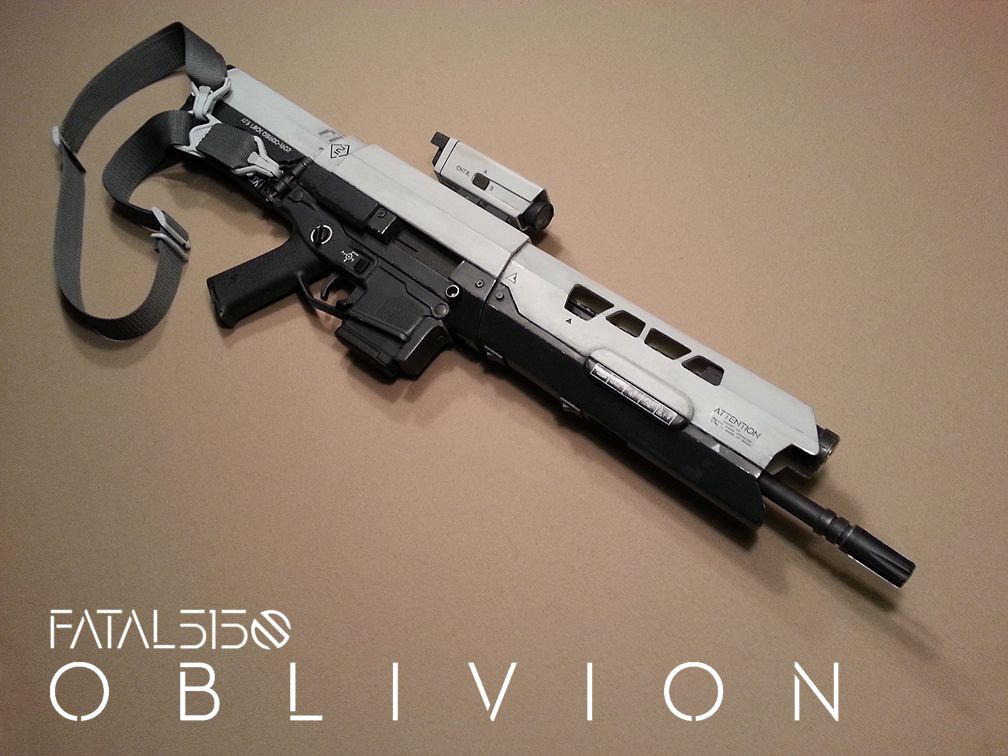
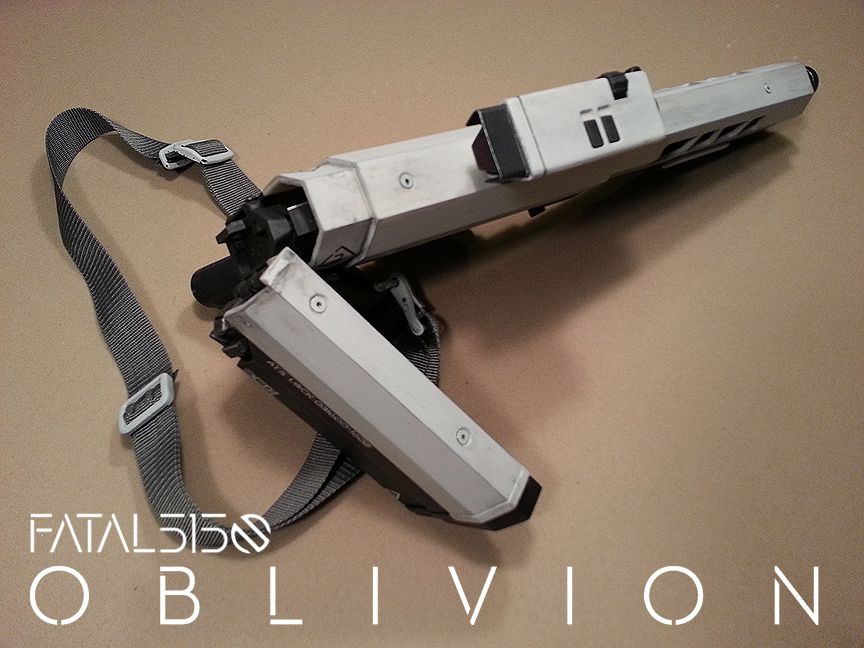
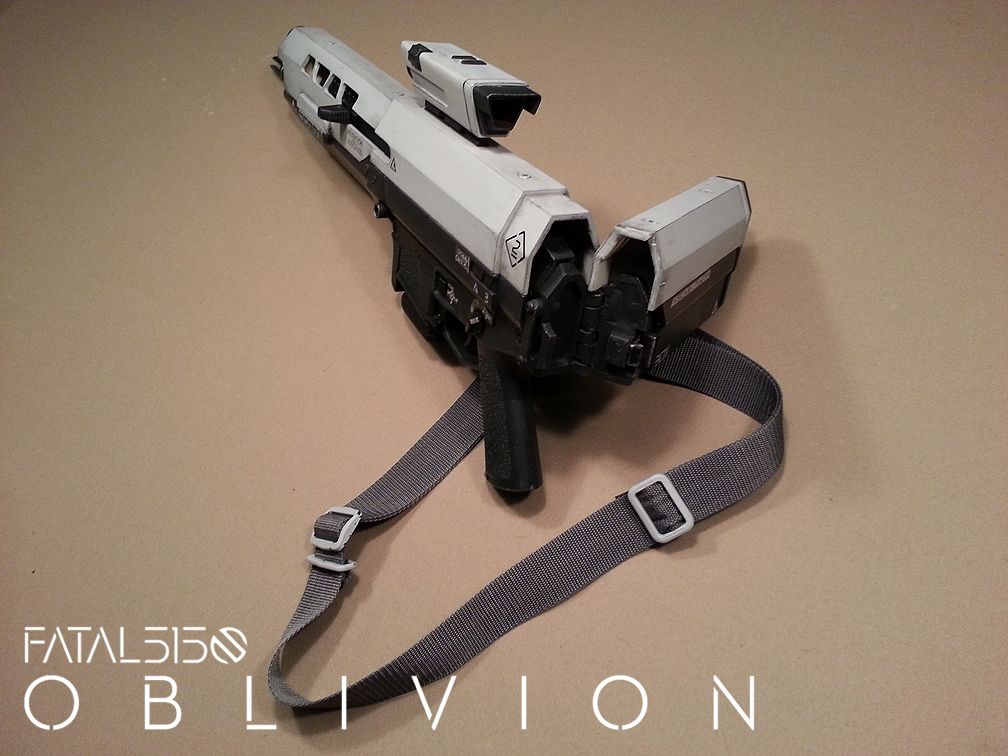
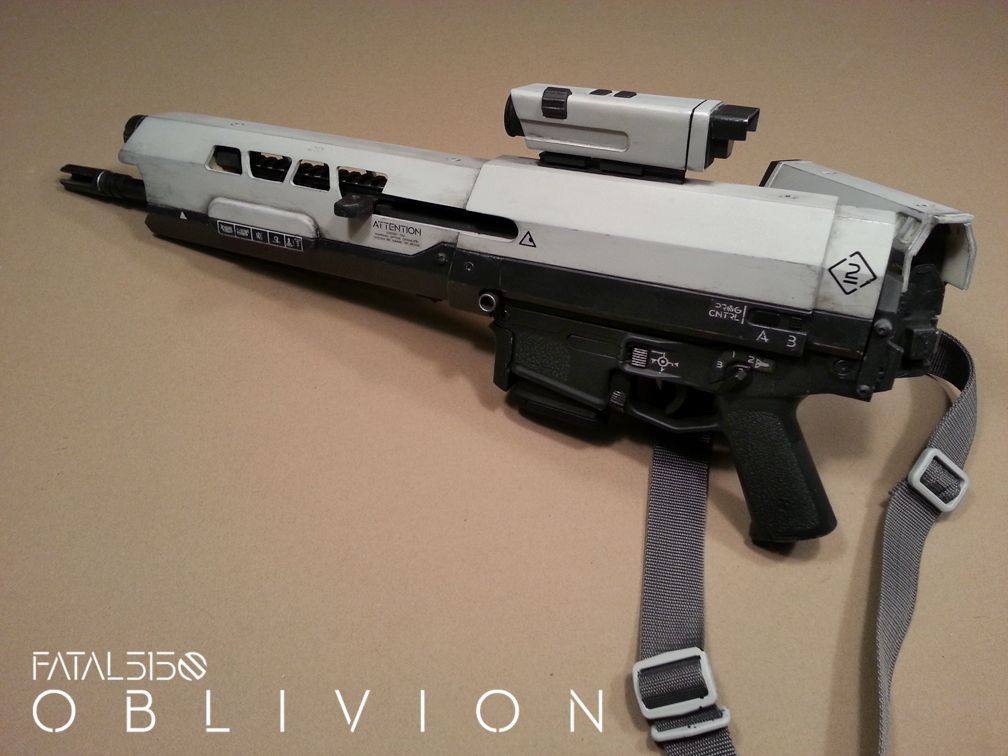
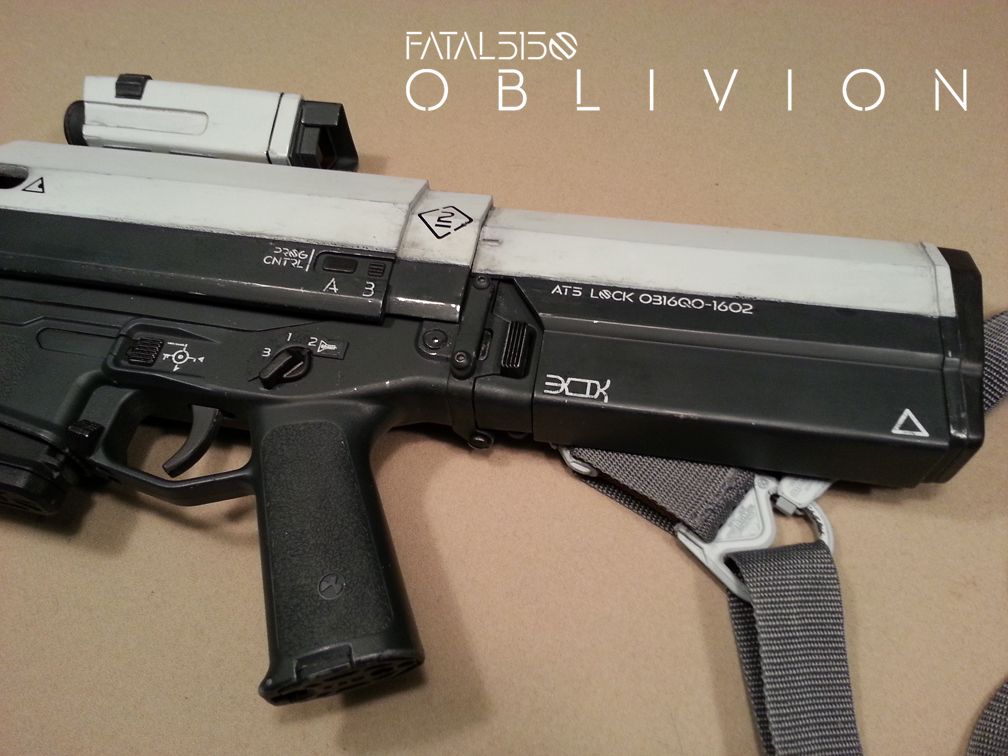
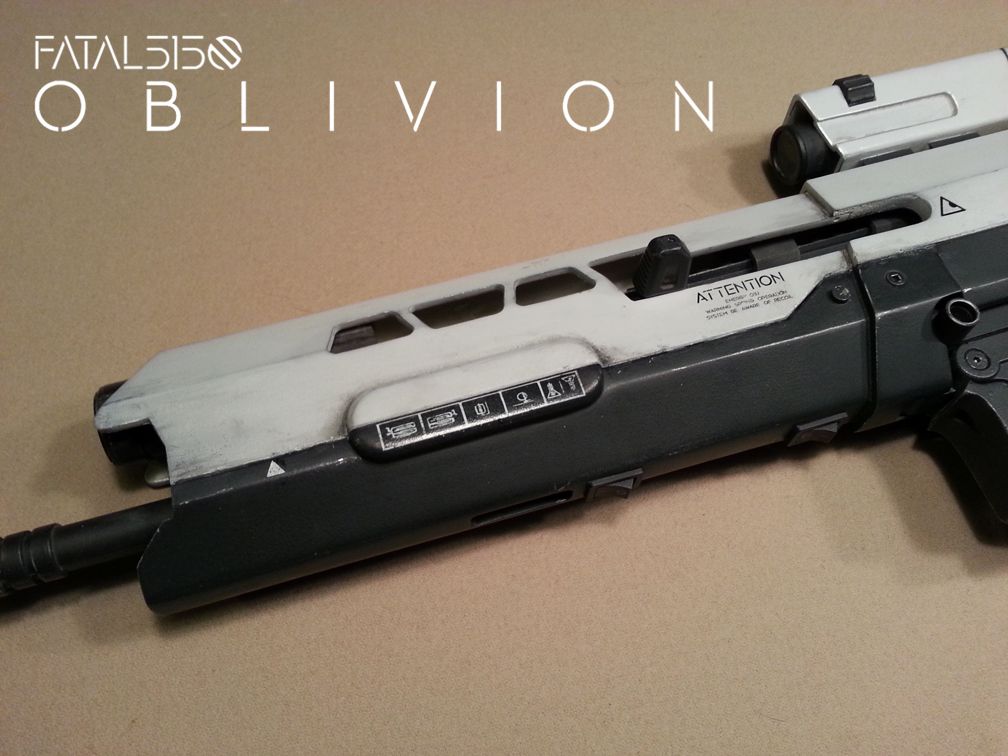
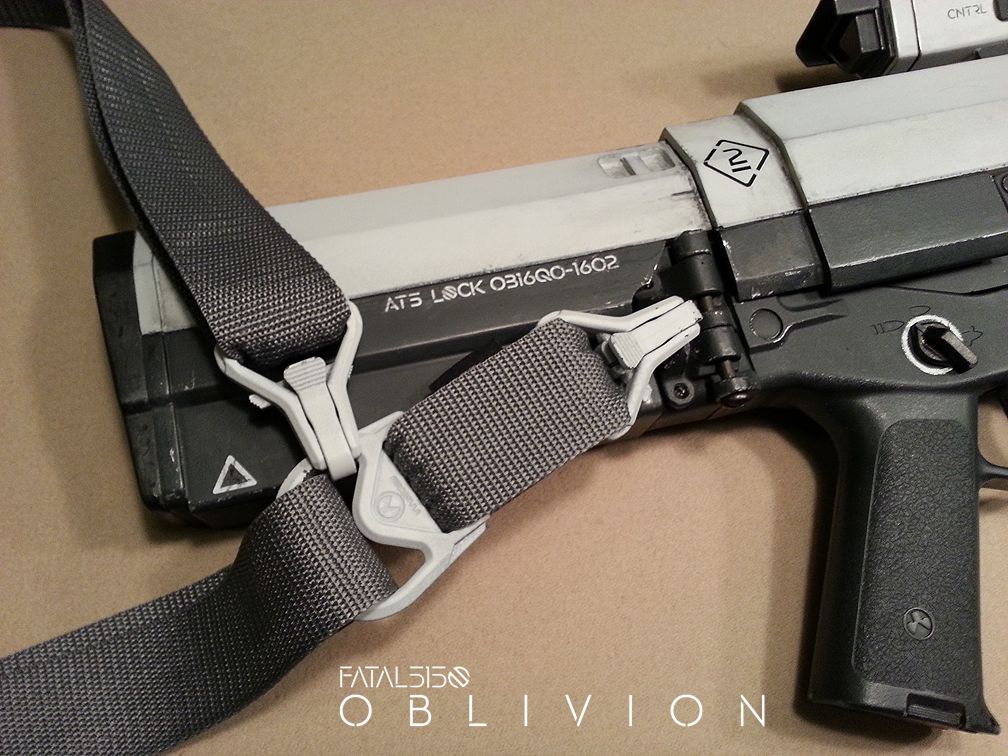
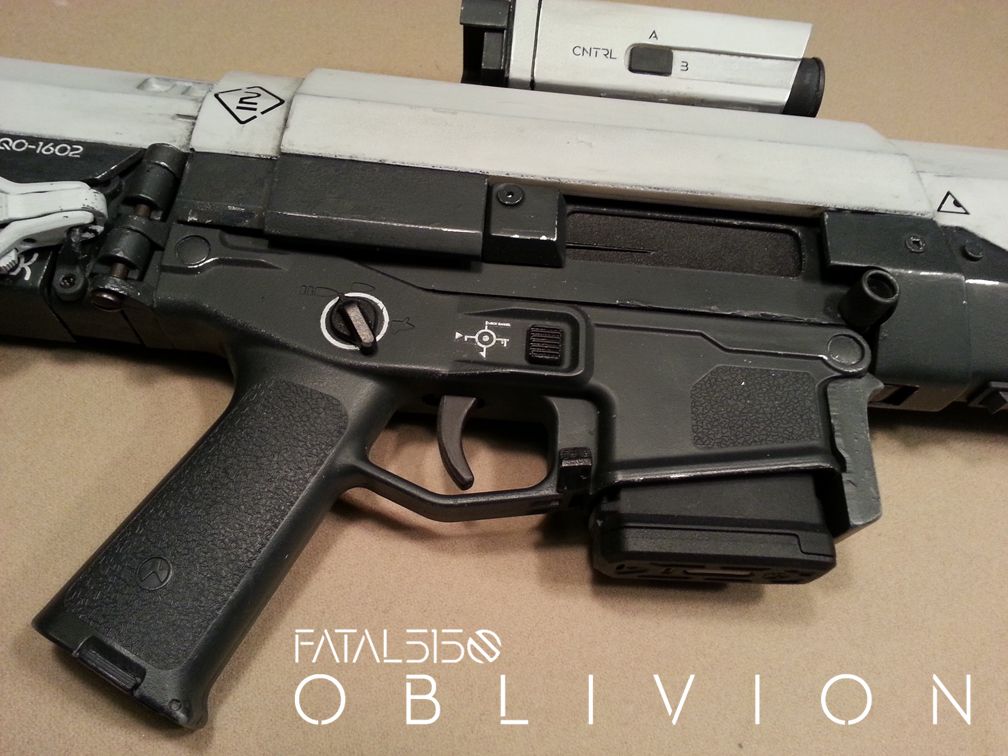
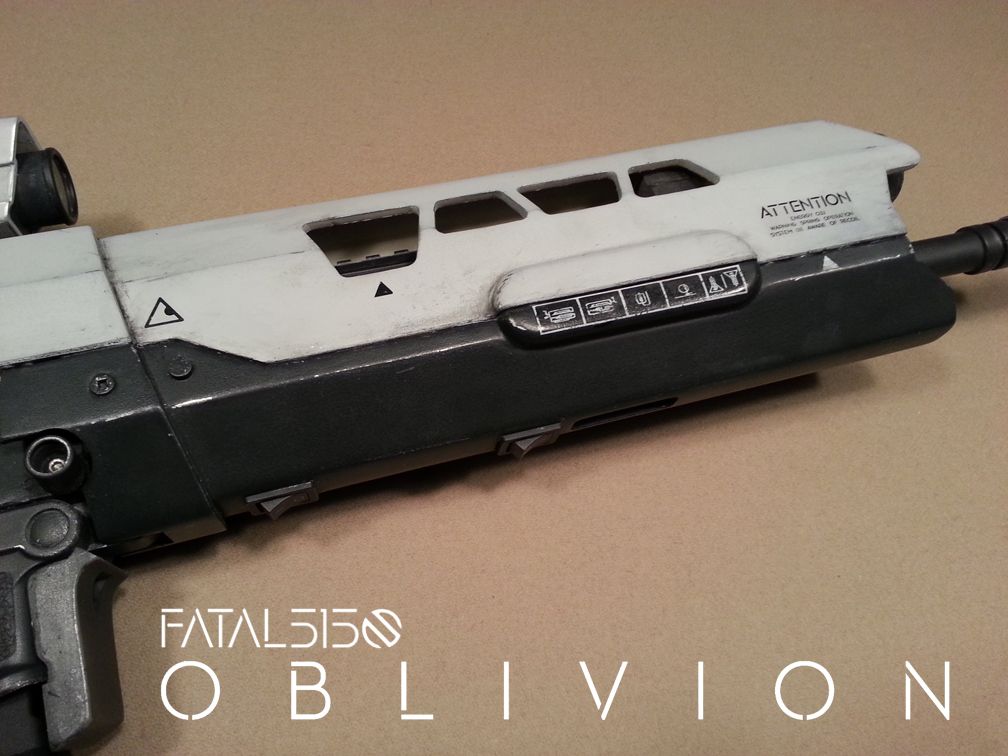
Week 21 - Oblivion Tet Rifle
Notes: Lots of extra refs for this one. The replica comes courtesy of Soulinertia via therpf.com
Tech note: The rifle in the movie (and this replica) is based on the ACR. Notice the lower receiver is unchanged, and it uses standard Magpul Pmags. Should be able to easily find more details for those items.
Ref 1
Ref 2
Ref 3
Ref 4
Ref 5
Ref 6
Ref 7
Ref 8
Ref 9
Ref 10
Ref 11
_____________________________________________________________
_____________________________________________________________
Week 22 - Autopsy Table
Reference 1
_____________________________________________________________
_____________________________________________________________
week 23 - flamethrower
Reference 1
_____________________________________________________________
_____________________________________________________________
Week 24 - Valve cover
Reference 1
_____________________________________________________________
_____________________________________________________________
Week 25 - Tokico calipers
Reference 1
Reference 2
Reference 3
Reference 4
____________________________________________________________
_____________________________________________________________
Week 26 - Optical Theodolite
Reference 1
_____________________________________________________________
_____________________________________________________________
Week 27 - M314 Motion Scanner
Extra detailed reference
Reference 1
Reference 2
_____________________________________________________________
_____________________________________________________________
Week 28 - Type 25 DEP aka Halo Plasma Pistol
As in previous weeks with game models, you will need to translate an in game model into a nice clean "realistic" hard surface object. The plasma pistol has been in five Halo games, so reference images will probably vary.
Reference 1
_____________________________________________________________
_____________________________________________________________
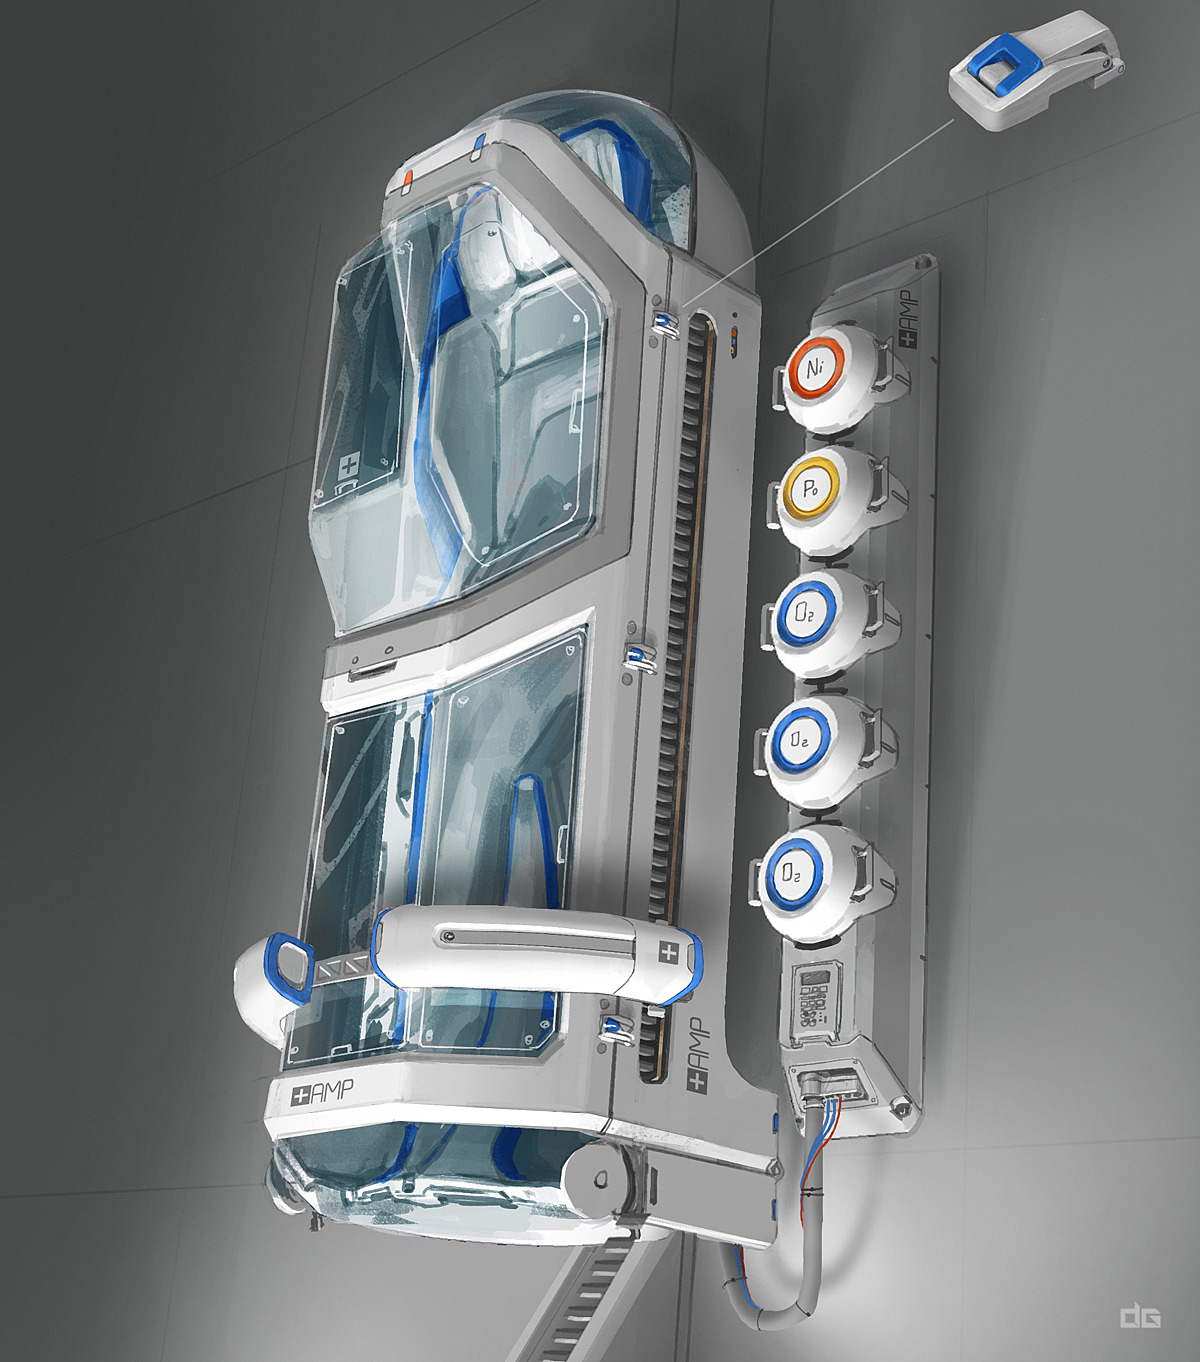
Week 29 - Medical Pod
Here is a pretty cool piece by Danny Gardner. Lots of smooth contours as well as sharper parts so it should be a fun one.
Reference 1
_____________________________________________________________
_____________________________________________________________
Week 30 - Tank Trolley
Here is a cool piece from Natural Selection 2. It has nice contours and a variety of materials so edge definition will be important.
Reference 1
_____________________________________________________________
_____________________________________________________________
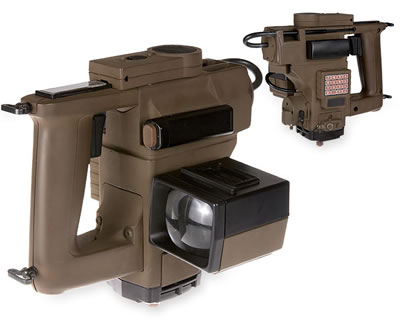
Week 31 - Devilbiss HVLP paint gun
Additional Reference
Reference 1
_____________________________________________________________
_____________________________________________________________
Week 32 - Waterproof ship hatch
Reference 1
Reference 2
Reference 3
Reference 4
_____________________________________________________________
_____________________________________________________________
Week 33 - Jerry Can
Reference 1
Reference 2
_____________________________________________________________
_____________________________________________________________
Week 34 - Alternator Rotor. This is harder than it looks. There are 4 main parts; spindle, coil, finger poles, and fan.
Reference 1
_____________________________________________________________
_____________________________________________________________
Week 35 - AR Bolt Carrier.
Feel free to pick and create any one you want, but they all share the same main parts as outlined in the diagram.
[url=]http://i.imgur.com/uqR6dPw.jpg]Reference 1[/url]
![http://i.imgur.com/uqR6dPw.jpg]Reference](http://i.imgur.com/uqR6dPw.jpg]Reference)
[url=]http://i.imgur.com/cWQh7m2.jpg]Referemce 2[/url]
![http://i.imgur.com/cWQh7m2.jpg]Referemce](http://i.imgur.com/cWQh7m2.jpg]Referemce)
_____________________________________________________________
_____________________________________________________________
Week 36 - BMW M3 Differential Cover
Reference 1
_____________________________________________________________
_____________________________________________________________
Week 37 - Hydraulic cutter/spreader
Reference 1
_____________________________________________________________
_____________________________________________________________
Week 38 - Astro A50 Headset
Reference 1
_____________________________________________________________
_____________________________________________________________
Week 39 - Vise Grip Pliers
Reference 1
_____________________________________________________________
_____________________________________________________________
Week 40 - Natural Gas Meter
Reference 1
_____________________________________________________________
_____________________________________________________________
Week 41 - KSport Coilover
Reference 1
Reference 2
Reference 3
_____________________________________________________________
_____________________________________________________________
Week 42 - Vortex Ranger
Reference 1
Reference 2
Reference 3
_____________________________________________________________
_____________________________________________________________
Week 43 - Soyuz T/TM O2 Valve
Additional Refs provided by JurassicPerk
Reference 1
_____________________________________________________________
_____________________________________________________________
Week 44 - Pentax K1000 - Feel free to use other lenses if you like!
Reference 1
_____________________________________________________________
_____________________________________________________________
Week 45 - Kitchenaid bowl lift stand mixer
Reference 1
Reference 2
_____________________________________________________________
_____________________________________________________________
Week 46 - Sci-Fi Fantasy Pistol
This week is a request to try a cool piece by Brandon Liao. Check him out here
Reference 1
_____________________________________________________________
_____________________________________________________________
Week 47 - Tadiran CNR - 9000 UHF/VHF Radio
Reference 1
_____________________________________________________________
_____________________________________________________________
Week 48 - Fender Stratocaster
Reference 1
_____________________________________________________________
_____________________________________________________________
Week 49 - Klarus XT11
Reference 1
Reference 2
Reference 3
_____________________________________________________________
_____________________________________________________________
Week 50 - Shimano Calcutta 400B - *NOTE* If you search for additonal reference, be aware there are multiple configurations such as right hand vs left hand. These three reference images have variations as well, so be aware of any differences between them.
Reference 1
Reference 2
Reference 3
_____________________________________________________________
_____________________________________________________________
Week 51/52 - FINALE!
Evolution 160cc radial engine


Replies
This is my progress so far, still working on refining some shapes to fit the picture more accurately, although some changes were made purposely to for design matters. Updates soon.
You are off to a good start. It may be a bit hard to see, but the swashplate (the piece with the 5 links attached) is actually two seperate parts. The inner section has the two links connected to the rotor blade mounts, and the 3 links which connect to the servos. All you should have to do to denote the cut between the parts is just that, a cut. Simple
WIP, some of my proportions are a bit off not to hard to fix might just leave them as is.
Nice choice in a object Commandor
3ds Max shaded render.
Beauty shot.
Wireframe renders here.
Week 9 Advanced, only a week remains till I begin to focus mainly on texturing. These challenges have greatly improved my modeling (lucky it started when I was focusing mainly on learning to model)
Wires
I also learned and refined my modeling skills more during Week 1 I thought I was skilled enough to only do the beginner objects.
This is my beginning :
Render from max
There are some "cut" in the mesh because I work with intense and didn't collaps them yet.
At the top it's just beginning so don't pay attention at the smoothing group.
Thanks for the critique Alex!
You are right on the 3 wings. Looking at the reference again thought that it was 4 when I originally created that shape.
I originally had moved the bottom section down but raised it up a bit as the connectors seemed stretched in comparison to the reference but think I can find a happy medium distance for those two sections.
Sorry for the weird reflections on the plastic part.
I Might get around to tweaking and retopo during the weekend.
I'll get week 10 posted tomorrow. Keep an eye out! For everyone who completed this week, good job! For anyone who has yet to join, come on in. I'll restart the two model format with week 10, giving a choice of an "easy" model, and an "advanced" model.
Wires
Beauty.
Wireframes here.
HighPoly
LowPoly
The next piece is going to be fun yes haha.
I think commador you should make a little bit smaller the edge at the top of the square, it seems to be a little bit more "round" (the center piece)
Posting for week 10. Lots of cutting and merging for this one. I'm sure booleans could've made quicker work, but this is practice after all. I think I could've made the high speed fuel needle (the tall brass gizmo on the left) a bit fatter, but its pretty good I think.
Wires
Welcome to the challenge!
Your mesh looks pretty solid. All the proportions are very good, and there isn't anything that looks off or out of place. Some of the edges look a bit tight however. The way you have modeled it is very accurate to the real piece, and very much how it would be machined in reality, but if you have the intent of baking this mesh to a low poly asset, those tight edges would lose detail. Just something to keep in mind going forward. In fact, thats probably what you would hear most. I still need to get better at "loosening up". Anyway, keep it going and stick around!
WIP Merging the cylinders onto a cylinder was kind of complex in maintaining a clean topology. I gave it shot and almost got it just the way I wanted, will tweak tomorrow upon finishing the HP
i'd recommend going with the flow on such parts, keeps your corners consistent.
Been toying with SubD stuff a fair bit lately, figured I'd take the night off my personal project and have a crack at this.
Took me about 2 hours so far, the shape and stuff is pretty complex. Most of the time spent was just bridging, merging and connecting polygons and ensuring the edge loops worked properly.
[edit - I need to learn how to type ]
Welcome aboard Mitch!
I picked this object for that very reason. There isn't really a whole lot to the shape, and at cursory glance it looks easy enough, but its quite deceptive and requires a bit of planning to reproduce it. What I did was essentially manual booleans. I could make a quick demo (which reminds me, I need to finish the one for week 8) but it basically goes like this: Align the part you want to "merge" (in this case the angled cylinders on the right side) and on the "host" mesh, draw an outline of edges around the cylinders. Draw a loop of edges on the cylinder where it intersects. Remove the faces that overlap, and merge the two parts. Do any cleanup work to make the edges flow as good as you can get it. Then, draw a loop of edges around both sides of the intersection for support. Try to tie these off someone to avoid pinching or weird surface shading.
This method may not be perfect, the best, or the fastest, but it will result in a decent mesh, and as I mentioned earlier, its really good practice for doing boolean operations manually, and getting a really good understanding of how they work. I imagine Modo's new Mesh Fusion feature would have this knocked out in minutes with great results.
On a final note, do some research on Week 10 model a simple Google search of "Team Associated rotary carb" is a excellent start *this piece is actually more complex then one might think*
I use this method, and you're right it is slow but it's effective and can provide really neat joint seams! I'm using Maya and while the new modelling tools speed up the process a fair bit, it's still far from perfect. Boolean operations almost never work for me in Maya. I'll be focusing on the angled pipe sections today trying to get those to look neat and sexy.
The hardest part I'd say so far has been getting the extrusion at the top of the phillips head screws to work properly. Any subdivisions to strengthen the edge borders through results in more edges running through the screw cap itself and down through the cylindrical body of the peice which gives it sharp lines. Still, it's great fun problem solving this stuff.
wire
Good work Mitch. Keep an eye on the proportions, and be careful of making edges too tight. If you stick around you will probably hear that quite often. As for your screw, you could add more segments, or change the direction of your support edges to "follow" the edge of the cut. I think Perna has some examples of this floating around somewhere.
Nice work Copletaf! Shapes look quite nice and seem to match the reference well. However I notice some proportion issues with the brass cylinder on the left. It could be a bit taller. Would you mind posting the wireframes?
Working on keeping my edges farther apart as I have begun to learn to texture/render
Quick Light Render
Front View
The back was done by using reference images from teamassemble (everything was at a angle was hard to judge accurate proportions). Would have loved to see other try the back side or show what they did some of the back started rerouting my edge flow making it a much thrilling challenge
Front Wires
Back Wire
The part with "DV-I" is high res on the 2 screen because I collaps my modifier in max when I add the text, didn't think about the screen at this moment.
The next piece is challenging, good choice !
With nurbs
No nurbs
WIP would of used a un-wired but as it still pretty low poly it hard to see. Most of my geometry is modeled into the model. Only used a few floaters mostly on the screws
Sanchez: Look over at your bolts on the right image the outer most bolts are a-lot bigger then the others. Also the outer ring has a little more definition. But overall looking good don't forgot the stand/bottom
I just notice that my round (with spring) around the center are too small and I need to remake the big circle. I need to correct some scale error too and make the support.
AlexRodriguez : Good start ! But your big circle seems to be too thick and the center piece not enough thick.
MSanchez : Looks good ! But I think the top of the support should be bigger
Wireframe no nurbs
https://dl.dropboxusercontent.com/u/17495638/week11_BackLow.jpg
https://dl.dropboxusercontent.com/u/17495638/week11_BackLow.jpg
Wireframe with nurbs
https://dl.dropboxusercontent.com/u/17495638/week11_BackLow.jpg
https://dl.dropboxusercontent.com/u/17495638/week11_BackLow.jpg
Just need to go in and smooth and add control loops. But I wanted to see how people tackled the wire knot, I was thinking of using a nurbs curve to get the form but wasn't to sure.
You could both add a little rotation to the springs where they latch on so it not so symmetrical and duplicated. I did it slightly as a suttle affect. Lastly on the front where there 4 screws there the biggest of the whole piece (those screws) has a washer on the surface below it. Commandor has it there slightly bigger then the screw and can be seen more clearly
Besides that it all nitpicking
Good model. Everything looks very solid and the proportions are bang on. The only piece I can spot that needs work is the base of the ring mount that threads into the stand. The cylinder is much fatter than the "wings" that flank it to either side.
Nicely done. I think the inner diameter of the front bezel could be shrunk just a tad, and the outer "lip" could be made a little bigger, as on the reference it appears as if they aren't quite the same size. The last thing I can spot is the "dogbone" piece on the front should have smoother transitions from where it extrudes forward. Your mesh is pretty sharp there.
Looking pretty good so far. The outer ring mount should be flat on the inside. On the reference images, you can see some welding marks where the two halves were joined. The ring looks like it has a straight profile the entire way through, with maybe a touch of curvature on the outside. You have a pretty steep bevel on yours.
Commador : Nice piece ! I think faces around the center face extruded of your "dogbone" should be more large and your spring should be bigger if we really want the same as the reference
Otherwise your spring attachment are funny, it's seems like that will break.
wire
Quick Light Render
Nice Completaf you should brighten up the lighting a little more some areas aren't very well light (Bolts).Your wiring also looks very clean (seem you like to have a few floaters hanging about)
Smooth Wires
Un-Smooth Wires
Wires
Make a block-in mesh and observe the references. Sometimes there won't be much presented to you (week 11 I actually got lucky that there were so many good photos taken) and you will have to make some assumptions about how things work. I've said before assumptions are bad, but if you have no other choice, experience and observation will fill in the gaps.
For your entry, the diameters of the microphone and ring mount are pretty good. The depth could be brought down a bit. The spring hooks should be centered in the ring. Yours are almost on the front edge. The spring mounts on the mic itself should be centered in the gap between the two halves of the mic body. The horizontal of the dog-bone piece on the front should also have more height. The base mount that threads onto the stand should be much bigger. The two sides are half the size of the center portion in height/width, whereas yours are very flat. Finally, there are only 2 wires on the mic, the part screwed into the back looks to be some kind of strain relief. Otherwise, you have a good start for the model.
Alex, your ring mount is waay too thick. If I had to guesstimate, the cross section is probably one quarter inch or less. Yours looks like its an inch or more.
http://vintagemike.files.wordpress.com/2013/09/photo8.jpg?w=645&h=863
You can set this one on the Side View is great for the front shape proportions
Then once you have the front done you can look over at this image
http://vintagemike.files.wordpress.com/2013/09/photo6.jpg?w=645&h=863
(This is about 2 inches wide, and yours was about 4 inches wide) *There also another showcasing how wide to make the outer ring*
As for Week 9 the mirc rotor head you basically have to judge it, you can mark a line and say that is 1 inch then any piece that is the same length as that line is 1 inch (Then when you make the shape a scale of 1 can mean 1 inch *least that how i do mine*
Yeah I made my a little thicker, I didn't like how thin it was. But thanks notice compared to ya mine was thicker. (You could switch it out, I keep mine at cm doesnt change much scale of 1 to scale of 2 is always going to be twice as big.
When you create a primitive for example you needed a cylinder for this piece and you determined its 2 inches thick just make the first one 1 inch as your only making half (you may of started with the correct thickness but when you made the back it just become twice as big). Then when your extruding a face out look at your values (.5 is half a inch and .33 is 1/3rd (that is if you set a scale of 1 = 1 inch *I found just pulling out causes your proportion to get out of hand*
Clay render.
Wires found here.