Best Of
Re: [Blender Add-on] Smart UV Tool – Fast, Clean UVs for Dense Meshes
Is that an AI-watermark on your marketing graphic. If so, I wonder what else is AI generated 
On Superhive it says the creator of this addon is 'Anvil Interactive Solutions', which reminds me of @anvilinteractive, who recently promoted addons by that creator too. Do you know each other?
On Superhive it says the creator of this addon is 'Anvil Interactive Solutions', which reminds me of @anvilinteractive, who recently promoted addons by that creator too. Do you know each other?
 Fabi_G
3 ·
Re: Dishonored 2 - Desk prop Fan Art
But i didn´t stop there. For my Table were i can now play Dishonored i need an stand for my PC. So this was a no brainer what it has to look like:


 Bostrope
3 ·
Re: Sketchbook: Eric Chadwick
Some sketching in the Dr. Sun Yat Sen classical Chinese garden in Vancouver.
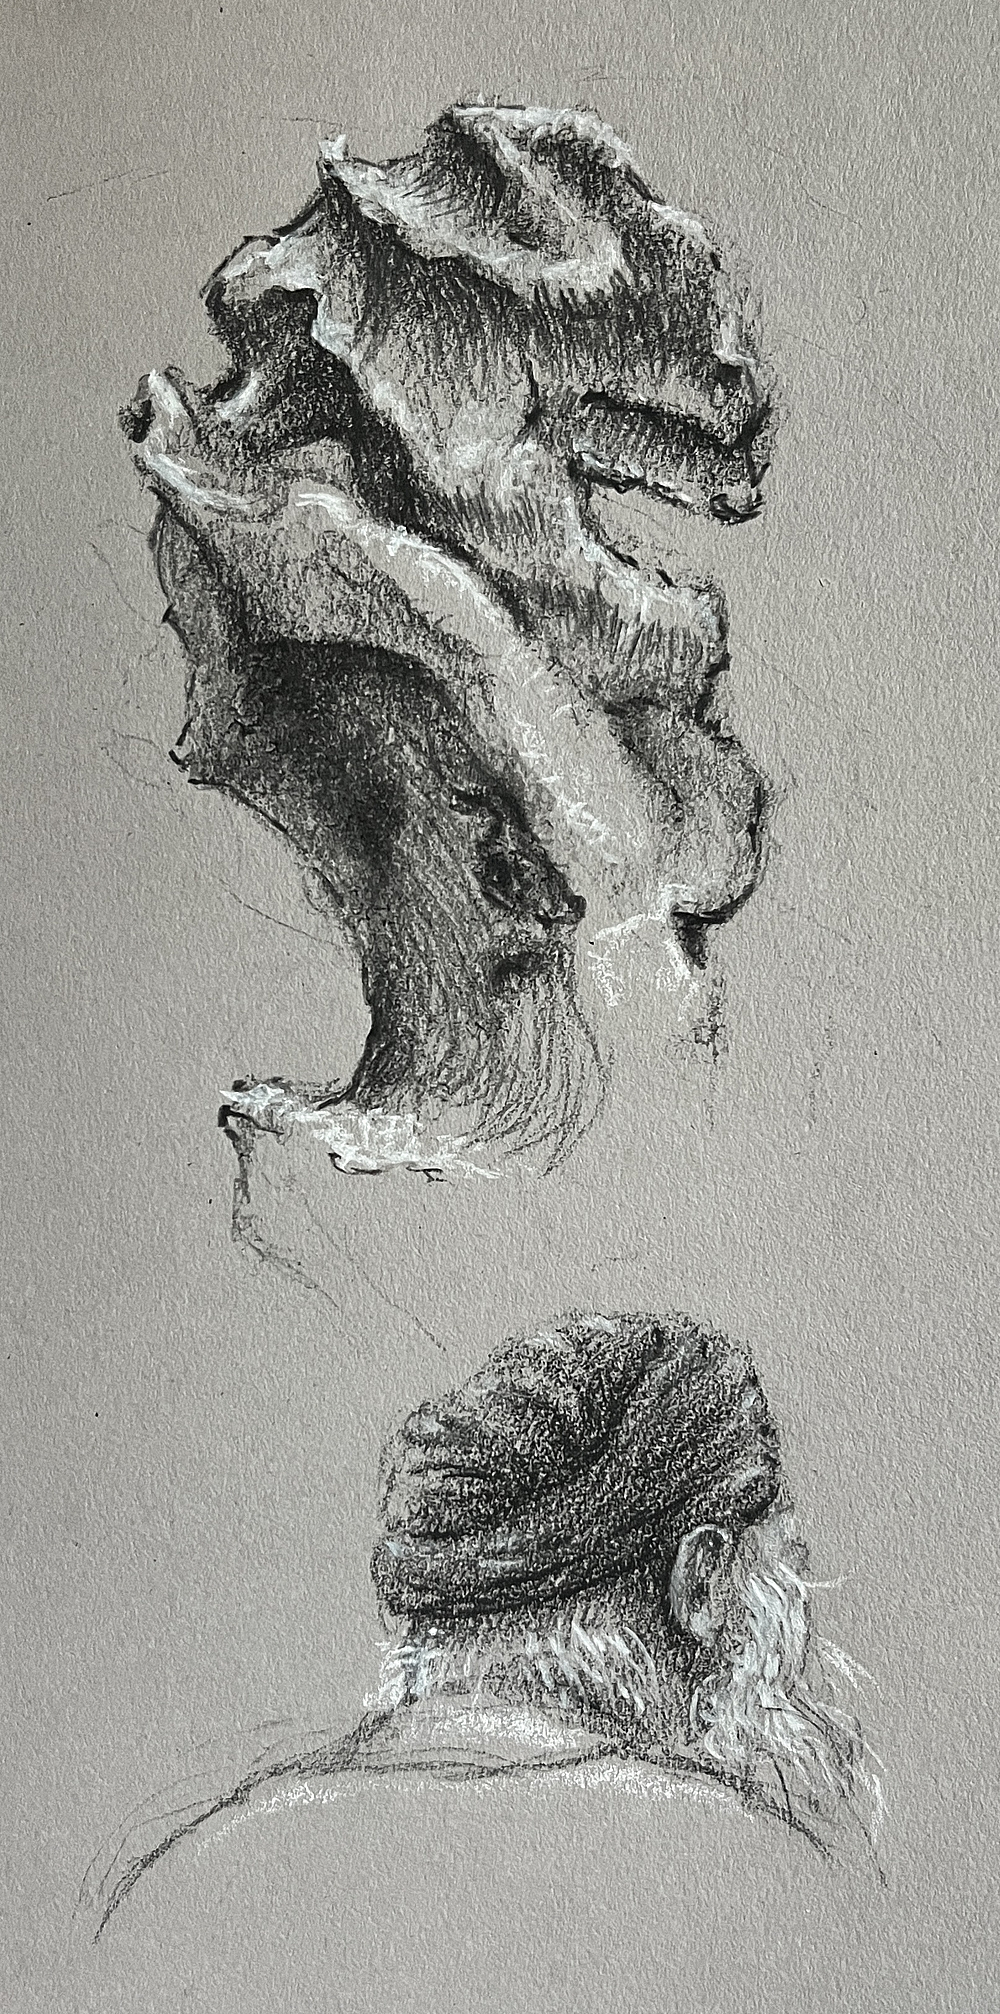

Rainy day, but it was so peaceful, magical.


Rainy day, but it was so peaceful, magical.

 Eric Chadwick
3 ·
Re: Sketchbook: Eric Chadwick
Working on some iridescent sunglasses. Not sure yet which colors to use, though I think I prefer the warmer hues.


 Eric Chadwick
4 ·
Re: Sketchbook: Zetheros
decided to remove the pauldrons and arrow stopper. These will show up later as modular attachments if at all


Have a great week!


Have a great week!
 zetheros
4 ·
Re: Sketchbook: Zetheros
No lowpoly yet, but more polish. Replaced the internals with synthetic digestive organs protected by a removable internal panel. Added rivets and hooks. This is a great example of how functionality drives aesthetics. Everything is designed with intention and not because it "just looks cool", and the art is better served because of it. There are two pages of notes in my developer notes about how these function in-game and lore-wise.


Have a great week!


Have a great week!
 zetheros
4 ·
Re: The Bi-Monthly Environment Art Challenge | May - June (102)
Hi! Wanted to try one of these for a while now, but always decided against it at the last moment.
I haven't done many (any?) projects where I had to follow [somebody else's] concept art, so I don't really know how much freedom of interpretation to exercise and how to do this properly. Any advice about how to proceed and what to change will be most appreciated!
Here's blockout so far:
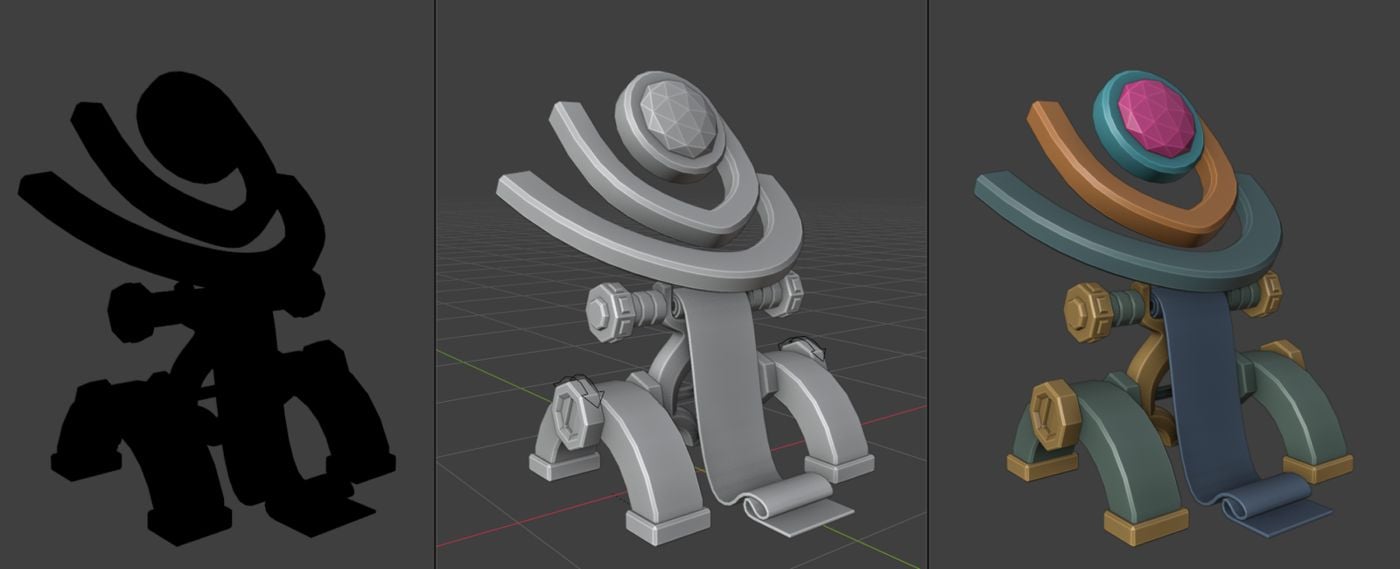
It seemed to me this prop is made of movable parts, so I interpret it as something that needs to have it settings adjusted from time to time via upper axis "handles" (rotary dials?).
Unlike the concept, I made the "arches" disconnected from each other to allow for more independent movement when switching modes. I wonder if that's something I should change back...
And the scroll is short in this case, so it's simply rotates in the opposite direction when the mechanism is tilted.
The fire is planned to be a static ornament, because anything else is well outside my skillset at the moment - I wouldn't know where to start.
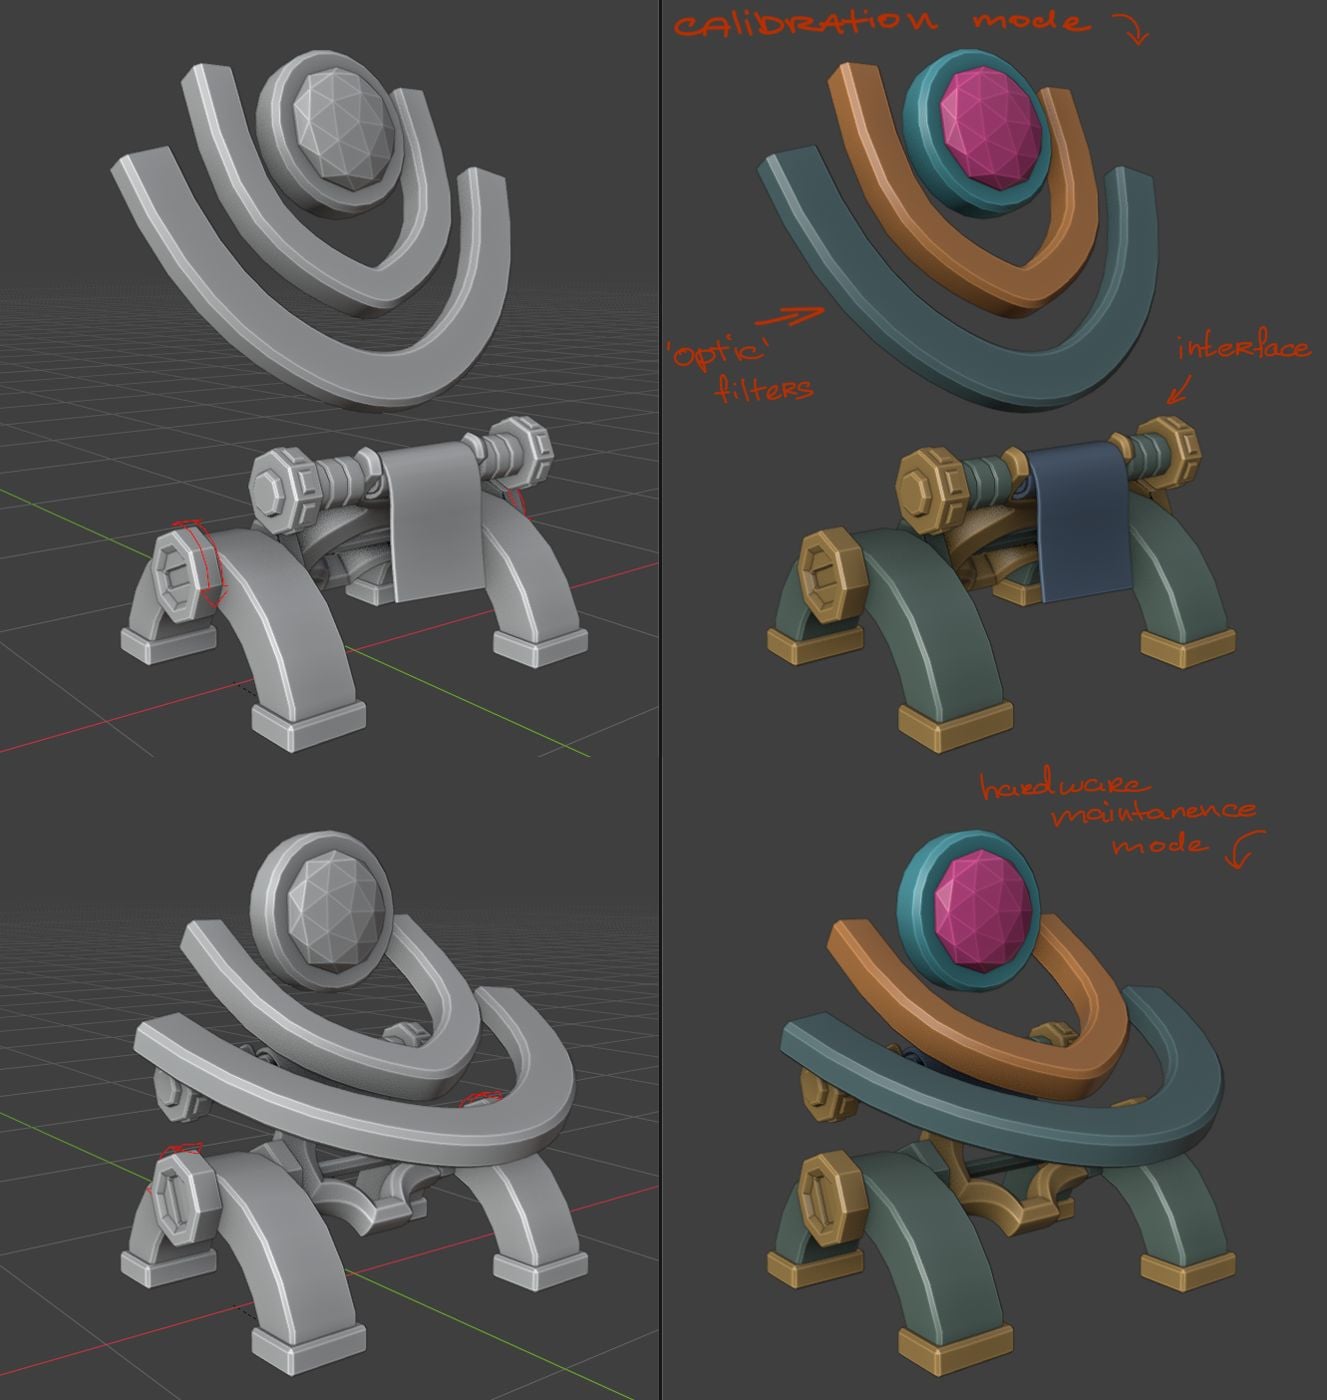
I haven't done many (any?) projects where I had to follow [somebody else's] concept art, so I don't really know how much freedom of interpretation to exercise and how to do this properly. Any advice about how to proceed and what to change will be most appreciated!
Here's blockout so far:

It seemed to me this prop is made of movable parts, so I interpret it as something that needs to have it settings adjusted from time to time via upper axis "handles" (rotary dials?).
Unlike the concept, I made the "arches" disconnected from each other to allow for more independent movement when switching modes. I wonder if that's something I should change back...
And the scroll is short in this case, so it's simply rotates in the opposite direction when the mechanism is tilted.
The fire is planned to be a static ornament, because anything else is well outside my skillset at the moment - I wouldn't know where to start.

 stray
stray
5 ·
Re: [WIP] Character | Fan Art | Mech Rekka
It has been a while, like a really long while but here is more progress of my mech

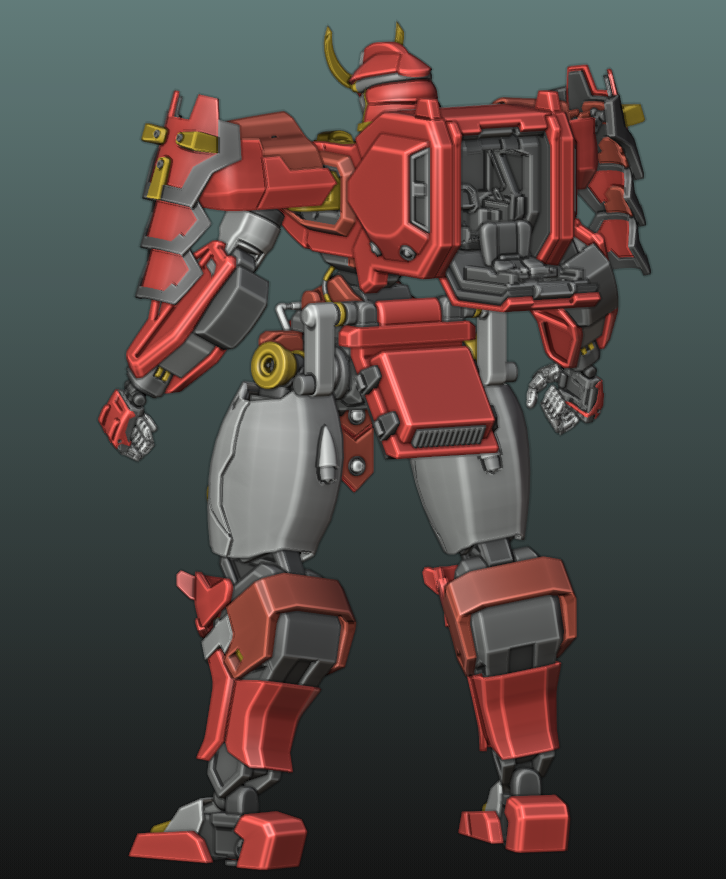


 np1094
6 ·
