The BRAWL² Tournament Challenge has been announced!
It starts May 12, and ends Sept 12. Let's see what you got!
https://polycount.com/discussion/237047/the-brawl²-tournament
It starts May 12, and ends Sept 12. Let's see what you got!
https://polycount.com/discussion/237047/the-brawl²-tournament
Best Of
Re: Star Wars Outlaws: Character design was the least of this games problems.
NikhilR said:And my assessment that she might have been addicted to meth and a street fighter was based on the extreme changes in her face that many meth addicts do show and her living environment (she lived above a seedy bar) in Canto Bight
Rose Tico said"It's a terrible place filled with the worst people in the galaxy."so its possible that Kay abandoned by her mother and living without a father figure and engaging with known criminals did get in with the wrong company.
Atleast in Outlaws she is likely post rehab, but the scars of the hard life remain and perhaps the devs wanted to frame her development as a redemption story like Han Solo............She's also extremely overpowered being able to beat up whole platoons of storm troopers with her bare hands.
Like her appearance really isn't too far from out of province panhandlers that I've seen downtown with pets and they fight in much the same way with drug dealers, bicycle thieves and the police.
Mate. It's Star Wars. She's not a fucking methhead, you're just a weirdo that can't accept the shape of her face.
Do you apply this standard to all the games? Where's the complaint about Kyle Katarn soaking up dozens of shots from Stormtroopers, or that guy in Jedi Survivor?
She can beat them up with her bare hands because it's a bloody video game. It's not that deep. If you want to go on about the unrealism of it, start by complaining about how stormtroopers can't aim for shit and question how Luke Skywalker or Han Solo ever survived a shootout with them when
they're massively outnumbered and not even wearing any armour.
You can't put the blame for the game underperforming on the comments the creative director made. Do you really think that any normie even knows who the creative director is? Hell, they probably don't even know what a creative director is. Its underperformance is much more likely because the economy is in the shit and AAA games are expensive, Ubisoft's reputation is also in the shit, they released the PC version on a service nobody fucking uses....It's completely myopic to think that the reason it underperformed is because of what the creative director said.NikhilR said:Somebody needs to point it out to the team, but honestly given the way the creative director addressed comments on the game, I don't think there is any point, but their actions did result in the game underperforming.......https://www.youtube.com/watch?v=rqzDN2nlPYY&t=2s
and couldn't be bothered to make the actress look like the character in the game, so either they just never cared or this is the direction they are planning to go.
This kay doesn't even fight the strom troopers, Gremlin Nyx saves her.
As for that video, did you actually look at the channel before presenting this? They clearly have like, 3-5 guys who just play different characters depending on what the video needs. It's not a fucking statement about what Kay's face should look like, it's just who they had on hand. Get a grip.
Honestly, how many pages of absurd overanalysis and dogwhistling do you need?
2 ·
Re: Star Wars Outlaws: Character design was the least of this games problems.
Enough about Kay, now let's talk about how Henry from Kingdom come Deliverance doesn't look like himself anymore. They even gave him a chin cleft those rascals!!

 Melomad
1 ·
Re: Star Wars Outlaws: Character design was the least of this games problems.
NikhilR said:I felt that there is just not enough exploration of Kay's backstory and how the child kay turns into adult kay with the models and personalities not really matching up in several aspects. (petty thief young Kay -> ex-meth addict post rehab street fighter Kay)
Was the bit where people pointed out the people who worked on that game could be browsing Polycount somehow not enough for you to consider it might not be a good idea to put your actual name and face on going here and nakedly insulting people's work? Ex-meth addict, really?
God forbid a woman has a chin...
1 ·
Re: [ Maya ] DecalMaster - Accelerate Detailing Through Decals and Trim Sheets
Hey there, thanks for taking an interest.
de_cbble said:How would this integrate in a workflow with an external texturing program like Substance Painter? I'm also curious what you meant by a midpoly + decals workflow exactly.
The plugin provides tools to export decal atlases and trim sheets with customizable channel packing, and the decals mesh is exported along with the main mesh in an FBX so nothing is stopping you from importing the files into other 3d tools, like Substance Painter.
As for the number of decals on the mesh, that's the benefit of using the midpoly + decals workflow. You're able to use hundreds or possibly thousands of geometry decals on a mesh at little performance cost, provided you're combining the decal textures into a decal atlas and the decals geometry into a single primitive. On top of that, the details of the mesh are not bound to one or a handful of large textures, so if used correctly you can achieve a much higher texel density than the traditional workflow.
Games like Doom Eternal, Star Citizen and Alien Isolation relied on them for their game models.
I'm not gonna pretend to know as much as others do about the subject, but I recommend you research the midpoly + decal workflow vs the highpoly to lowpoly workflow (traditional bake to texture), they both have their pros and cons. There's plenty of good resources right here on polycount.
de_cbble said:Functions like parallax occlusion mapping work in both Unity and Unreal?
Yeah, the plugins export tool exports shaders that utilize the default POM nodes provided by Unity and Unreal, you just need to import the files into your game project and hookup the material/texture connections. Eventually I'd like to get a POM shader in the Maya viewport to preview before exporting to game engines.
de_cbble said:And lastly your Maya viewport looks really good, how do you get it to look like that?
I'm not sure what you're referring to about the viewport but I'm gonna guess that you mean the lighting of the model looks good?
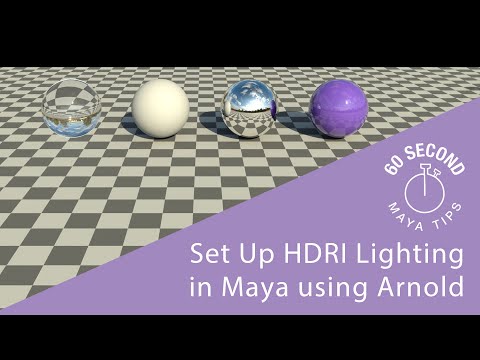
I'm using Arnolds skydome light with an HDRI to render IBL (Image Based Lighting) in the viewport.
This is a quick video explaining the setup.  https://www.youtube.com/watch?v=5af3oAWef9E
 https://www.youtube.com/watch?v=5af3oAWef9E
 Xealot
1 ·
Re: [ Maya ] DecalMaster - Accelerate Detailing Through Decals and Trim Sheets
Yeah that's the idea. When it comes to stickers or logos you just save those as .png files in your image editor of choice and place them in a decal library folder that you point DecalMaster to. There's also a baking tool included so you can model out high poly surface decals in Maya then bake them into normal maps, but if you already have normal map decals from somewhere else you can also import them.
Then you can just select one of your decals from the floating radial menu and place it using using the custom gizmos.
There's more details in the website/videos documentation if you feel like checking it out.
 Xealot
1 ·
Re: [ Maya ] DecalMaster - Accelerate Detailing Through Decals and Trim Sheets
Appreciate the full reply! So if I had, say, just a bunch of stickers/decals with custom texture maps I would make that in Painter on its own, then load them individually into the plugin for decal atlas creation and mesh placement?Xealot said:The plugin provides tools to export decal atlases and trim sheets with customizable channel packing...
That is what I meant. Thanks a lot, I'll have to check this out!Xealot said:I'm using Arnolds skydome light with an HDRI to render IBL (Image Based Lighting) in the viewport.
 de_cbble
1 ·
Re: The Bi-Monthly Environment Art Challenge | September - October (92)
I think I'll call this done, unless anyone has any feedback:) The cylinders show the materials that I have set up in Unity under the scene lighting and then more neutral lighting. The painted sky is from a Unity package called Cozy Weather.
https://www.youtube.com/watch?v=QXM1jr6nxTU


https://www.youtube.com/watch?v=QXM1jr6nxTU


 crowlena
7 ·
Re: Star Wars Outlaws: Character design was the least of this games problems.
how is henry so clean shaven?
total immersion break for me. wont play
total immersion break for me. wont play
 Alex_J
3 ·
Re: Star Wars Outlaws: Character design was the least of this games problems.

pov: when op gets new reply
 pxgeek
3 ·

