Best Of
WIP Environment Scene – Feedback Needed (Lighting / Foliage / Composition)


 Hello everyone,
This is my first completed environment scene in Unreal Engine, and I’m looking for honest and detailed feedback to understand what I should improve going forward.
I’m still early in learning environment art, so I would really appreciate critique that focuses on fundamentals like lighting, composition, and scene readability rather than advanced polish.
I used a concept as the main guide for the composition and layout.
 Any critique is highly appreciated—especially technical breakdowns rather than general impressions.
 rafiii
1 ·
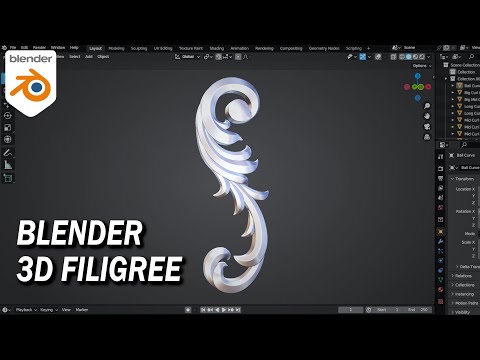
Re: Learning Blender and Texturing
Sub-d is likely the best way to make filigree ornamentals like this. Though I wonder if someone has made some neat tool out there?
 https://www.youtube.com/watch?v=4a--25POO7k

https://www.youtube.com/watch?v=4a--25POO7k  Eric Chadwick
1 ·


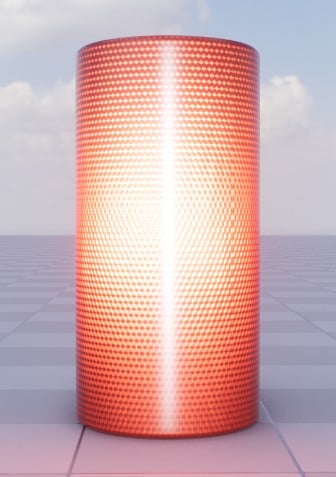
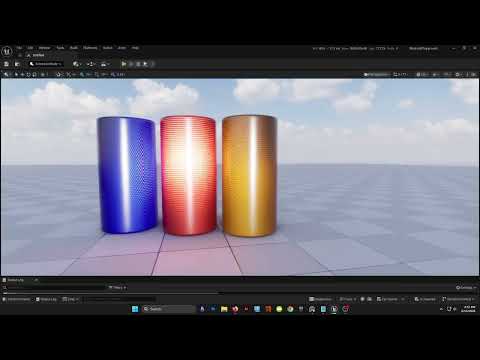
Re: Unreal 5.8 Substrate Retroreflector Mat
Really liking this, thought of uses, like stop lights, construction worker gears, landing strip/guides, all that fun stuff.
Looking good.
 iam717
1 ·

Sketchbook: マルコ
My 3d Journal.
Was trying to make some wood, but those deep cuts are too soft and messing everything up, I need to figure out a better brush
Wood 1:

Was trying to make some wood, but those deep cuts are too soft and messing everything up, I need to figure out a better brush
Wood 1:
 マルコ
マルコ
1 ·


Re: Unreal 5.8 Substrate Retroreflector Mat
A bit of a breakthrough on the next iteration for the reference material. If you use the CameraVector node (which I was using some of my dot products), as your normal, you get "free" retroreflectivity. This much better because it actually takes into account all scene lights, rather than relying only on a single directional light. The reference shader is simpler overall and more visually responsive than the previous iteration.

 https://www.youtube.com/watch?v=oKpPW7EdTYs
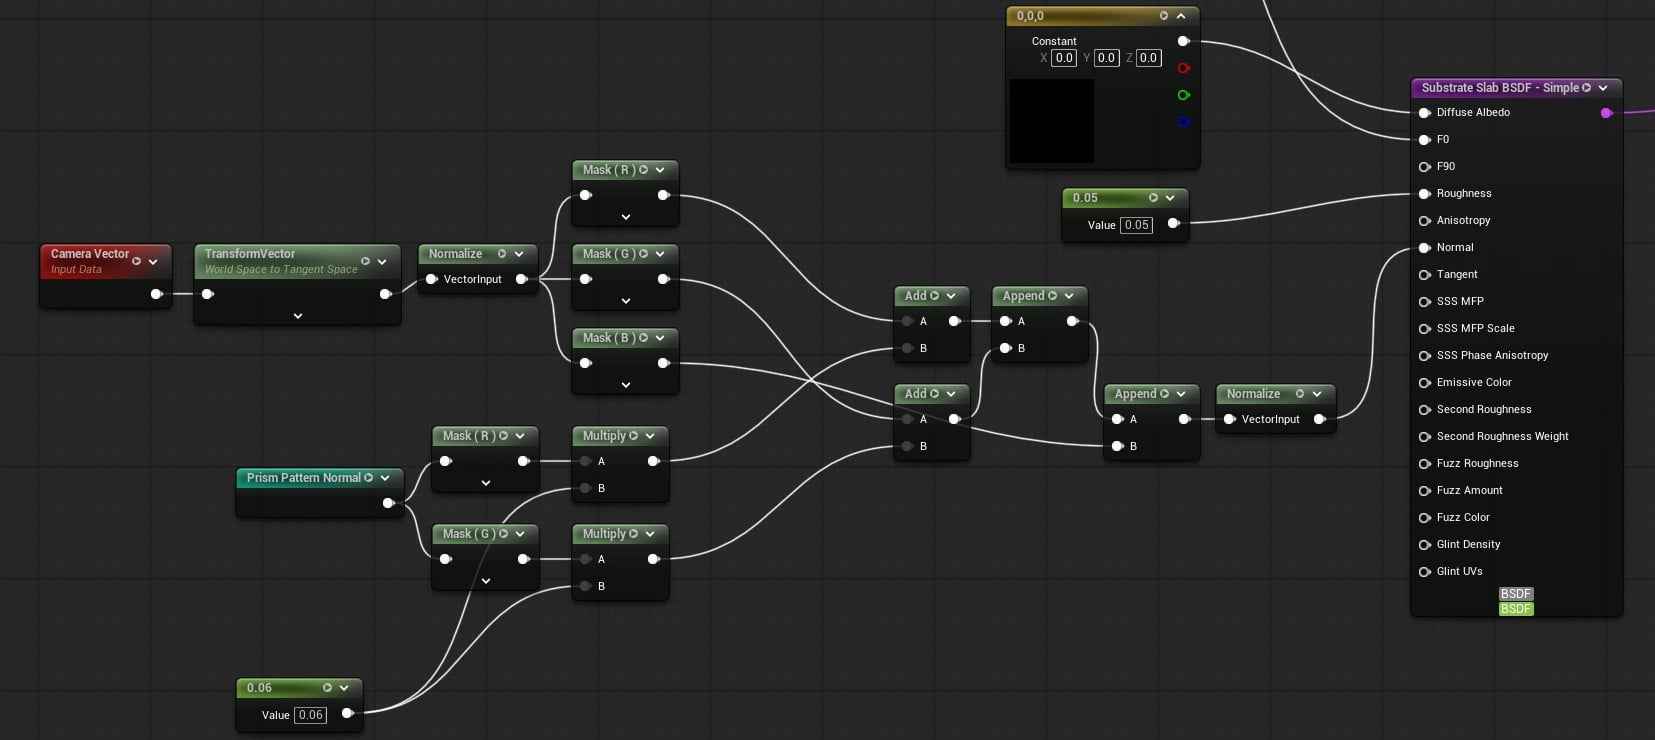
The bottom layer shown above mostly just the normal math. I take the camera vector, convert it to tangent space, where it then acts as the tangent basis. Then I blend the x and y normals from my prism pattern normal map over the new basis, disregarding the map's blue channel. The strength of the x and y normals from the map scatters the specular response more. So stronger = dimmer and more scattered retroreflector effect based on the prism pattern.
The top layer remains the same as the previous version. I also went ahead and started on the optimized version
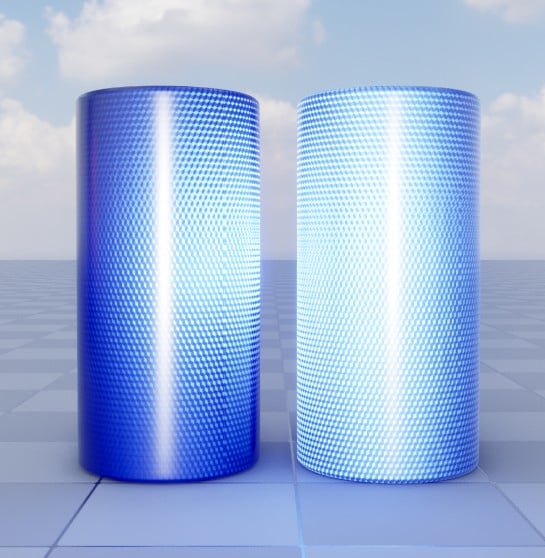
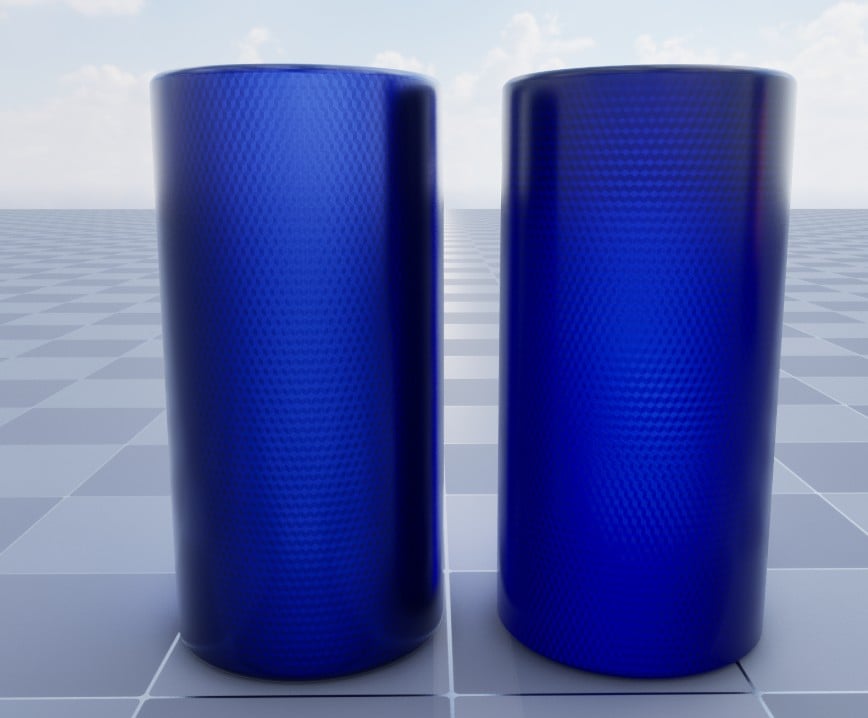
Left is the current reference version, right is the optimized version (flip that for the bottom pic).
 https://www.youtube.com/watch?v=-h7qeSII8oI
I tried using just straight up, non-substrate, clearcoat and it did not work very well. I then tried a single slab with a secondary roughness. That also didn't look great. I settled on "Substrate simple clear coat" slab. After tweaking some things I got it fairly close to the reference.


As far as numbers go I went from 2 closures and 48 bytes per pixel to 1 closure and 16 bytes per pixel.
Next is to create some different cube corner patterns like stripes and diamonds for different effects. I will probably do a simple noise/fleck version too to mimic RR coatings.
 sketchem
1 ·
Re: What Are You Working On? (3D) 2026
This year I'm working on a collection of Aliens ready for games. I wanted to make one from each universe I like; Star Wars and Star Trek already have theirs in progress, and I'm thinking of doing something from the Alien franchise in the future as well.

 Ryonvieira
1 ·