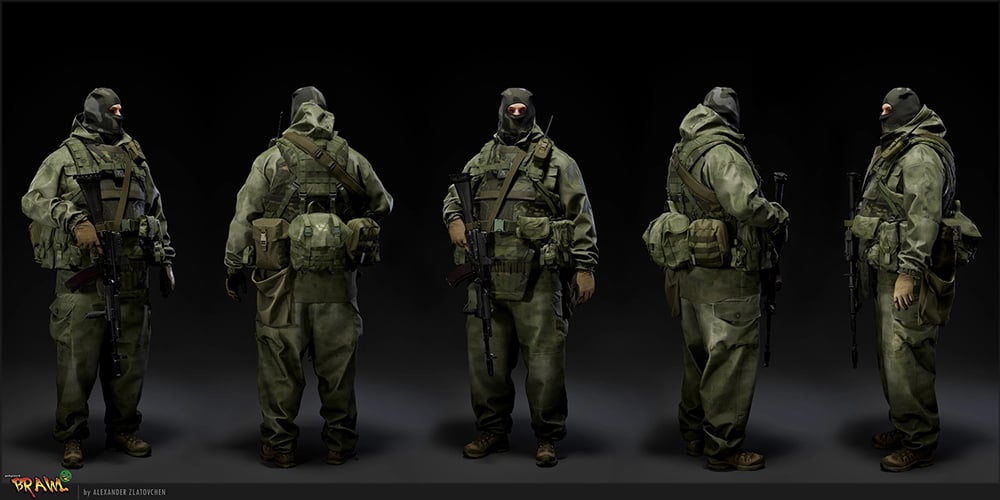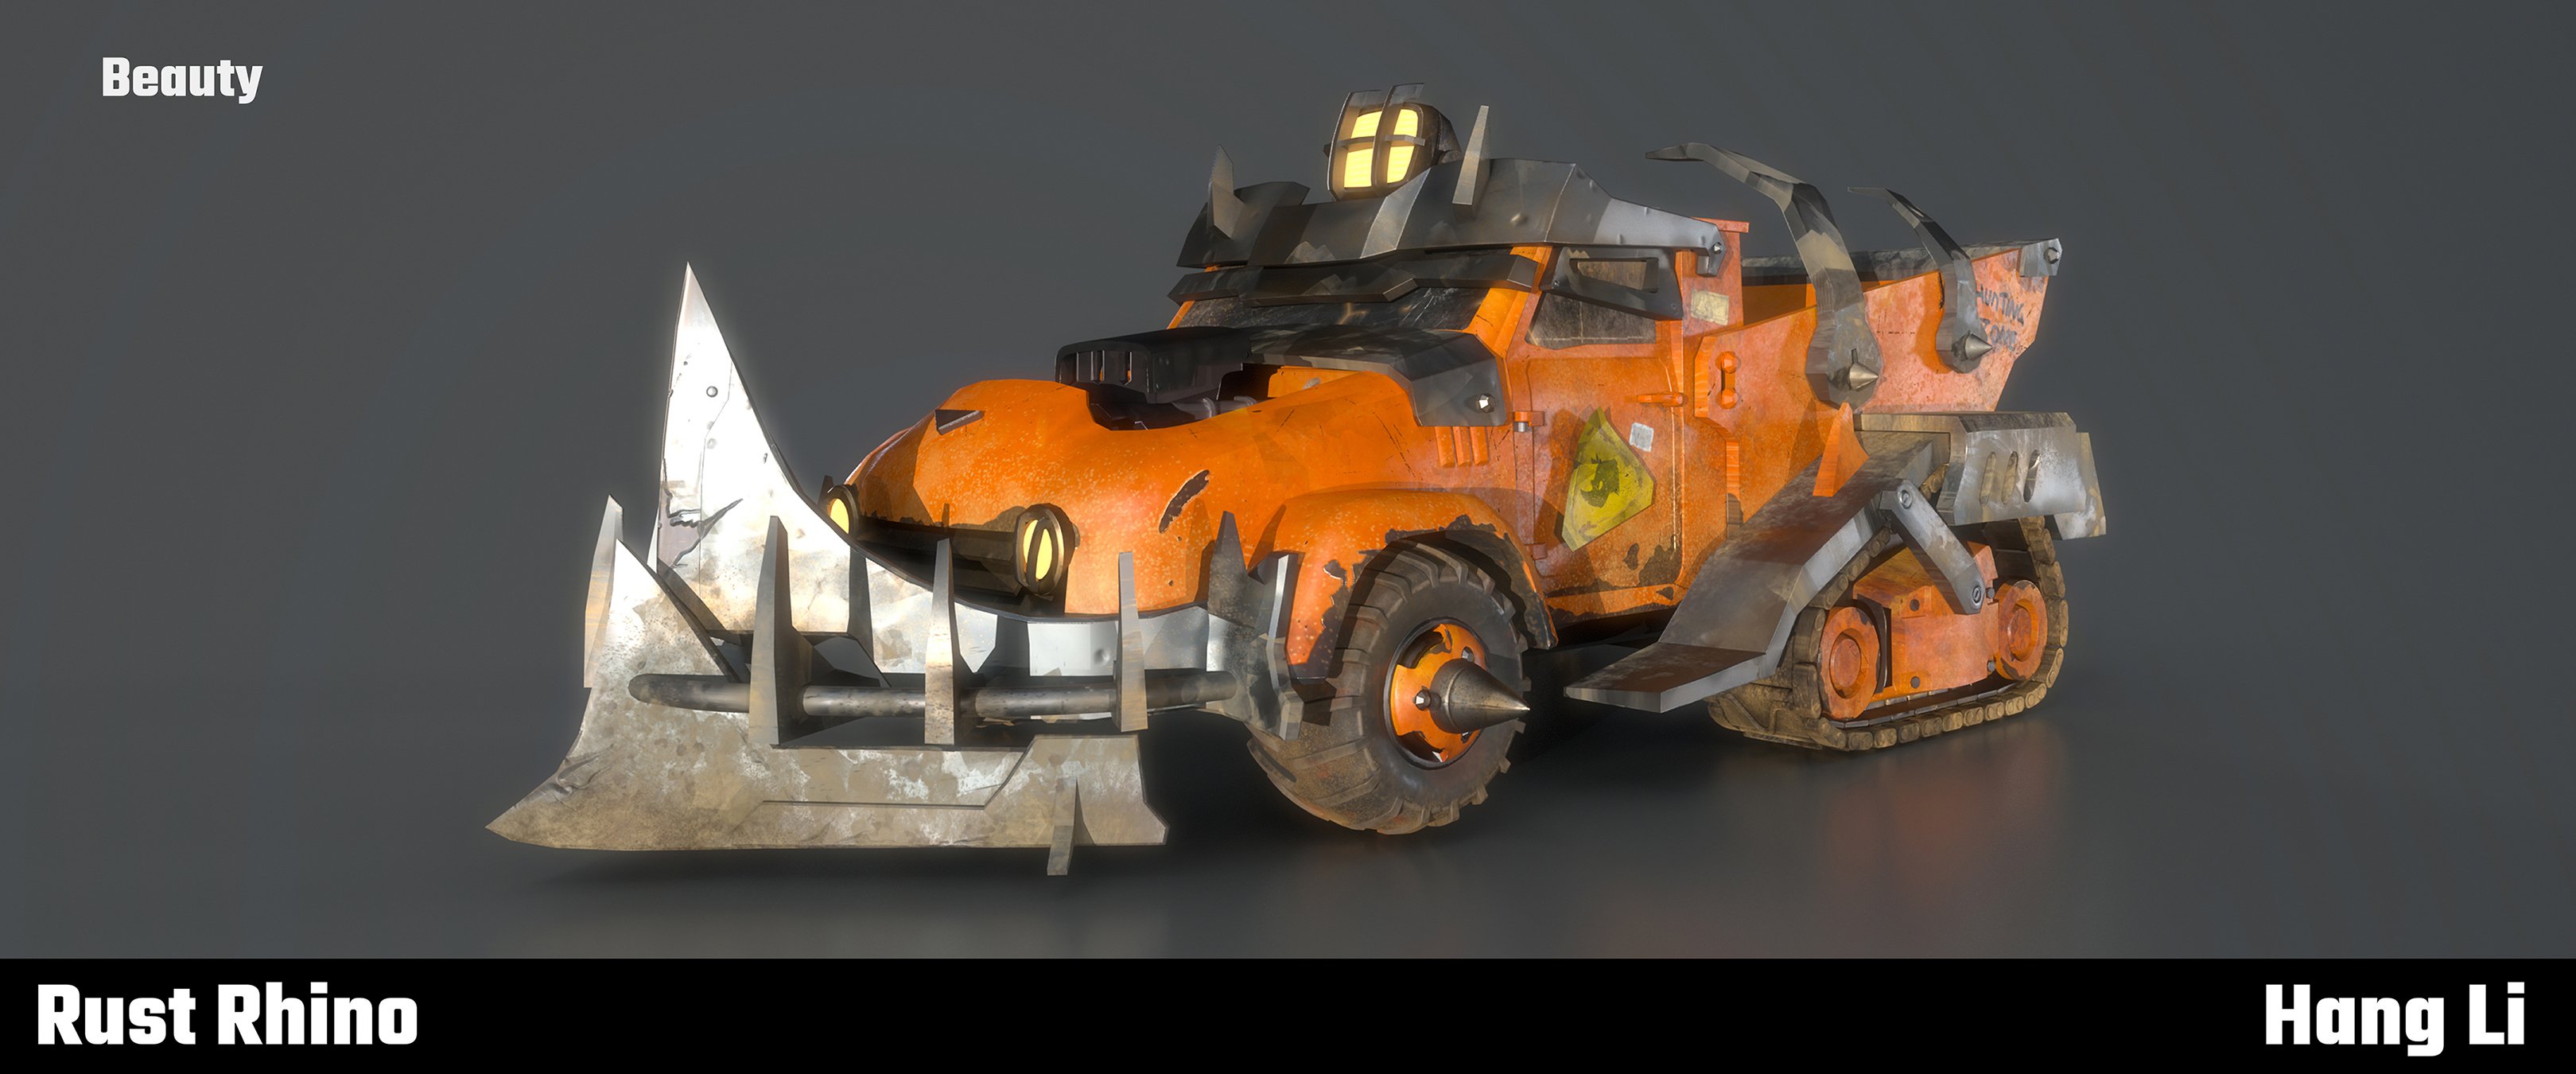
Best Of
RadCity: UE5 mid-poly assets
Hello friends. After a short break I'm working on a new solo project, one I want to wrap up by end of year.
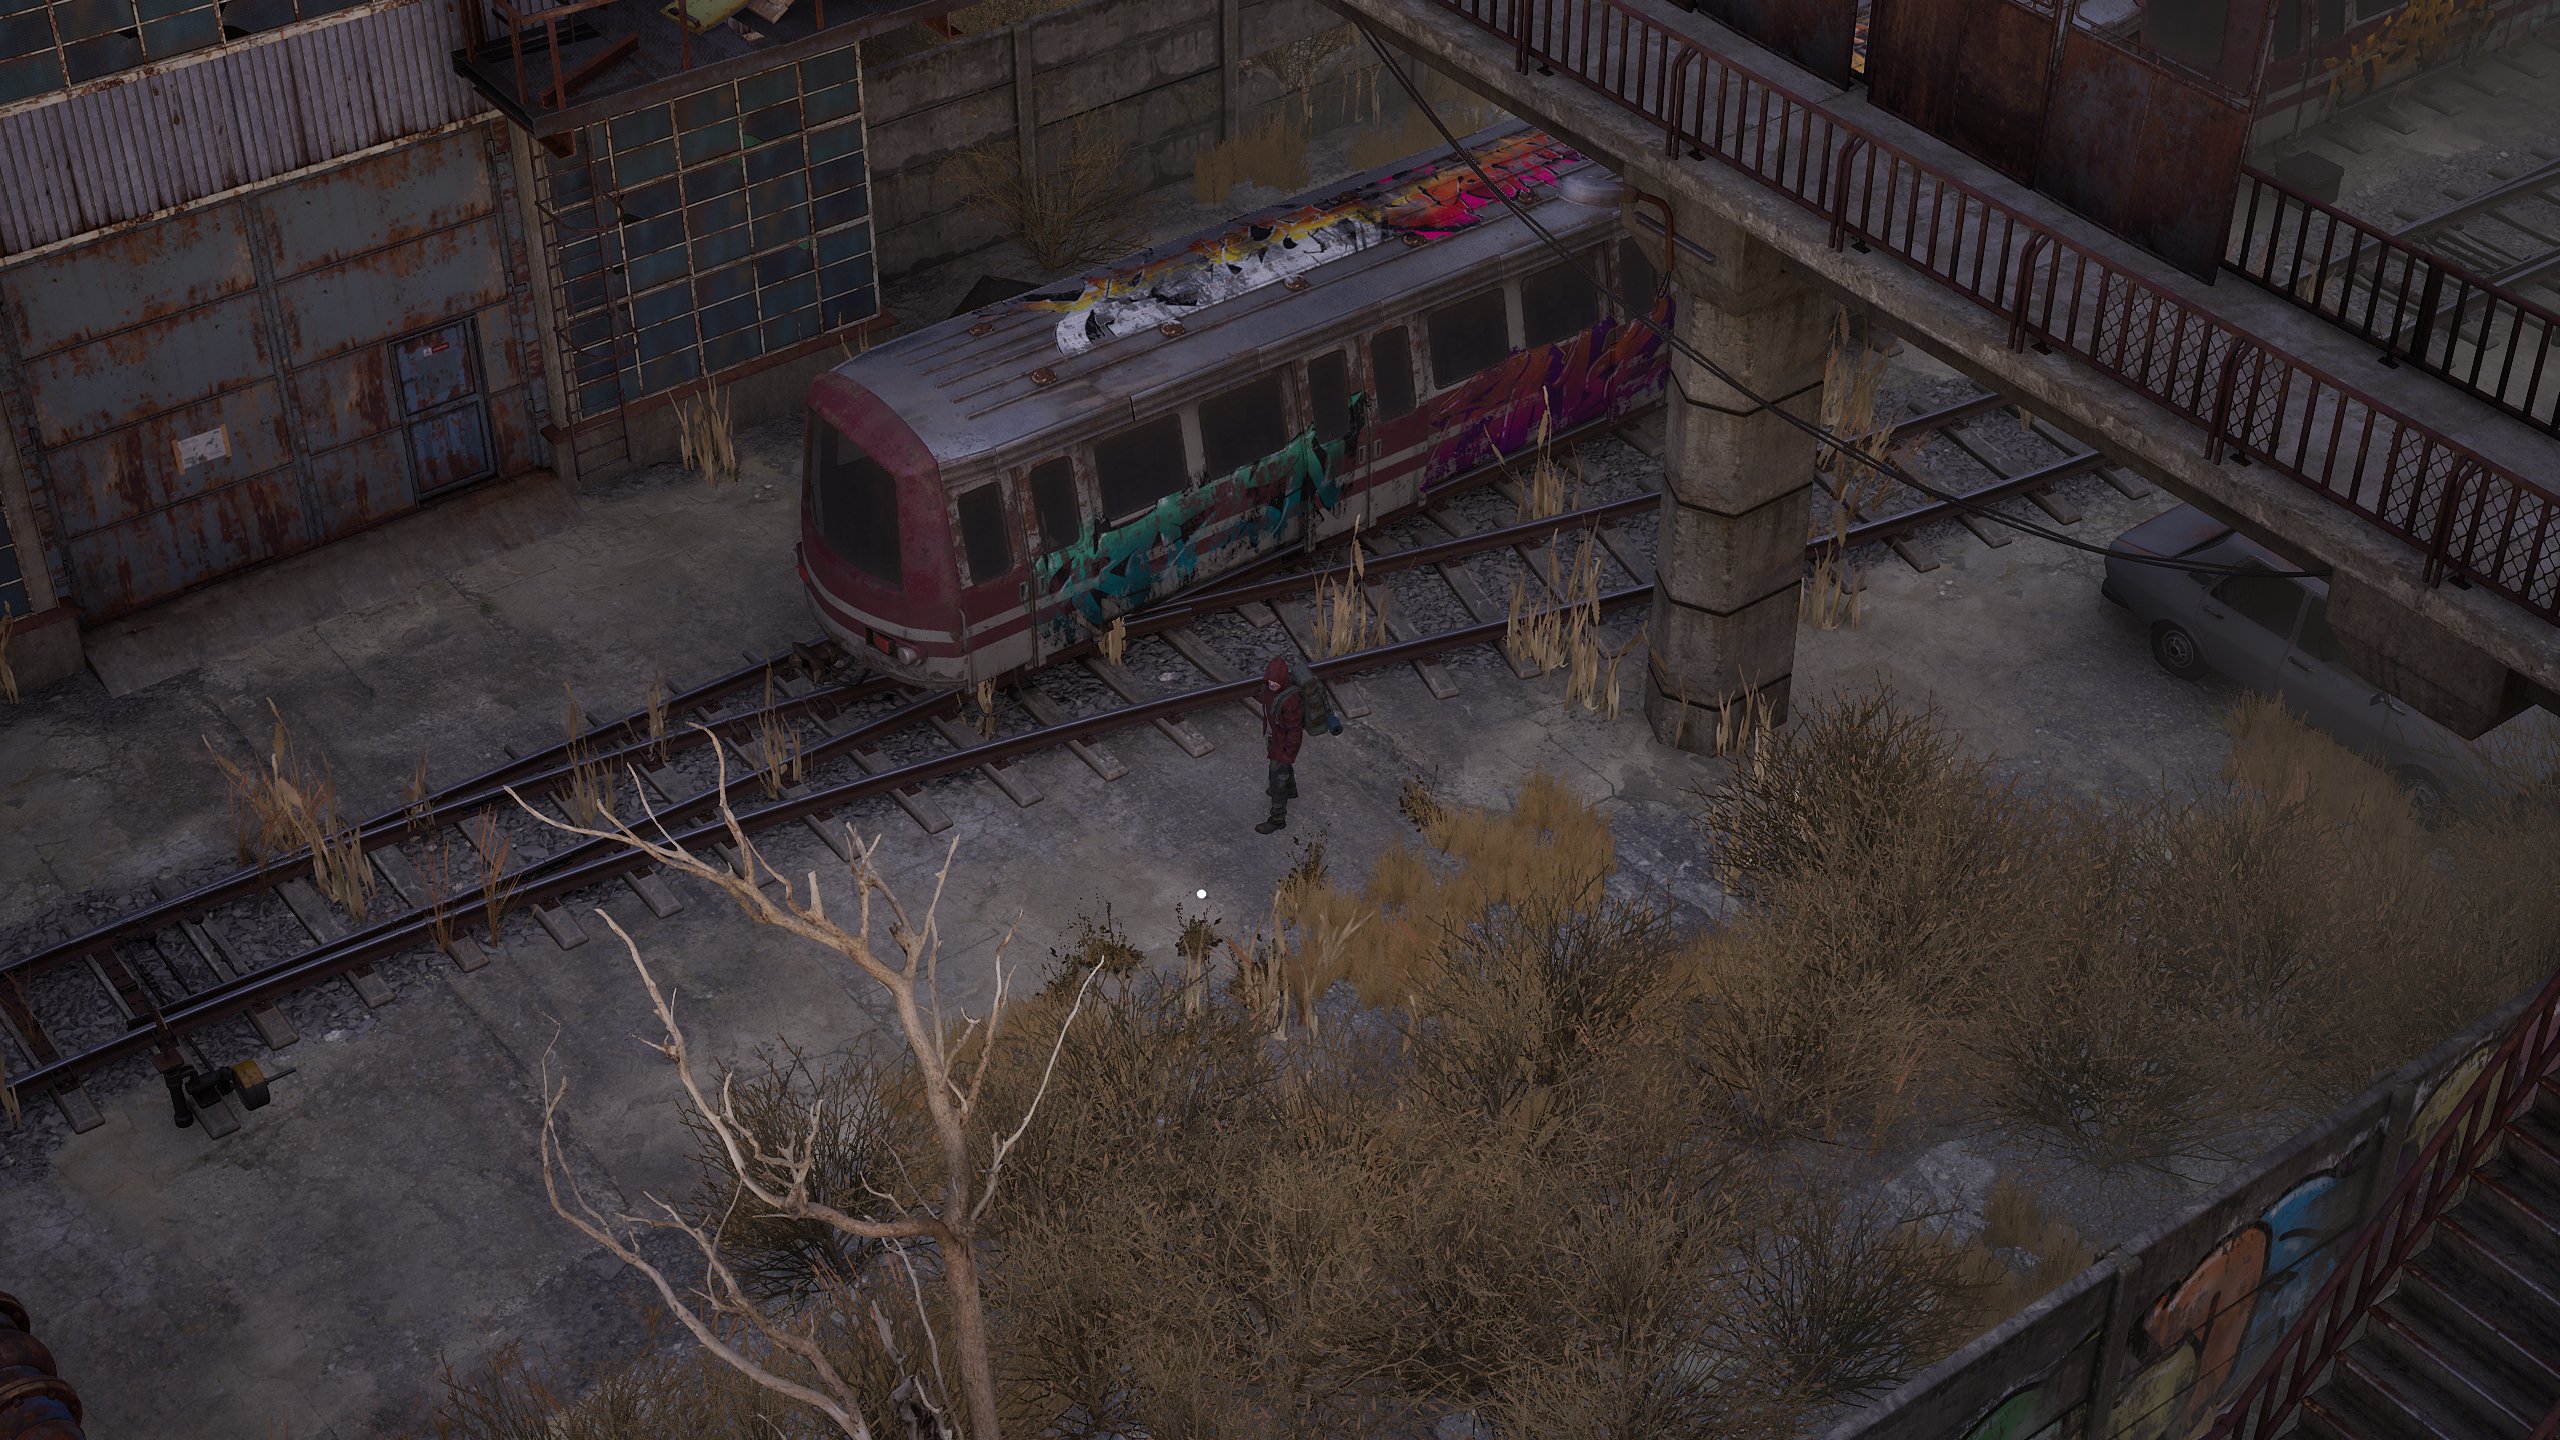
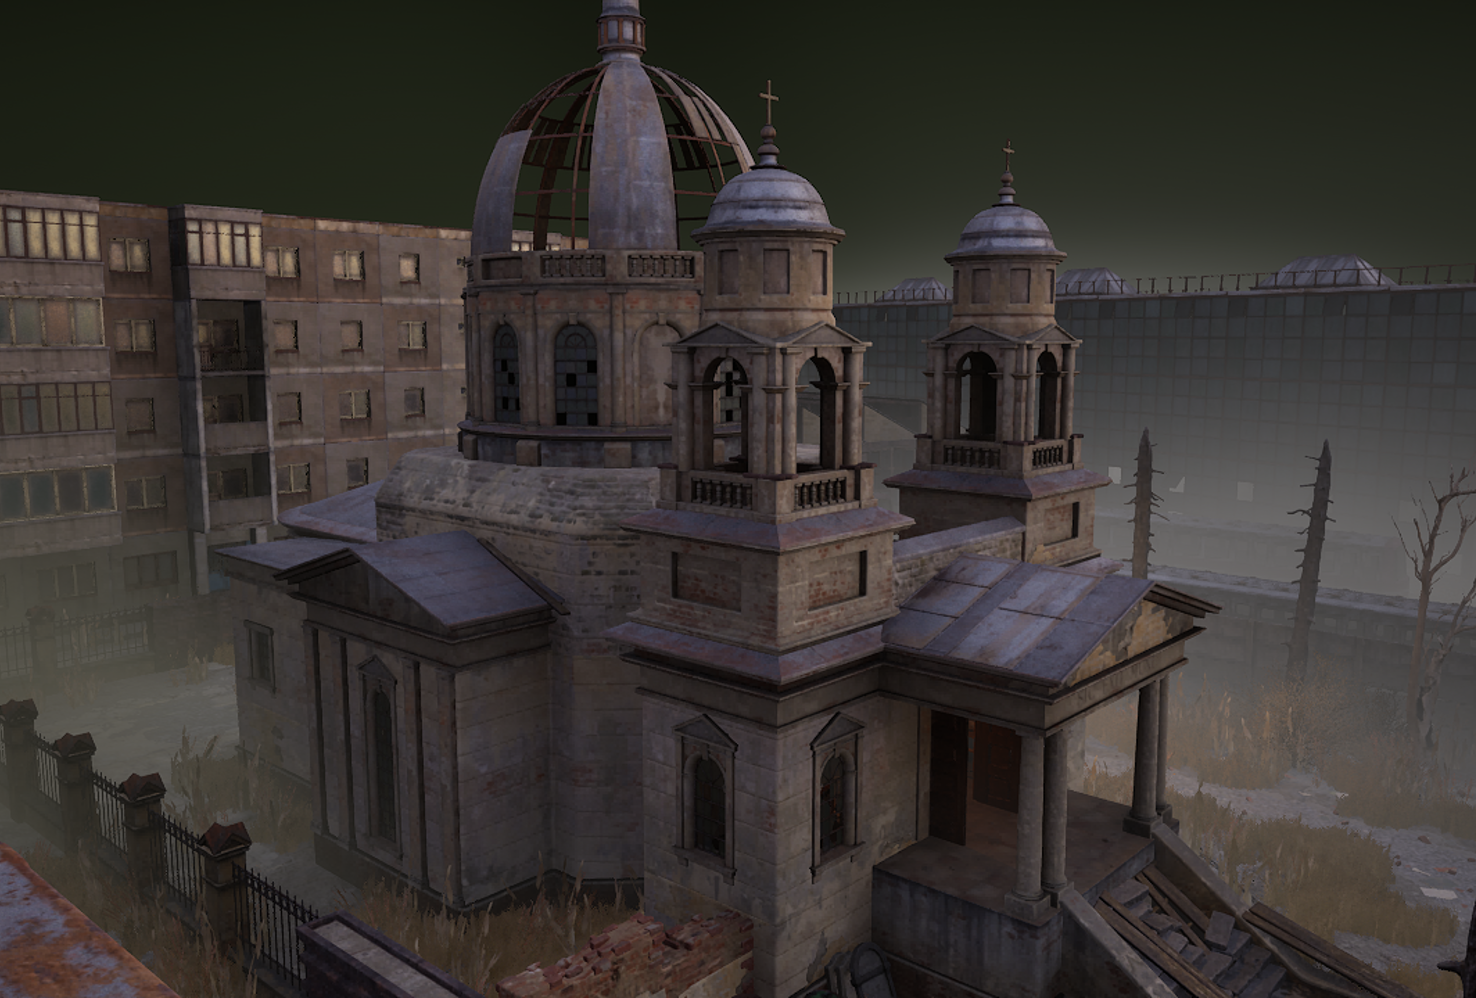
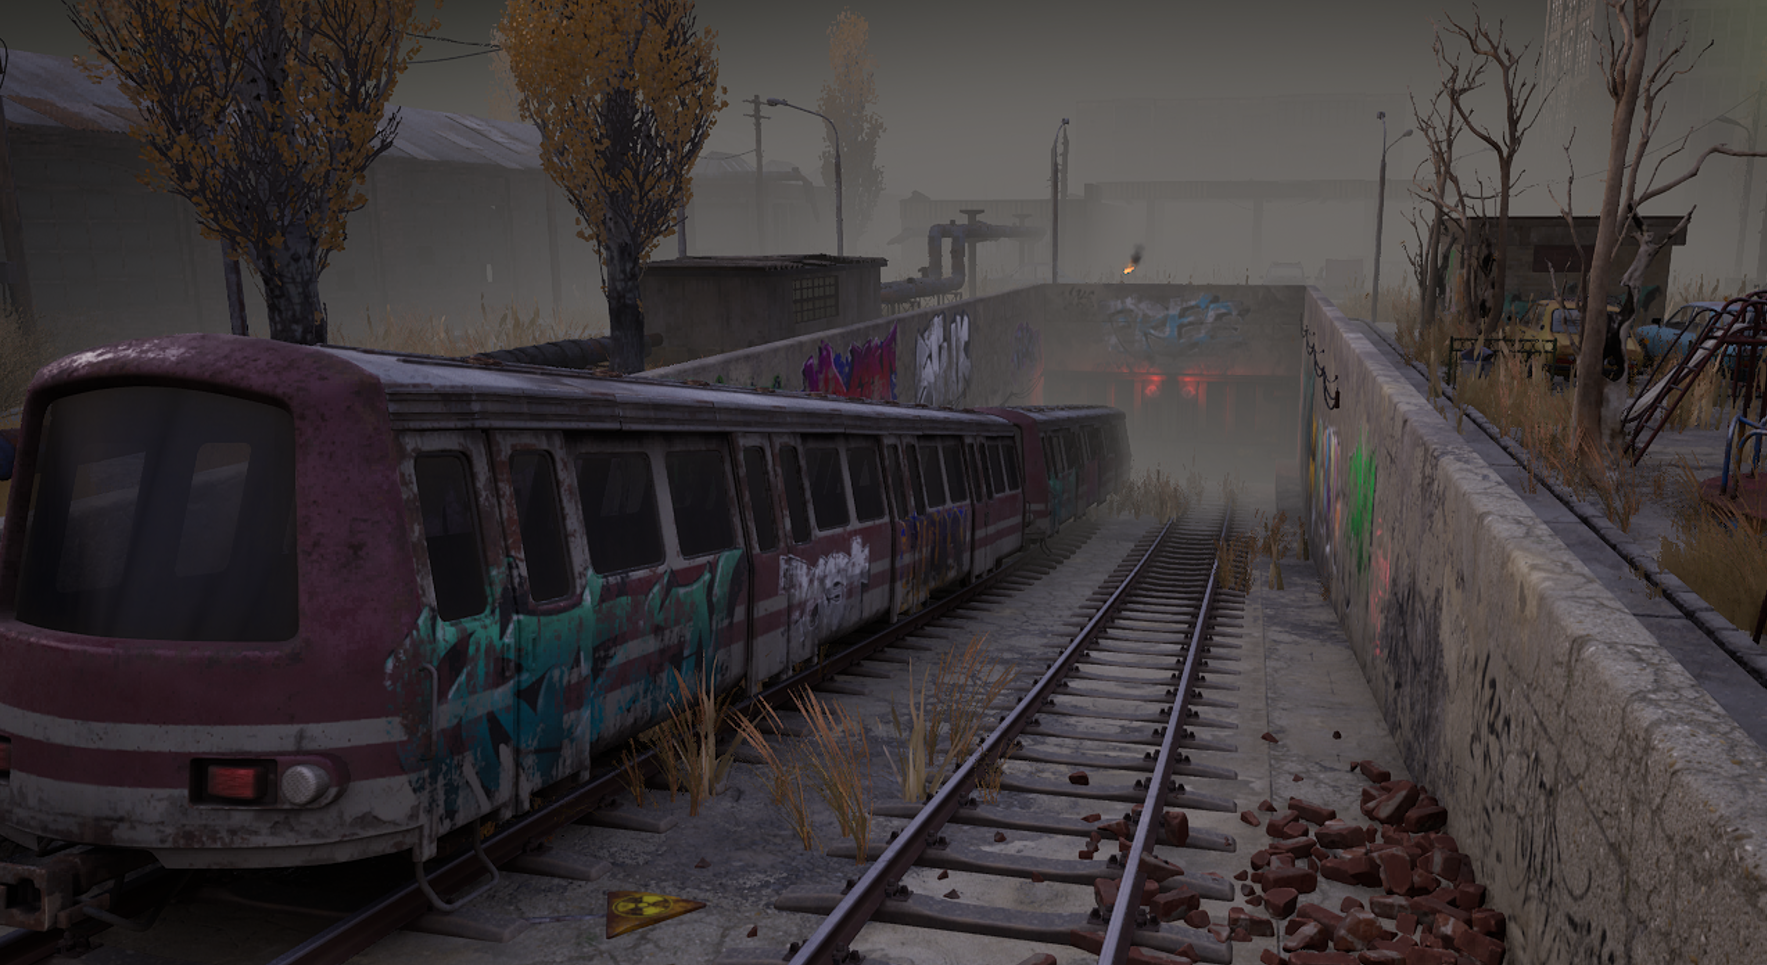
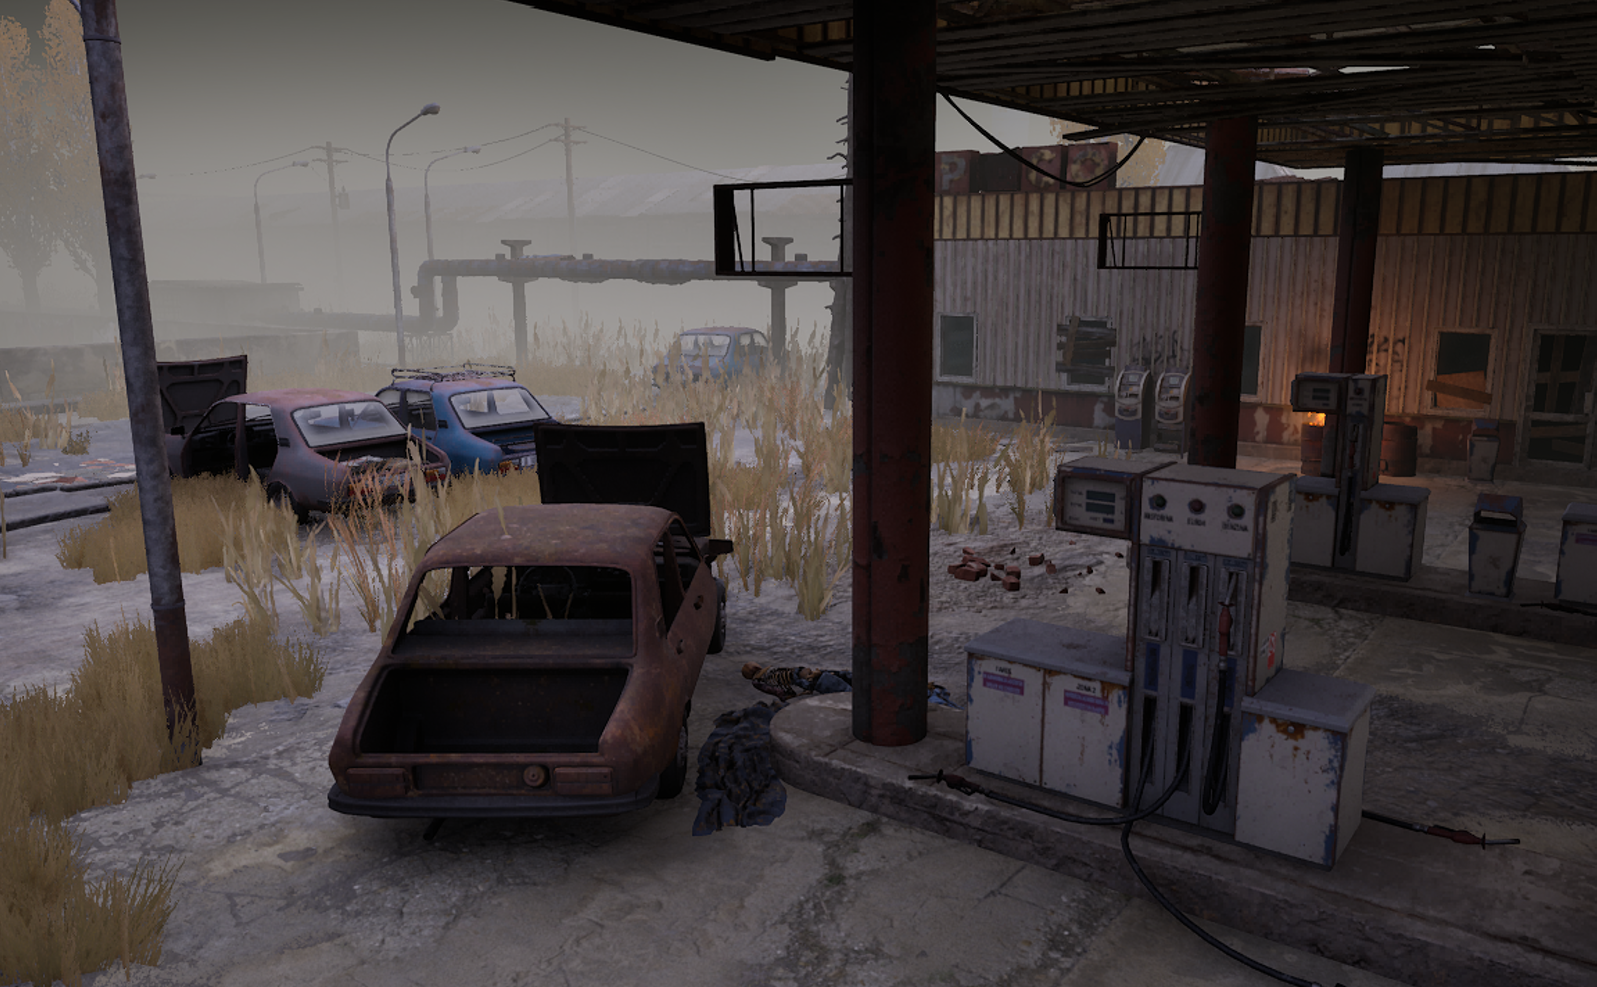
A top-down, post-apocalyptic exploration game, a little bit of Fallout 1 + Stalker, without combat. Just exploration and scavenging for food.
I'm using UE5 with nanite and 99% of assets are made in a mid-poly workflow, that is - no bakes and just chamfers and geo detail as needed. Probably made creation time 1/3 of what it was with baking, and honestly after so many years of baking I love this workflow. Brings back a little bit of the joy of creation. I can be done in a few hours with geo and uvs then go immediately to texturing.
Anyway here are some screenshots.
Assets are made for top-down views, but also may work for thirdperson games (everything is 256px/m). Most buildings and locations are real locations I photographed here in Romania.
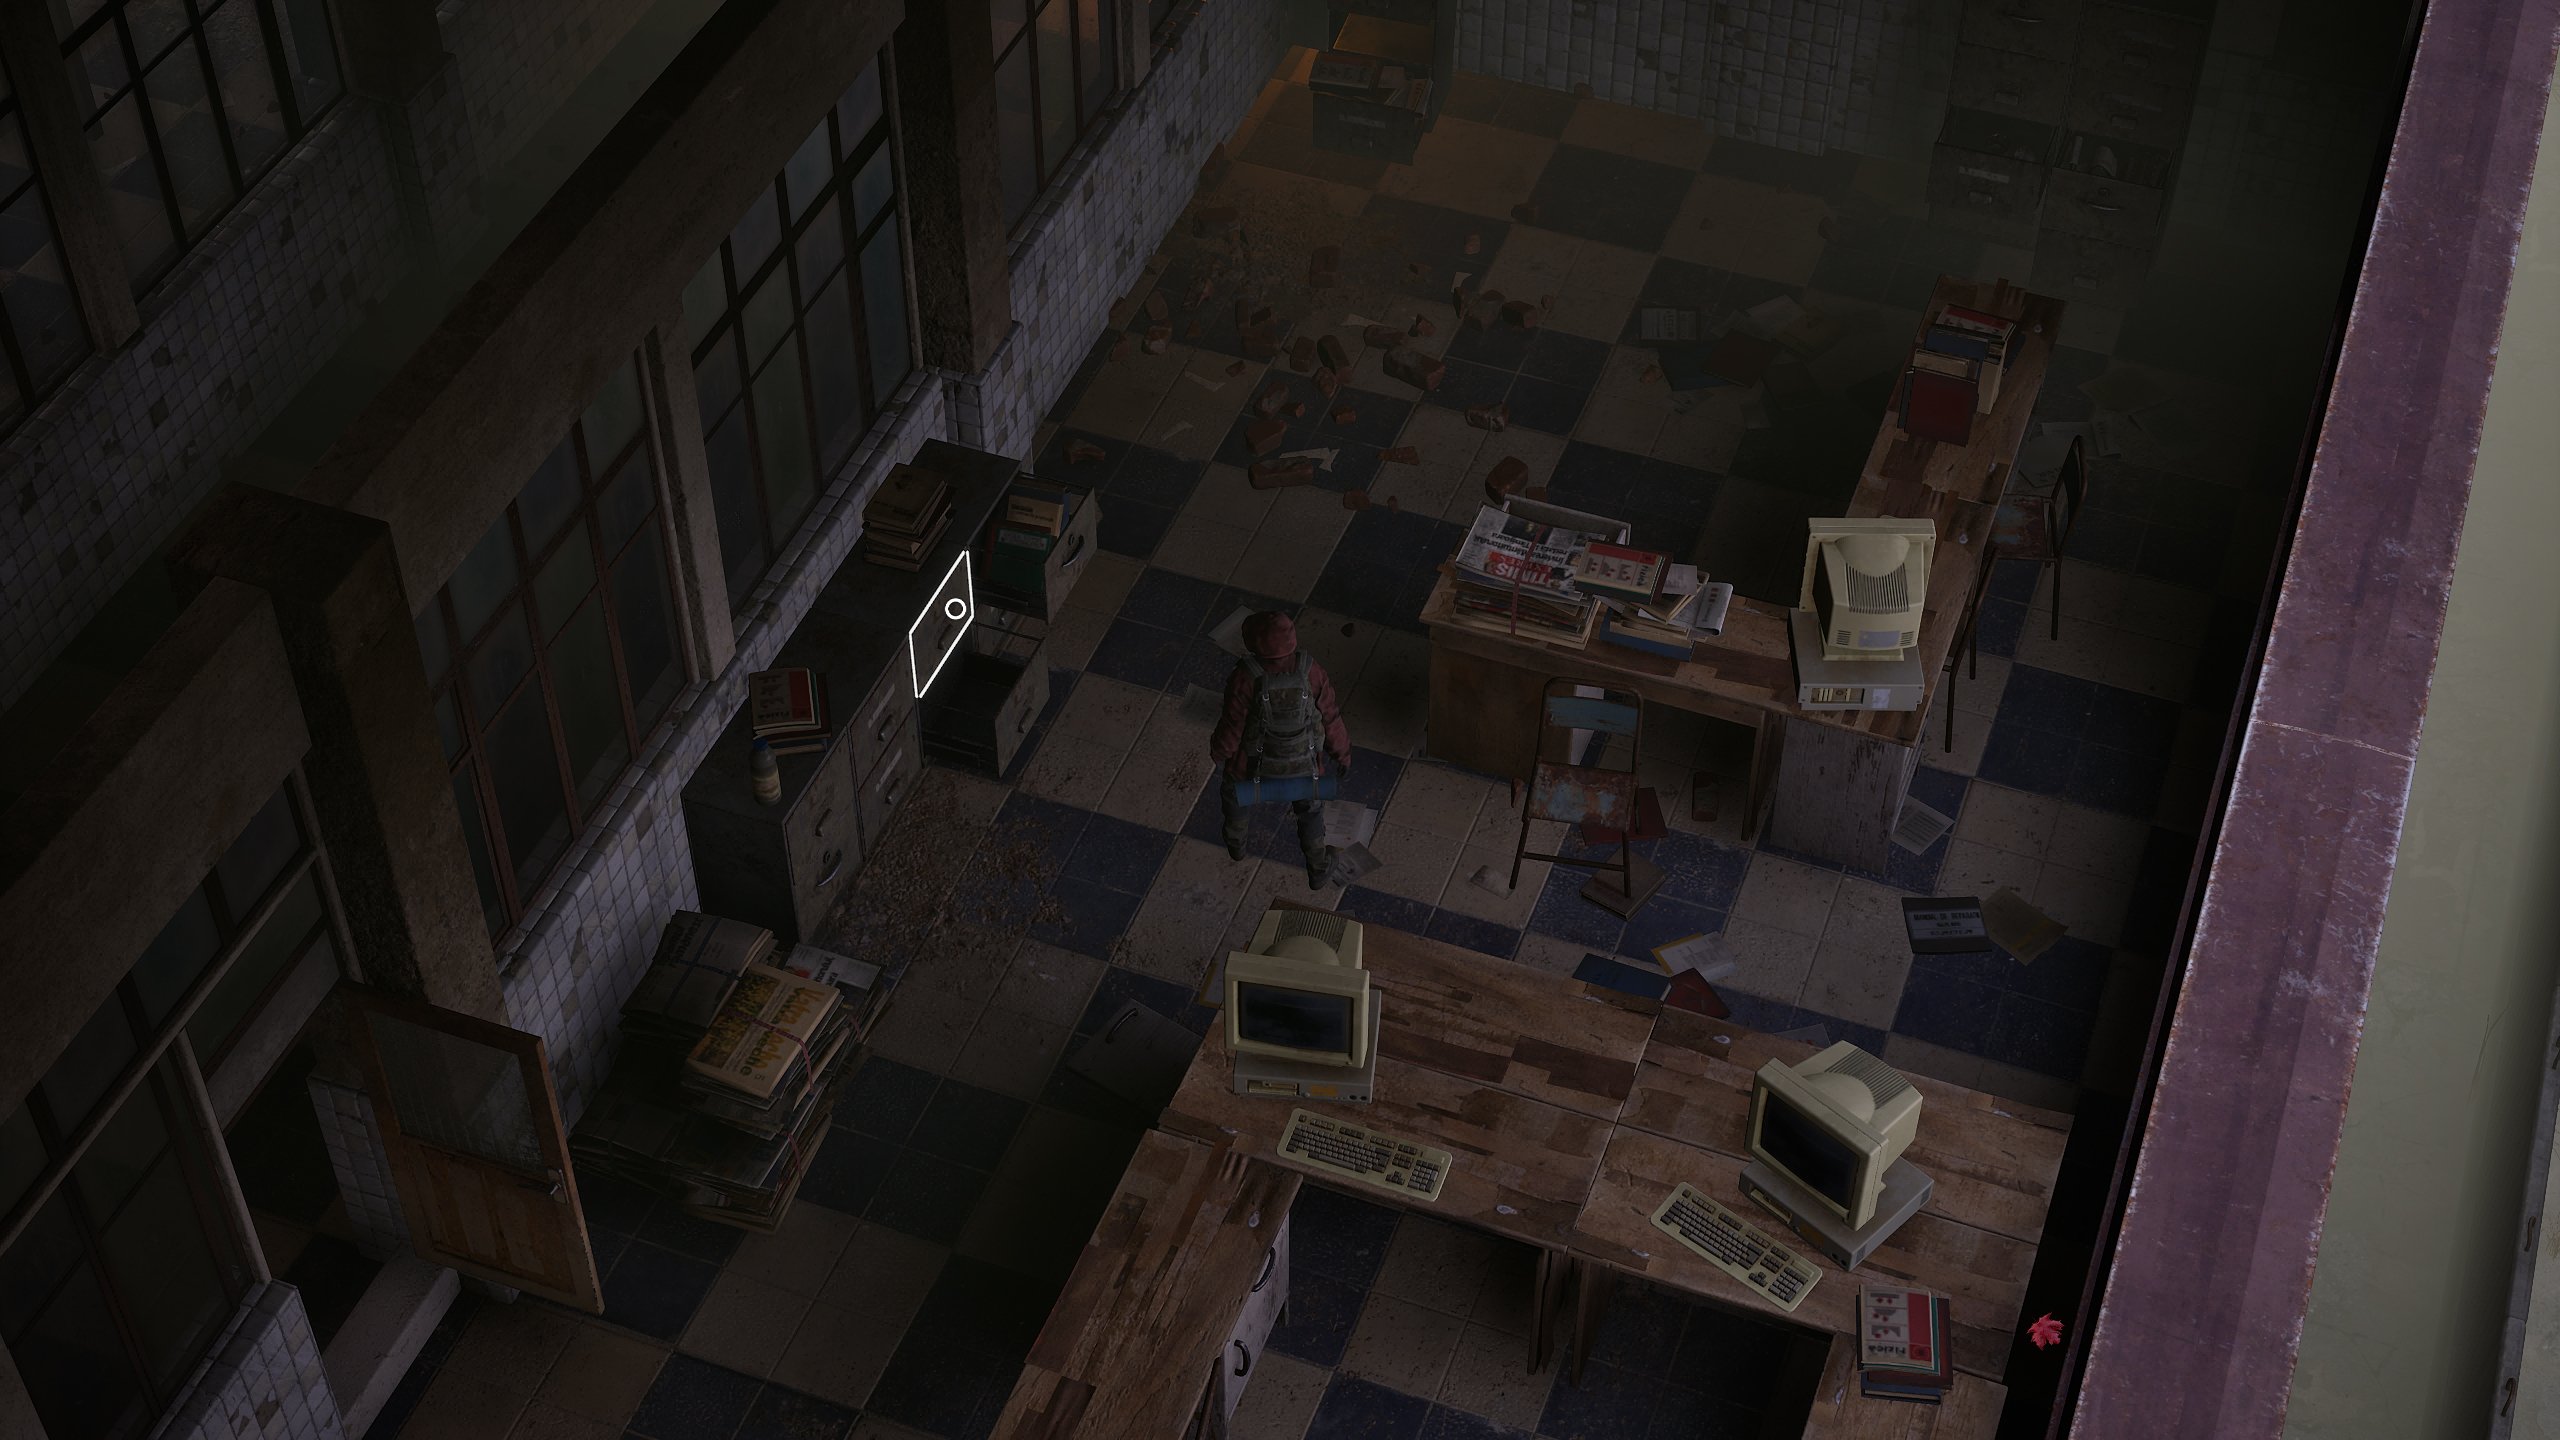
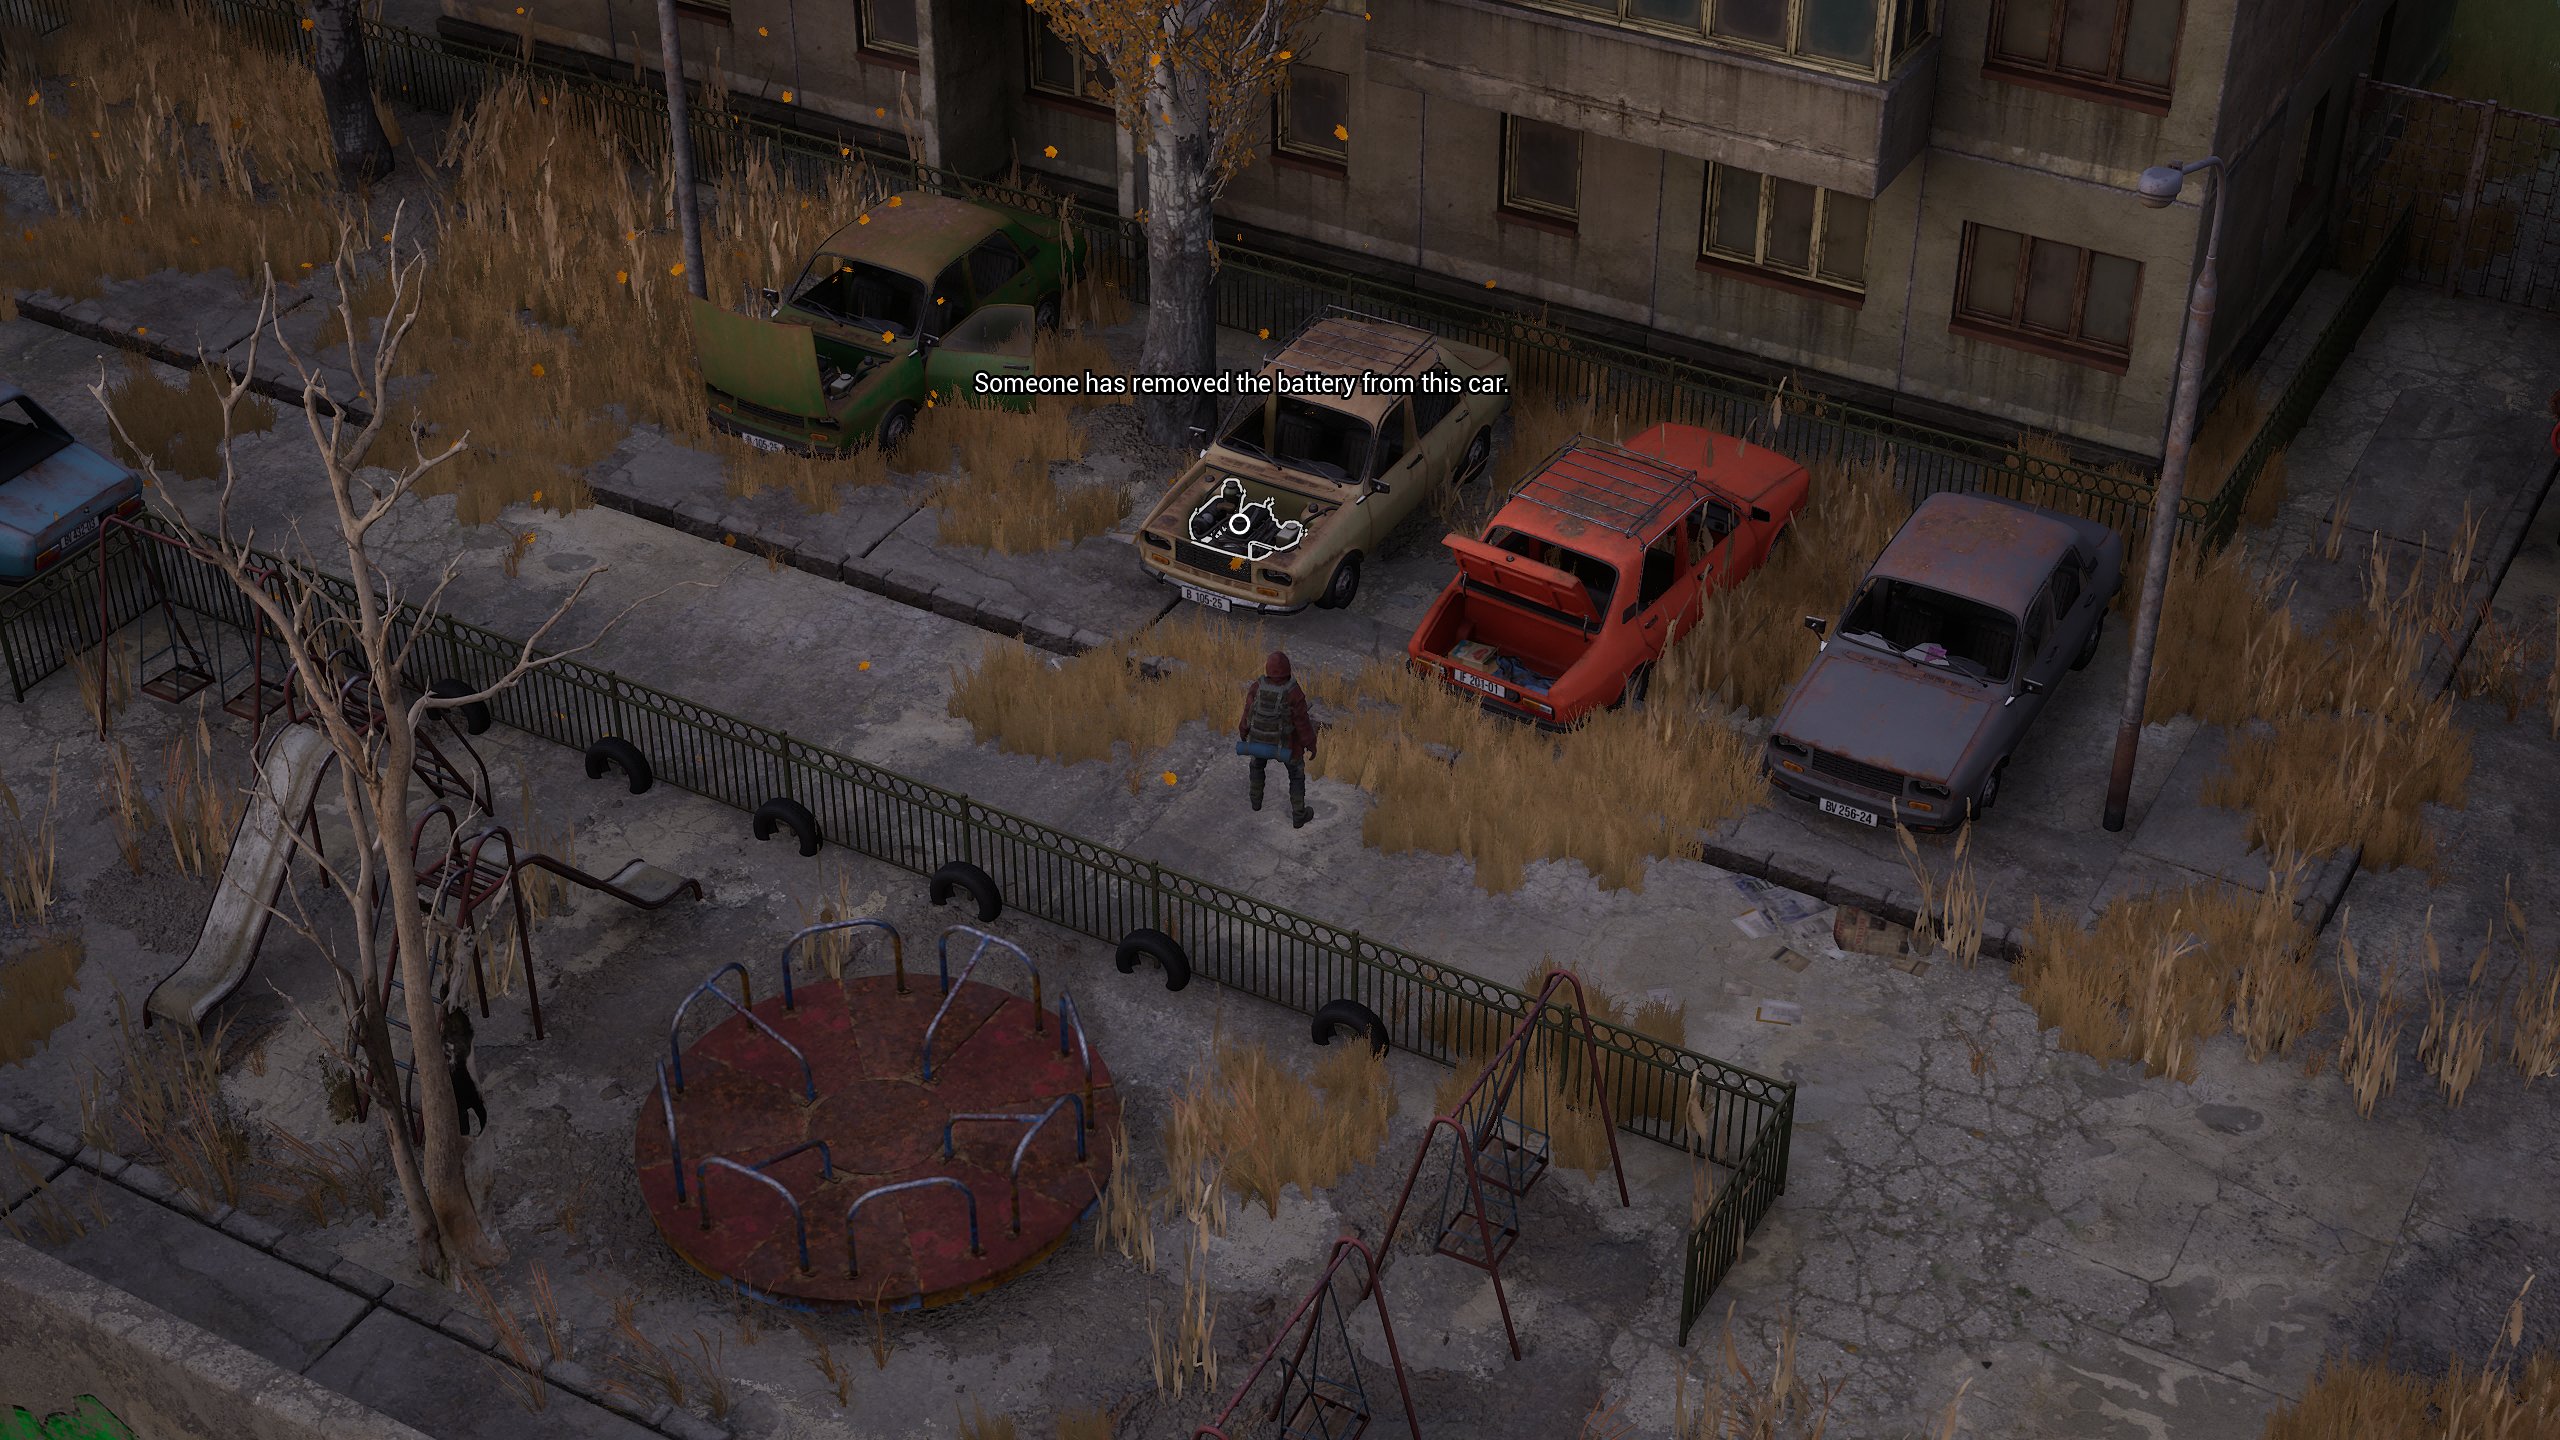
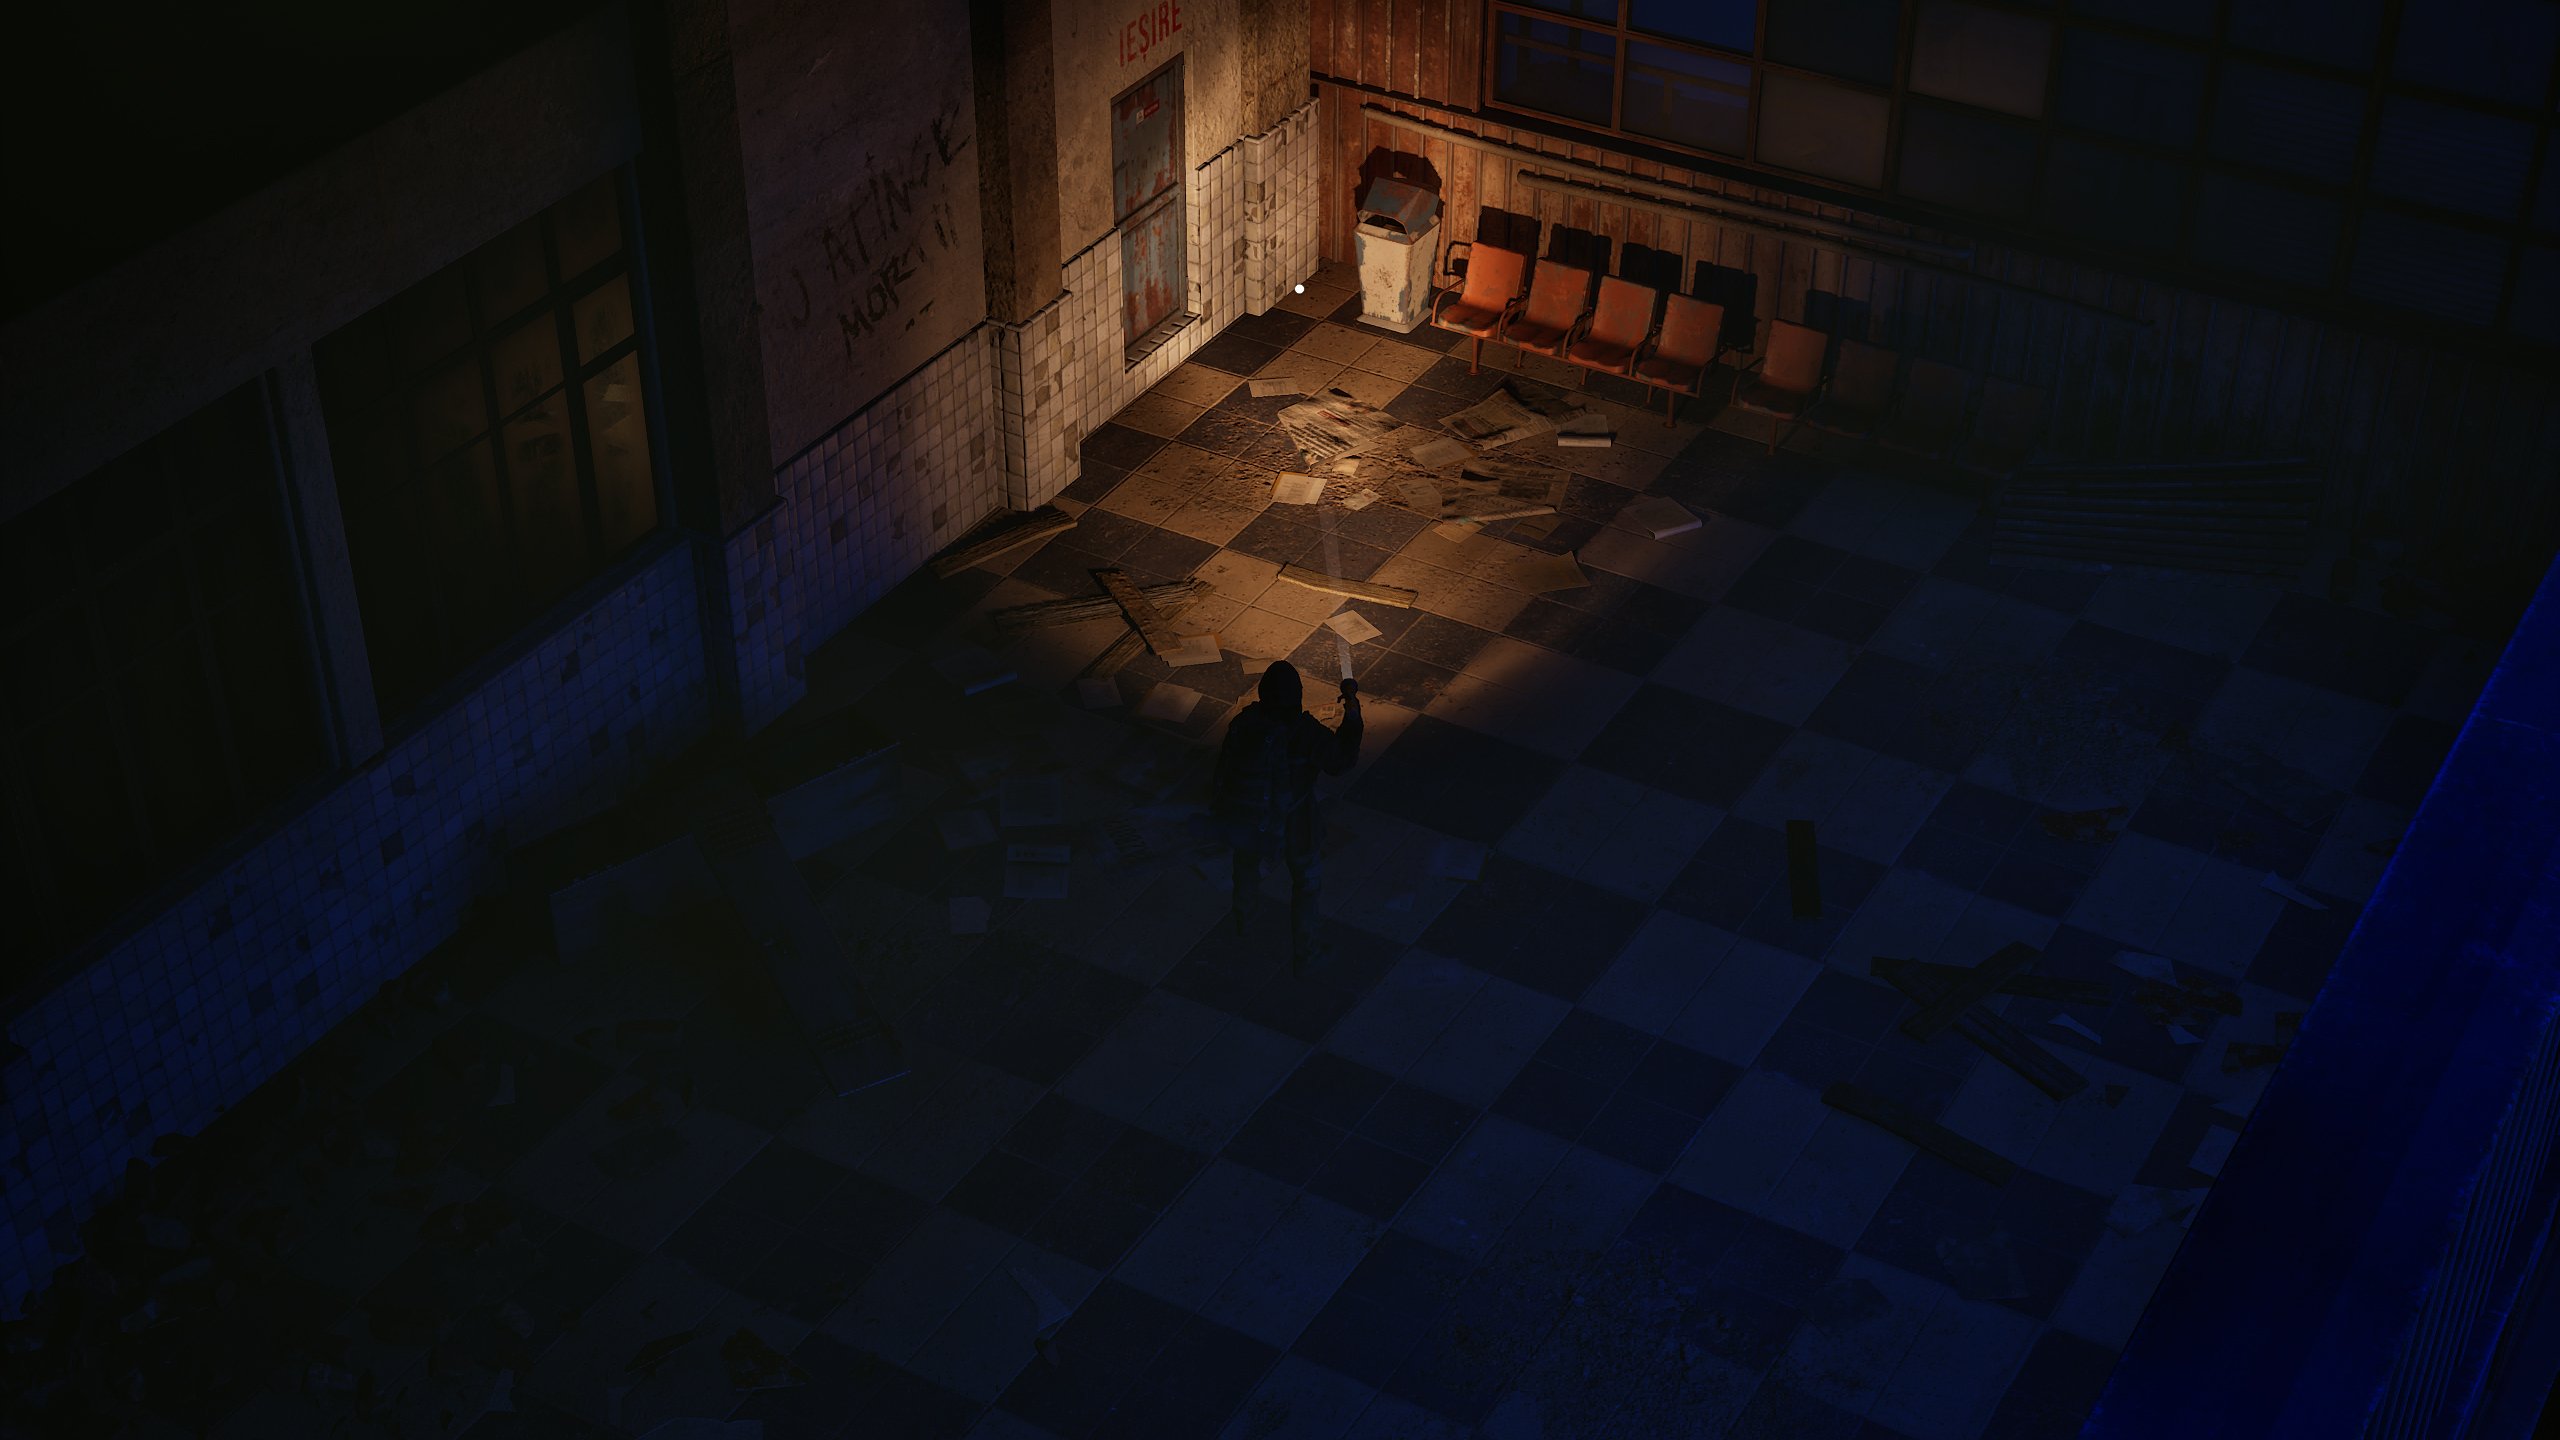
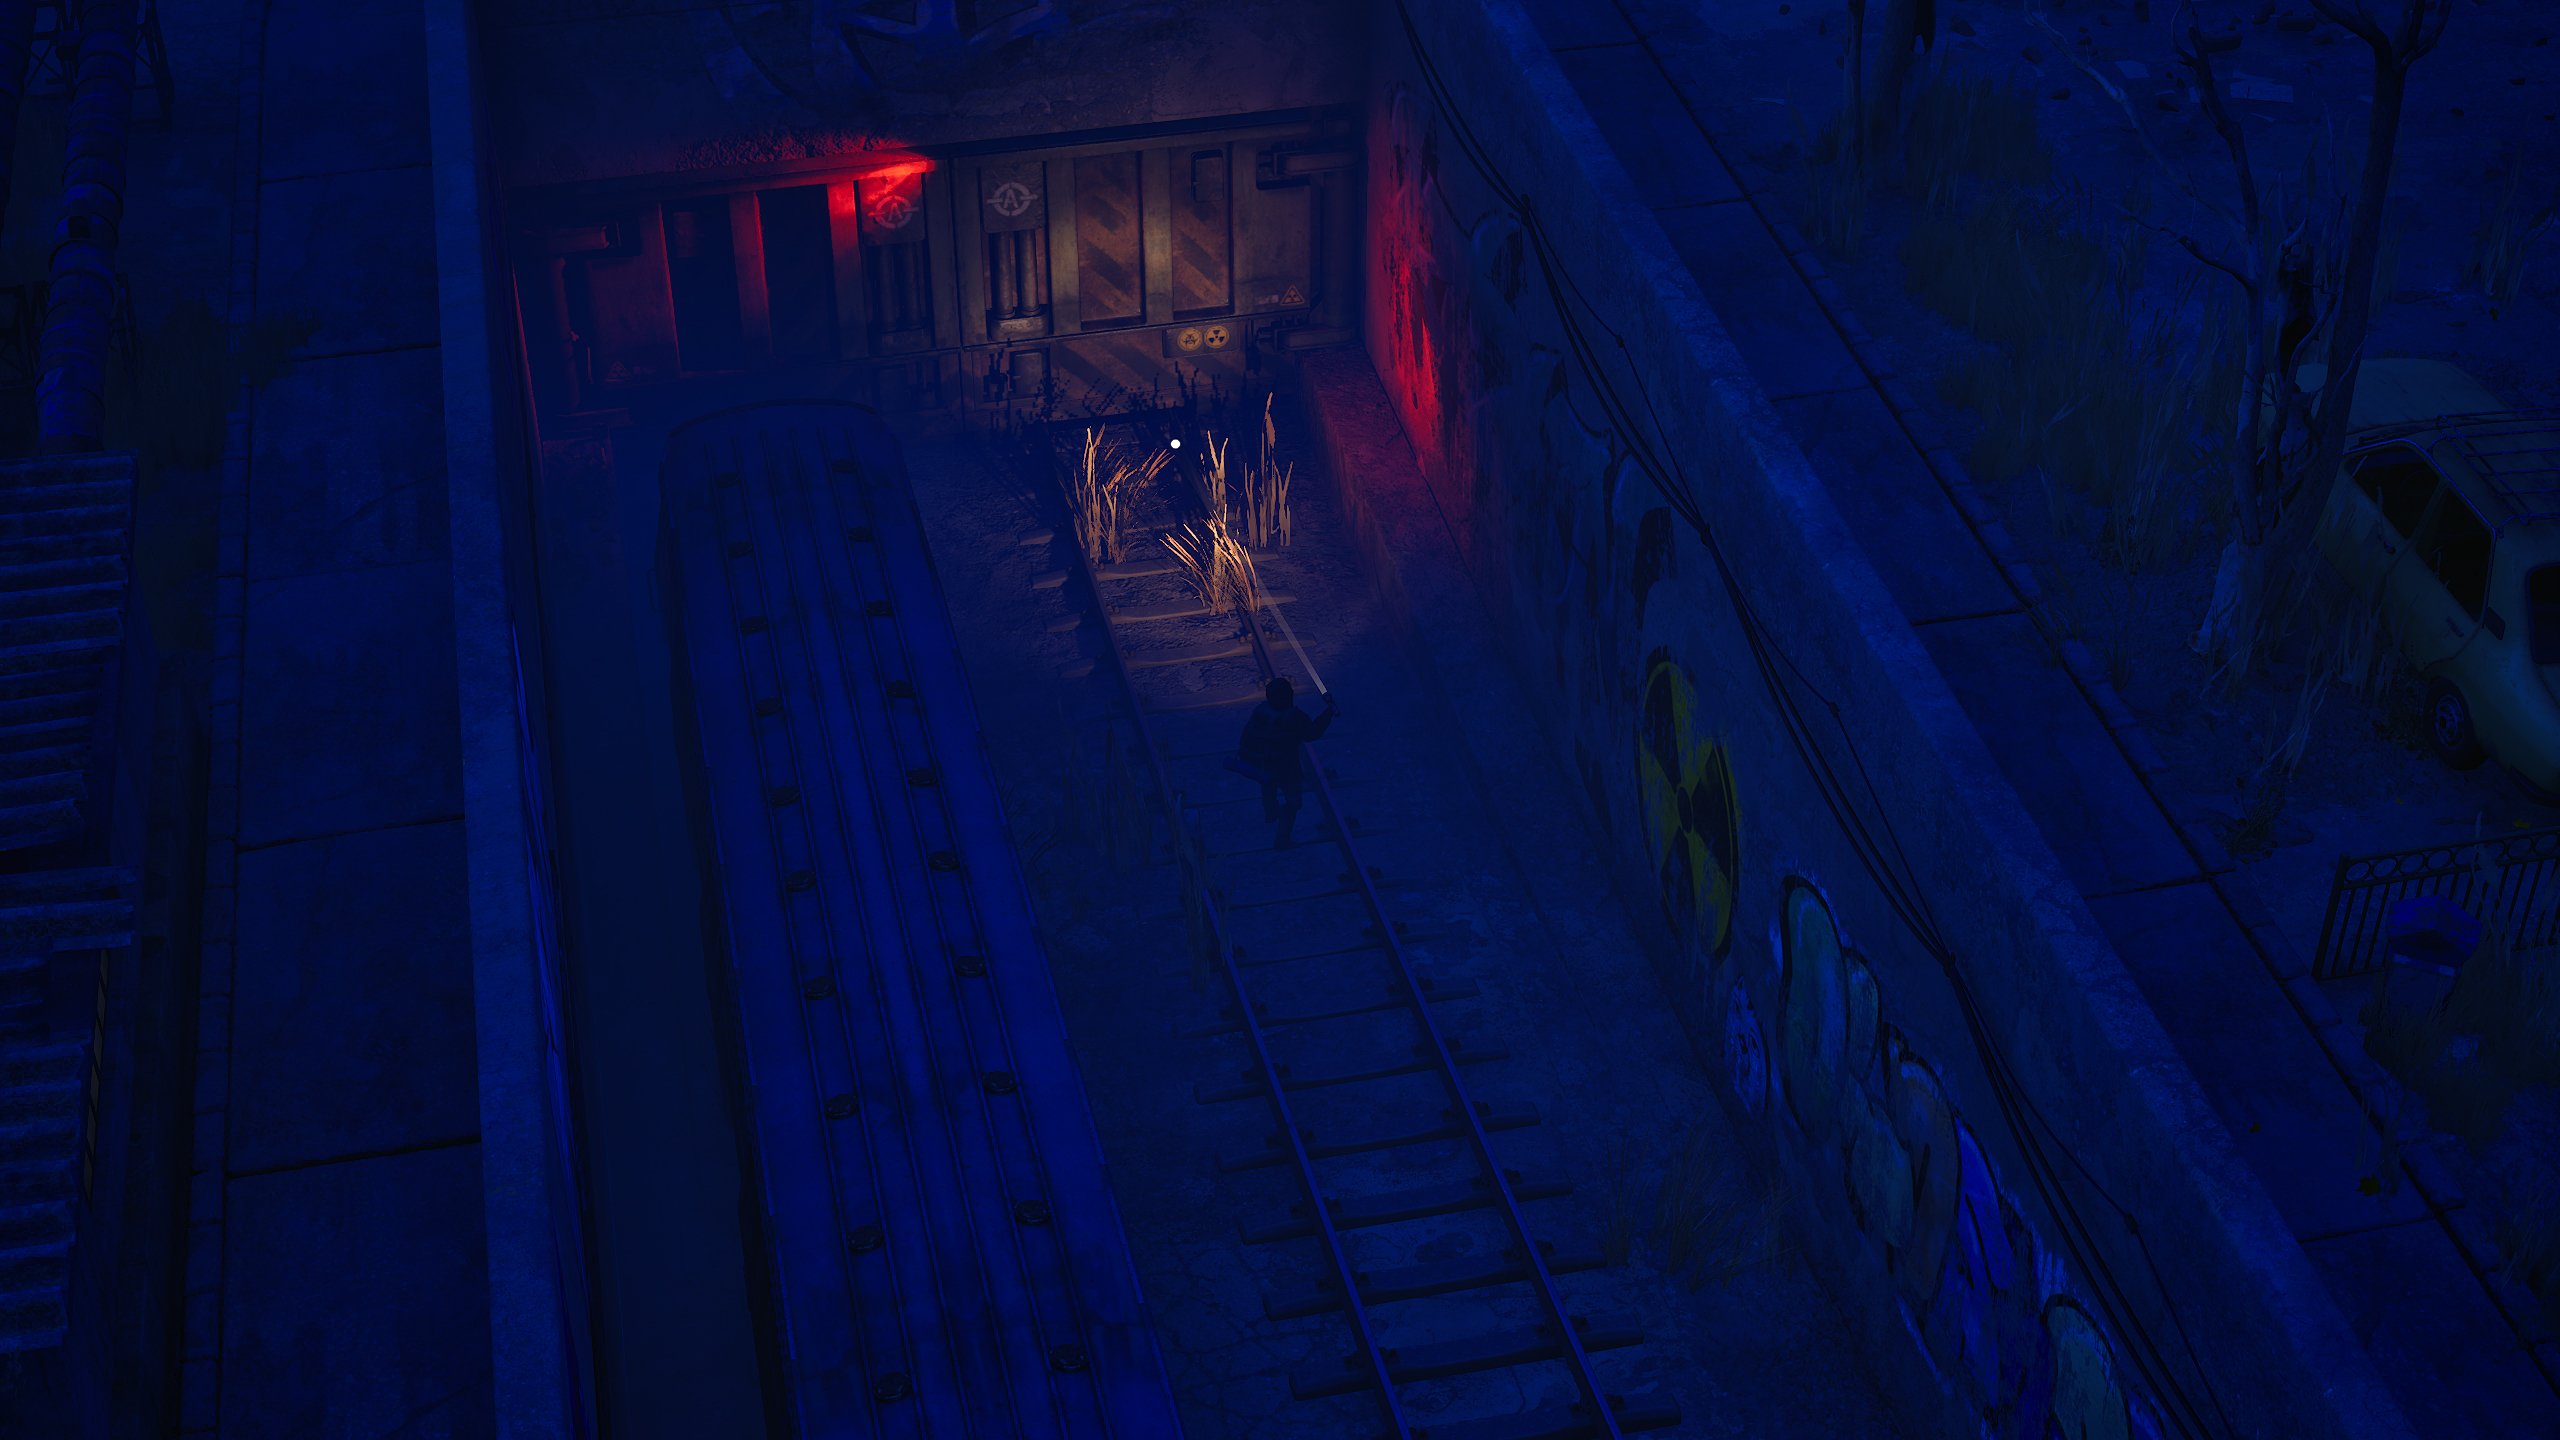
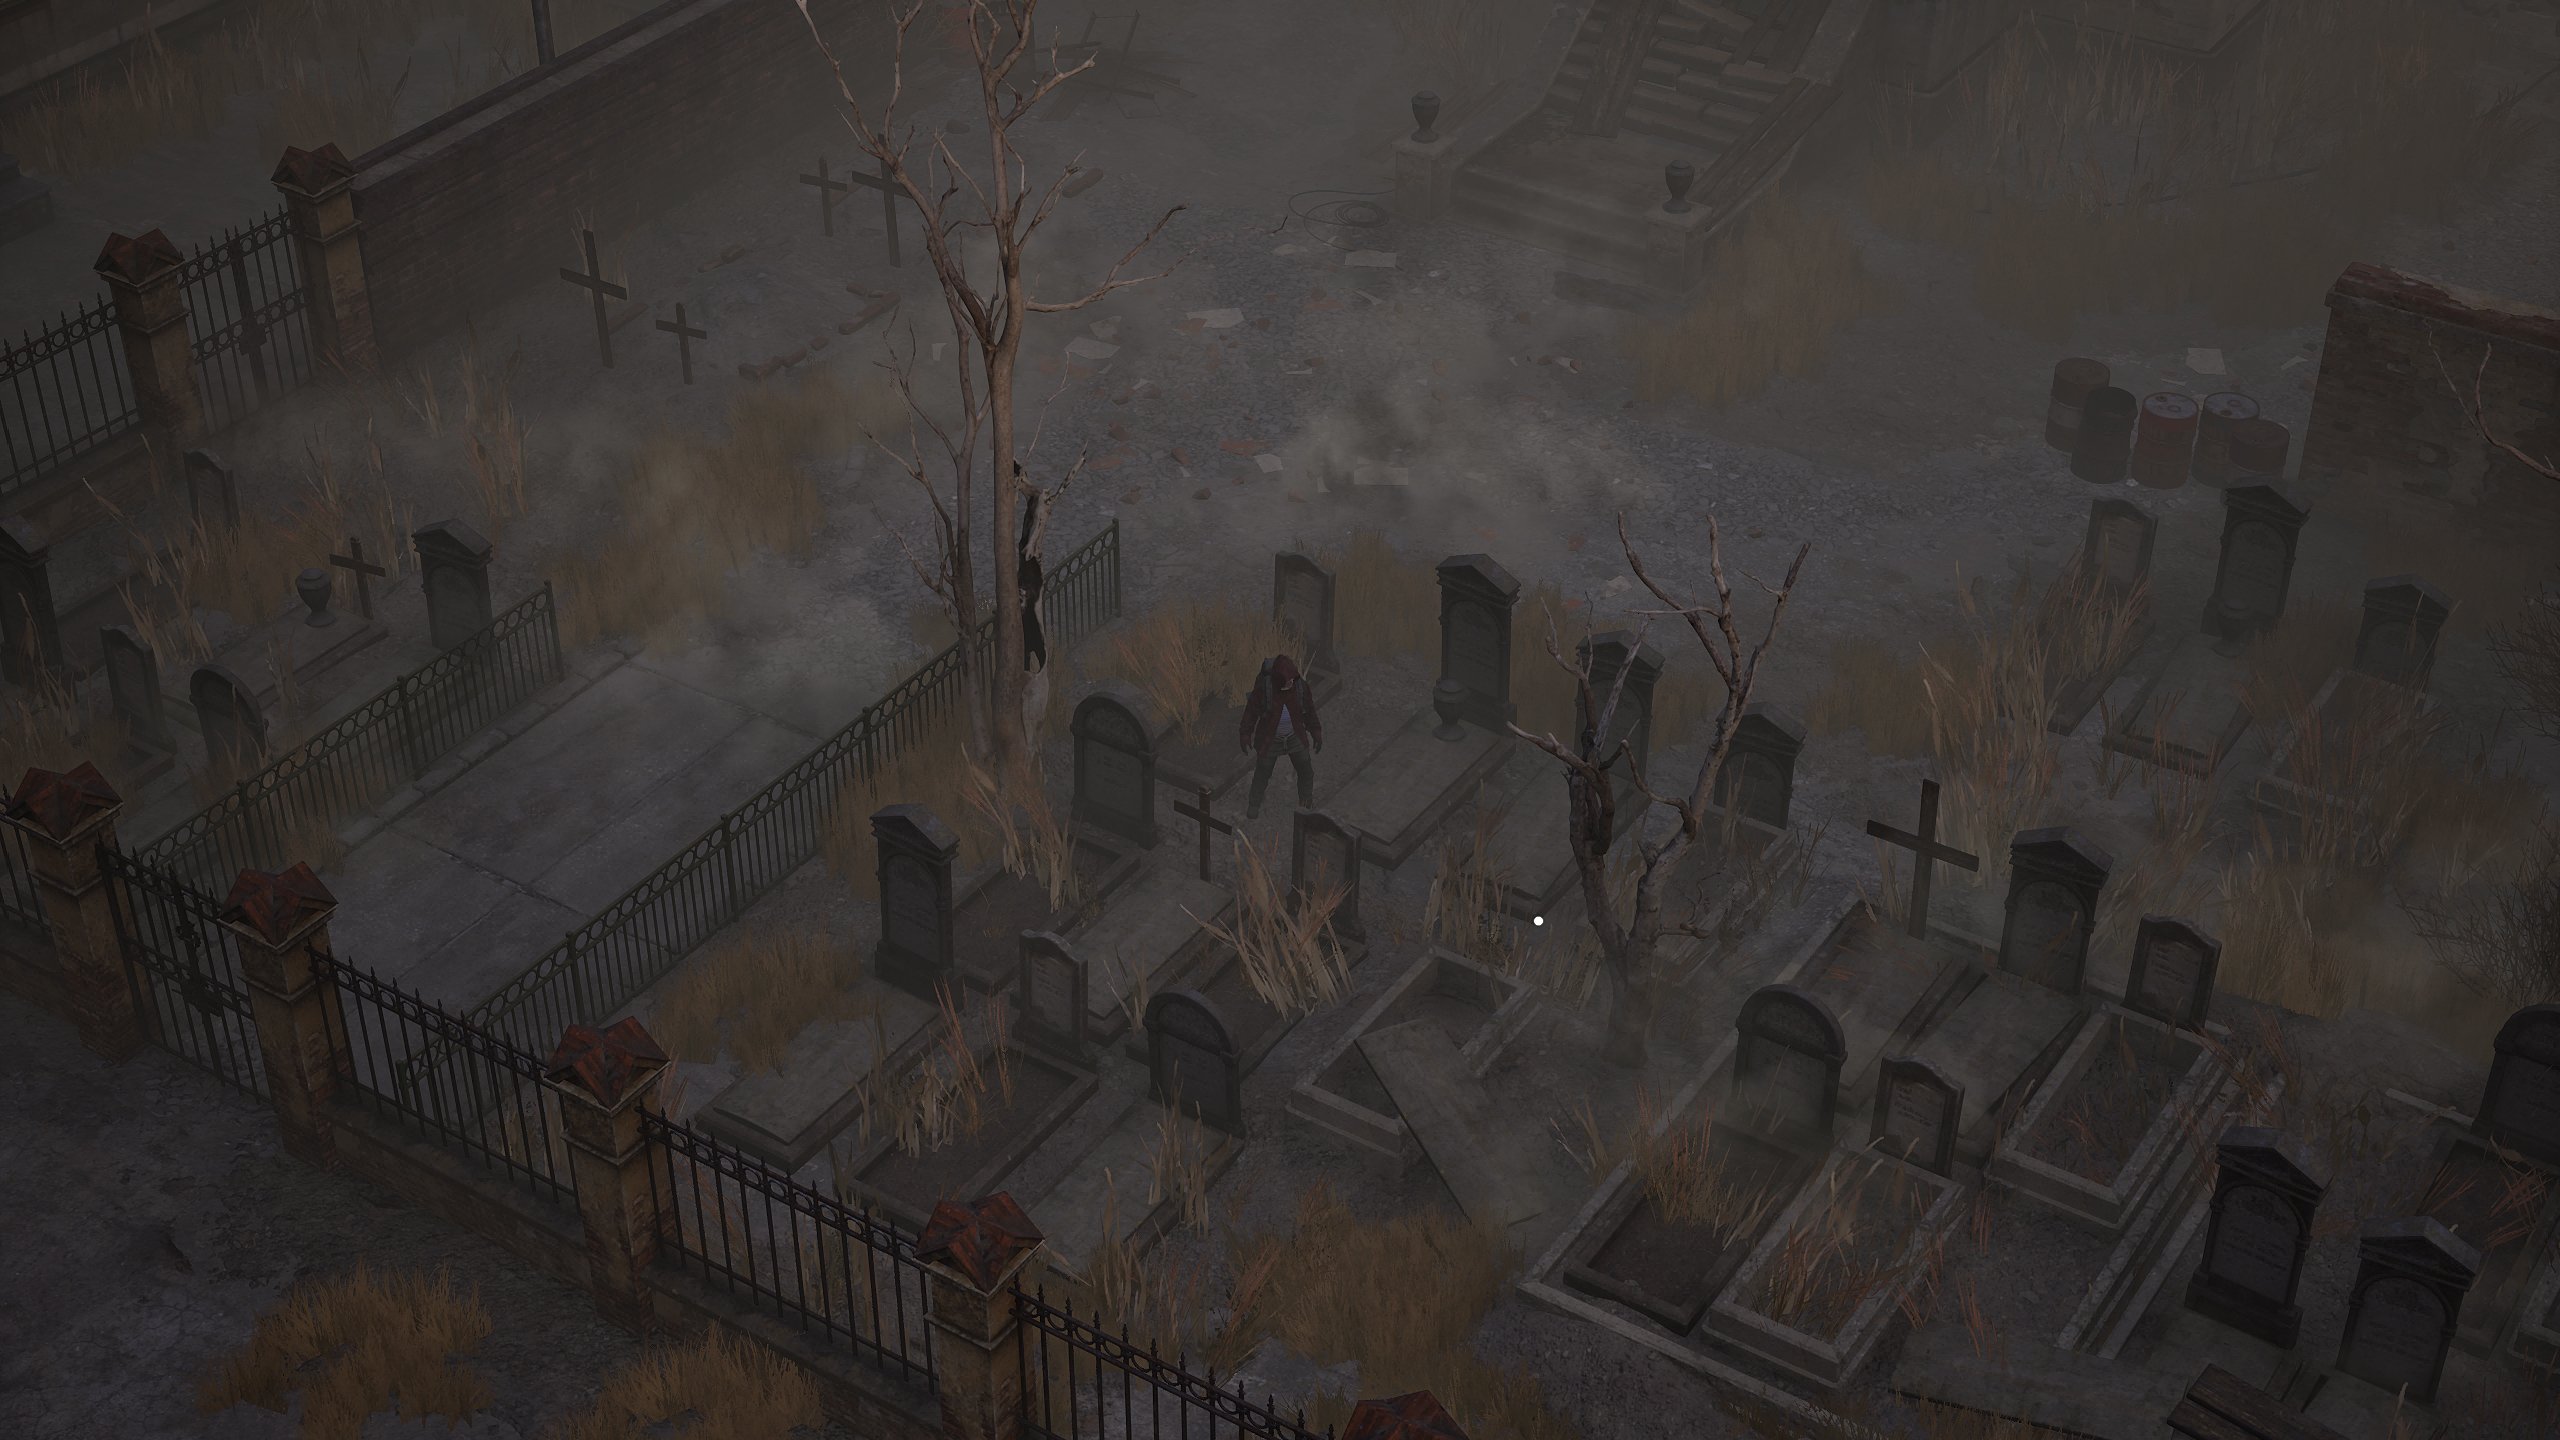
and here are some closeups:

Let me know if you have any cool ideas for this project!
14 ·
Transformers - Soundwave
passion project for me as a transformers fan So here is my interpretation/reimagining of the classic Deceptions Soundwave.
Made in Maya and Render with Arnold
Main Renders:

Grey

Main Shots and Asset Breakdown:


Turntables:
Main

Grey

Made in Maya and Render with Arnold
Main Renders:

Grey

Main Shots and Asset Breakdown:


Turntables:
Main

Grey

10 ·
The Bi-Monthly Environment Art Challenge | January - February (100)
Happy New Year and a big milestone for the Bi-Monthly
Environment Art Challenge as we kick off number 100 for the months of January and February!
This
challenge is a way for real-time 3D artists to test their skills and
create a piece of work based on concepts provided. It's open to those of
all skill levels and we do our best to provide meaningful feedback
along the way so everyone can come away from the challenge with
actionable points on which they can improve their craft!
- ENVIRONMENTS -
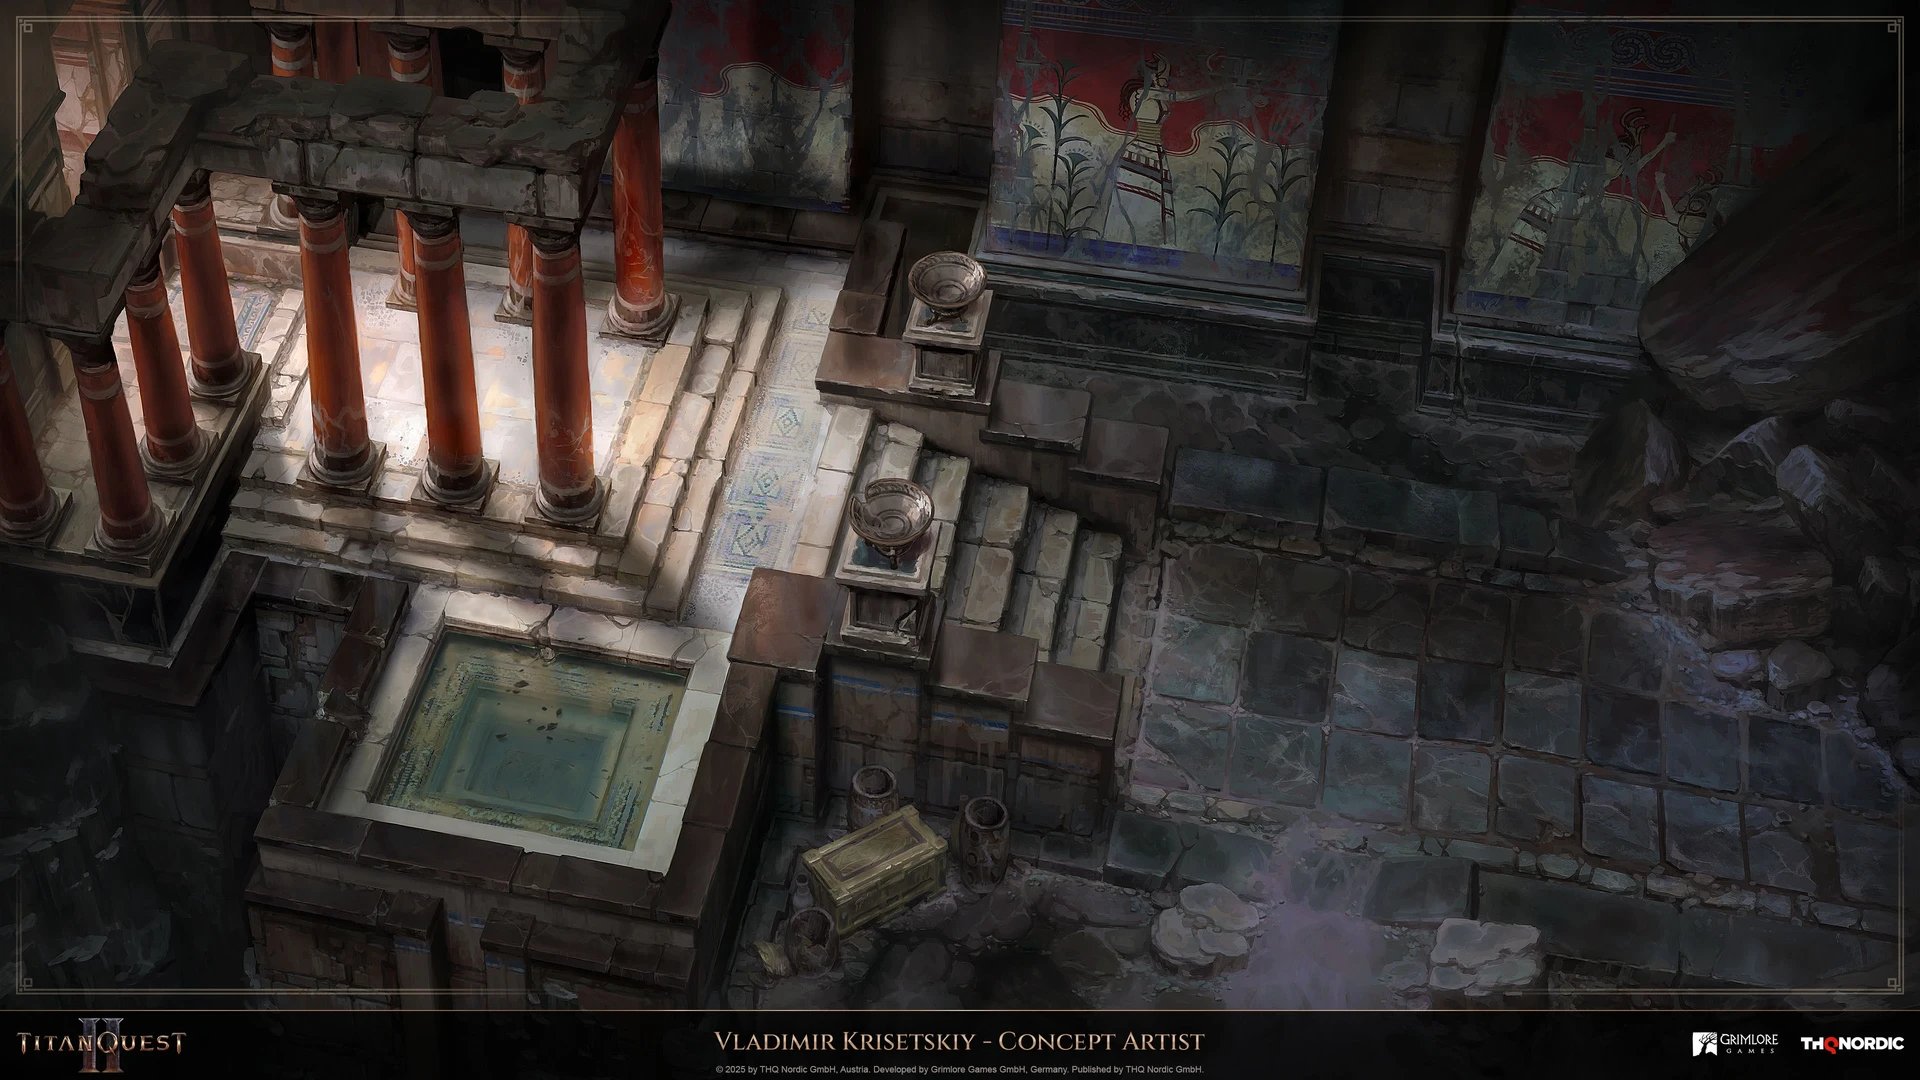
HARD SURFACE ENVIRONMENT:
Titan Quest 2 - Environments Exploration by Vladimir Krisetskiy
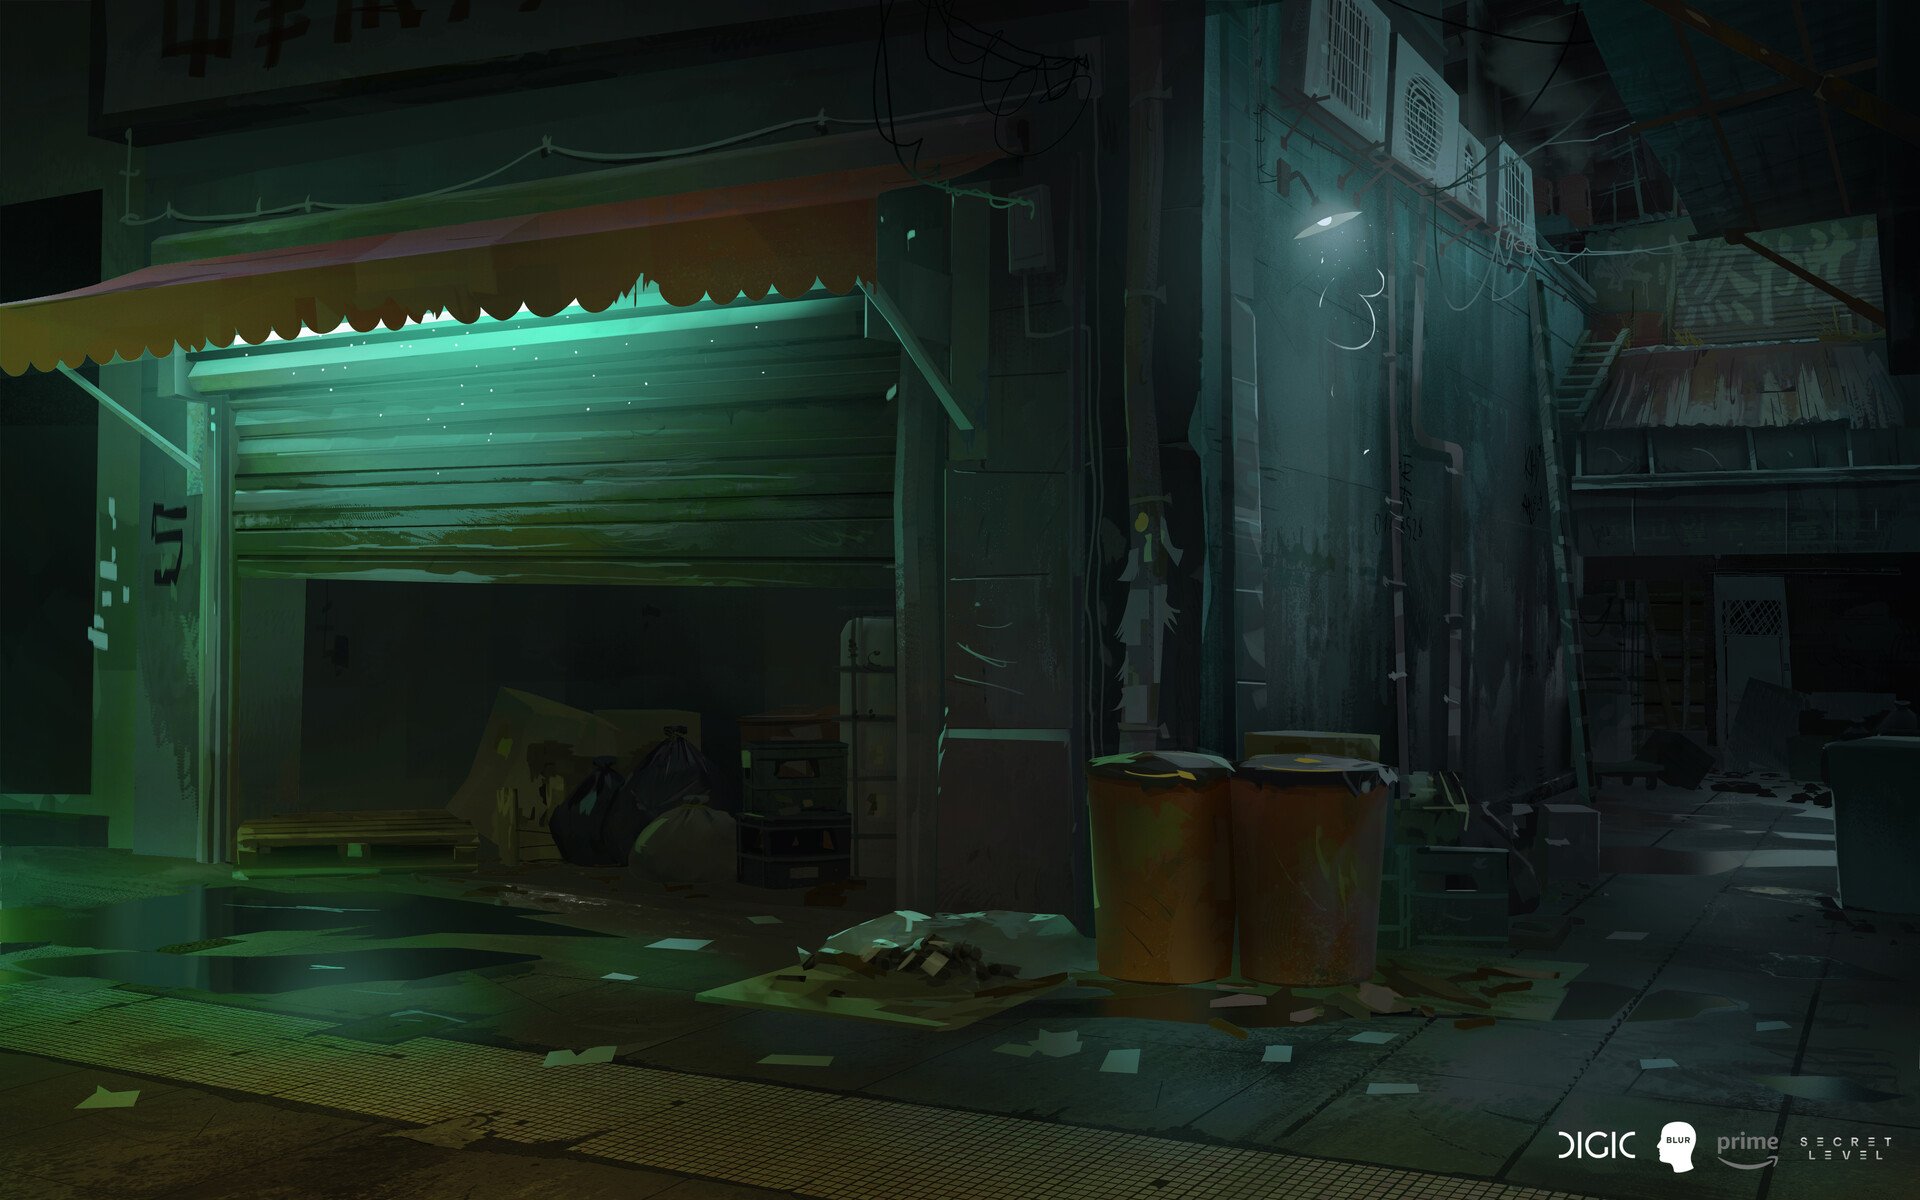
STYLIZED ENVIRONMENT:
Secret Level Sifu: It Takes a Life by Clément Dartigues
- PROPS -
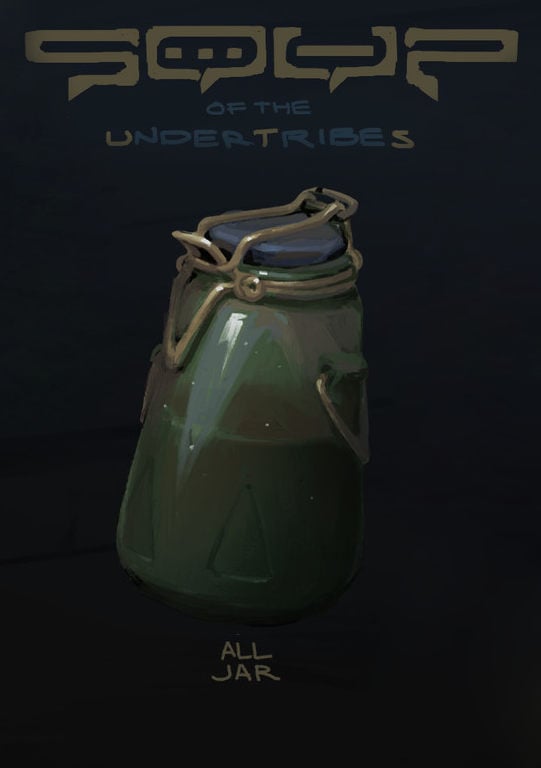
HARD SURFACE PROP:
SOUP - Items by Georgi Simeonov
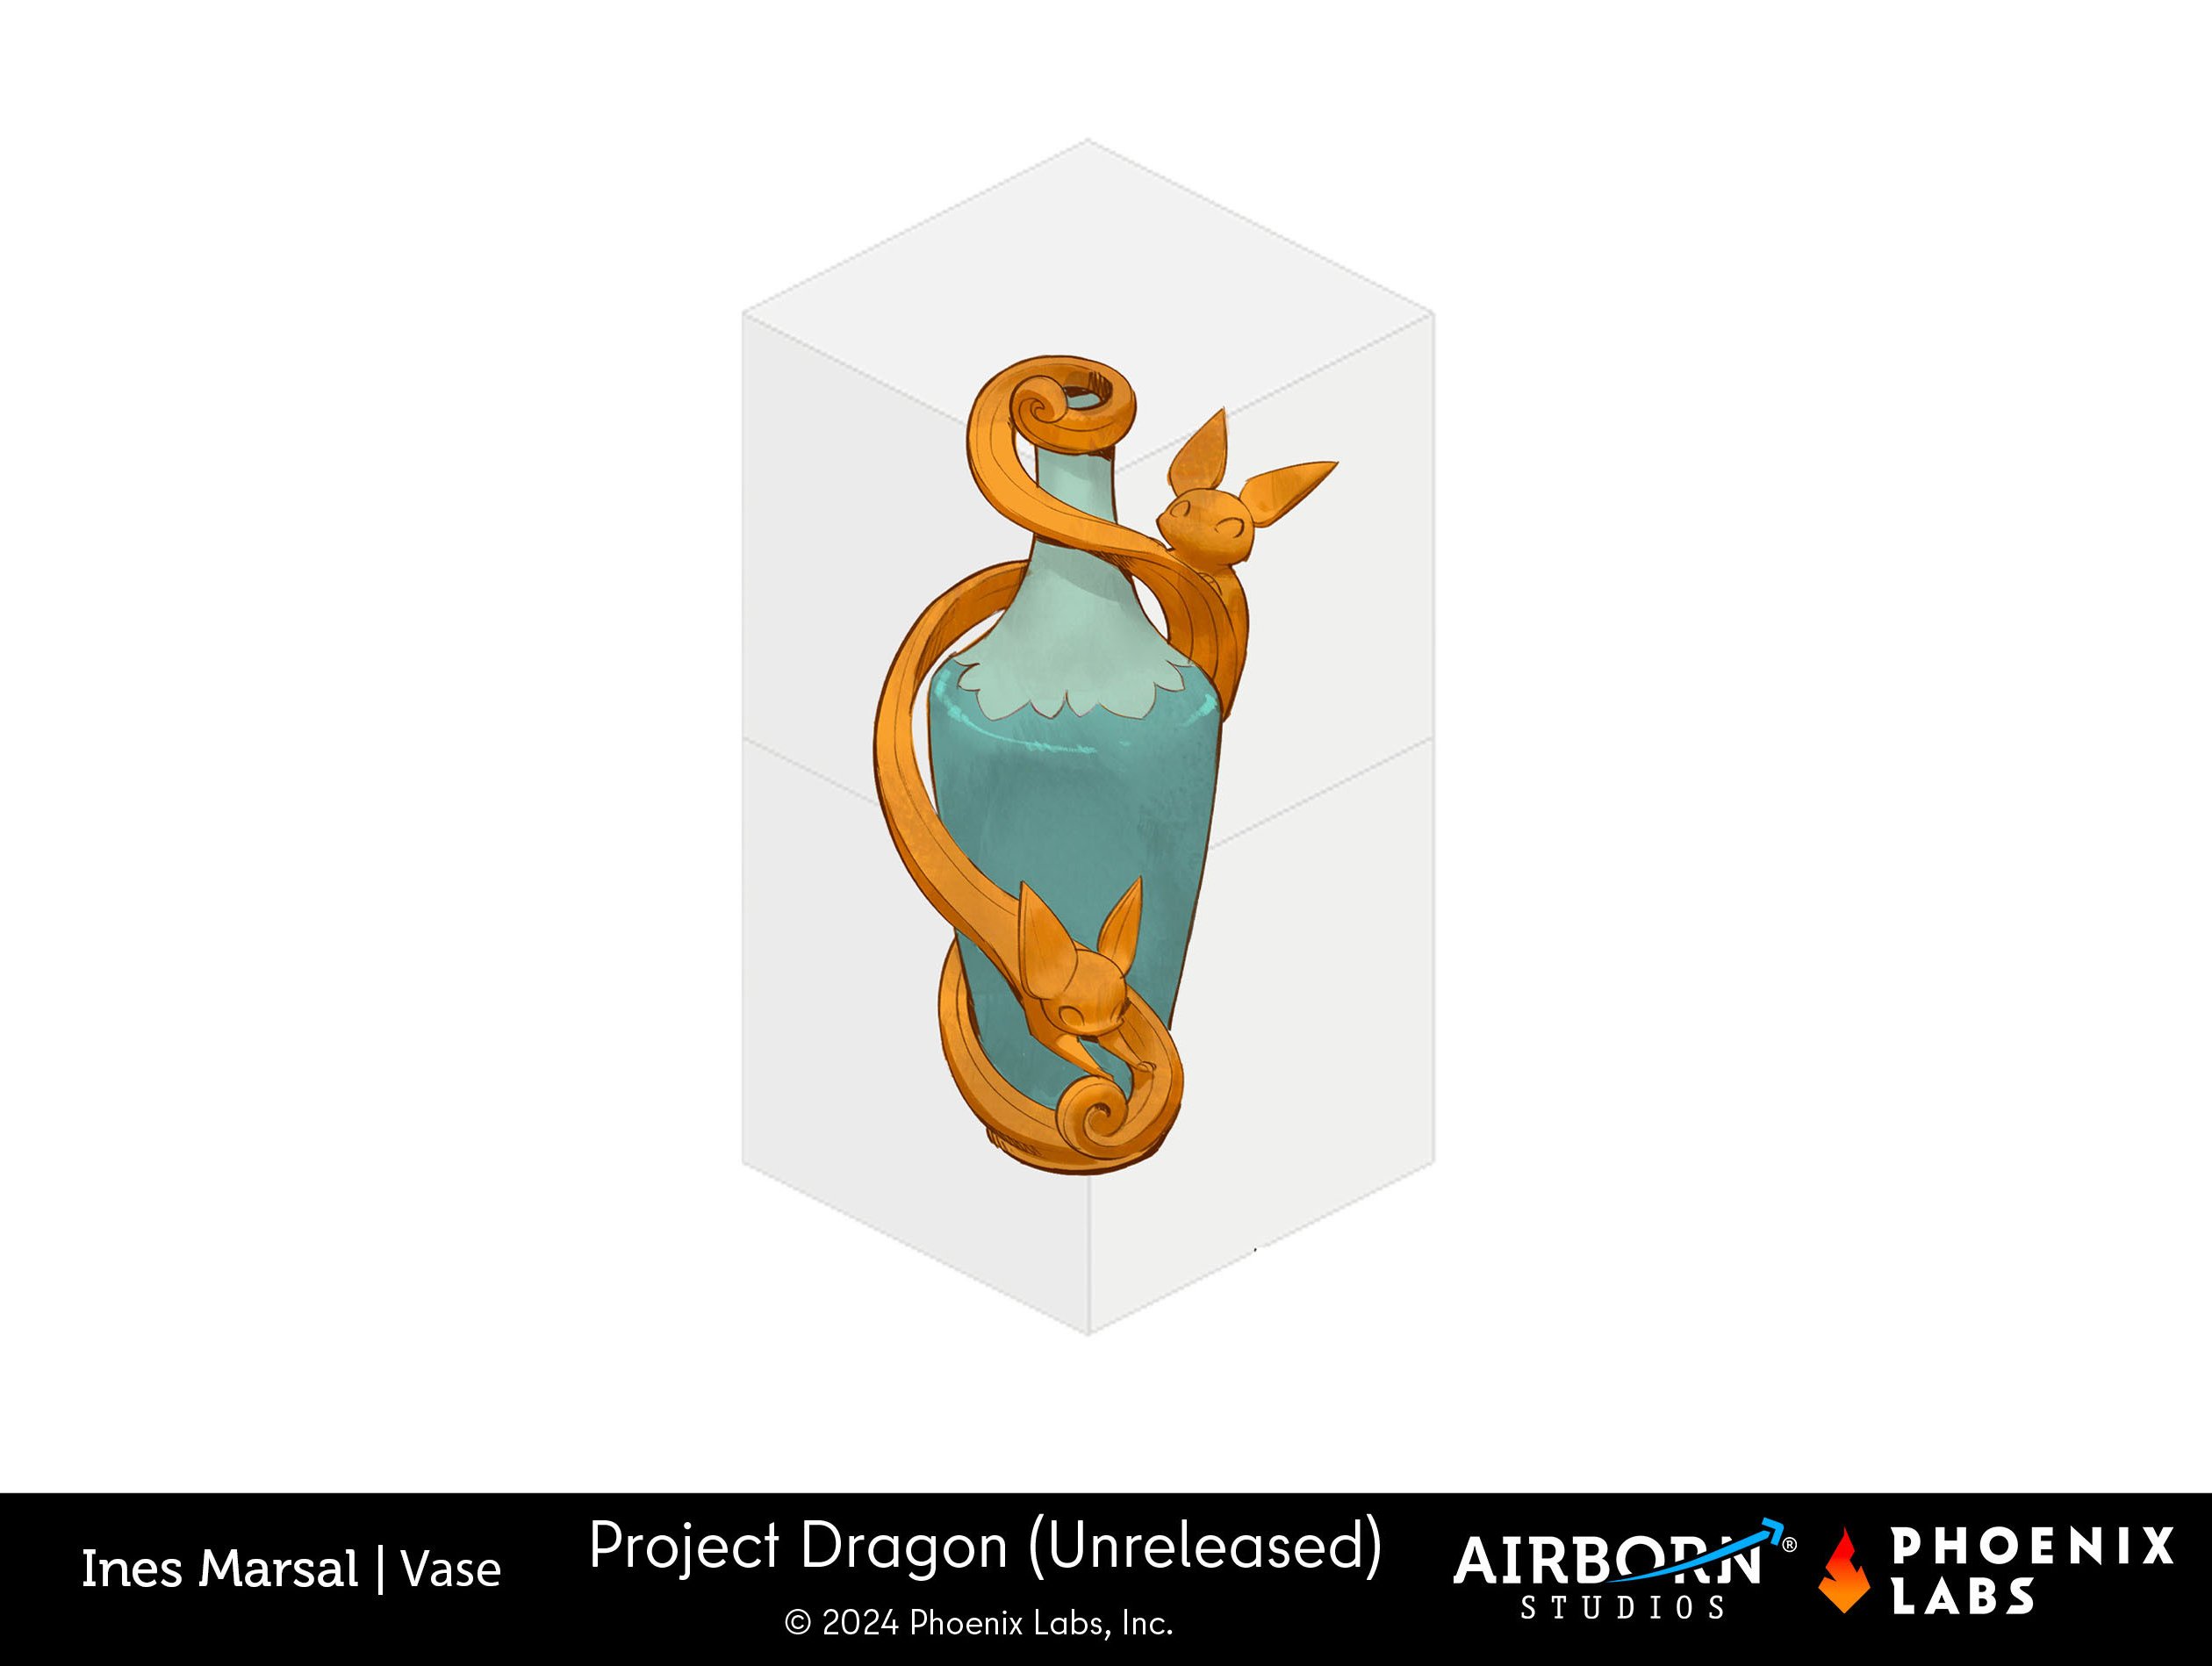
STYLIZED PROP:
Project Dragon - Misc Furniture & Props 2 by Airborn Studios
- RULES -
Please read all the rules before starting:- Try to post at least one critique for every post that you make. This will make for a better learning environment and help us all grow as artists.
- Try your best to finish as much as you can in the time frame provided, but remember even if you don't finish by the end of the challenge we encourage you to keep pushing and finish your piece!
- Post what you are working on in this thread so that way it's a more centralized place for advice and critique. Please avoid creating a new thread as we don't want to spam out the forums.
- It is recommended to use a game engine to present your work. Unreal Engine, Unity, and Godot are very common engines that can be used but feel free to use any alternatives that you want.
- 3D Viewers (Sketchfab, Marmoset Viewer, etc) are welcome, but please note that their contents can be stolen by those who know how. Please ensure you're comfortable with this potential before using one.
- Feel free to change up your chosen concept a bit if you want! Interpret these concepts to your liking, especially if your aim is to add storytelling elements.
- If you finish your project and decide to post it to something like Artstation, make sure you give credit to the concept artist in the form of a link to their profile. Additionally, it is recommended to ask a concept artist for their permission to post a 3D piece based on their work before doing so.
- RECOMMENDATIONS -
- When you are just starting out making a scene, it can seem complicated or imposing. Take your time planning and blocking out, it will set you up for success later on.
- Think about how you can re-use assets, re-use textures, break it down as simple as possible and plan it out. A lot of people will break it down in their own way when they start out their challenge. Gather some reference images as well for different parts of the scene, don't be afraid to make it your own.
- We strongly encourage you to go and look at other games and see how they make their assets as well as get concept art to give it your own feel.
- The goal is to learn and grow both artistically and in your ability to both give and receive critique, but don't stress about it and remember to have fun!
 Pinkfox
7 ·
Re: Sketchbook: Frank Polygon
Subdivision sketch: cylindrical grip.
This is a brief overview of a couple ways to streamline poly modeling and a quick visual comparison of a few high poly workflows.
There's a lot of different ways to approach poly modeling but most artists usually start out with the basics: inserting primitives, cutting in edges, then pushing and pulling the geometry into shape while using basic modeling operations like loop cut, loop slide, extrude, inset, bevel / chamfer, etc.
In some ways this is a very direct and linear process, so while the modeling tools and order of operations might vary, it tends to be a relatively intuitive workflow that's fairly easy to pick up. There's certainly nothing wrong with this approach either: manually creating mesh components and destructive editing tends to work well for modeling simple, irregular, or organic shapes but it can sometimes be a real struggle when it comes to complex hard surface models with repetitive features. Especially when those repetitive features have subtle differences or are part of complex shape intersections.
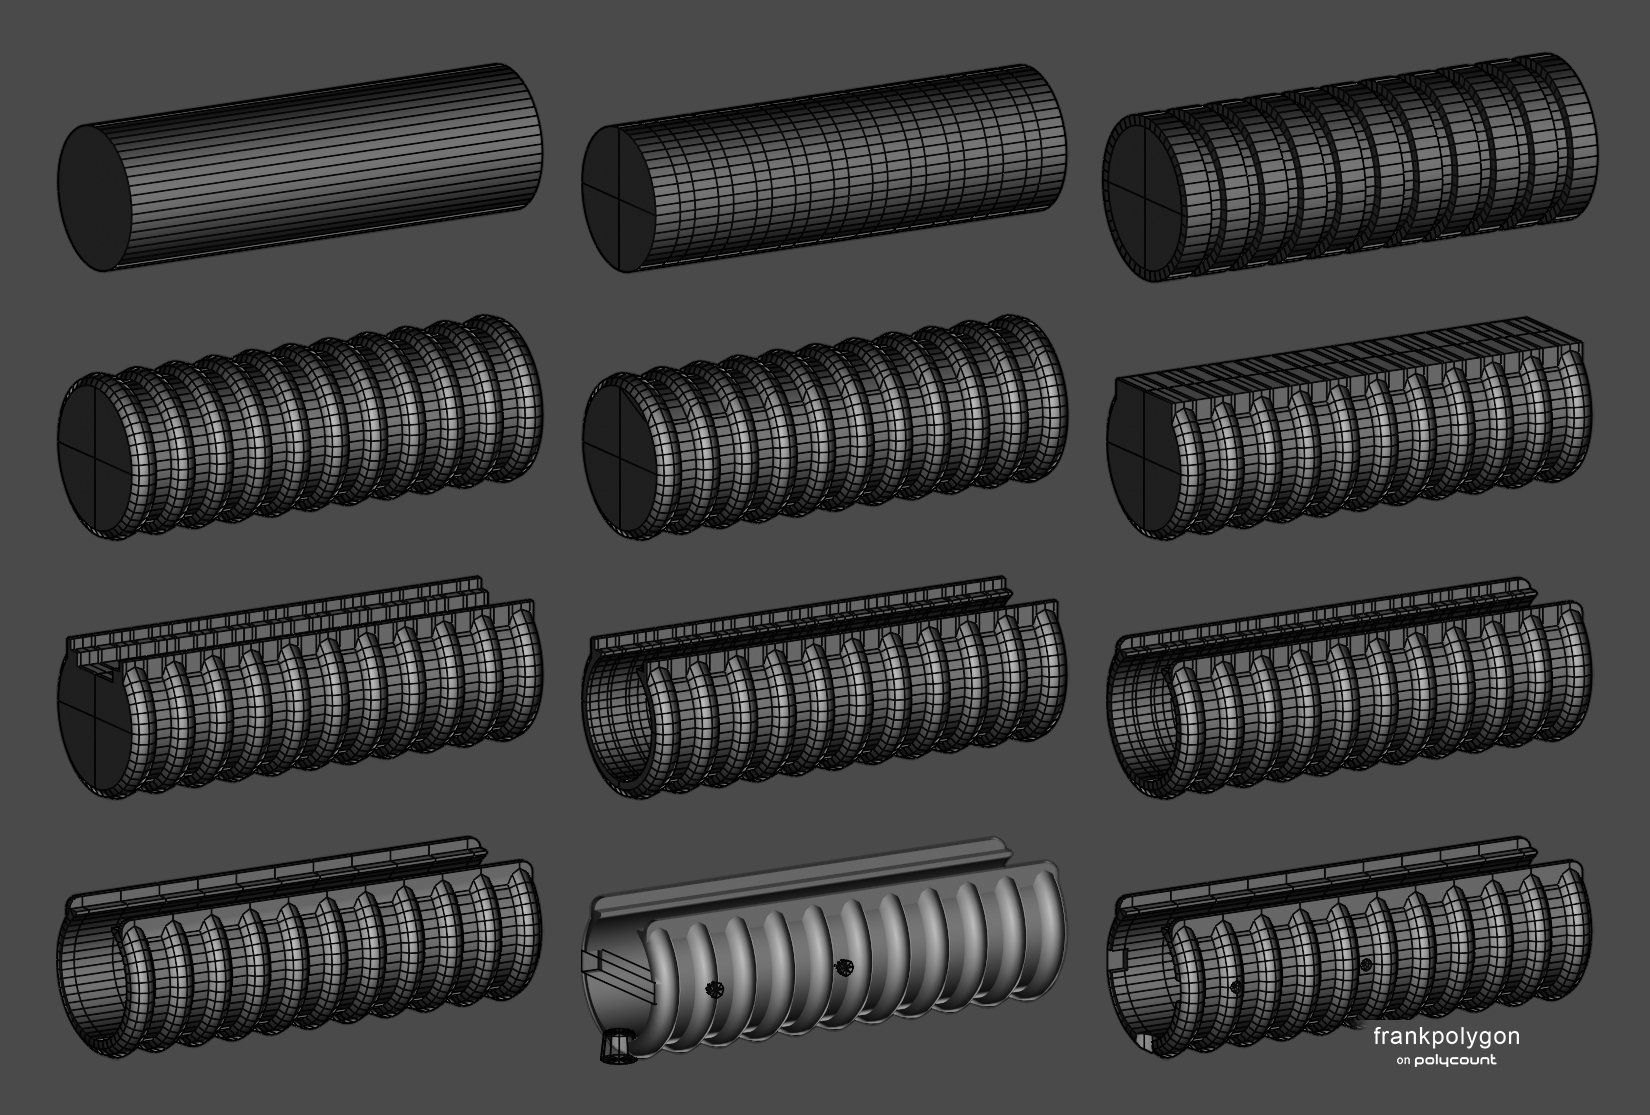
Below is an example of what a basic poly modeling approach might look like on a relatively simple part with some repetitive features.
Block out the major form with a primitive, loop cut, then inset to create depth and round off the secondary shape profiles with a bevel / chamfer operation. Create the rest of the secondary features with simple operations like extrude and spin. Smaller tertiary details could either be manually created using the same loop cut and extrude process or by boolean subtracting another mesh. Clean up and simply the mesh as required.
Again, there's a lot of different ways to approach modeling this. Which
means it's less about the order of operations and more about
the total number of steps needed to create the base mesh and there's
always the question: What happens if the shapes need to be corrected or
the mesh density needs to be changed? With basic poly modeling the
answer usually ends up being either manually adjusting the
mesh or completely re-modeling the part from scratch. Depending on the size problem that rework could be anything from a slight annoyance to a major time sink.
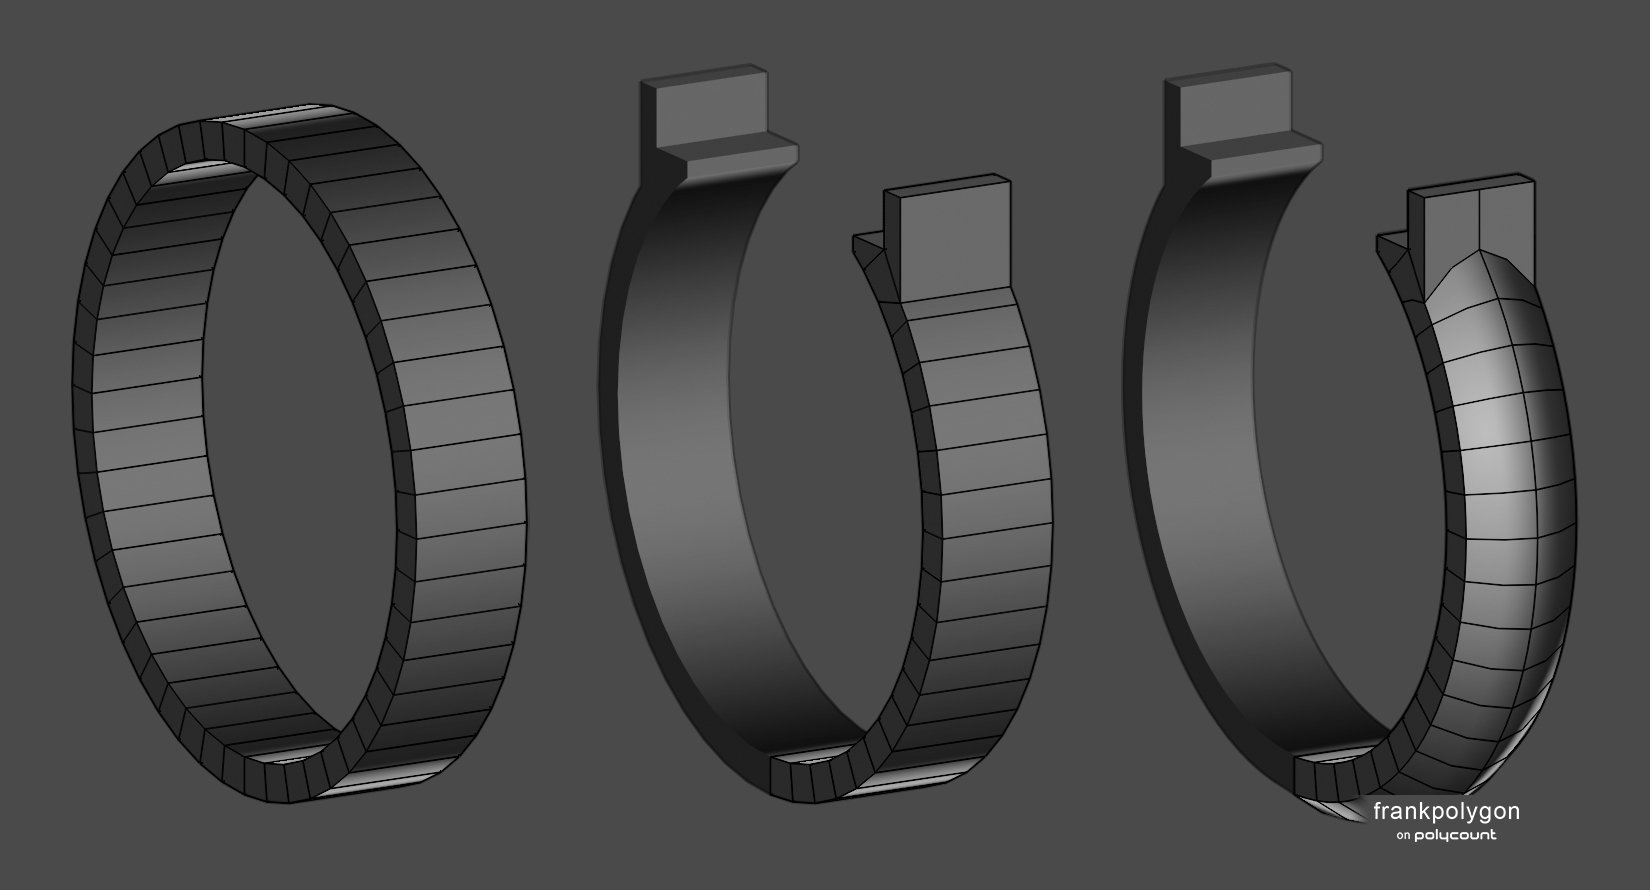
Mirroring the mesh is an easy way to reduce repetitive work but it's possible to take this a step further by splitting the mesh down into tileable sections for each repetitive feature set. Adding an array modifier to these tileable mesh sections is a quick way to copy and merge them. With the added benefit that any edits to the original will automatically propagate to all the copies.
The example below shows what poly modeling those tileable mesh sections could look like. Insert a basic open cylinder primitive, delete the unnecessary segments, extrude upwards to create the flat features, then add a loop cut and scale it up from the center origin point to create the major diameter of the ribbed section and use a bevel / chamfer modifier controlled by edge weights or vertex groups to create the round over.
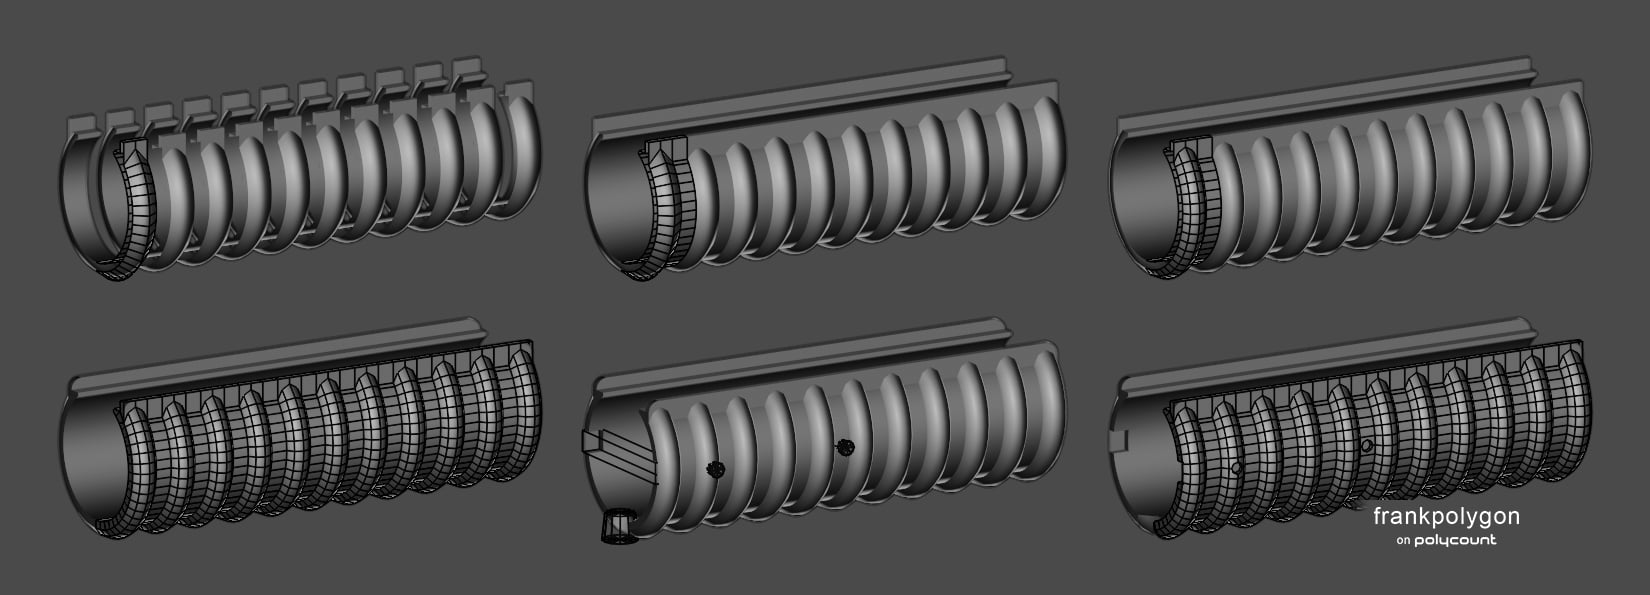
Here's a wider view of what the process looks like once the array modifier is added.
Define the larger primary forms of the major diameter first then extrude the edge along the minor diameter outwards to fill in recessed section between the ribs. Round off the corners of the first and last segment of the array with another bevel / chamfer modifier and that's it for the primary and secondary shapes. The rest of the tertiary shapes can be added with a series of boolean modifiers.
In this example the larger primary forms were created quickly with basic [destructive] poly modeling operations but since it's tileable and all of the secondary and tertiary details are generated by modifiers it's fairly easy to edit everything without having to do a lot of repetitive re-work. Though not ideal, it's even possible to destructively change the segment count of the primary forms by simply re-spinning the center edge profile up to where it meets the flat features at the top of the model.
Streamlining polygonal modeling with non-destructive parametric mesh primitives and modifiers like boolean, bevel / chamfer, deform, etc. take this concept a step further. Once the primary shapes are established, the curvature and mesh density of almost every single surface is independently adjustable throughout most of the block out process. Which makes it a lot easier to line up the segments for subdivision modeling and a lot of this flexibility also carries over into the base mesh for modifier based subdivision and single application re-meshing high poly workflows.
The example below shows what this process could look like.
Intersect cylinder primitives with a simple editable mesh that outlines the internal features of the flat areas at the top of the grip then round off the corners of that rectangular portion of the mesh primitive using a bevel / chamfer modifier. Add a torus primitive and use an array modifier to copy it along the length of the cylinder primitive then boolean union them to create the ribs. Use additional primitives and boolean operations to add the smaller tertiary cut out details.
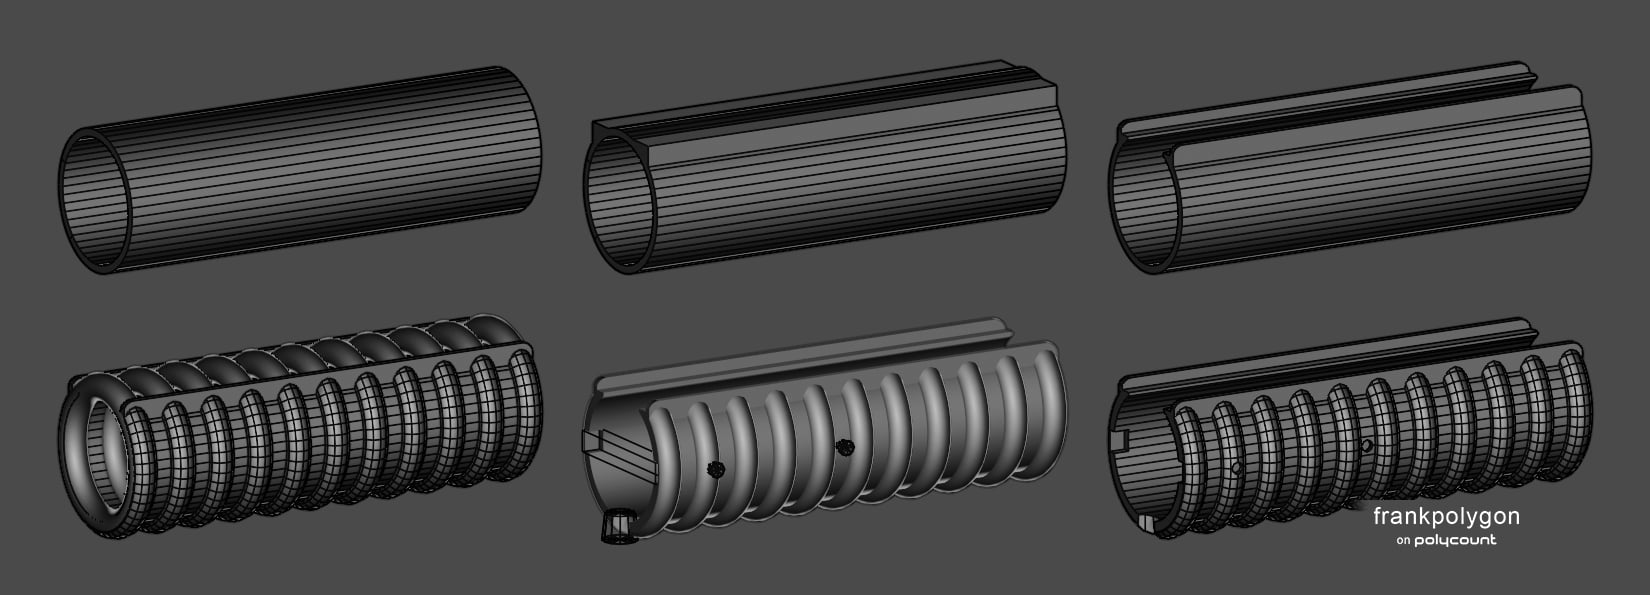
Better references and thorough block outs do help prevent the kinds of problems that often require completely reworking large sections of a model but sometimes certain features just need to be adjusted. Especially when it comes to refining the visual read of shapes in vague and unpolished concepts or when there's a limited amount of reference material available.
This approach doesn't have to be all or nothing either: sometimes it only makes sense to make certain features non-destructive. So try to anticipate what parts of the model may need to be changed and plan accordingly.
Another advantage to this kind of streamlined poly modeling workflow is that, regardless of the final high poly process, the low poly model is essentially "free" because of how easy it is to generate different base meshes from the same model. As shown in the example below.
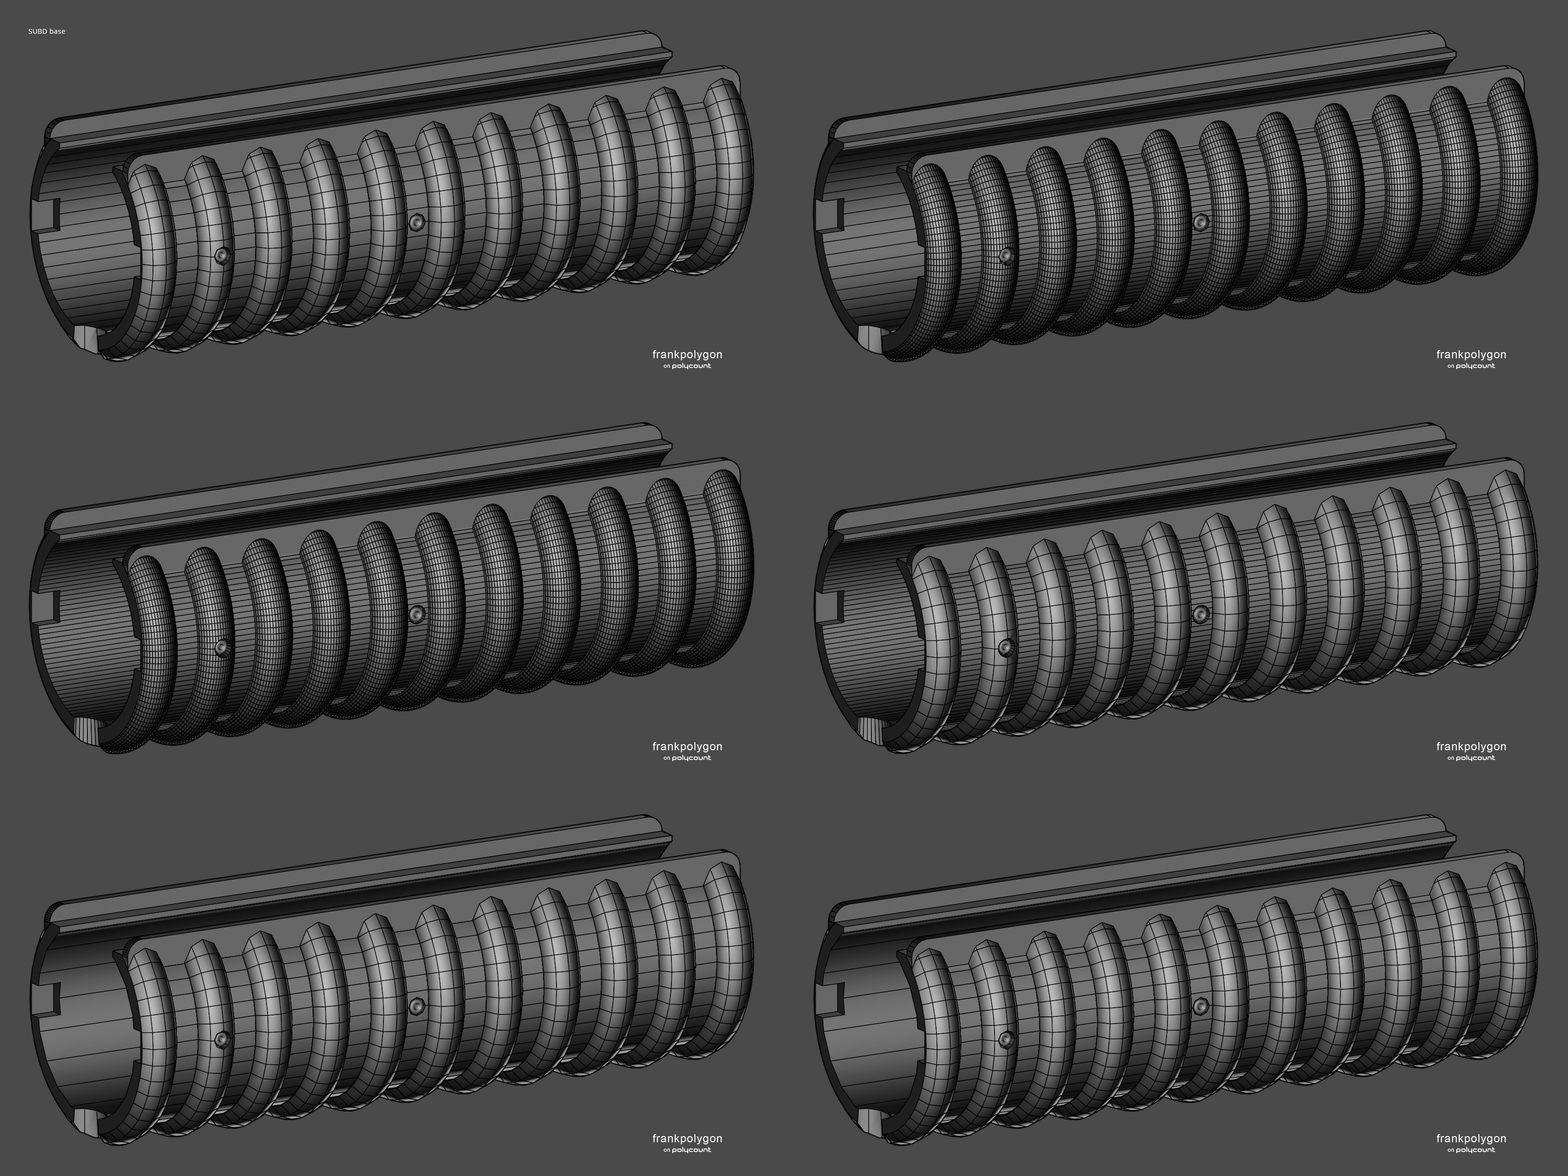
All three workflow examples generate the same exact base mesh. So, which approach to poly modeling makes the most sense? Well that all depends:
- What's the model for?
- What's the available tool set?
- What's the chance the model will need significant changes?
Sometimes the most direct approach [destructive editing] is the quickest and easiest.
Other times it's much easier to rely on parametric primitives and
modifiers to generate surface features with accurate and consistent geometry. Sometimes it's nice
to have some flexibility when it comes to easily adjusting shapes and mesh
density.
What makes sense for one part of the model may not make sense for another. So it often just comes down to balancing accuracy, effort, and flexibility. I.e. how much work it takes to create the shapes and how easy it is to
change things like curvature, mesh density, proportions, etc. without
having to re-do a lot of the existing work.
A similar streamlined modeling approach can also be used to generate the high poly model.
Below is an example of a modifier based subdivision workflow. A fairly simple base mesh, previously
generated by the parametric primitive and boolean block out workflow,
has all the support loops generated automatically by a bevel / chamfer
modifier that's controlled by edge weights. Which means the base mesh is fairly easy to edit and the width of those support loops can be changed by simply adjusting the width parameters in the modifier panel.
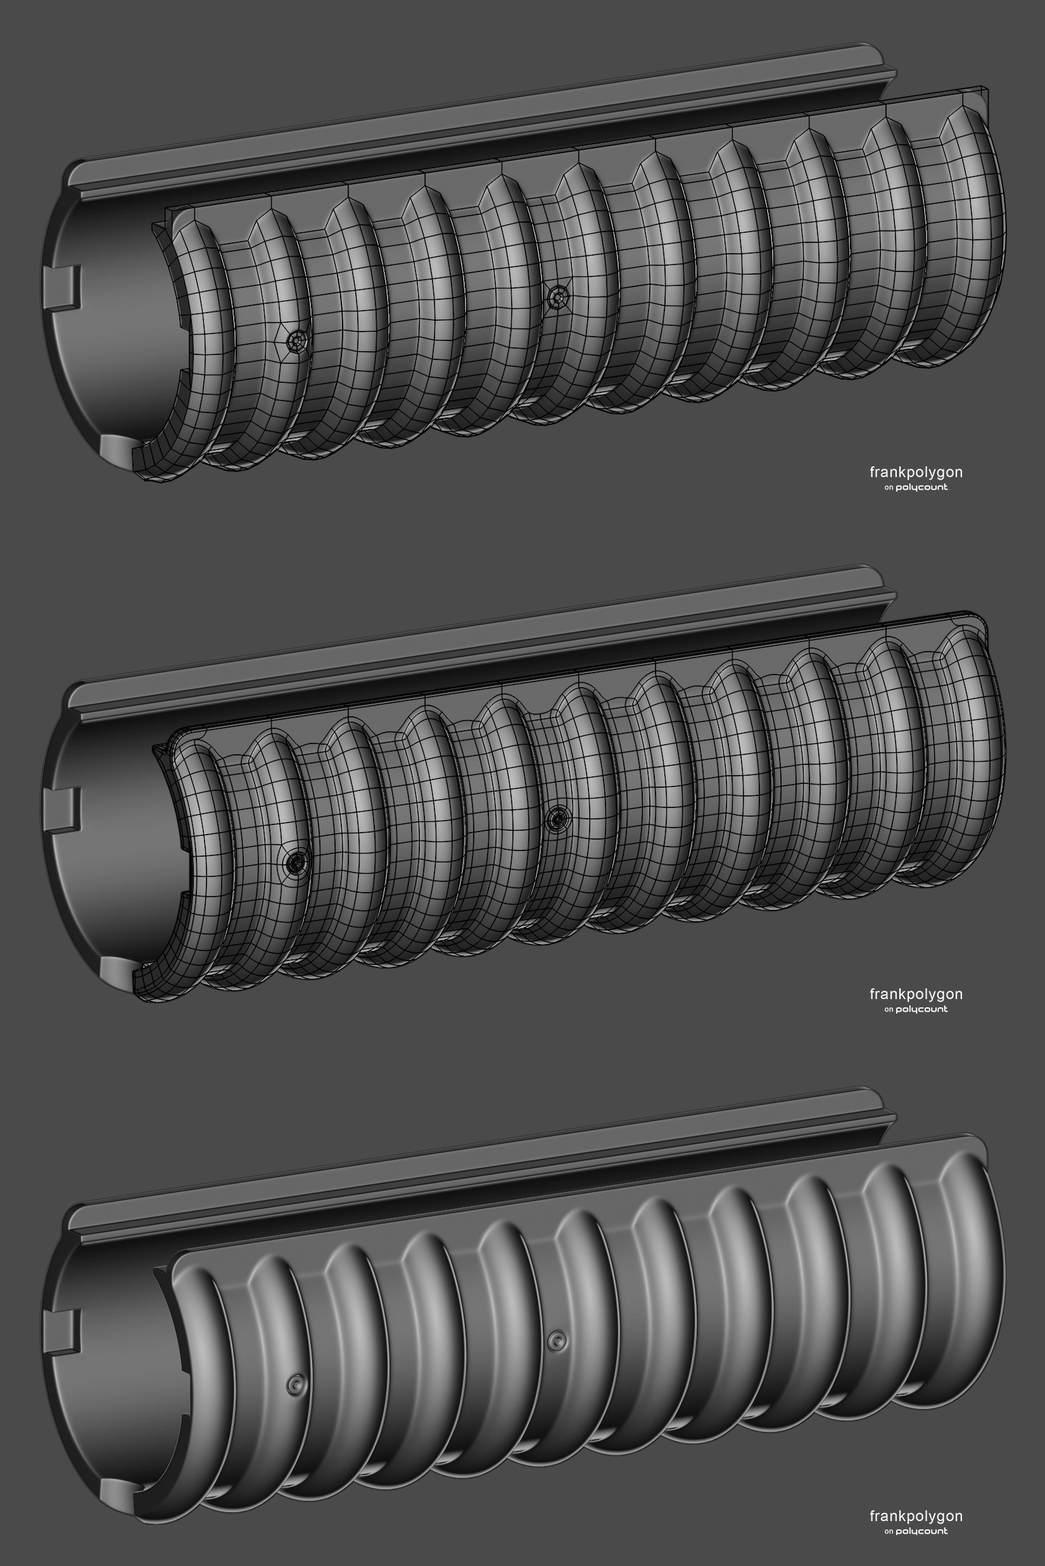
Below is an example of a single application modeling, re-meshing, and smoothing workflow in Blender. The same parametric primitive and boolean block out is used to generate a denser base mesh then voxel remeshing and corrective smooth modifiers added to polish the surface. Without creating micro bevels there's a distinct lack of variable edge width but any changes to the primitives, modifiers, and meshes that drive the remeshing modifier are almost immediate and there's no need to export the base mesh or switch apps to generate a bakeable high poly for game art.
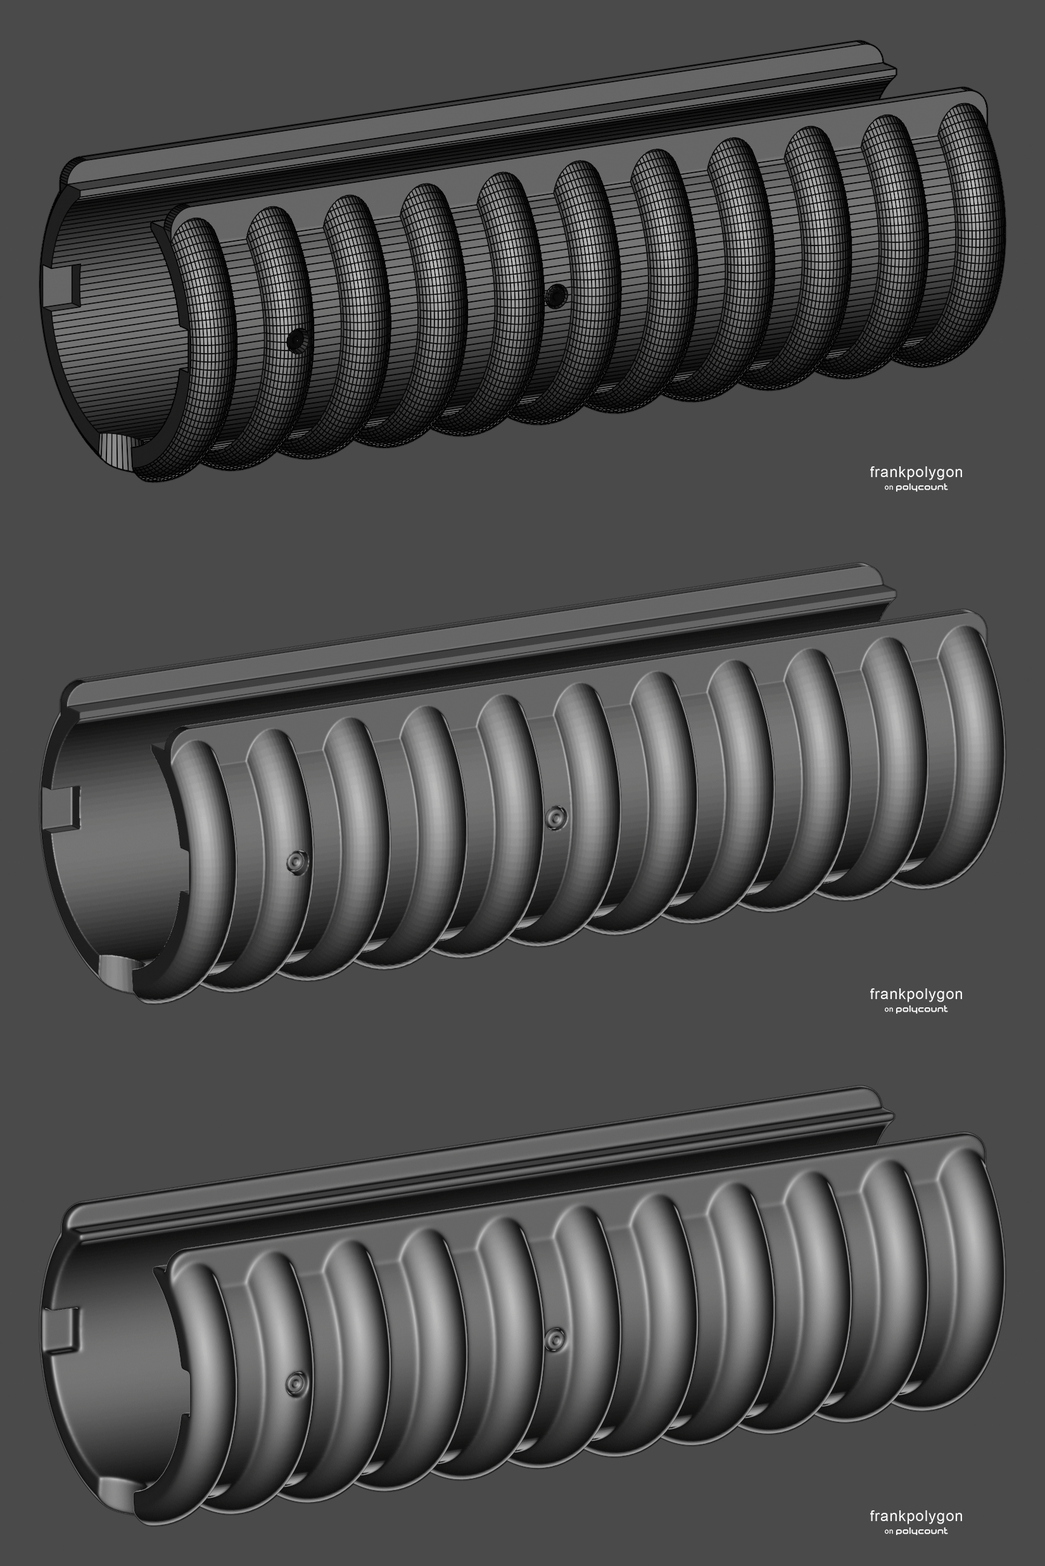
Below is an example of a DynaMesh and polish workflow. The same denser base mesh from the previous example is exported to ZBrush for a DynaMesh pass then followed up with polish by group and polish by crisp edges. For most game art workflows the high poly model still needs to be decimated and exported out of ZBrush for baking.
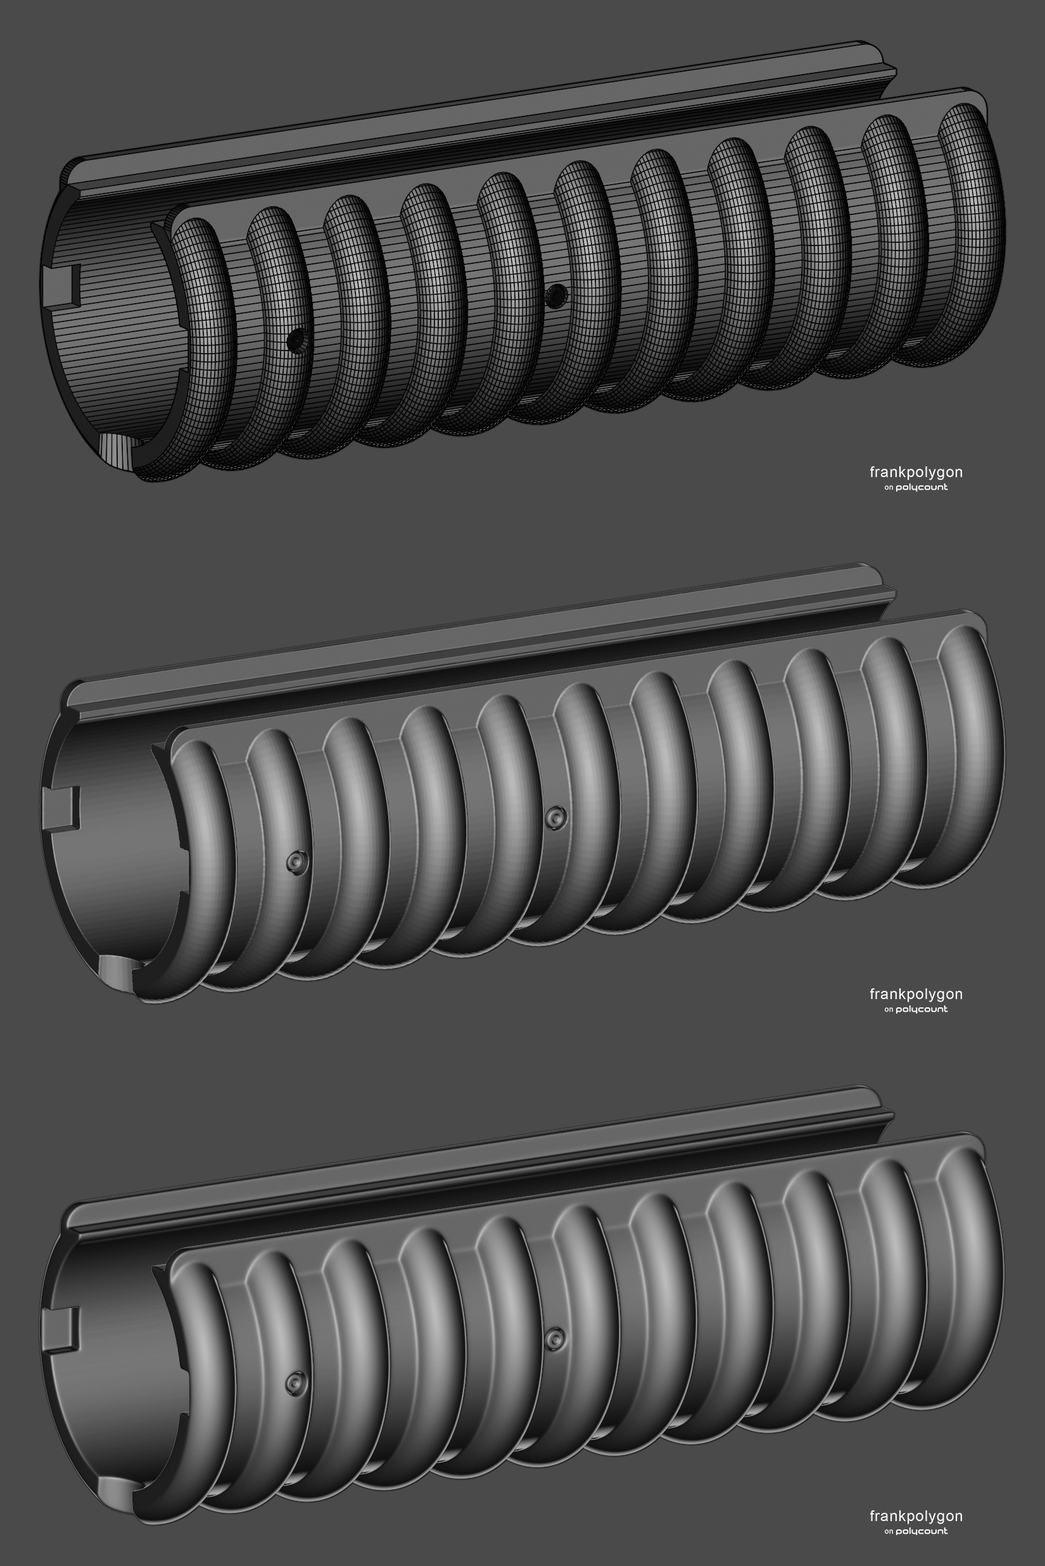
High poly comparison, left to right:
Subdivision @ 2x or 180K.tri, Blender remesh + smooth @ 7M.tri, ZBrush DynaMesh + polish @ 7M.tri

Subdivision @ 2x or 180K.tri, Blender remesh + smooth @ 7M.tri, ZBrush DynaMesh + polish @ 7M.tri

Overall the subdivision high poly is clean with minimal smoothing artifacts. The single application re-meshing and smoothing workflow in Blender produces a high poly that's mostly smooth but does have some subtle crunchiness in spots. Surface quality of the high poly generated by the ZBrush DynaMesh and polish workflow is mostly on par with the subdivision high poly.
All the results are more than passable for high to low poly baking. Especially when considering the material has a moderately rough surface texture and the part will be relatively small when viewed from a first person perspective. There's some amount of variability in the high poly workflows but overall it's fairly representative of what can be expected in most cases.
Recap: look for ways to automate or reduce repetitive modeling tasks by sectioning the mesh into tileable sections, offloading modeling operations to modifiers, and leveraging the flexibility of parametric primitives. Consider whether each part of the model needs to be simple, quick, or flexible, and adjust the workflow for each part accordingly.
Here's a couple of links to other write-ups that explore streamlined poly modeling and modifier based subdivision workflows a bit further:
https://polycount.com/discussion/comment/2779298/#Comment_2779298https://polycount.com/discussion/comment/2773644/#Comment_2773644
https://polycount.com/discussion/comment/2779584/#Comment_2779584
10 ·
Sea of Thieves - Anniversary Update - Environment/Level [Art Dump]

Hello everyone!
With the anniversary update for Sea of Thieves releasing a few days ago, we can show you some of the artwork that the environment and level teams have been working on for the past year!
Anniversary serves as a big big update, so there's a huge amount to share. We'll post a selection of our work in this thread, but please follow through the Artstation links below to see everything we're sharing.
Anniversary serves as a big big update, so there's a huge amount to share. We'll post a selection of our work in this thread, but please follow through the Artstation links below to see everything we're sharing.
Huge props to the super talented concept team, and art direction, for guiding the visual look of this update. Thanks to the rest of the departments at Rare for helping to ship this product to the highest standard, and for making this art happen! Also, big thanks to Reiss Archibald and Rashed Al-Metrami for the banner art, and for helping with renders.
Environment Art
Bradley Heszelgraves https://www.artstation.com/heszelb01
Carl Packer https://www.artstation.com/carlpacker
George O'Keeffe https://www.artstation.com/tino-george
Glen Fox https://www.artstation.com/glenatron
Johan Lagesson https://www.artstation.com/johanlagesson
Matt Wilkins https://www.artstation.com/ivo_de_taillebois
Carl Packer https://www.artstation.com/carlpacker
George O'Keeffe https://www.artstation.com/tino-george
Glen Fox https://www.artstation.com/glenatron
Johan Lagesson https://www.artstation.com/johanlagesson
Matt Wilkins https://www.artstation.com/ivo_de_taillebois
Level Art
Andrew Finch https://www.artstation.com/afinchy
Ant Skilton https://www.artstation.com/antskilton
Hannah Smith https://www.artstation.com/hlsmith
James Crosbie https://www.artstation.com/jamescrosbie
Marketing
Rashed Al-Metrami https://www.artstation.com/rashedalmetrami
Reiss Archibald https://www.artstation.com/reissarchibald
Art Director - Ryan Stevenson
Lead Environment Art - Andy Betts
Lead Level Art - Darren Nourish
Director of Art Production - Andria Warren
Thanks for looking, and we hope you enjoy!
Environments


Assets


Sculpts


 glenatron
11 ·
The BRAWL² Tournament Challenge: Judgement!

Your BRAWL² Finalists!
1st Dorado - 2 votes for 1st - 1 vote for 3rd
2nd iam717 - 2 votes for 2nd - 1 vote for 1st
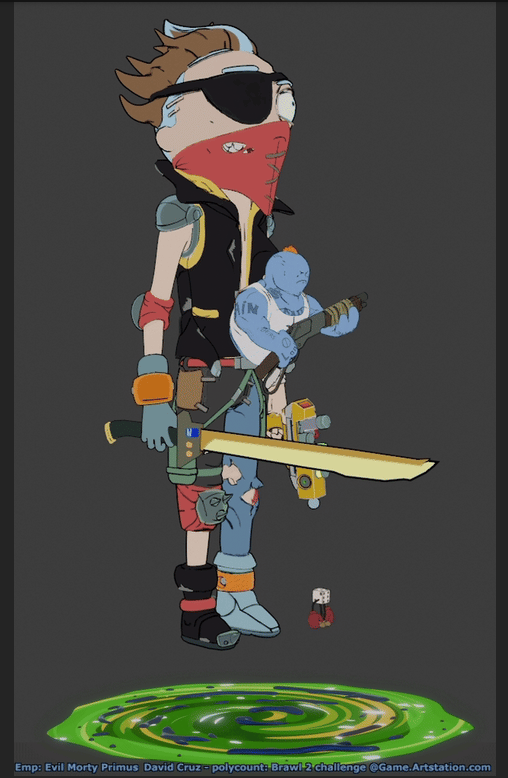
The Honorable Mentions:
(in no particular order)
Great time all, thanks again!
 iam717
5 ·
Plexus - Unity Procedural Node Editor
Plexus - Procedural System for Unity ( 6.1+ )
- Node-Based Procedural System - Visual graph editor for creating procedural content using nodes
- Terrain Generation (Altura) - GPU-accelerated heightmap generation with Ridge/Simplex noise and terrain manipulation
- Point Scattering & Sampling - Generate and distribute points across surfaces or terrain with density control and spatial constraints
- Prefab Instancing - Automatically instantiate prefabs at generated points with rotation, scale variation, and weighted selection
- Multi-Surface Support - Work with multiple surfaces, terrains, and weighted prefabs through the PlexusManager component
- Real-Time Editing - Live parameter updates with draggable sliders and direct value input in the graph
- Hybrid Rendering System - BatchRenderer (SBR) and GPU resident drawer support with LODs.
- Editor Integration - Custom Control Panel and Graph Editor with hierarchy icons and status indicators
 https://youtu.be/zI7khUDJCBk
 https://youtu.be/bUrz_chfoYI
 https://youtu.be/NfFhTlijE9U
Here`s a screenshot of nodes that are implemented

Looking for feedback and use cases. Thanks!
1 ·
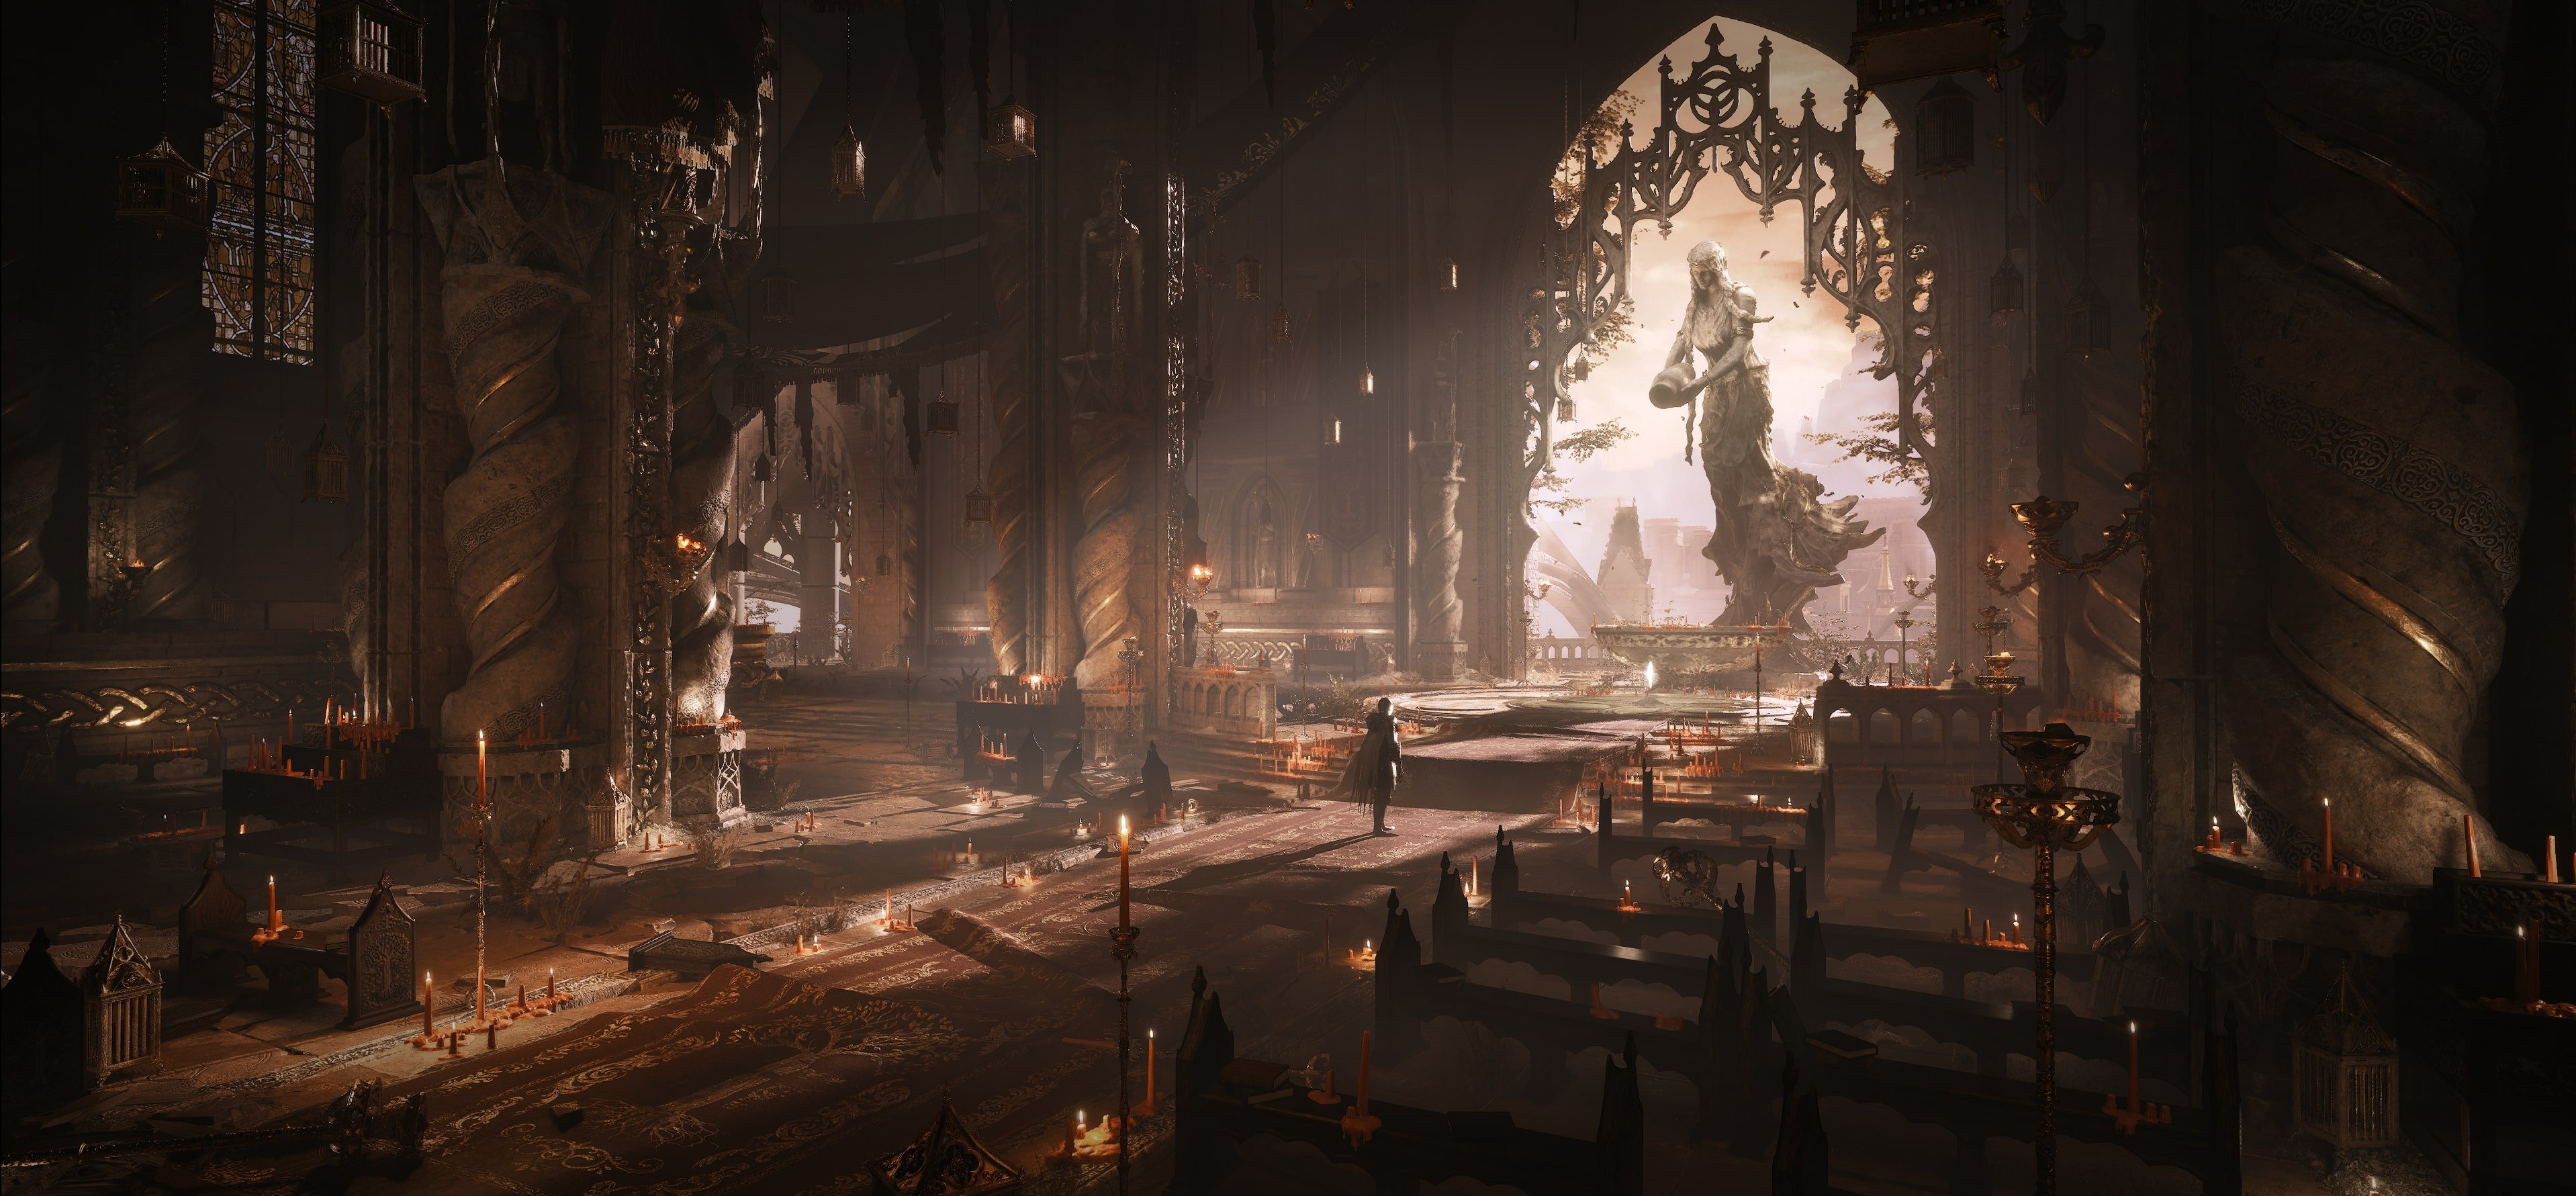
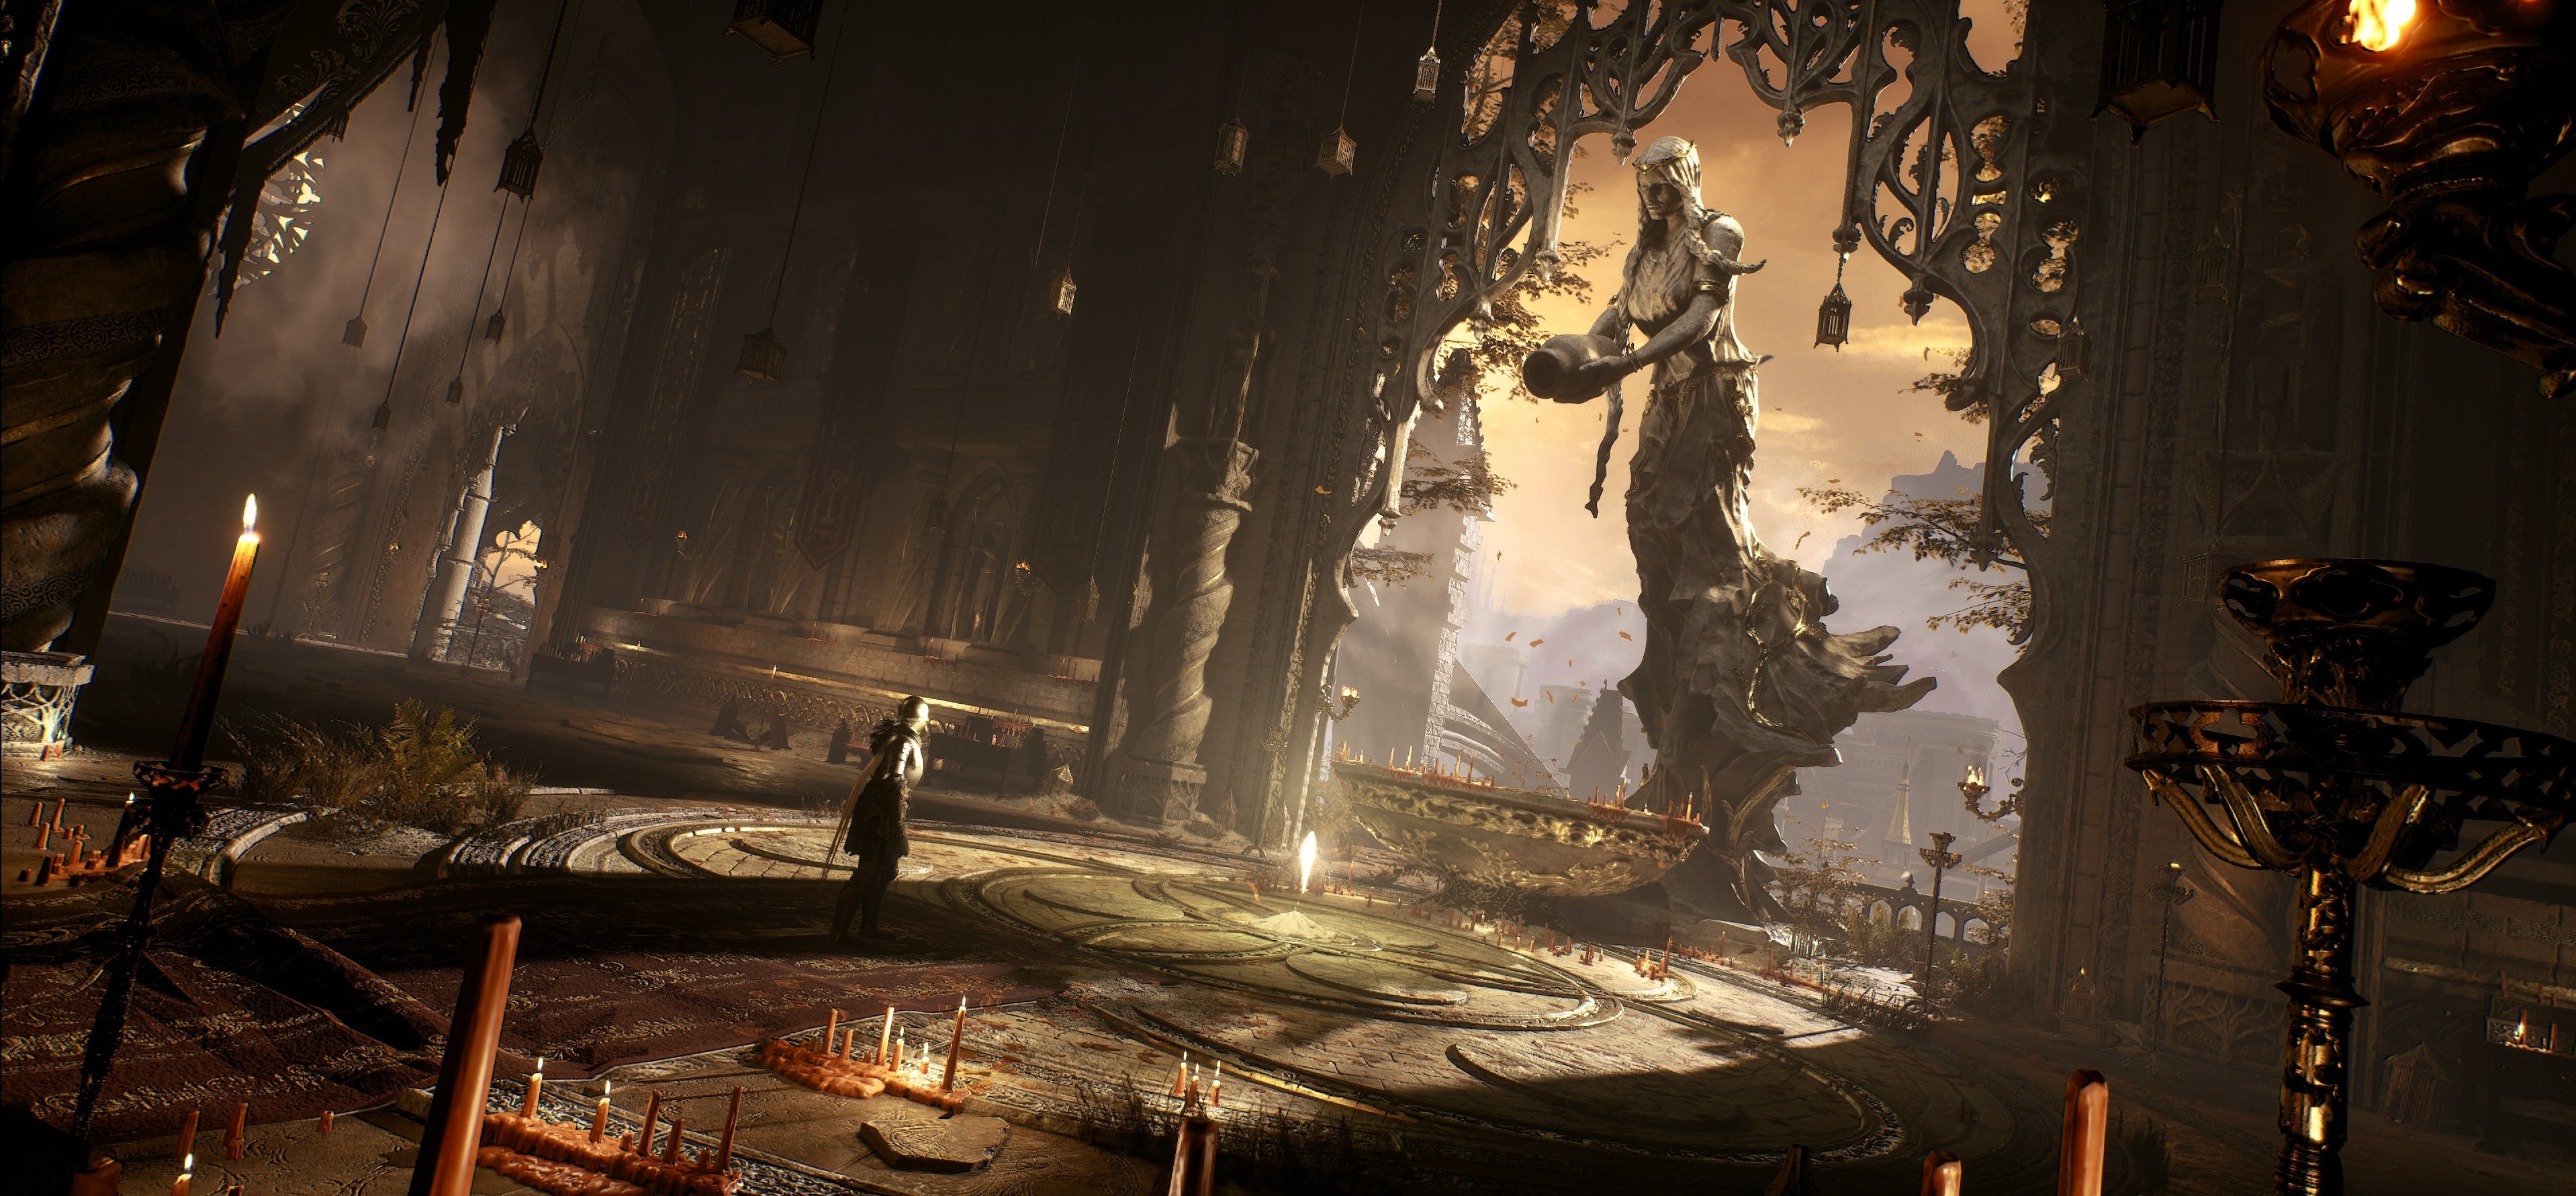
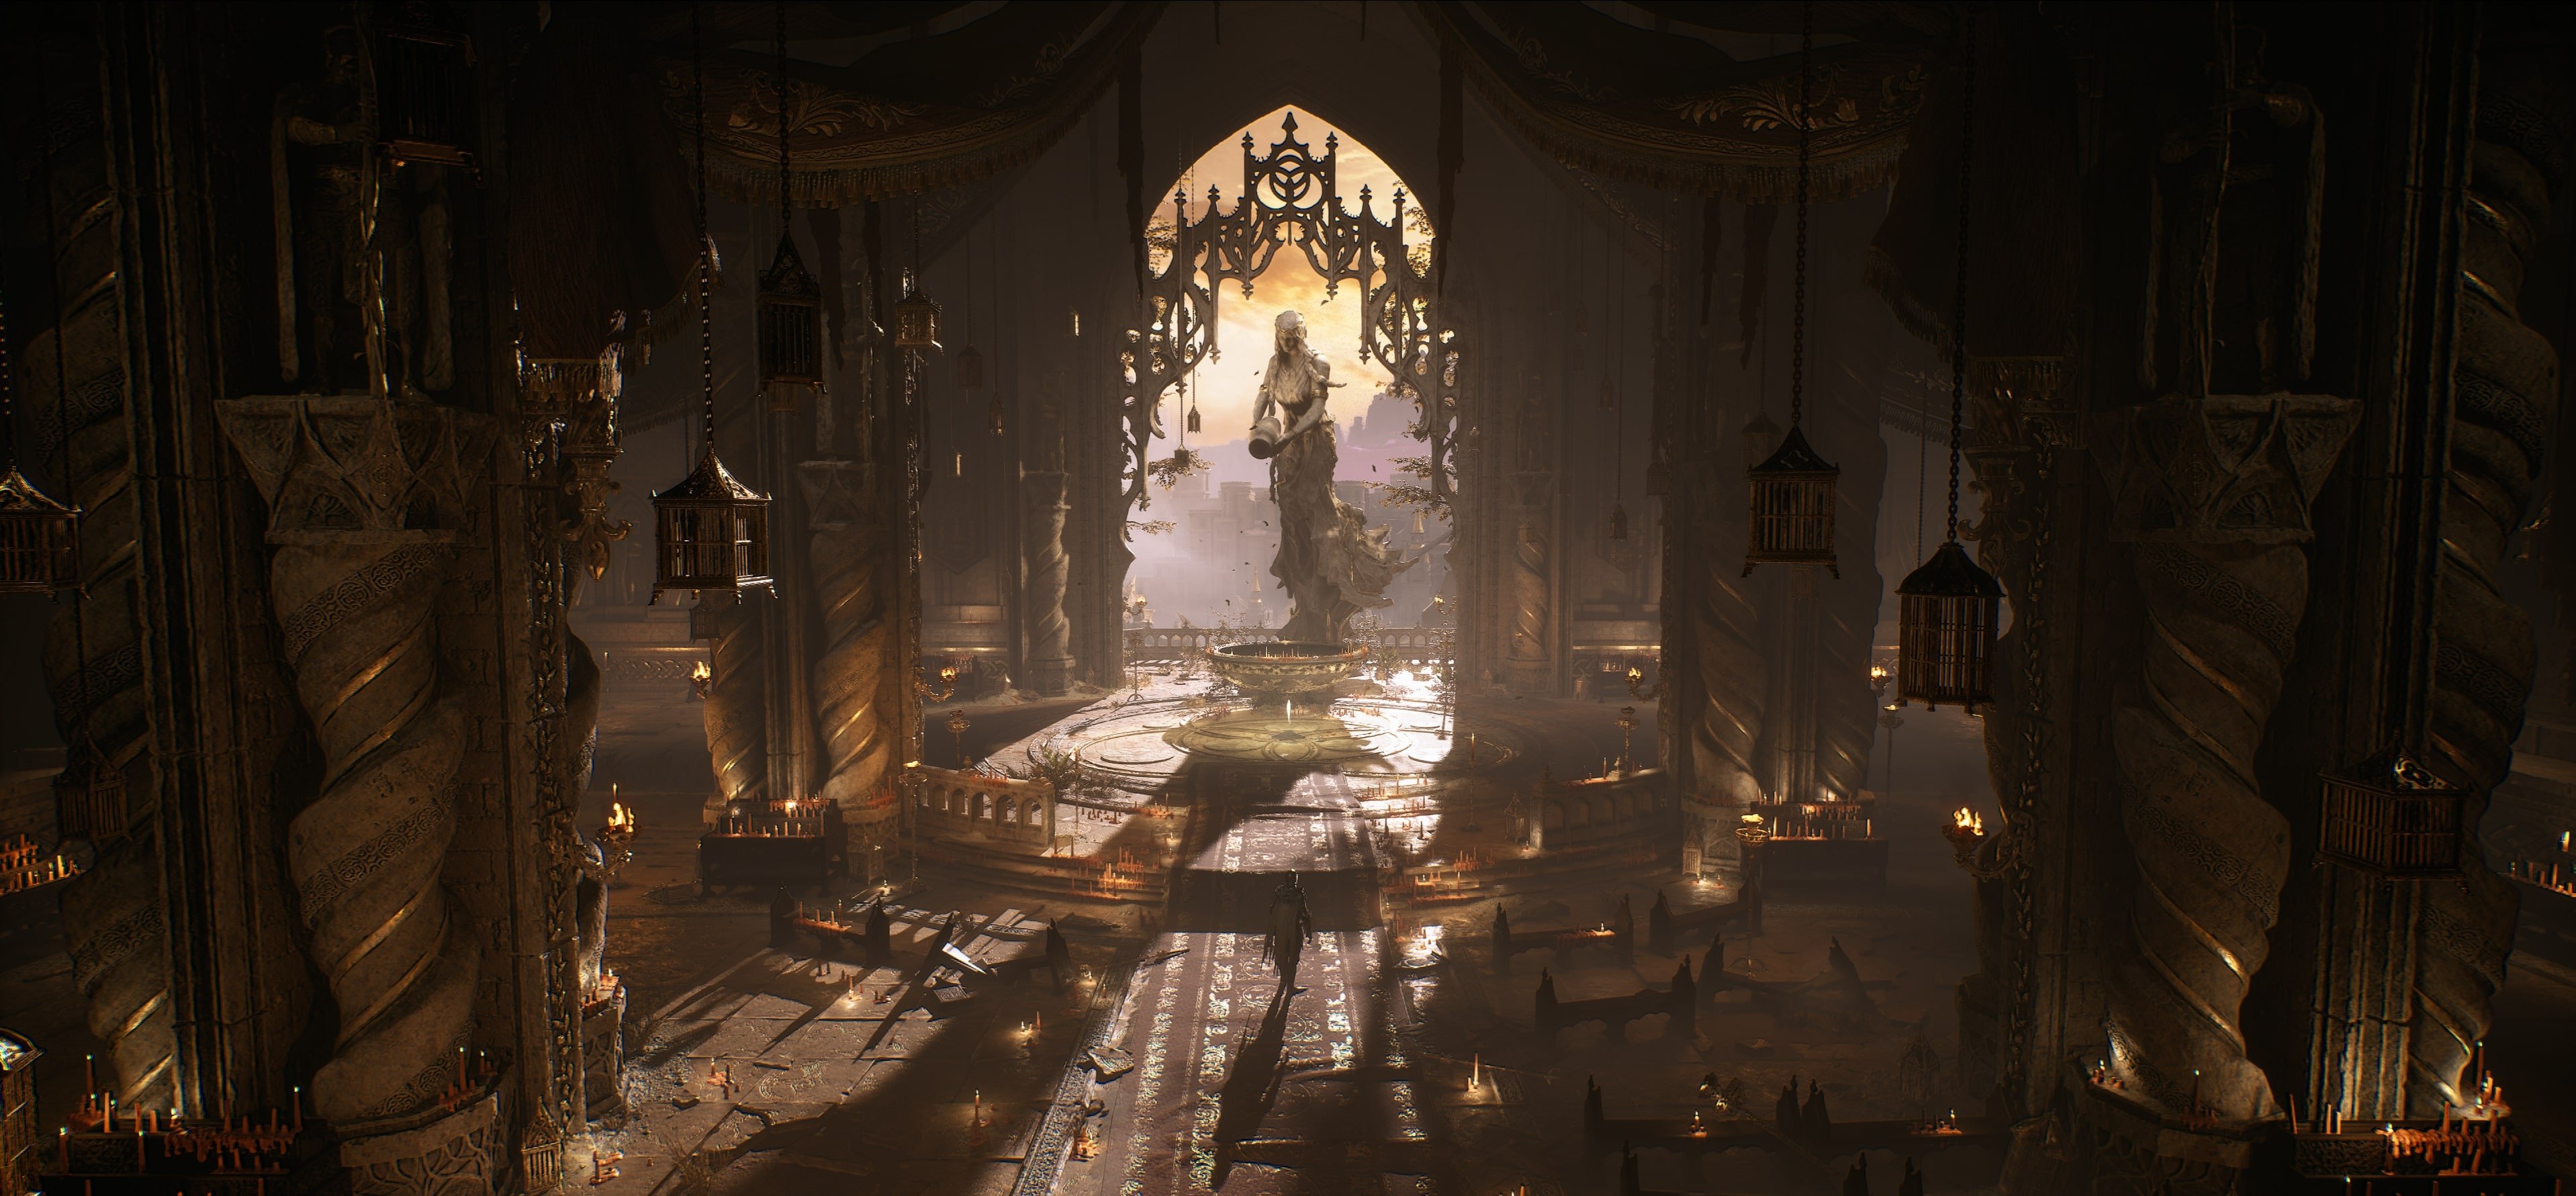
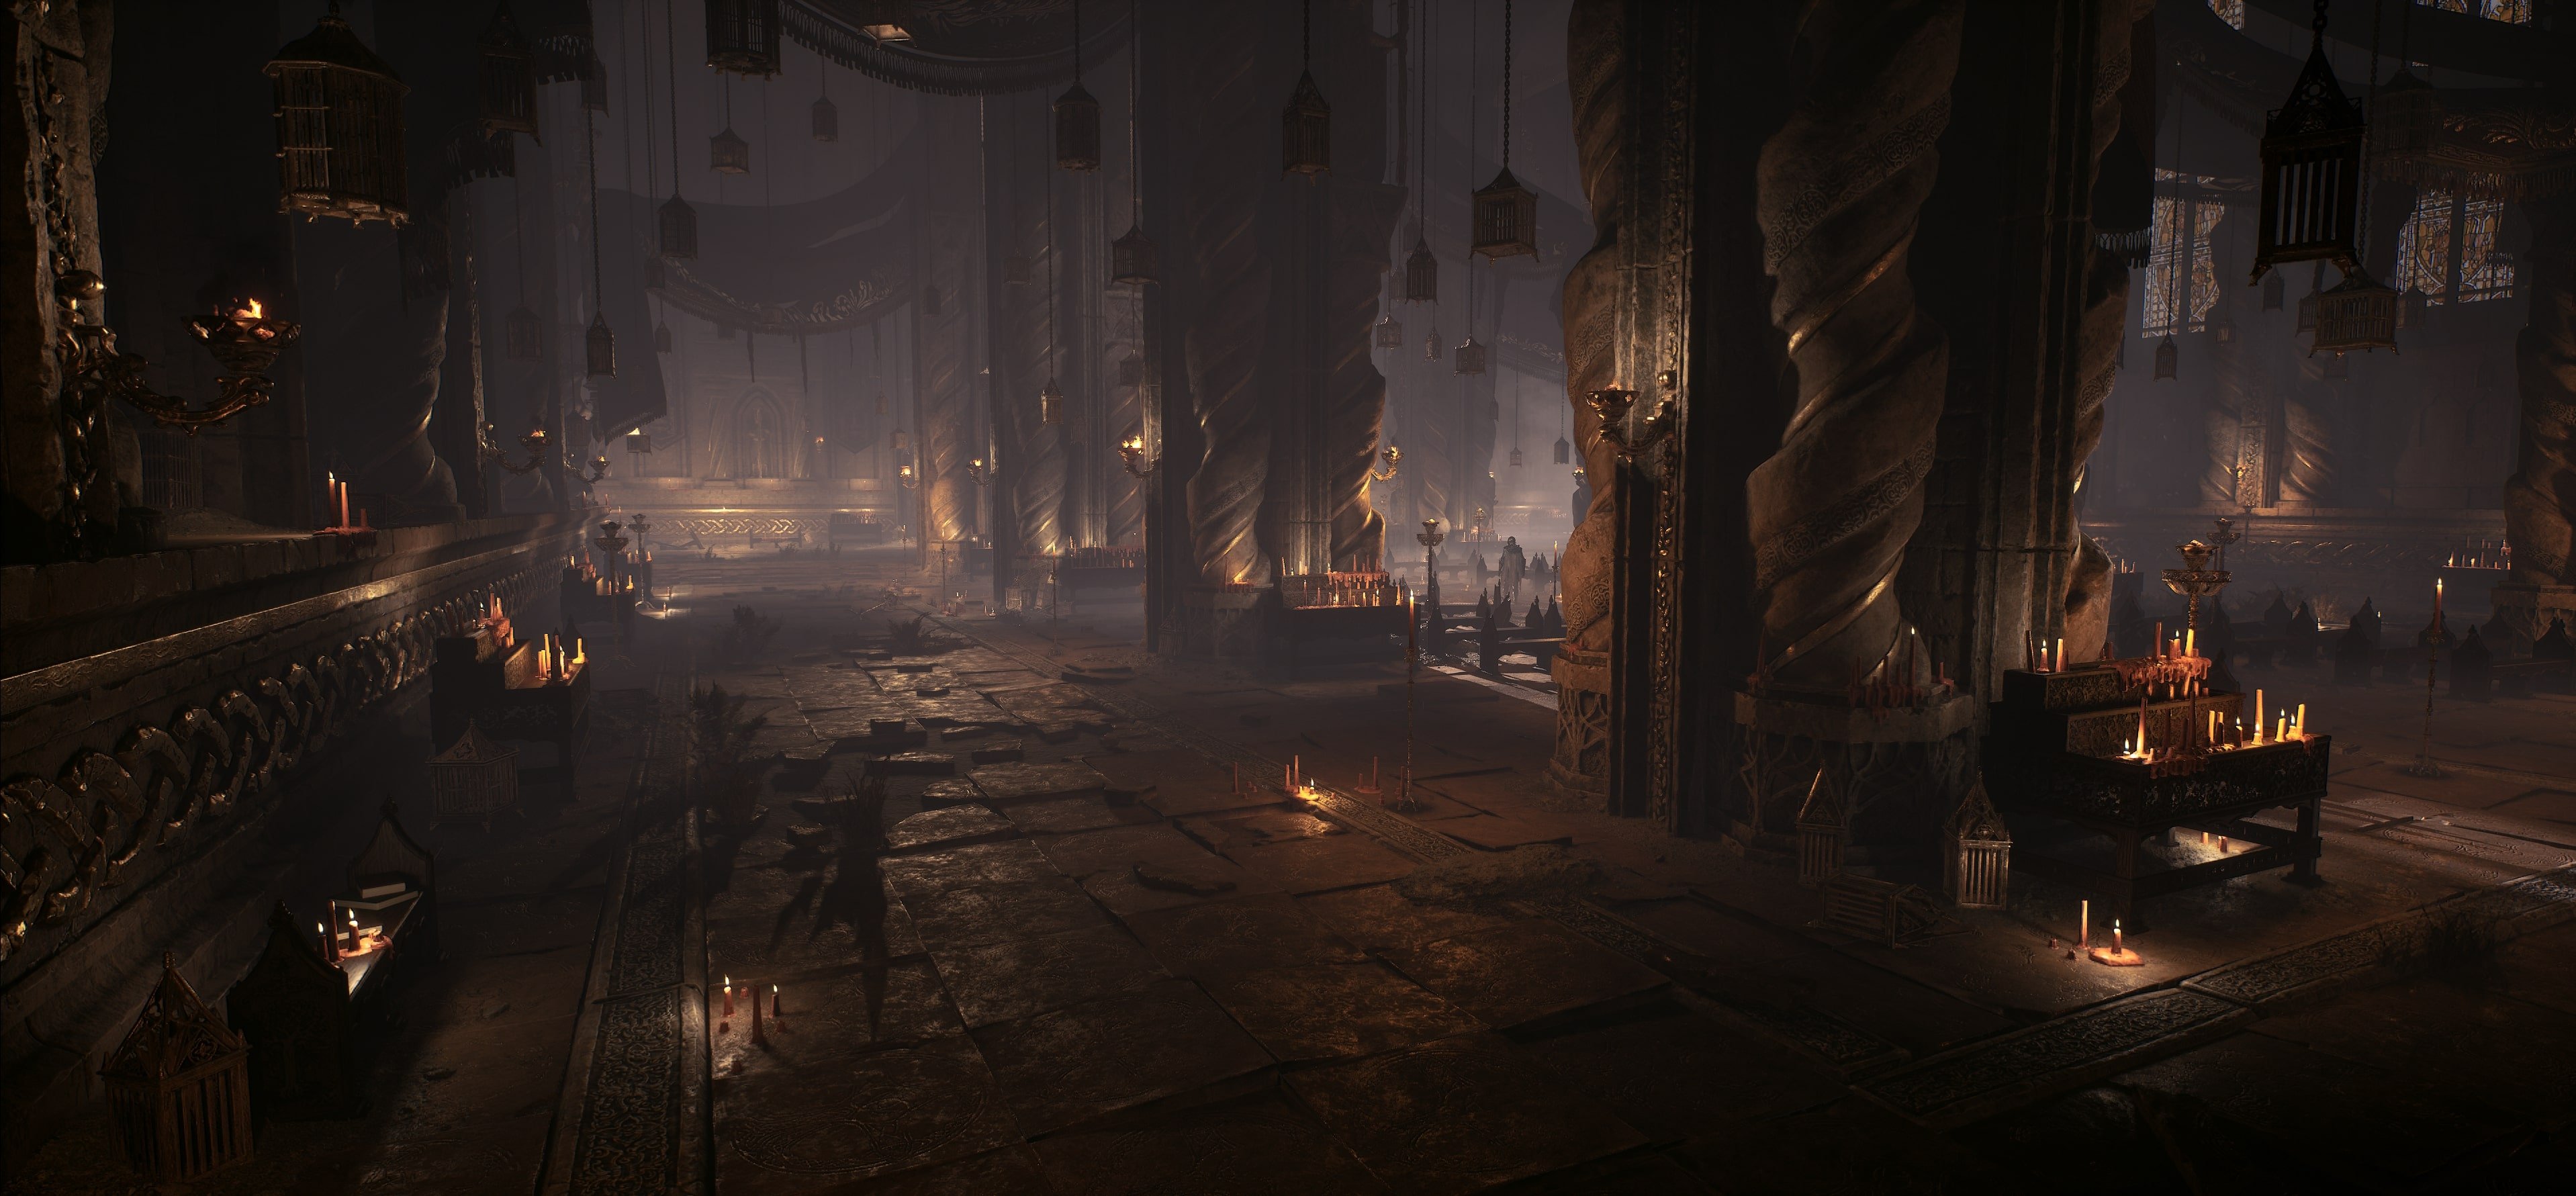
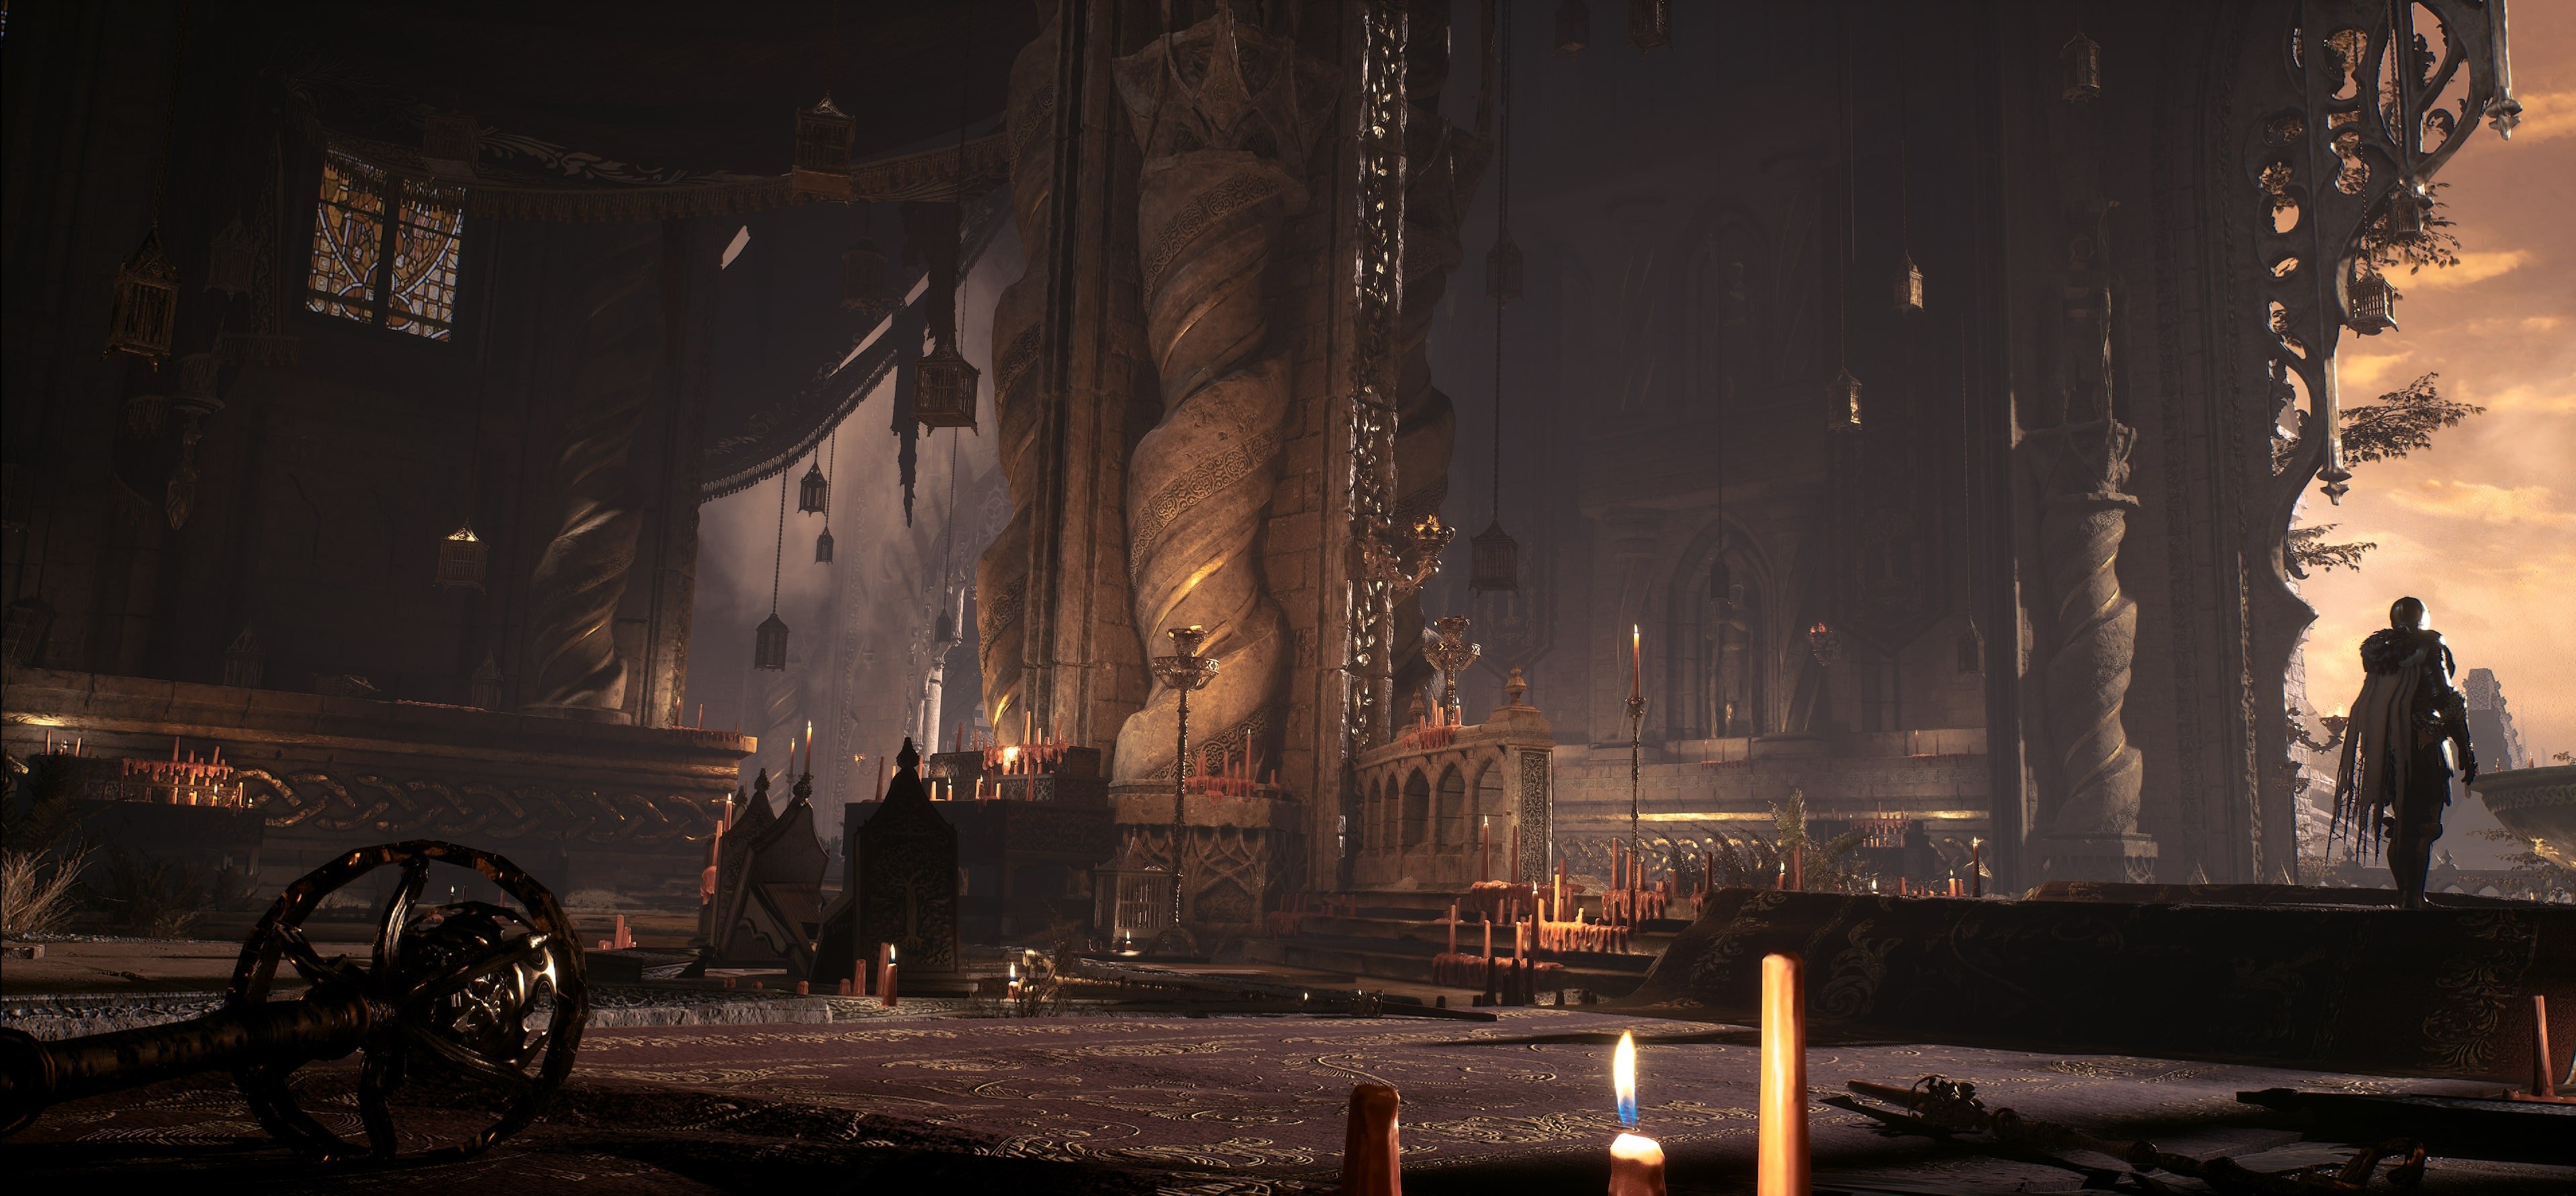
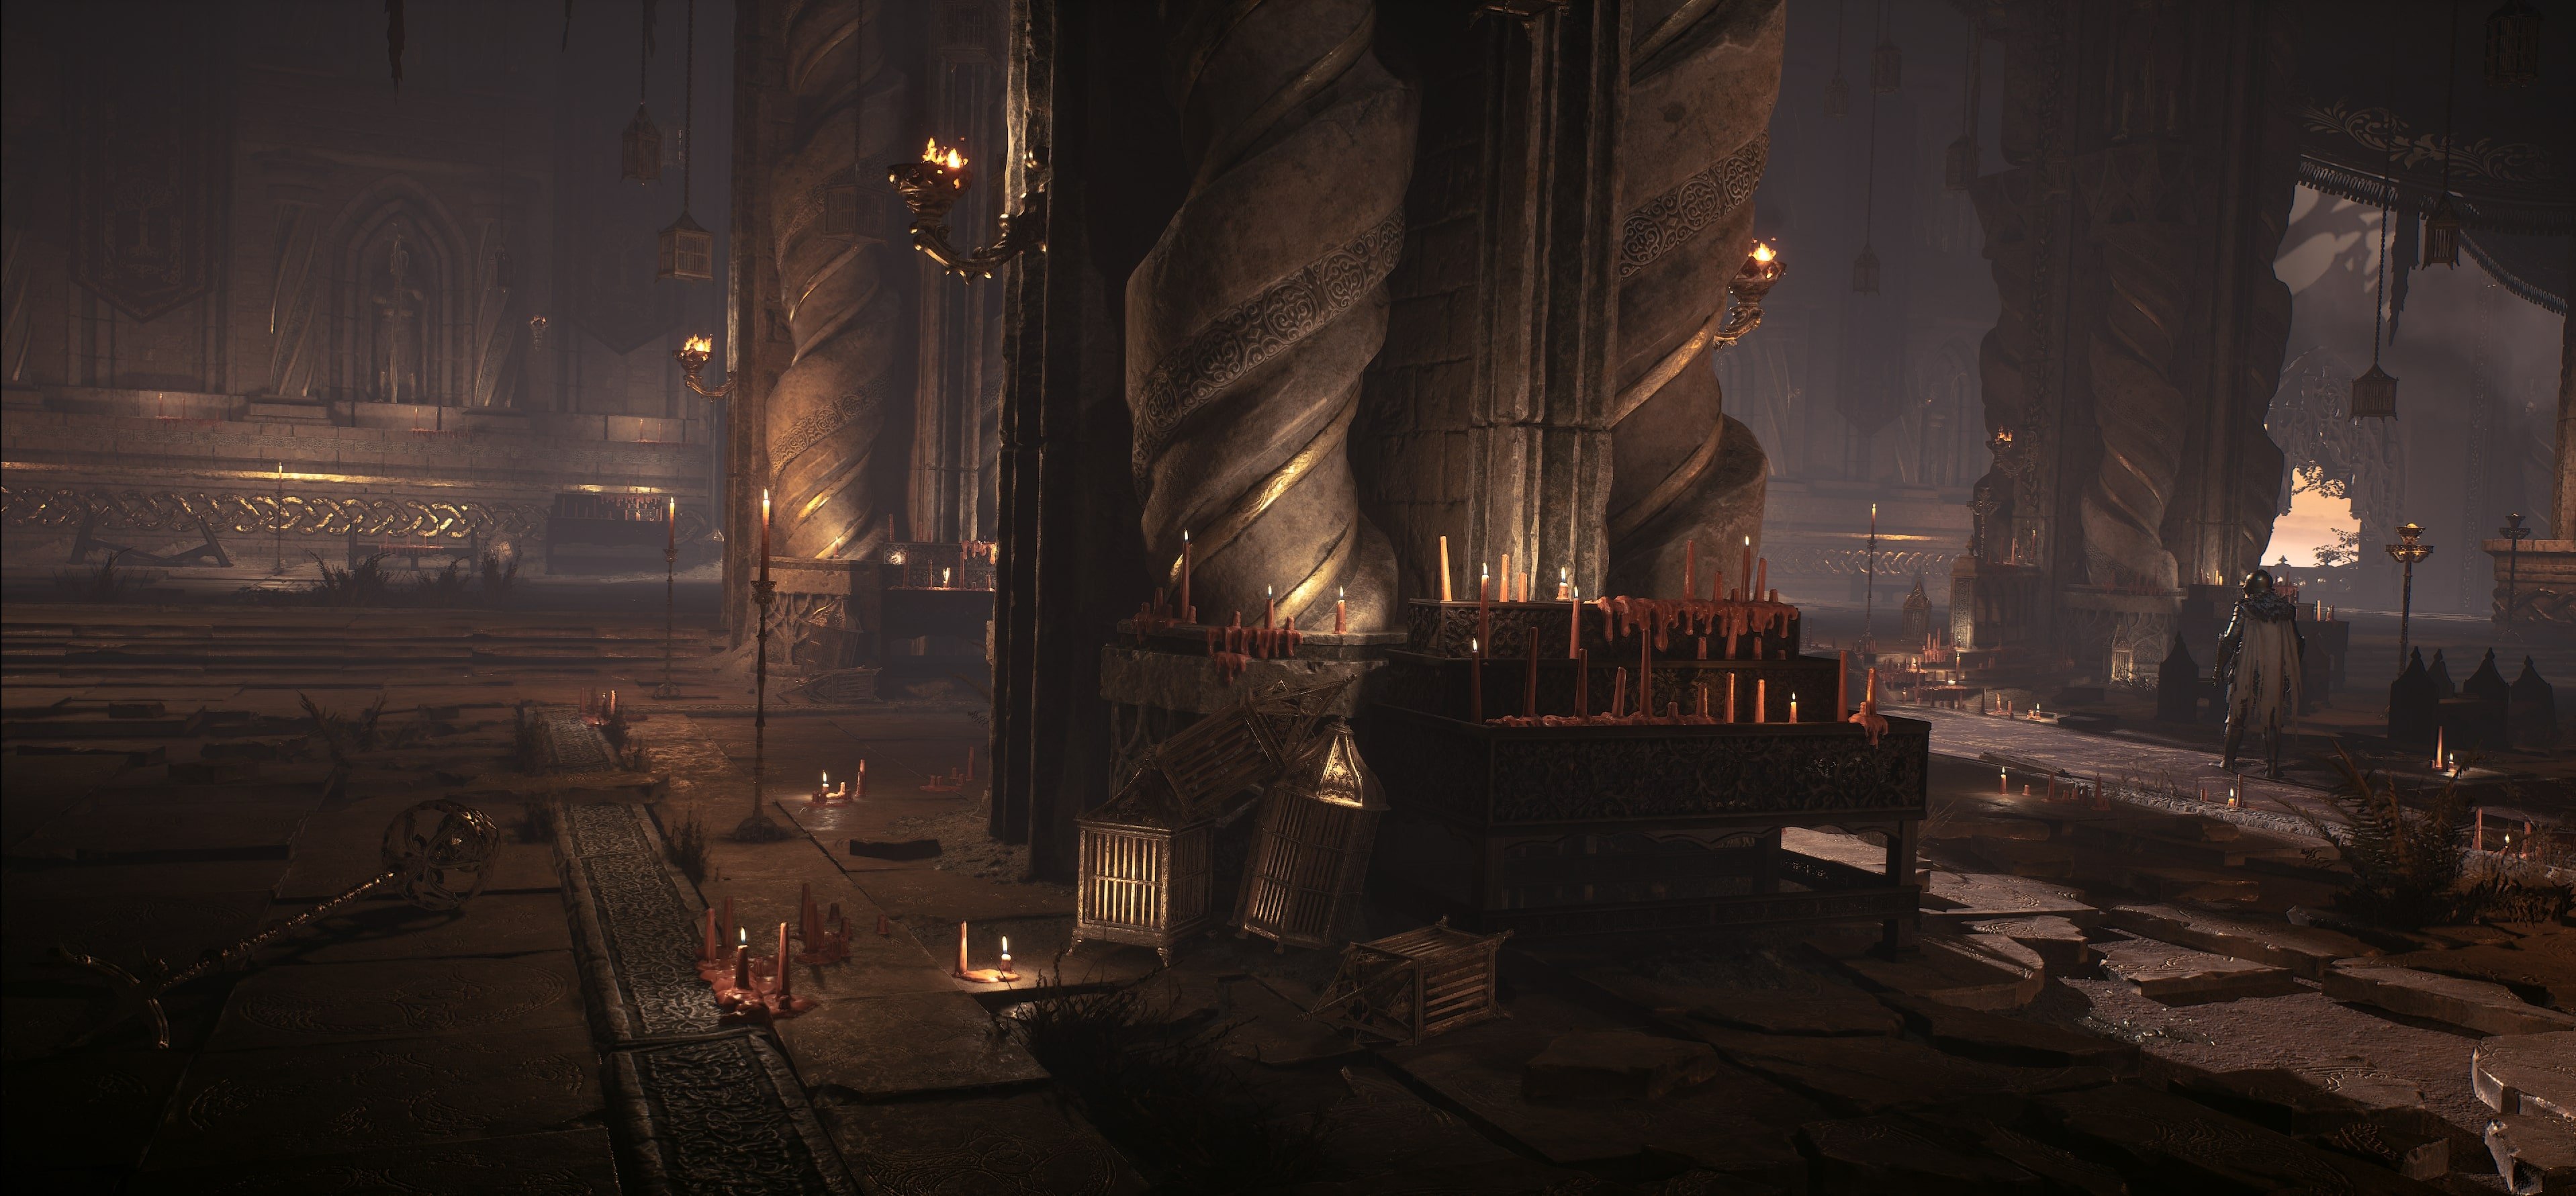
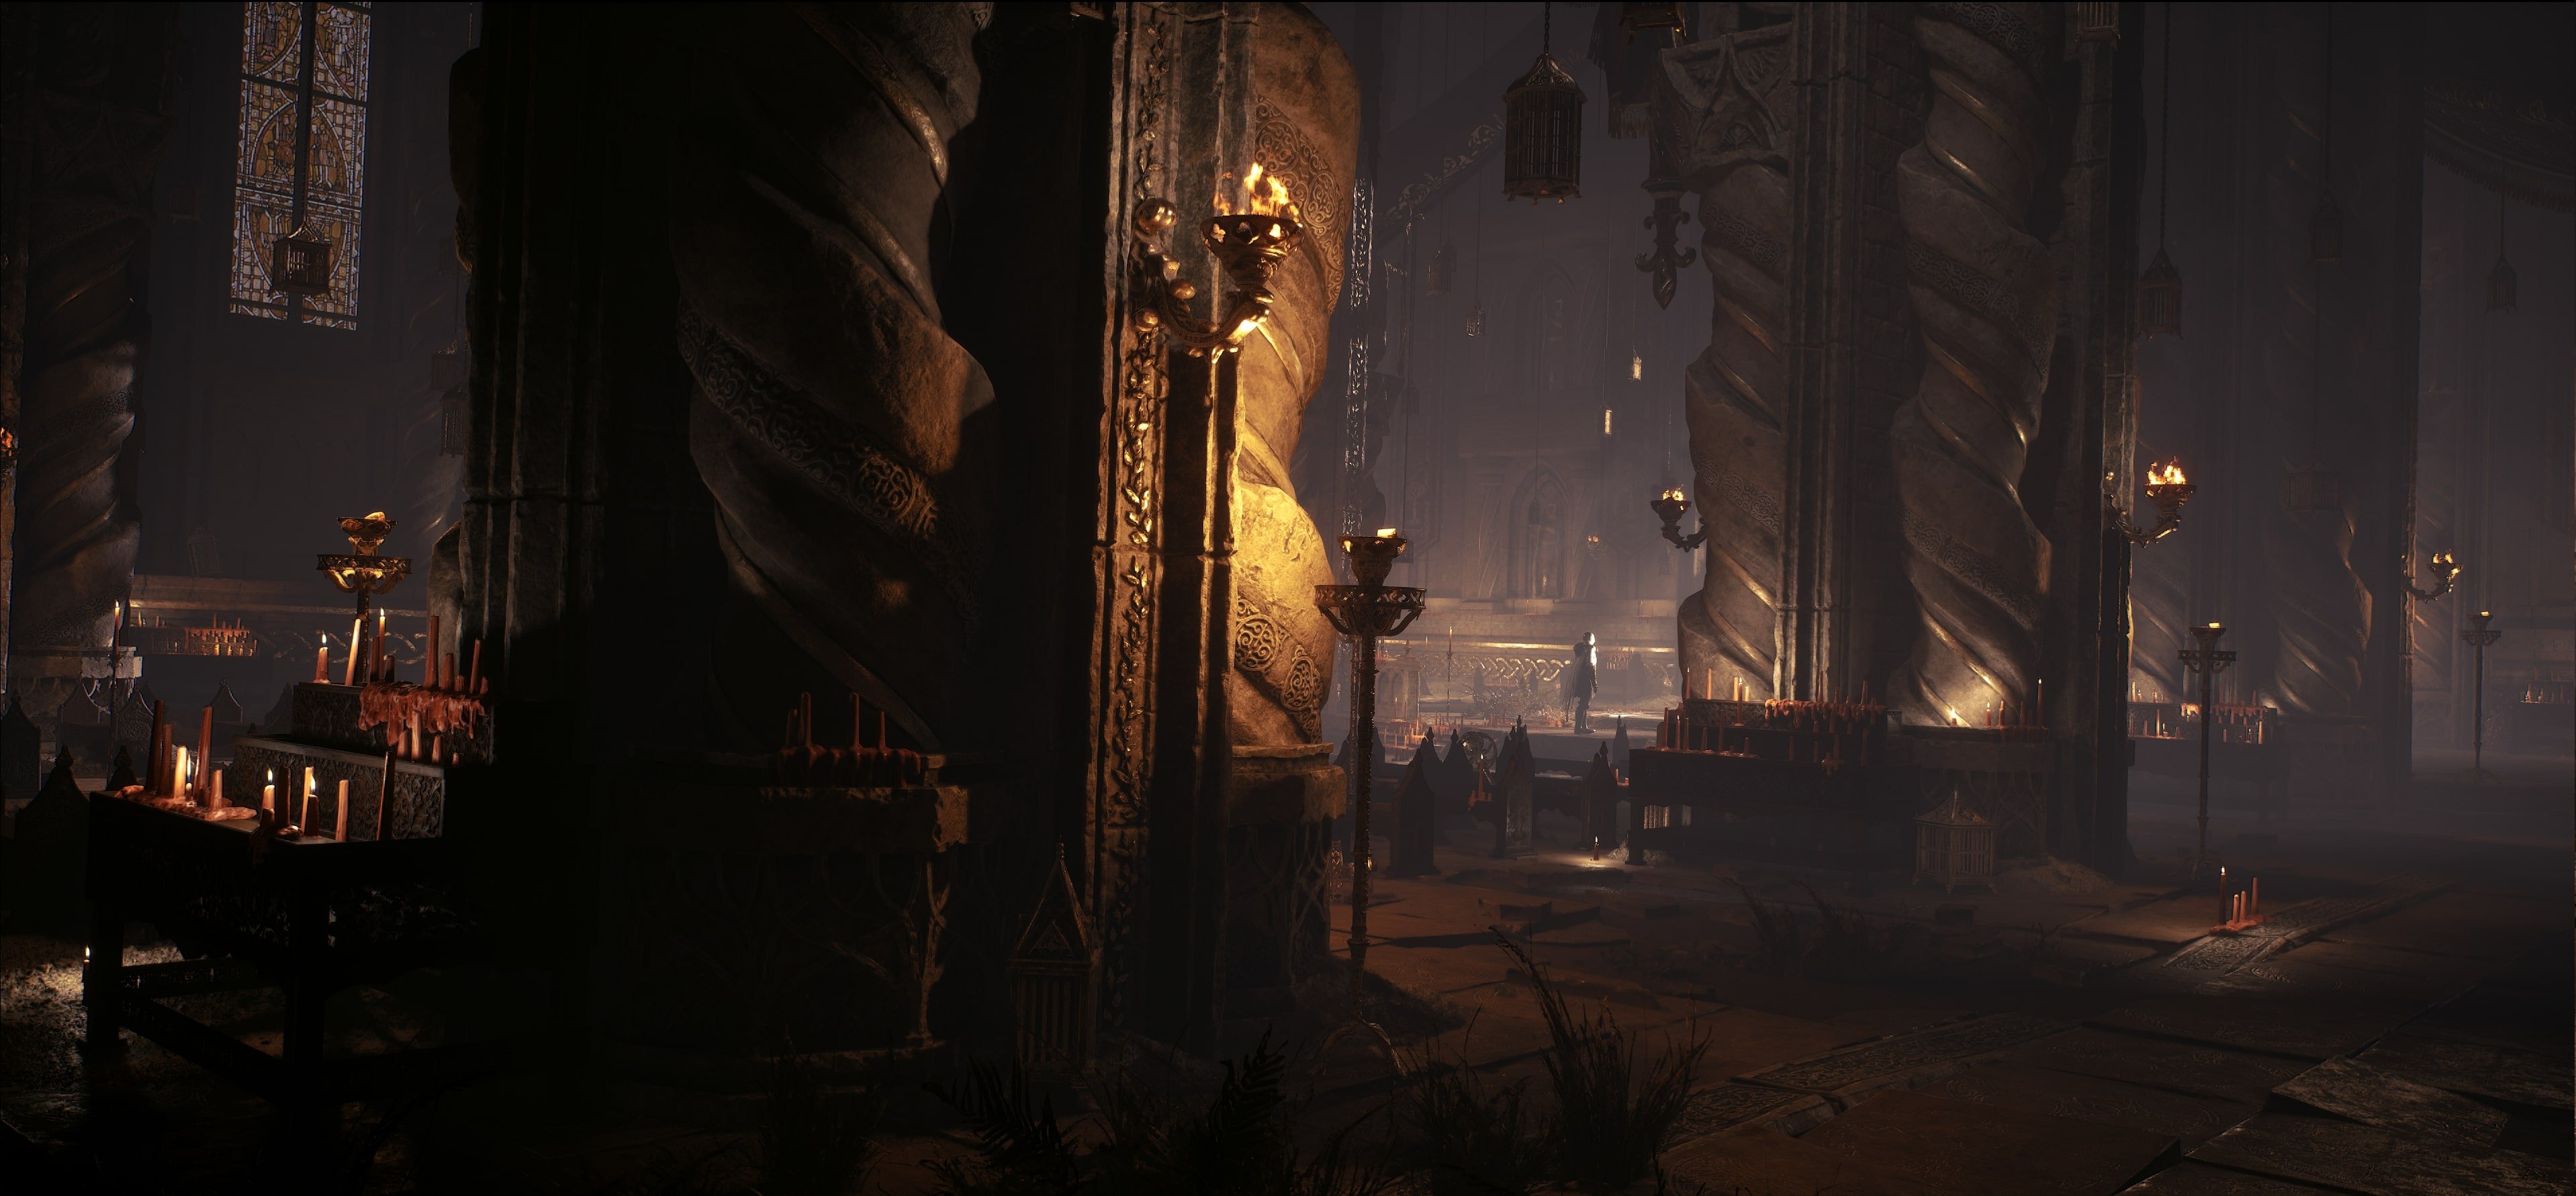
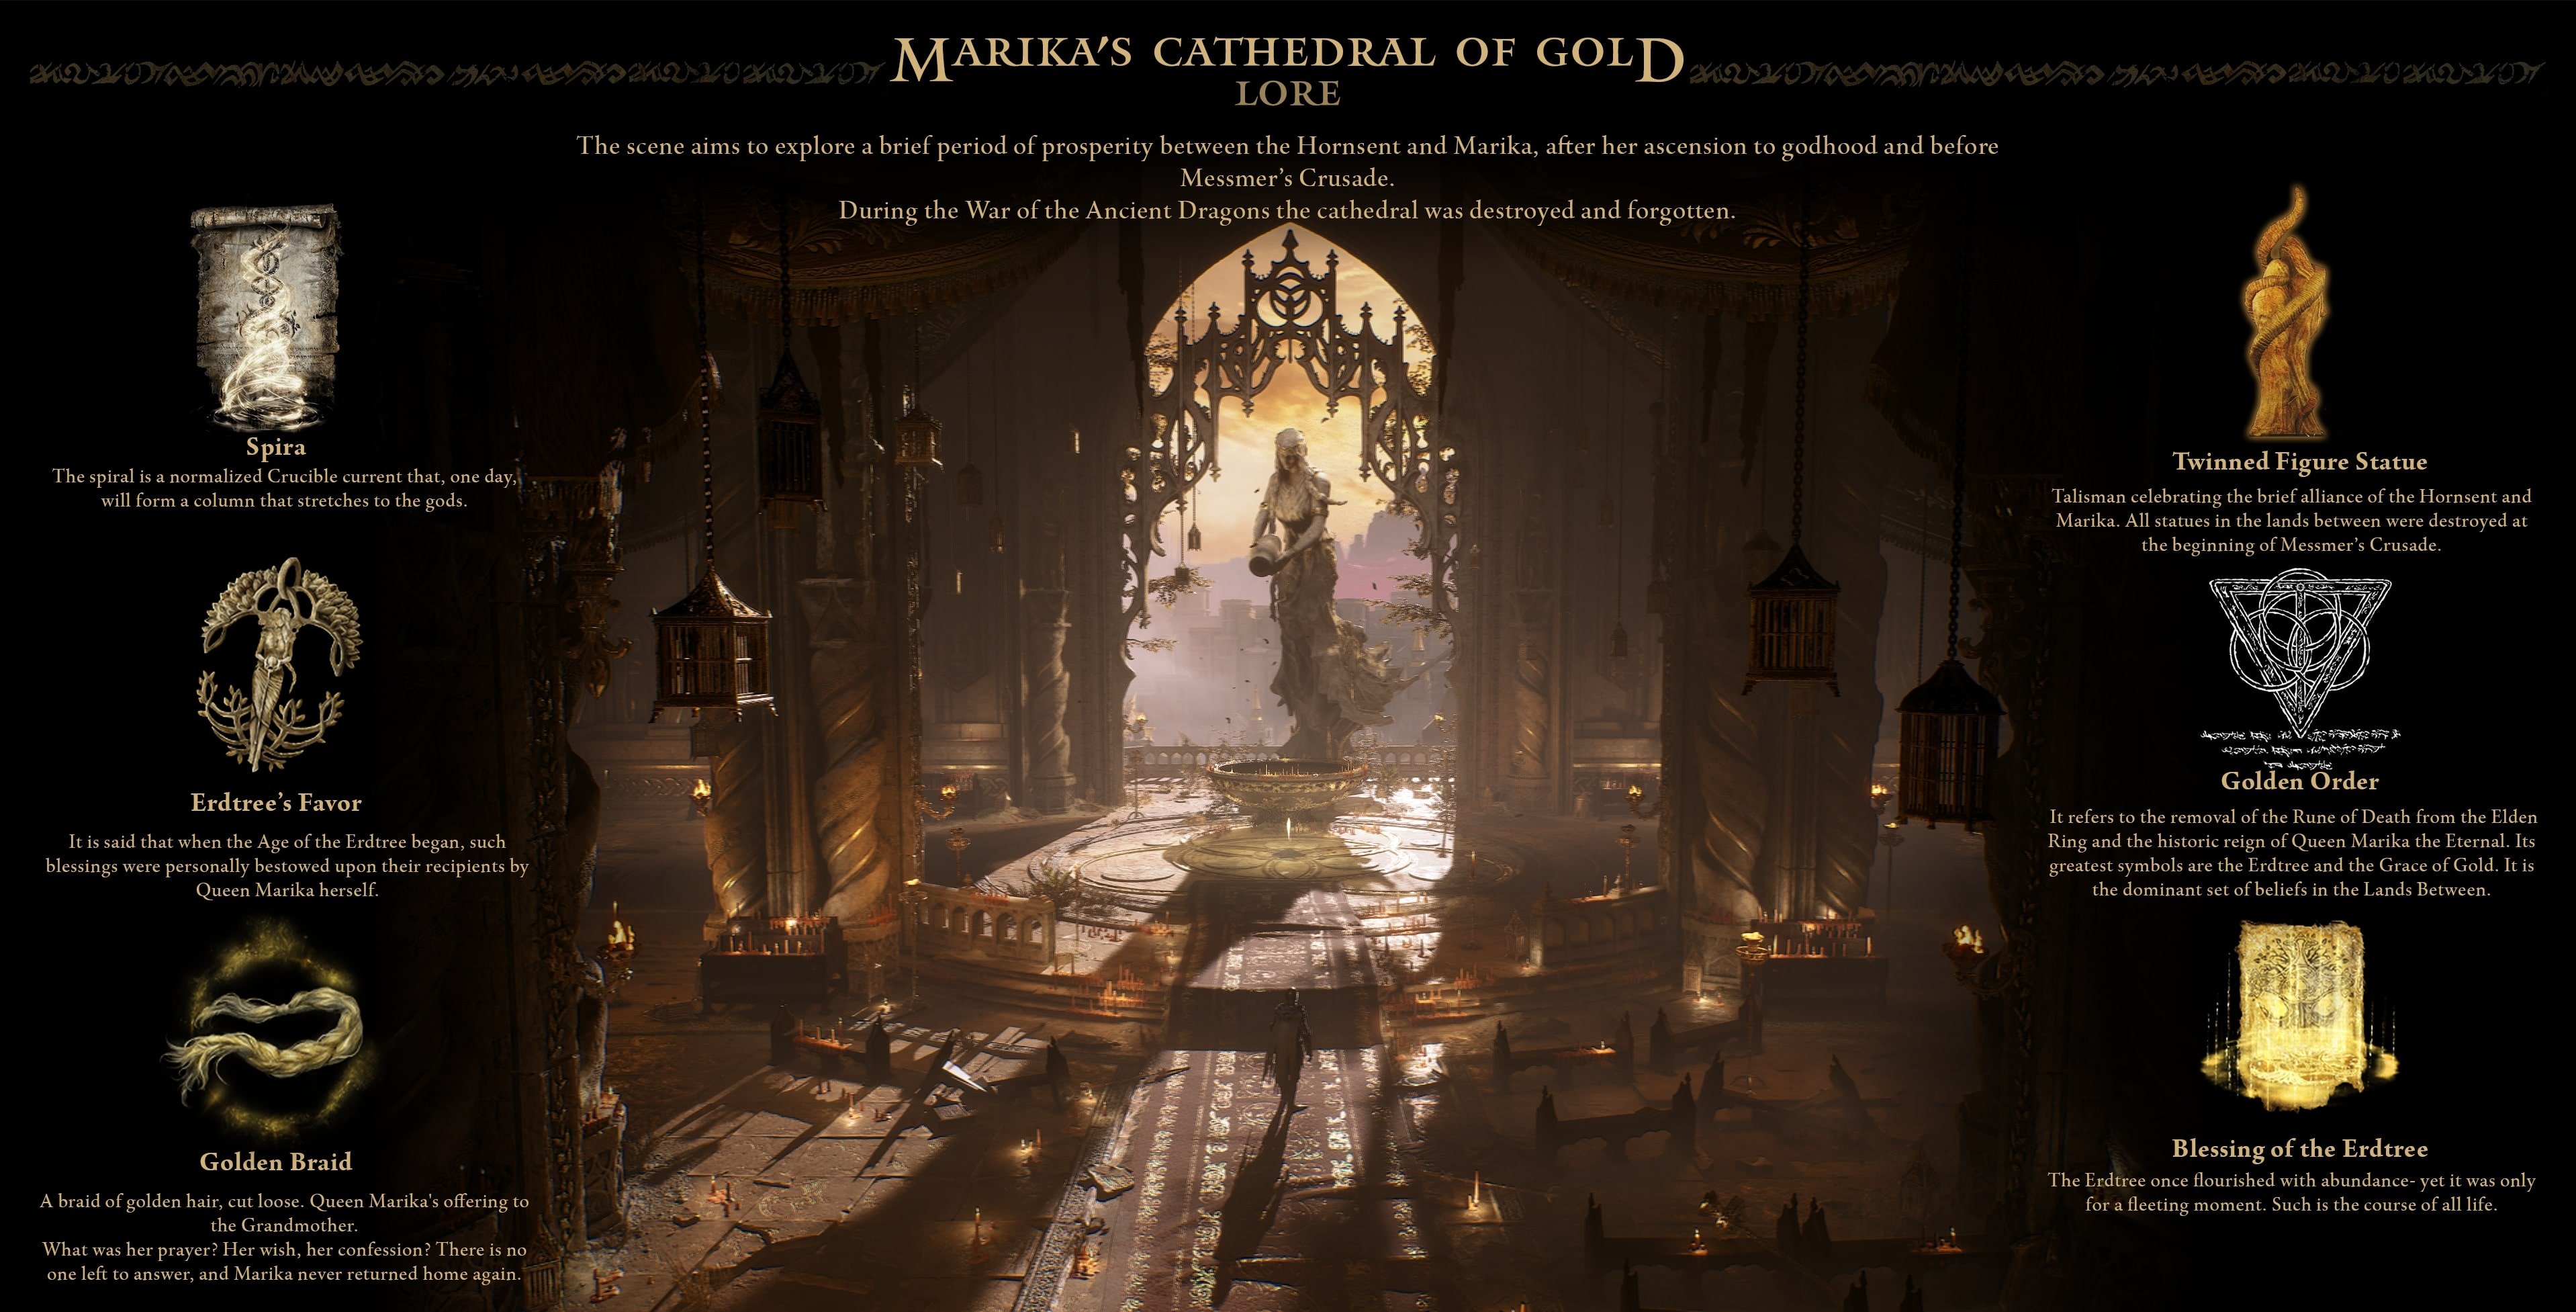
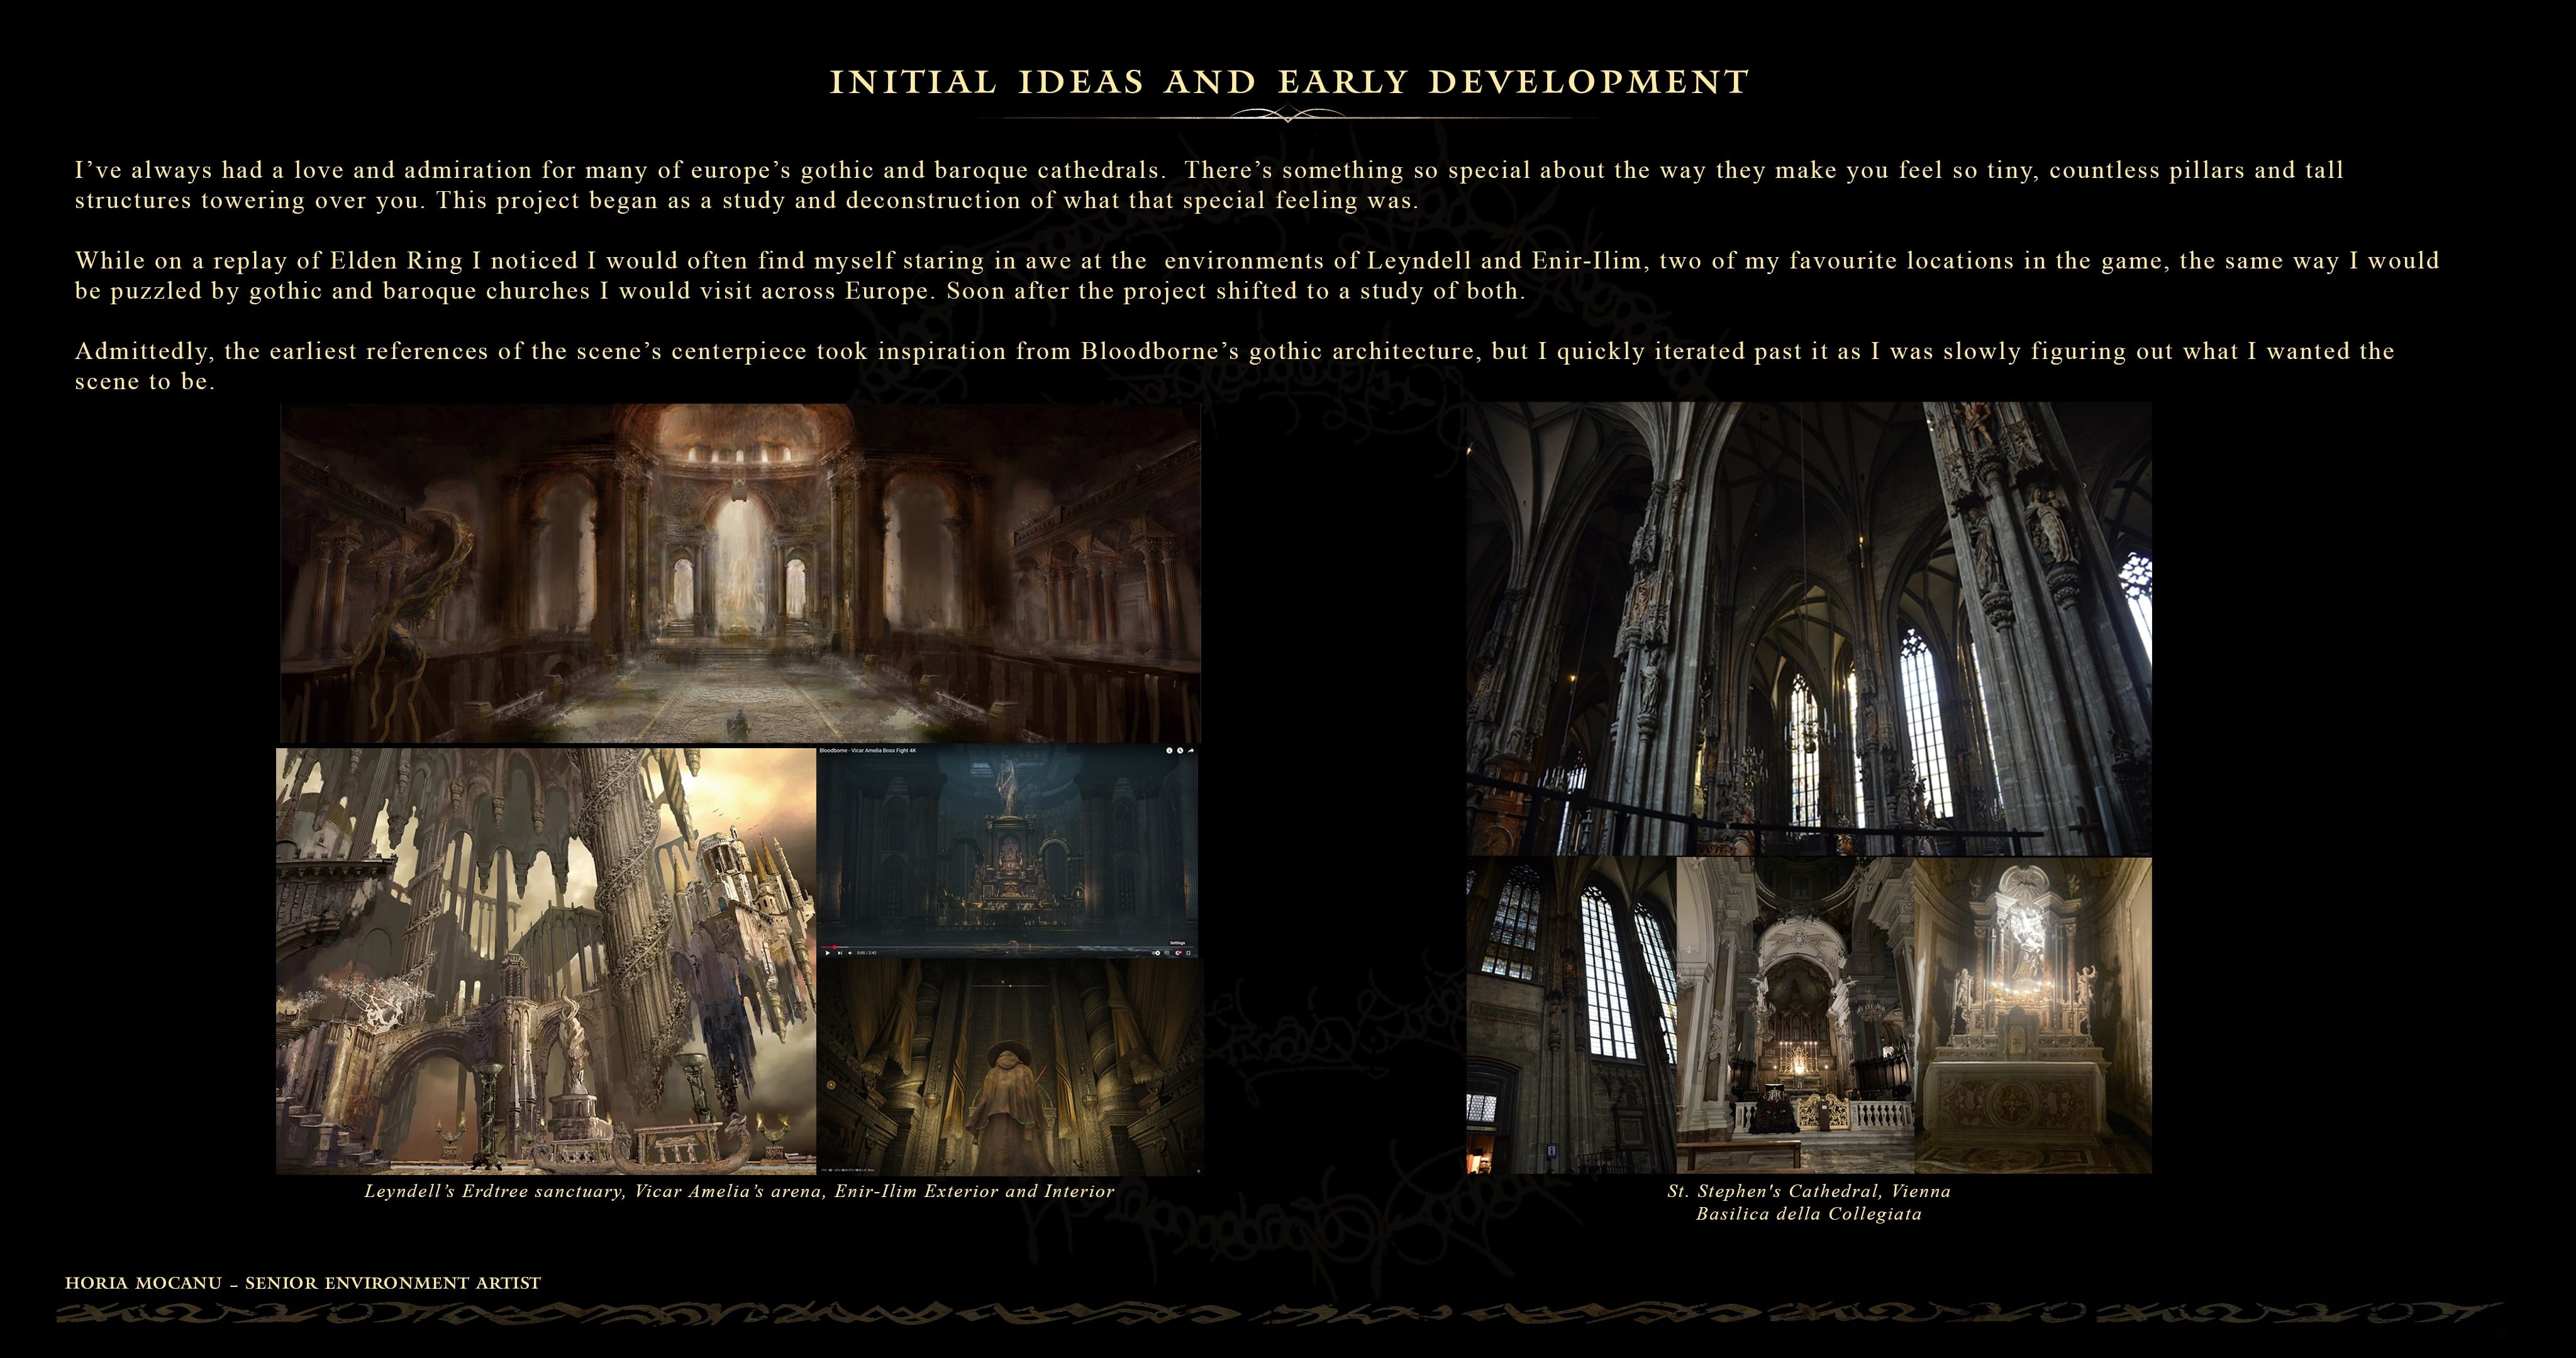
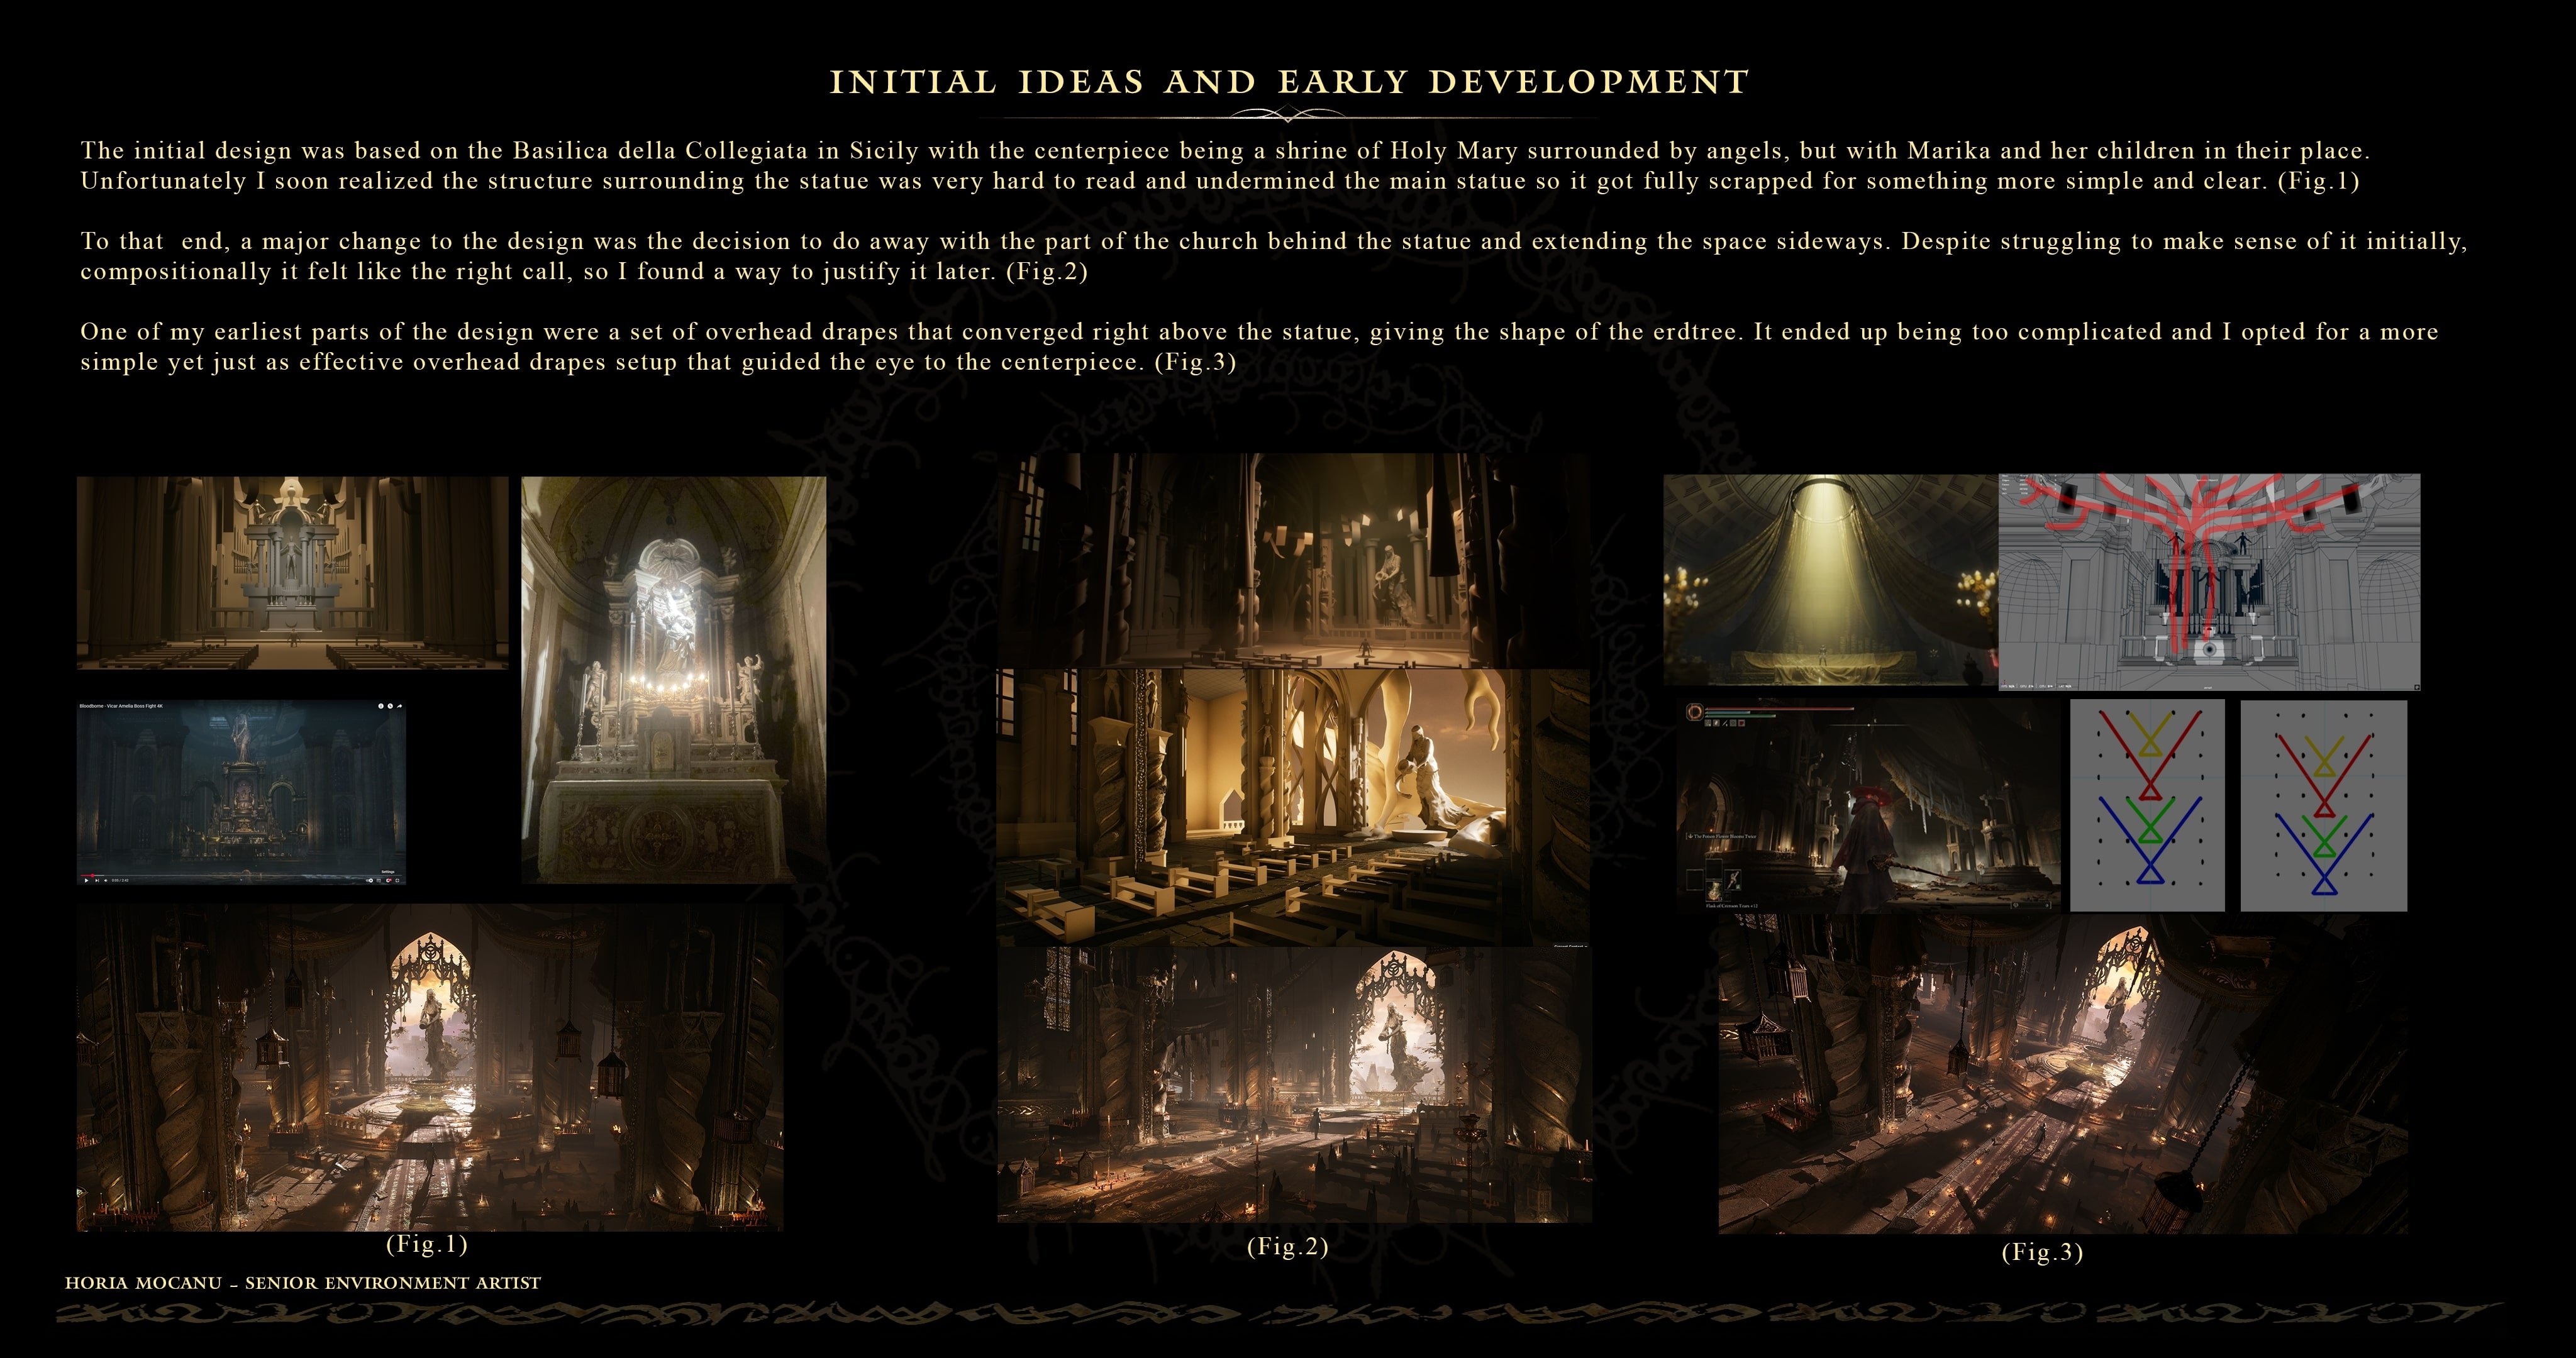
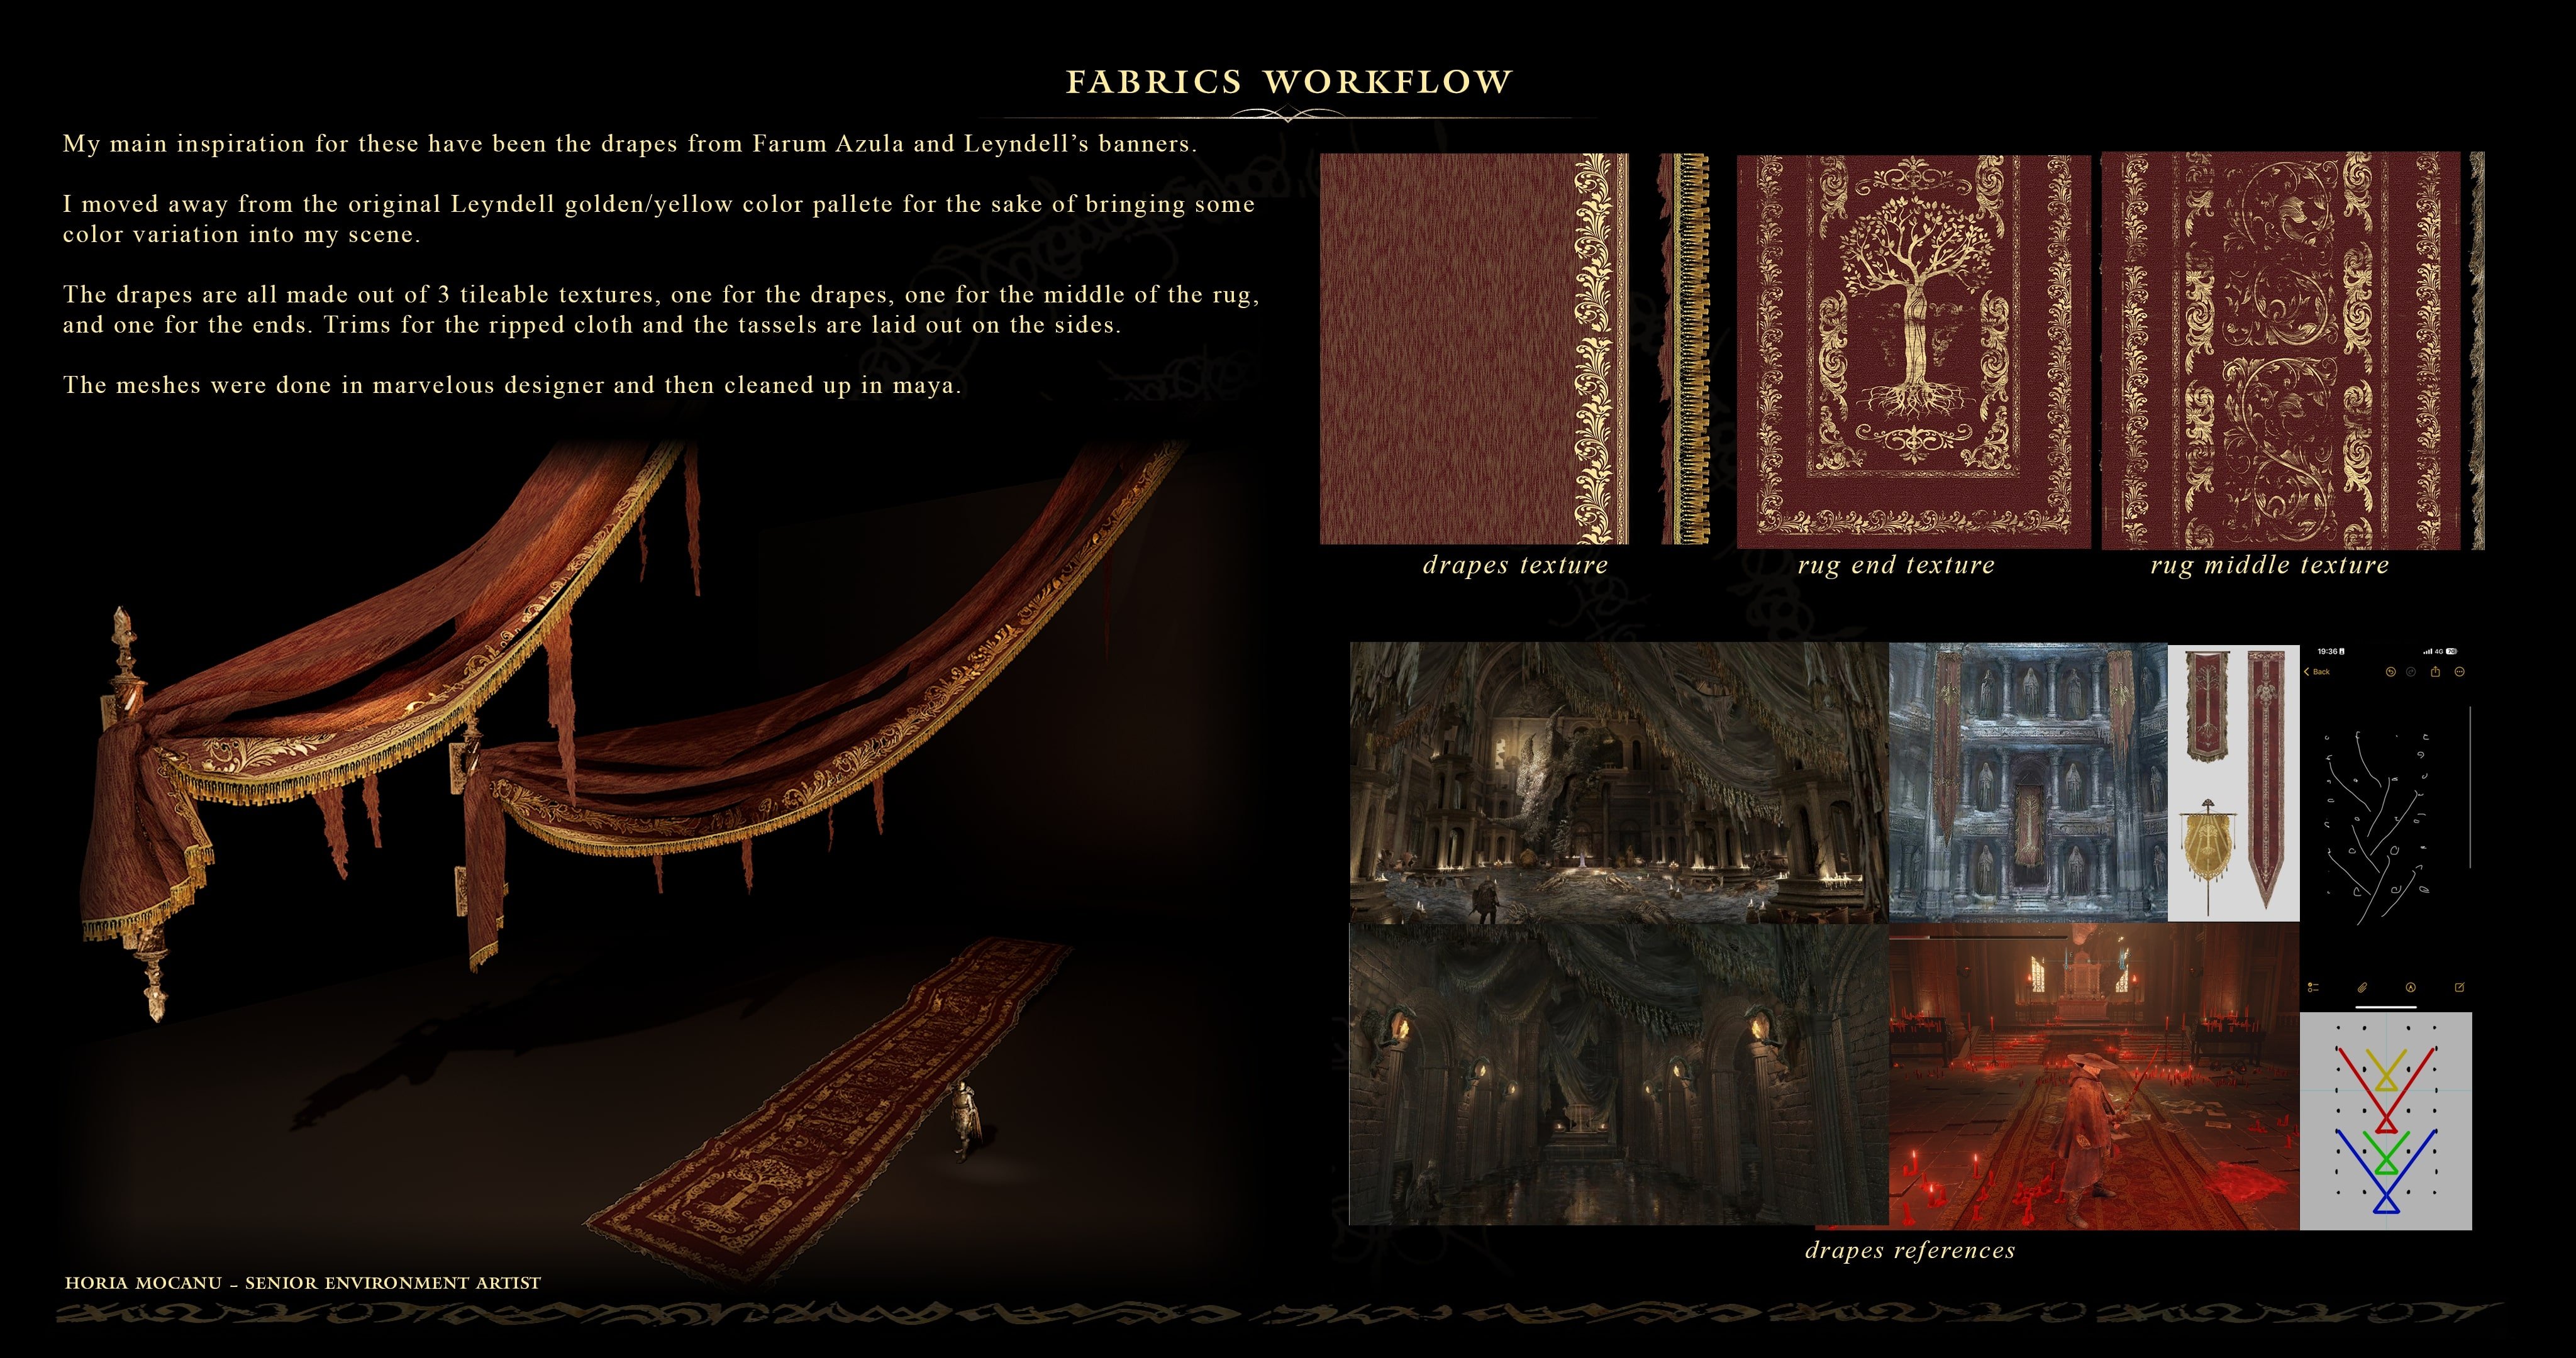
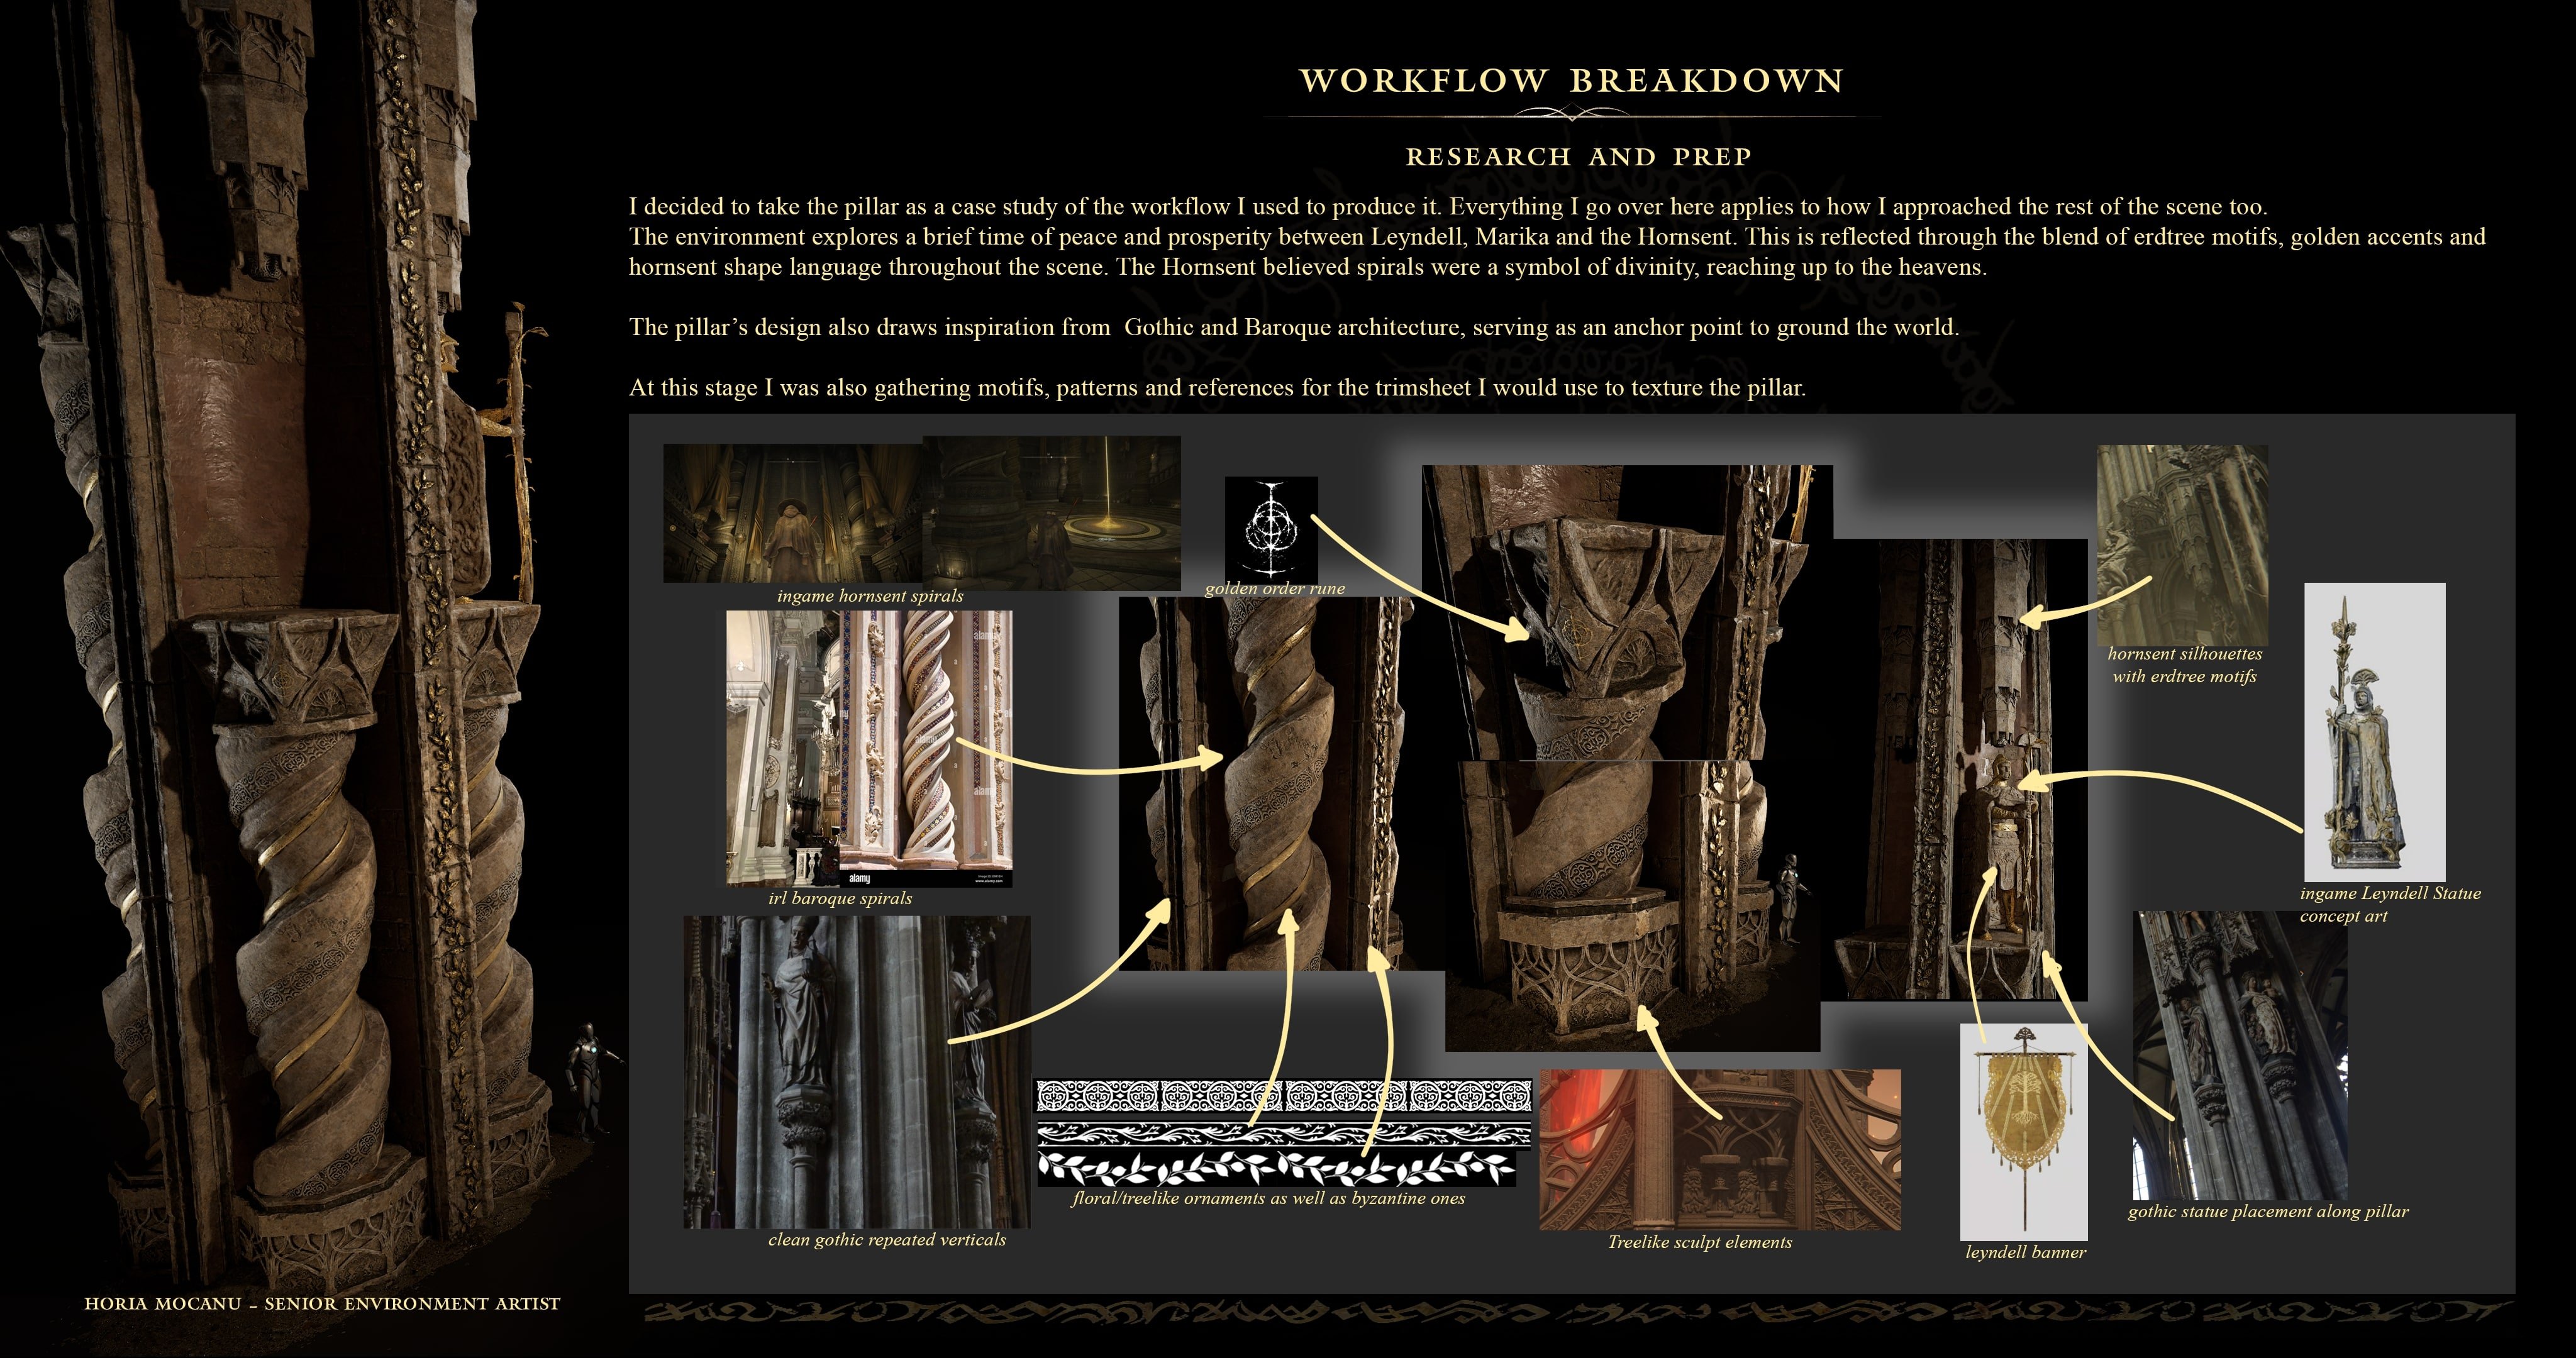
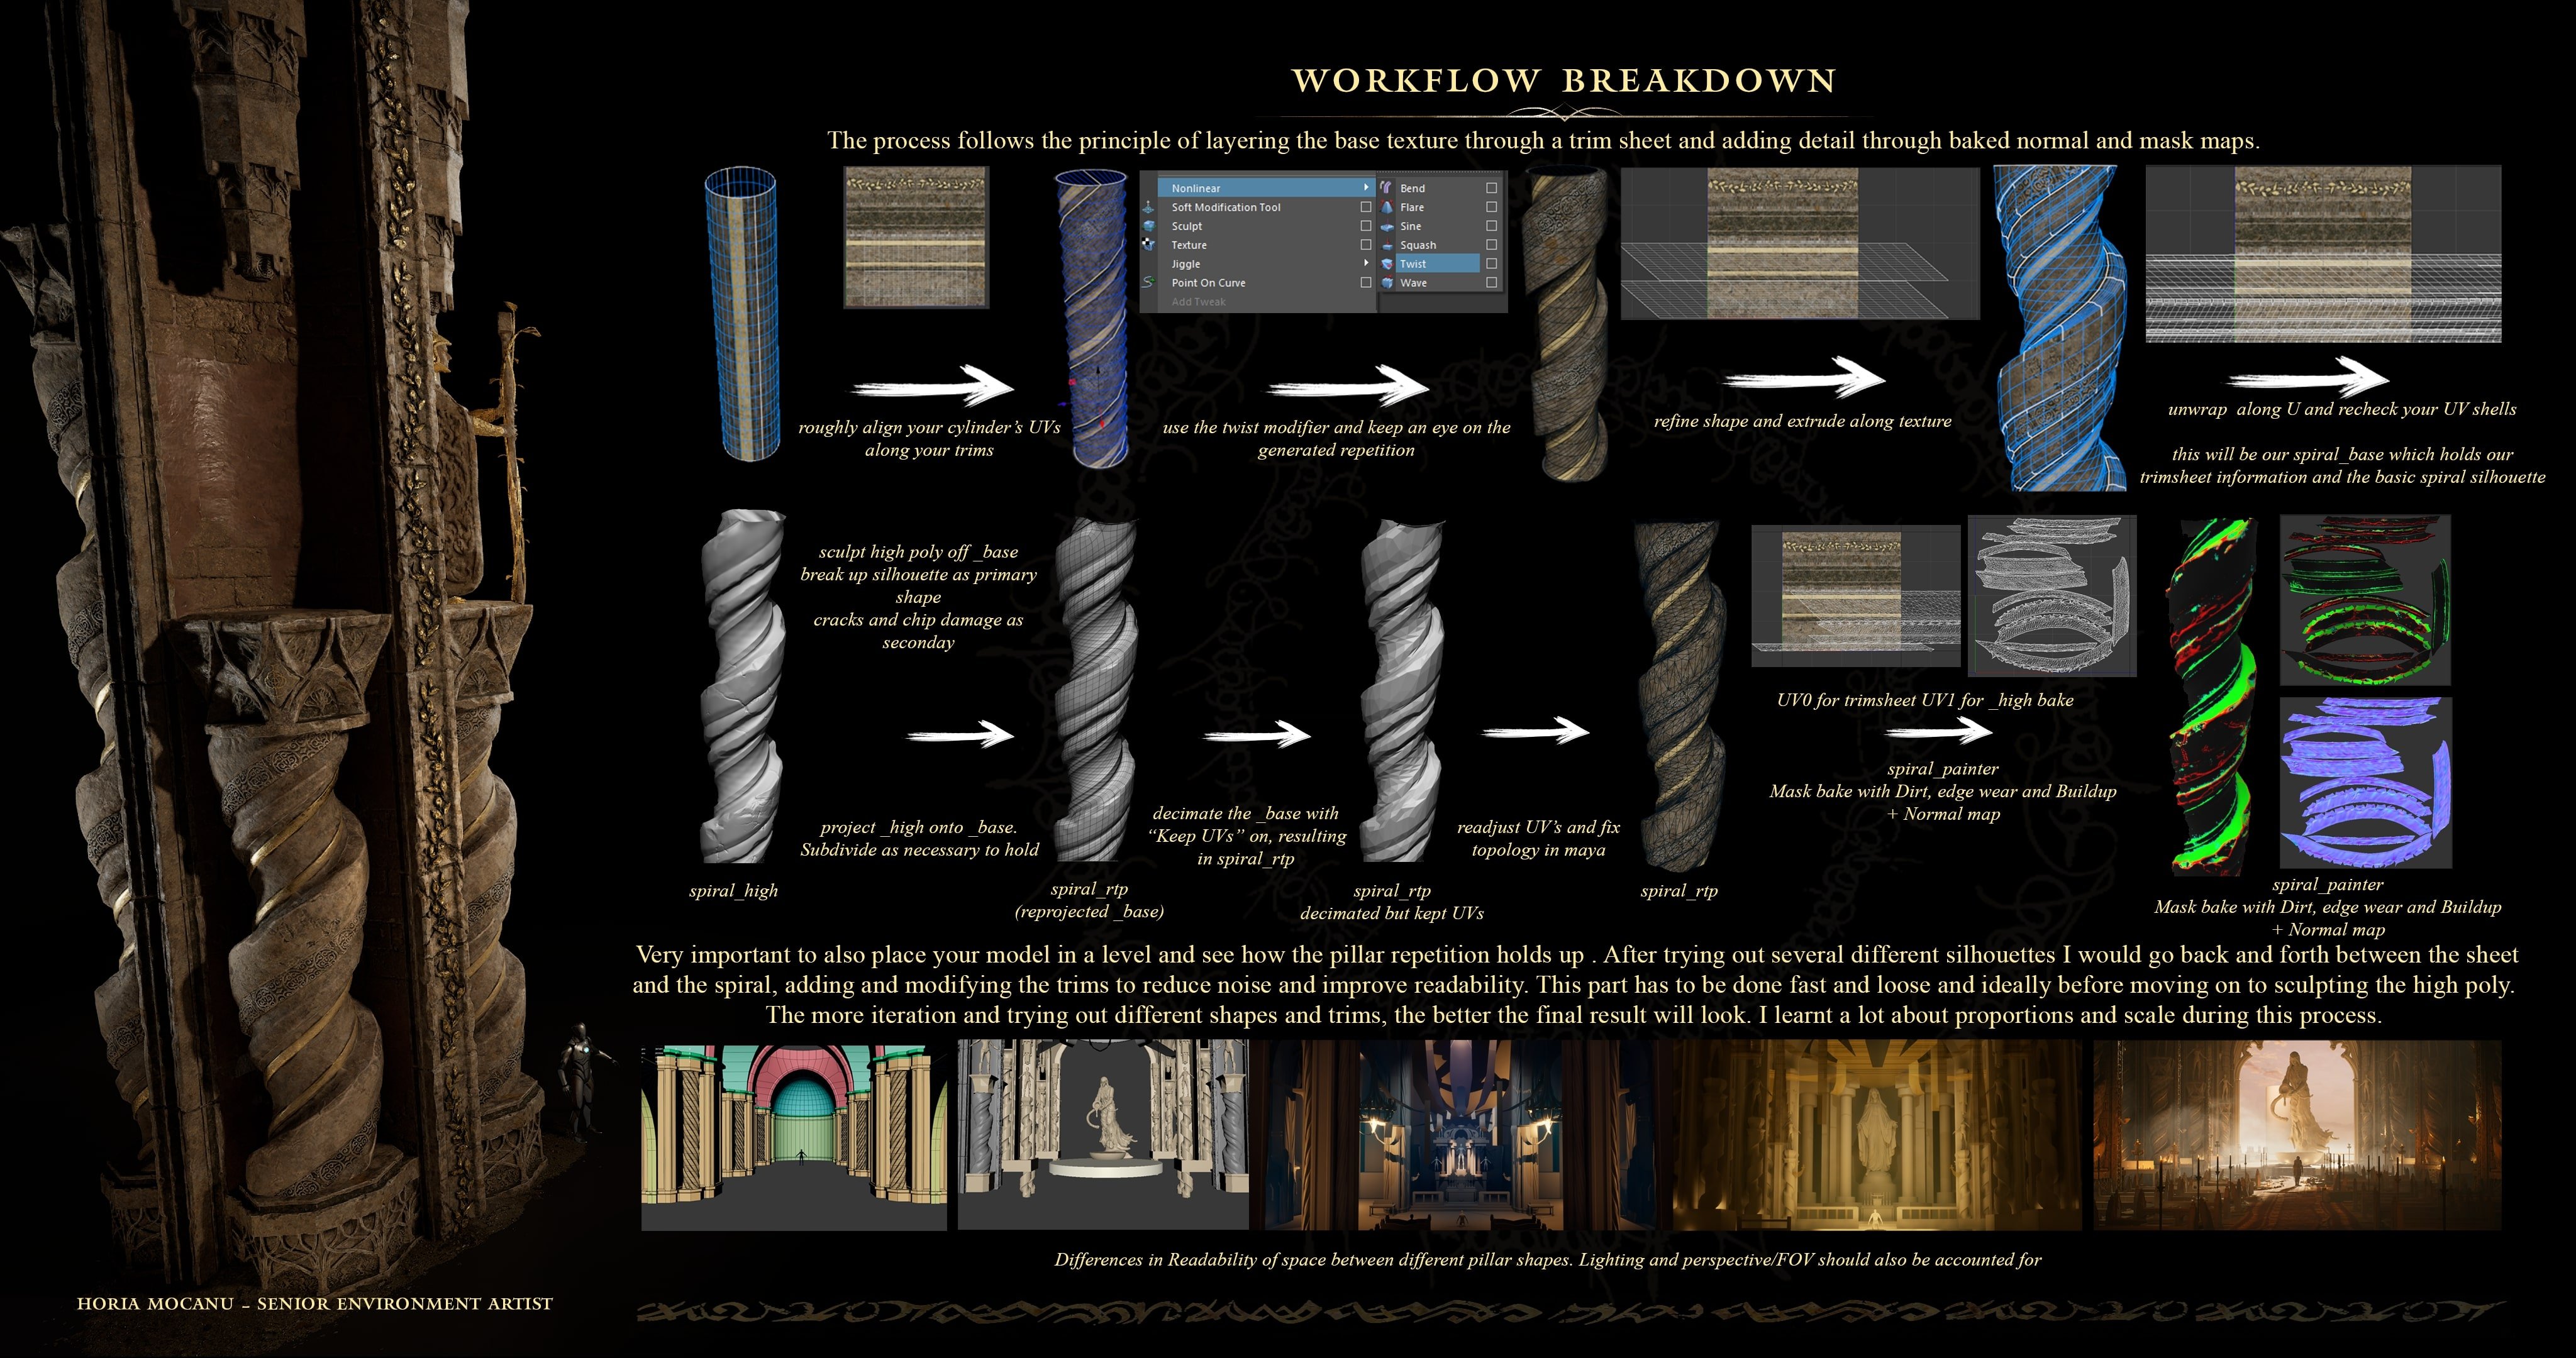
Elden Ring Inspired - Marika’s Cathedral of Gold
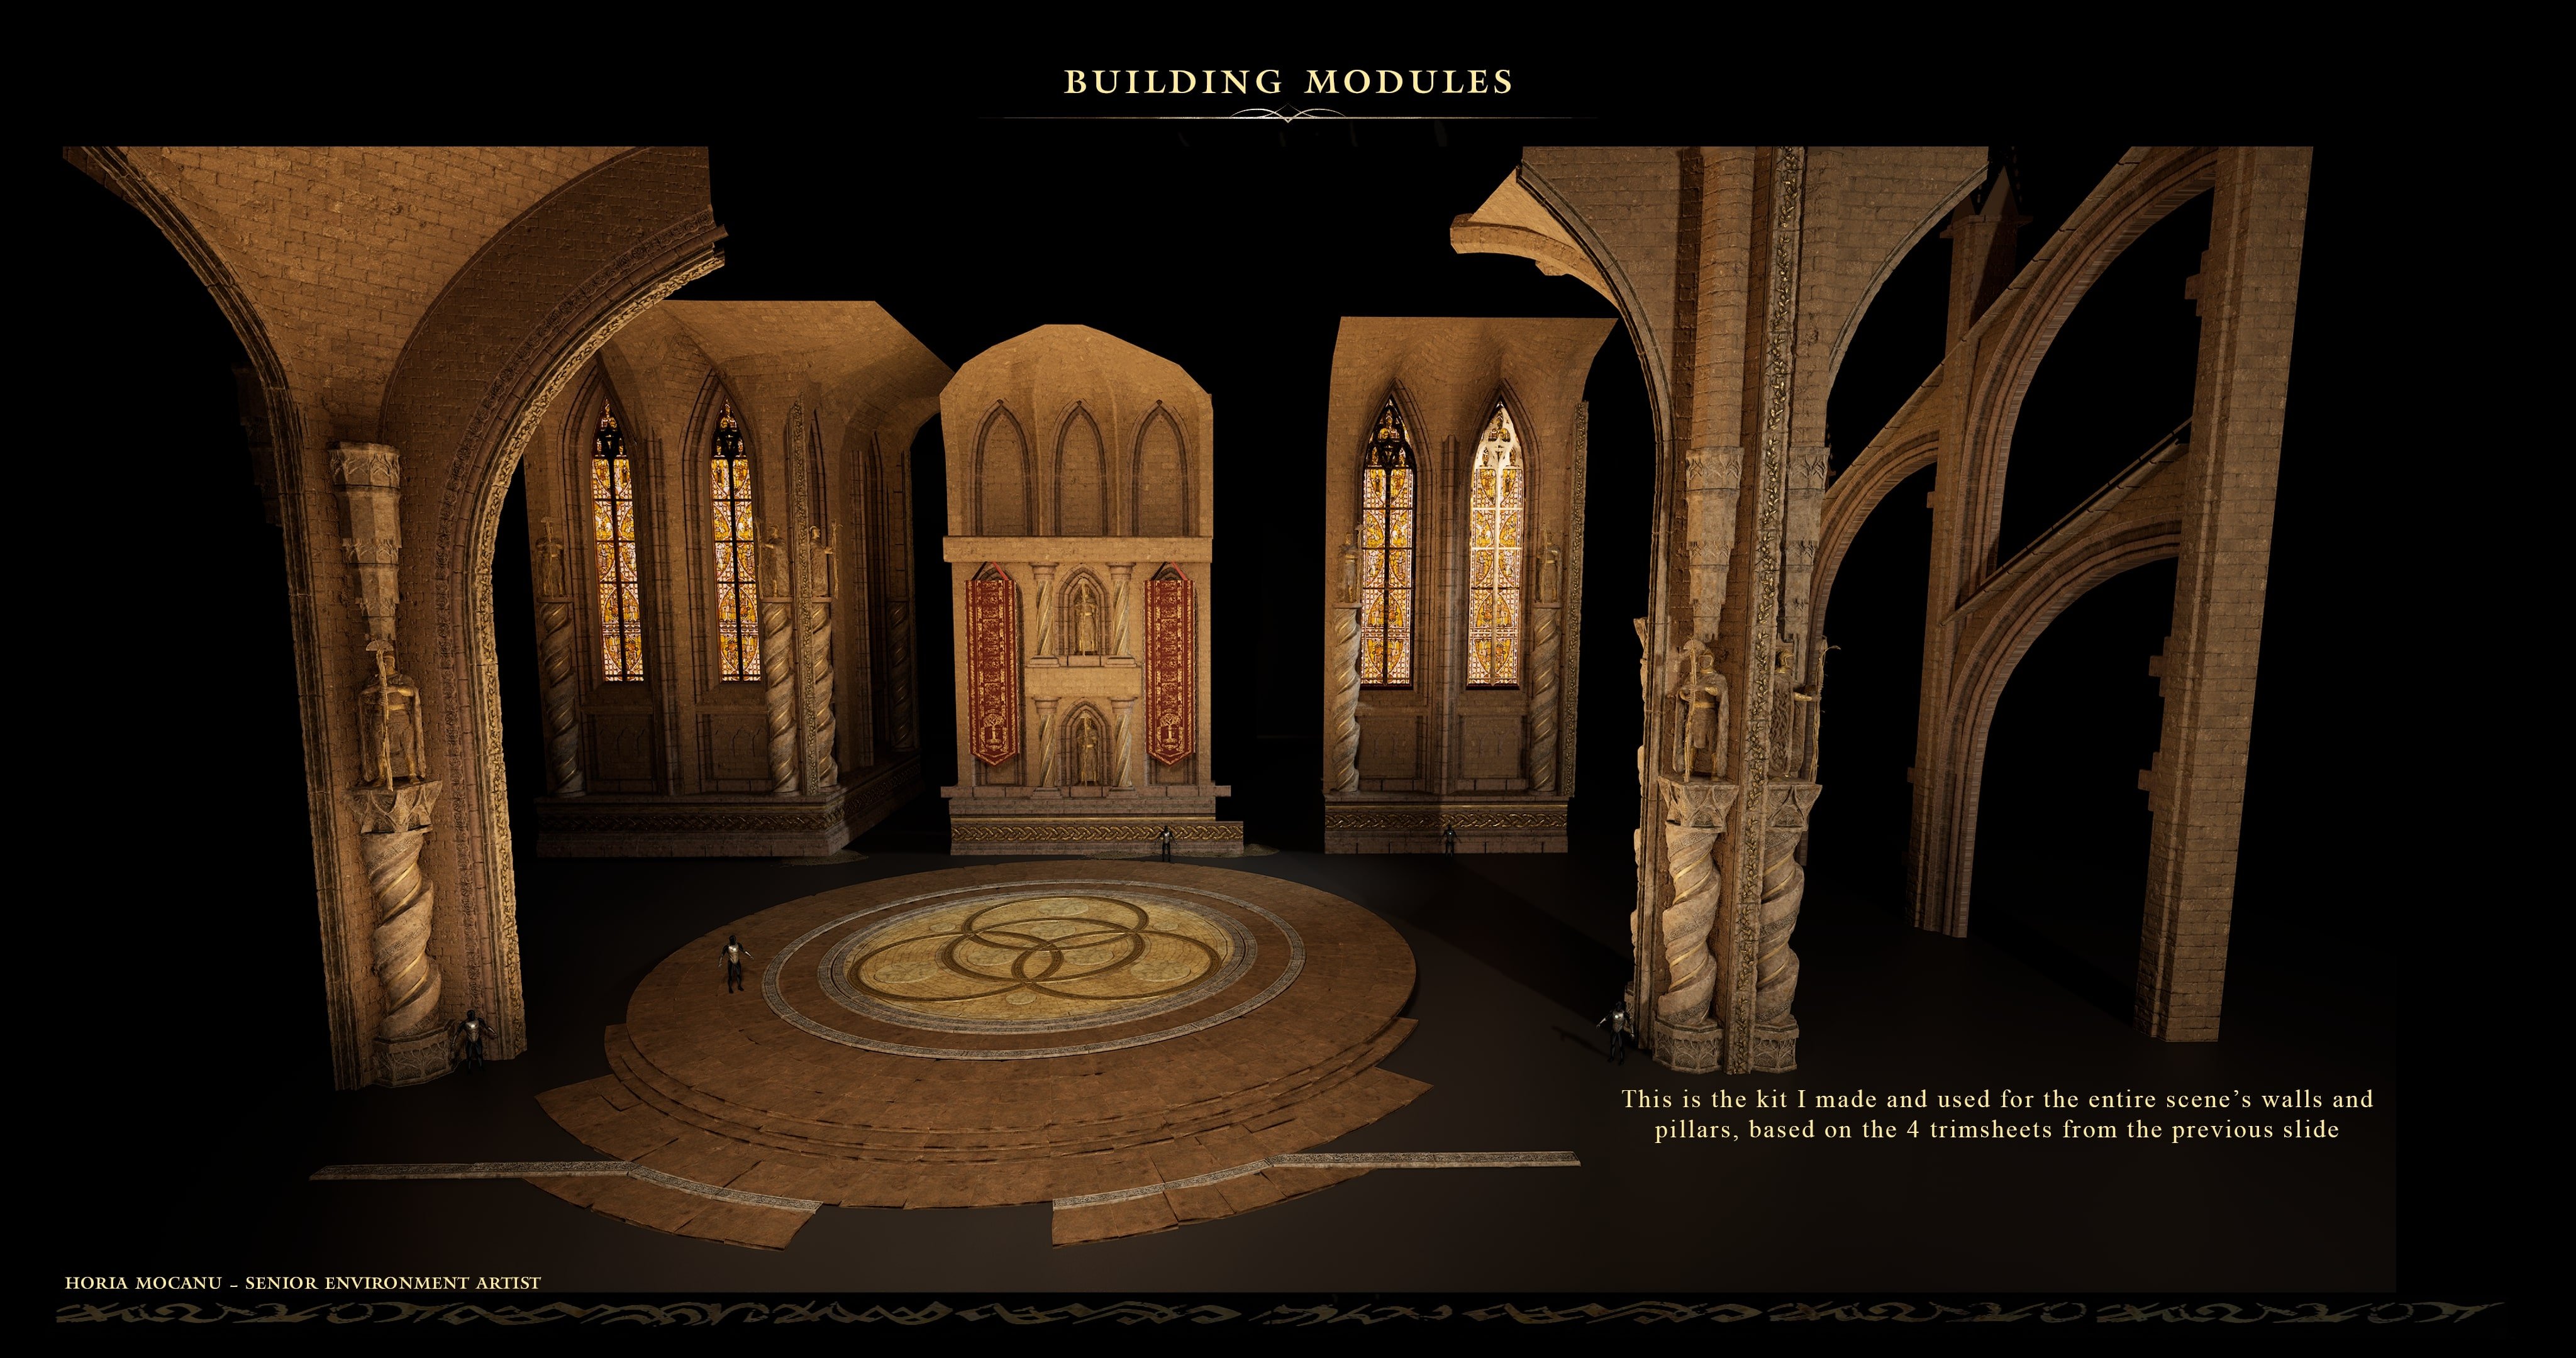
After her ascension to godhood and before Messmer’s Crusade there was a brief period of peace between Queen Marika and the Hornsent. Built as a celebration of the two cultures, the cathedral thus shares Leyndell’s golden lineage and Enir Ilim’s heavenly spirals.
During the War of the Ancient Dragons however the cathedral was unfortunately destroyed and lost to time.
I’ve been working on and off on this passion project for the past year and I am so excited to finally share it (also relieved it is finally over).
There have been several goals I wanted to achieve and explore with this scene:
-Pay homage to my all time favourite video game Elden Ring (i can finally resume my RL1 playthough now that this is done)
-Push visuals as far as I can with Nanite, Lumen and Megalights and see what I learn from it
-Last but not least, I wanted to see if I’m able to create a scene that can stand shoulder to shoulder with the original game. Let me know if you think I managed to meet this expectation.
The Foliage and the one pile of dirt I used everywhere are Megascans. The Sky is by Velarion and our tarnished warrior is by TalkingDrums.
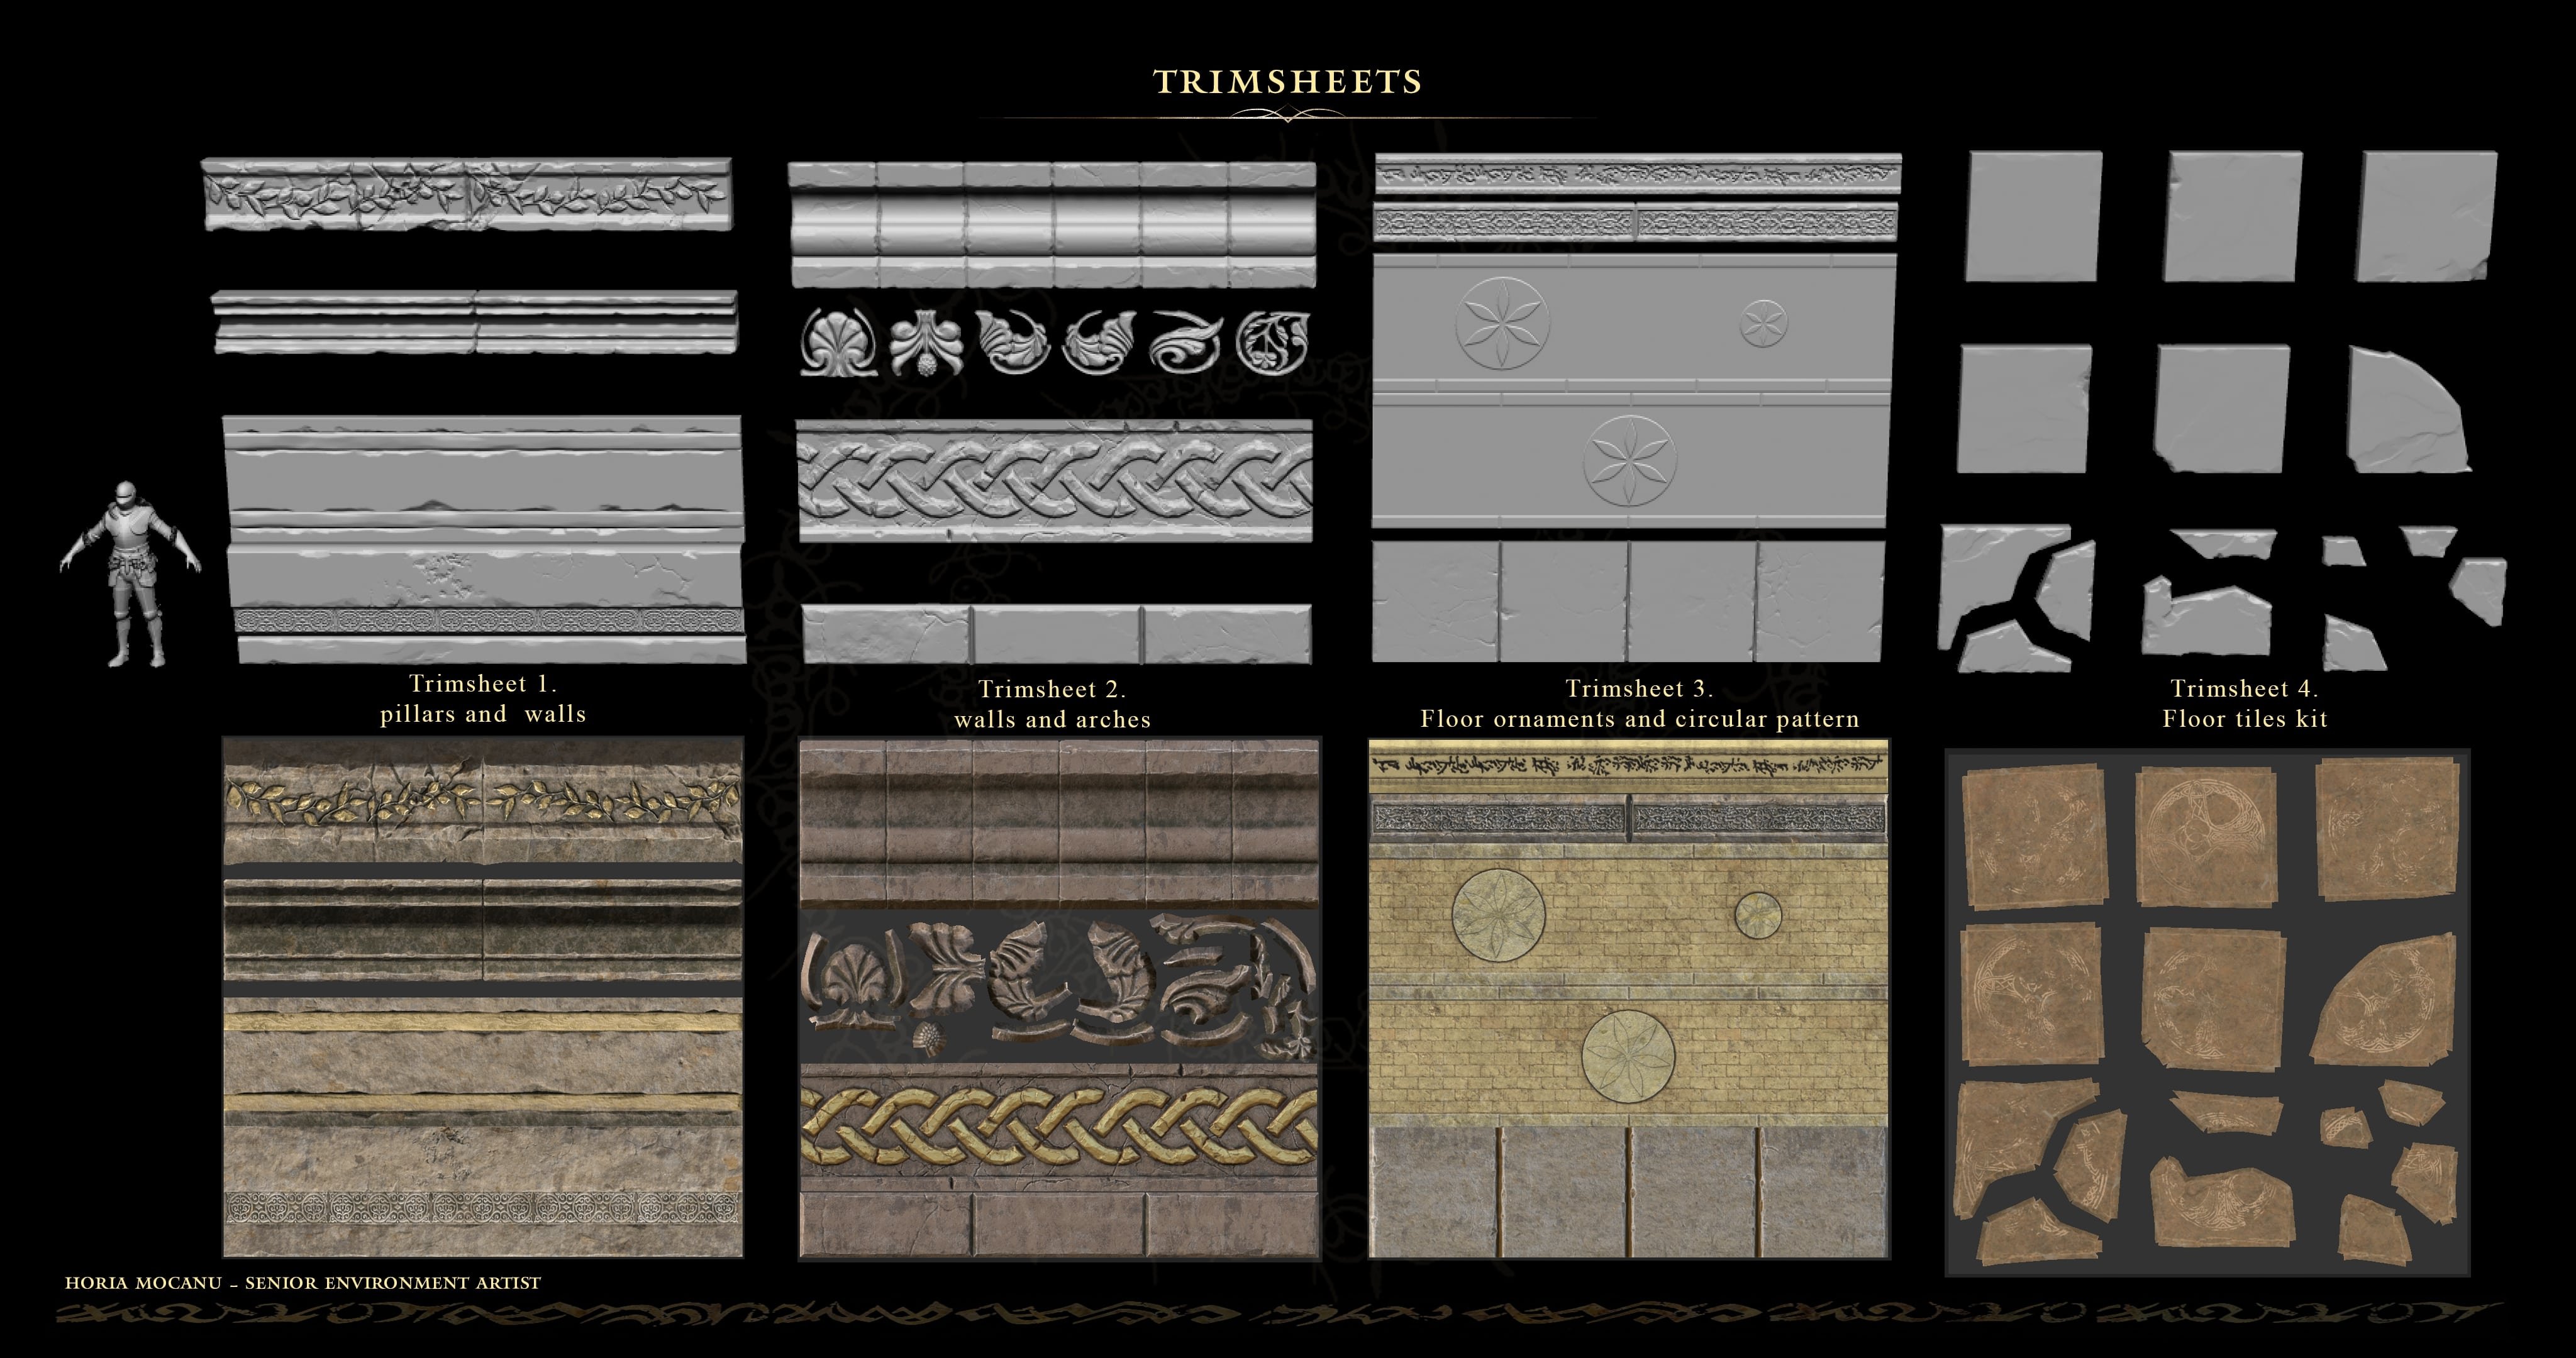
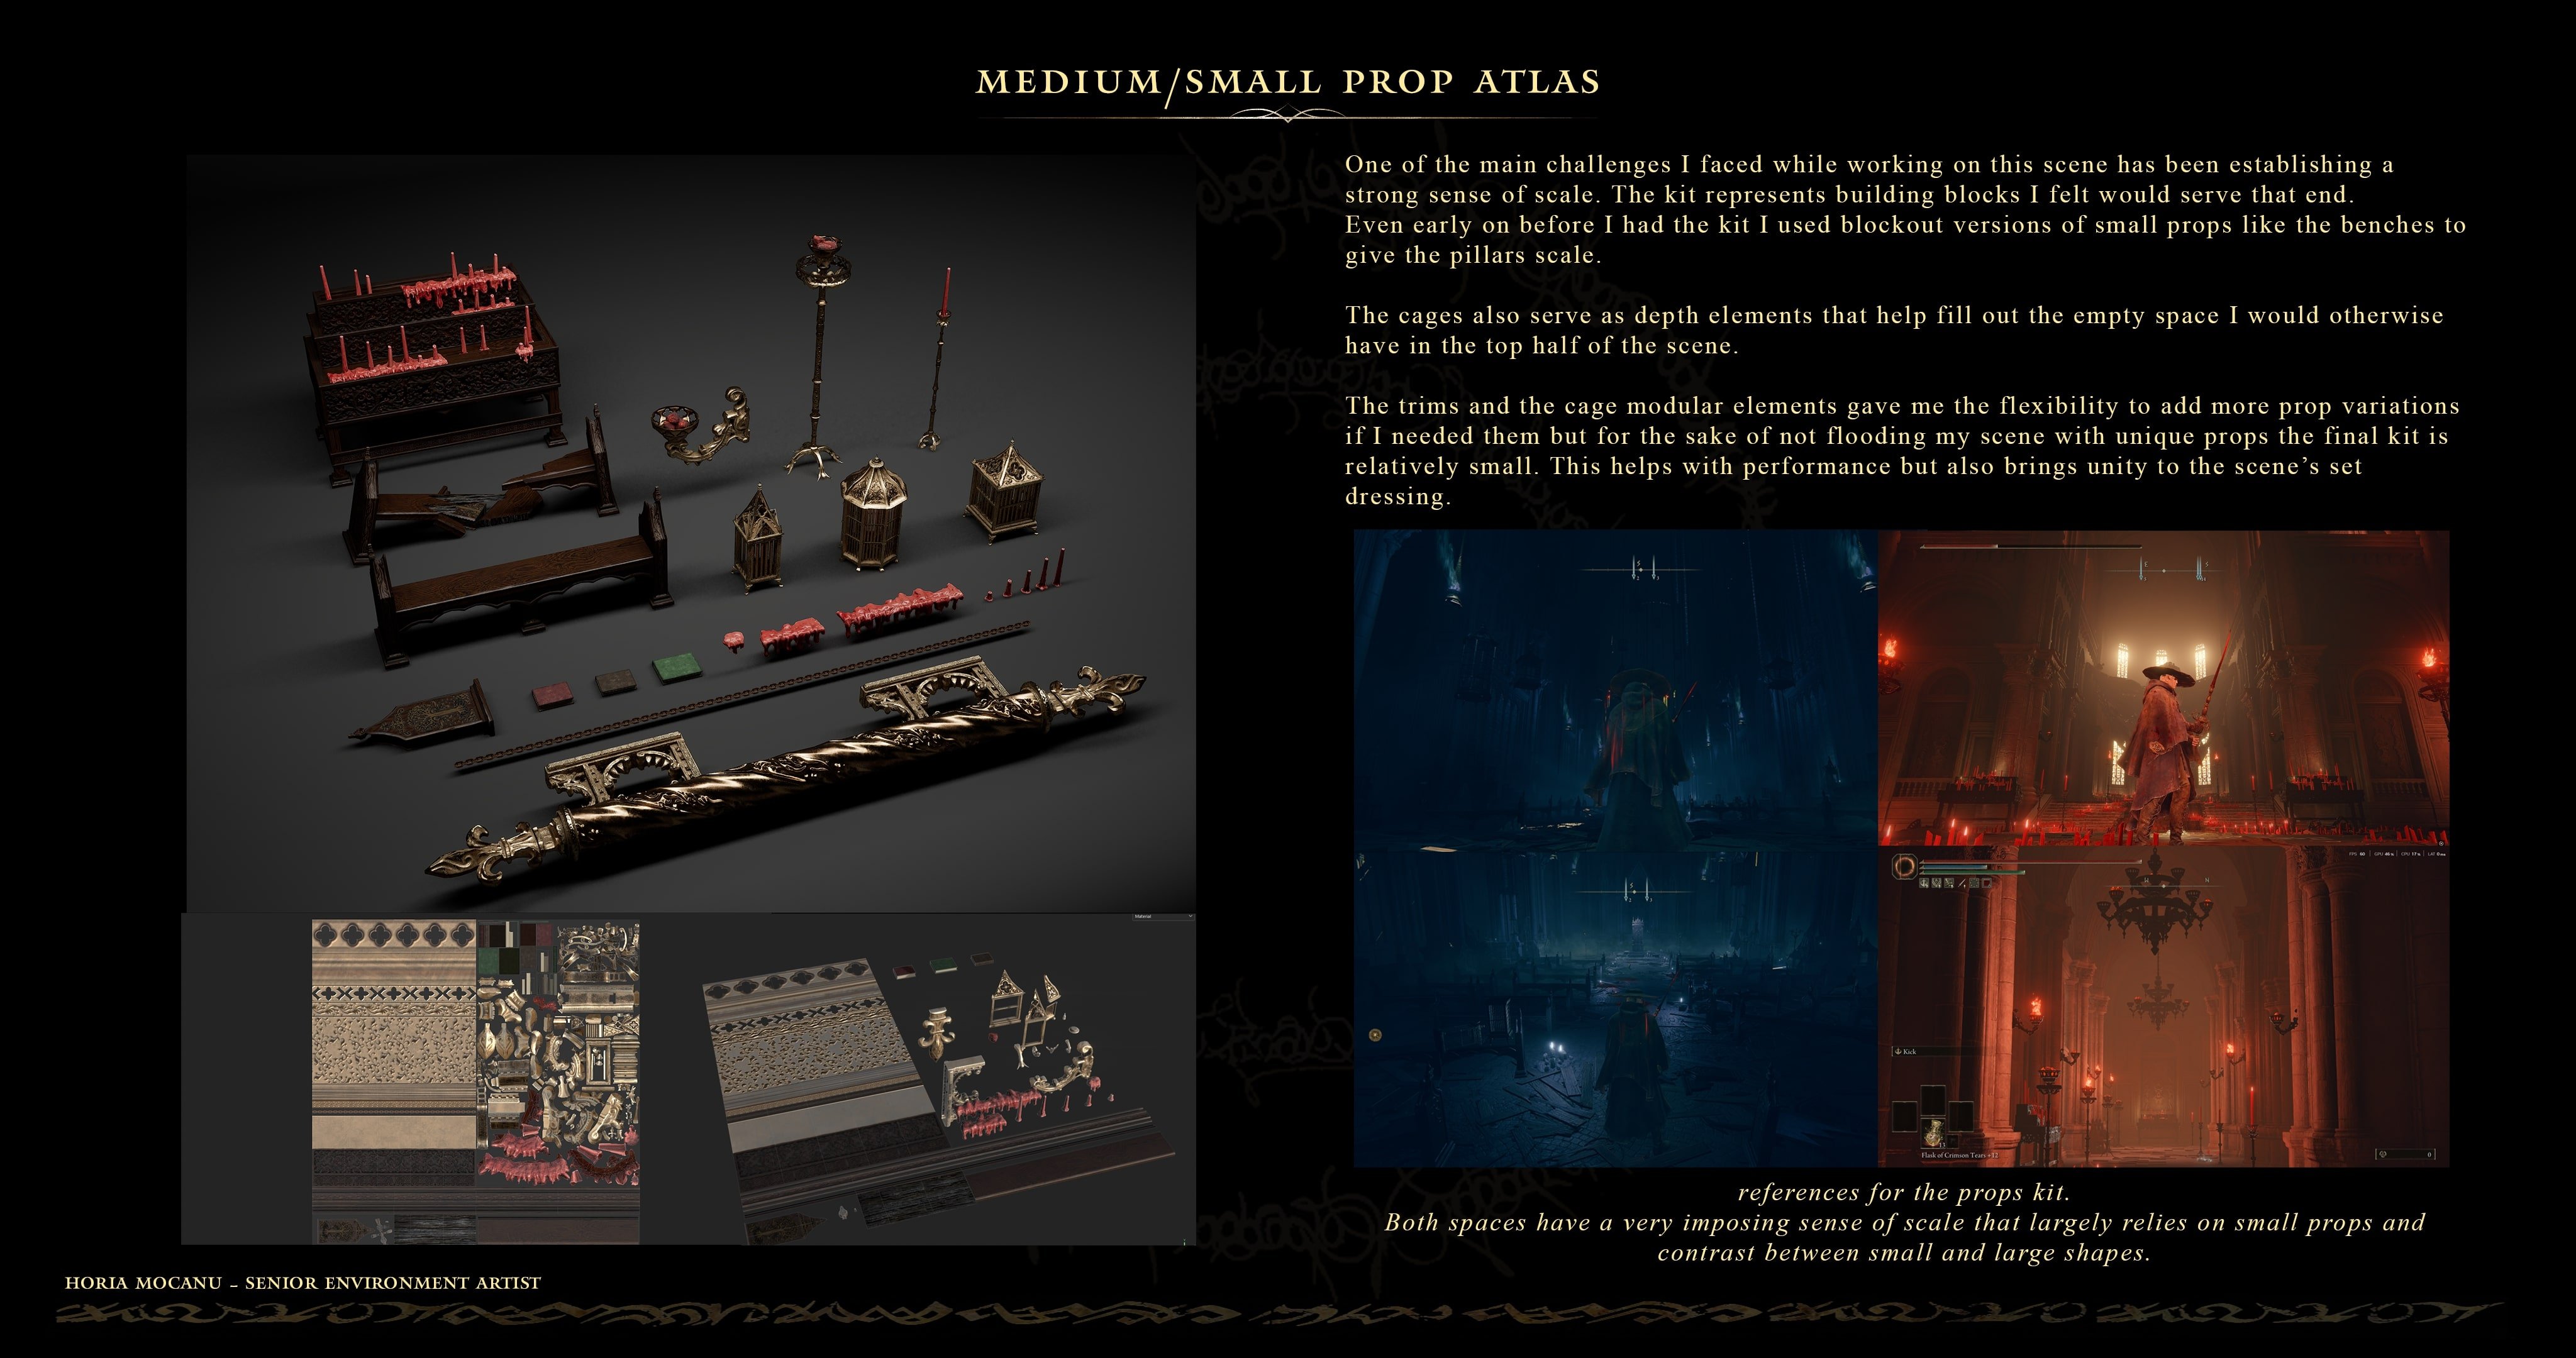
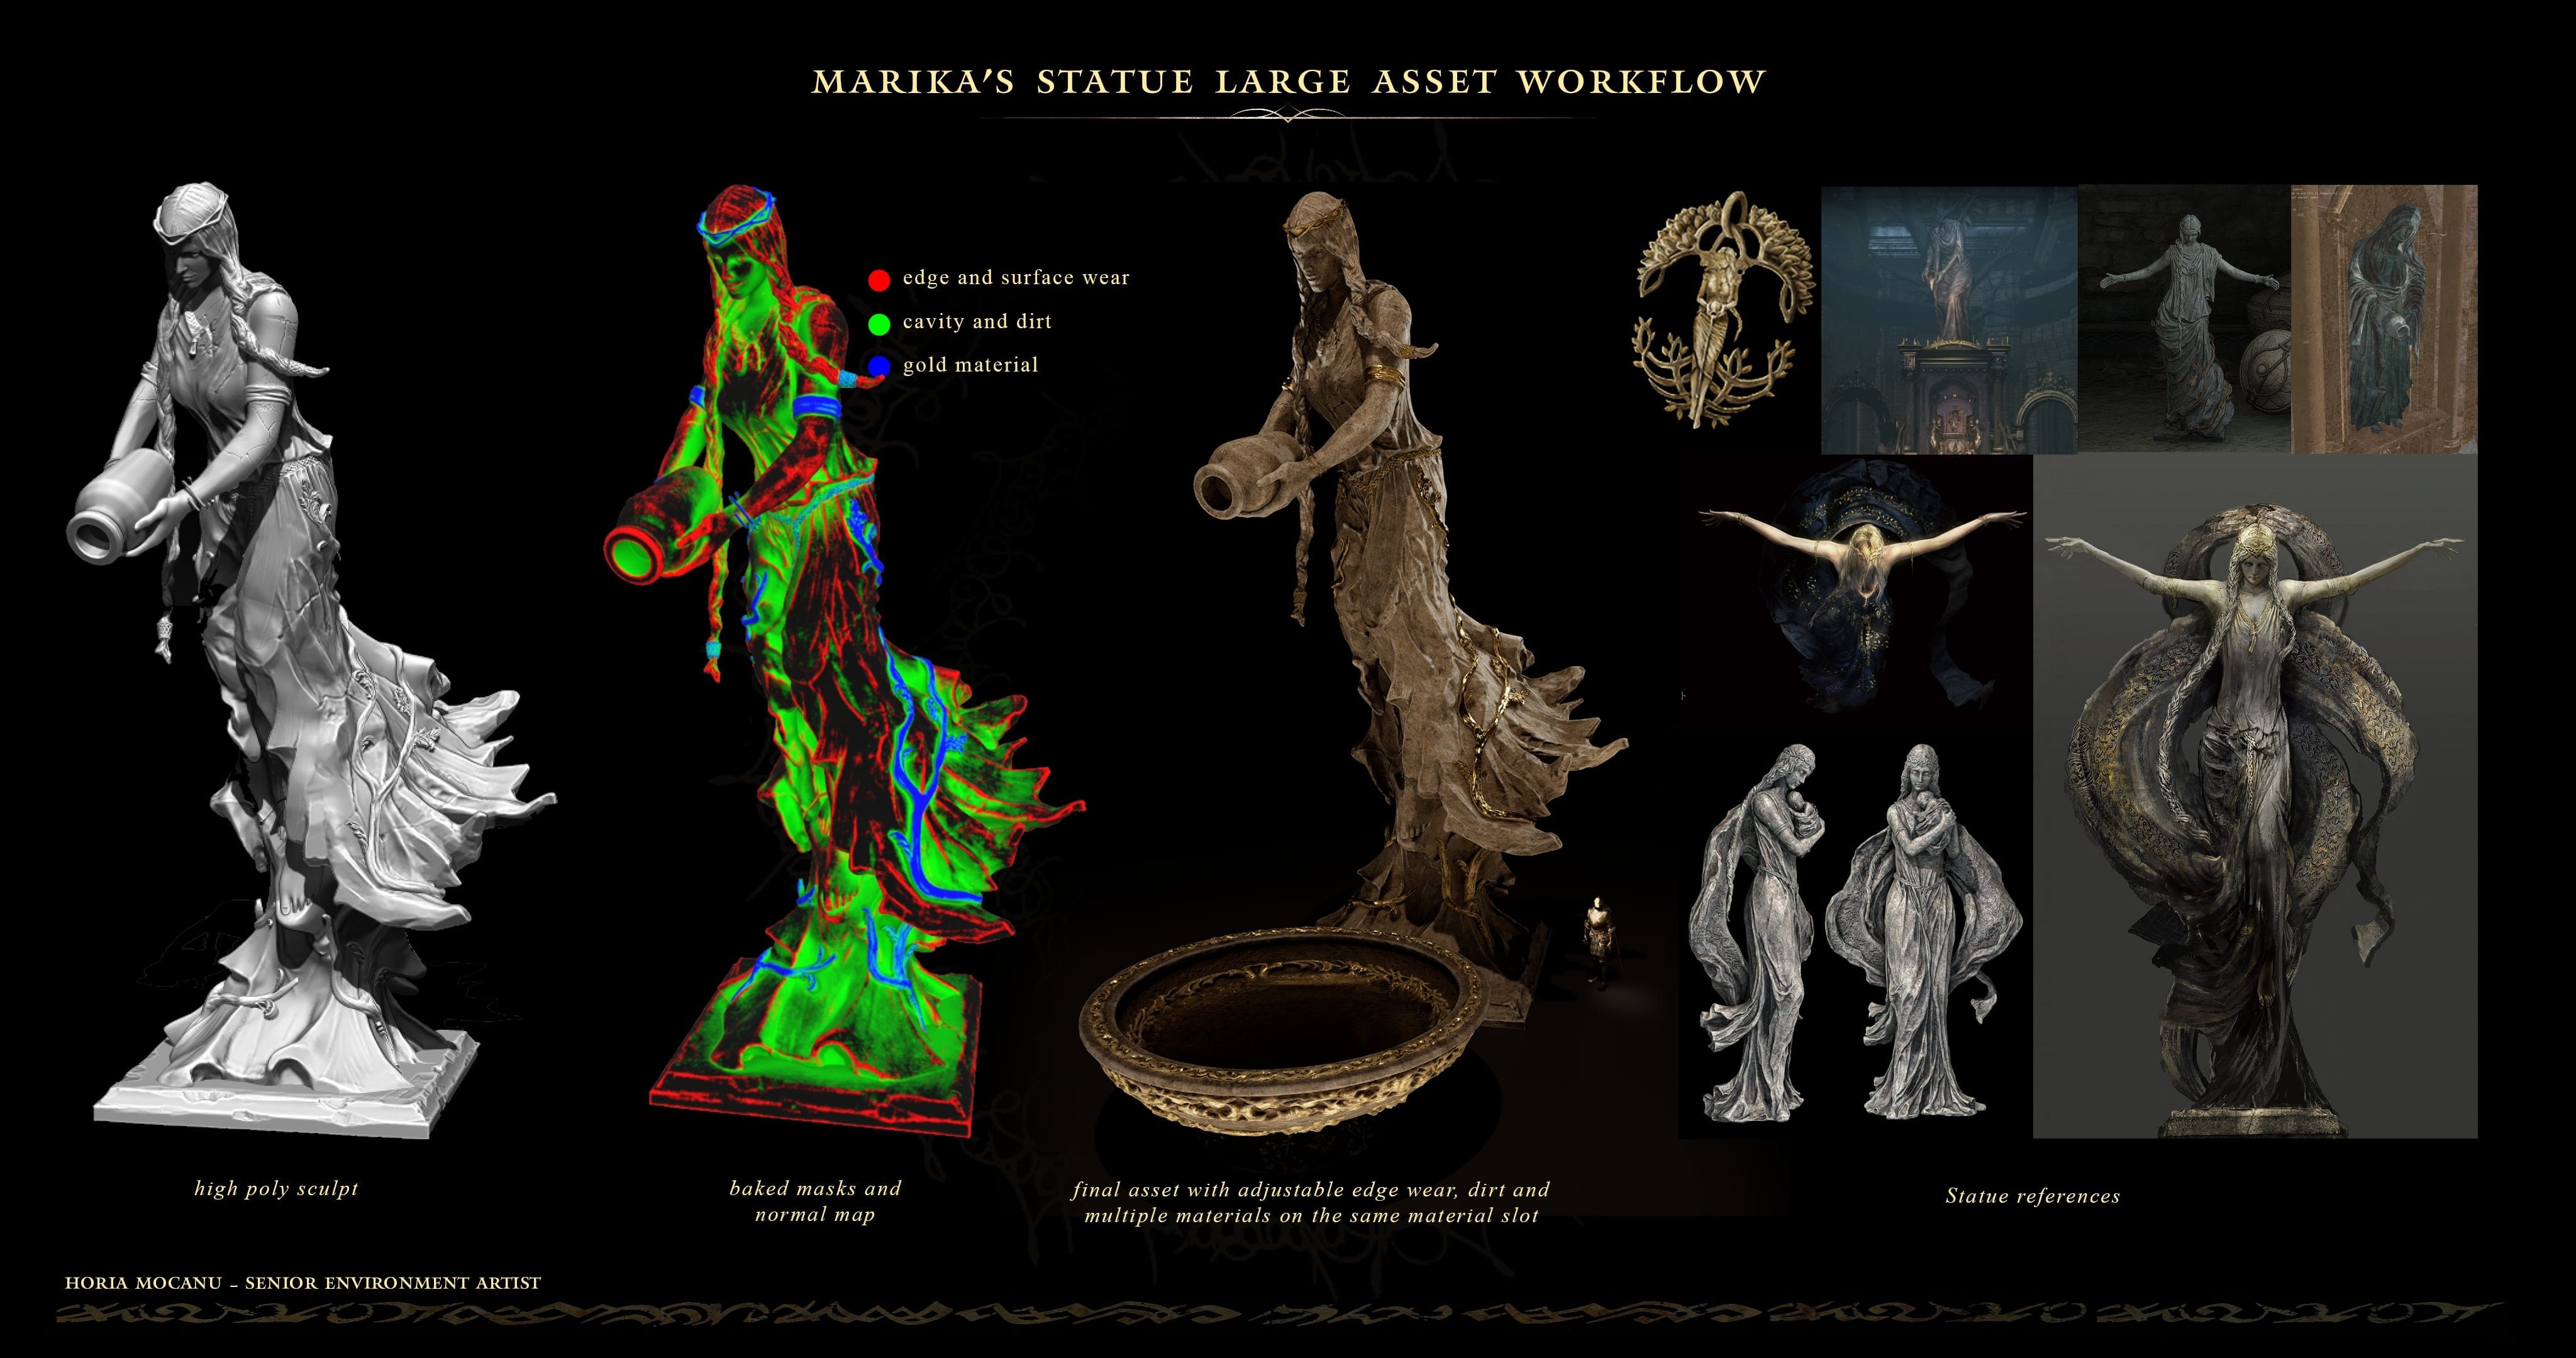
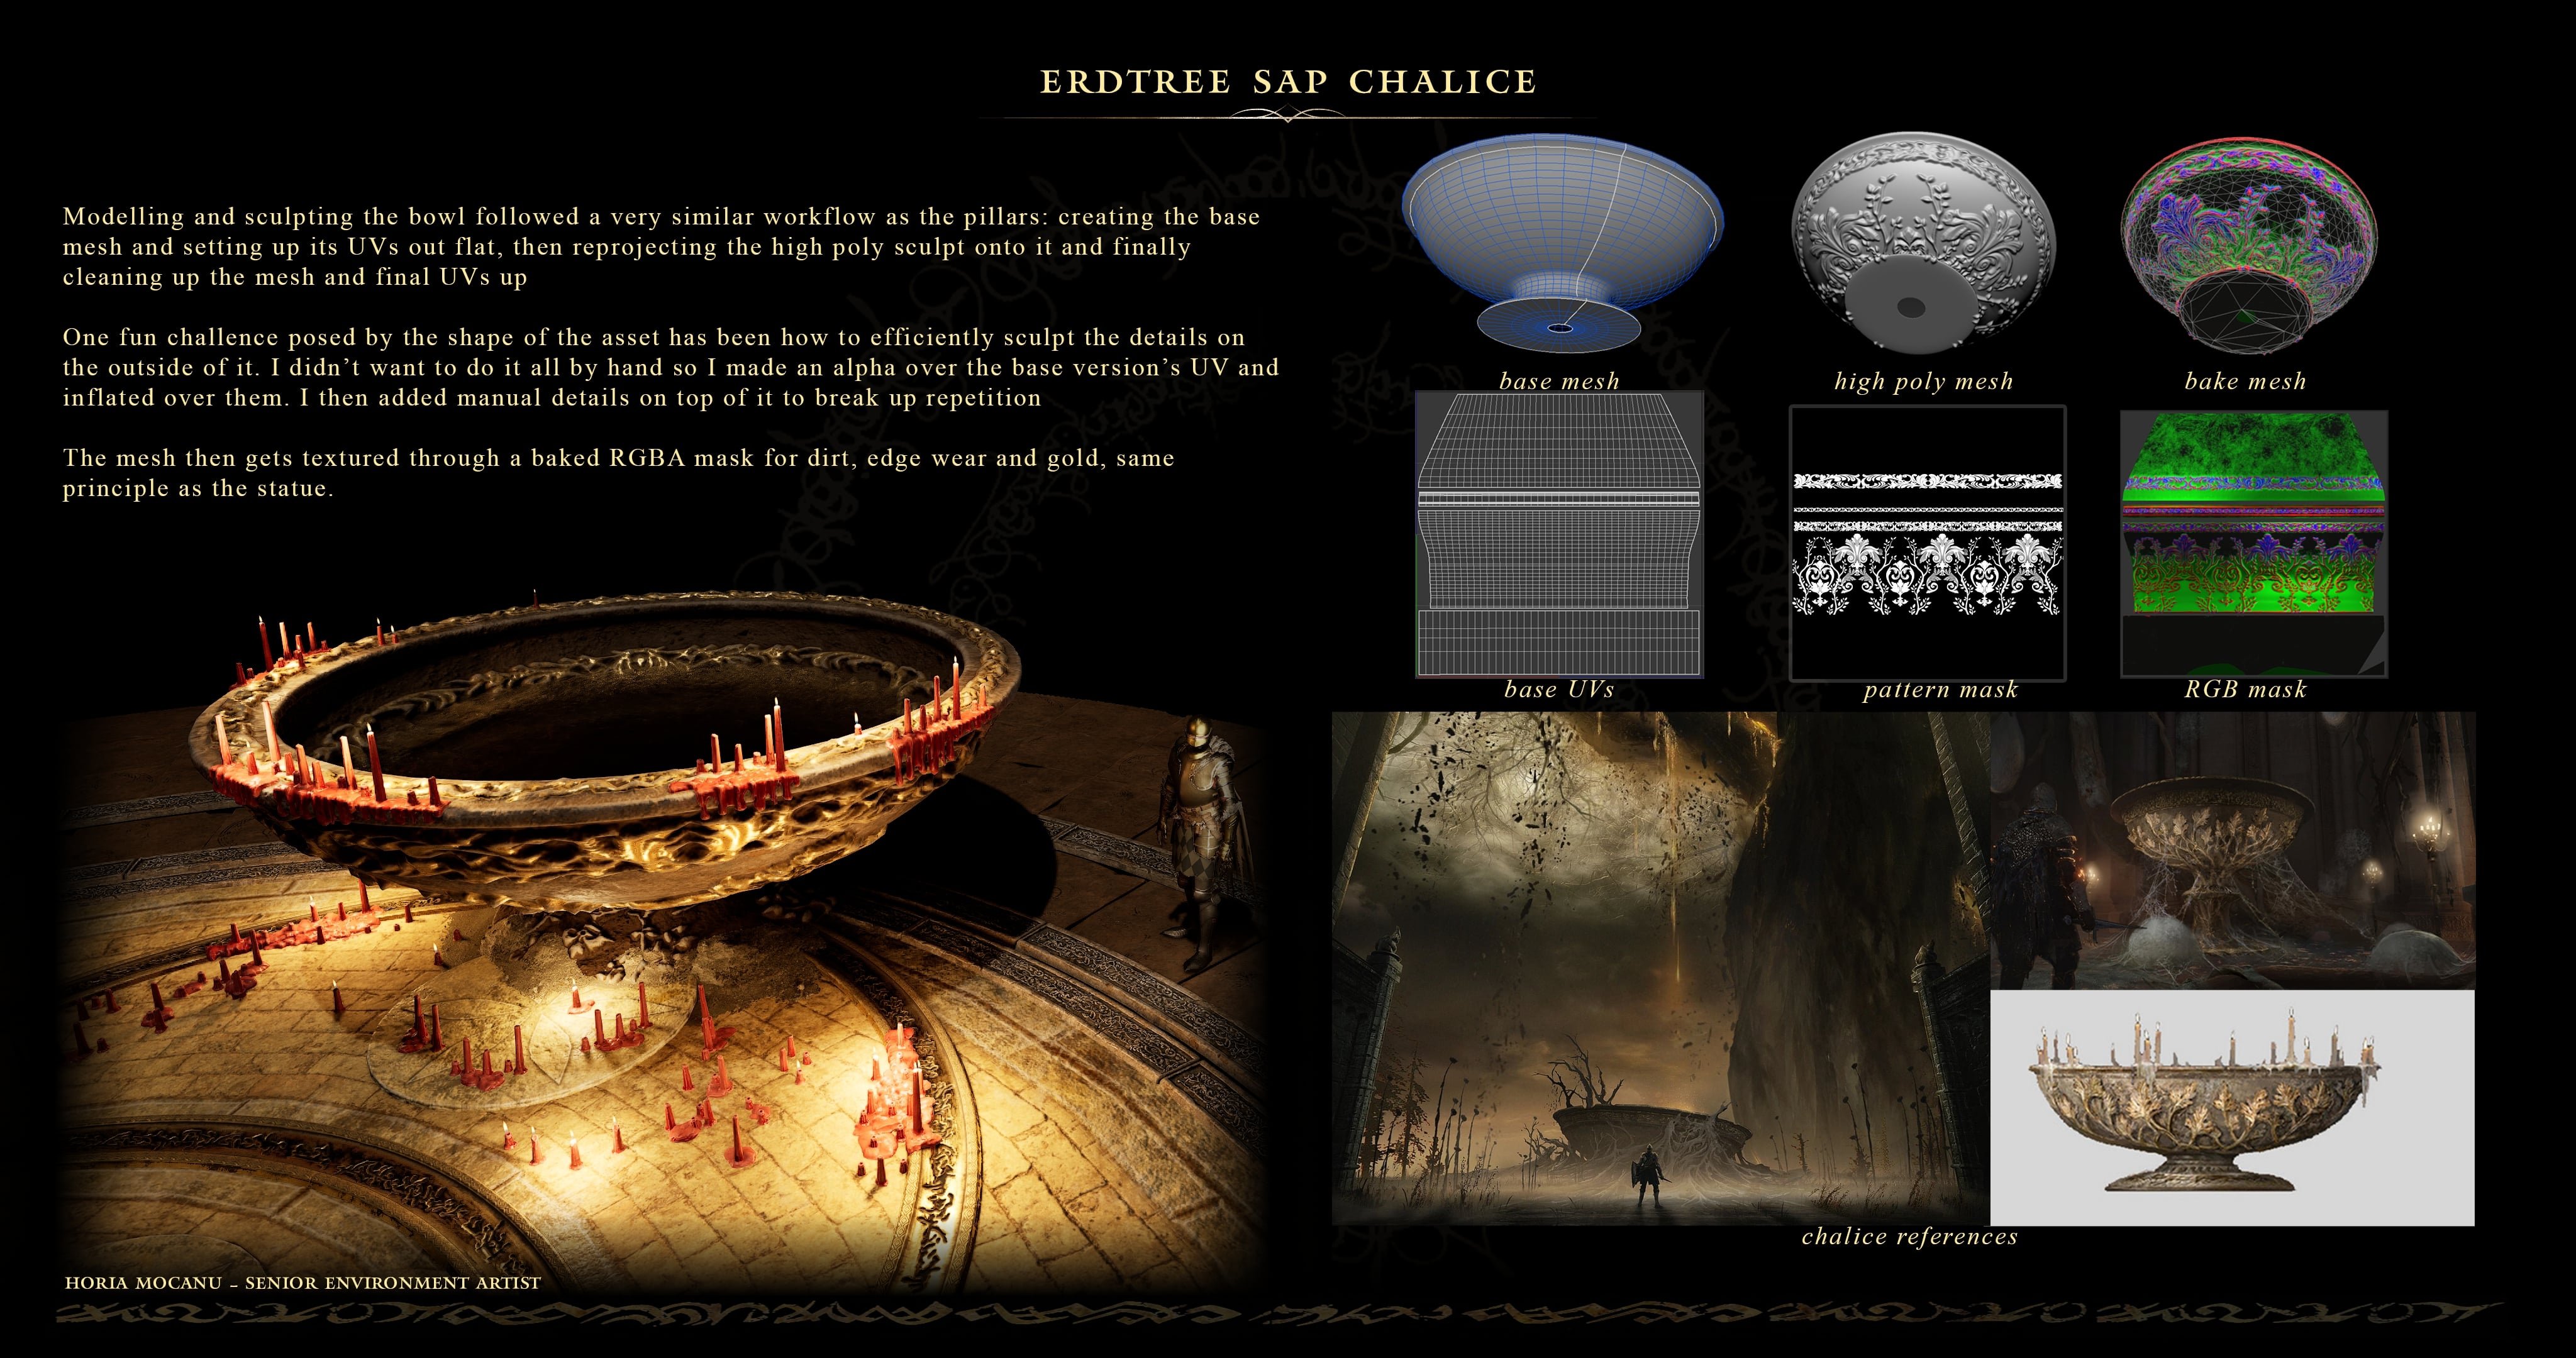
Everything else was modelled, textured and assembled by me in Unreal Engine 5
The full Artstation post features a bunch of videos I wasn’t able to upload here, please have a look:
https://www.artstation.com/artwork/a0529z




 bduck67
13 ·
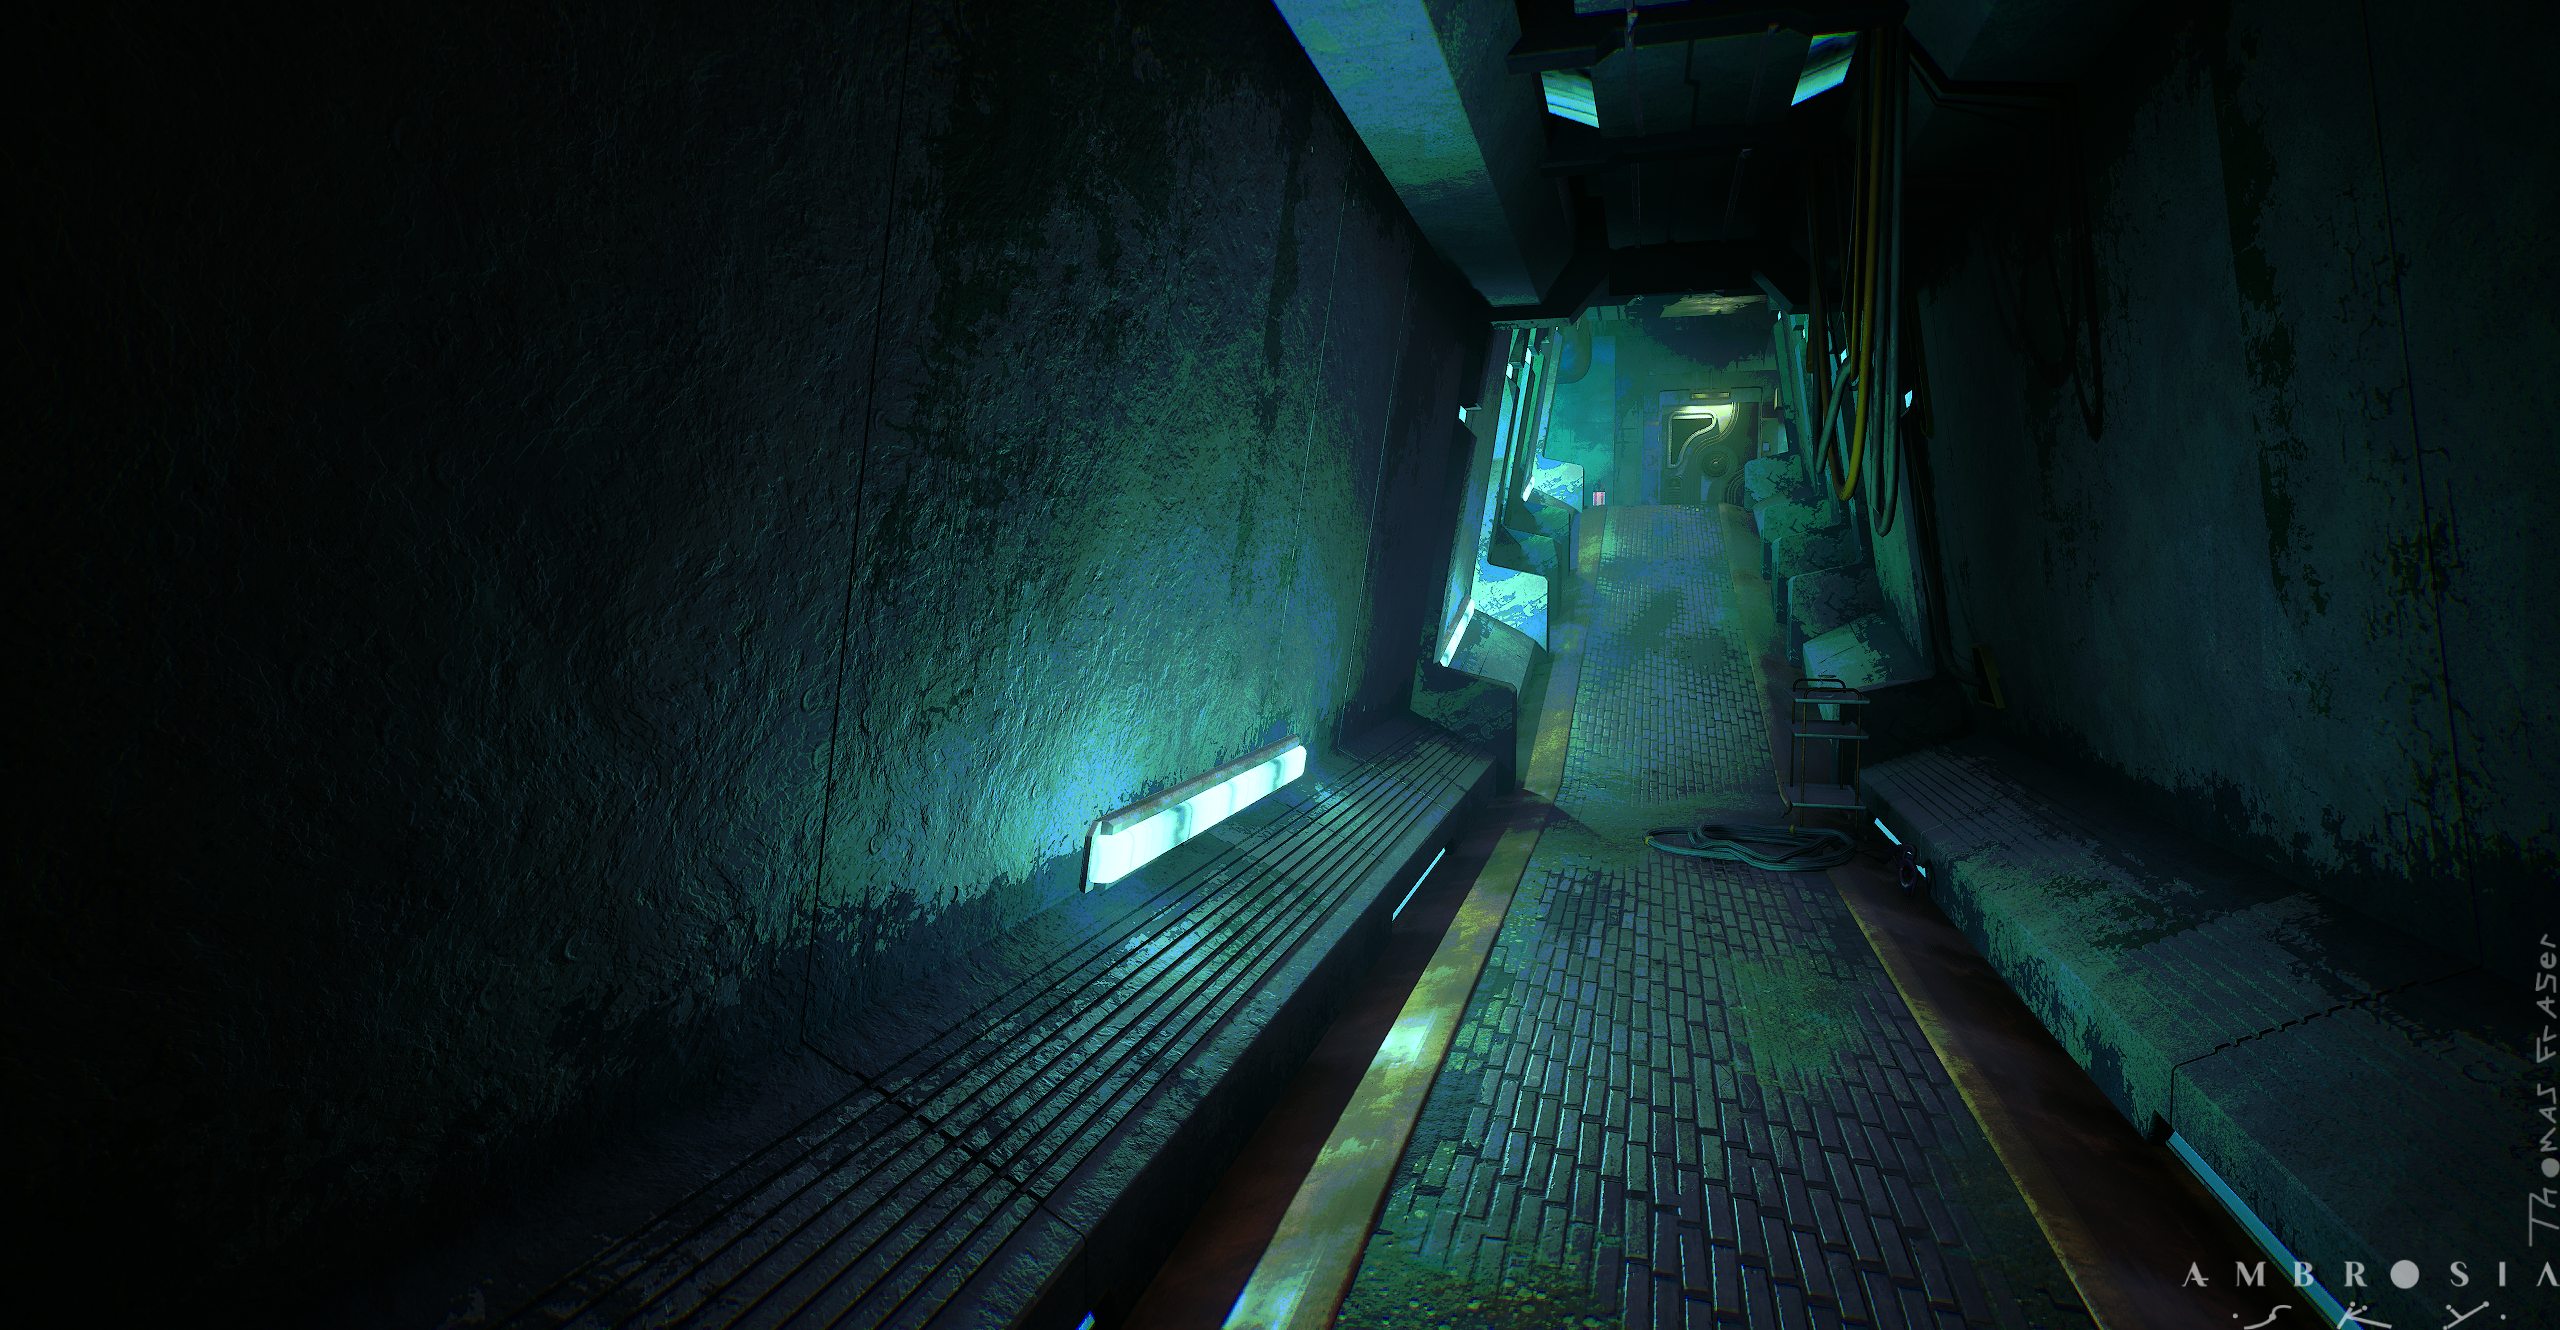
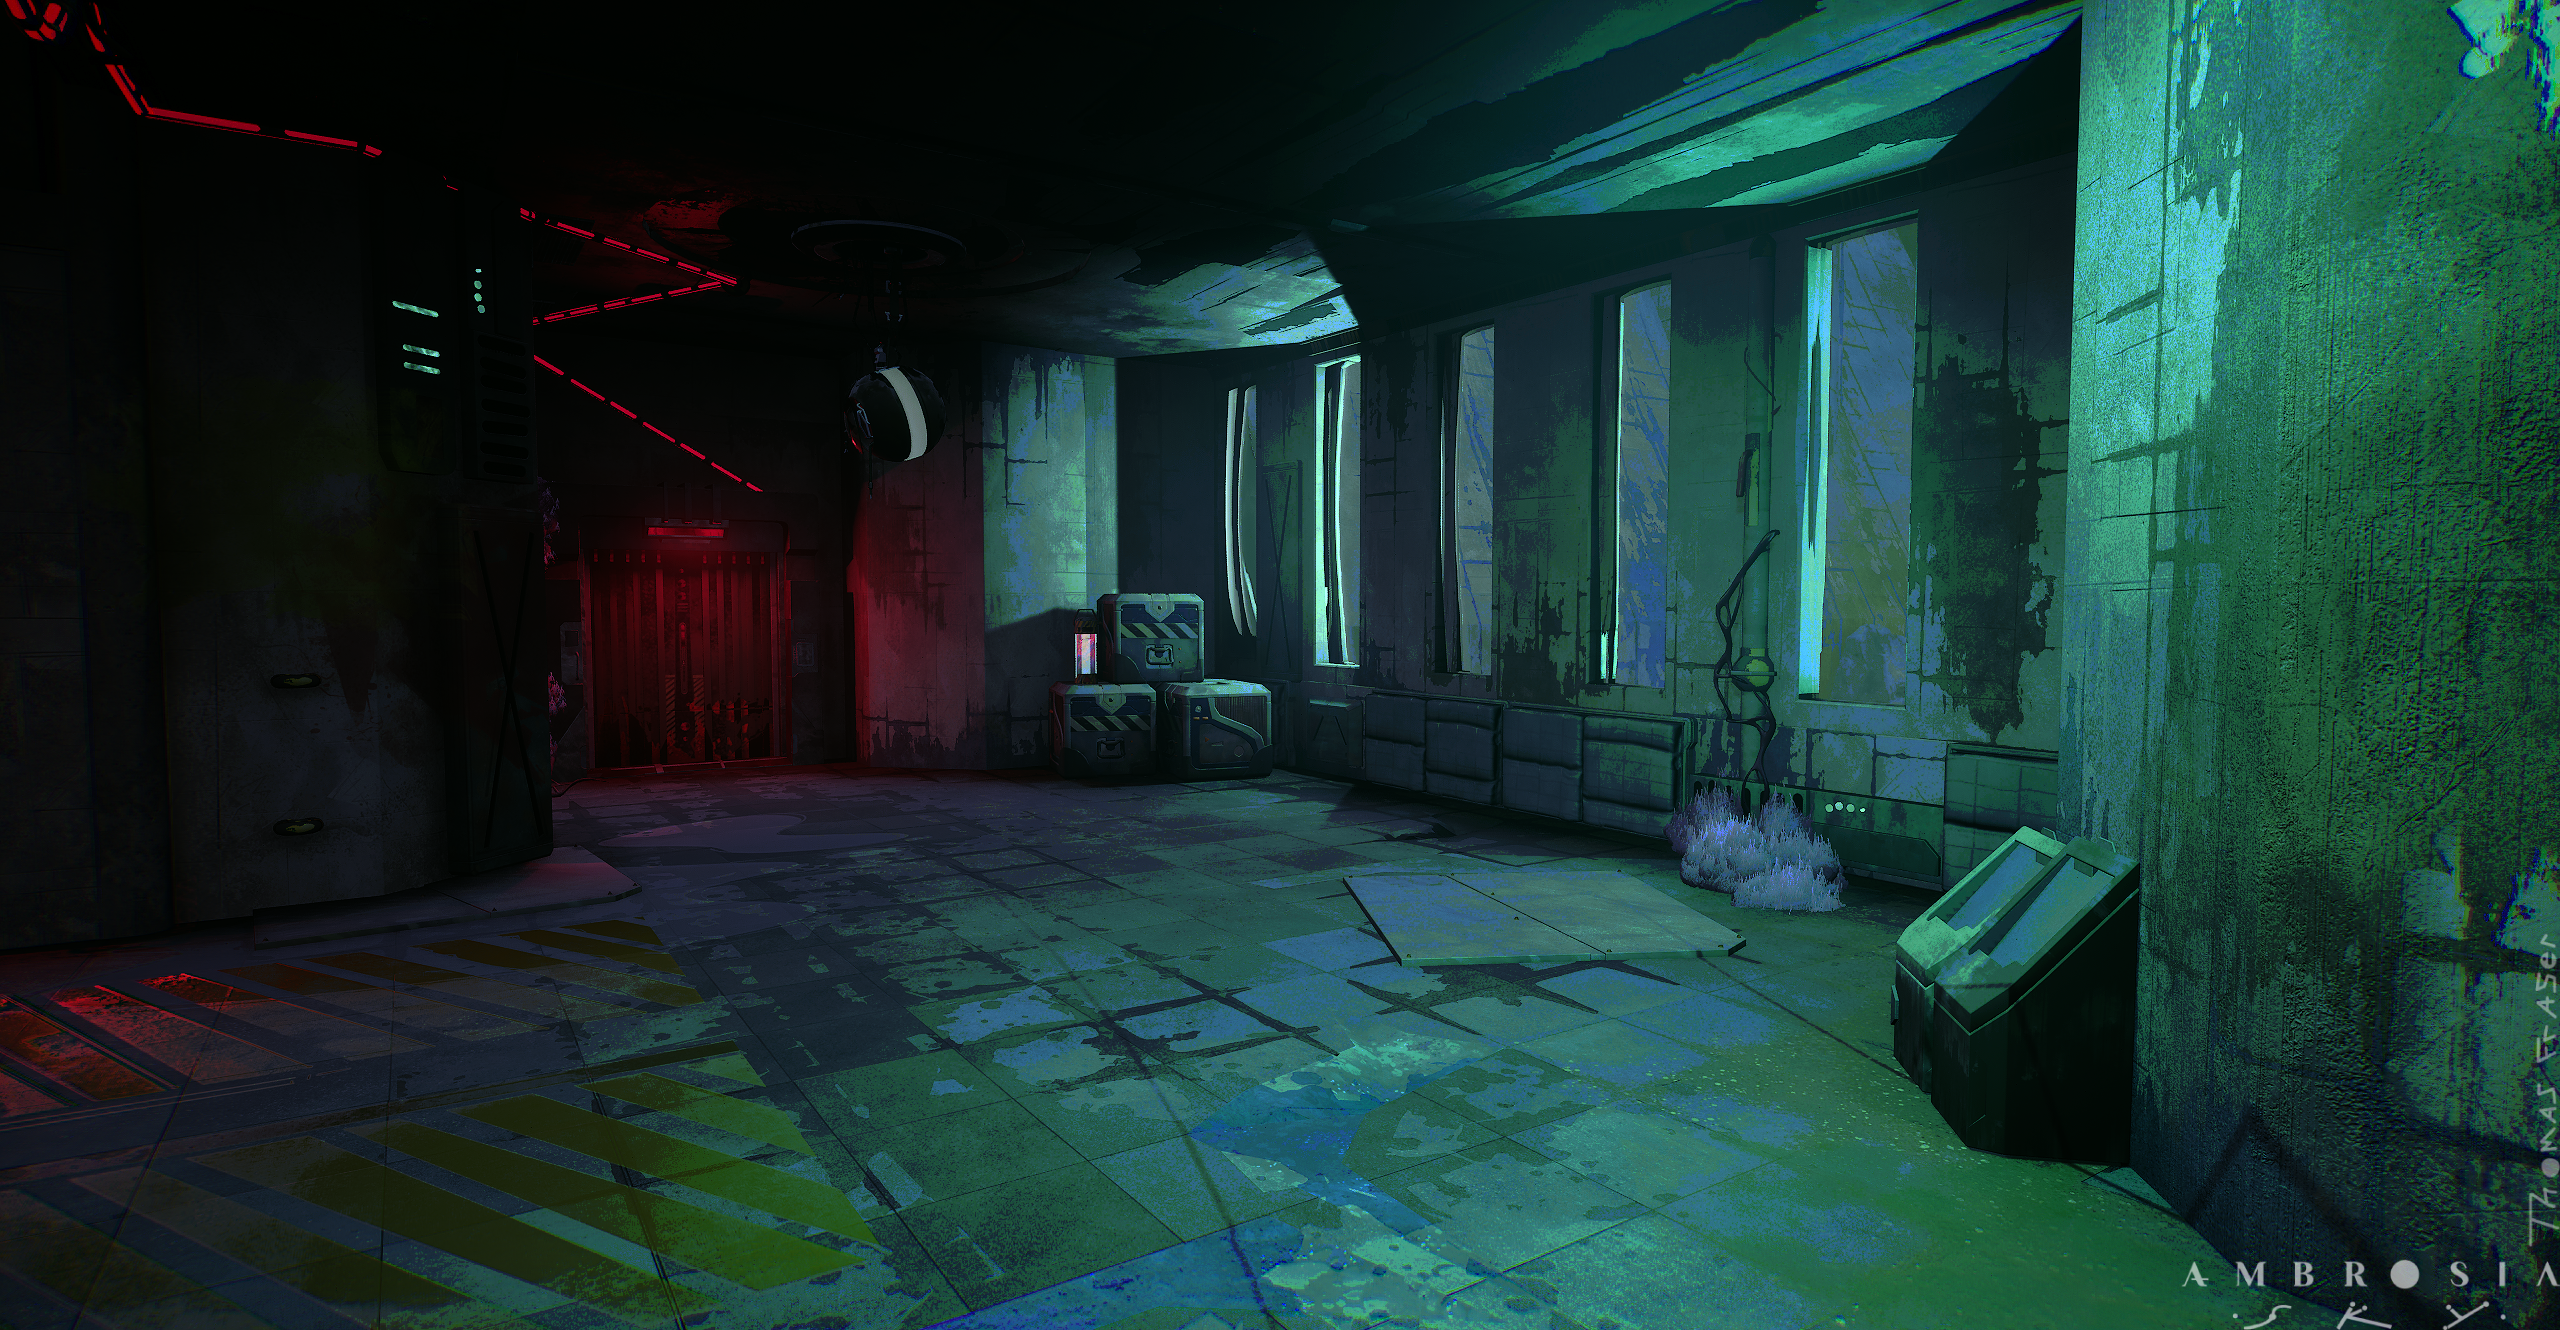
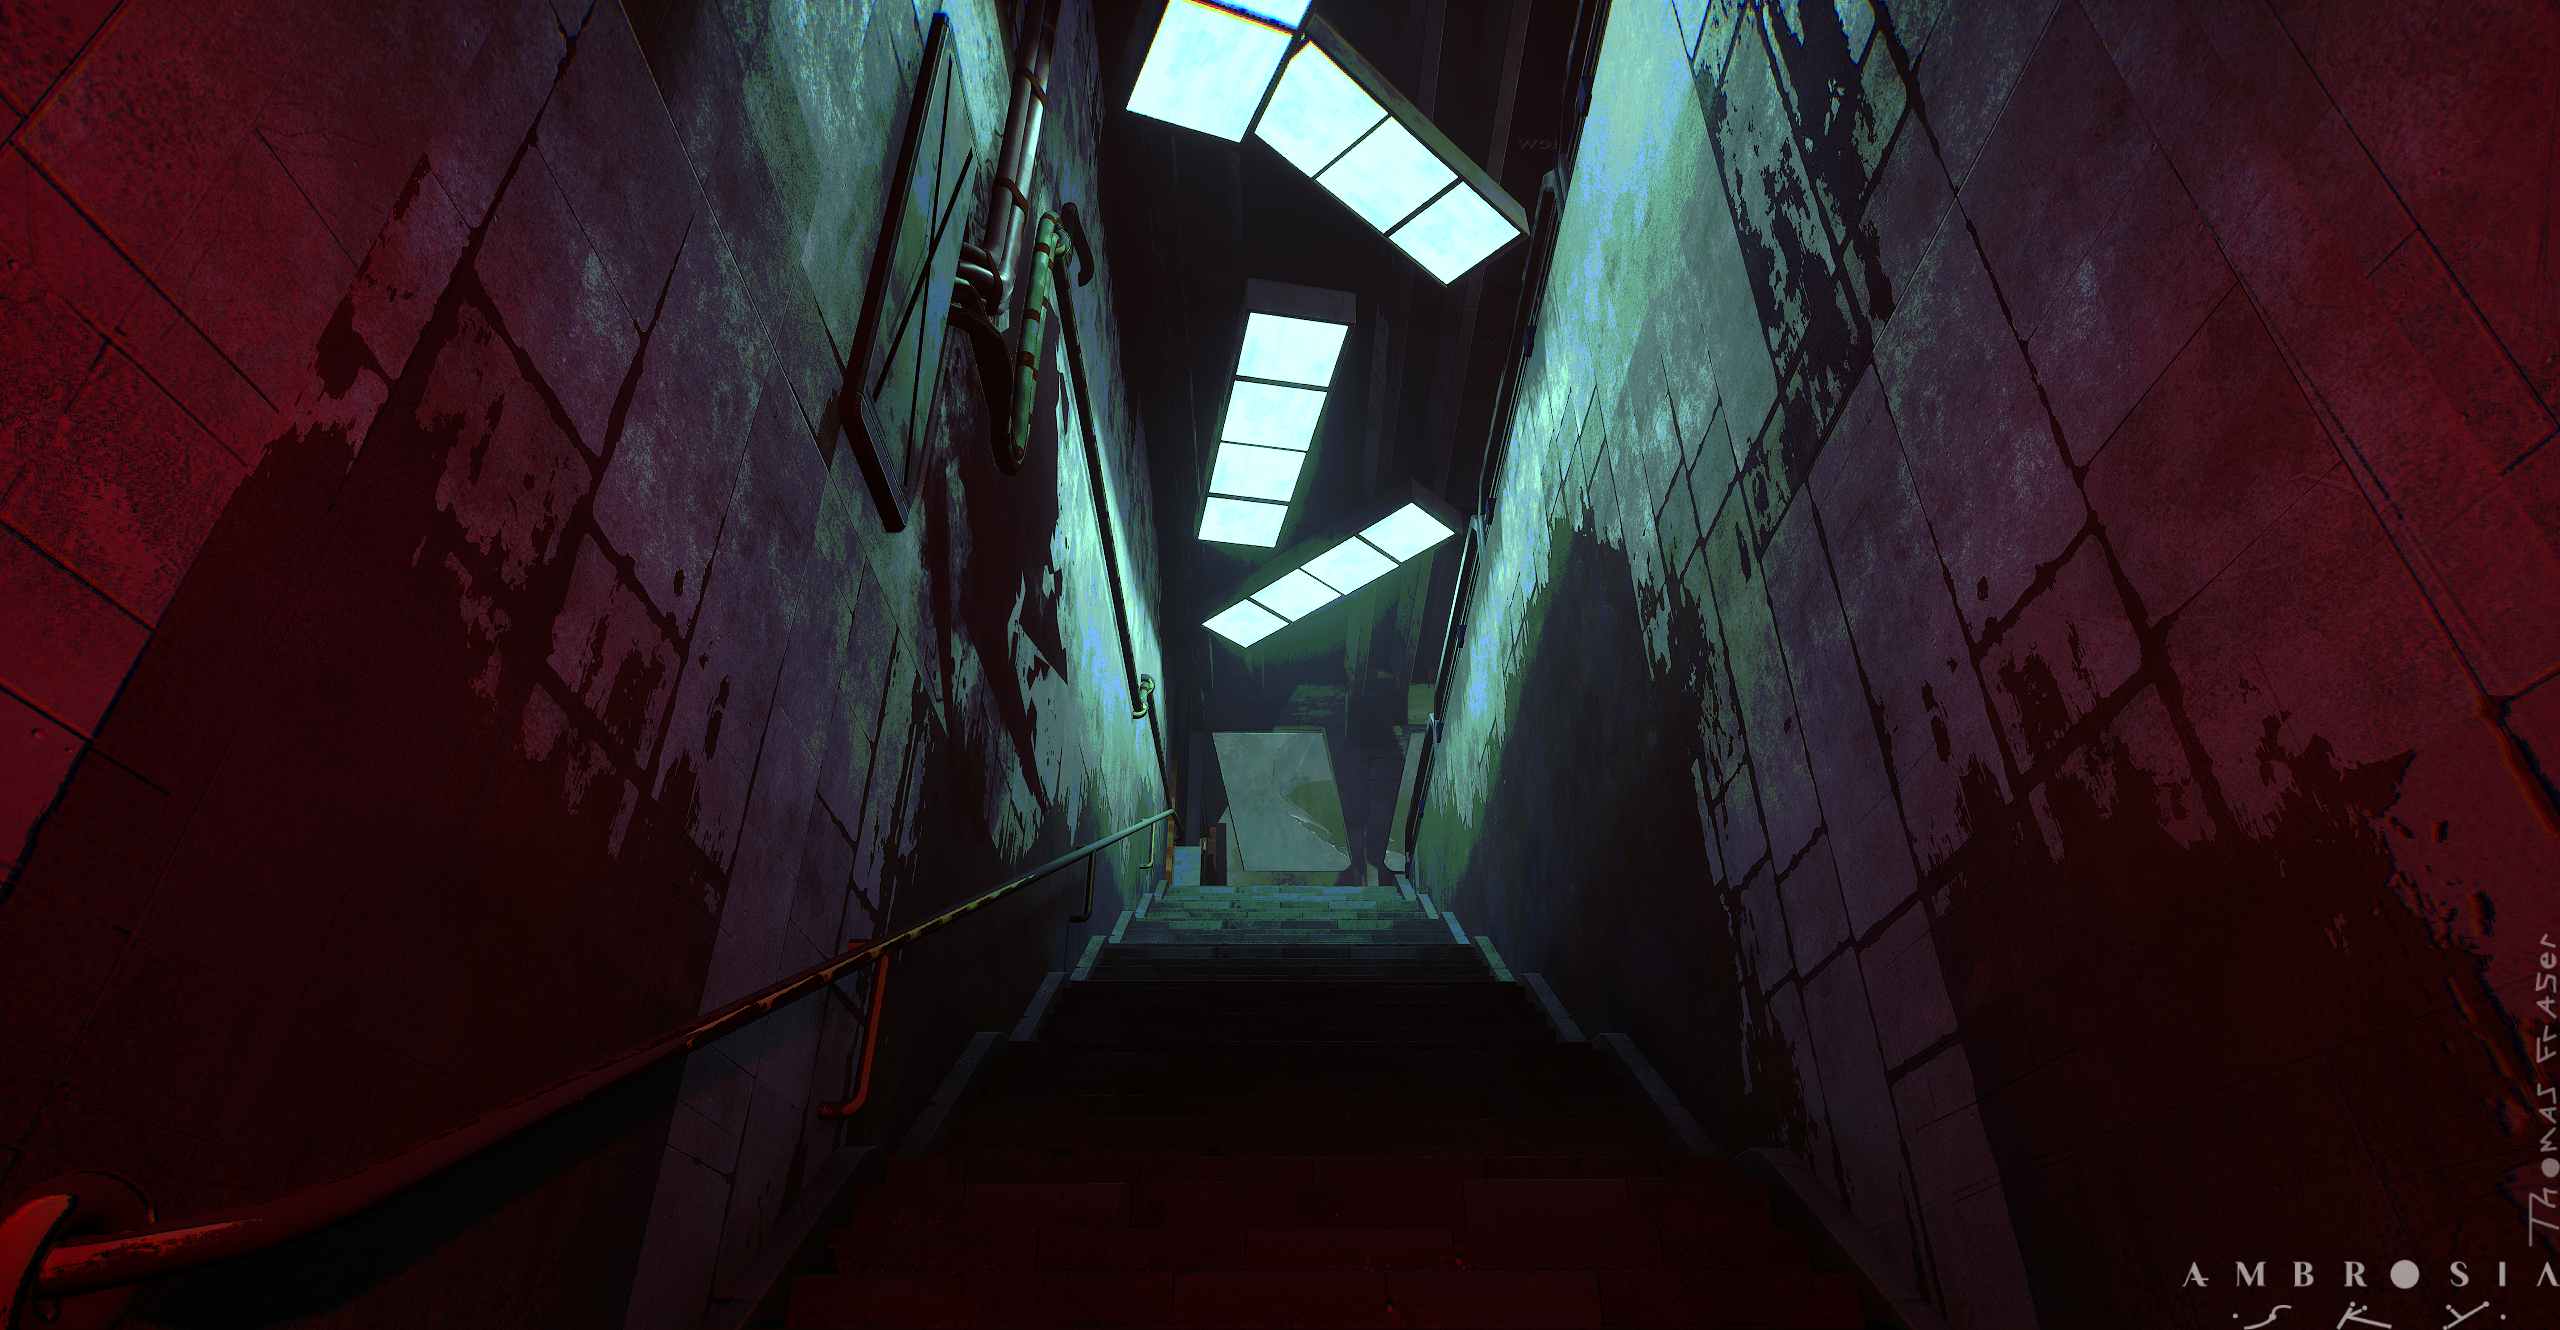
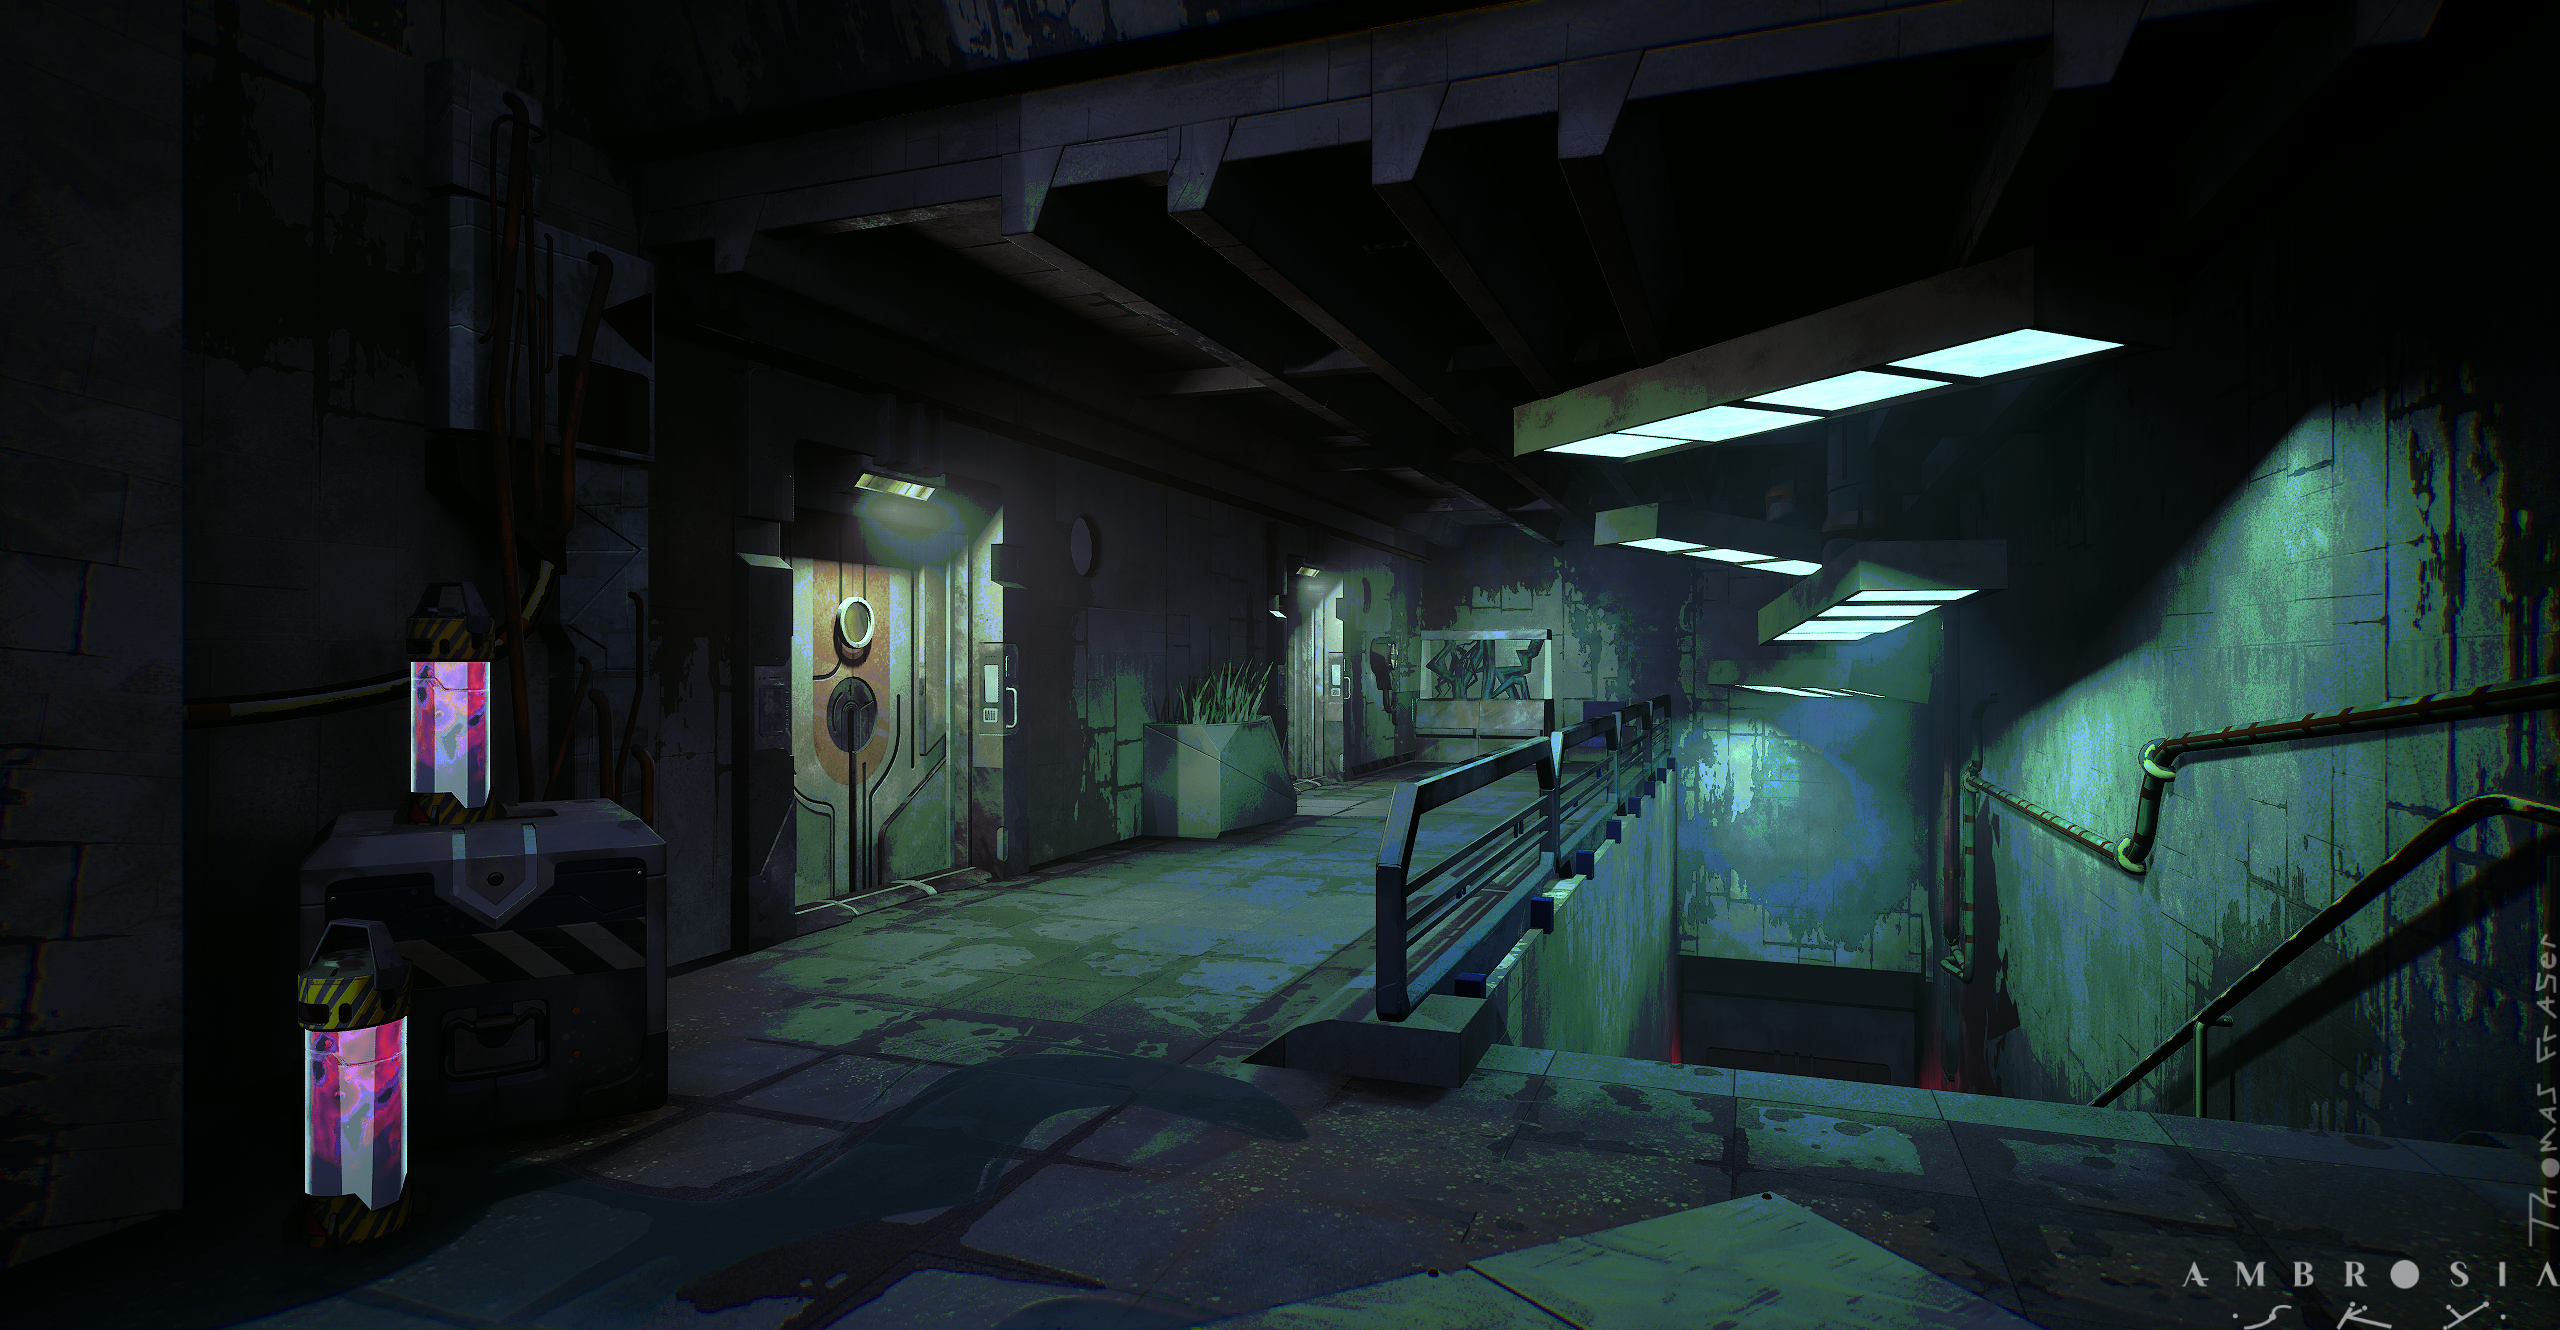
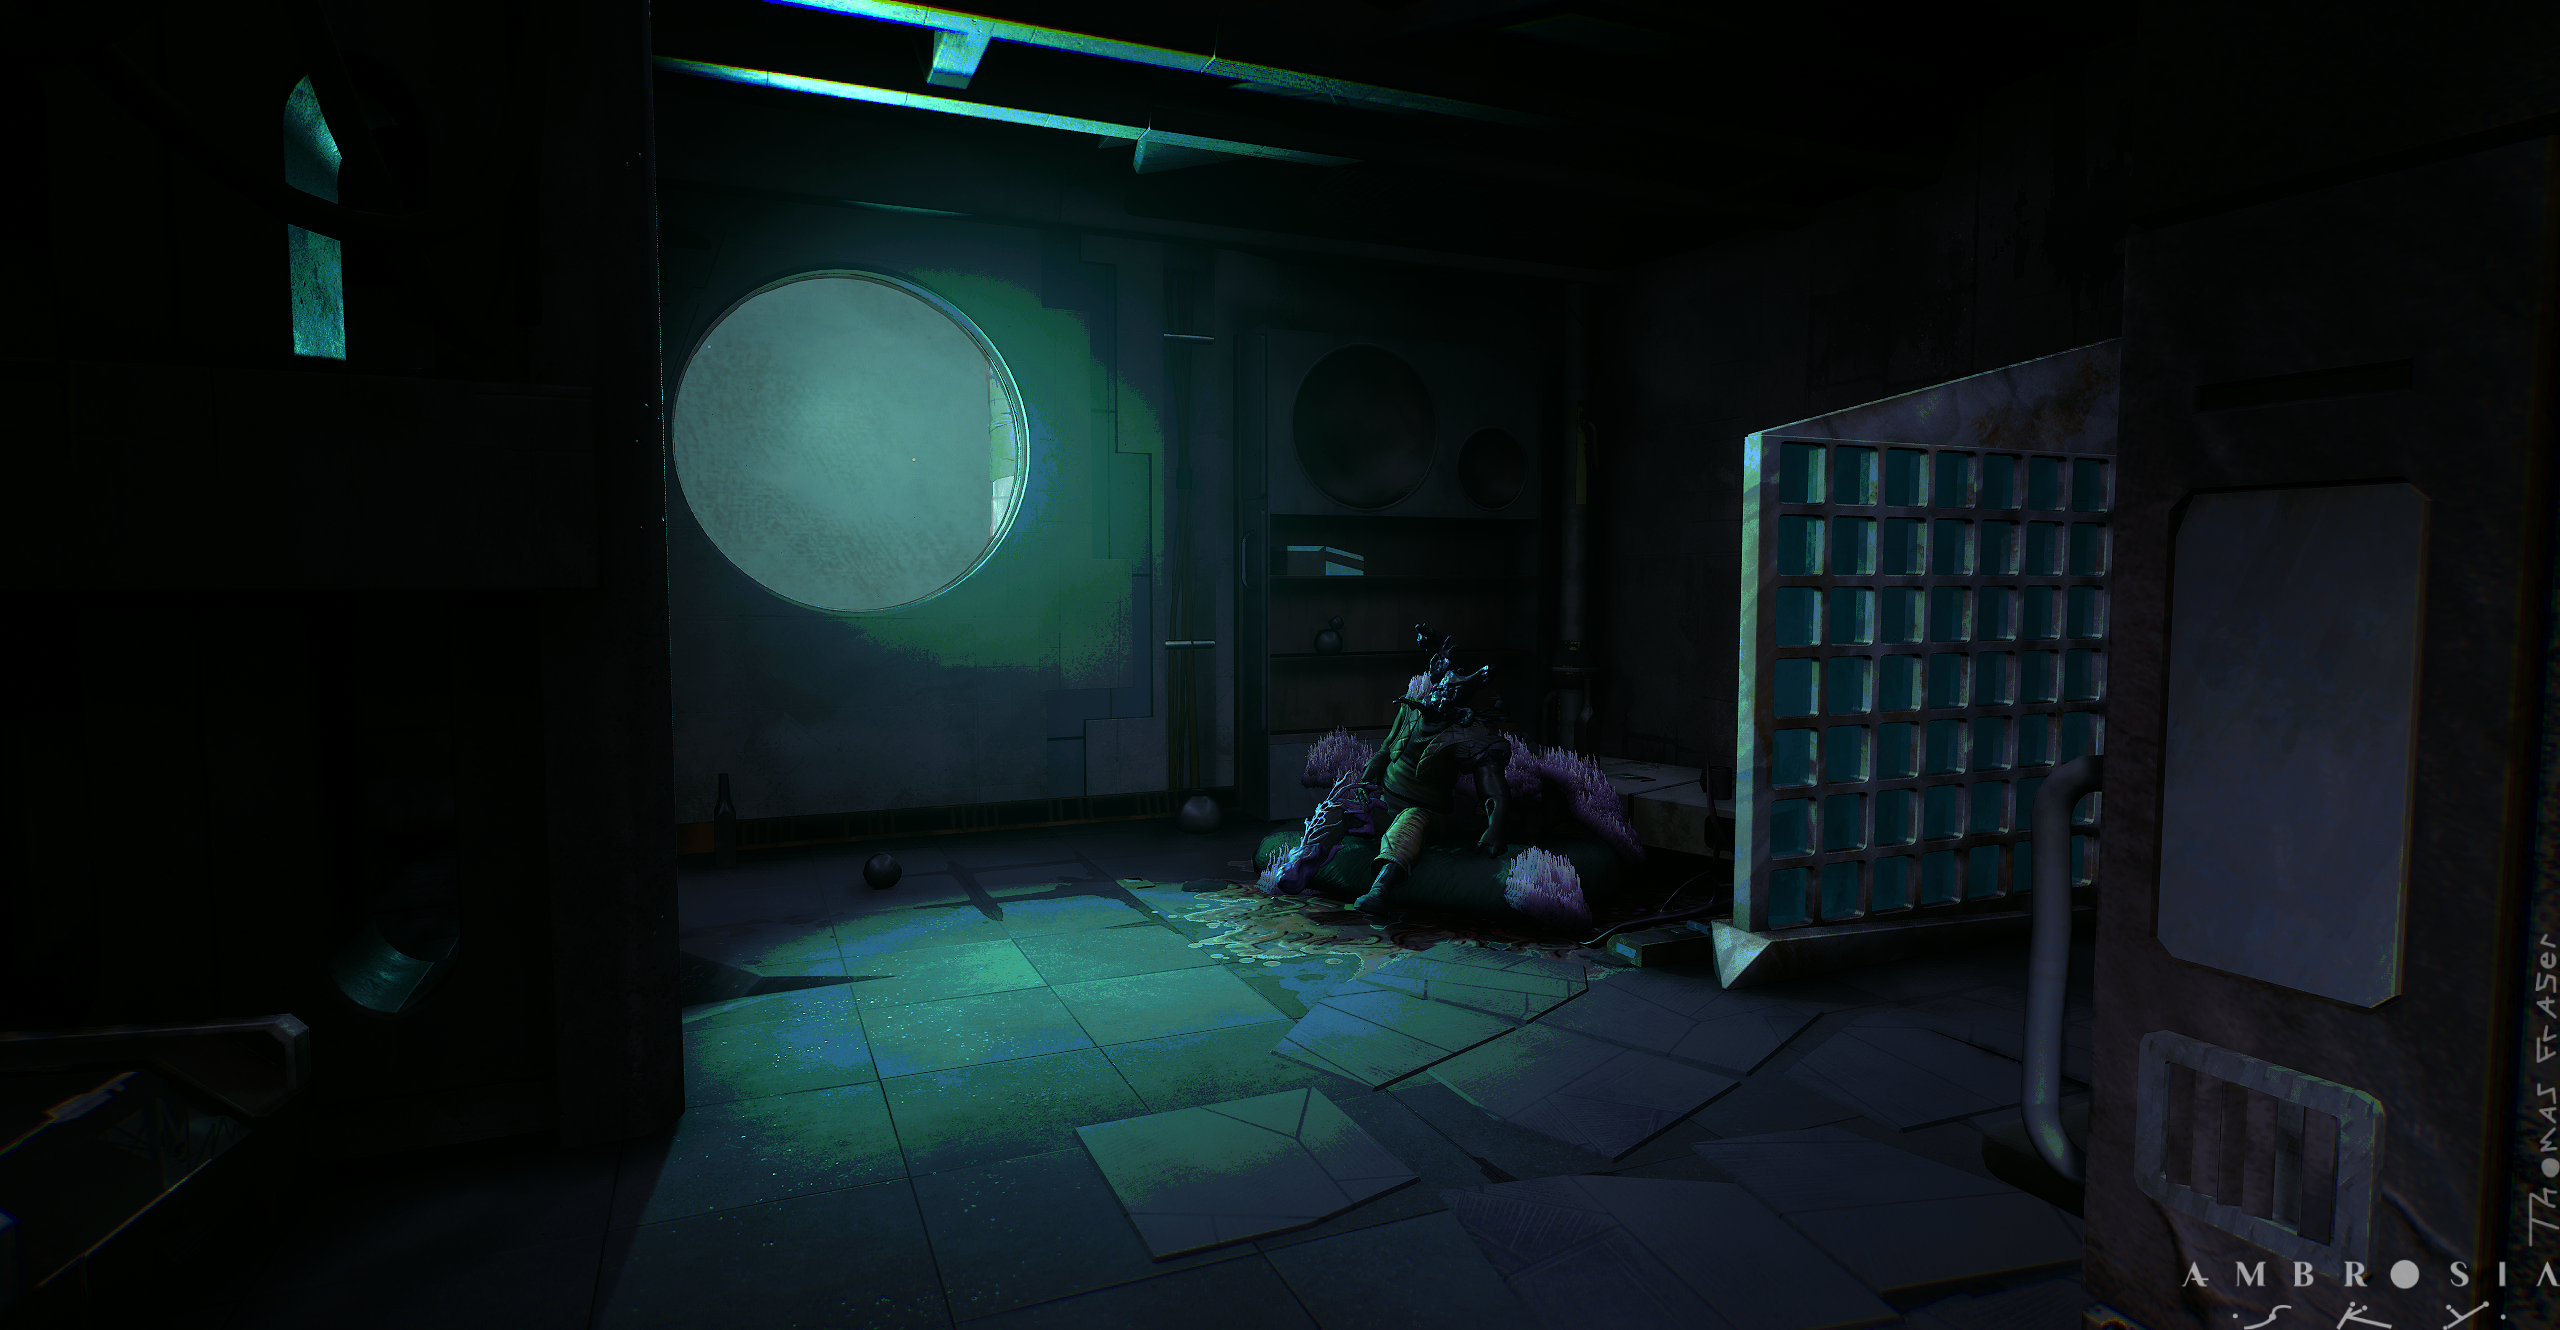
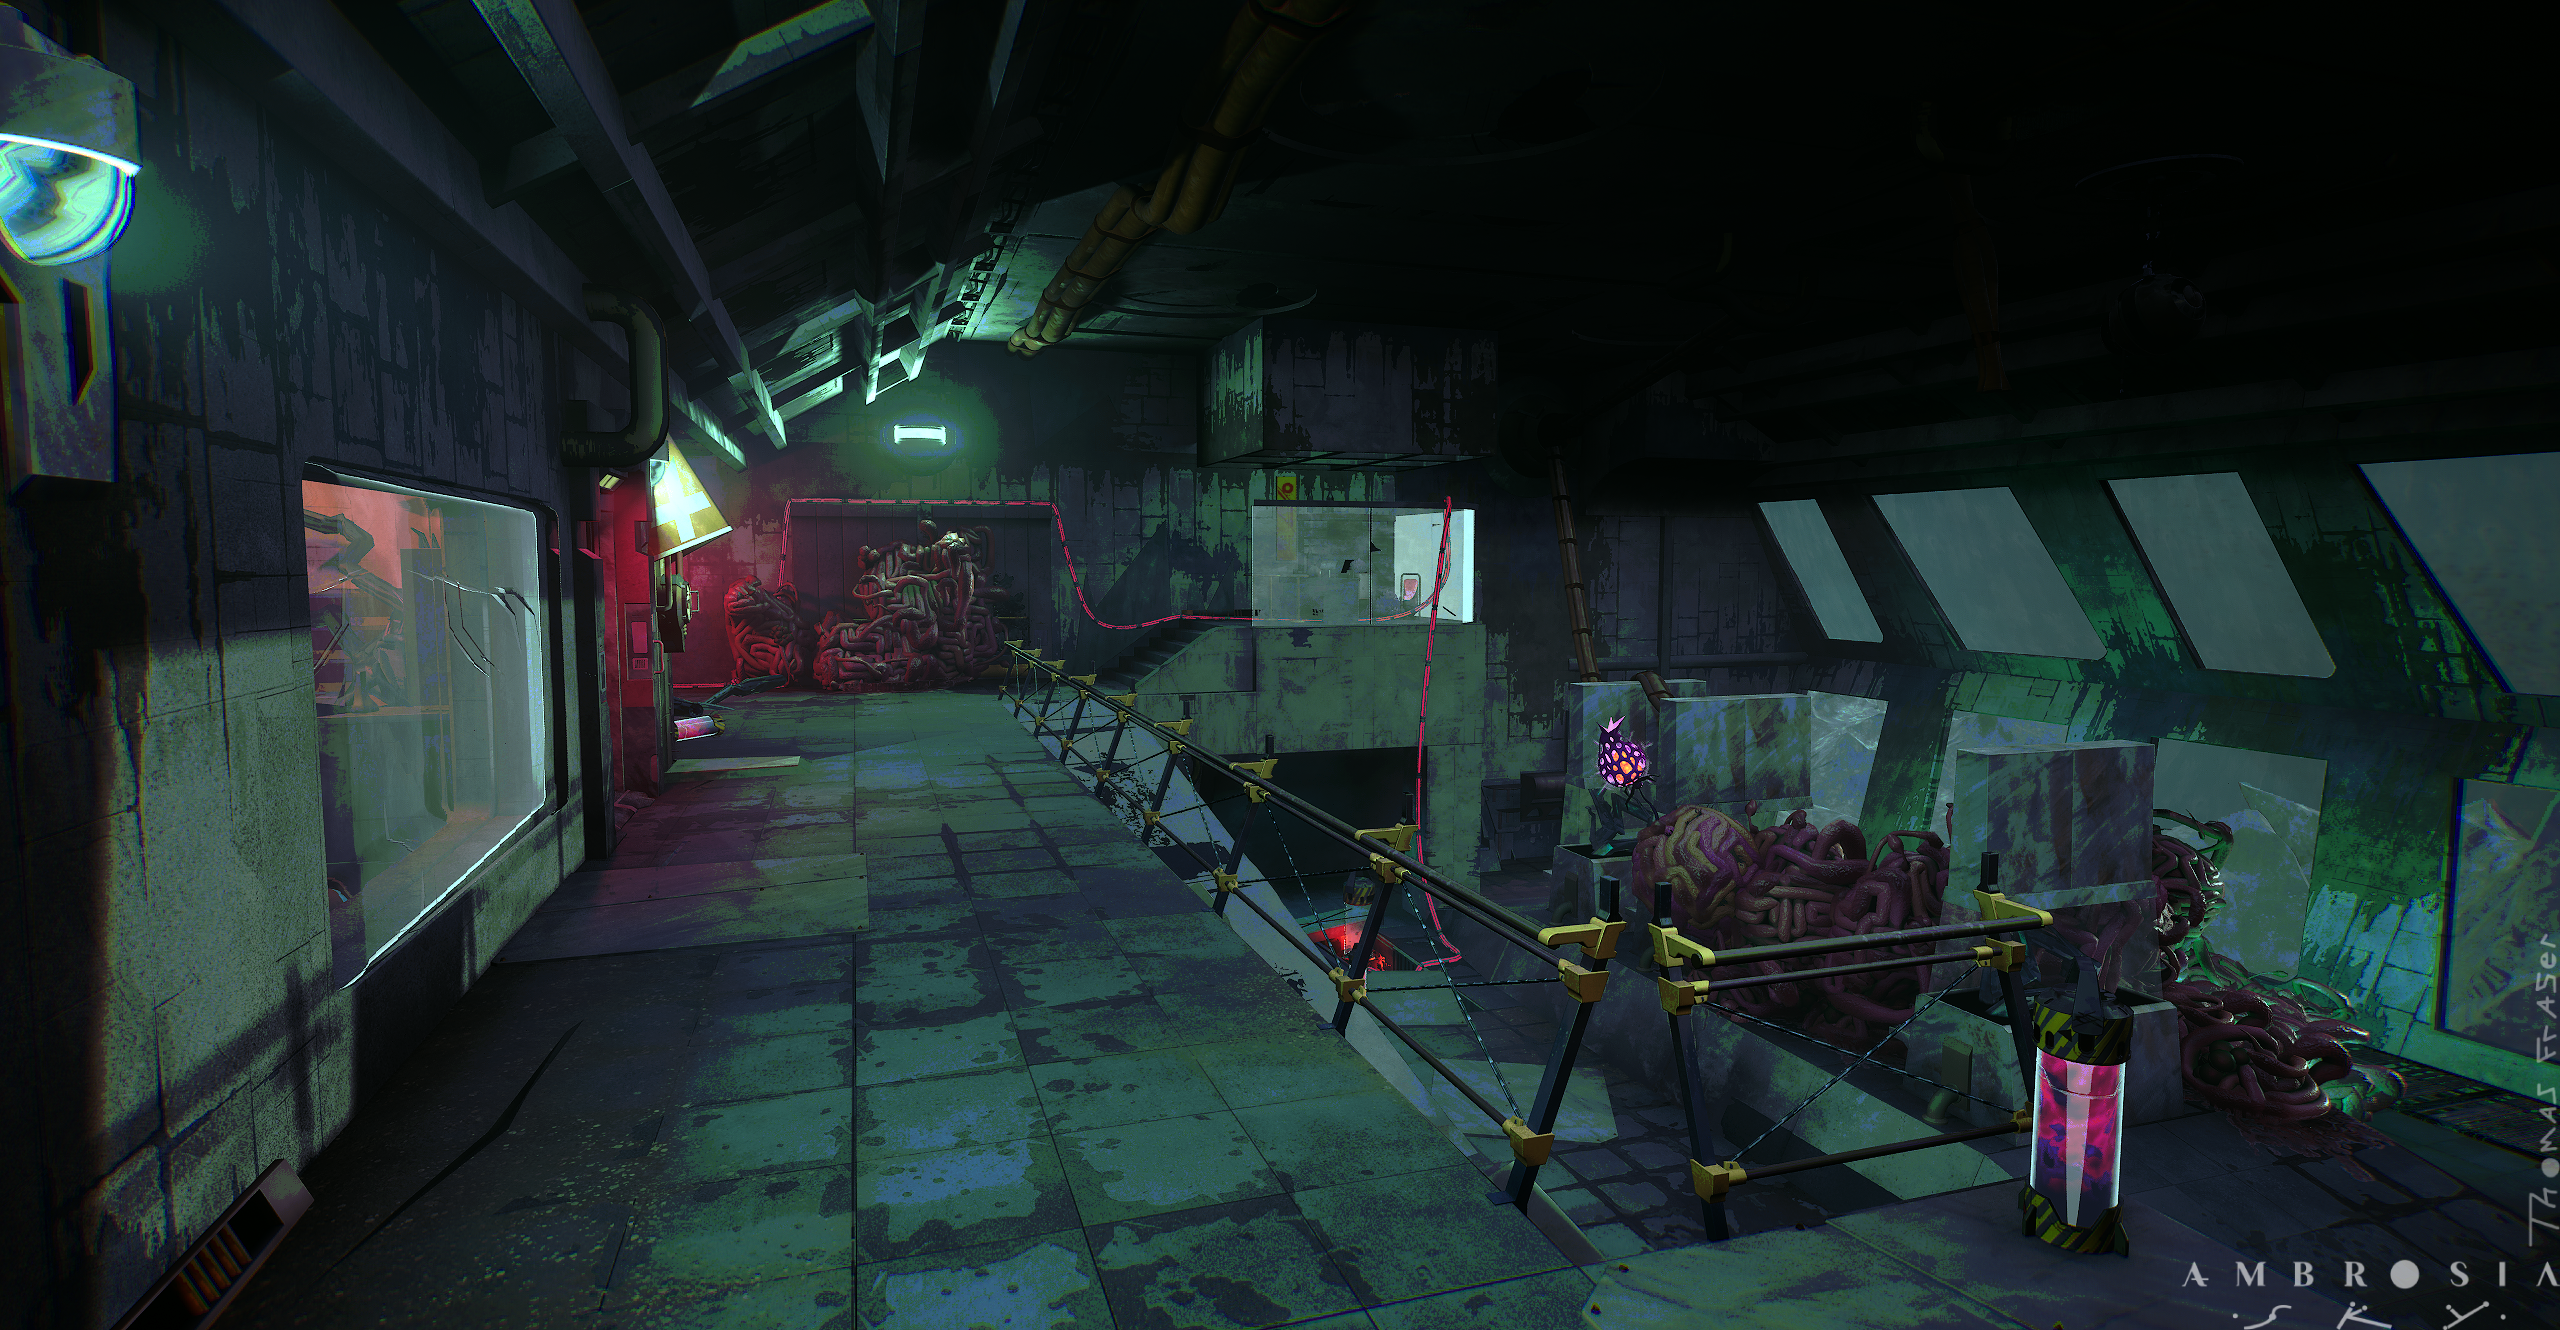
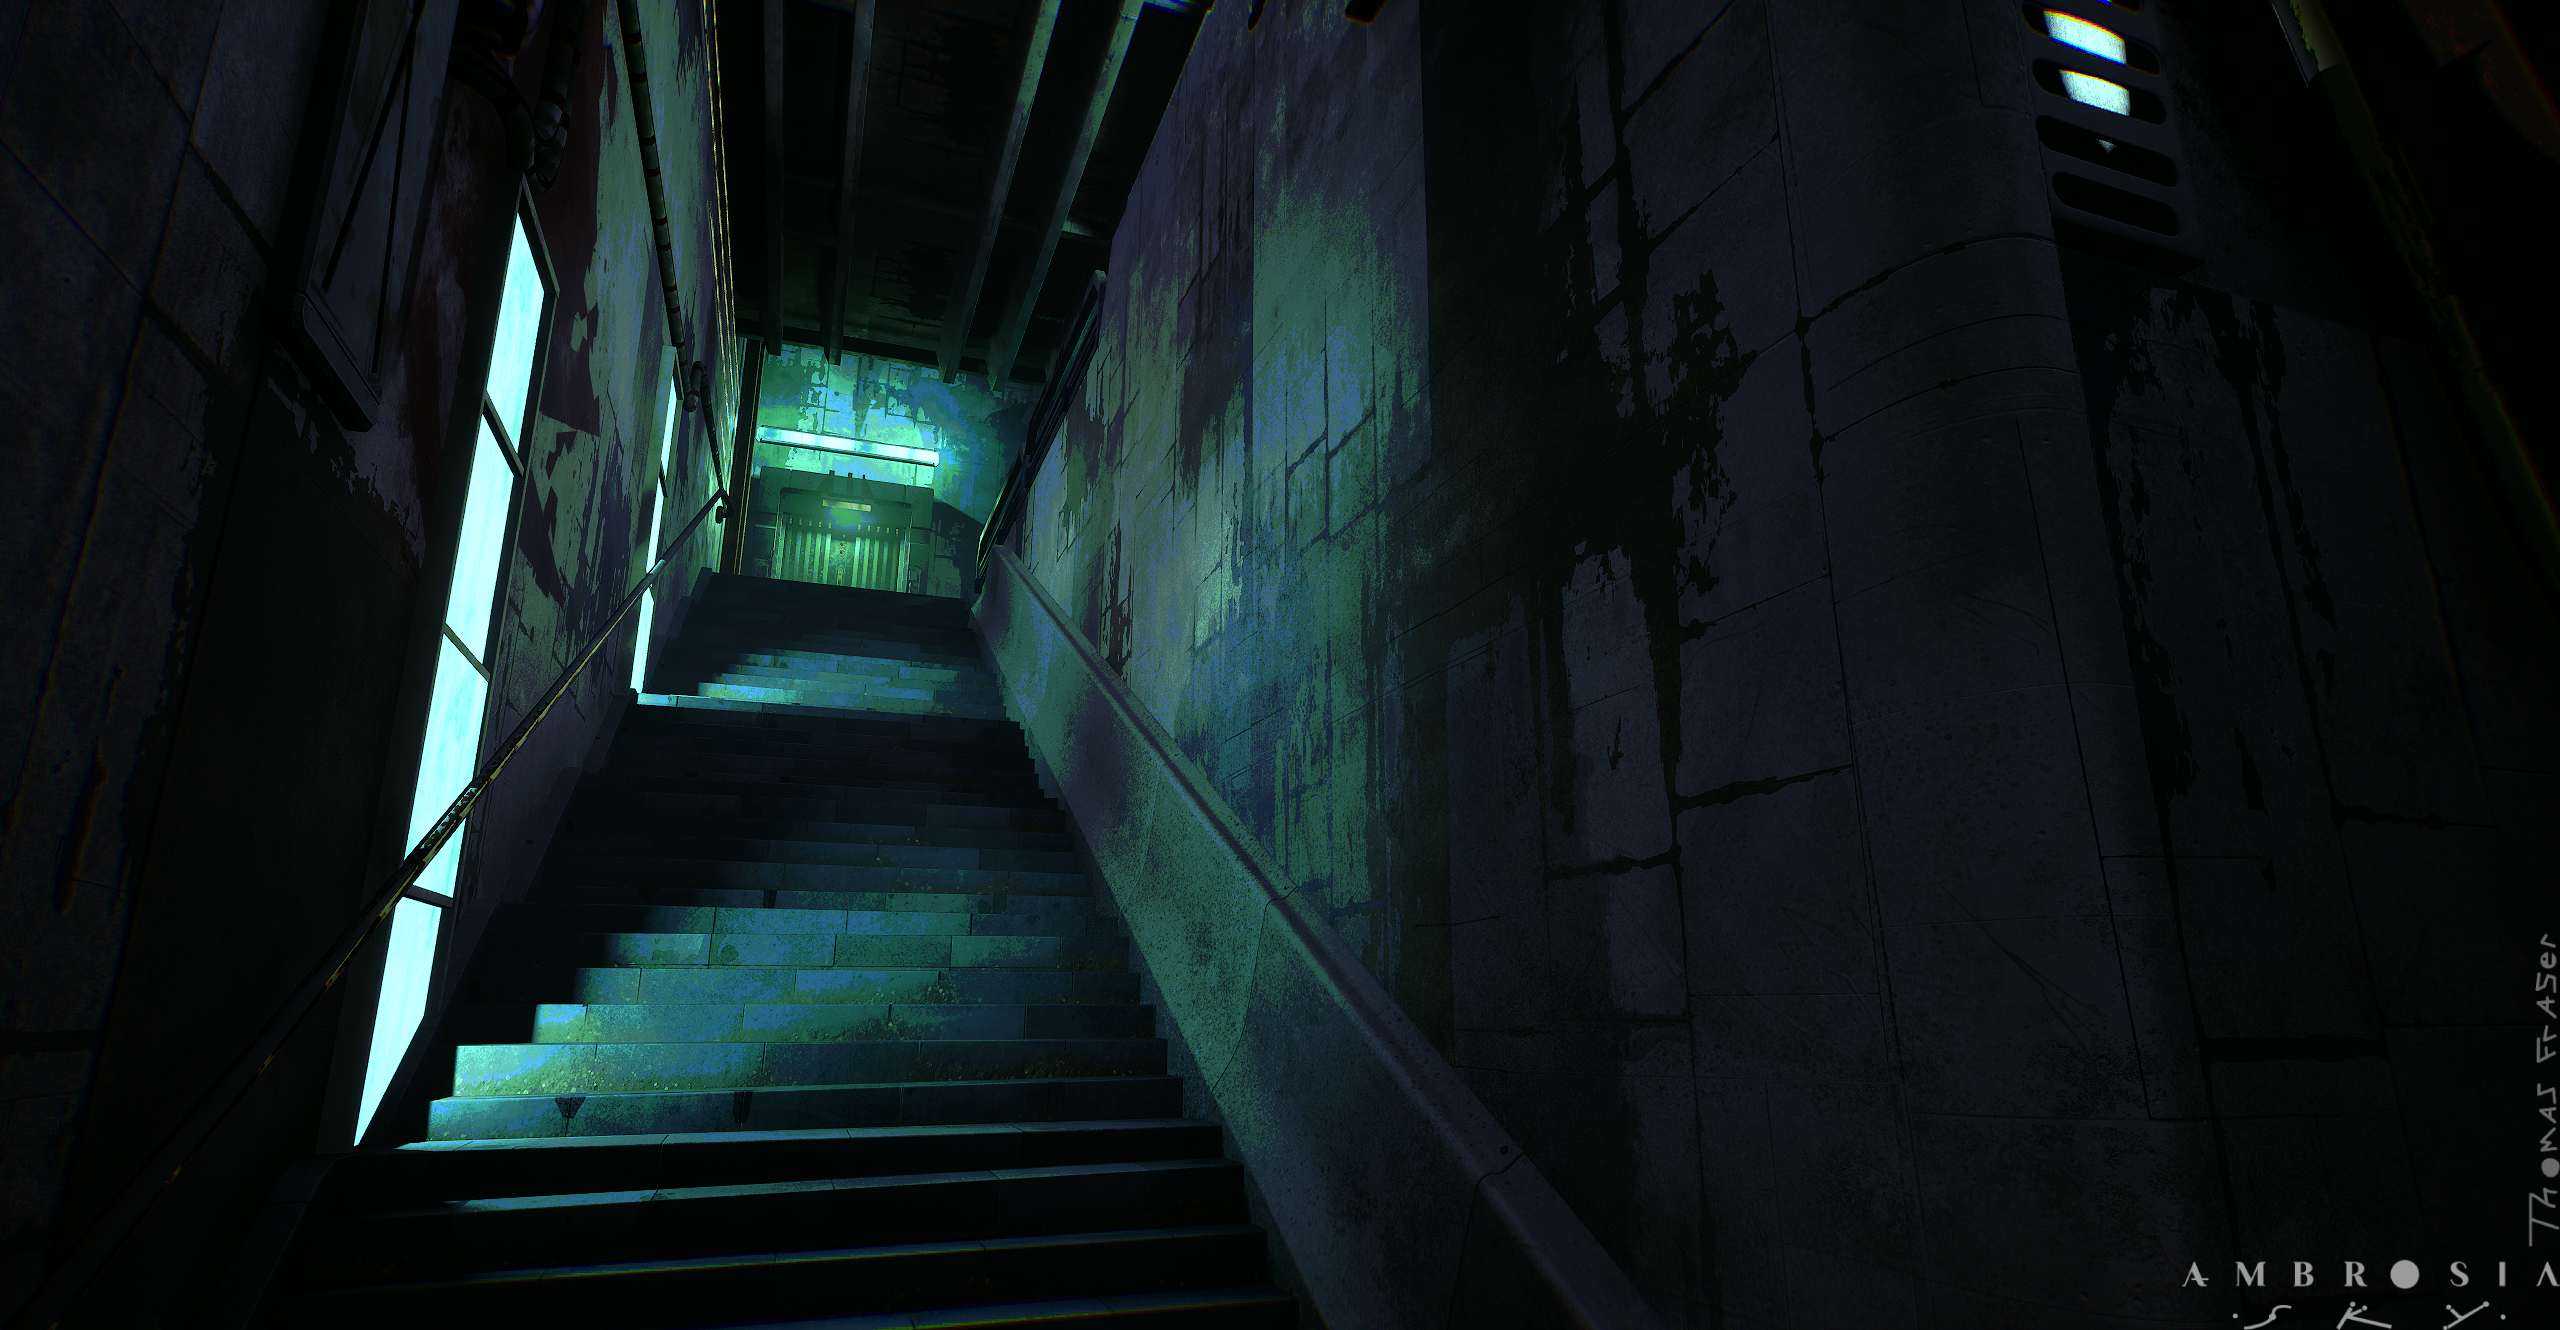
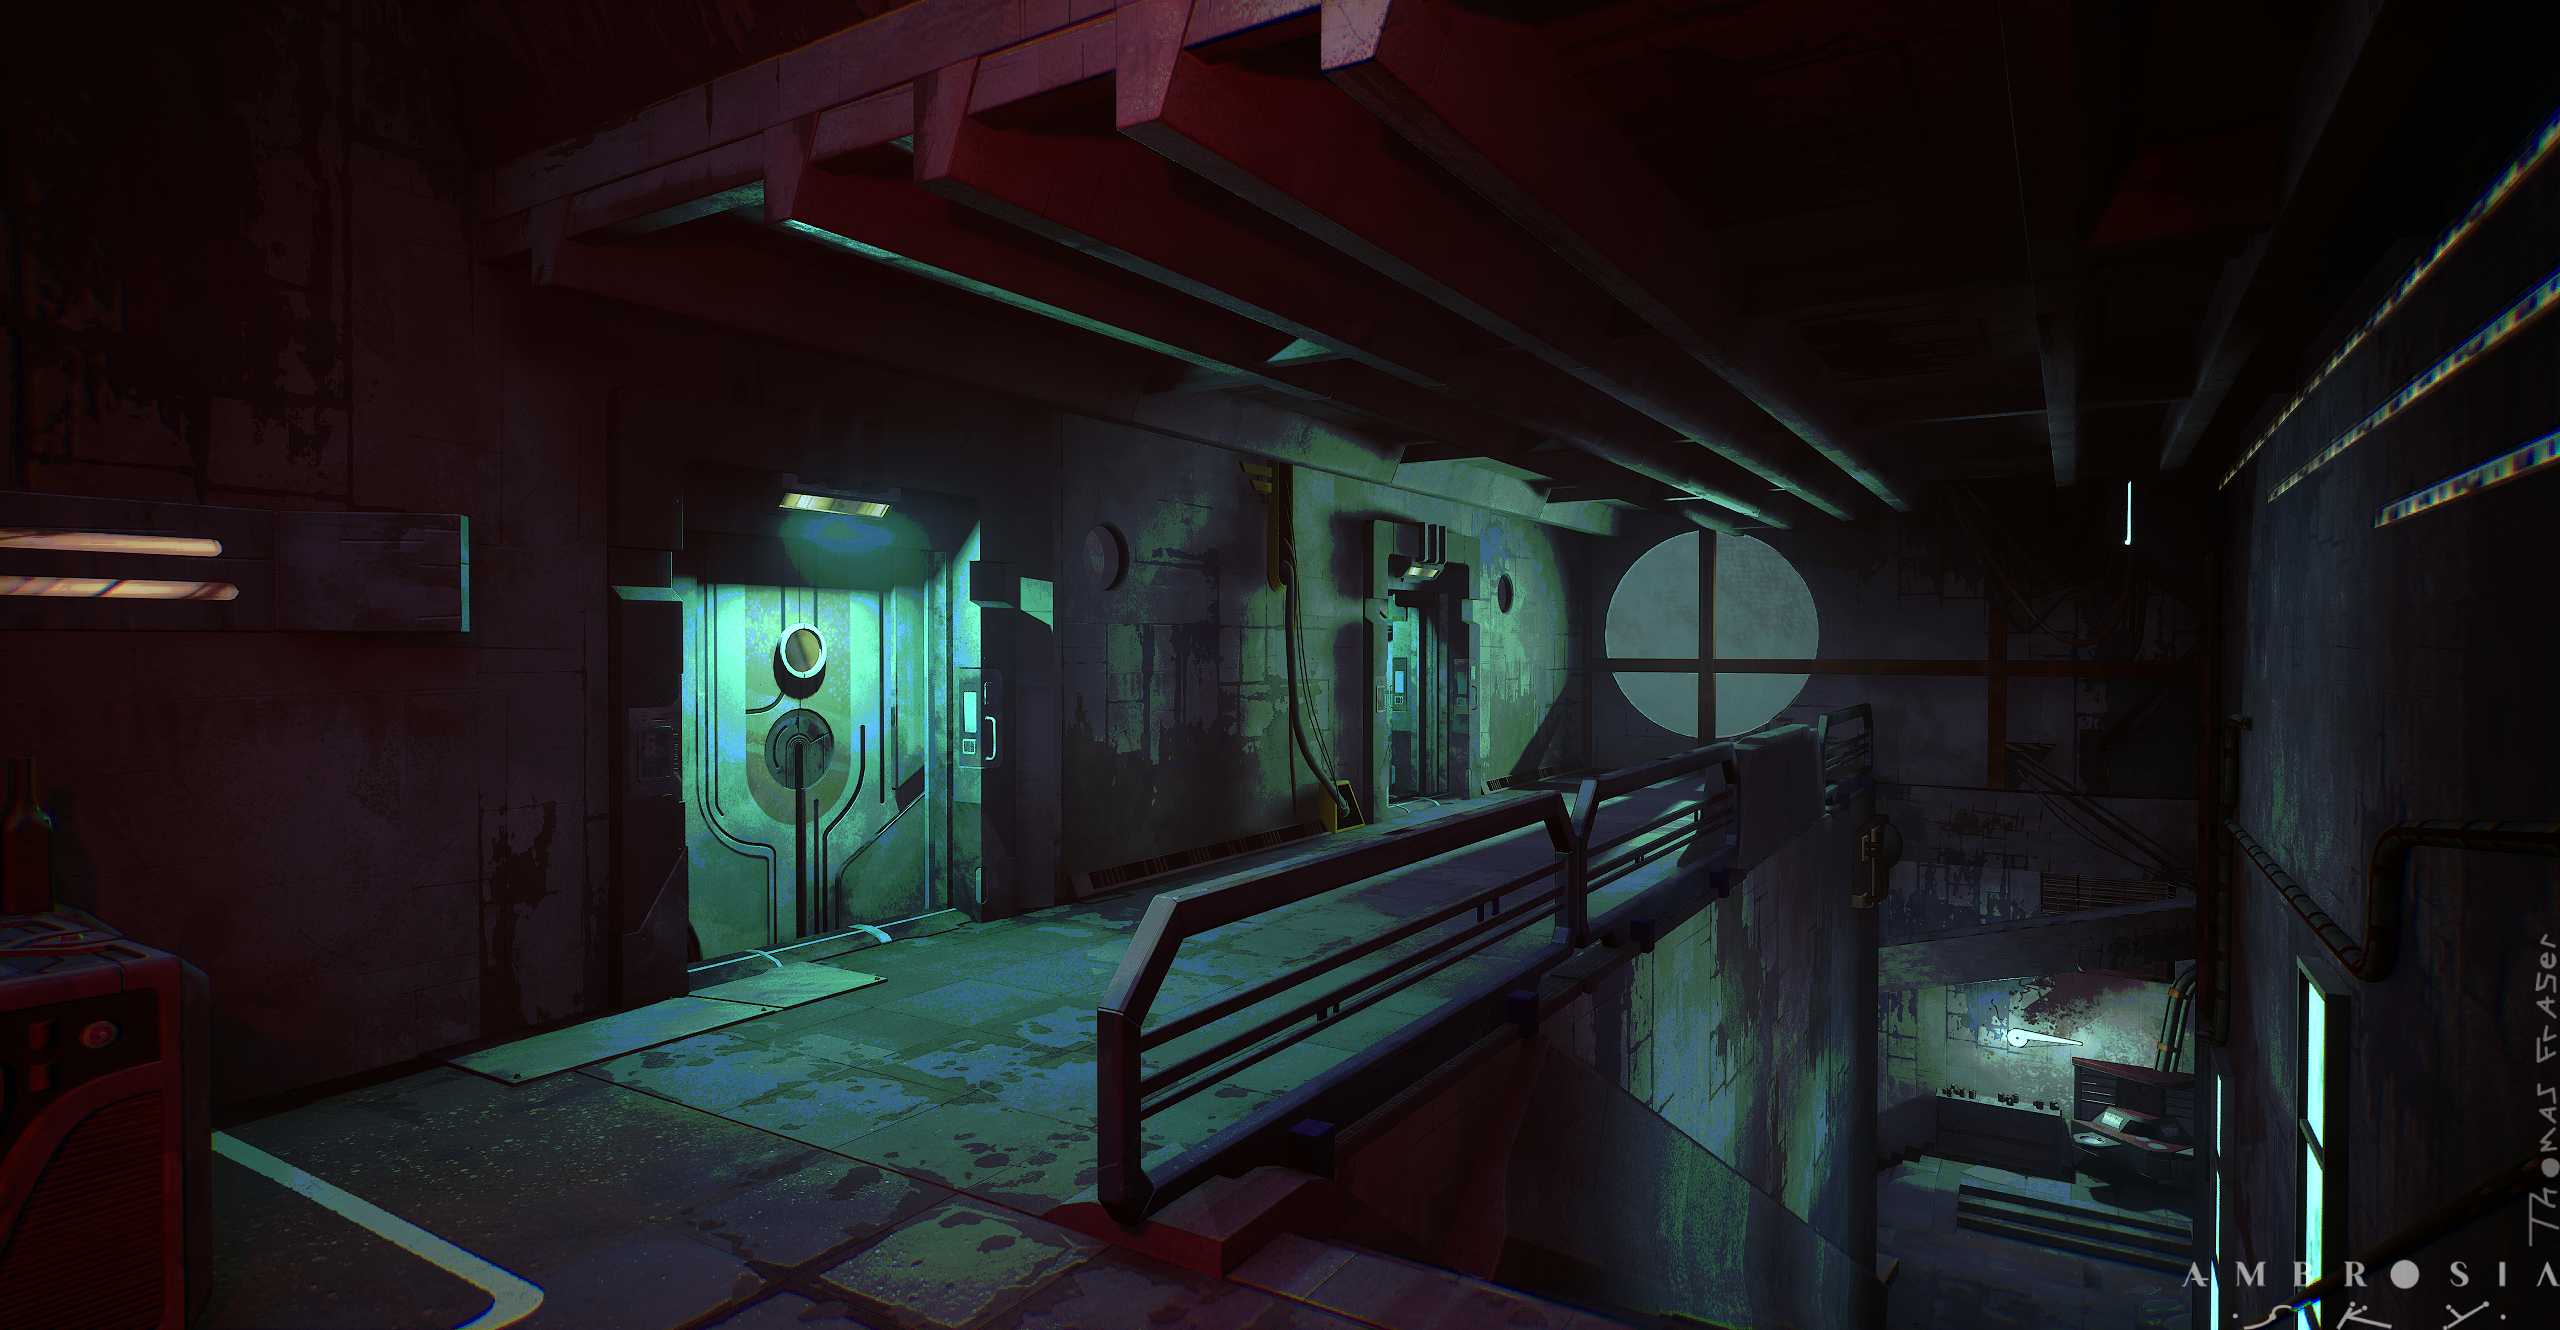
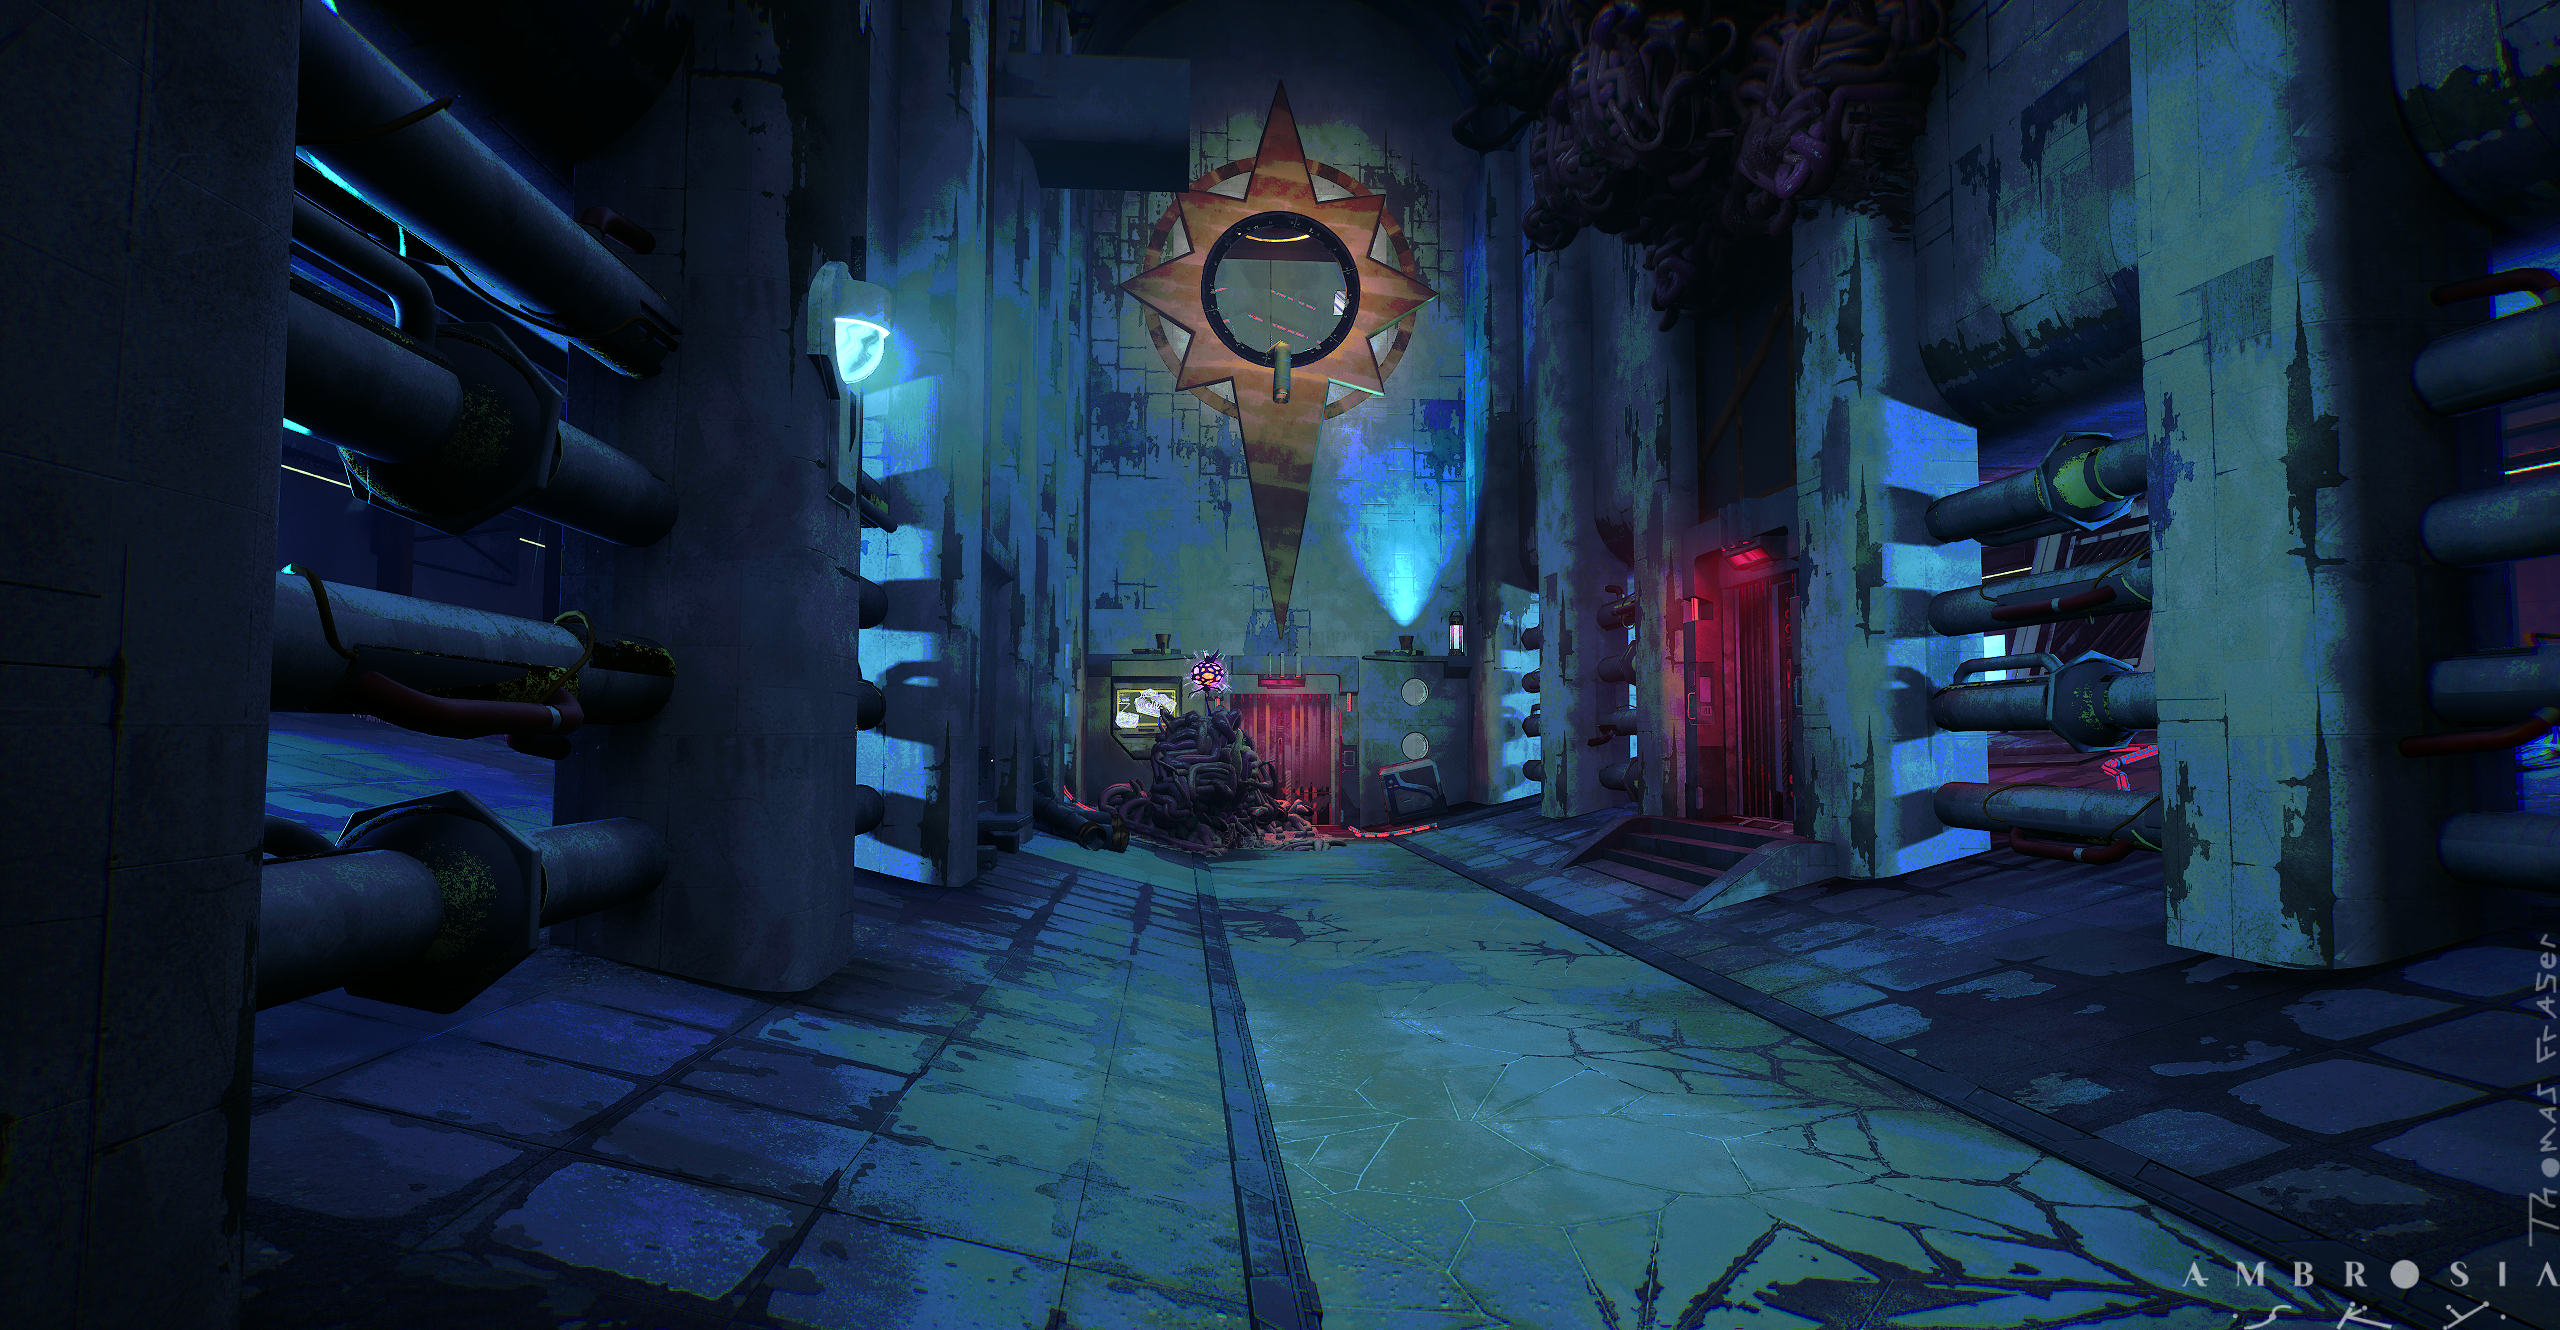
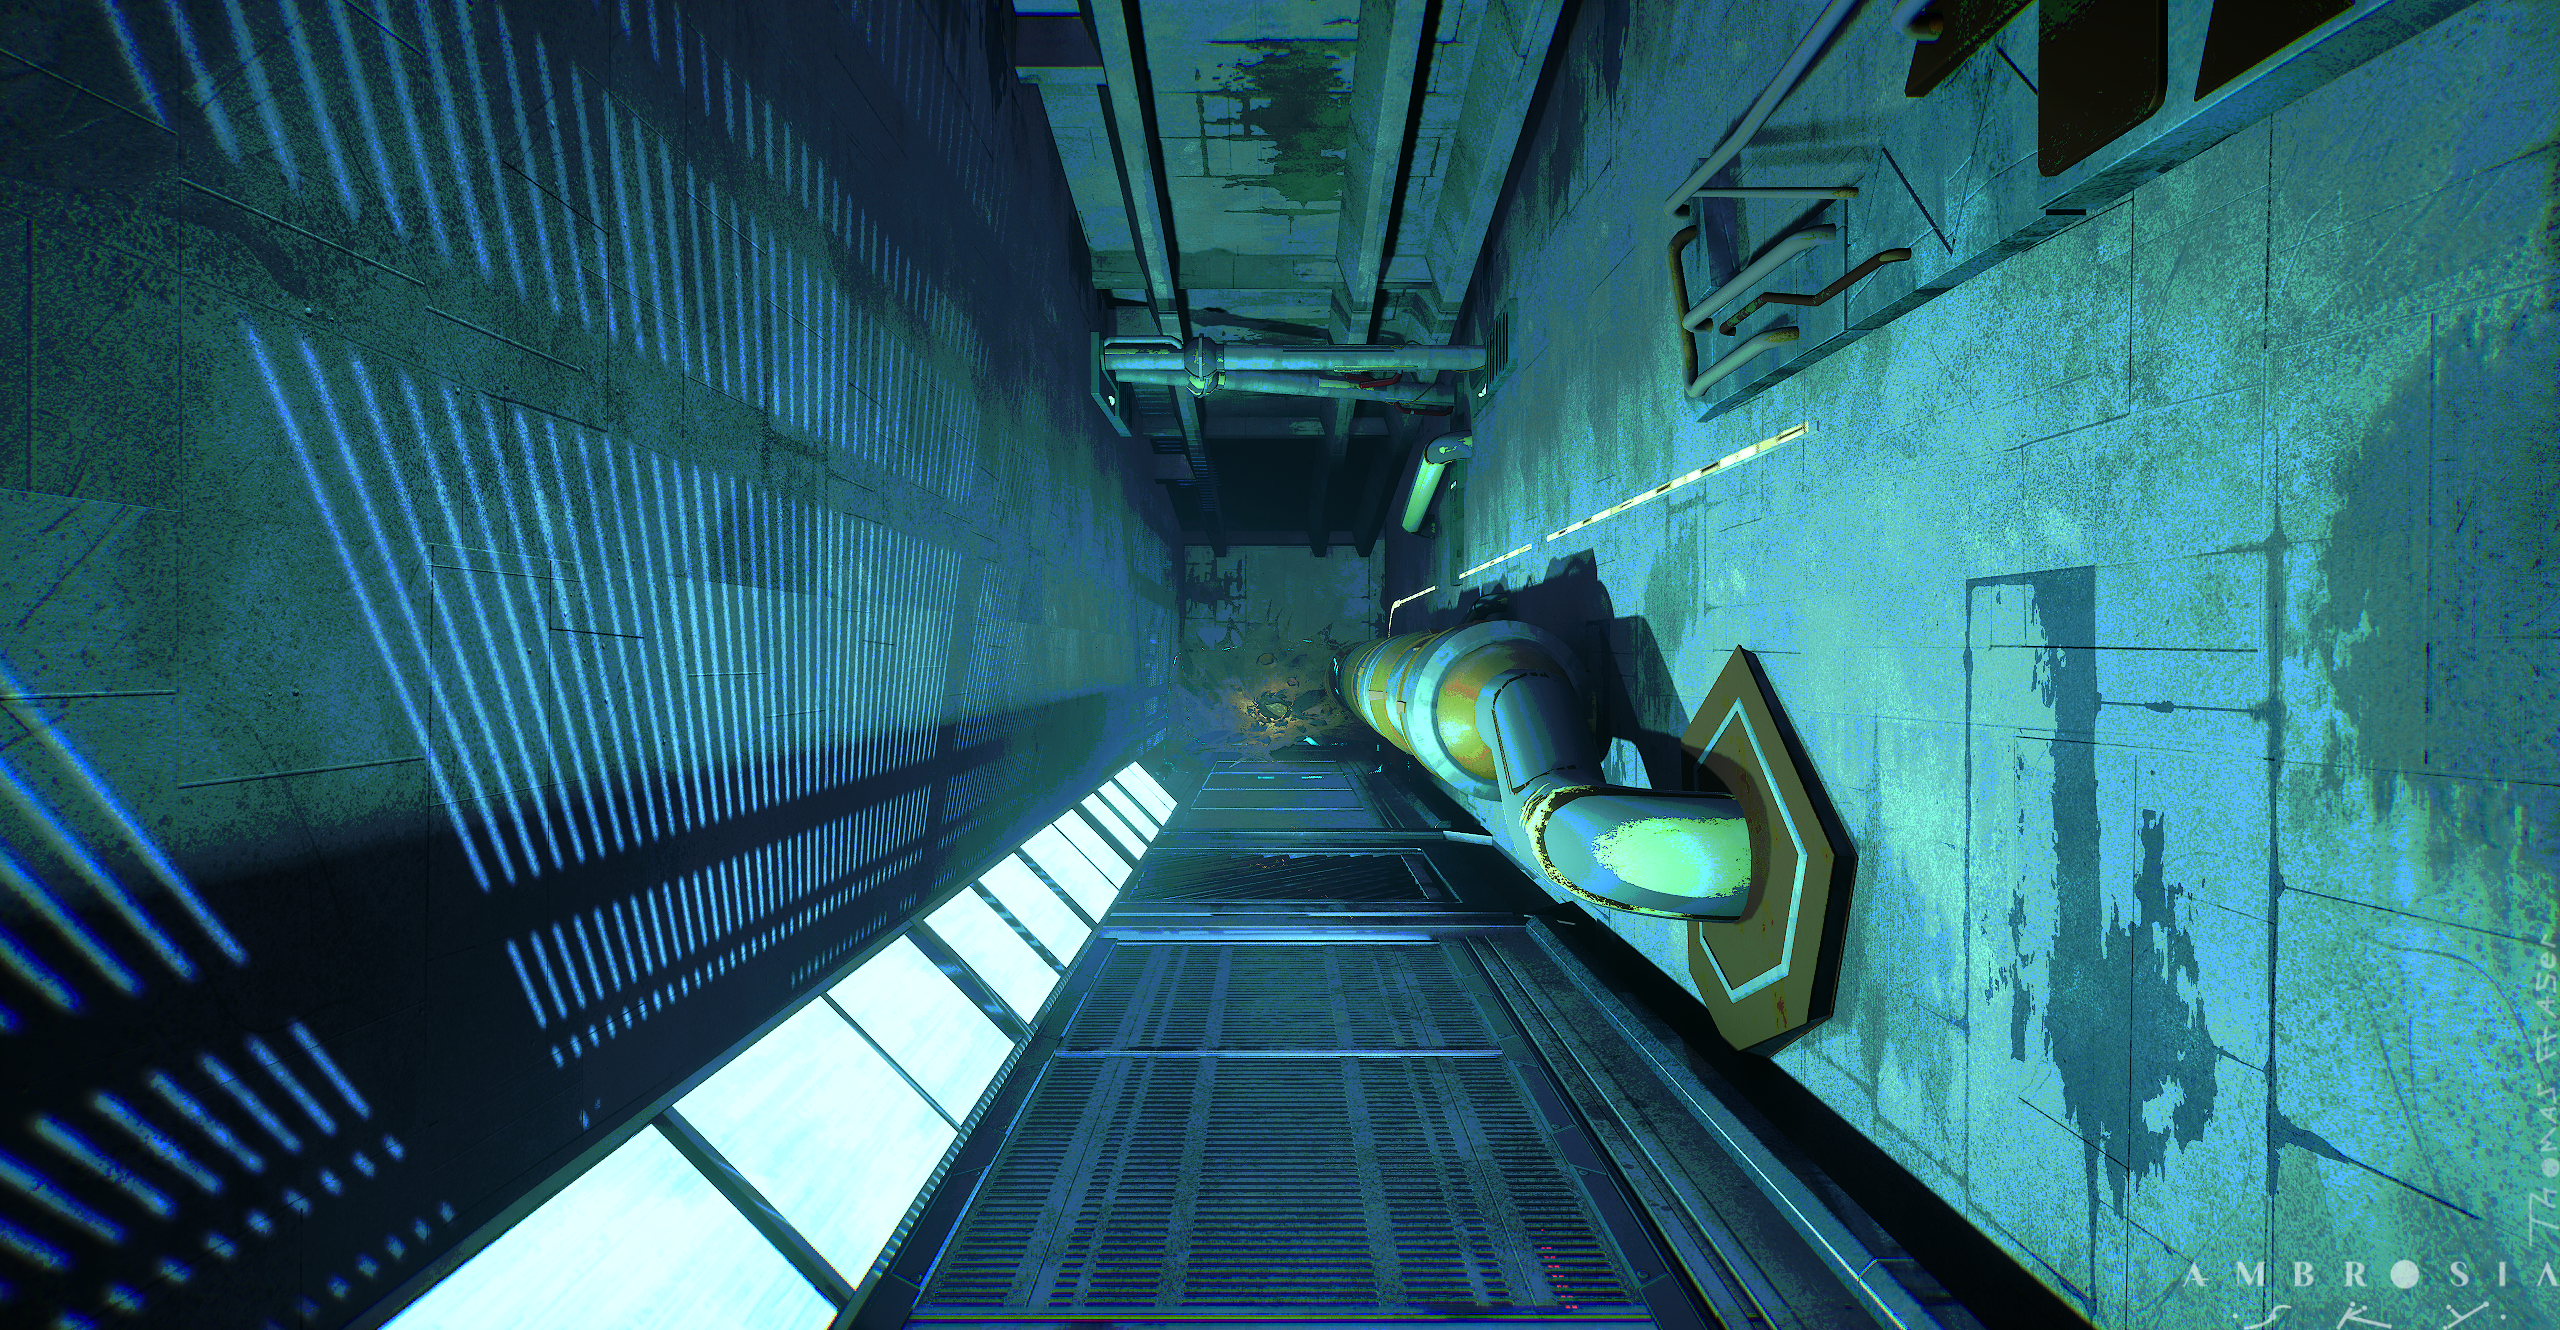
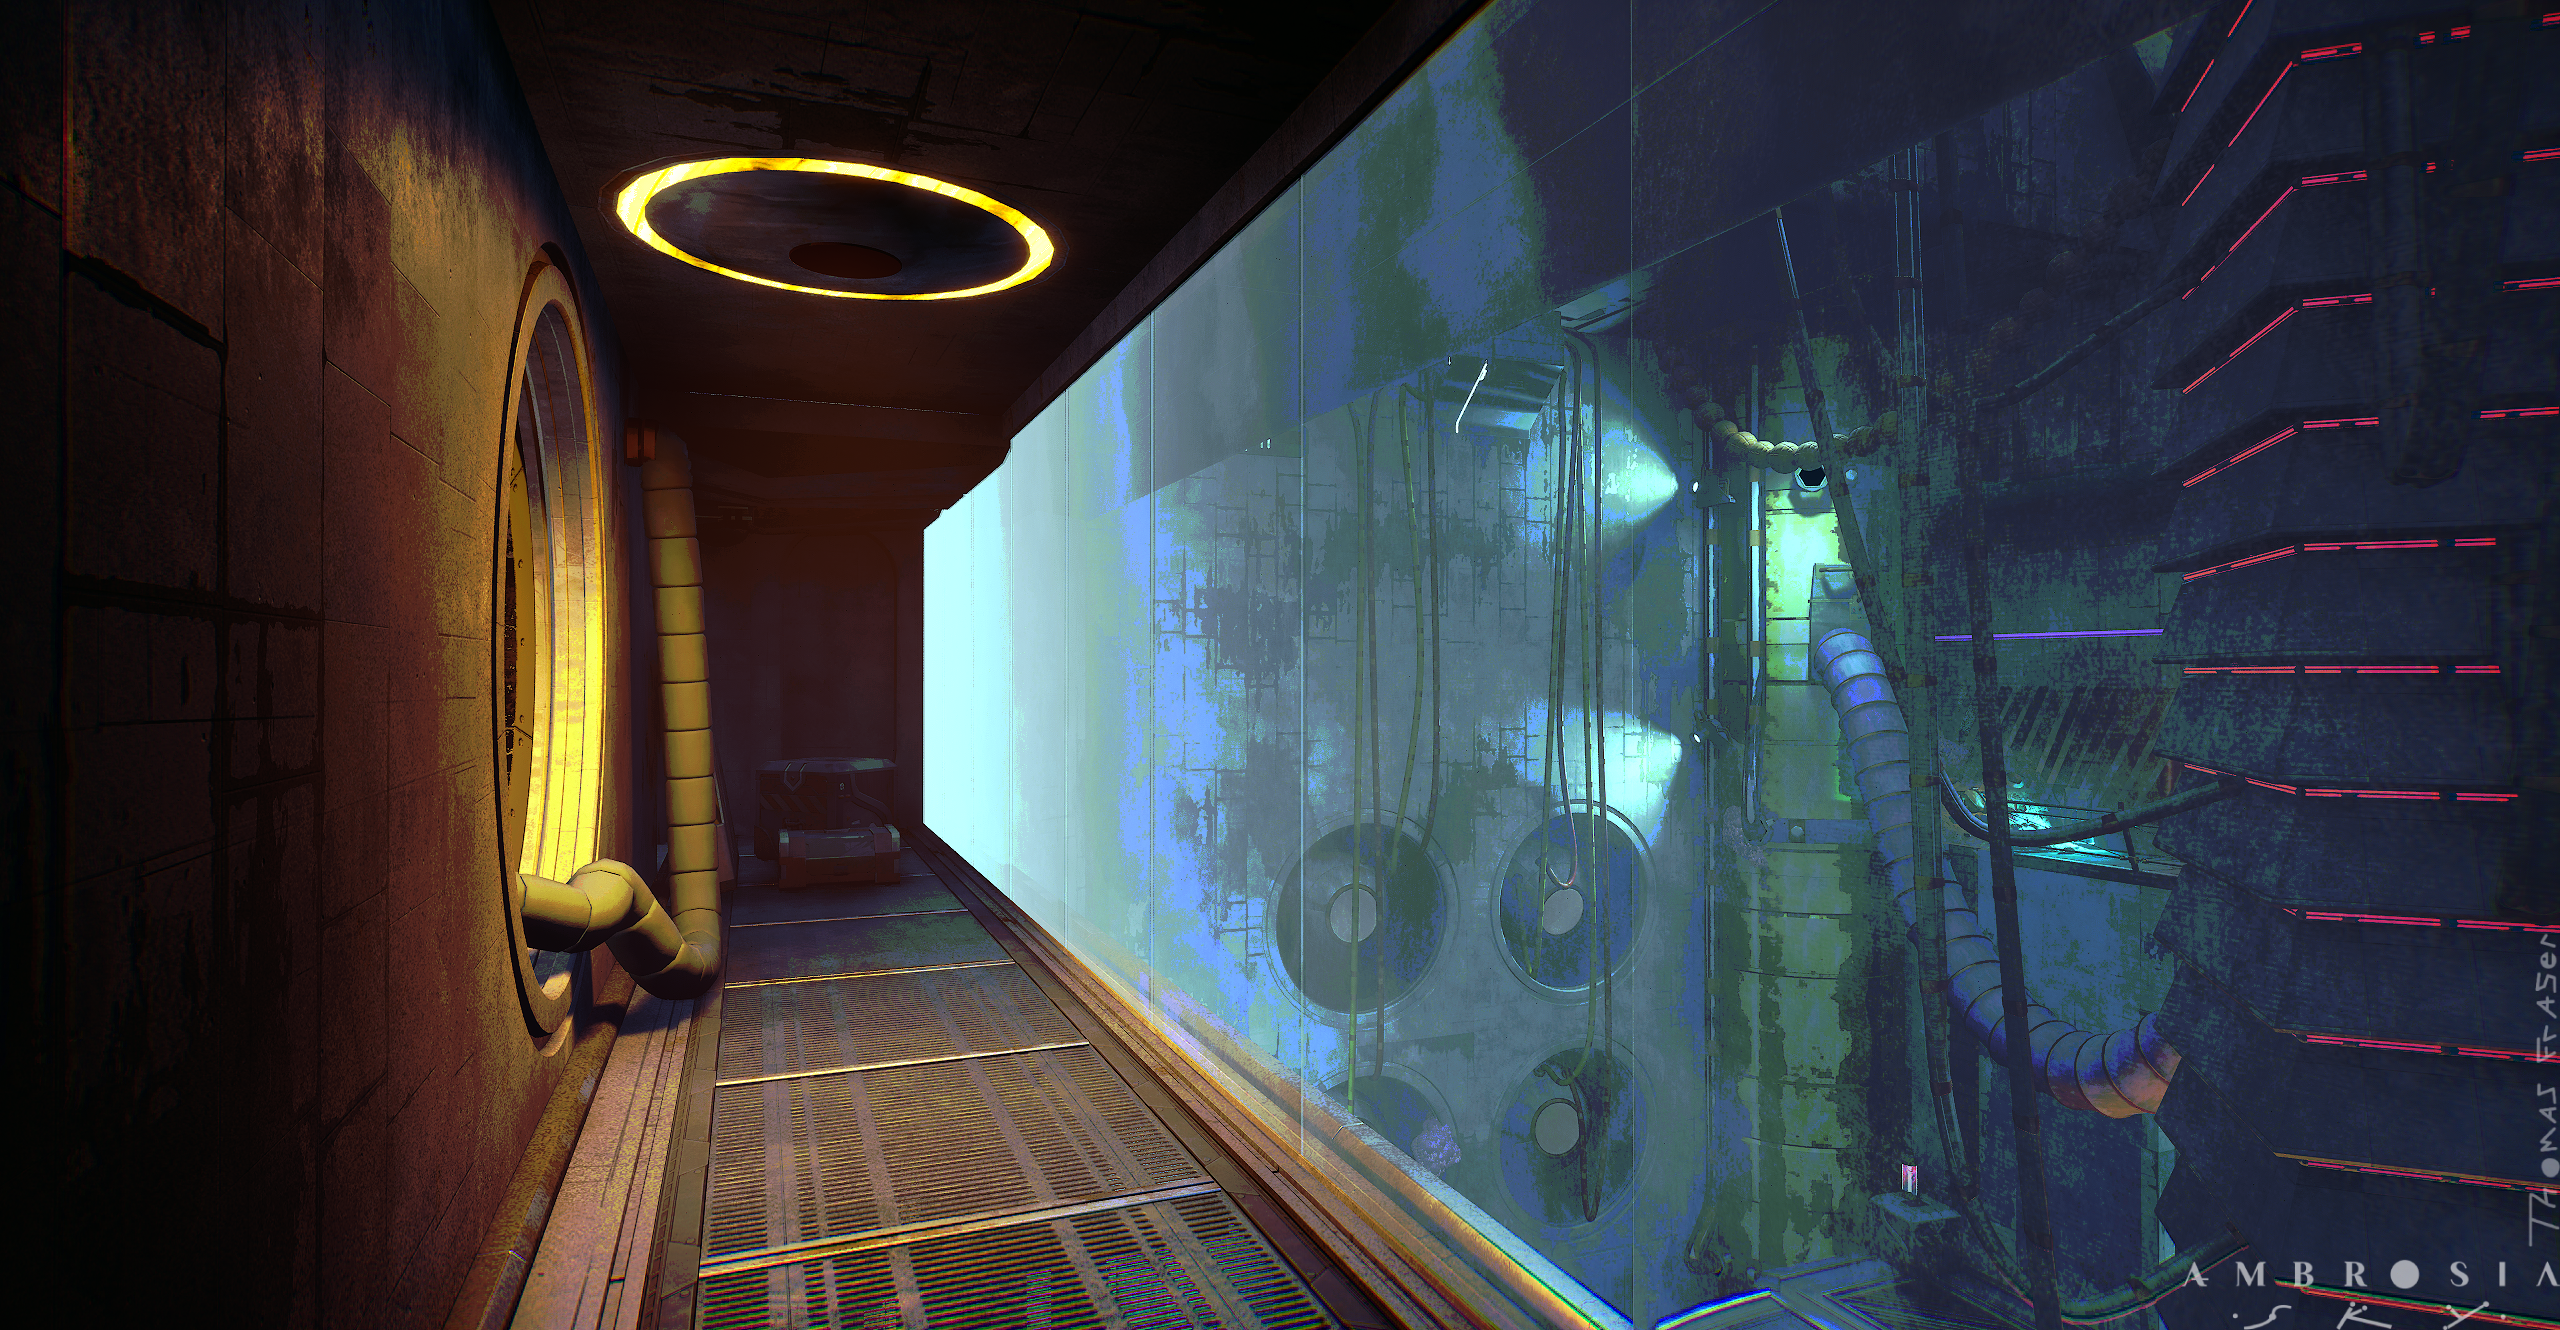
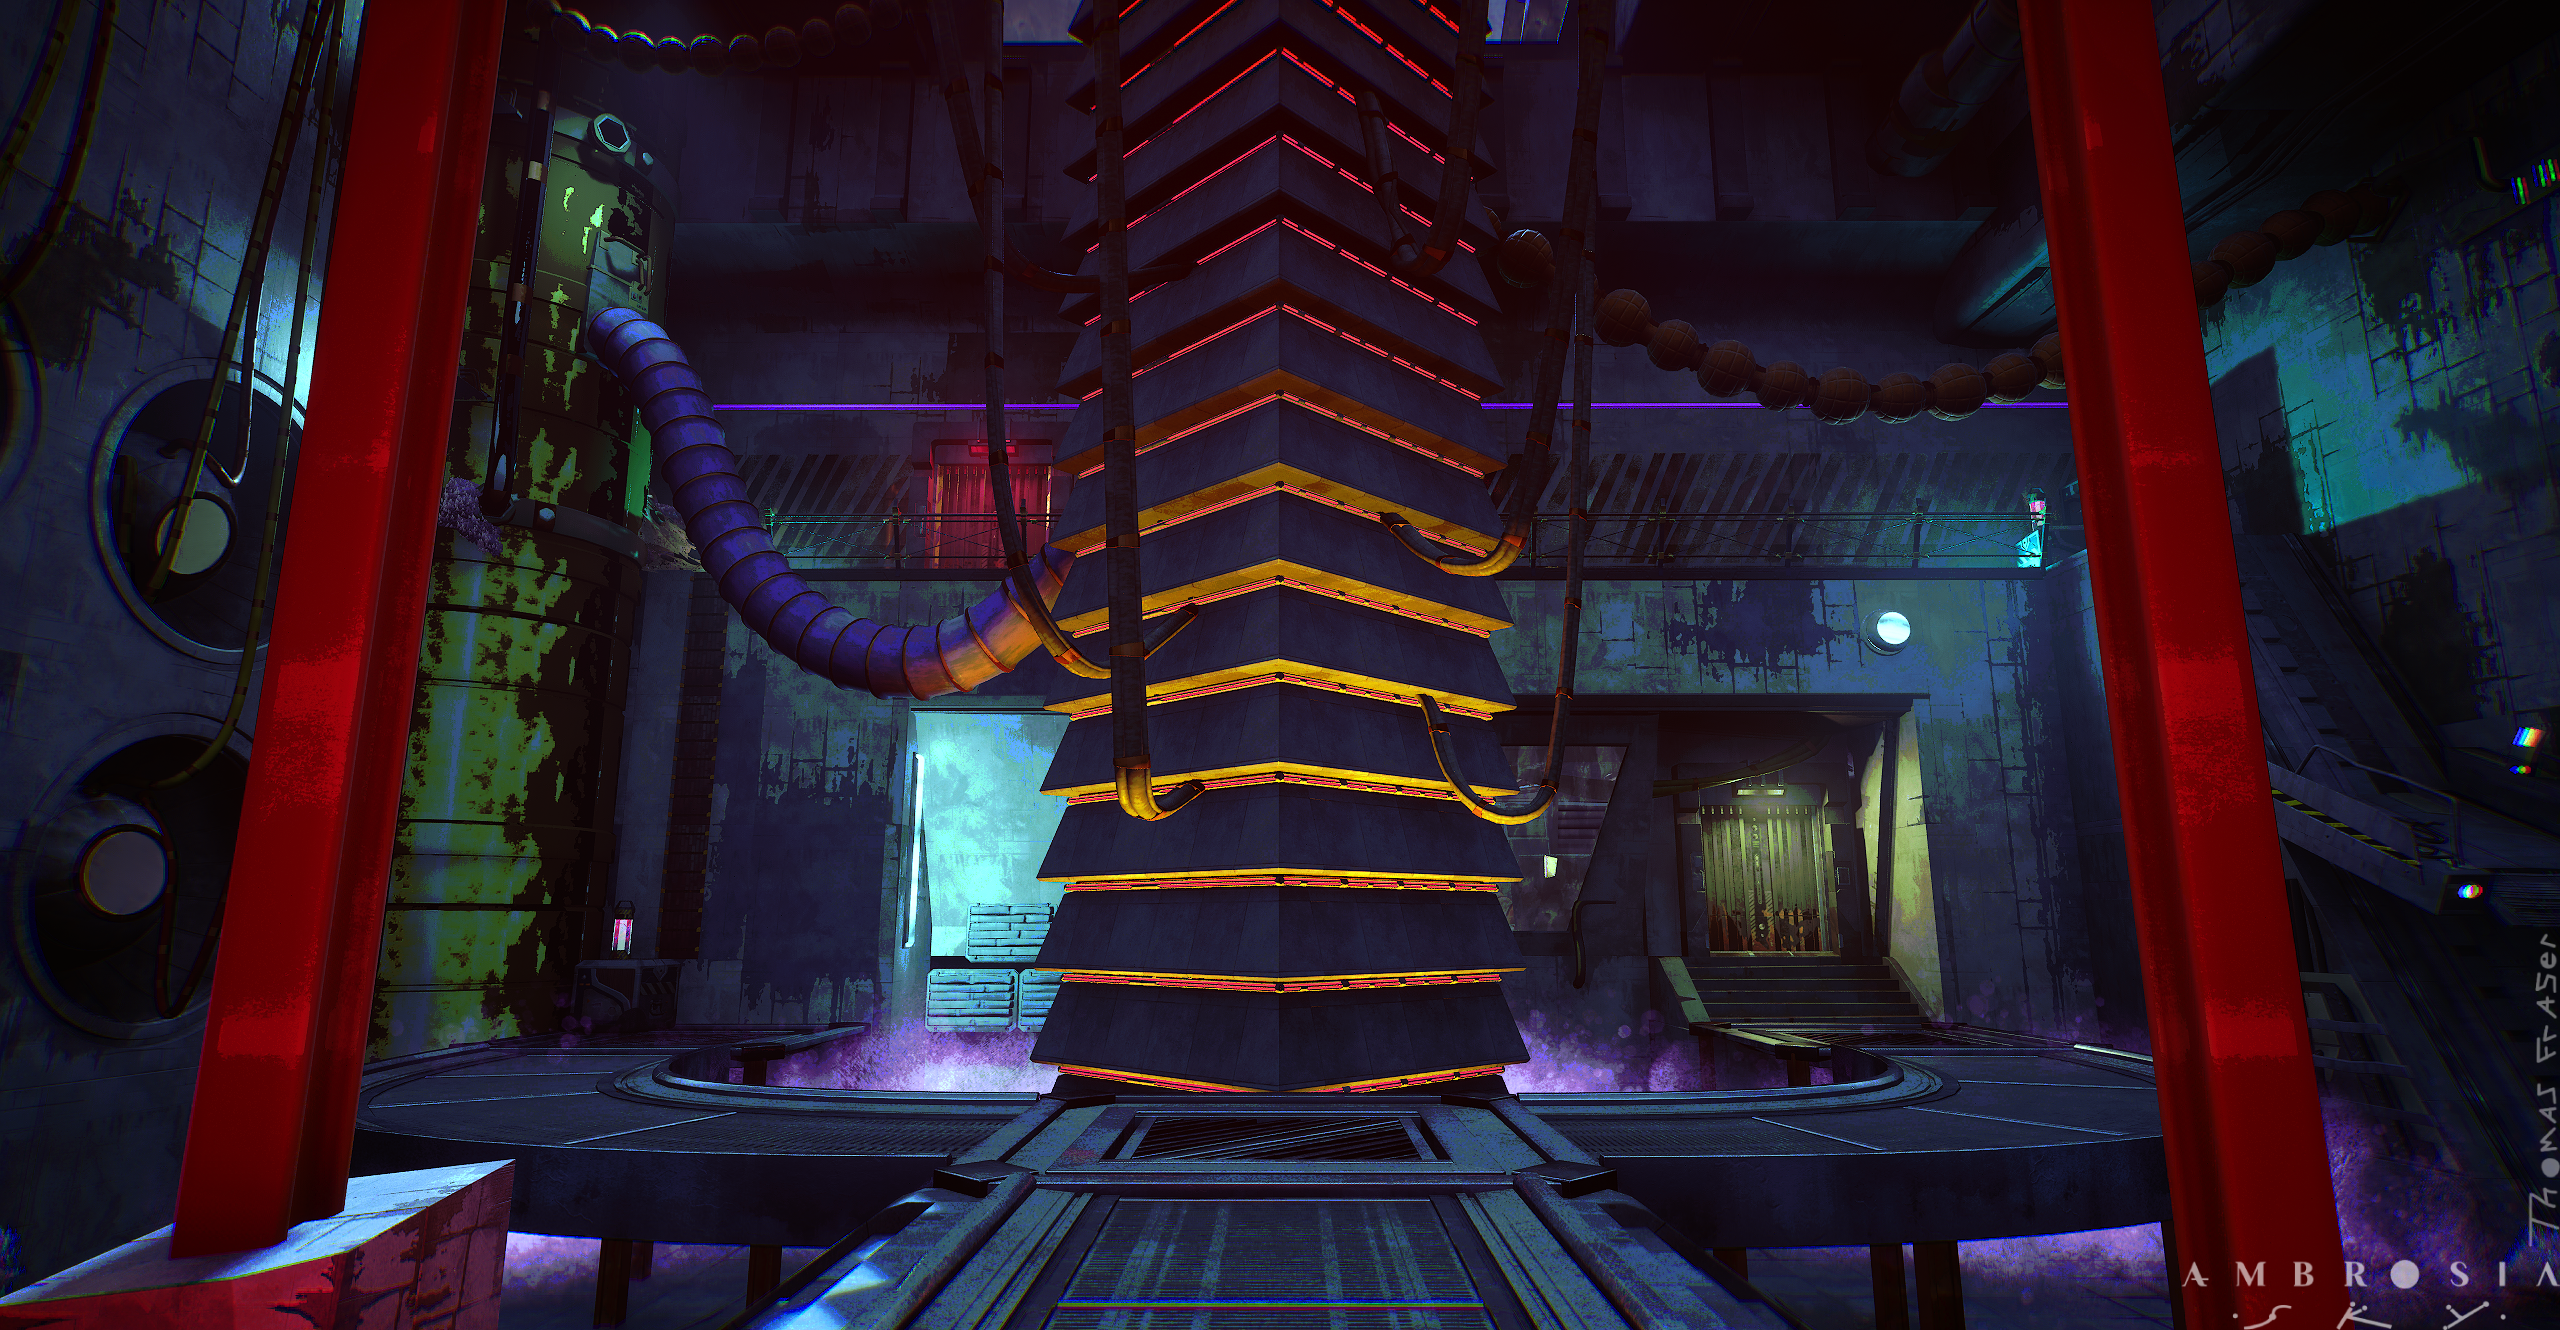
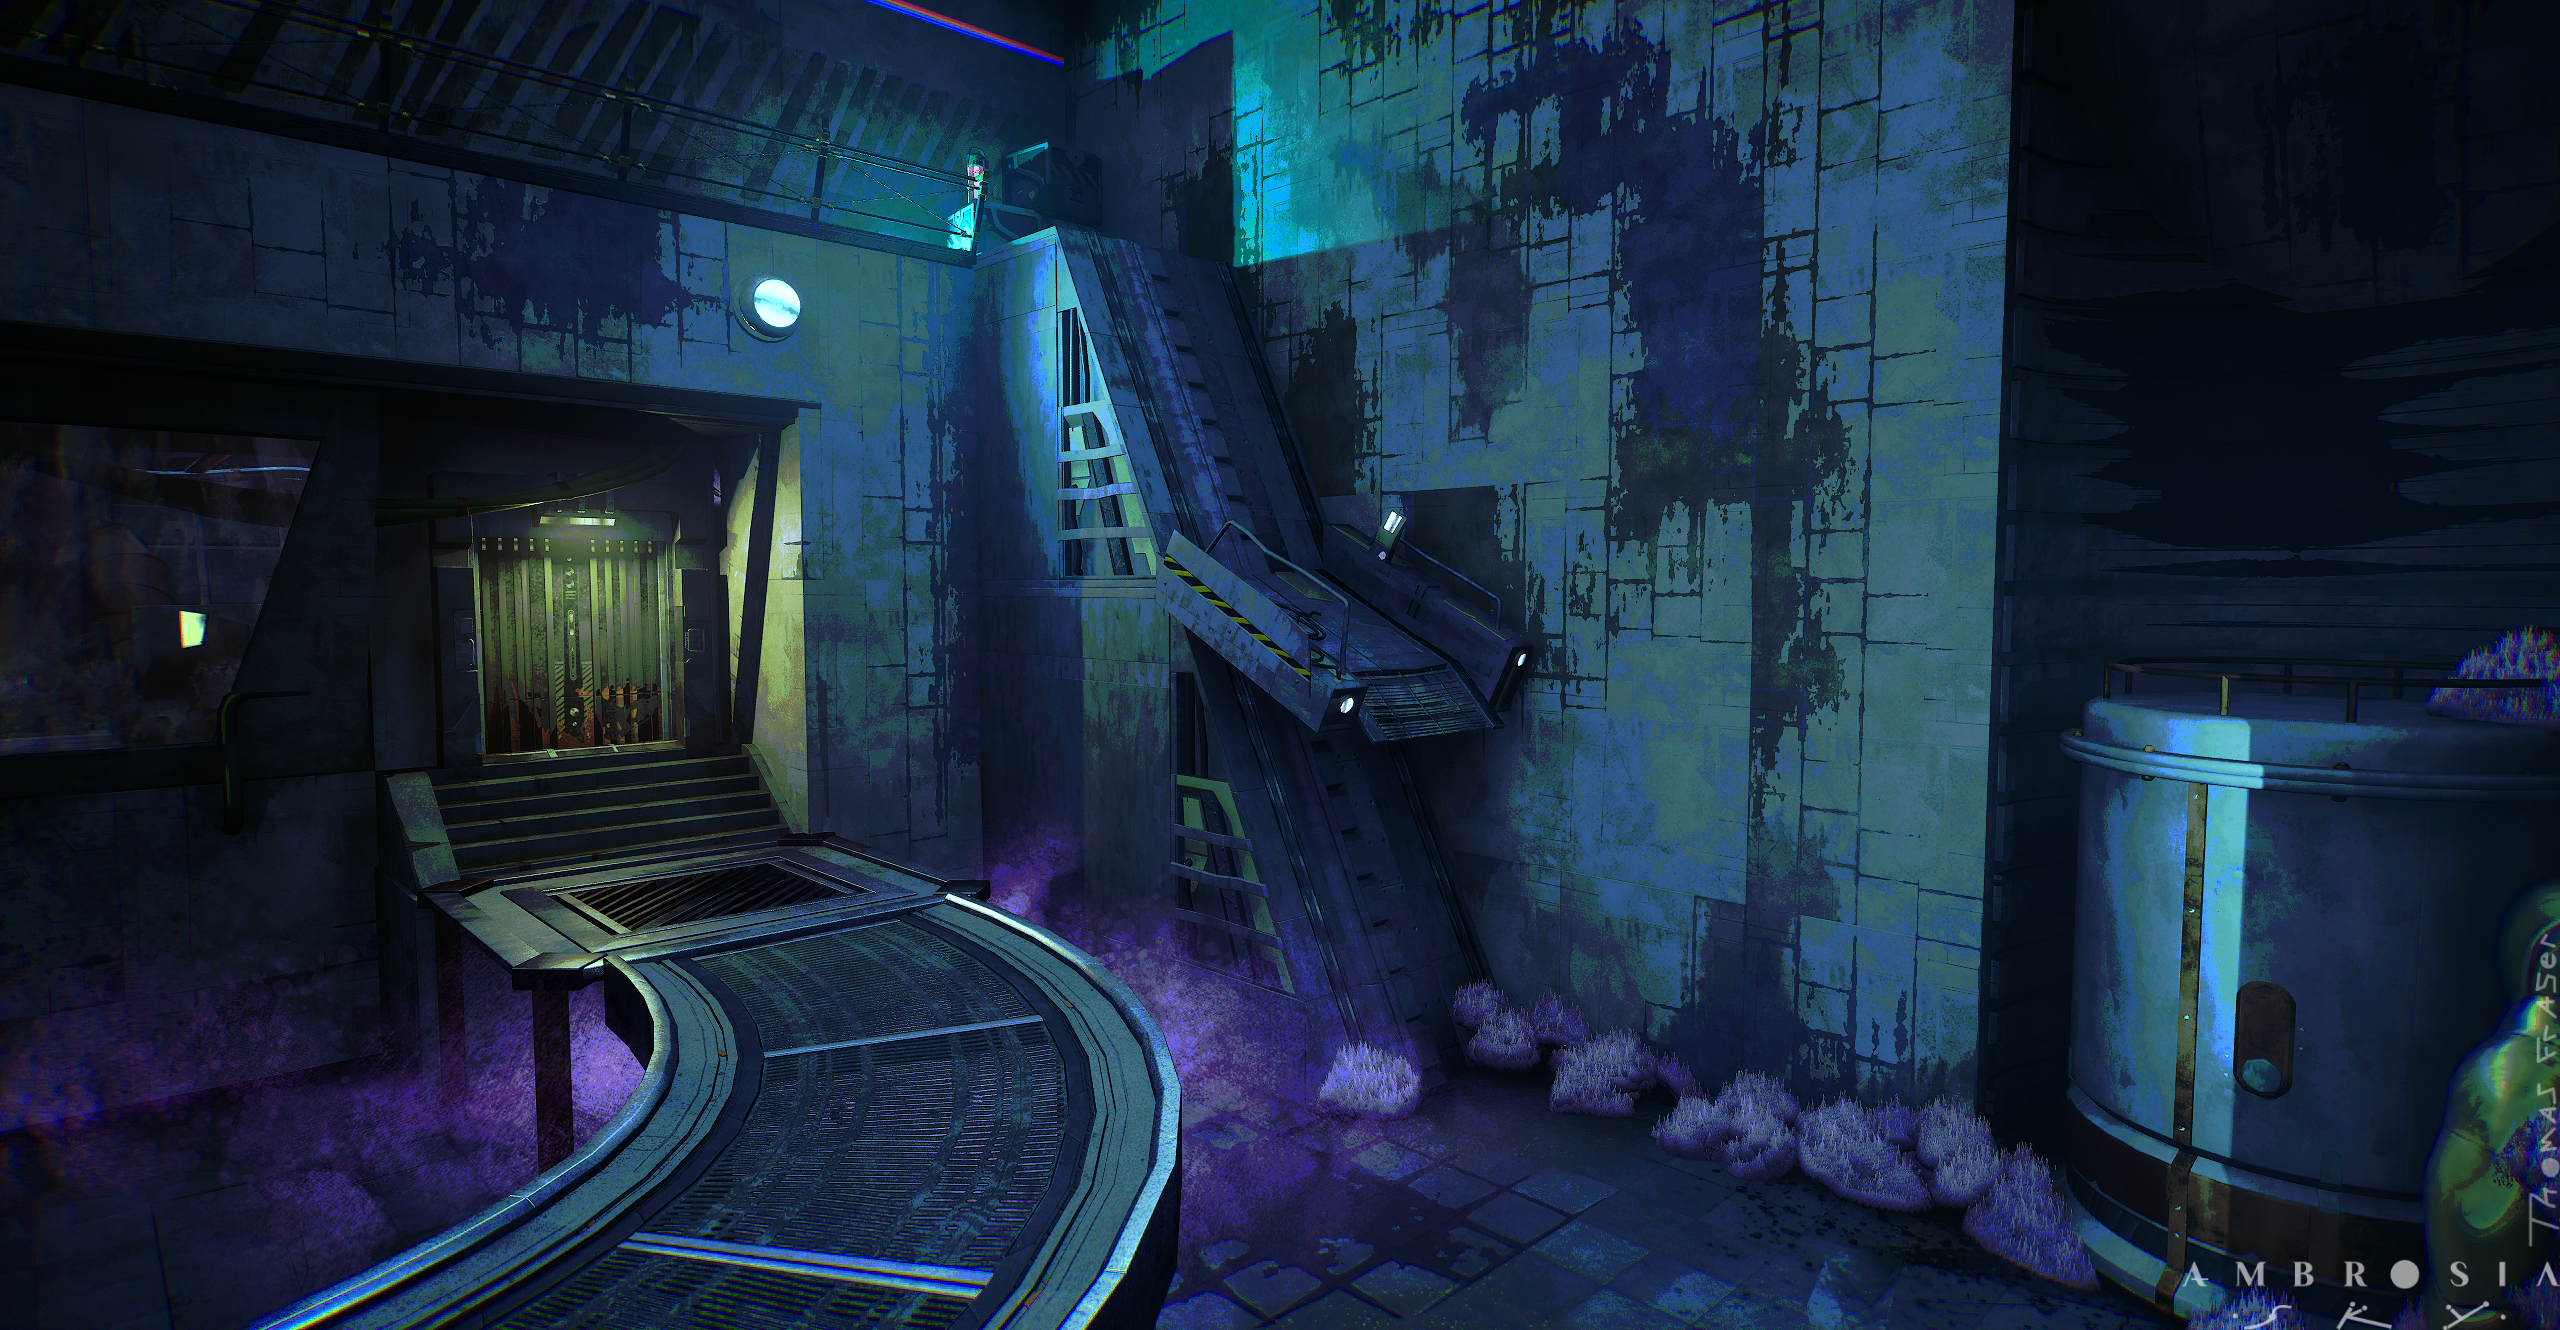
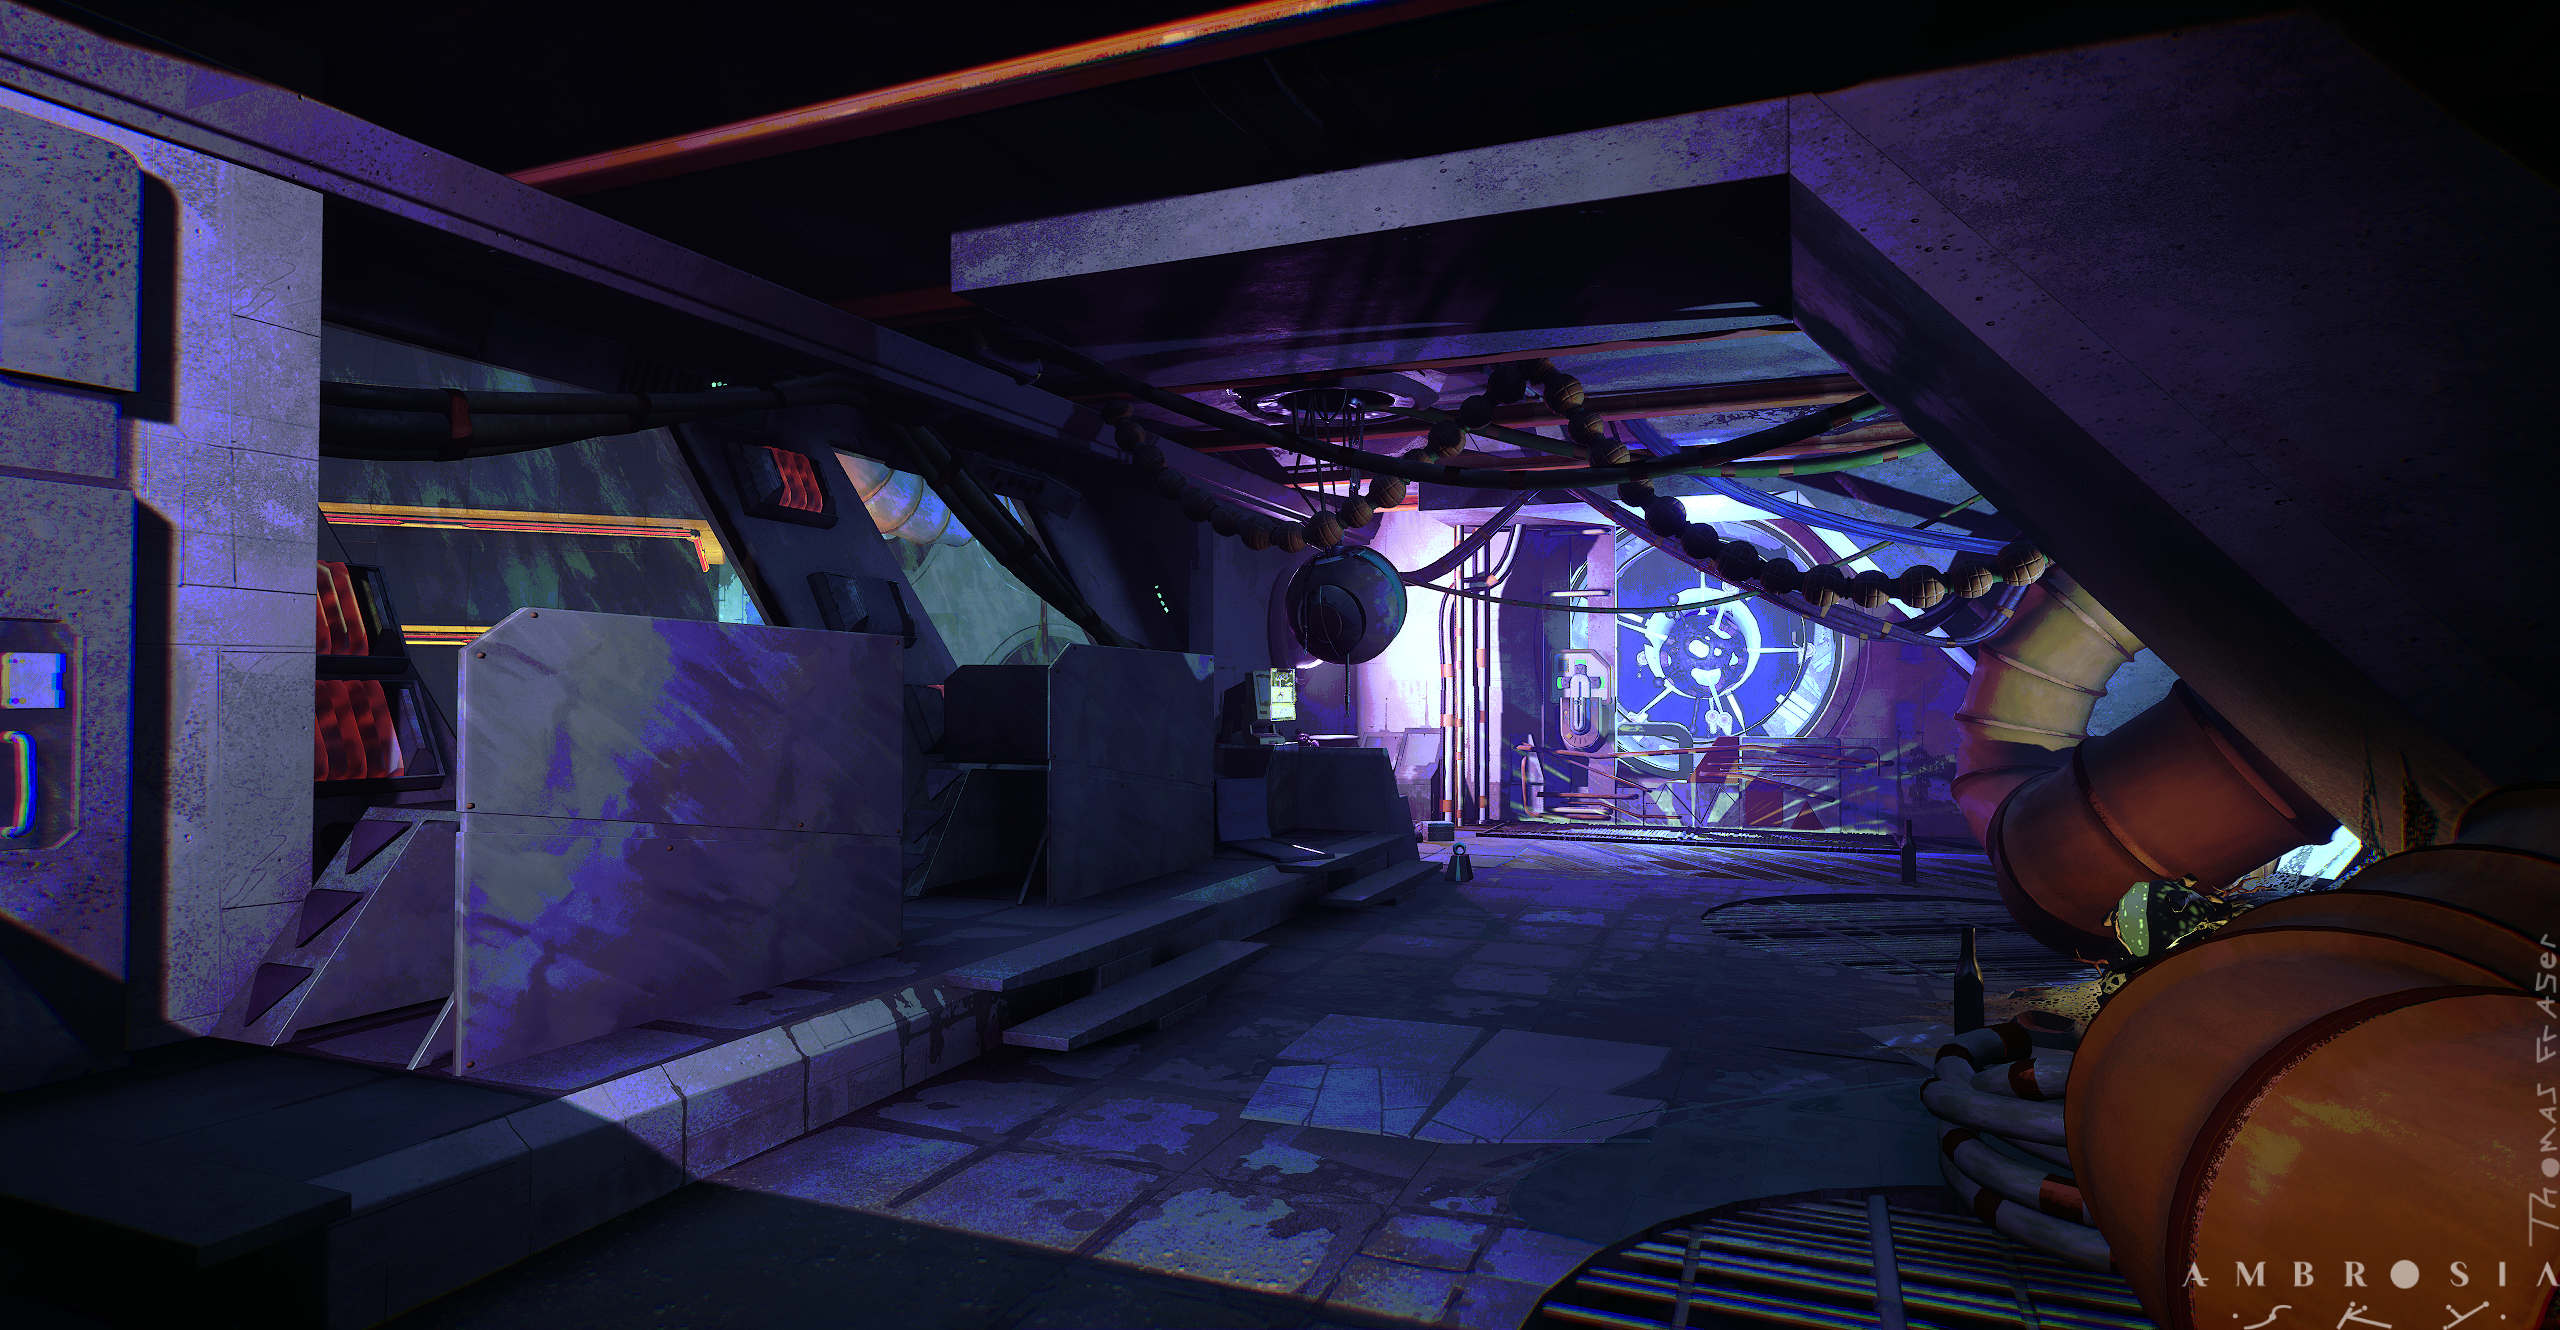
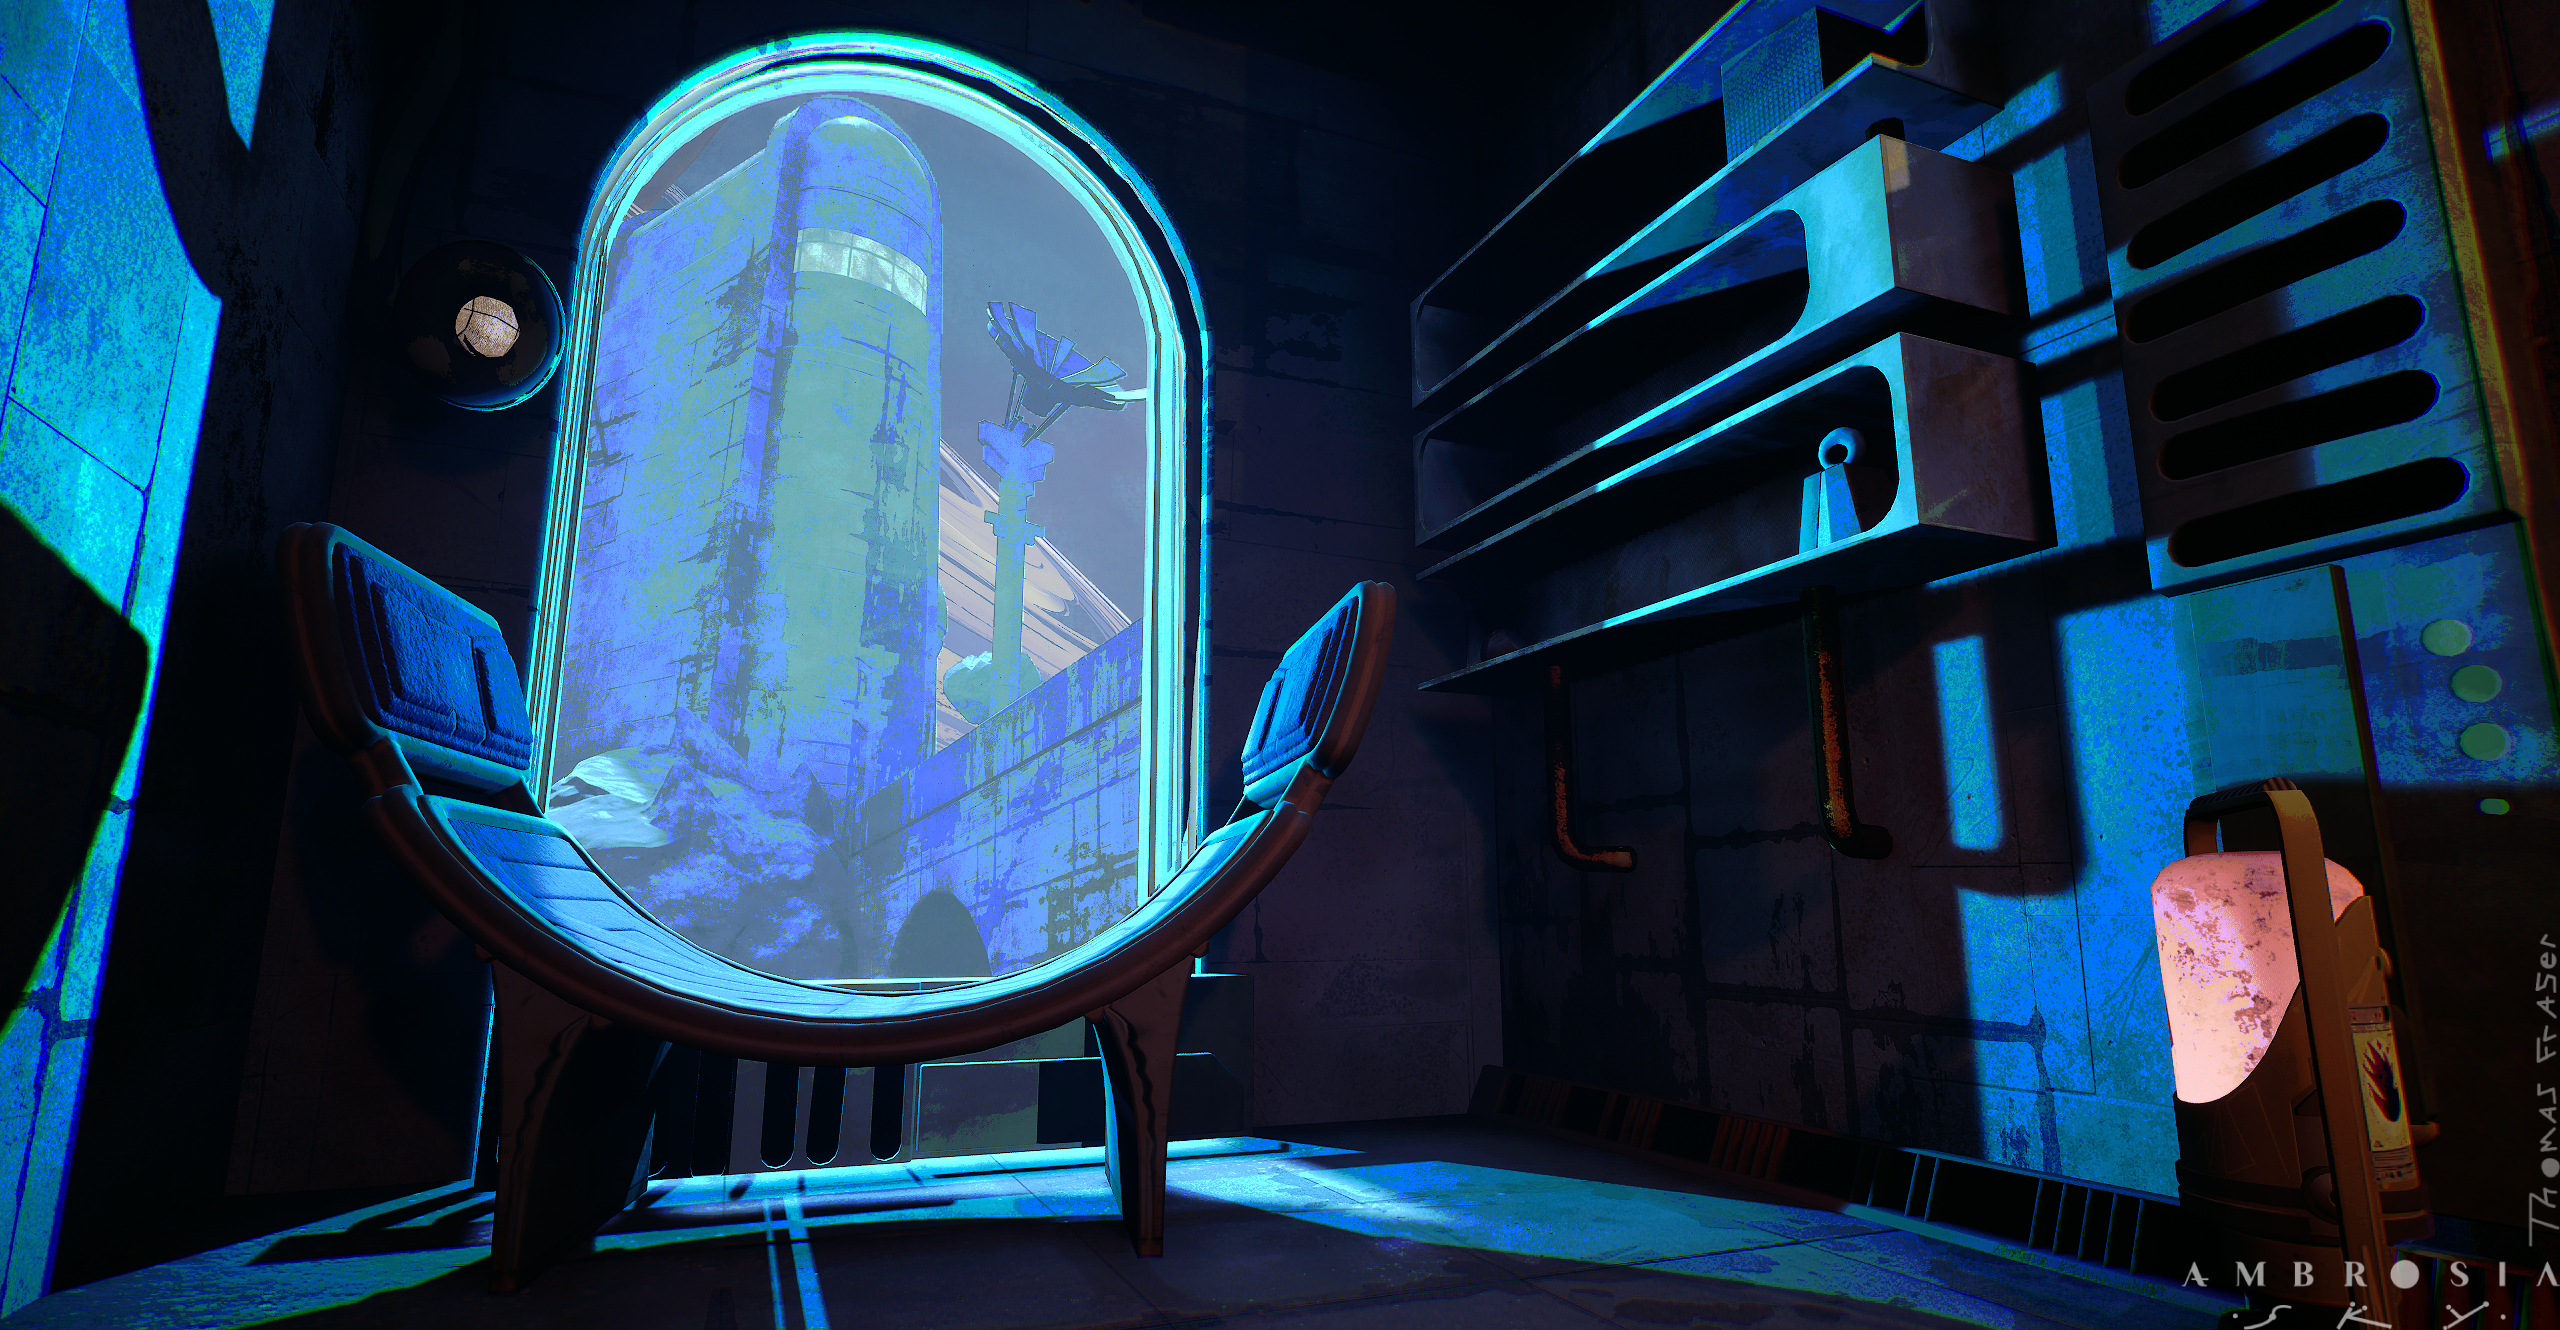
Ambrosia Sky enviro art
https://www.artstation.com/artwork/oJvbBw
Yo yo, my studio's game Ambrosia Sky was released yesterday on Nov 10th! I was the enviro artist on the game. I did most of the kits, props, textures, level art and lighting. We had a few other talented artists contract with us for key moments in production.
Yo yo, my studio's game Ambrosia Sky was released yesterday on Nov 10th! I was the enviro artist on the game. I did most of the kits, props, textures, level art and lighting. We had a few other talented artists contract with us for key moments in production.
The game itself is a cleaning simulator, in a brutalist civilization, on the rings of Saturn. You pressure wash away dangerous fungus to clear your way through the game. Everybody who use to live here died because of the fungus. You are sort of an undertaker, learning about the people who use to live there, and then laying them to rest.
Soft Rains art team includes art direction from Adam Volker, concepts from Ysabel Li and Vash Taylor, and tech art/effects by Fiona Jeeva.
Soft Rains art team includes art direction from Adam Volker, concepts from Ysabel Li and Vash Taylor, and tech art/effects by Fiona Jeeva.
I'll be putting up a few more posts containing the art but I didnt want to do it all at once. More incoming!
 Ashervisalis
10 ·
The Bi-Monthly Environment Art Challenge | November - December (99)
Hello everyone and welcome to the 99th edition of the Bi-Monthly Environment Art Challenge for the months of November and December!
This challenge is a way for real-time 3D artists to test their skills and create a piece of work based on concepts provided. It's open to those of all skill levels and we do our best to provide meaningful feedback along the way so everyone can come away from the challenge with actionable points on which they can improve their craft!
- ENVIRONMENTS -
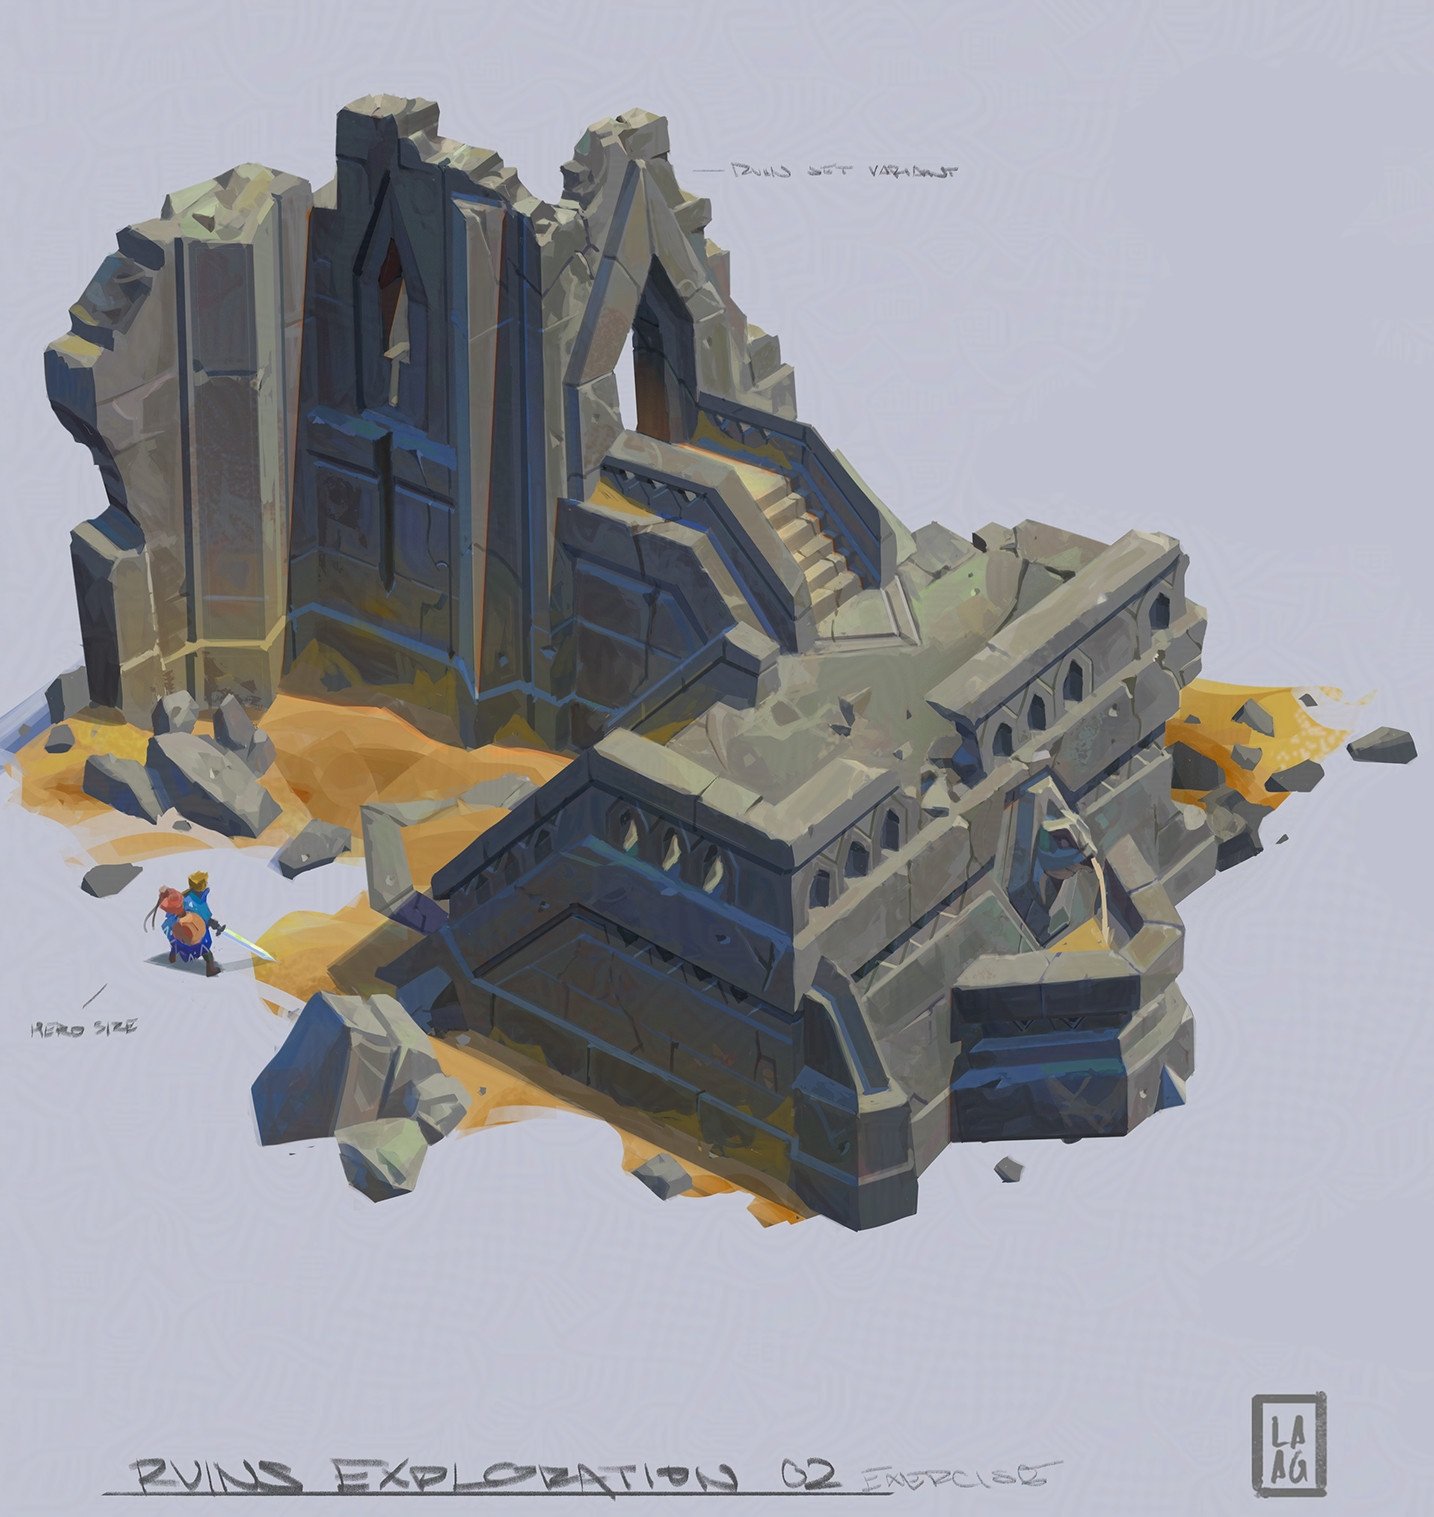
HARD SURFACE ENVIRONMENT:
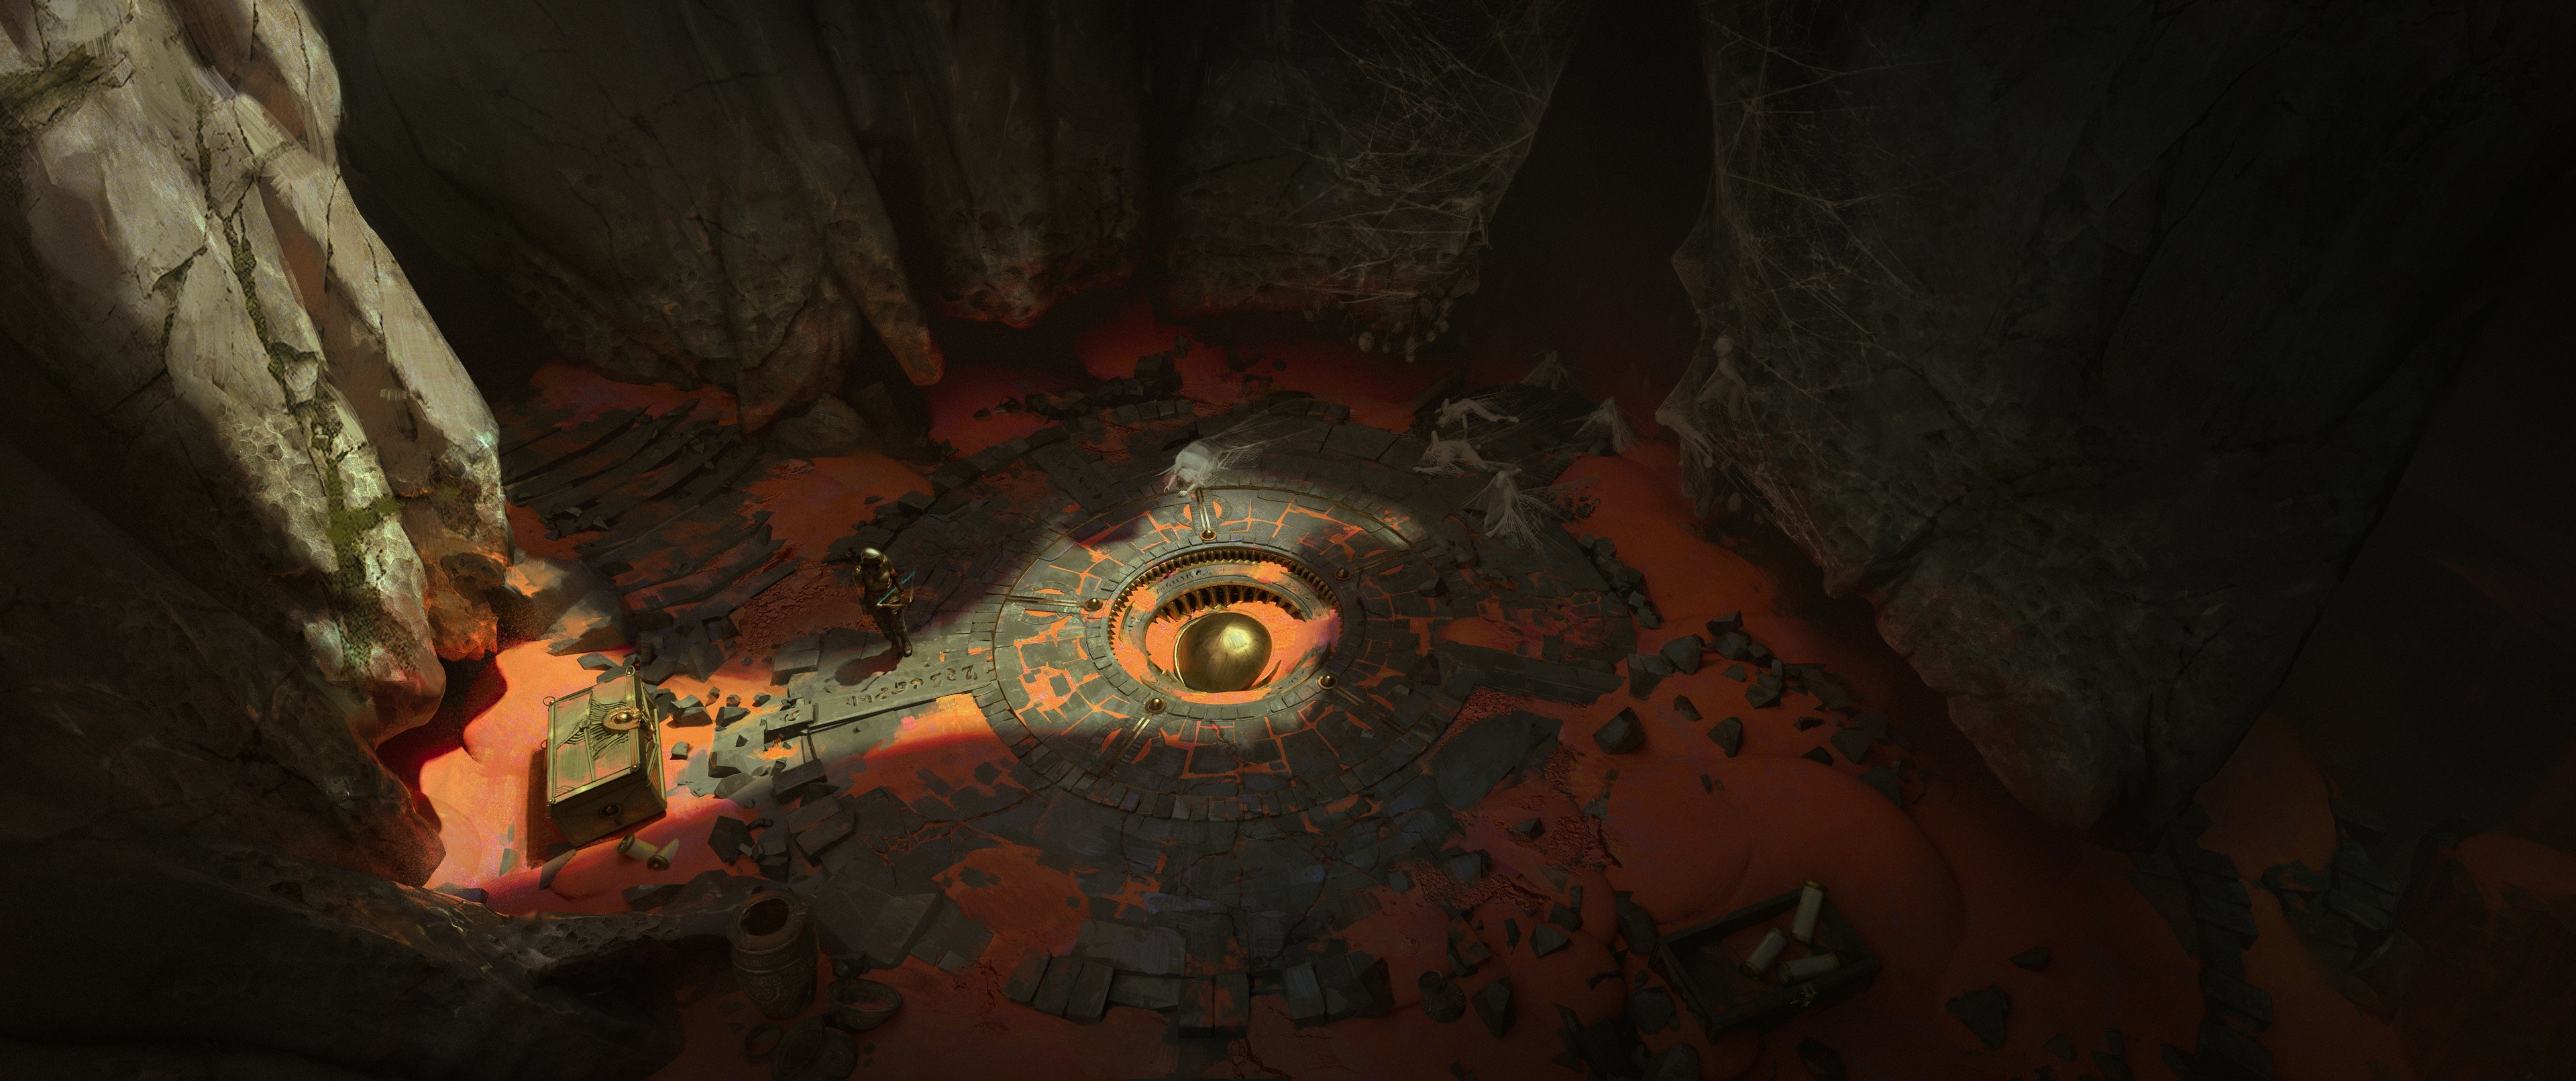
Dungeon Stage - Foundations Course by Jose Vega
STYLIZED ENVIRONMENT:
Enviroment Art & Worldbuilding by Dardo Studios
- PROPS -
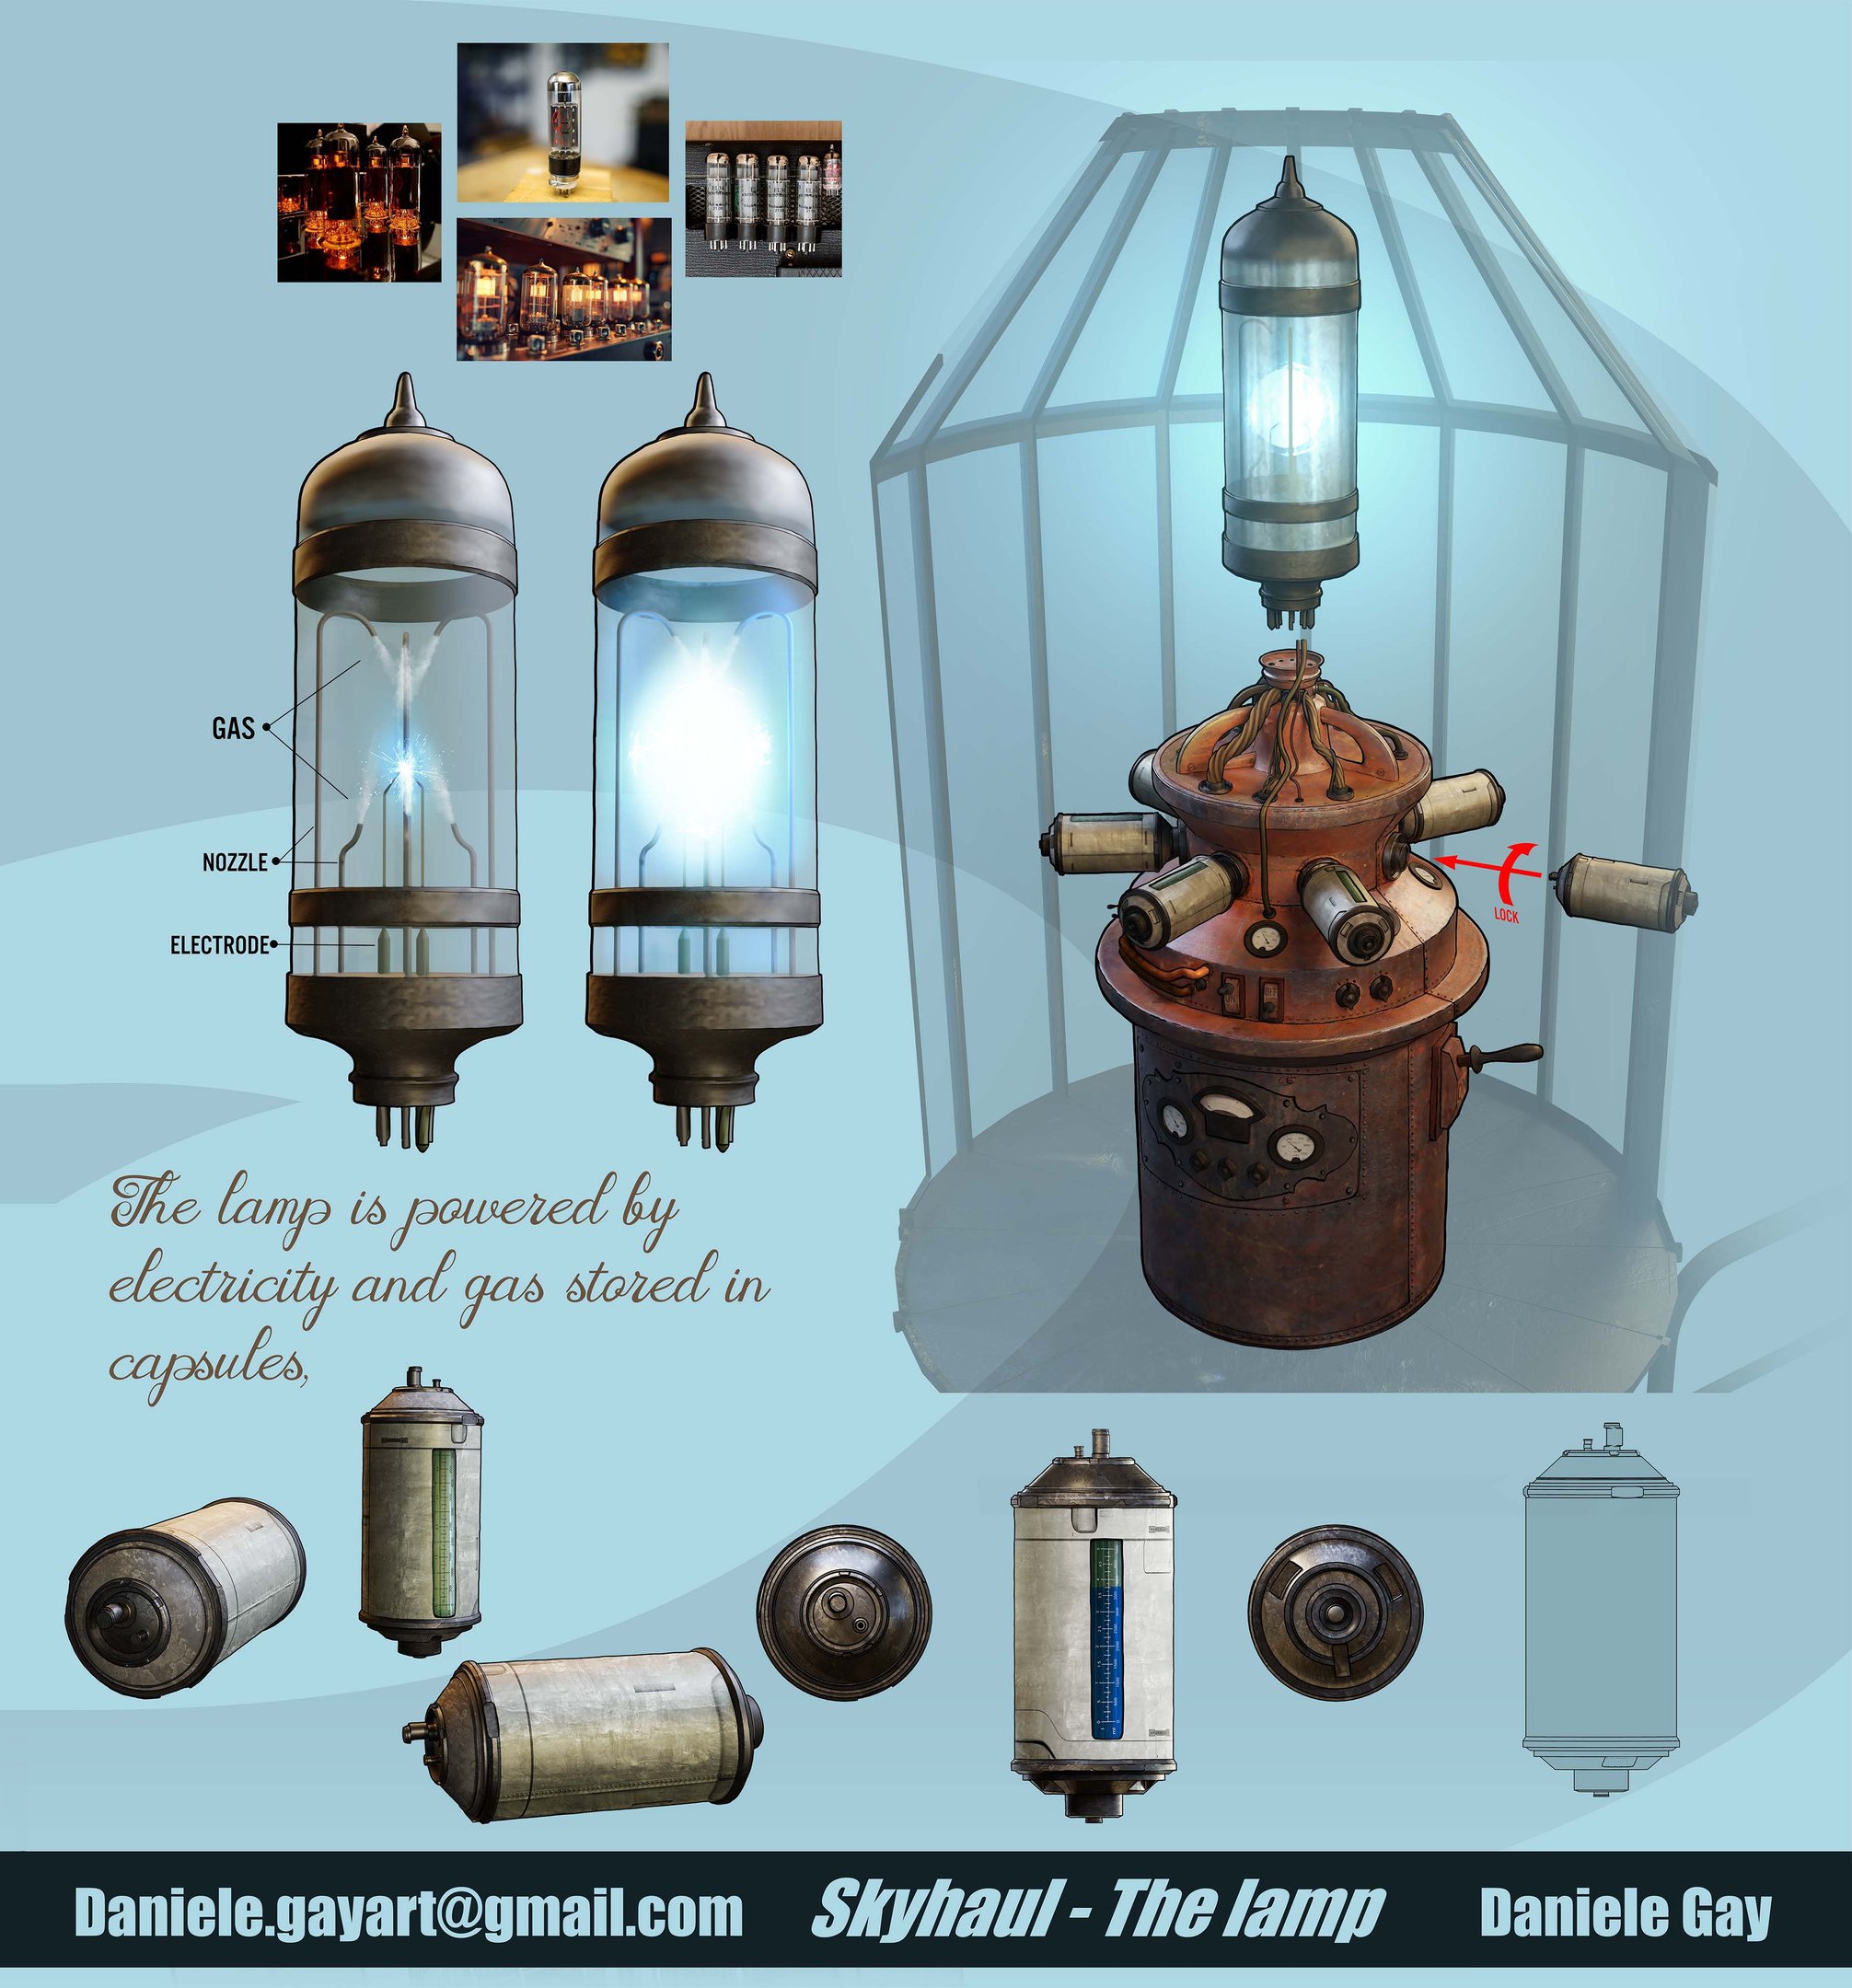
HARD SURFACE PROP:
Skyhaul - Karlsson house - chapter 01 by Daniele Gay
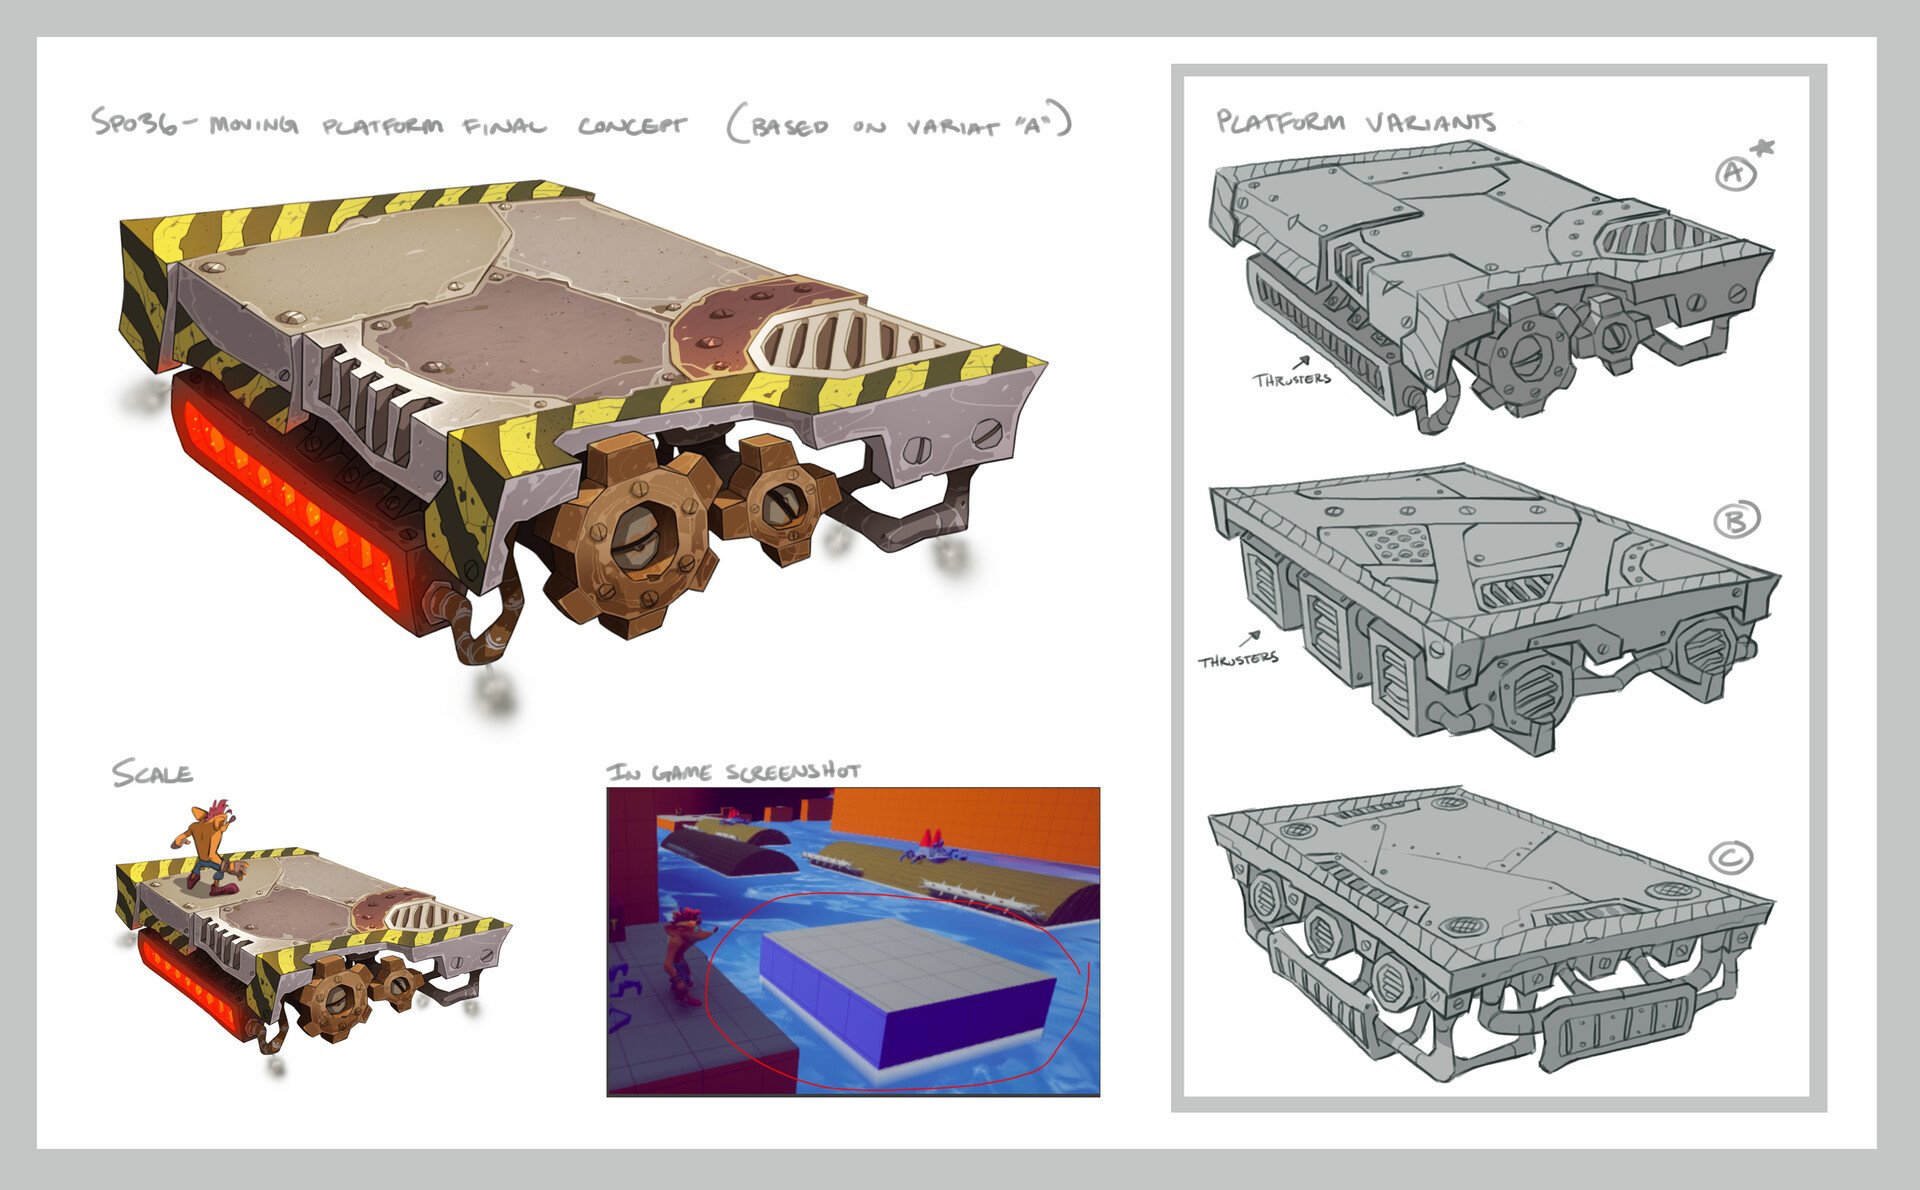
STYLIZED PROP:
Neo Cortex's Castle and the Toxic Tunnels concept art for Crash Bandicoot 4: It's About Time by Jeff Murchie
- RULES -
Please read all the rules before starting:- Try to post at least one critique for every post that you make. This will make for a better learning environment and help us all grow as artists.
- Try your best to finish as much as you can in the time frame provided, but remember even if you don't finish by the end of the challenge we encourage you to keep pushing and finish your piece!
- Post what you are working on in this thread so that way it's a more centralized place for advice and critique. Please avoid creating a new thread as we don't want to spam out the forums.
- It is recommended to use a game engine to present your work. Unreal Engine, Unity, and Godot are very common engines that can be used but feel free to use any alternatives that you want.
- 3D Viewers (Sketchfab, Marmoset Viewer, etc) are welcome, but please note that their contents can be stolen by those who know how. Please ensure you're comfortable with this potential before using one.
- Feel free to change up your chosen concept a bit if you want! Interpret these concepts to your liking, especially if your aim is to add storytelling elements.
- If you finish your project and decide to post it to something like Artstation, make sure you give credit to the concept artist in the form of a link to their profile. Additionally, it is recommended to ask a concept artist for their permission to post a 3D piece based on their work before doing so.
- RECOMMENDATIONS -
- When you are just starting out making a scene, it can seem complicated or imposing. Take your time planning and blocking out, it will set you up for success later on.
- Think about how you can re-use assets, re-use textures, break it down as simple as possible and plan it out. A lot of people will break it down in their own way when they start out their challenge. Gather some reference images as well for different parts of the scene, don't be afraid to make it your own.
- We strongly encourage you to go and look at other games and see how they make their assets as well as get concept art to give it your own feel.
- The goal is to learn and grow both artistically and in your ability to both give and receive critique, but don't stress about it and remember to have fun!
 Pinkfox
8 ·
