Home Technical Talk

How to unwrap a VERY HIGH-POLY ONLY model in Maya 2020? Help me please, I wanna die...

node
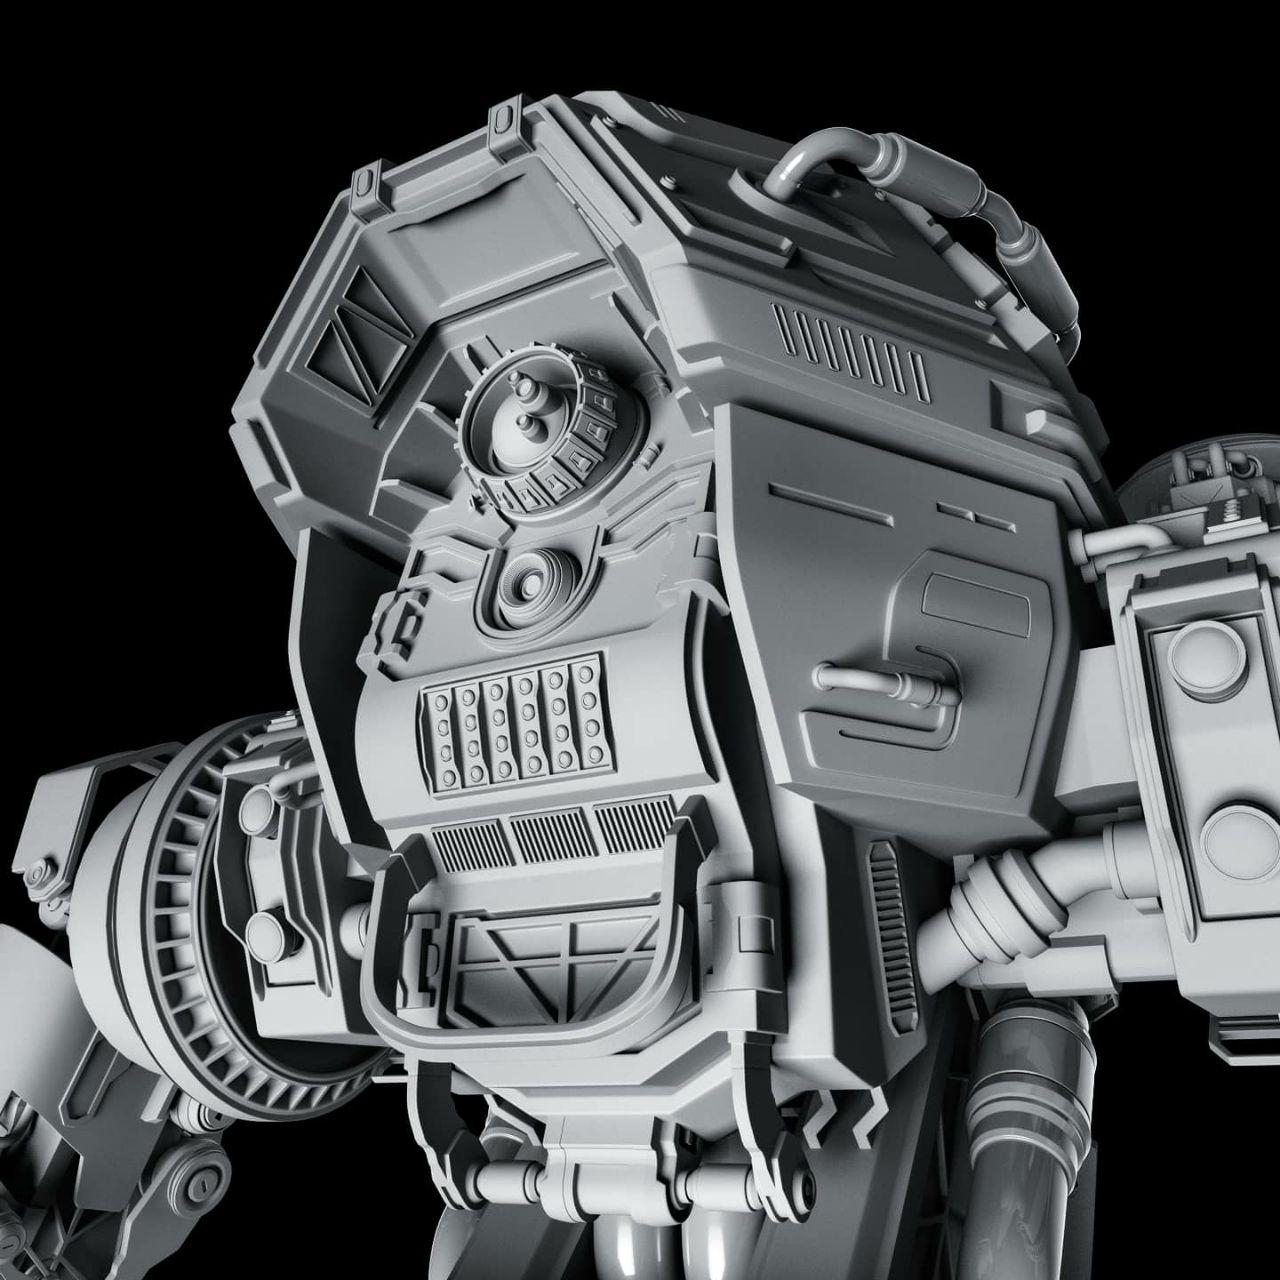
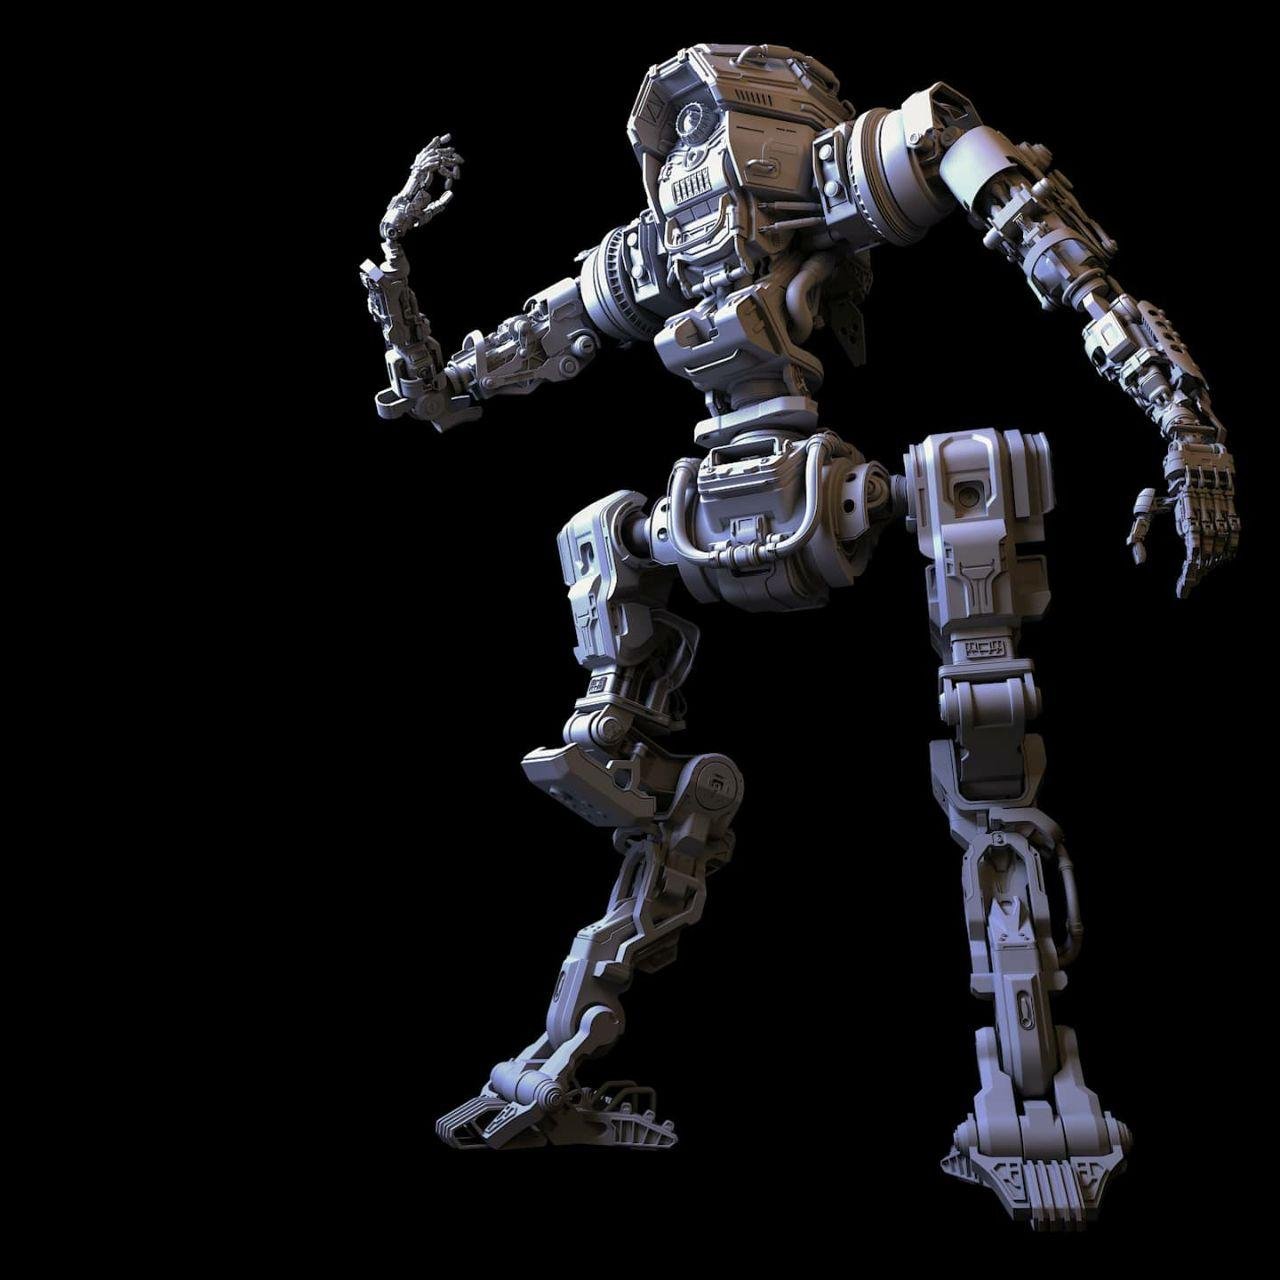
Hi, everyone! I hope you are doing well! I have an issue with my graduation project. So I decided to model a mech that is very high detailed and complex, so I modeled each piece of it separately and just placed it as it is. I was learning the software and modeling fundamentals as I was doing the project. The topology is relatively good (mostly quads and sometimes tris) and I ended up with 2500+ pieces. Some are very complex, some of them are simple shapes. So my question is: how the hell do I texturize it???
Because Substance Painter won't handle that amount of polygons I guess.
I was planning on splitting the mech to it's main parts (arms, legs, upper body, lower body, etc.) and throw it into Substance Painter to texturize separately and then gather everything in one scene. But for that I need to unwrap it all.
And oh boy I do NOT want to sit one extra month unwrapping all the pieces by hand.

So my question is how would you approach to this problem?  Thank you for the answers in advance!

UPD: 
I don't have low-poly, because I thought I AM making it low-poly...

I can put some screenshots of the wireframe if needed and polycount is 40mill+ I think.

Doing this project from the scratch is not an option since I have a lot more to do (pilot for the mech, hangar, filling props, etc) and the deadline is 'till Feb 2021

Also I was planning to do close-up renders to show all the details I was working on, so the texture quality should be very good as well. 

Replies

  • icegodofhungary
    Offline / Send Message
    icegodofhungary interpolator
    If this is for a film, I can't help you. If it's for a game, I would say bite the bullet and create the lowpoly. You're halfway there anyways. Reducing polygons and/or building a lowpoly isn't nearly as bad as you're making it out to be. Just make a copy of your highpoly version, and use the copy as a basis for creating the lowpoly. You don't have to model every single piece. So don't make a lowpoly bolt and a lowpoly panel line and a low poly tiny tube. Just bake all that down to a texture once you get your lowpoly mesh worked out. Look at the art for mech games like Titanfall.

    You could use a series of triplanar materials and masks to get something basic. But without a curvature map you're not going to get any edge wear details. It will look off. And even with LODs, you're pushing it with 40M polygons. I'm not a tech art guy, so I can't say for sure. But it seems like something that wouldn't work well in engine.
  • VagiVagi69
    If this is for a film, I can't help you. If it's for a game, I would say bite the bullet and create the lowpoly. You're halfway there anyways. Reducing polygons and/or building a lowpoly isn't nearly as bad as you're making it out to be. Just make a copy of your highpoly version, and use the copy as a basis for creating the lowpoly. You don't have to model every single piece. So don't make a lowpoly bolt and a lowpoly panel line and a low poly tiny tube. Just bake all that down to a texture once you get your lowpoly mesh worked out. Look at the art for mech games like Titanfall.

    You could use a series of triplanar materials and masks to get something basic. But without a curvature map you're not going to get any edge wear details. It will look off. And even with LODs, you're pushing it with 40M polygons. I'm not a tech art guy, so I can't say for sure. But it seems like something that wouldn't work well in engine.
    I could say that it was made more for a film quality since I was planning to just make a sequence with camera movement in Maya's Arnold, so no animation will be needed. I understand that no game-engine can handle this much polys in one model. I tried to automatically reduce polys with Maya's "reduce" option and it didn't get it properly. So are you suggesting retopologizing it by hand then?


    And yes, it was inspired by Titanfall btw ;)
  • icegodofhungary
    Offline / Send Message
    icegodofhungary interpolator
    Yeah I would just try to build the lowpoly by hand around the highpoly, skip the tiny details, and just bake those down. It should be a good compromise be speed and quality. But I'm not up on film texturing techniques. I know you can do stuff like Mari where you paint directly on the model, so that might be something to look into first. And there's UDIMs but that still requires unwrapping all those parts unfortunately.
  • gvii
    Offline / Send Message
    gvii polycounter lvl 10
    Even if it's for film you still need to do a lowpoly. You make UV's for that and add subdivisions as needed and use displacement instead of just normals and such. If you just want to render it, you can do vertex painting instead.
  • poopipe
    Offline / Send Message
    poopipe grand marshal polycounter
    If you do some clever stuff with materials you'll get away without UVing it - if you are stuck for time look into using Arnold to generate curvature etc.  There'll be plenty to read up on

    But, next time...
    whether you're working on films or games you will be baking stuff - what you have there is not going to get through a rigging and animation pipeline without ruining plenty of people's day. 

  • Alex_J
    Offline / Send Message
    Alex_J grand marshal polycounter
    yeah i dont know much about the film pipeline, but i have been working with some character rigs for visual novel. At first I thought, fuck it there is no real restriction because of realtime renderer, I'll just go crazy with poly count and not worry. But when it comes to rigging and animation there is still good reason to stay as low as possible. It really sucks to weight paint and animate with a model that bogs system down. Too much waiting, it will drive you crazy.

    as far as retopo goes - the model is symmetrical so its not near as daunting as it might seem at first. Should only take one day if you are proficient with your tools. If not, well time to get proficient.

    couple things will help keep maya running smoothly during retopo: 

    - decimate a version of the highpoly to use for retopo
    - load as alembic cache
    - break into pieces to retopo individually (i.e., just the legs, just the torso) 
    - periodically split your quad draw mesh into separate objects (i've found this to make the biggest impact on performance)
    - dont retopo with symmetry turned on. just do half, unwrap UV's, and mirror. 
    - retopo by hand will be the fastest thing considering the entire pipeline. when you retopo by hand, you'll make topology that helps support easy unwrapping. You'll get to know your model on a UV shell by shell basis. This will gear your mind for texturing, making that all go smoother.

    also, consider design next time: may benefit both aesthetics and workflow to use some large, simpler pieces. big pieces of armor to cover thighs, chest, etc. 


  • VagiVagi69
    yeah i dont know much about the film pipeline, but i have been working with some character rigs for visual novel. At first I thought, fuck it there is no real restriction because of realtime renderer, I'll just go crazy with poly count and not worry. But when it comes to rigging and animation there is still good reason to stay as low as possible. It really sucks to weight paint and animate with a model that bogs system down. Too much waiting, it will drive you crazy.

    as far as retopo goes - the model is symmetrical so its not near as daunting as it might seem at first. Should only take one day if you are proficient with your tools. If not, well time to get proficient.


    Thank you for the advice. I already started to retopologize the model and I hope it will be low-poly enough to keep working with it as I have too much small geometry that really has to stand out so it cannot be replaced with normals. And yes, I've just realized that I just have to retopo half of the model bc of symmetry.
  • VagiVagi69
    poopipe said:
    If you do some clever stuff with materials you'll get away without UVing it - if you are stuck for time look into using Arnold to generate curvature etc.  There'll be plenty to read up on

    But, next time...
    whether you're working on films or games you will be baking stuff - what you have there is not going to get through a rigging and animation pipeline without ruining plenty of people's day. 

    I already understand that I can't get away from baking stuff. At first I thought that since I am not planning on rendering all this in real-time renderers/game engines, then I can go crazy with polycount and just model all the details. But as I was learning more and more about 3D workflow I realized that I f*cked up and I needed to do low poly first, but it was too late as 70% of the whole Mech was modelled. I started retopologizing it and am still planning to split the model into main pieces and paint as I mentioned in the topic and then gather everything together and pose it via parenting or simple rigging.I also have a question: If I apply textures (preserving more or less correct UVs) to the model and then switch to Smooth Preview in Maya will they be distorted or not?

    Also thank you very much for the answer!
  • oglu
    Offline / Send Message
    oglu polycount lvl 666
    Could you show us some wireframes? I do net see a problem with a 40mil polymesh for rendering. 
  • Eric Chadwick
    You should carefully examine your scope, and prune away, reduce. Don't try to do a whole Pacific Rim hangar.

    Focus on a small scope, just the head for example. Finish just that, to completion, to learn the process.

    Then apply your learnings to the rest of the mech, if there's time. You'll be redoing things a few times, as you learn what works and what doesn't.

    Get really good at making one thing well, rather than making a whole lot of halfway.
  • VagiVagi69
    You should carefully examine your scope, and prune away, reduce. Don't try to do a whole Pacific Rim hangar.

    Focus on a small scope, just the head for example. Finish just that, to completion, to learn the process.

    Then apply your learnings to the rest of the mech, if there's time. You'll be redoing things a few times, as you learn what works and what doesn't.

    Get really good at making one thing well, rather than making a whole lot of halfway.
    I know, but head only would not be accepted as a graduation project so I was told to model, texturize and render the whole scene. I want to mention that I'm doing 3D modeling for almost a year now and this is my second project so far. Before that I modelled Millenium Falcon with very bad topology and no textures at all, but it went pretty well as for someone who didn't know the software and modeling principles at all :)
    Also I was learning software, basics and fundamentals while working on this mech. I just want to finish this as soon as possible and star working on my own project to learn proper workflow, techniques and, most importantly, fundamentals.  
  • VagiVagi69
    oglu said:
    Could you show us some wireframes? I do net see a problem with a 40mil polymesh for rendering. 


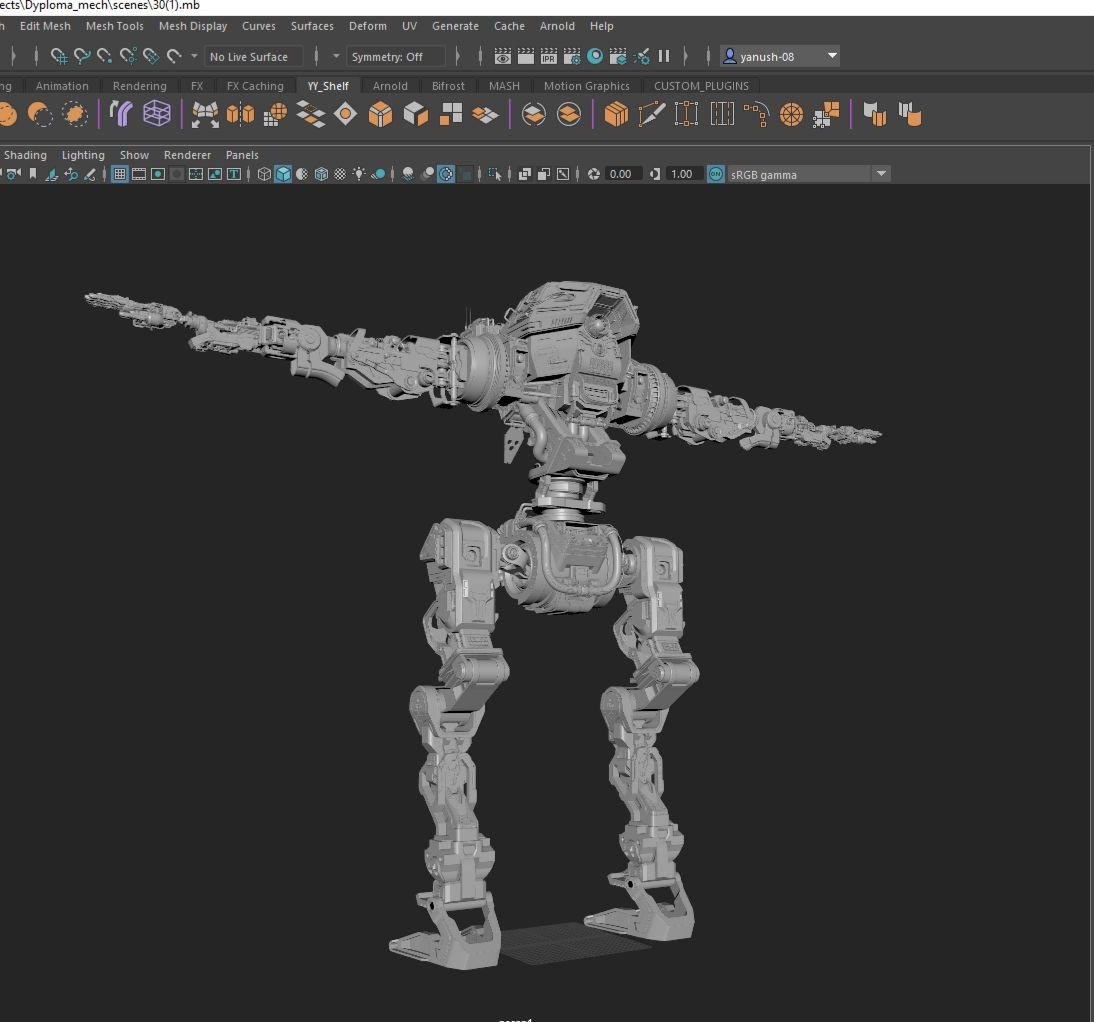
    Some screenshots of the wireframe. Don't mind the design. I've got some feedback on it and I know it's pretty bad. I am currently fixing the topology getting rid of some non-required edges piece by piece

    UPD:

    Topology is 90% quads, 10% tris. No n-gons. Some pieces have supporting edges, some are beveled (bc I've learned the tool during the process)   \( "_ )/
  • oglu
    Offline / Send Message
    oglu polycount lvl 666
    I would say thats fine for rendering. Just make UVs. Its not uncommon todo 5 days UVs for such complex model. 
    Polyshell per polyshell. One by one. Dont give up.

    We do basic uvs during the modeling. Just simple cuts + unfold.

    If you would use this model with displacement you would need even more poly on some objects. 
  • VagiVagi69
    oglu said:
    I would say thats fine for rendering. Just make UVs. Its not uncommon todo 5 days UVs for such complex model. 
    Polyshell per polyshell. One by one. Dont give up.

    We do basic uvs during the modeling. Just simple cuts + unfold.

    If you would use this model with displacement you would need even more poly on some objects.


    Thank you, I will try to make UVs as good as possible because I never really unwrapped any model yet. About the displacement... Is it really needed with this much detailed already implemented into geometry? Or you suggest i.e. making some seams between the panels, skrews, bolts, etc?


  • oglu
    Offline / Send Message
    oglu polycount lvl 666
    I thought more in the dericton of big scatches. Surface Detail displacement. 
  • VagiVagi69
    oglu said:
    I thought more in the dericton of big scatches. Surface Detail displacement. 
    Okay I will try. Thank you again for your advices! 
  • sprunghunt
    Offline / Send Message
    sprunghunt polycounter
    you could probably just use procedural textures for a lot of the surfaces on this. Despite what other people have said when you're going to a offline renderer you don't need to bake things. 

    You can use materials that have box projections for textures and then use an edge-detection node to blend it with other materials. This is dependent on what renderer you're using. 

    Here's a tutorial for arnold that shows the technique I'm talking about:
    https://youtu.be/6_KzuYlbqDw
  • oglu
    Offline / Send Message
    oglu polycount lvl 666
    And how does this work if you animate the robot? 
  • gnoop
    Offline / Send Message
    gnoop polycounter
    Never dealt with such a hi poly manual unwrapping myself.   It had always been Zbrush auto unwrap   or just vertex paint + edge detecting shader  to be baked then into low poly shell.

    Still I wonder isn't Ptex texturing  had been invented for exactly this issue.     Is Ptex dead  now?  Haven't heard any fuss  about it for  a while.
  • oglu
    Offline / Send Message
    oglu polycount lvl 666
    Ptex does work only good with low polycount objects optimized for subD. Its made for Disney Style.
    Making UVS for complex stuff is just part of the game if you work for Film.
    This robot here will need some UDIMs to get a decent pixel density. But first you have to create clean unfolded UVs.
  • oglu
    Offline / Send Message
    oglu polycount lvl 666
    VagiVagi69 if you need help you could upload the upper leg here and i could show how to unwrap it.
  • VagiVagi69
    oglu said:
    VagiVagi69 if you need help you could upload the upper leg here and i could show how to unwrap it.
    I can just put it here for you just to check it and practice unwrapping  :)

  • VagiVagi69
    oglu said:
    And how does this work if you animate the robot? 
    Also I don't plan to animate the robot, so one problem less I guess
  • VagiVagi69
    oglu said:
    VagiVagi69 if you need help you could upload the upper leg here and i could show how to unwrap it.
    Here's a link for download https://we.tl/t-TZbC384PXJ
  • oglu
    Offline / Send Message
    oglu polycount lvl 666
    First i did a fast test with Automatic UVS in Maya and Substance. 
    Both are doing a decent job for fast automatic uvs.
    Maya does have less distortion but a lot of small UV shells.

     If you use projections in Substance for painting this could be a solution.
    You would have to use UDIMs with parts not bigger that this upper leg. Otherwise you wont get enough texture resolution for closeups.

    I would do first an automatic UV pass in Maya or Substance. And pick the most visible parts and do  UVs by hand.
    Depending on the time you have.


  • oglu
    Offline / Send Message
    oglu polycount lvl 666
    Here a fast video to get you an idea. 

    For Film Assets straight UVs and texture space usage isnt that important than for Games. You doint need super clean UVs.
    Its more or less a matter of how much time you have todo the UVs. Sure overlaps and extreme distortions arnt welcome.
    Cause of UDIMs you have a much higher texture resolution and this is "hiding" a lot of UV troubles.

    https://youtu.be/S7g7fcmigx8
  • oglu
    Offline / Send Message
    oglu polycount lvl 666
    My suggested workflow would be. Delete one leg and one Arm. Those UVs get mirrored in the end.
    Create 10 Parts for UDIMs. Bring one by one into Substance to create the UVs.
    Bring them back to Maya and decide wich Polyshells you like todo by hand.

    I assume in around 5h you have decent enough UVs. Invest 16h and you have really good UVs.
  • oglu
    Offline / Send Message
    oglu polycount lvl 666
    Even with Automatic UVs you get something.

    Note: If you deliver those UVs for a Game your Head will get bitten off.
    And i wont show those UVs on Artstation.


  • oglu
    Offline / Send Message
    oglu polycount lvl 666
    I dont believe your polycount is 40mil. Those leg part does have only 73k Faces.
    You are in smooth preview mode. Turn that off and you see the real polycount.
  • VagiVagi69
    oglu said:
    Even with Automatic UVs you get something.

    Note: If you deliver those UVs for a Game your Head will get bitten off.
    And i wont show those UVs on Artstation.


    Wow! Looking at how you are doing this it looks sooo simple! Thanks a lot for showing the process as well!

    When I tested unwrapping, what I did is first i did Planar Uv's, then I auto-cut it, then unfolded it with Unfold3D and then with Legacy unfold just to make sure it unwrapped better both horizontally and vertically. And then layout. Sometimes I was getting similar results to yours showed above, but most of the time with more simple objects it did a decent job.
    Of course it doesn't fit the game production workflow at all, I understand that. But since I am not planning on putting it inside game engine, I think I'm good :D

    I will definitely try your method! Just need to finish optimizing the model to lower the polycount. 
  • VagiVagi69
    oglu said:
    My suggested workflow would be. Delete one leg and one Arm. Those UVs get mirrored in the end.
    Create 10 Parts for UDIMs. Bring one by one into Substance to create the UVs.
    Bring them back to Maya and decide wich Polyshells you like todo by hand.

    I assume in around 5h you have decent enough UVs. Invest 16h and you have really good UVs.
    Also I didn't quite get the part with UDIMs. By bringing parts to SP you mean to generate auto UVs?
  • oglu
    Offline / Send Message
    oglu polycount lvl 666
    Yes you create the uvs in Substance. But the final UDIM layout in Maya. 
  • gnoop
    Offline / Send Message
    gnoop polycounter
    oglu said:
    Ptex does work only good with low polycount objects optimized for subD.
    Wonder what's the issue exactly?  I'v never worked with ptex really  but  considered  it for some coming project.    Too heavy for calculating  in real time preview with hires models?

  • Neox
    Offline / Send Message
    Neox veteran polycounter
    i really don't see the problem with using this for film, or even rigging it. The basemesh looks fine, rigging is easy because its 90%+ just hard linked stuff. making a lowpoly and baking displacement maps for a hardsurface object is highly unlikely to happen in film, at least the productions i know. This will go straight through the pipeline into the renderer, there is nothing complicated here besides maybe the amount of meshes, which could be grouped or attached together if needed.

    just make uvs and go with that
  • oglu
    Offline / Send Message
    oglu polycount lvl 666
    The animation question was for Sprunghunt. Cause projections and triblanars arnt stable for animation. You need to bake them.
    And without UVs you cant.
  • sprunghunt
    Offline / Send Message
    sprunghunt polycounter
    • oglu said:
      And how does this work if you animate the robot? 
      oglu said:
      The animation question was for Sprunghunt. Cause projections and triblanars arnt stable for animation. You need to bake them.
      And without UVs you cant.
      Triplanar mapping or box mapping in Maya has a gizmo that you can parent to an object if you want to move it around without the textures swimming. Obviously this could be complicated if you have lots of small objects and it might be simpler just to give them UV's. You still don't need to bake the textures though - UV's just replace the triplanar mapping node. 
  • VagiVagi69
    Neox said:
    i really don't see the problem with using this for film, or even rigging it. The basemesh looks fine, rigging is easy because its 90%+ just hard linked stuff. making a lowpoly and baking displacement maps for a hardsurface object is highly unlikely to happen in film, at least the productions i know. This will go straight through the pipeline into the renderer, there is nothing complicated here besides maybe the amount of meshes, which could be grouped or attached together if needed.

    just make uvs and go with that
    Yes I was keeping in mind that I have 0% knowledge of riggin, so that's why I didn't make any pistons, wires, etc. Only main joints that can rotate :D
  • VagiVagi69
    Thank you all by the way for joining this topic and helping with this stuff! I really appreciate it a lot!
  • oglu
    Offline / Send Message
    oglu polycount lvl 666
    • oglu said:
      And how does this work if you animate the robot? 
      oglu said:
      The animation question was for Sprunghunt. Cause projections and triblanars arnt stable for animation. You need to bake them.
      And without UVs you cant.
      Triplanar mapping or box mapping in Maya has a gizmo that you can parent to an object if you want to move it around without the textures swimming. Obviously this could be complicated if you have lots of small objects and it might be simpler just to give them UV's. You still don't need to bake the textures though - UV's just replace the triplanar mapping node. 
    I would like to be in the room if you tell that workflow the rigging and rendering department.  ;) 
  • VagiVagi69
    oglu said:
    • oglu said:
      And how does this work if you animate the robot? 
      oglu said:
      The animation question was for Sprunghunt. Cause projections and triblanars arnt stable for animation. You need to bake them.
      And without UVs you cant.
      Triplanar mapping or box mapping in Maya has a gizmo that you can parent to an object if you want to move it around without the textures swimming. Obviously this could be complicated if you have lots of small objects and it might be simpler just to give them UV's. You still don't need to bake the textures though - UV's just replace the triplanar mapping node. 
    I would like to be in the room if you tell that workflow the rigging and rendering department.  ;) 
    I am still learning! :D I will get better at it for sure
  • sprunghunt
    Offline / Send Message
    sprunghunt polycounter
    oglu said:
    • oglu said:
      And how does this work if you animate the robot? 
      oglu said:
      The animation question was for Sprunghunt. Cause projections and triblanars arnt stable for animation. You need to bake them.
      And without UVs you cant.
      Triplanar mapping or box mapping in Maya has a gizmo that you can parent to an object if you want to move it around without the textures swimming. Obviously this could be complicated if you have lots of small objects and it might be simpler just to give them UV's. You still don't need to bake the textures though - UV's just replace the triplanar mapping node. 
    I would like to be in the room if you tell that workflow the rigging and rendering department.  ;) 
    If you have a separate rigging department you probably have the budget to just take longer texturing. 
  • ninthtale
    Offline / Send Message
    ninthtale polycounter lvl 7

    Super late to the party but bifrost might help:

    https://www.youtube.com/watch?v=p6EuH5o_CuQ

  • oglu
    Offline / Send Message
    oglu polycount lvl 666

    Have you watched that video? That wont help doing UVs.

  • Klaudio2U
    Offline / Send Message
    Klaudio2U polycounter lvl 8
    Potentially there could be little bit better way then just dirty "Automatic UV"  and since you have hardsurface model with lots of pieces but basic shapes overall so this could work good.

    Process: 
    1. Select one piece of the model (or more) and apply under Mesh Display > Soften/Harden Edges (you want hard edges on "sharp" corner and stuff for later UV cutting)
    2. First step in UVs apply "Camera-based" UVs
    3. Now go to "Auto-Seams" option box and there chose "Cut along hard edges"
    4. Select all the UVs and Unfold and then Layout to pack them
  • chien
    Offline / Send Message
    chien polycounter lvl 13

    i won't use auto unwrap, even if convinience, still will use cut for manage the UV's and UV islands. to save on the time can make instance too

  • poopipe
    Offline / Send Message
    poopipe grand marshal polycounter
    why not?  doing as Oglu did  with auto unwrap and then manual finishing is a lot quicker and gets you the same result.
  • sprunghunt
    Offline / Send Message
    sprunghunt polycounter


    I have found that in Maya using auto unwrap on very high poly objects sometimes crashes. But doing separate UV projections always works. Sometimes doing a UV projection to split the mesh and then auto unwrapping in chunks works too.


    The auto unwrap in Houdini is much better than Maya though. If I was working on a very high poly object I might just go to Houdini to unwrap it instead of using Maya.

  • poopipe
    Offline / Send Message
    poopipe grand marshal polycounter

    that's fair - my point was don't be dogmatic about it.


    j

Sign In or Register to comment.