Character Seams - How to Optimise UVs for Good Seams
*EDIT* Looks like I put it in the wrong thread, was supposed to go into Technical Talk. Any admins know how to move these posts? Thanks!!
Hello,
I have a question about optimizing your UVs for better Seams, as I'm having issues unwrapping the faces which would eliminate the harsh seam altogether. I'm basically creating this Monster character and I've finished UV and Baking it. But I have noticed the seams are really noticeable at some segments.

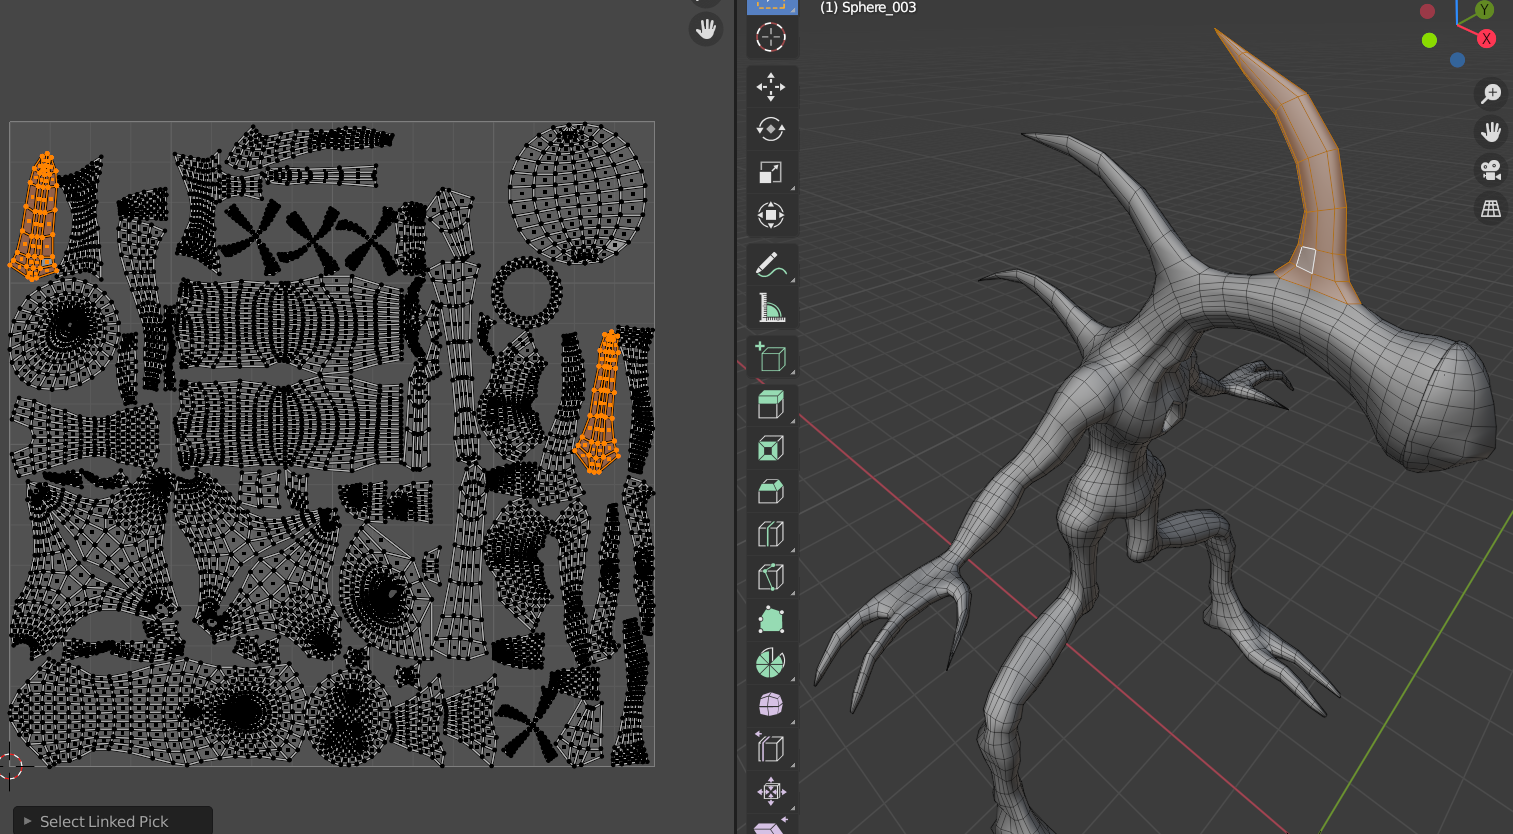
These are the UVs for the character, with the highlighted faces showing the normal seams from the above screenshot. Tried to remove Seams and Unwrap it but it completely messes up. I'd ideally like good UVs that join both of these islands together basically.

I have amended these particular faces to straight UVs, but I really have no idea if that is even the right way to go about it, especially for organic creatures.

Basically, what I'm asking is what to use/go about getting better UVs so I can avoid harsh visible seams after normal baking. Whenever I try to join both islands up and Unwrap it, it just looks like a complete mess. Any help would be appreciated.
Hello,
I have a question about optimizing your UVs for better Seams, as I'm having issues unwrapping the faces which would eliminate the harsh seam altogether. I'm basically creating this Monster character and I've finished UV and Baking it. But I have noticed the seams are really noticeable at some segments.

These are the UVs for the character, with the highlighted faces showing the normal seams from the above screenshot. Tried to remove Seams and Unwrap it but it completely messes up. I'd ideally like good UVs that join both of these islands together basically.

I have amended these particular faces to straight UVs, but I really have no idea if that is even the right way to go about it, especially for organic creatures.

Basically, what I'm asking is what to use/go about getting better UVs so I can avoid harsh visible seams after normal baking. Whenever I try to join both islands up and Unwrap it, it just looks like a complete mess. Any help would be appreciated.

Replies
thanks for the response, I think you misunderstood my question though. I have no issues seeing the seams at all, just needed to know how I can properly UV this type of organic character to avoid seams like the one shown in the screenshot!
Can you post a screenshot with your baked textures applied?
The first thing that comes into my mind is that you might be worrying too much about how the normal map looks around those seams. However, the thing about "tangent space normal maps" is that they depend on the tangents, which may vary drastically depending on how the UV islands are rotated relative to each other. So it is to be expected that those seams are going to look "wrong" if you only look at the normal map rather than the final result. That in itself is not really something to worry about too much. You only really have a problem if you can see the seams in the final result.