It starts May 12, and ends Oct 17. Let's see what you got!
https://polycount.com/discussion/237047/the-brawl²-tournament
The Polycount Newsfeed
Re: topology for subdivide
The curves in the base mesh subdivide cleanly because both sides of the grooves have the same number of segments. Adding the support loops to the two adjacent splits in the shape below the groove changes the segment spacing on the lower half of the curve. Which does sharpen the corners but also causes them to overlap with the upper half of the curved groove.
There's a few different ways to resolve this kind of smoothing artifact. Deciding which approach makes the most sense will depend on how soft the edges need to be and whether or not the model needs to be split into separate meshes.
If the subdivision model will only be used for rendering then it probably makes sense to keep the relatively tight support loops and mesh splits along the object's parting lines. Since the model's existing topology looks workable: the easiest solution would be to shrink down the outer vertices of the sharpened corners, preferably before adding the support loops.

Moving the corner geometry down compensates for the upward distortion caused by the abrupt change in the segment spacing. This will leave a small gap between the individual meshes but everything will fall in line with the larger curve when the subdivision is applied. How far the corner vertices need to be moved will depend on the shape of the arc, number of segments in the curve and the width of the support loops that are causing the distortion.
Enabling subdivision preview will make it easier to line everything up. It may also be a good idea to constrain any move operations to the edge normals of the surface. This will help prevent the adjustments from disrupting the compound curvature of the underlying surface.

If the subdivision model will only be used as a high poly for baking then it probably makes sense to use looser support loops and it may even be worth merging some of the mesh components to simplify the shapes. A simple block out can be used to establish the topology flow of the larger forms and this can be refined in stages to resolve any potential issues around the smaller shapes. Creases and edge weighted bevel modifiers can be used to preview loop smoothing behavior while working through the topology.
Once the basic loop flow is established, the loop path can be created with a single bevel / chamfer operation or multiple inset operations. The depth of the parting lines can be added by shrinking the middle loop on the path inwards. Final support loops can be generated using an edge weighted bevel modifier. Below is an example of what that process could look like.
Having a continuous base mesh provides some additional options for the topology routing. It's possible to use a 5 sided E pole to direct the flow around the split in the shapes or use a triangular quad to reduce the perpendicular support loops without adding segments to the primary curvature. Here's a close up look at the topology near where the corners meet the top curvature of the parting line.
Support loops can be organized with several different routing strategies but the goal should be to constrain any minor smoothing artifacts to the narrow area between the support loops where it won't be visible. Generating the support loops with an edge weighted bevel modifier means it's possible to adjust the number of segments and width of the support loops as required. Without having to manually re-work each individual loop.

While a continuous mesh can be used to simplify the high poly geometry for baking, it may not be the right choice for every shape. Large, complex objects should generally be broken up into individual components that match the desired fidelity of the in-game model. Splitting a mesh along an object's seam lines also allows each part to have a slightly different polygon density. Which can make it a lot easier to establish seperate topology flows on individual surfaces. Just be sure that the adjacent shapes deform as expected when subdivision is applied and adjust the shape of the base mesh as required.

Recap: Complex objects should generally be broken down into individual parts that are modeled separately. It may be necessary to adjust the shape of separate mesh elements that are adjacent but have mismatched segment counts or additional support loops. Certain shapes can be simplified by merging adjacent shapes. Establishing the topology flow in several different stages can make it easier to create continuous meshes but it can be challenging to plan for every surface detail. Take the time to think about how the subdivision model will be used and optimize workflow decisions around the desired results.
Sketchfab Spotlight | June 2022

A collection of the latest and greatest pieces from Sketchfab users
[FINISHED] Mad Science Gun - Seeking feedback
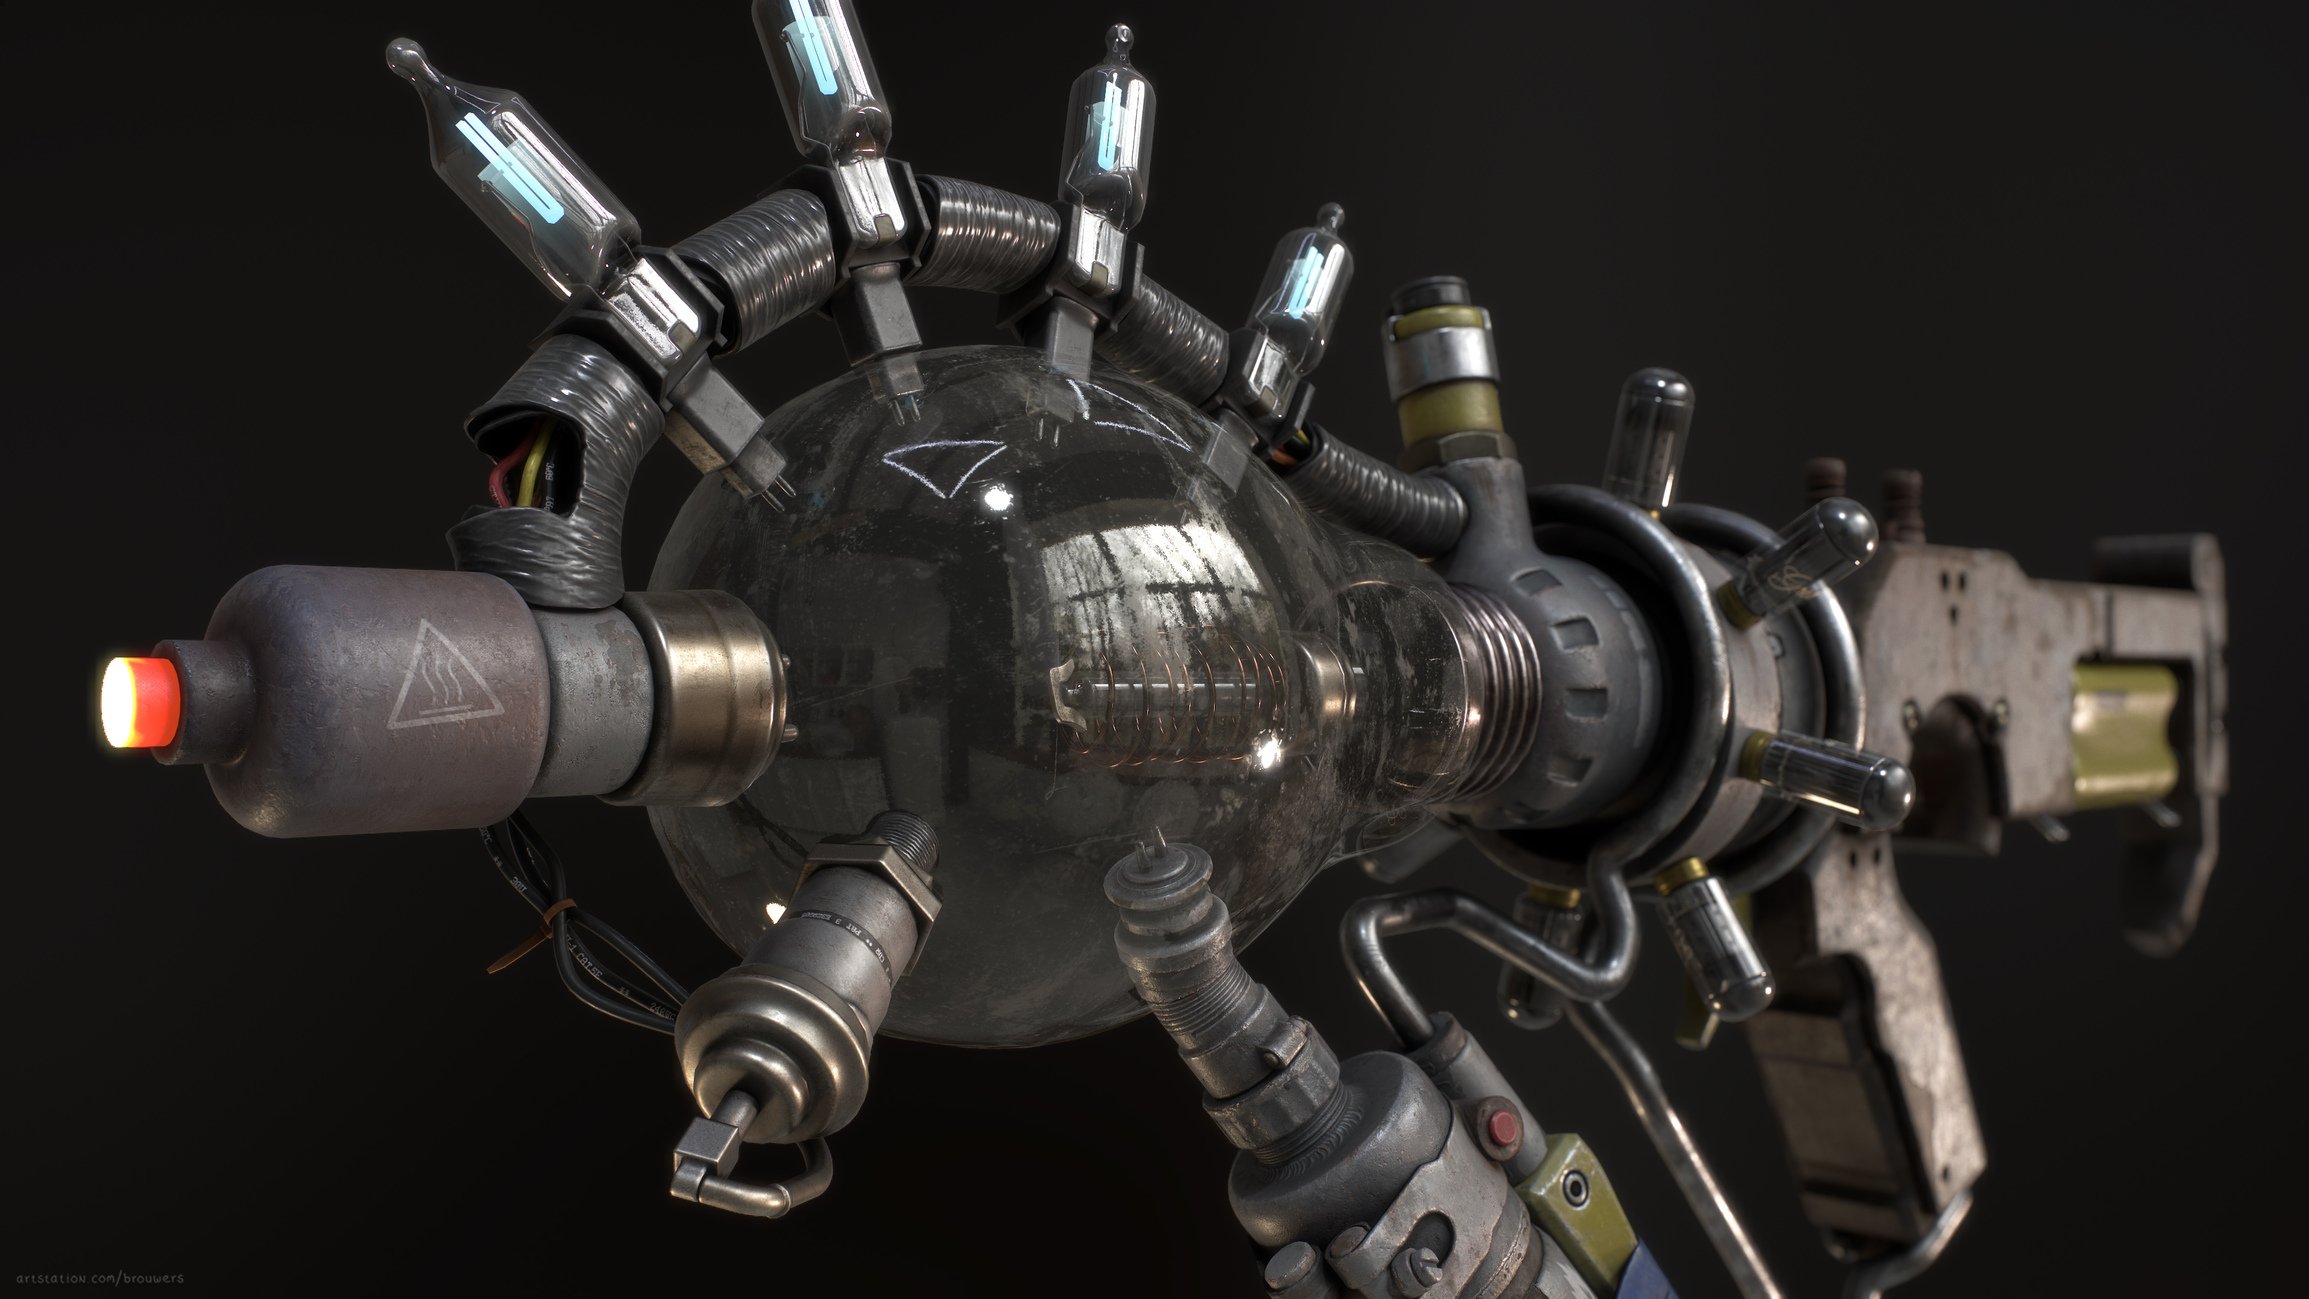
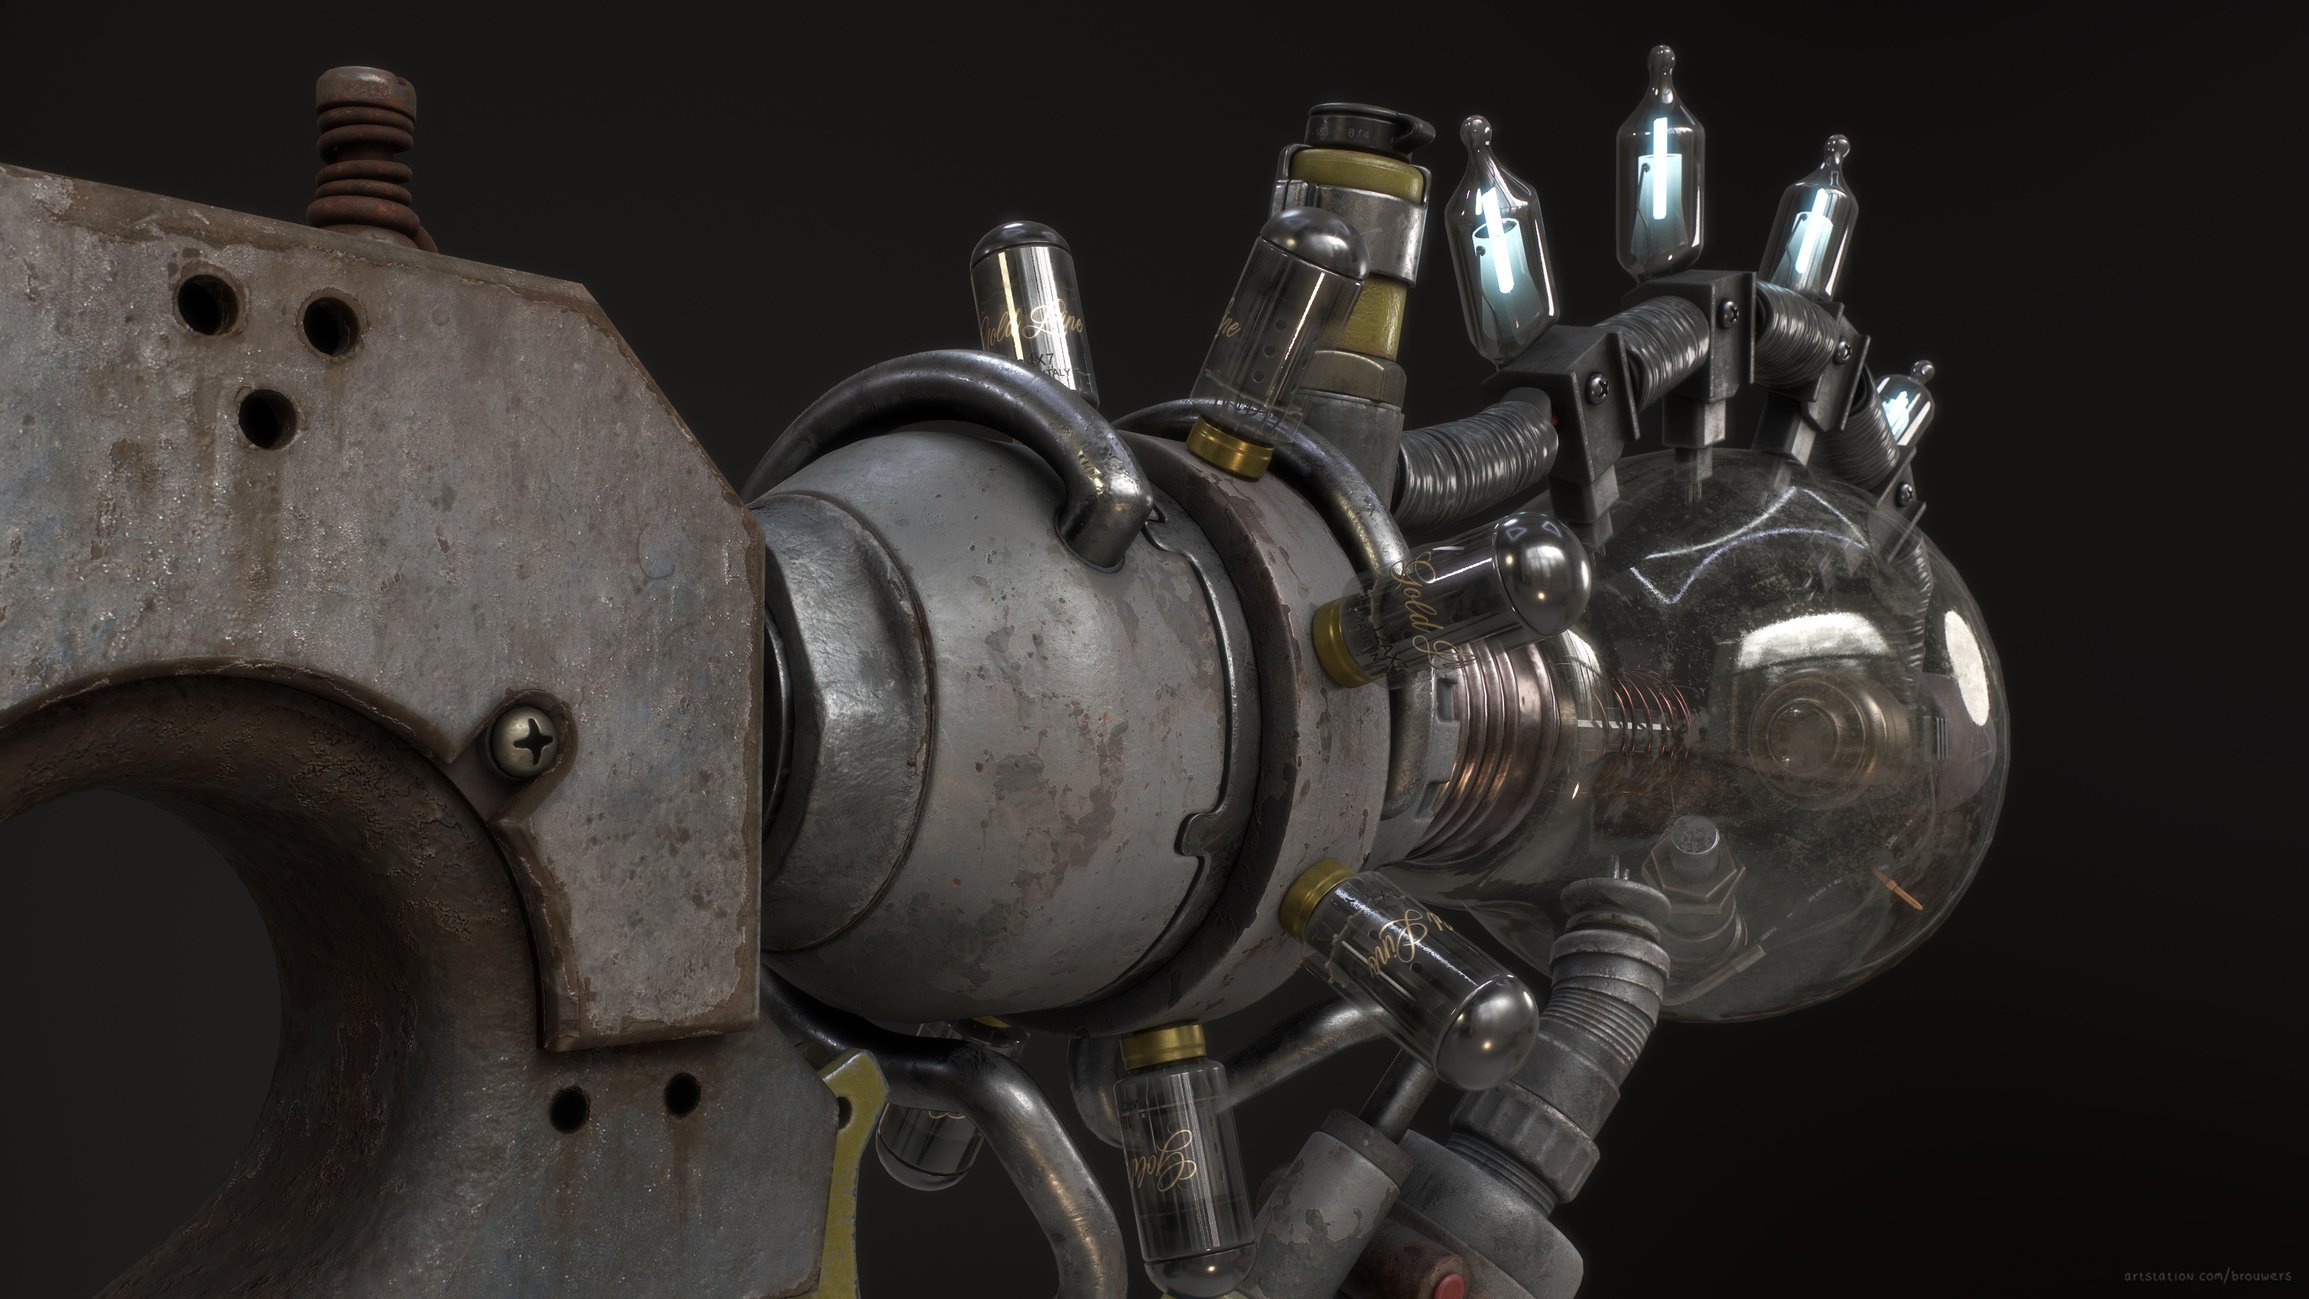
Hi everyone, today I finished rendering this portfolio piece I've been working on for about three months now. I'm trying to get it as high quality as I possibly can.
I could really use some feedback as I'm having a hard time seeing it for what it is after working on it for so long.
Original concept by Bruce Yu.
I'm really curious to hear what you think about the material as well as the renders (lighting, composition), and how it could be improved further!


 JorisArt
Sketchfab Spotlight | May 2022
A collection of the latest and greatest pieces from Sketchfab users
Re: Sketchbook: Frank Polygon
Subdivision sketch: radial selector switch.
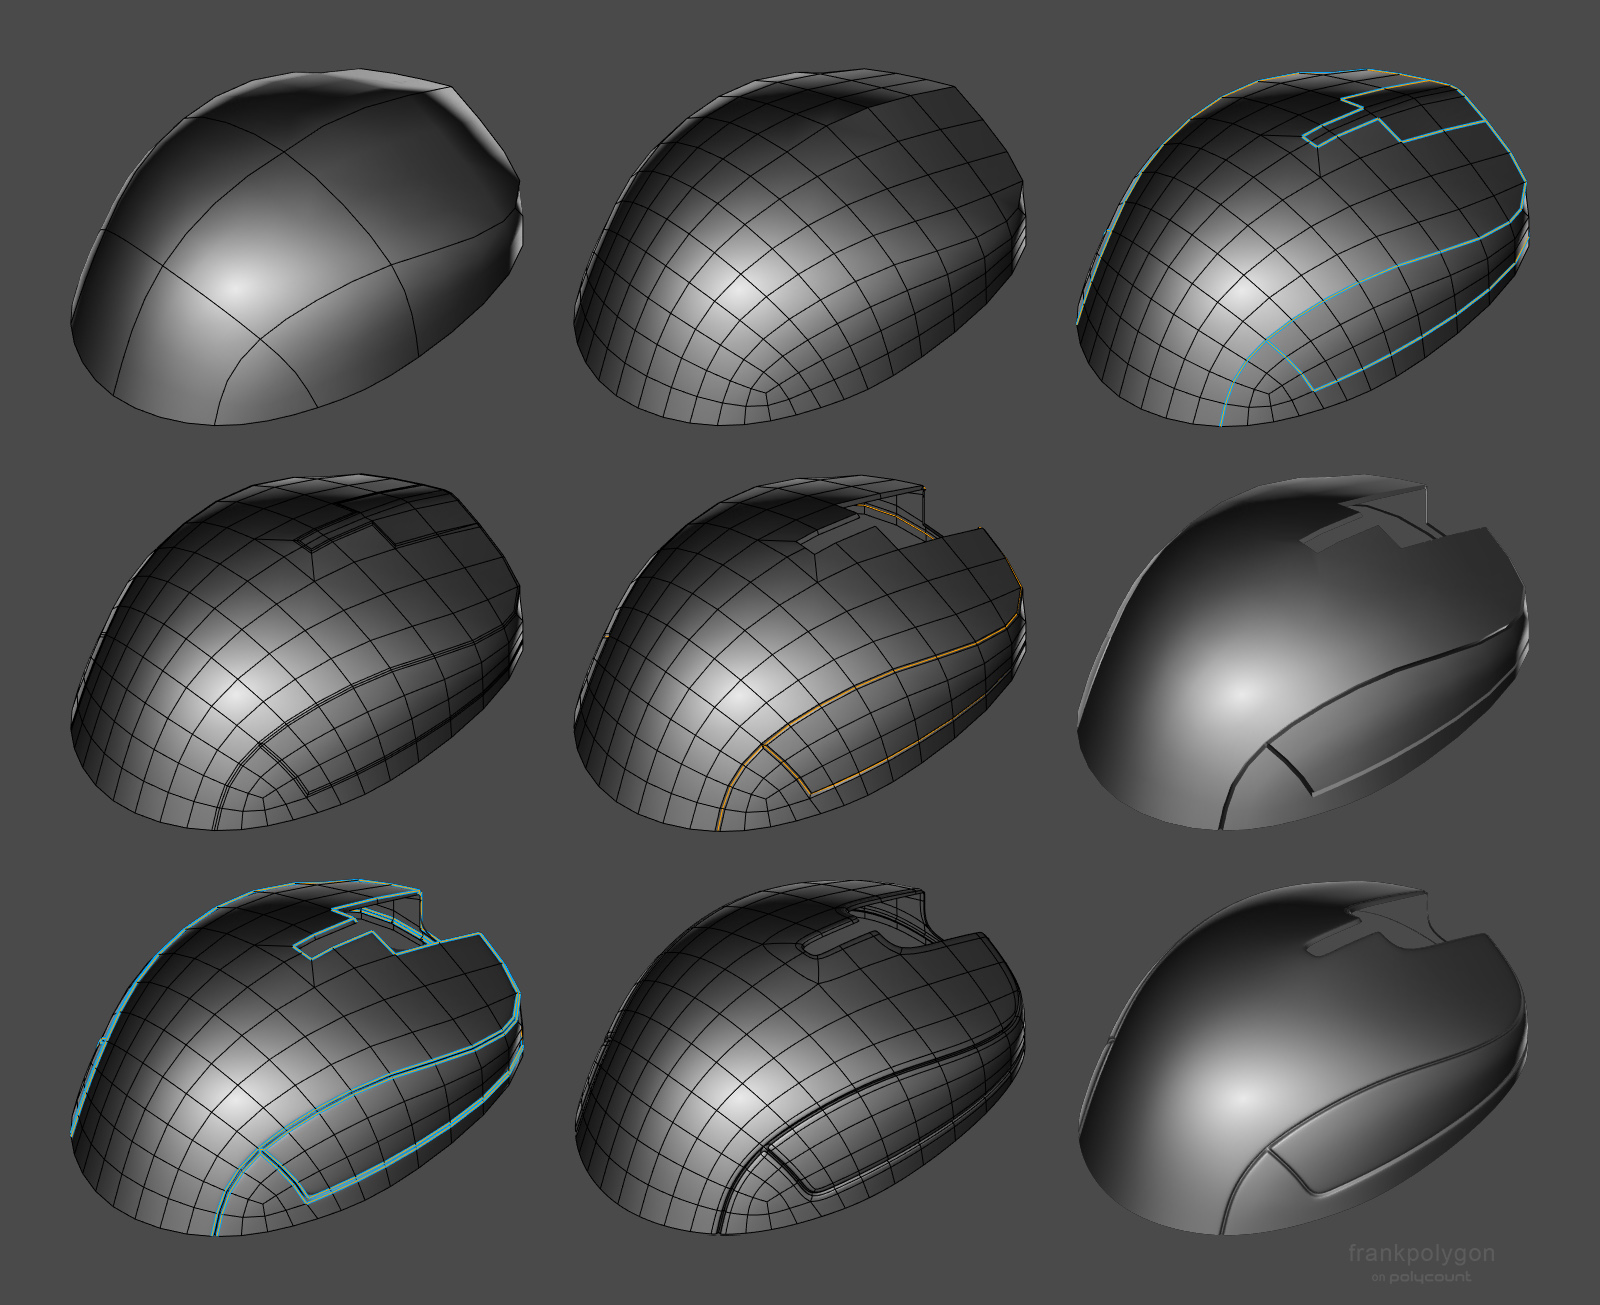
This write-up is a brief overview of how resolving topology issues, before moving on to the next level of mesh complexity, can help make subdivision modeling processes a lot easier to manage.
It often makes sense to start the block out by establishing the larger shapes and curved surfaces but it's also important to include any complex shape intersections, that could constrain the nearby geometry, when planing out the order of operations and topology flow. Basic modeling operations like [constrained] extrude, inset and bevel / chamfer can be used to generate accurate angles and curves that preserve the underlying edge structure.
Surface shapes, especially along curved areas, can be defined by adding loop cuts that follow the existing topology flow. Constrained cut operations can also be used to slice through the existing geometry. This is an easy way to connect nearby loops in a way that defines the straight edges of the surface features. Extraneous edge loops generated by these operations can be left in place to preserve the shapes for additional modeling operations but it is important to remove left over geometry as soon as it's no longer needed. After outlining the surface shapes, connect and dissolve operations can be a quick way to organize edge loops along a surface.

Extruding edges into existing shapes sometimes requires cutting holes in the surface of the mesh. Bridge and fill operations can be a quick way to close these holes but mismatched edge segments can leave behind triangles and n-gons. Both can be left in to make additional modeling operations easier or when they have minimal impact on surface quality.
If it's necessary to resolve the mesh as all quads, it can make sense to work through adding secondary shape details that can be used to even out the segment count of adjacent loops. Focus on creating accurate shapes first then adjust the number of segments in secondary details, to resolve the topology flow issues at the lowest possible level, before complicating the mesh by adding lots of support loops.

After the major surface features are established, it should be fairly straightforward to continue adding smaller details. Keeping the edge flow relatively tidy after adding each shape and breaking the mesh up into tileable sections will also make it a lot easier to add the final support loops.

Boolean operations and other modifiers can be used to speed up the block out process but the same fundamental principles of subdivision modeling still apply. The increased flexibility of these tools makes it a lot easier to adjust each shape independently and experiment with different segment counts to find complimentary geometry. Without having to rely on lucky guesses or having to manually rework the same shape multiple times.
In this example: the basic profile is created from a flat outline and a modifier is used to sweep it around the central axis of the shape. Another modifier is used to generate the outer round over. The curves of the subtractive boolean object are also created with modifiers. This setup makes it incredibly easy to adjust the number of segments in the features of the primary shape.
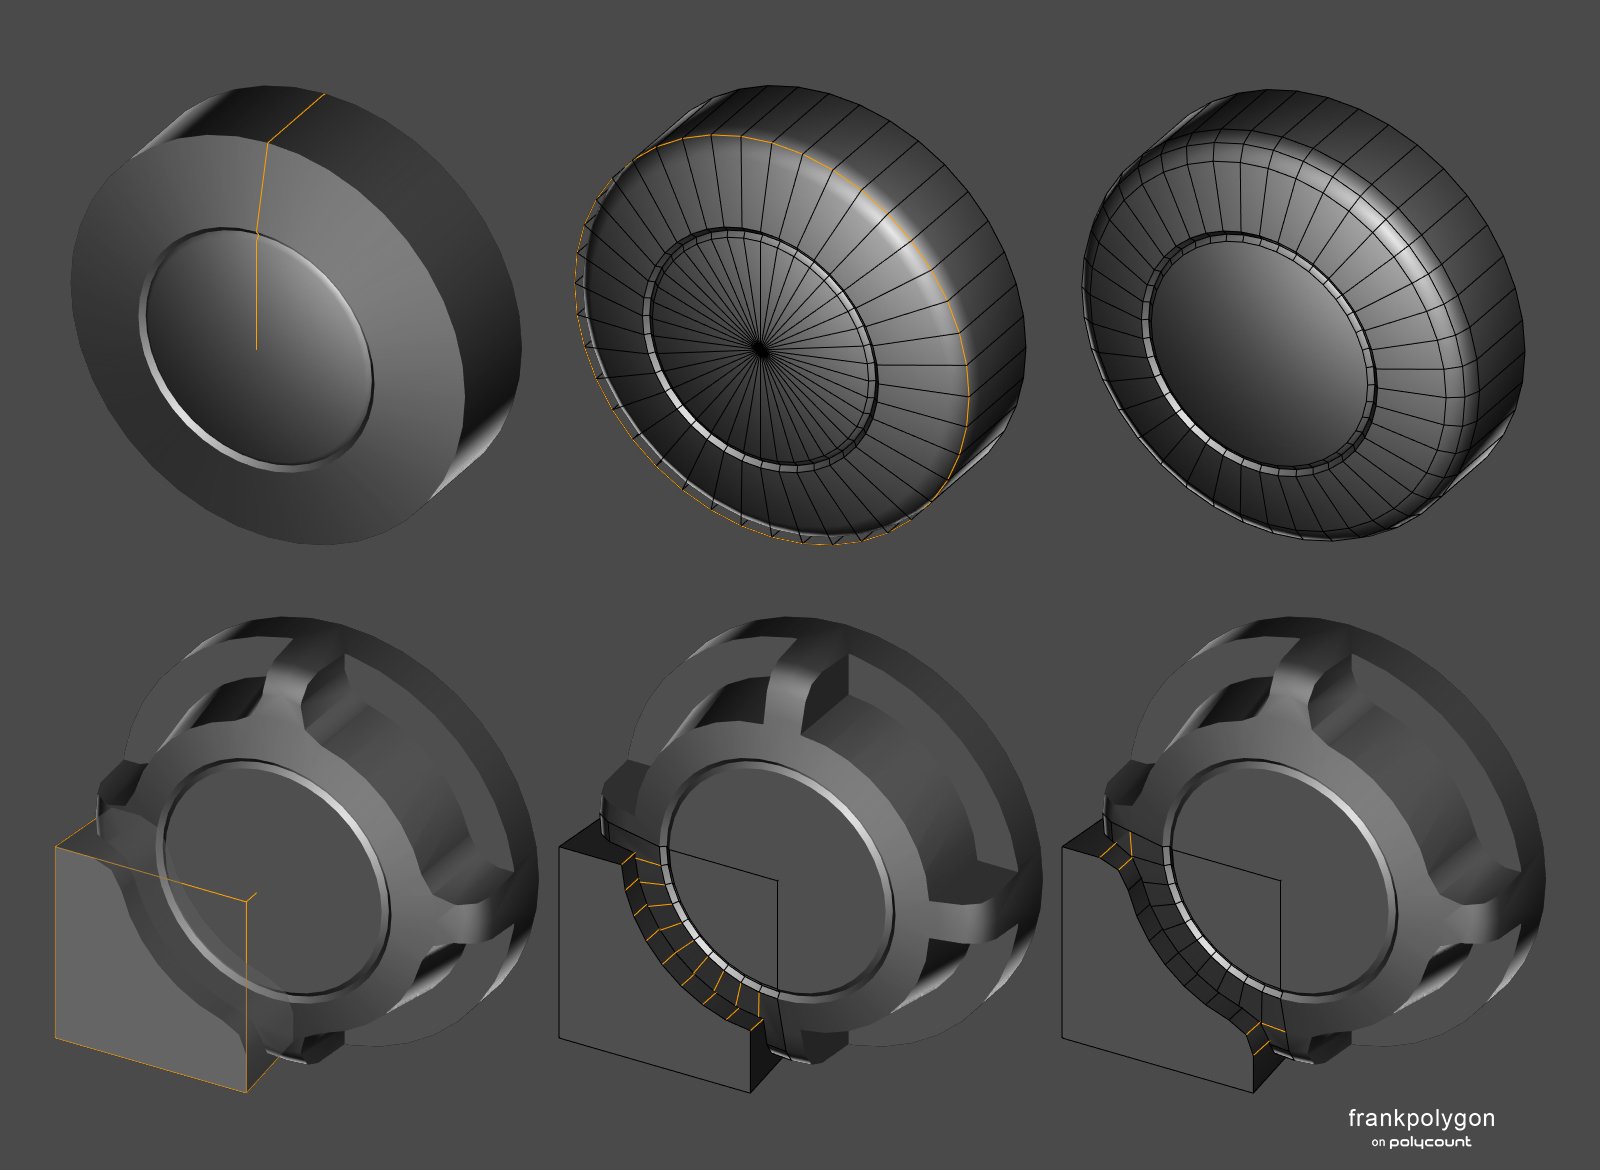
Once all of the segments in the shapes are roughly aligned the modifiers can be applied and the mesh can be cleaned up with a merge by distance operation. Multiple mirror modifiers make it possible to split the base mesh into the smallest possible tiling segment. Which makes it a lot easier to work on the topology routing. Additional edge loops are cut in to provide structure and resolve the mesh to quads then the support loops are added around the shapes using a bevel / chamfer modifier. So adjusting the softness of the edges is easy as changing the modifier's settings.

Final surface details can be added using grid fill, proportional editing and basic inset operations.

Re: Tankhead Heikegani Completed
For sure my friend. Recently finished the model and it is up on my portfolio. Check it out for more stuff like the model viewer, rig, and different shots.
https://www.artstation.com/artwork/Ea2EEq


 np1094
Re: Sketchfab Integration
So. Things have changed a bit. If you copy the page address from Sketchfab, you need to edit it a bit to produce an embed...
The raw address =
https://sketchfab.com/3d-models/rin-tohsaka-fatestay-night-heavens-feel-9ff1d66f147a460cad3217b80b884c11
But if you edit the address a bit, it will automatically embed itself...
https://sketchfab.com/models/rin-tohsaka-fatestay-night-heavens-feel-9ff1d66f147a460cad3217b80b884c11#UNIQSKFBVANILLA
I'll contact Vanilla, see if they can fix this on their end. But for now, this should help.
 Eric Chadwick
Re: UFC: Jon Jones
Texture Updates in Substance!
Hey folks, it's been a while since I've posted, here are some updates:


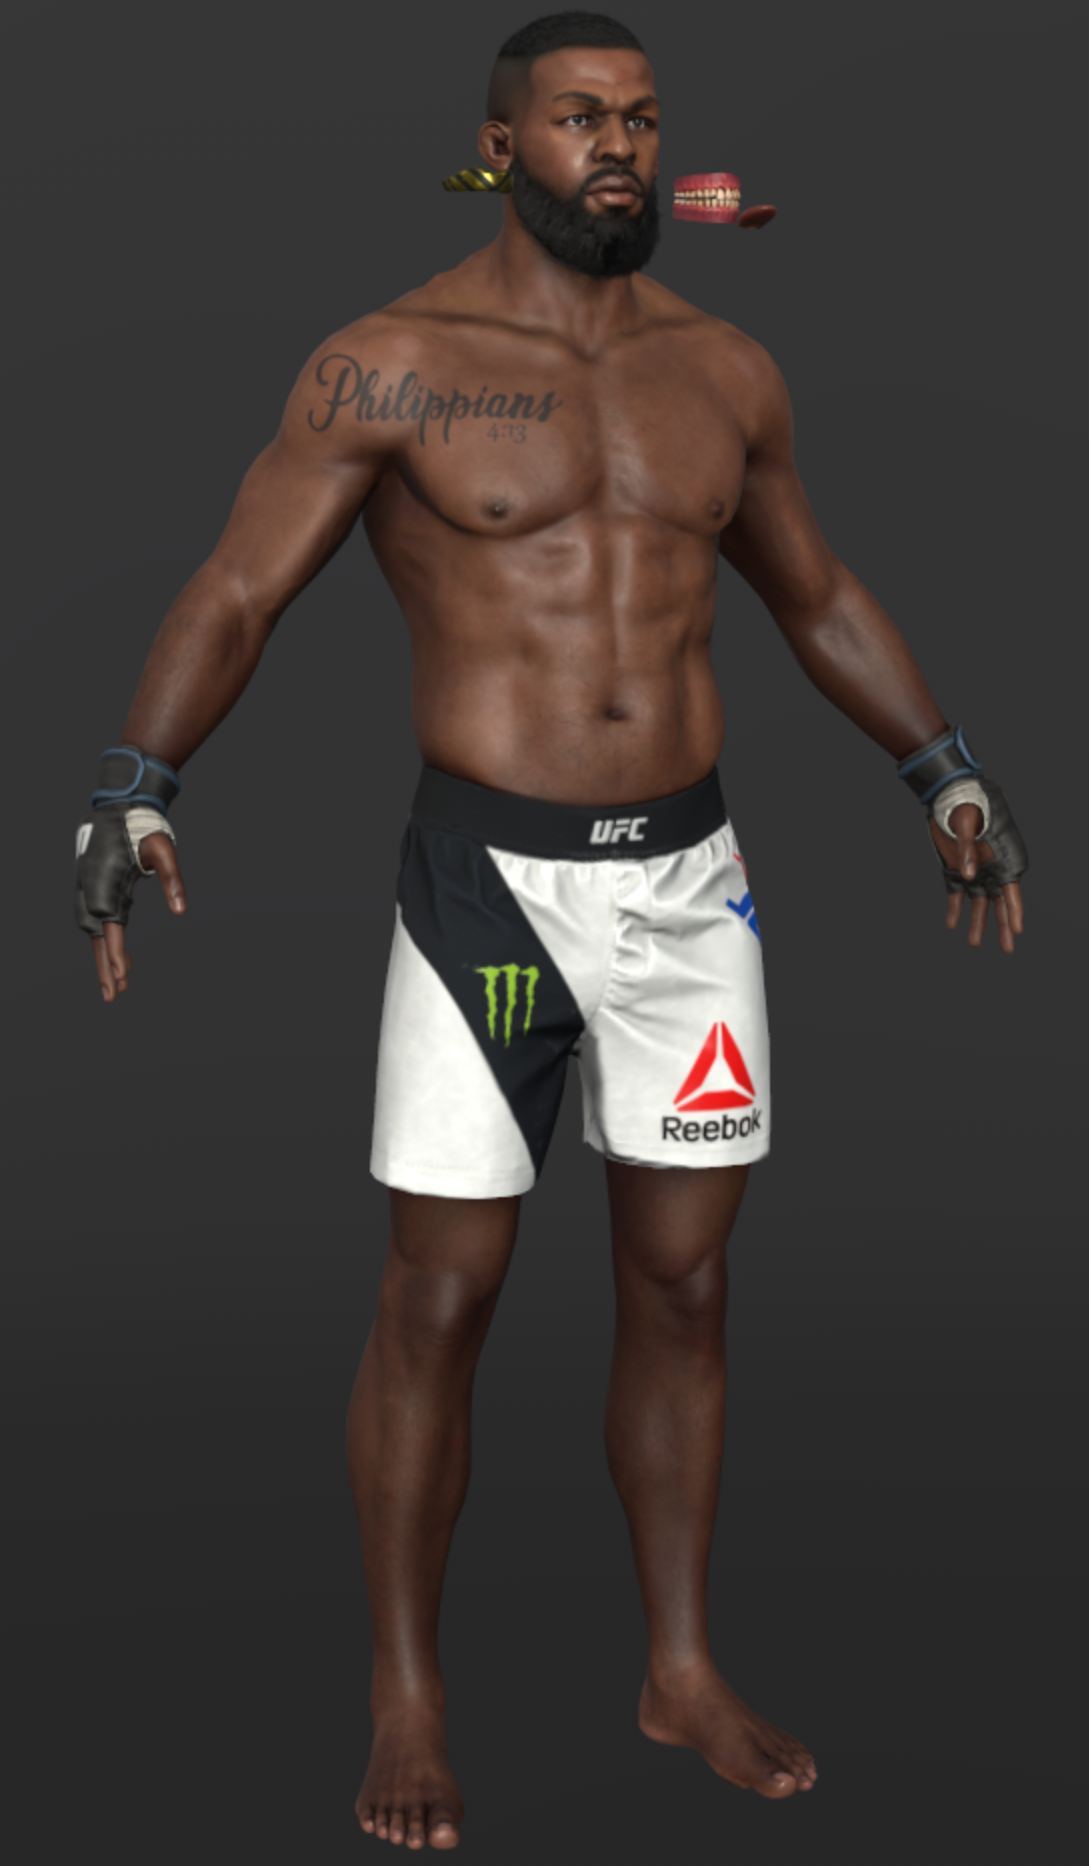
I'm happy with the texture process that I've done in Substance Painte, so I'll be moving onto the Lighting in UE5.
 Denzil_forde
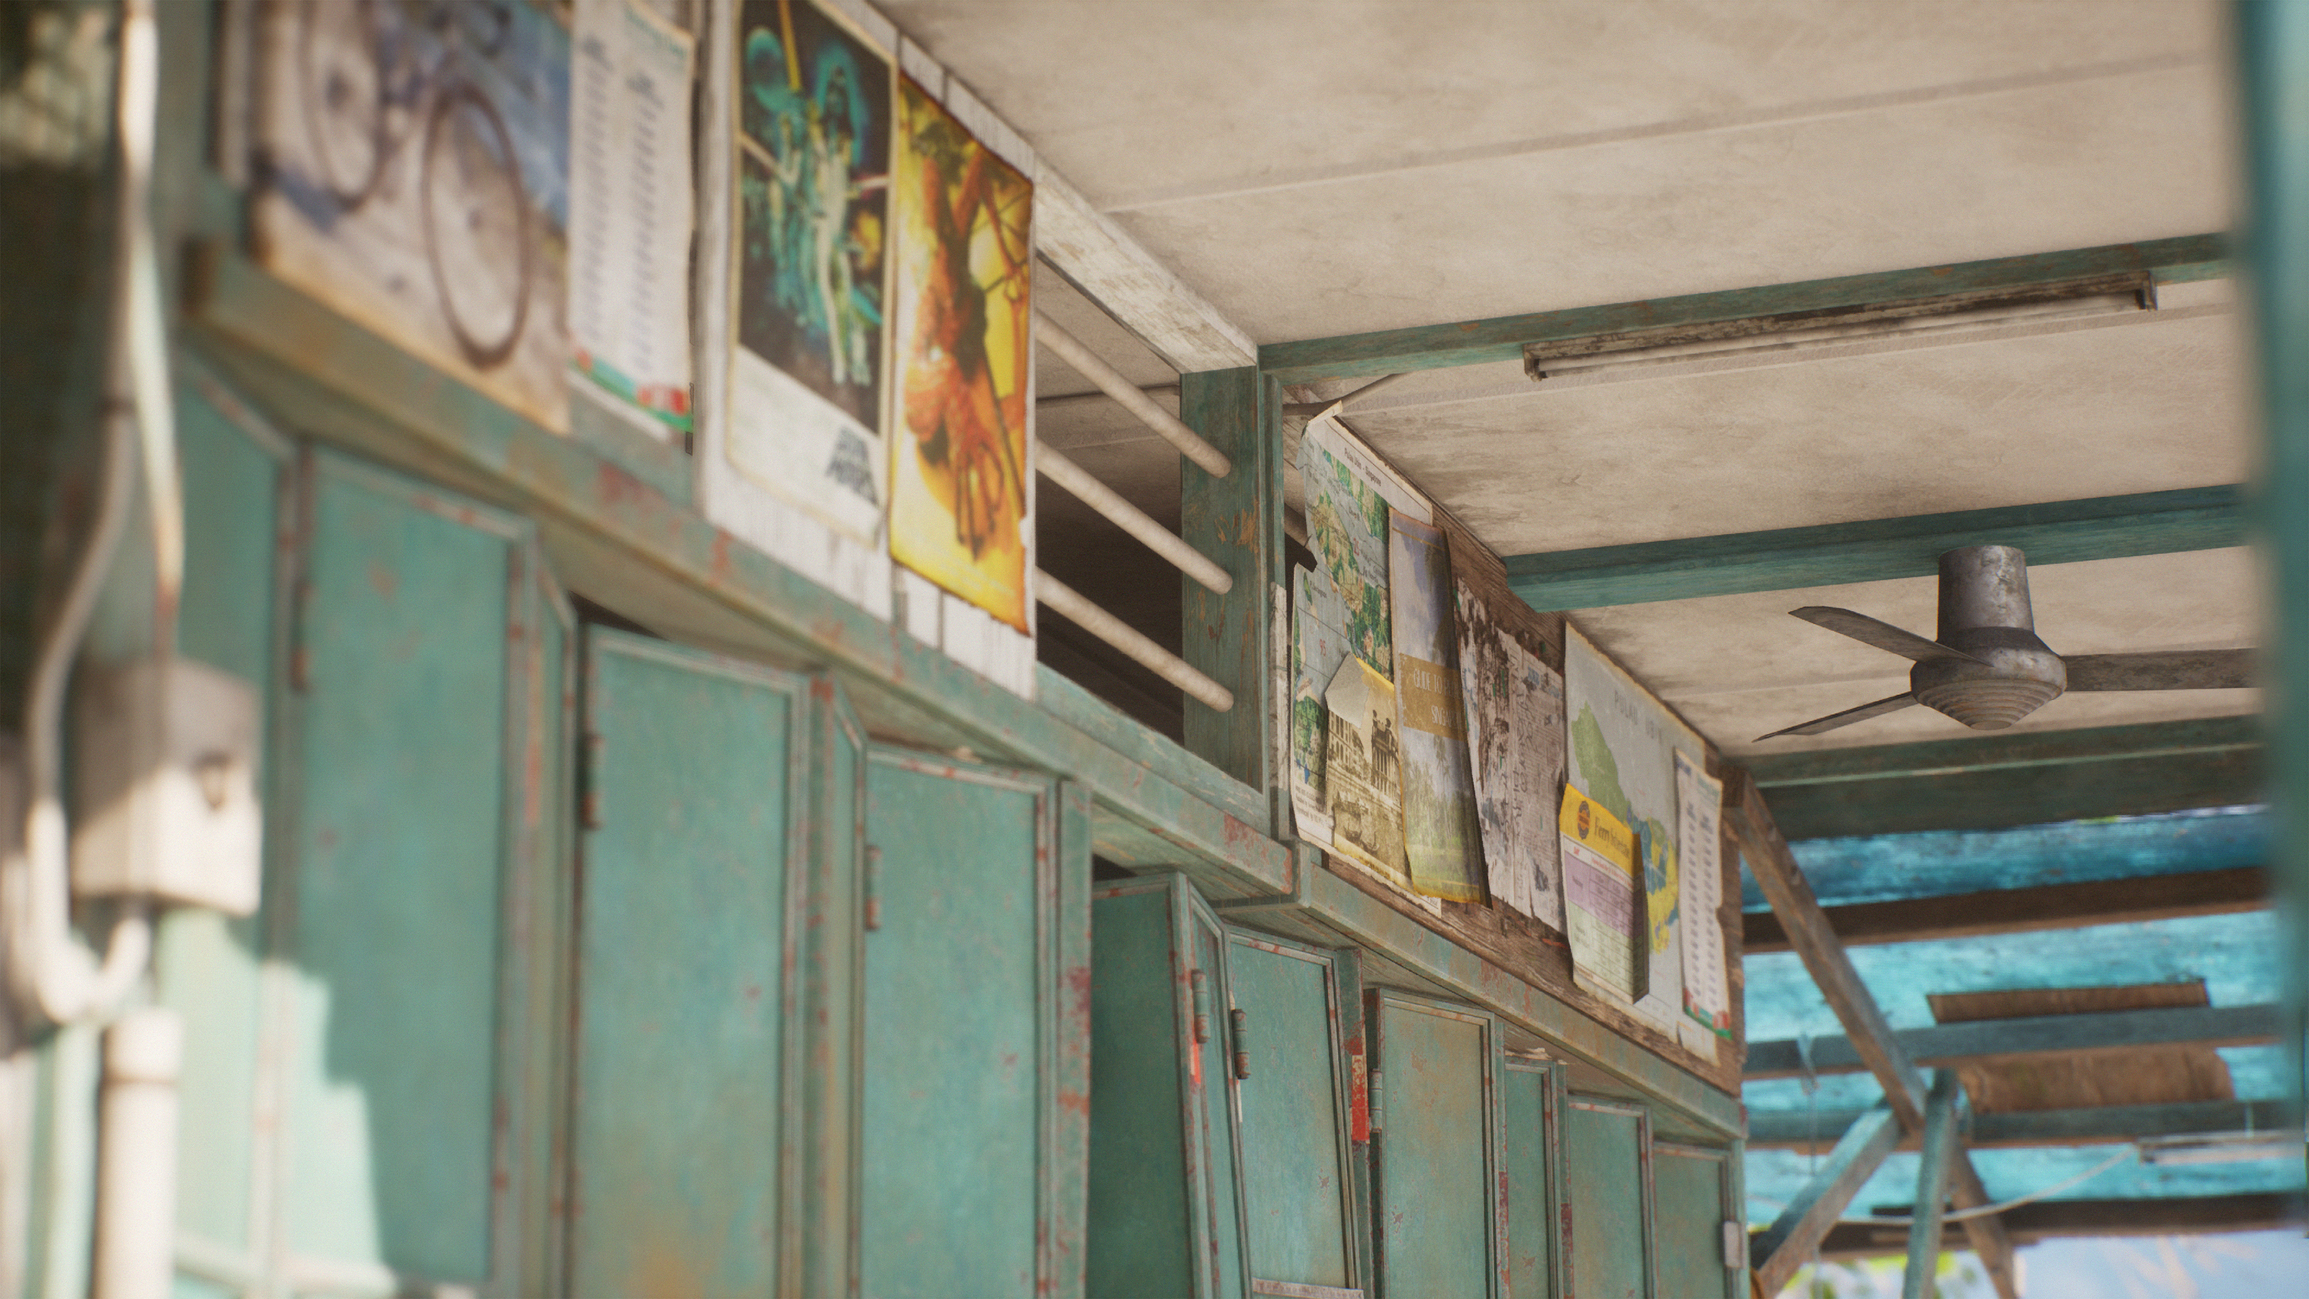
[UE5] Closed Bicycle Rental
Hi all! This is an environment piece based off a real bicycle rental shop that went out of business in Pulau Ubin, Singapore, done in unreal engine.
Bicycle rental shops are slowly closing off on the island, especially with the recent pandemic driving tourist traffic down. Hopefully this artwork will now let more people in the world know about the existence of these shophouses bicycle rental that existed on the tiny island of tiny Singapore.
I originally started this project in UE4, utilising RTXGI by Nvidia, and I've shifted over to UE5 ever since RTXGI became supported over there.
Most modelling were done in Maya, some in Zbrush. Some fabric made with Marvelous Designer.
Most textures are tiling/trim textures made in Substance Designer.
Some props are textured in Substance Painter.
All foliage assets are from epic store/megascans.
Hope you'll like it!
Artstation Link: https://www.artstation.com/artwork/VyY4BZ


Here's a process GIF from the various stages of the project:
Thank you for viewing!
 cwchunwei
Asker online Fan Art
High poly model of an Asker online fanart that I started during my last term at Think Tank online, mentored by J Hill. The cape was modeled in Marvelous Designer and the hair was groomed in Maya using Xgen. Everything else was sculpted in Zbrush.
Original artwork by artist Woo Kim.
Hope that you like it! :) Any feedback is appreciated of course :)
https://www.artstation.com/artwork/2qKReY


