It starts May 12, and ends Oct 17. Let's see what you got!
https://polycount.com/discussion/237047/the-brawl²-tournament
The Polycount Newsfeed
UE4 - Autumn Scene
ArtStation Link Here: https://www.artstation.com/artwork/3qnmJD
This Environment is made in Unreal Engine. It was actually more a project for myself to understand how to create a nice Landscape using the Virtual Texturing, Stylized Foliage, Rocks and also how to create a nice composition and a color palette.

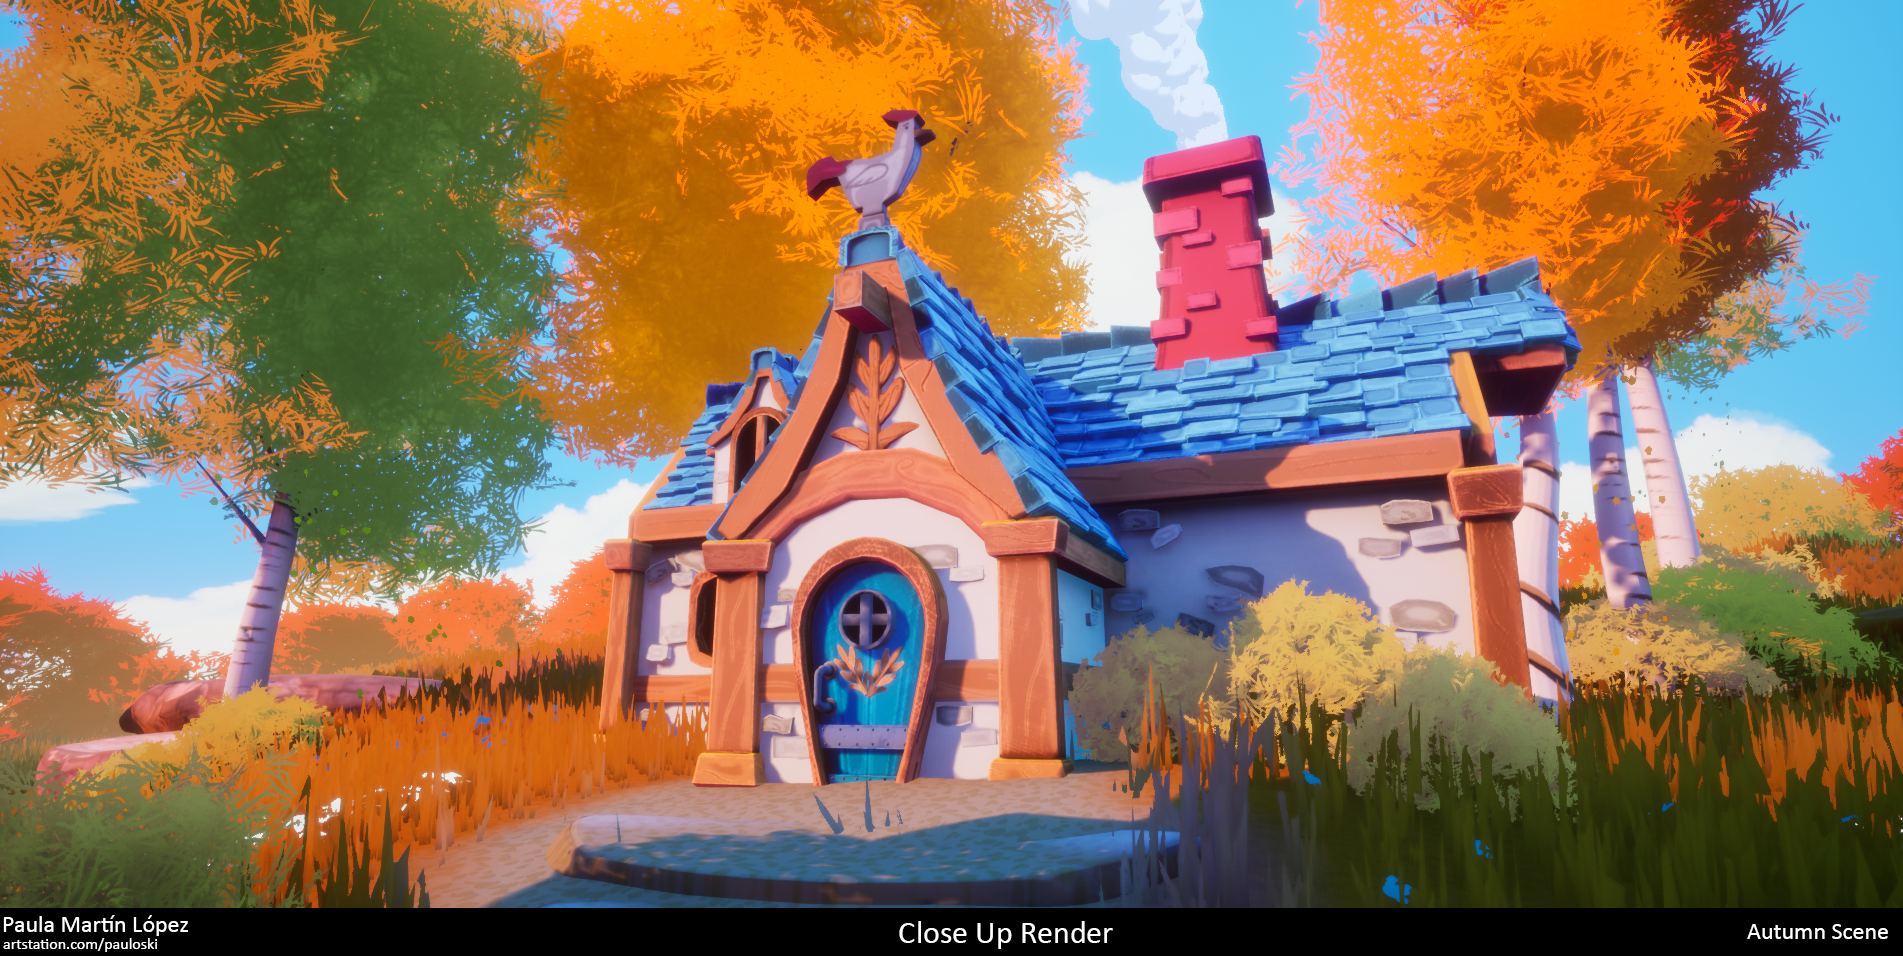
I was highly inspired by some other artists: Jasmin Habezai-Fekri, Sophie Rose Stübinger and Victoria Zavhorodnia.
The House is actually based on the Concept Art Farm Fable from Kiel Whitaker (https://www.artstation.com/artwork/g2LvL8)
In this project I also learned how to create Foliage and Rocks.
The softwares I used are: Unreal Engine 4, Maya, ZBrush, Substance Painter, Substance Designer and Adobe Photoshop.


I also wanted to learn how to make a Stylized Sky, unfortunatly the final result in the Sky is not what I wanted to do, the clouds are actually planes with the textures of the clouds. From other Environments that I saw, I think the other artists use a SkyBox or SkySphere but I'm not sure.
 Pmartinlopez
Re: Sketchbook : Teng Hin Chan
Skipped a few months, haha but this is the final outcome
more on artstation : https://www.artstation.com/artwork/xYLY3m


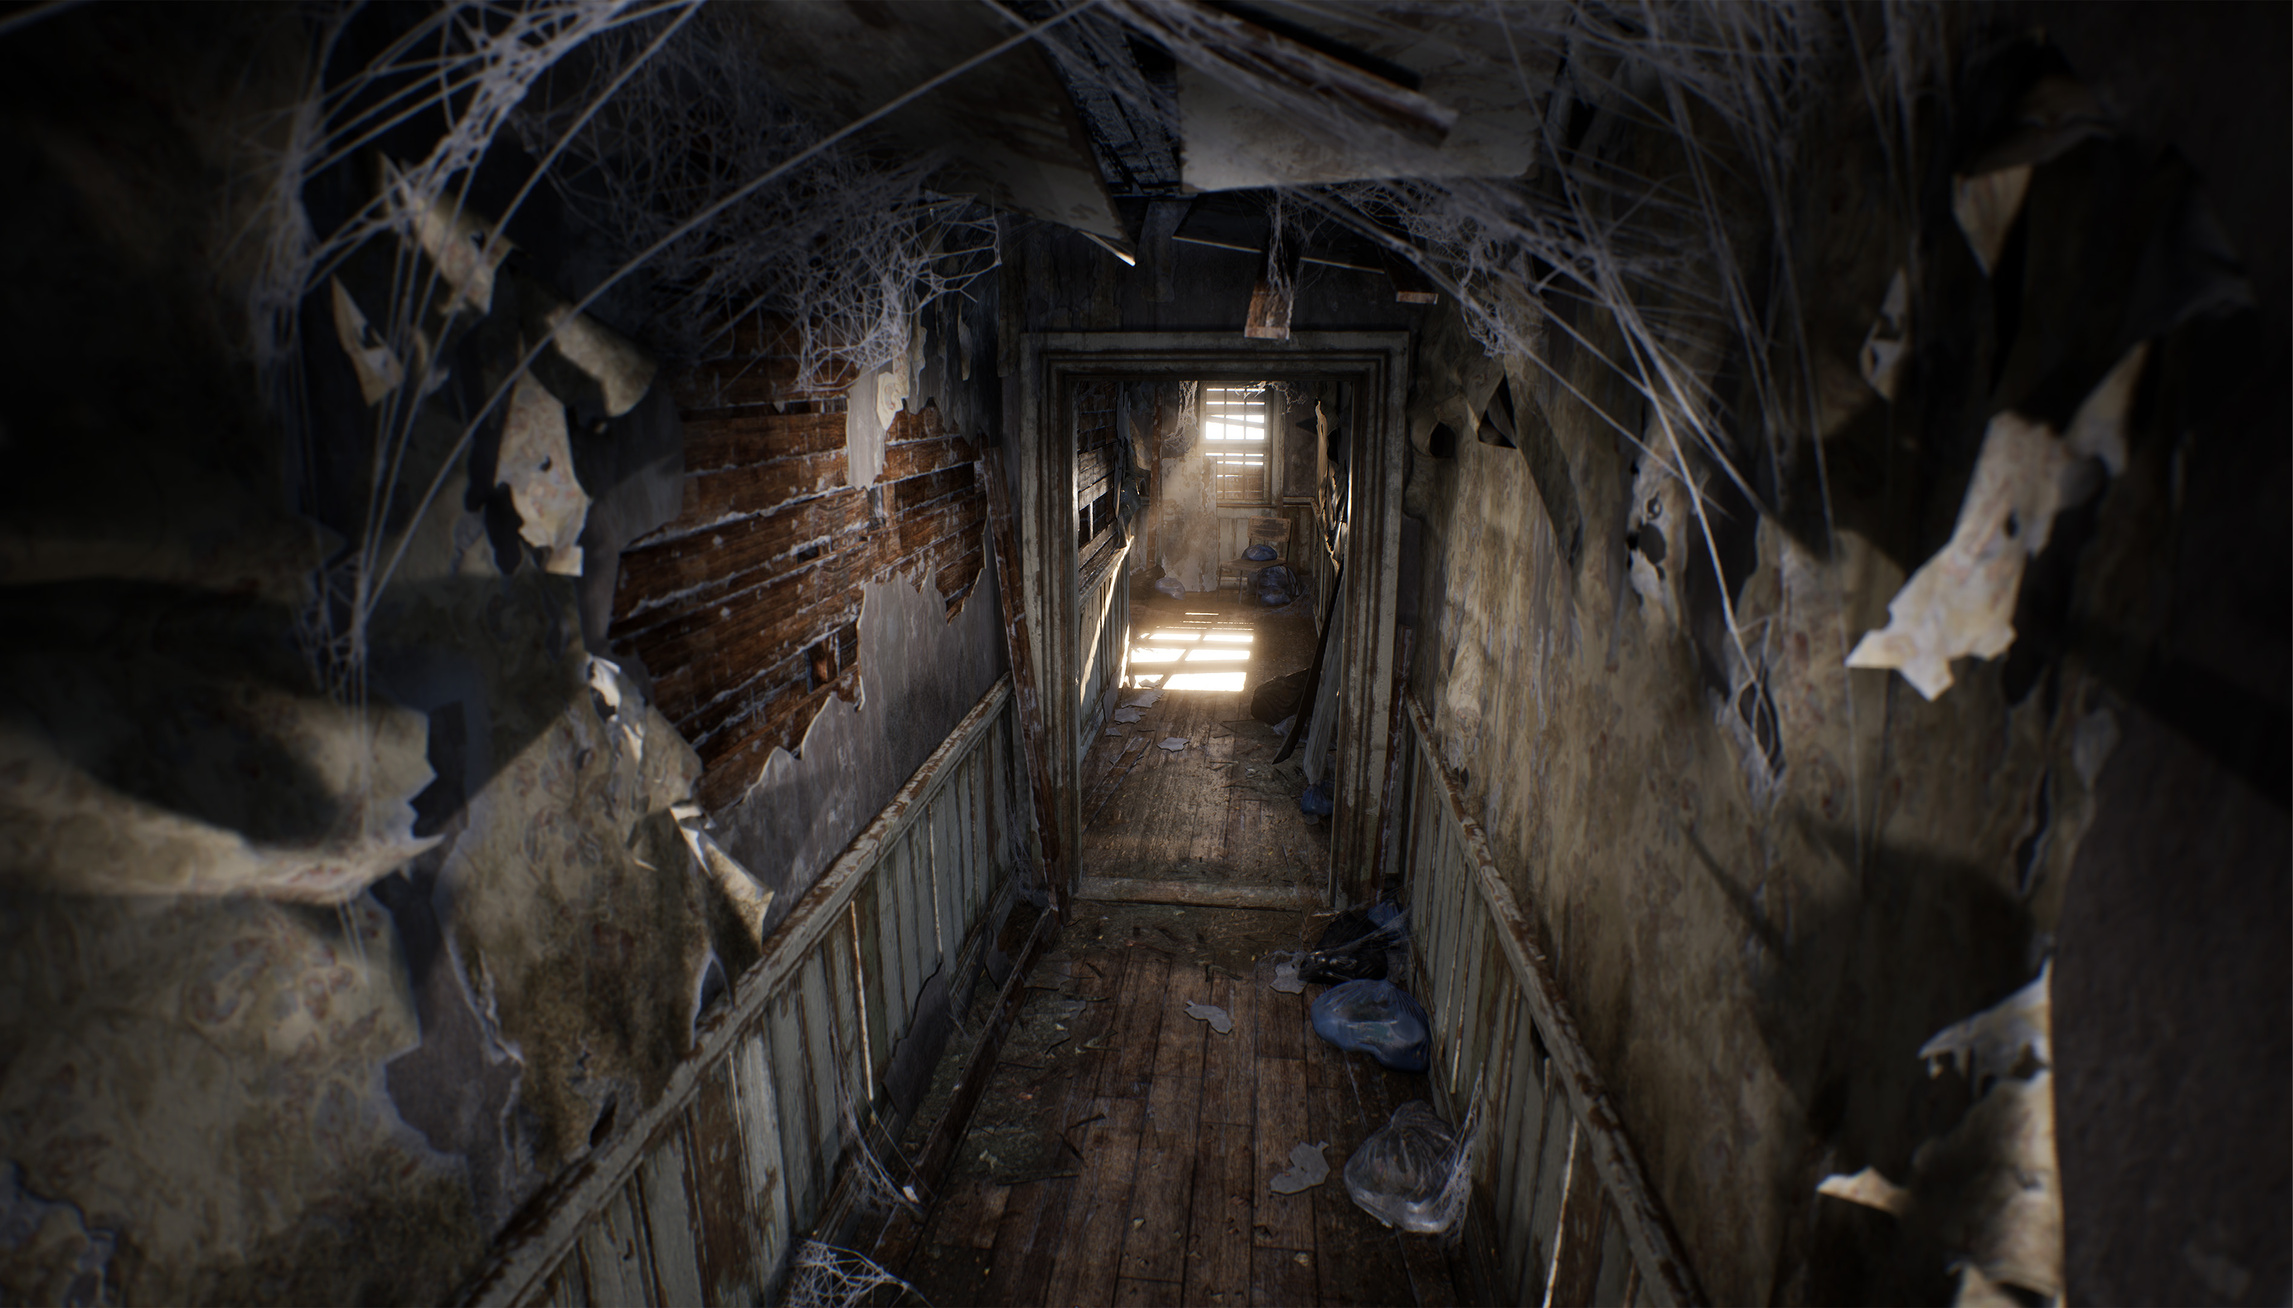
Re: Condemned Hallway [ WIP - C&C ]
Thanks everyone!
And I think I'm done. Been collecting some images for an Artstation post and thought I'd share.


 iansmithartist
Looking to improve my character art - In need of critique!
Hello! I'm starting a new personal project, and as per my usual process trying to identify the areas I want to improve upon. Thing is, whereas usually I'm fine with just analyzing my previous work retrospectively (the lack of tunneled vision and the honeymoon effect does wonders), I'm having a bit of a hard time right now: aside from usual misses stemming from laziness I don't really hate my previous character artwork. So the best course of action I could come up with is to be more thorough and use tools better suited for the job... Which is not good enough since aside from having fun I want to also get better at it.
I would really appreciate any criticism, especially regarding the design and texturing! Oh and the actual human parts were generated by the wonderful Metahuman Creator, so pay no attention to those.

With this one I was going for a kind of life support space wetsuit look; an old and worn out type, something like you'd see in a run down Soviet museum or something.
Plain modern wetsuits were the starting point in the design. Them being plain and rather detailless though I've also used a bunch of fictional stuff as references: ranging from David Lynch's Dune costumes to Mass Effect characters. Other than that there were some other things like old ball computer mice with this ugly yellowish plastic that I used for... ugly yellowish plastic parts. Or cat tongue spikes for the bottom of the shoes (that I ended up not including in any character renders).


Some early WIPs
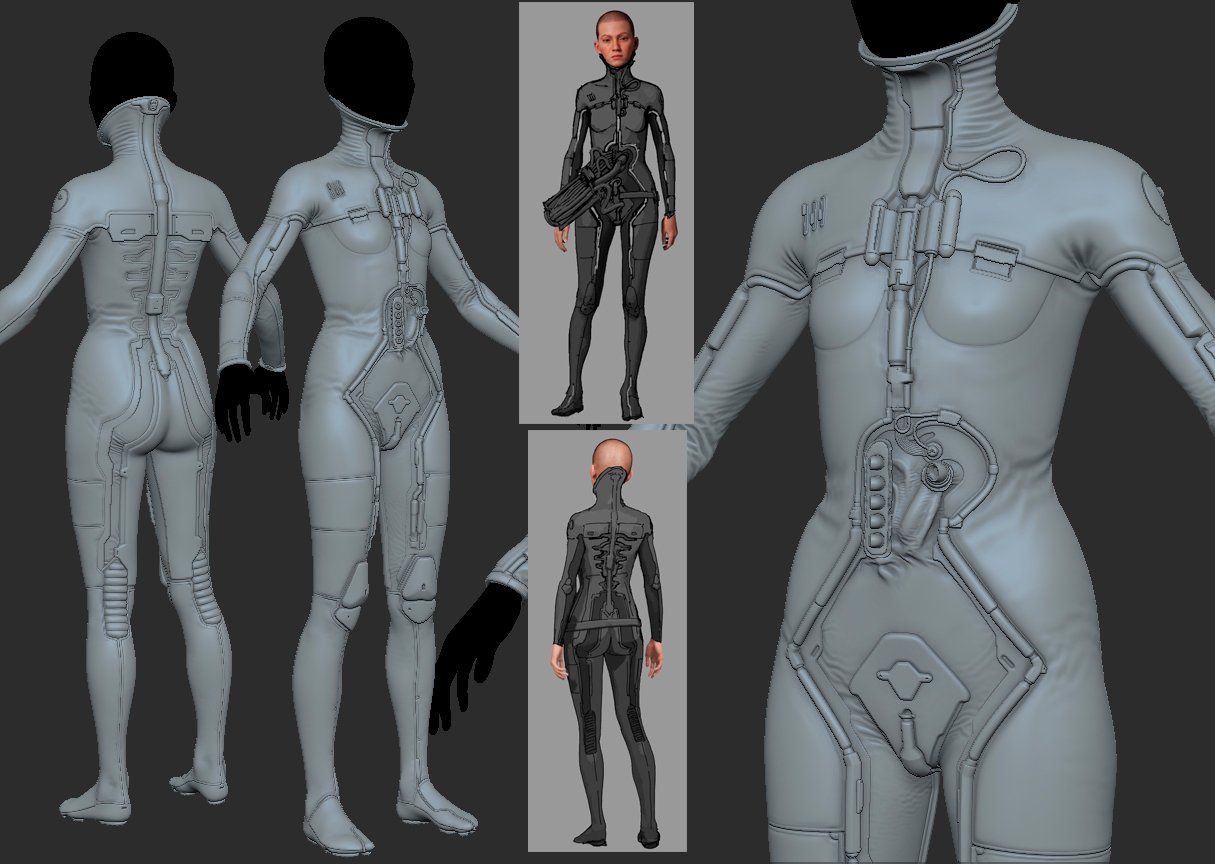
The idea with the tubes and everything here is that in the grim, dark, transhumanistic future you want to optimize (and dehumanize) your alien starship pilots, so you design them and their equipment to not leave the chair, ever. Thus you remove most of the pilot's internal organs and let the life support do the job. It's also a great excuse to not include any movement-induced wear and keep the dust uniform...

How it ended up looking in the final scene

The next thing is just a bunch of messy doodles so far, but why not.
Initially I was going for a somewhat utilitarian-looking space explorer suit; something more like Denis Dilleneuve's Dune (wait a minute...), with the design centered around a repeating horizontal motif. Later though I've moved to more of a goofy space adventurer vide, with a lot of inspiration drawn from Victorian era military outfits. I don't intend to go for the old and gritty look this time; only factory new looking plastic and rubber.

Anyway, I'd be happy to hear any critique, and if anyone has read through all this nonsense thank you for your attention.


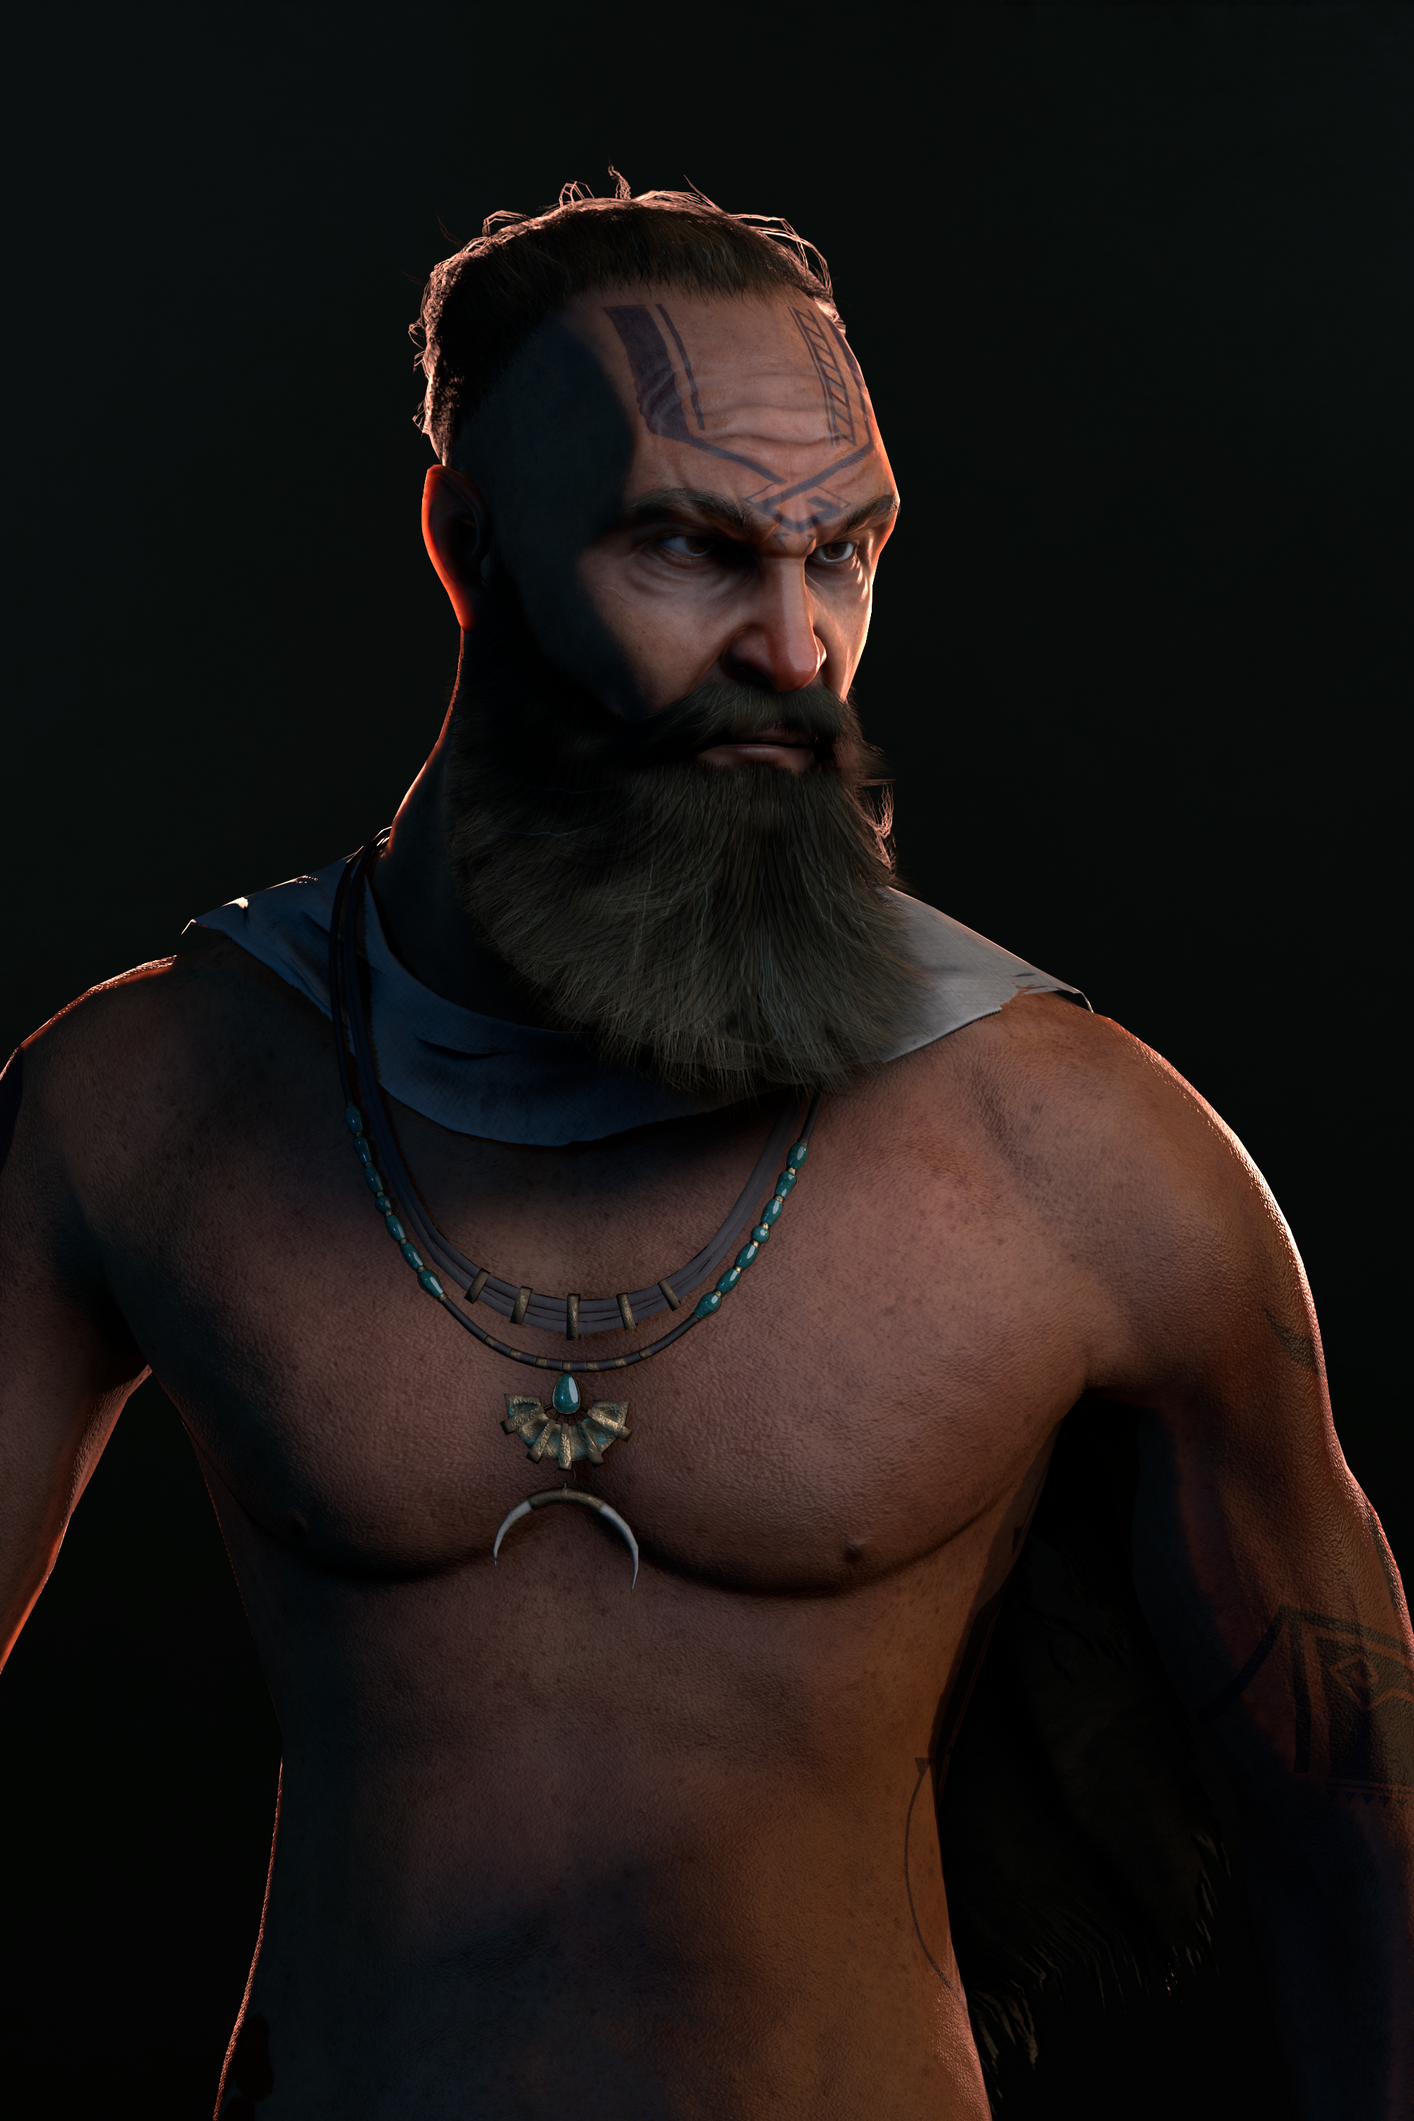
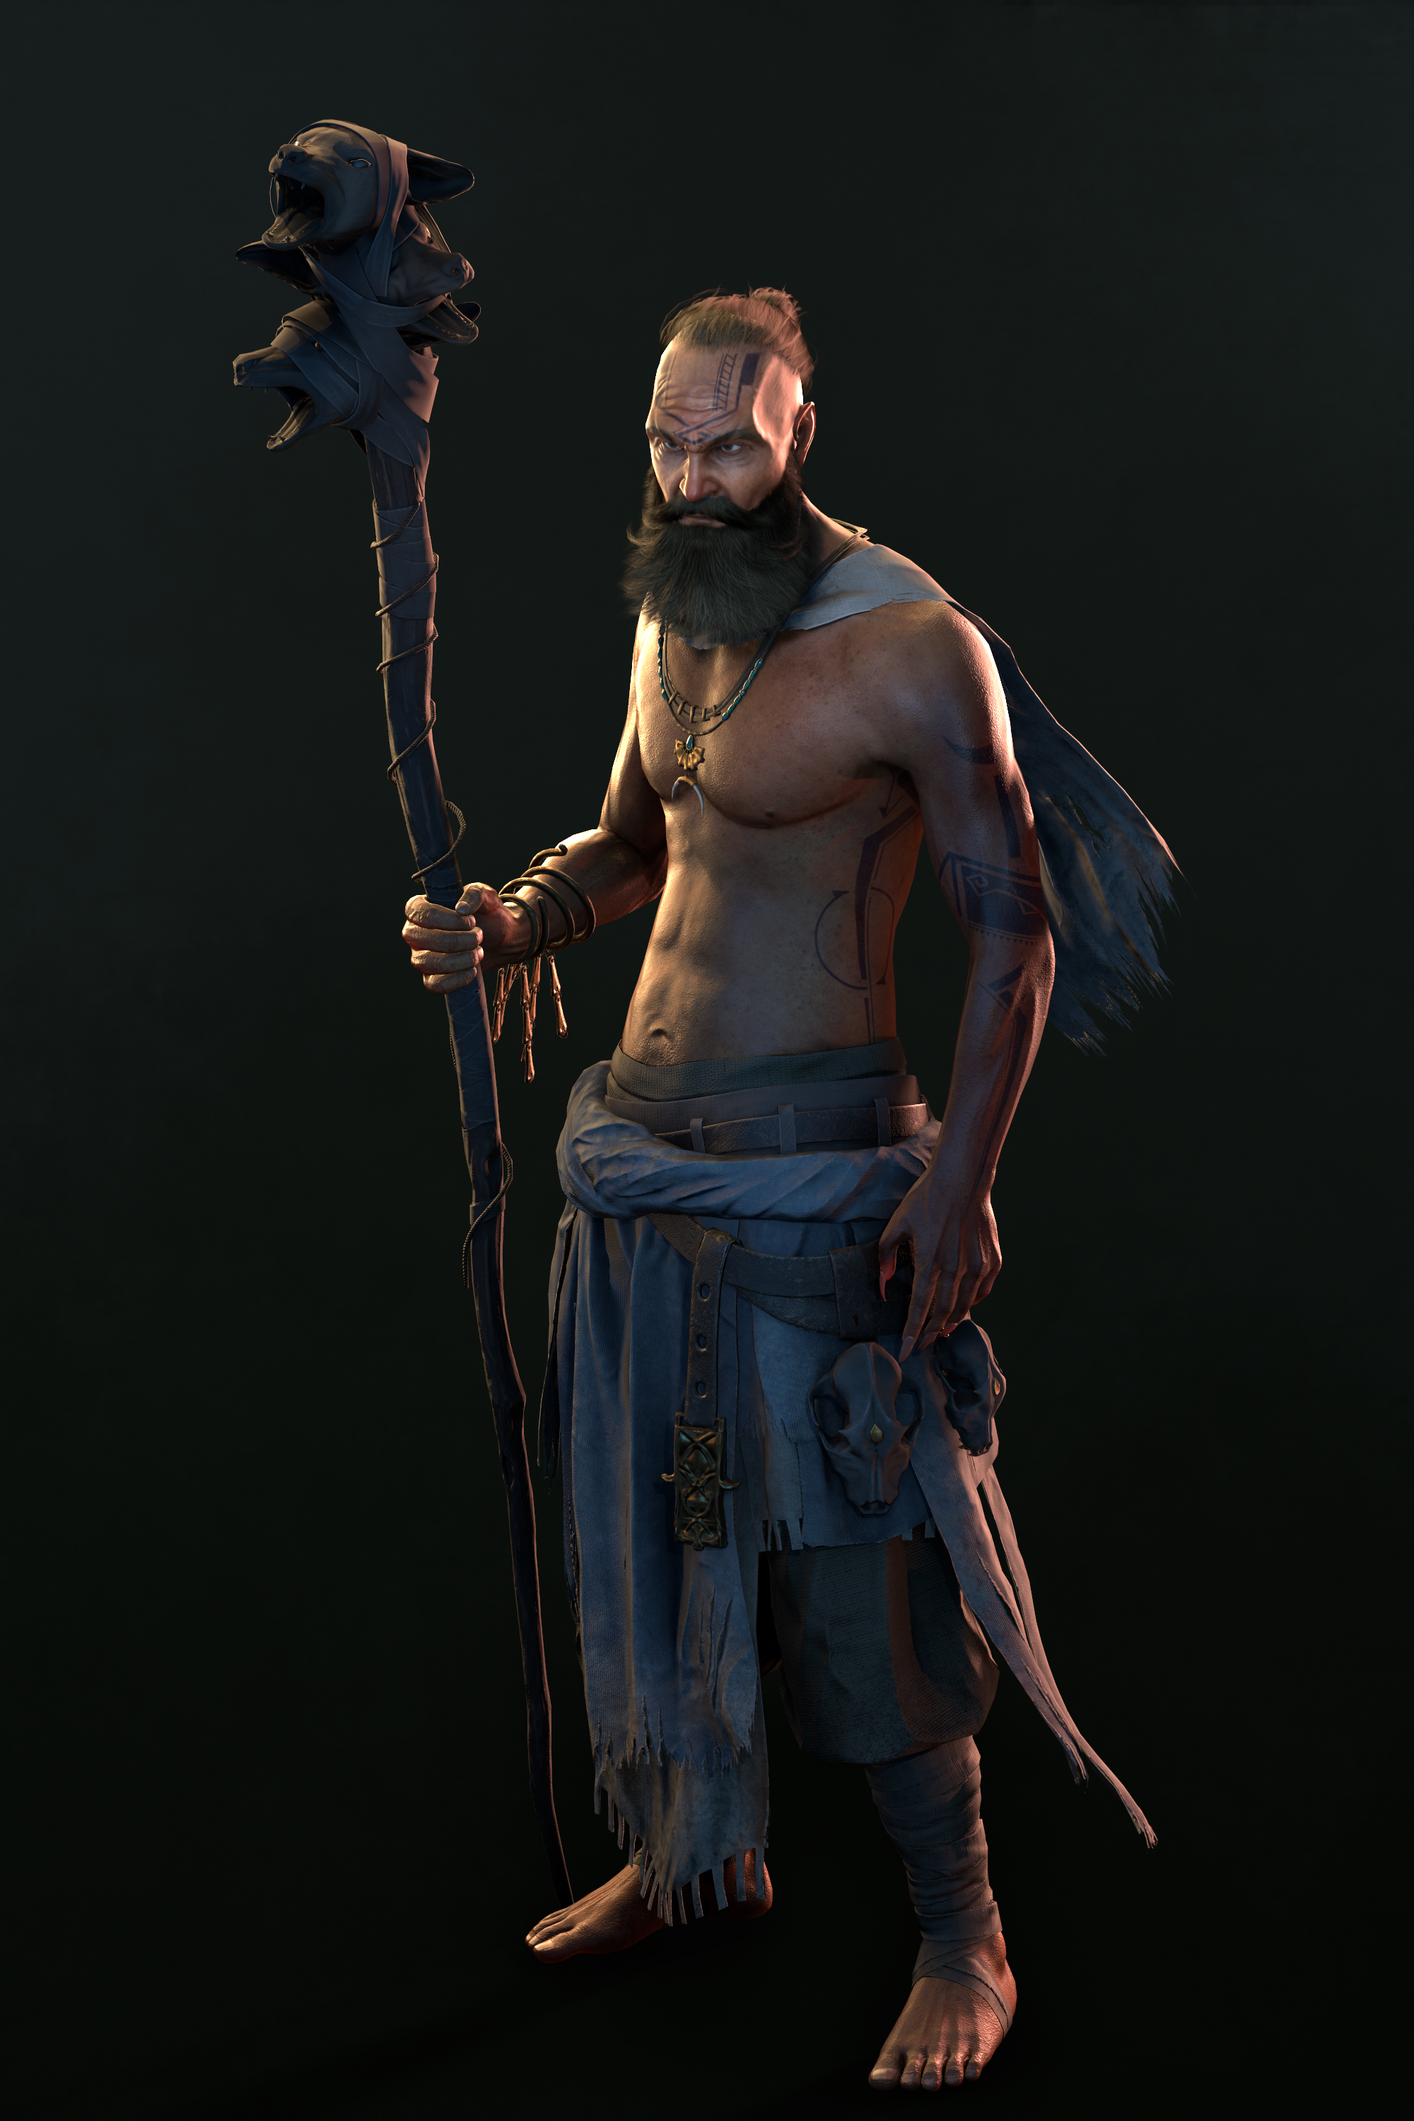
4.N.4.N.S.1- Statue


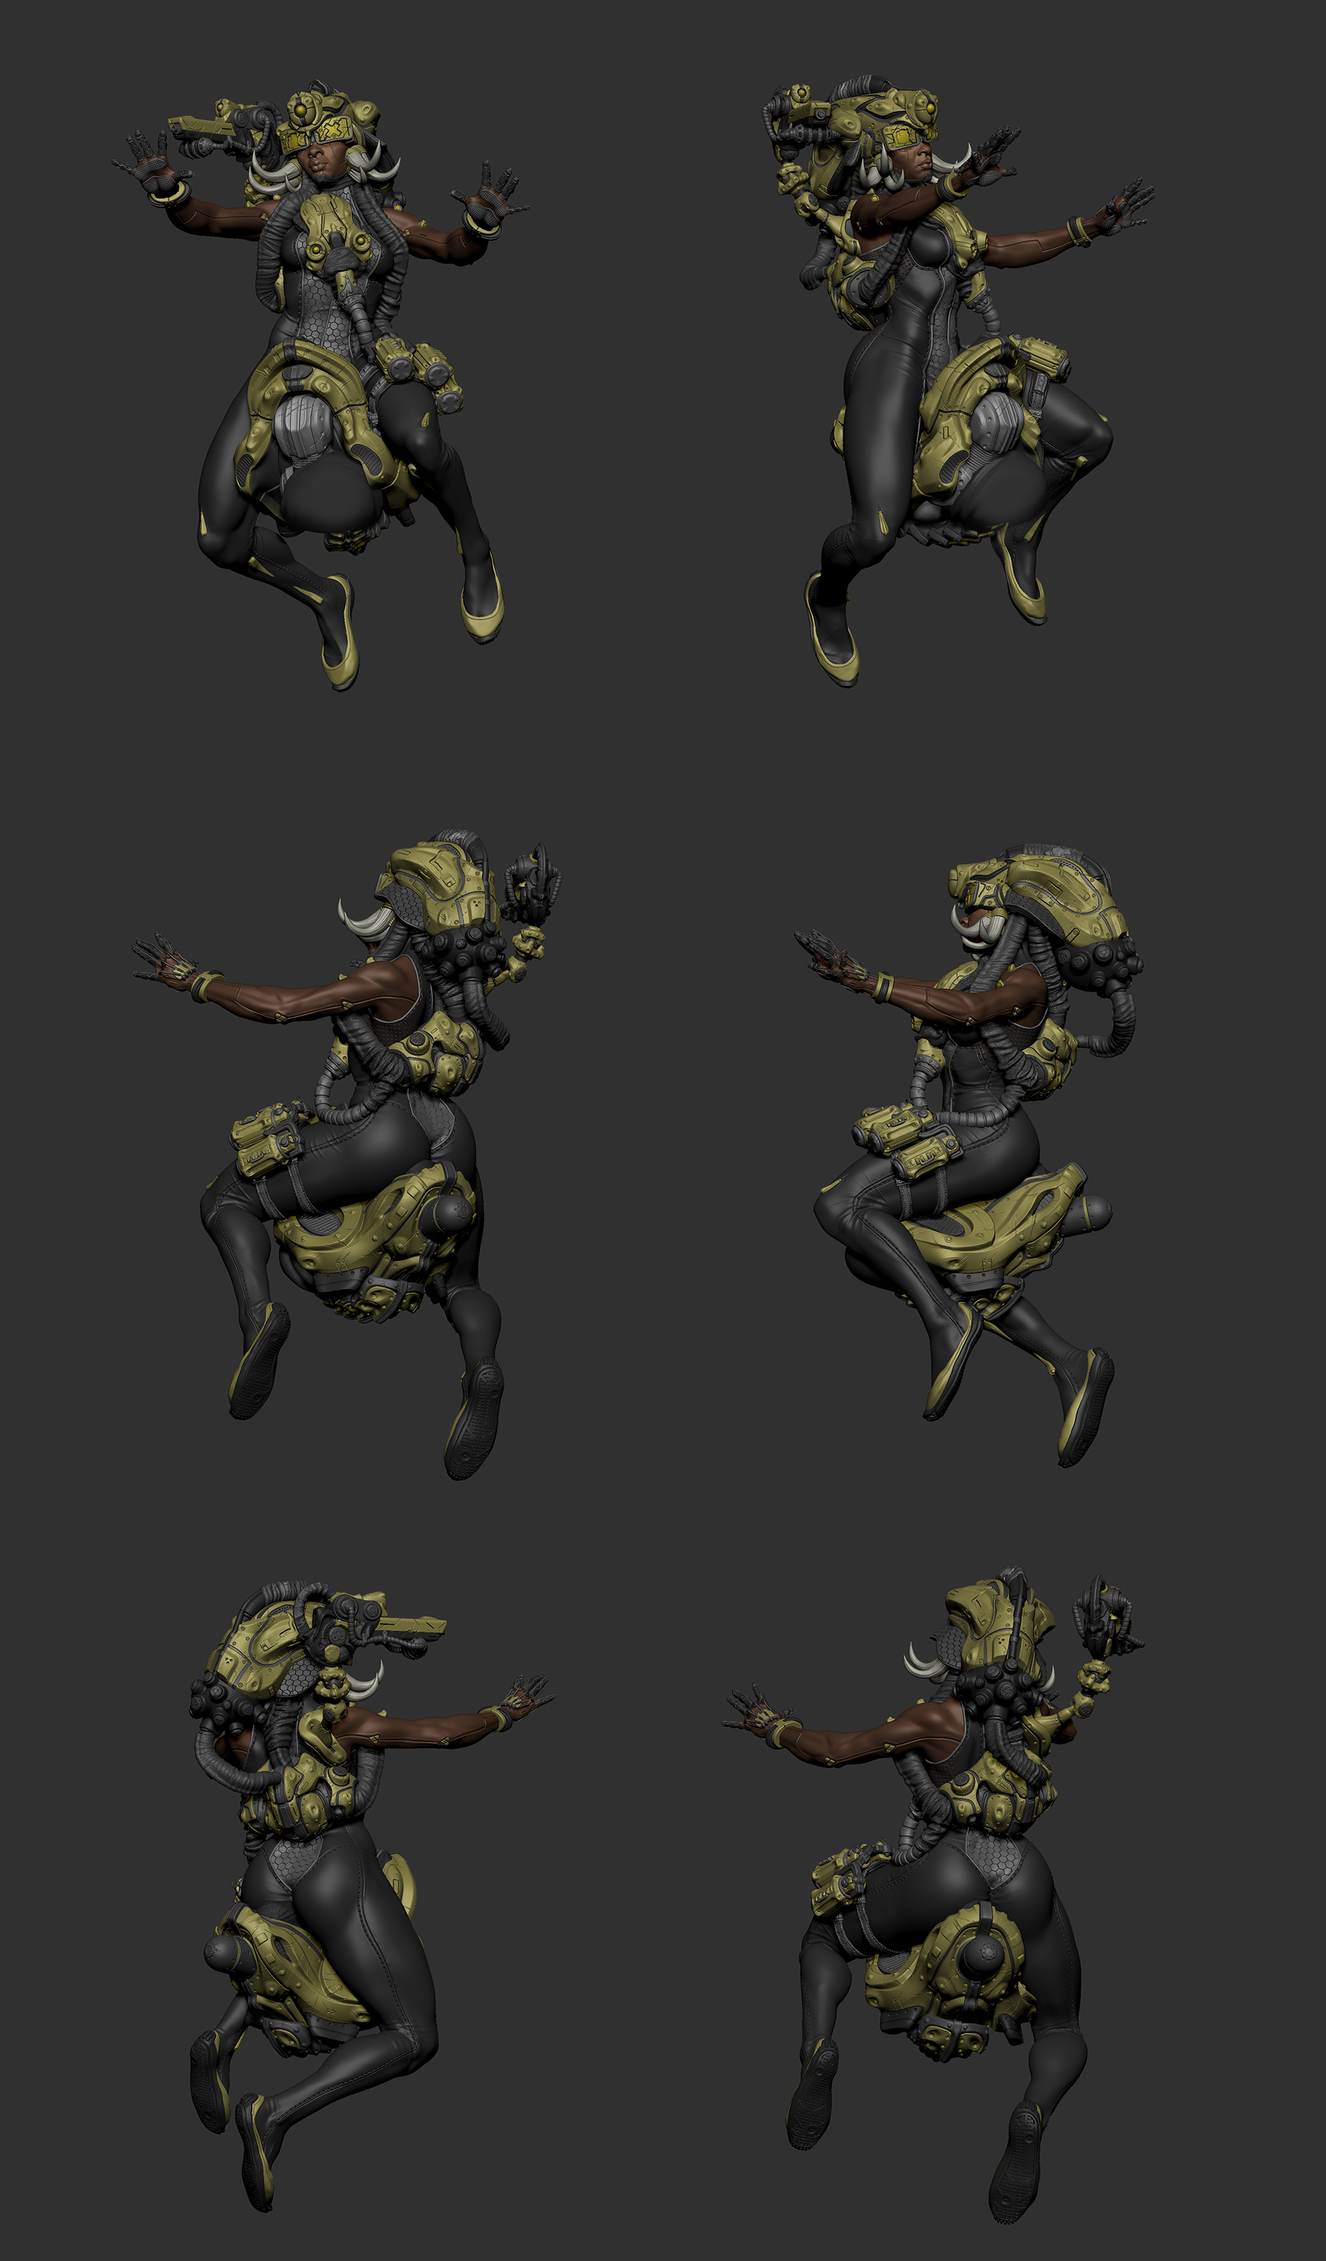


Project done for collectibles with the mentorship of the amazing Igor Catto, at ICS school.
I was greatly inspired by the works of Marco Plouffe, Cedric Seaut and Nikolay Georgiev. Tried to depict hybrid humans, with artificial bodies and shared minds.
Hope you all enjoy! If you went troutgh all the post, thanks a bunch!
 Ricardo_AO
Re: Sketchbook: Anastasia Wyatt
Another older artwork, of some deer type creatures on a snowy mountain top.

 AnastasiaWyatt


Tommy Shelby (Peaky Blinders)
Hi everyone,
This is a Tommy Shelby likeness I made during Pete Zoppi’s CGMA course. The first realistic character I ever made, pretty challenging but I had fun making it.
There is plenty of room for improvement, especially the hair. I used xgen core for the hair, but somehow I couldn’t get the exact hair style as him in Peaky Blinders. But I hope he’s still recognizable. After learning all the techniques, next project I will try to implement them into a real-time character, it should be fun!
Feel free to leave a comment or feedback. Thanks for viewing!
ArtStation: https://www.artstation.com/artwork/mDDyeZ
HDRIs are from: https://hdrihaven.com/hdris/
Softwares used: Maya, Mudbox, ZBrush, Arnold, Substance Painter, Marvelous Designer,Texturing XYZ, Photoshop


 Chung_Jui
Re: topology for subdivide
The curves in the base mesh subdivide cleanly because both sides of the grooves have the same number of segments. Adding the support loops to the two adjacent splits in the shape below the groove changes the segment spacing on the lower half of the curve. Which does sharpen the corners but also causes them to overlap with the upper half of the curved groove.
There's a few different ways to resolve this kind of smoothing artifact. Deciding which approach makes the most sense will depend on how soft the edges need to be and whether or not the model needs to be split into separate meshes.
If the subdivision model will only be used for rendering then it probably makes sense to keep the relatively tight support loops and mesh splits along the object's parting lines. Since the model's existing topology looks workable: the easiest solution would be to shrink down the outer vertices of the sharpened corners, preferably before adding the support loops.

Moving the corner geometry down compensates for the upward distortion caused by the abrupt change in the segment spacing. This will leave a small gap between the individual meshes but everything will fall in line with the larger curve when the subdivision is applied. How far the corner vertices need to be moved will depend on the shape of the arc, number of segments in the curve and the width of the support loops that are causing the distortion.
Enabling subdivision preview will make it easier to line everything up. It may also be a good idea to constrain any move operations to the edge normals of the surface. This will help prevent the adjustments from disrupting the compound curvature of the underlying surface.

If the subdivision model will only be used as a high poly for baking then it probably makes sense to use looser support loops and it may even be worth merging some of the mesh components to simplify the shapes. A simple block out can be used to establish the topology flow of the larger forms and this can be refined in stages to resolve any potential issues around the smaller shapes. Creases and edge weighted bevel modifiers can be used to preview loop smoothing behavior while working through the topology.
Once the basic loop flow is established, the loop path can be created with a single bevel / chamfer operation or multiple inset operations. The depth of the parting lines can be added by shrinking the middle loop on the path inwards. Final support loops can be generated using an edge weighted bevel modifier. Below is an example of what that process could look like.
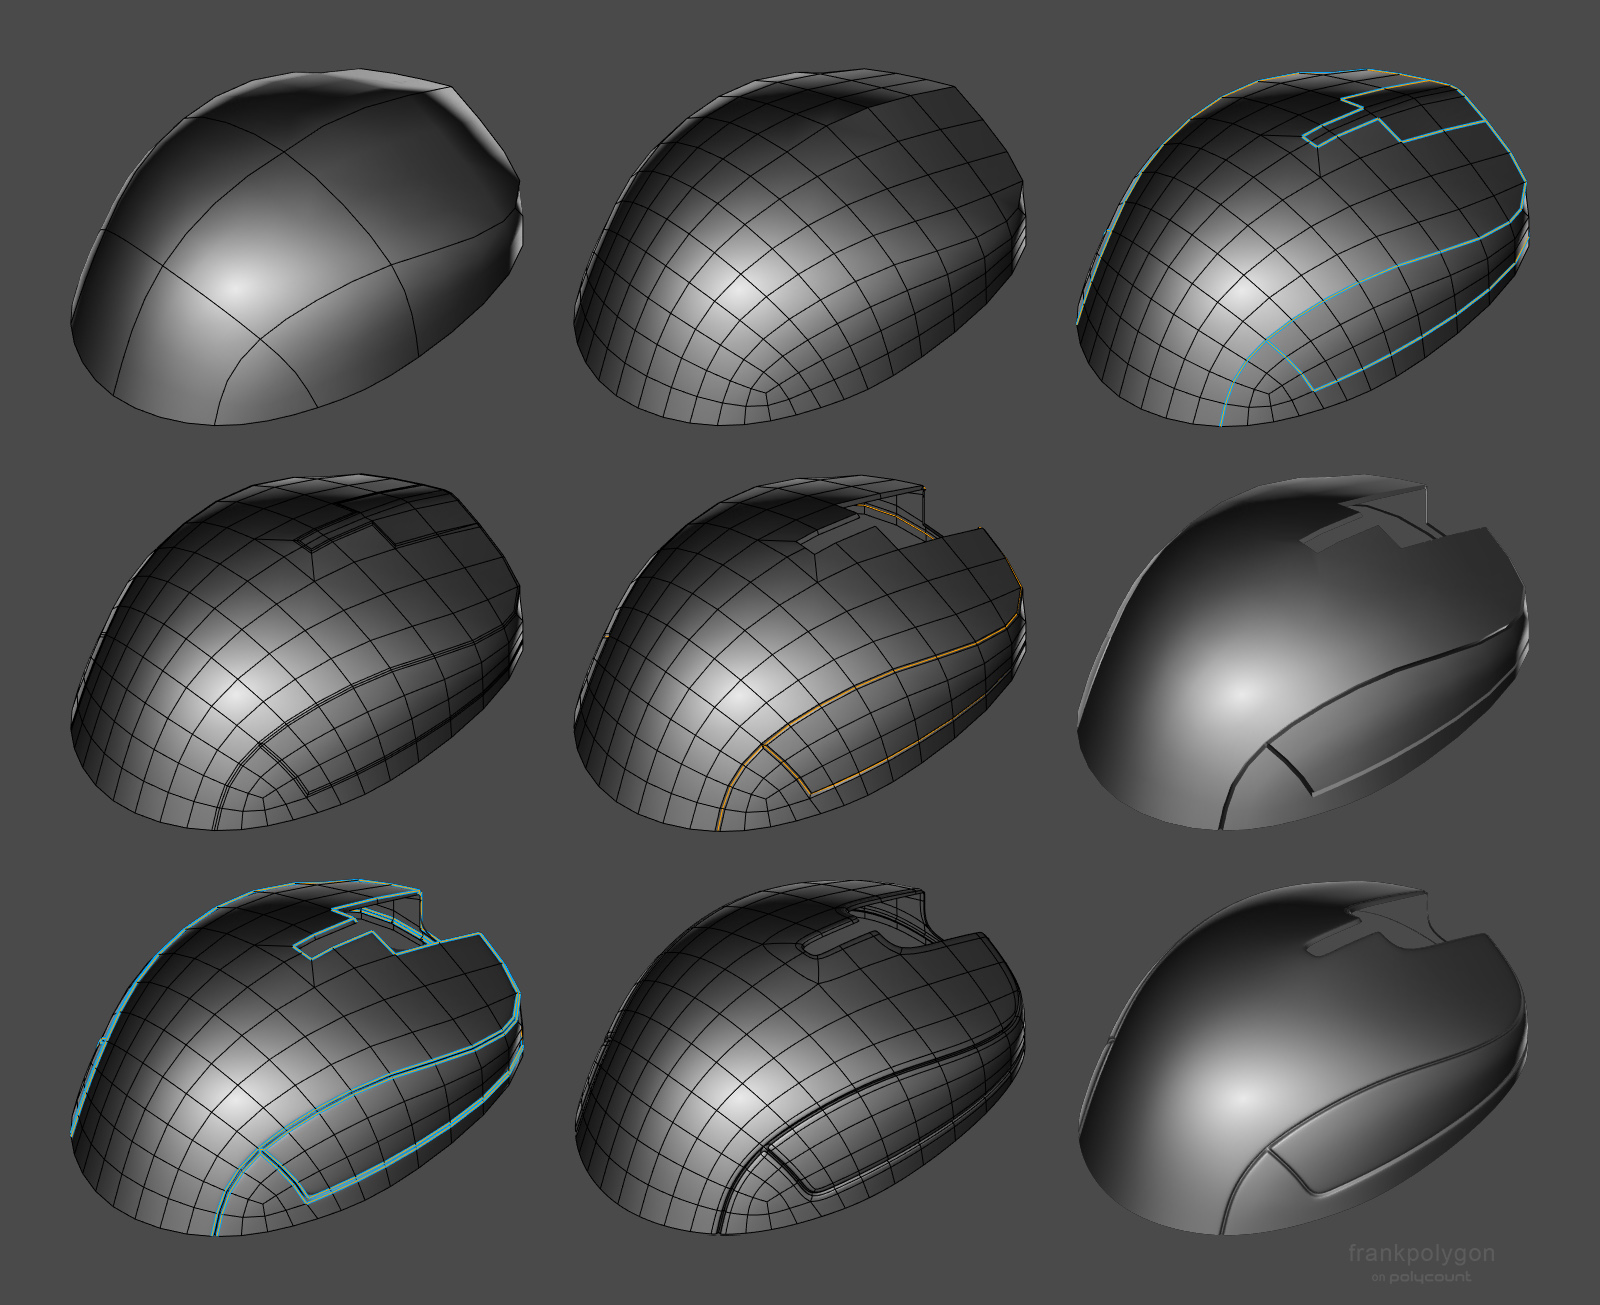
Having a continuous base mesh provides some additional options for the topology routing. It's possible to use a 5 sided E pole to direct the flow around the split in the shapes or use a triangular quad to reduce the perpendicular support loops without adding segments to the primary curvature. Here's a close up look at the topology near where the corners meet the top curvature of the parting line.
Support loops can be organized with several different routing strategies but the goal should be to constrain any minor smoothing artifacts to the narrow area between the support loops where it won't be visible. Generating the support loops with an edge weighted bevel modifier means it's possible to adjust the number of segments and width of the support loops as required. Without having to manually re-work each individual loop.

While a continuous mesh can be used to simplify the high poly geometry for baking, it may not be the right choice for every shape. Large, complex objects should generally be broken up into individual components that match the desired fidelity of the in-game model. Splitting a mesh along an object's seam lines also allows each part to have a slightly different polygon density. Which can make it a lot easier to establish seperate topology flows on individual surfaces. Just be sure that the adjacent shapes deform as expected when subdivision is applied and adjust the shape of the base mesh as required.

Recap: Complex objects should generally be broken down into individual parts that are modeled separately. It may be necessary to adjust the shape of separate mesh elements that are adjacent but have mismatched segment counts or additional support loops. Certain shapes can be simplified by merging adjacent shapes. Establishing the topology flow in several different stages can make it easier to create continuous meshes but it can be challenging to plan for every surface detail. Take the time to think about how the subdivision model will be used and optimize workflow decisions around the desired results.