It starts May 12, and ends Oct 17. Let's see what you got!
https://polycount.com/discussion/237047/the-brawl²-tournament
The Polycount Newsfeed
Sketchbook: Kahze
Hey everyone,
I used to go by "Neolight" on these boards and then stopped posting after entering the industry to do being too busy working all the time. I am now returning as "Kahze" which has been my official digital art handle for several years now. I'll continue to be Kahze from here on out, it is the name I have found I am most comfortable with.
That said, allow me to re-introduce myself. I'm a game artist, I've worked in AAA for several years as well as indie. I got my start in the industry at Insomniac Games where I worked on Ratchet & Clank for two and a half years and some other projects we had going on there. I then left Insomniac to start my own studio DreamSail Games and shipped two games on PS4 and Steam. In my spare time I contributed to other indie teams and also tabled artist alley at furry conventions and took allot of commissions.
I am an anthropomorphic focused artist mostly, but I love to make all kinds of game art so long as it fits within the realm of fantasy or sci-fi. I'll kick off this sketchbook with some of my favorites from my portfolio at: https://www.artstation.com/kahze


God Speed to you all, and I'll see you around these boards.
 Kahze
Kahze
Re: Blender Mega Thread
Sharing my latest finished #blender Project, "Scout Drone".
Its a reference from Roc H's concept art, You can find more renders at: luischerub.com
Enjoy!

 LuisCherubini
Tom Hardy, Game-Ready
https://www.artstation.com/artwork/B34gJ9


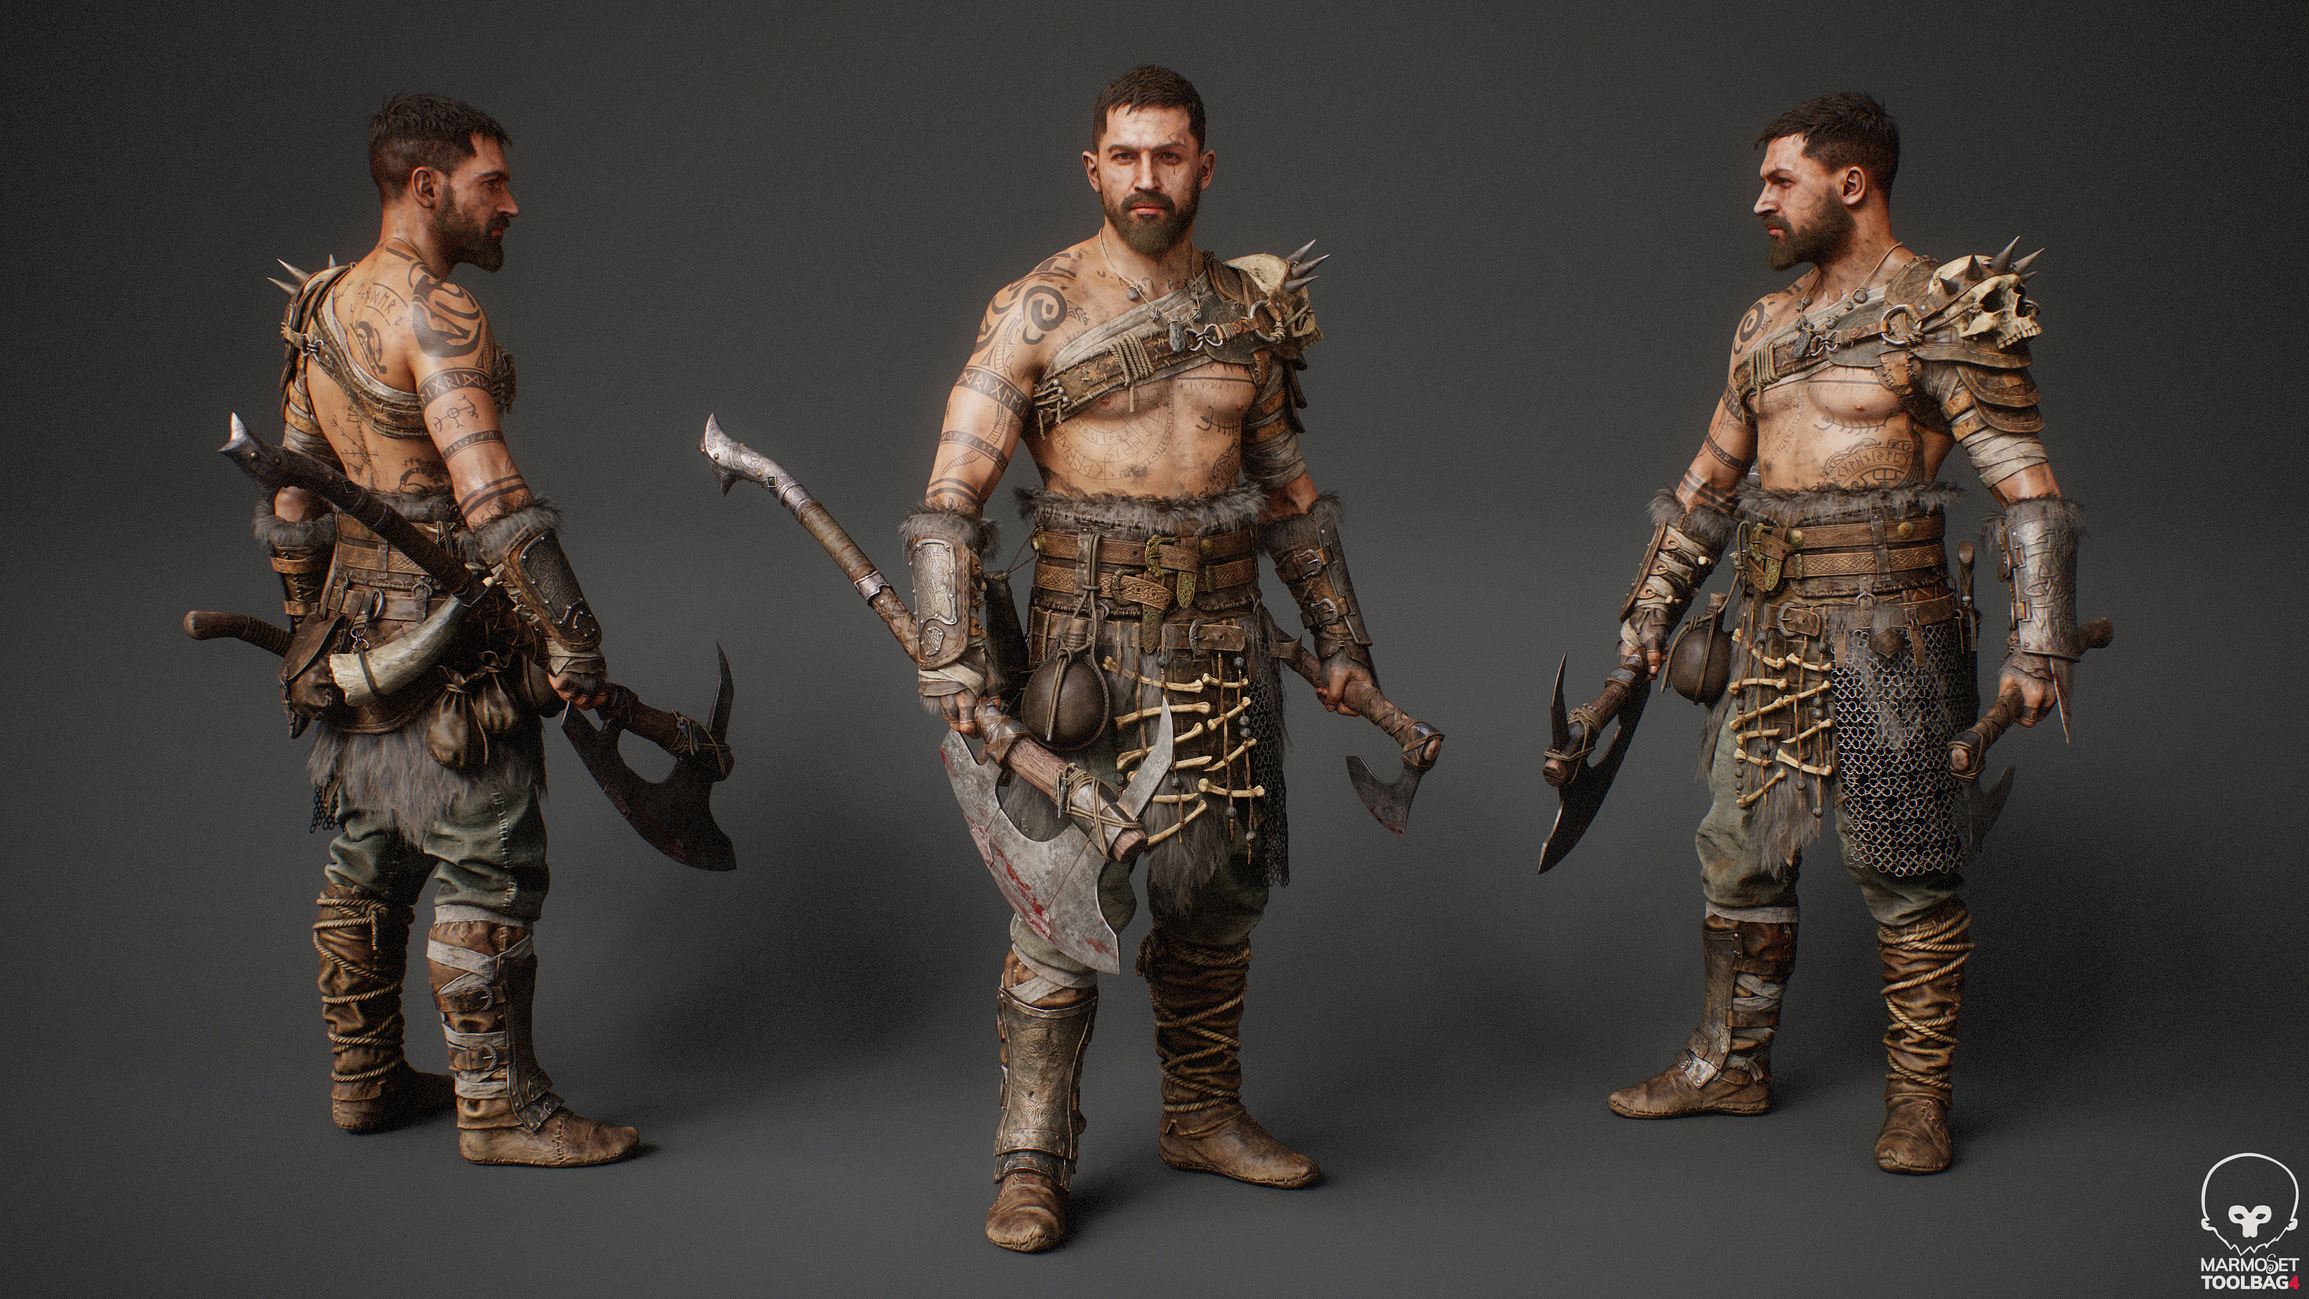


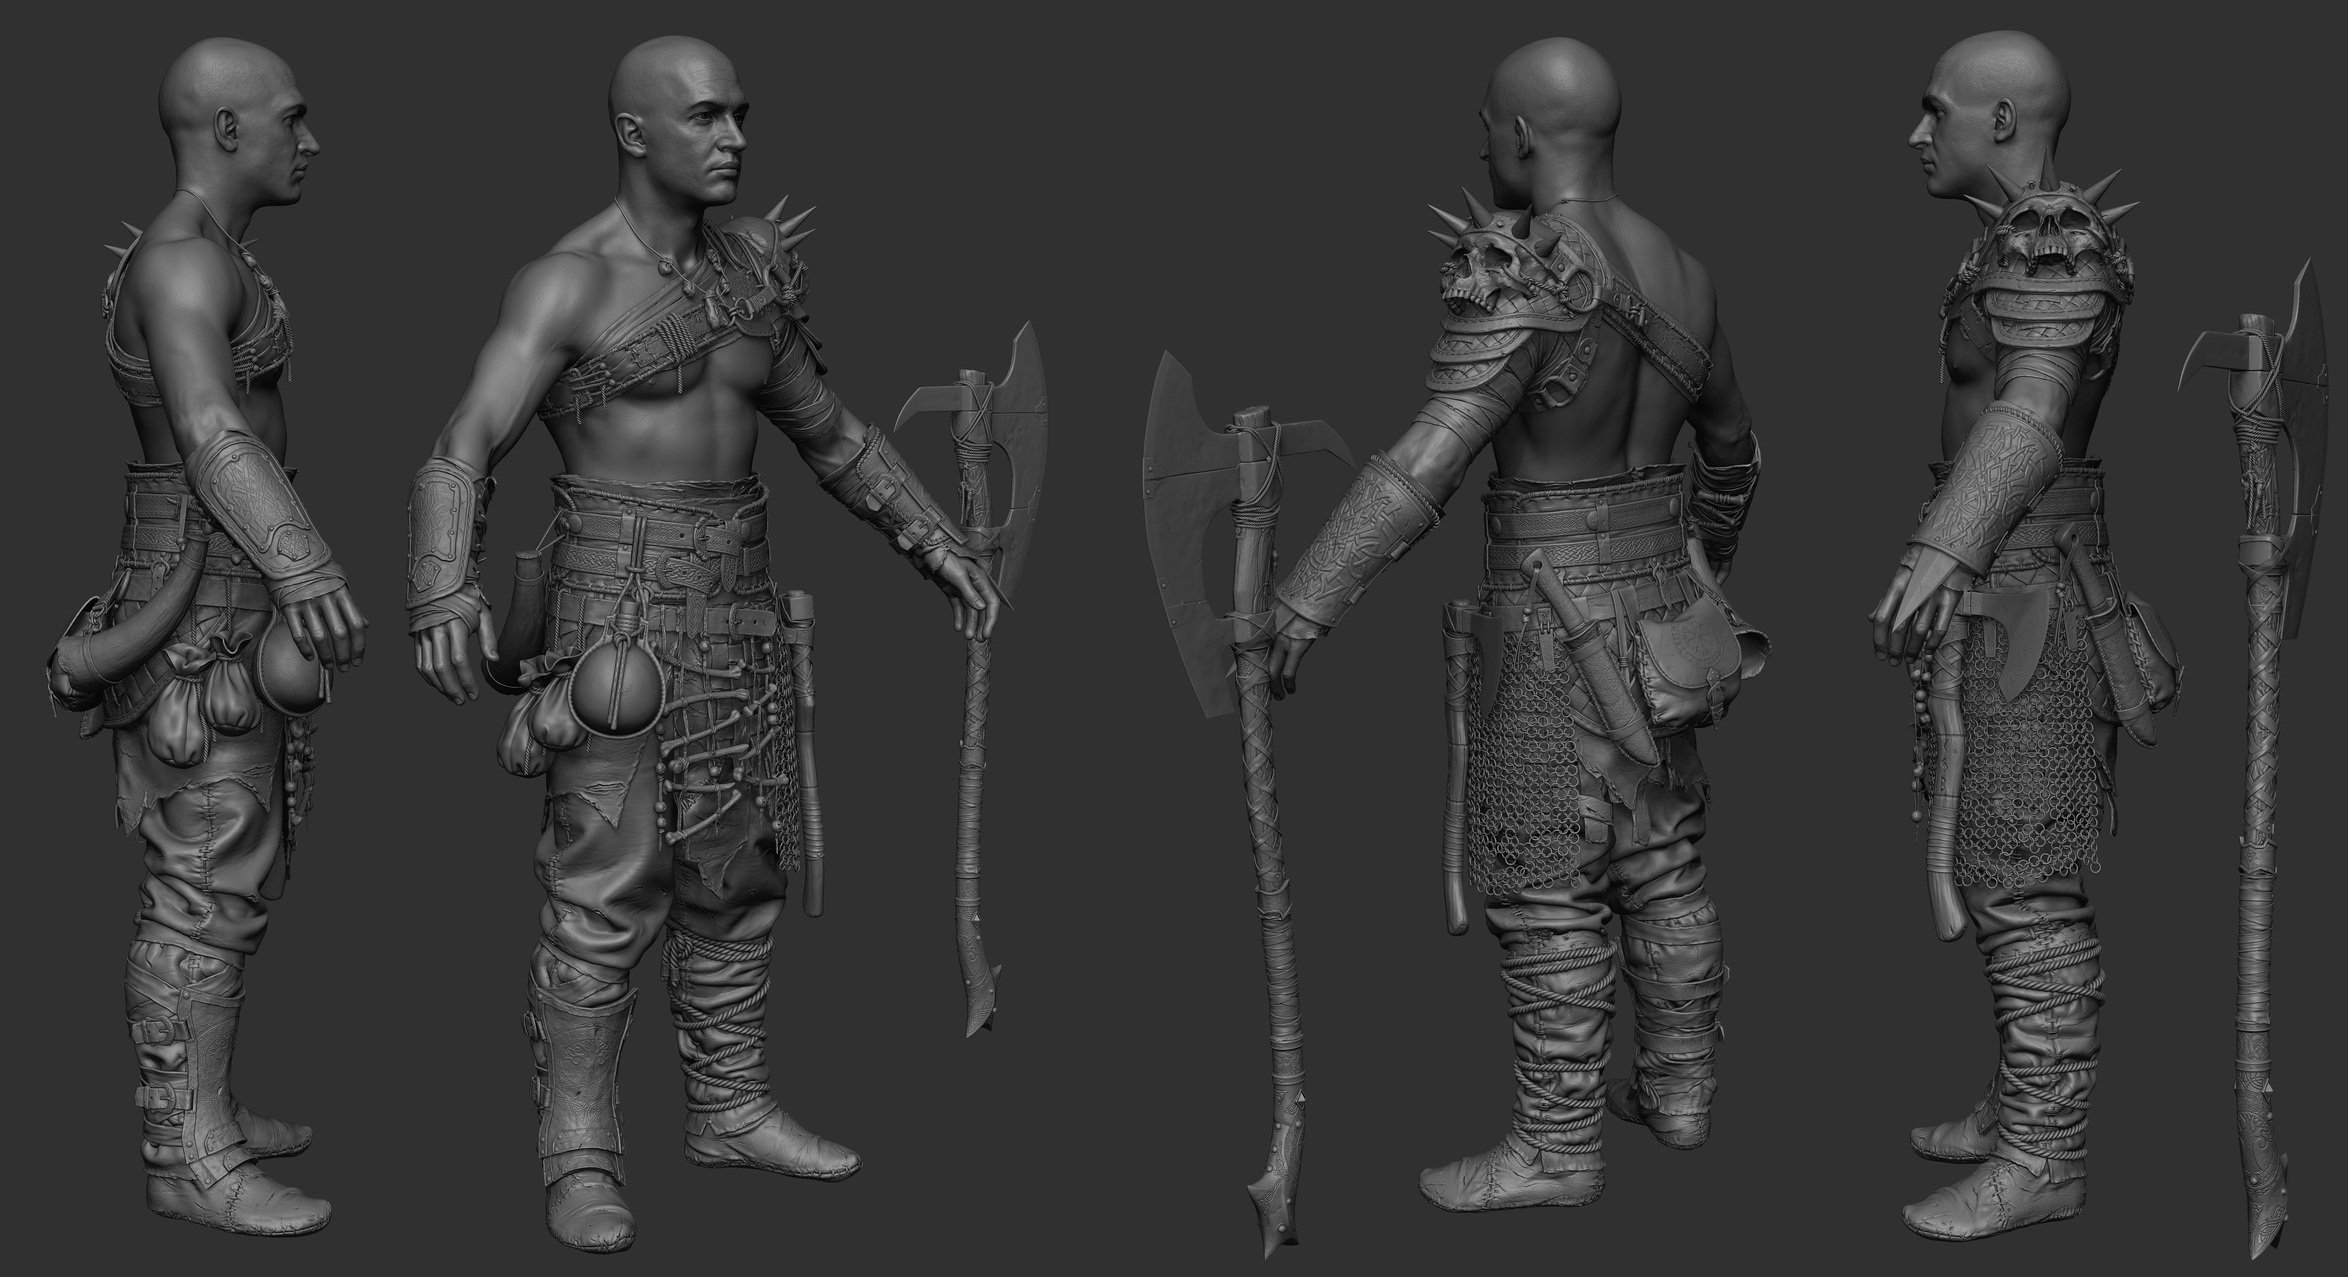


Game-Ready, Tom Hardy character, portraying a Viking of my own design - which is always how I see him (that or as Bane!)
Heavily inspired by his James Delaney look on Taboo as well as everything Viking related (God of War, Vikings Tv Series, etc).
- Everything sculpted in Zbrush from scratch;
- Maya for additional polymodeling (some armor parts, belts, etc);
- Marvelous for clothing (including straps) - with additional sculpting;
- Retopo using Topogun 3;
- UVs with Ryzom UV;
- Ornatrix for 3dsMax to generate the fur/hair for the fur/hair cards.
- Cards placement in Maya with the amazing GSCurve Tool.
- Fully baked and textured in Marmoset Toolbag 4 (additional use of substance on some other parts because marmoset doesn't support udims);
- Rigged and posed inside Maya
- Rendered in Marmoset Toolbag 4.
12 Texture sets in total
- Head; Torso; UpBody; MidBody; LowBody; Accessories; Main Weapon; Hair (including chest hair); Hair Cap; Fur; Eyes and Mouth
Total tris count is close to 200k. Optimized and game-ready.
I'll be making a separate post on UE5 since that was whole different battle in and of itself!
Thank you for watching!
 RaulTavares
Sketchfab Spotlight | September 2022

A collection of the latest and greatest pieces from Sketchfab users
Re: How do I go about fixing these baking distortions on a stylized character
- The first step is to design the lowpoly precisely according to the reference art/high poly, placing edges to support these details (like, for instance, having an edge that runs along the connection between boot and sole).
- These edges can also be used for UV splits, that way material separations will be razor sharp and will never depend on texture resolution.
- You can of course also control the baking rays with a custom cage to avoid wavy cylinders, but that's a bit of an obvious one.
- And lastly, you can also rely on manually editing the resulting textures. And this will be especially easy and relevant if the UVs have been split along material separations.
Overall you need to let go of the idea of baking begin a blind "retopo then UVs then hit bake" chain of events because it really isn't. The quality of the result almost fully depends on the way the lowpoly geo is built ... just like with old school "pixel based" texturing on ps1/ps2 era models really. You will not be "fixing" these distortions, you'll need to model your low with them in mind in the first place. But of course if this is your first time with all this this is a bit of a chicken and egg thing :D
Here's an extreme example of the principles above :

Also note that this model didn't even use a highpoly to bake from - the whole look comes from applying the principles above + adding a nmap bevel all around the panels. But of course it could receive baked highpoly details too.
One last remark : once your lowpoly and UVs are taking shape you can also take a few minutes/an hour painting in landmarks with a simple brush, just to get a feel of how the texture distortion will behave.
I can only recommend the study of models from Nintendo games, they are extremely tight in all these areas. That's the beauty of them always developing on low-end hardware, as it forces them to make pristine assets that look good even with lowres textures (while avoiding the pitfall of spending days on highpoly models).
 pior
pior
Re: Sketchbook: Cameron (Asura ) Cooper
Finished Hellboy and made a short video showing off the model.
https://www.artstation.com/artwork/RnowYe


 Asura
Asura
Re: What Are You Working On? (3D) 2022
Sculpt of Fire Guard fella for Artstation Challenge Dragon's Rise: Forgotten Realms (Game Art)

 idli
idli
Re: What Are You Working On? (3D) 2022
Since i am a big Fan of the upcoming Black Myth Wukong game already!
I did a FanArt based on this amazing concept ArtStation - Two mouse.
If you are interested check it out here:
ArtStation - Two Mouse - Realtime Character (Fan Art)

Sketchfab Spotlight | August 2022
A collection of the latest and greatest pieces from Sketchfab users
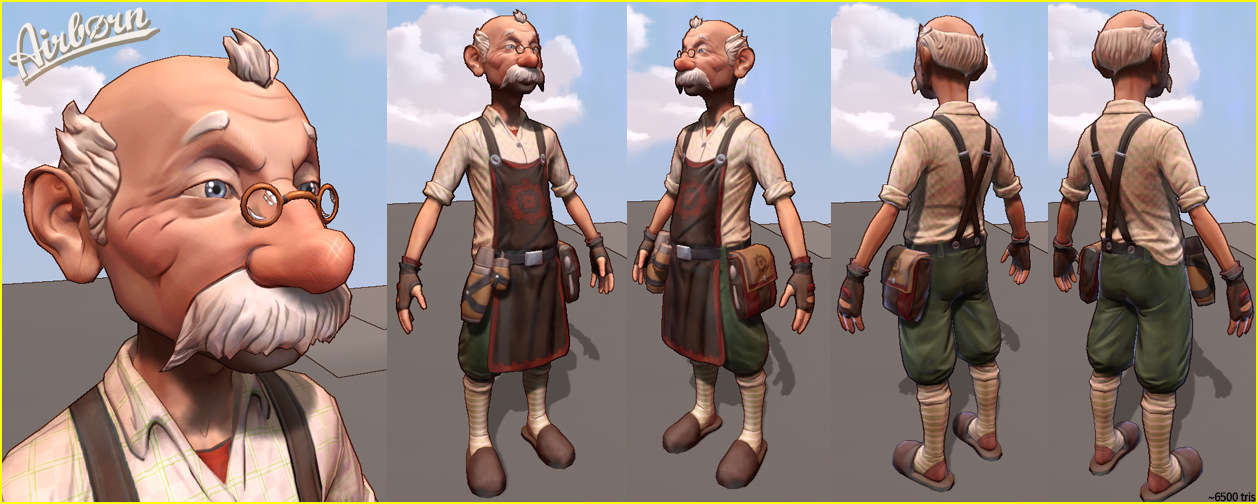
Airbørn
I am happy to call many of the people we worked with back then my friends and colleagues. It has been quite a ride.

Follow me to the last page for the latest updates
https://polycount.com/discussion/62779/airborn#latest
https://linktr.ee/airborn.art
Snip
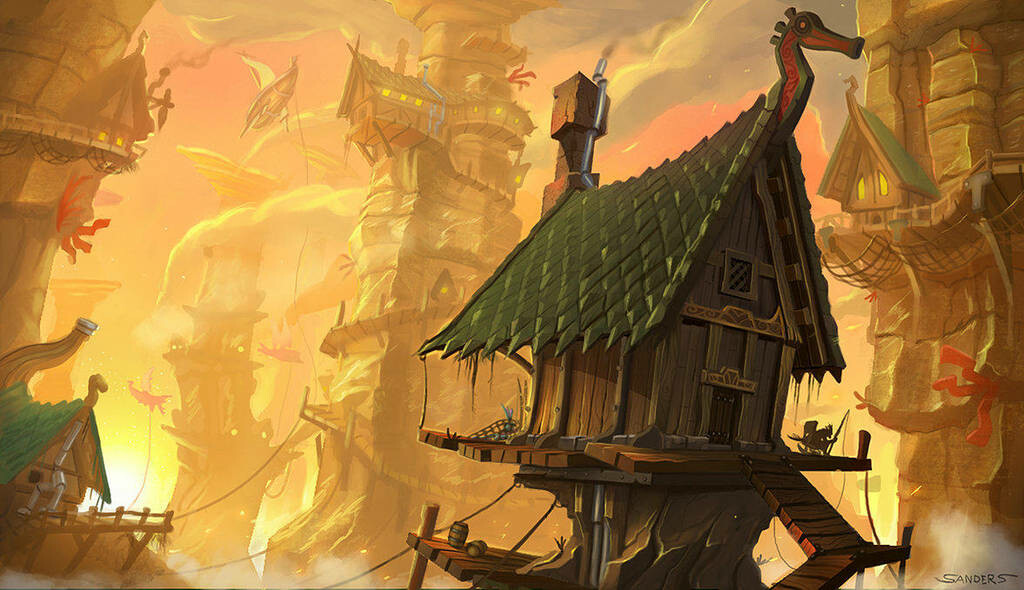
As we are moving closer to our first demo, i thought it might be time to start a dump for all our stuff over here...
So first of all what is Airbørn (not Airborne, more like born in the air, with a propeller as the o, awsum isn't it?
Airborn is a universe we are working for well, humm... quite some time i think 2 of us started experimenting with the world in 2006 maybe late 2005 i'm not sure, so it went quite a long way from the first ideas and artworks to what it is now.
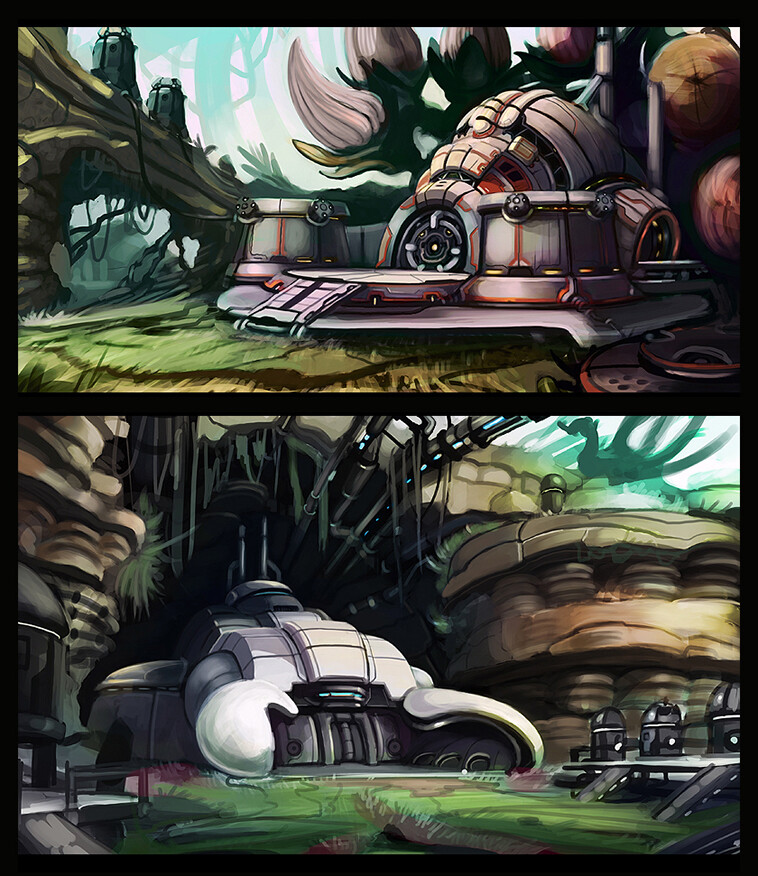
Airborn plays in a steampunkish (sort off early industrial, more brutal then the fine victorian steampunk) world quite a while after the World collapsed from over exploitation.
Our first Demo will take place in a story around Piño (he got the name after he was designed, as at first his projectname was just "boy" and a lot of people said "oh he looks just like Pinocchio" and also posta and niño - courier boy)
it's been done with Unreal Tournament 3, we created almost every asset from ground up, as the unreal assets didn't help us much (as opposed to some other mods that are way further but can reuse assets, like animations, shader etc) the only assets we reused are sounds, but even those will be replaced if we win at least a little amount of money at MSUC
http://nonpublic.airbørn.de/wip/neox/boy01/09.jpg an earlier design from 2006
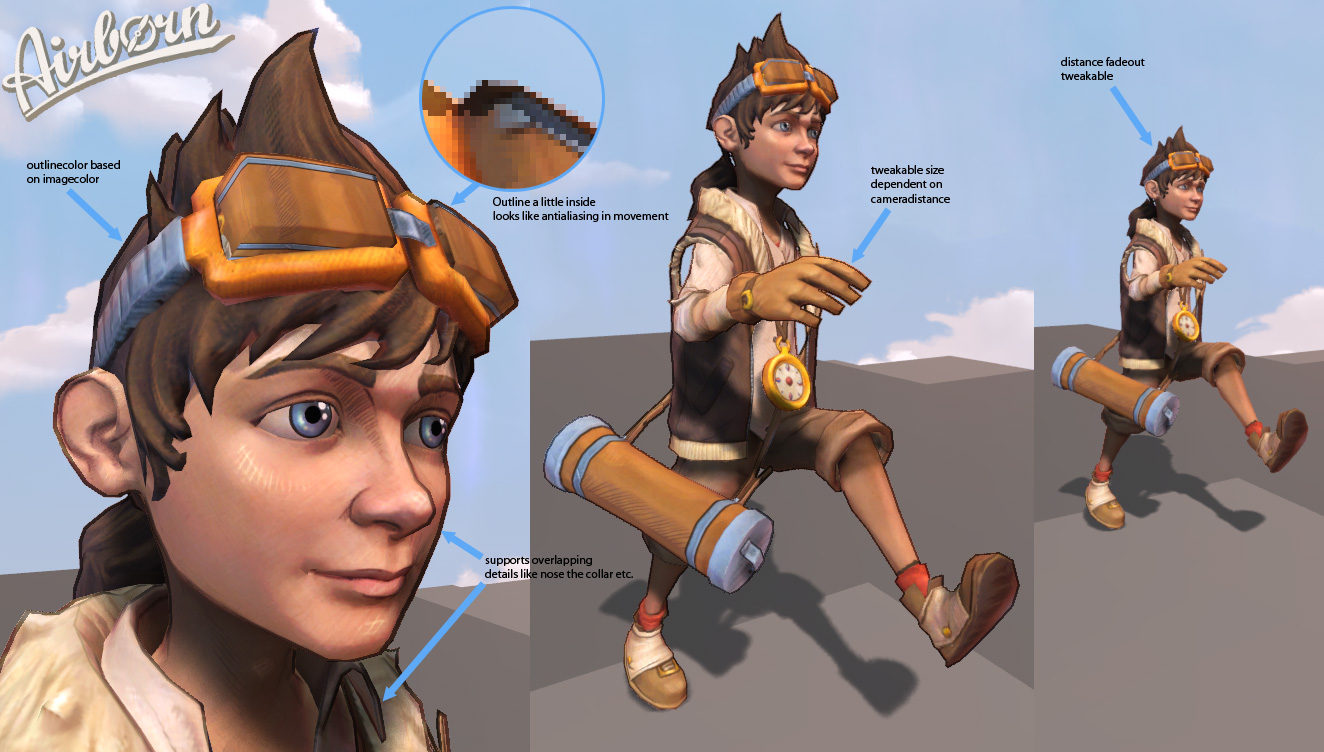 newer image should update to the latest build but i'm too lazy :P we worked on the colors and changed some details
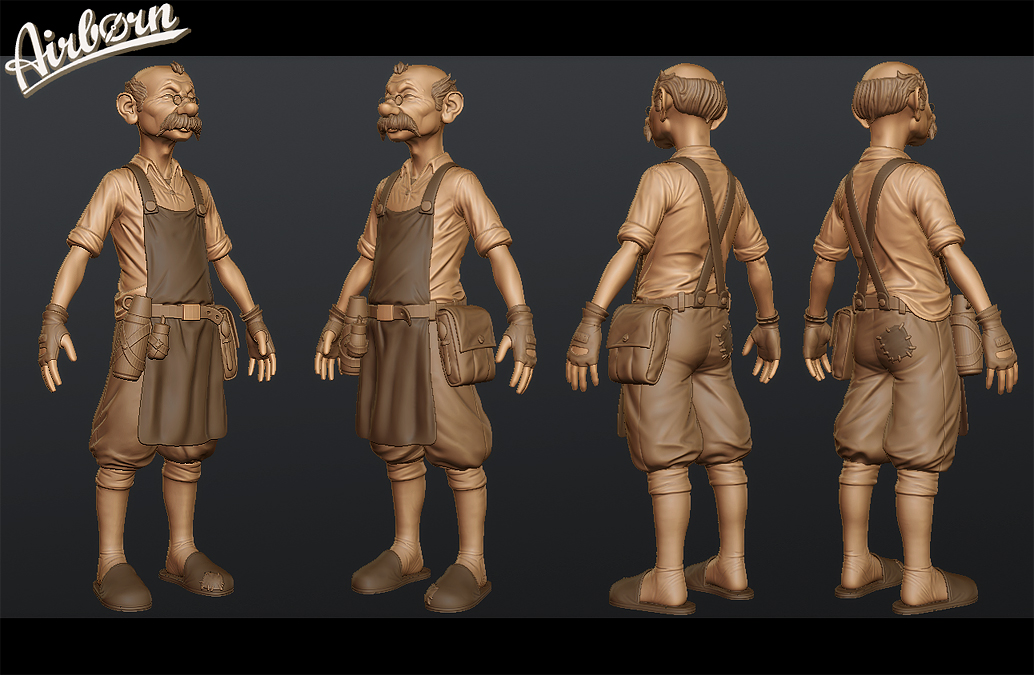
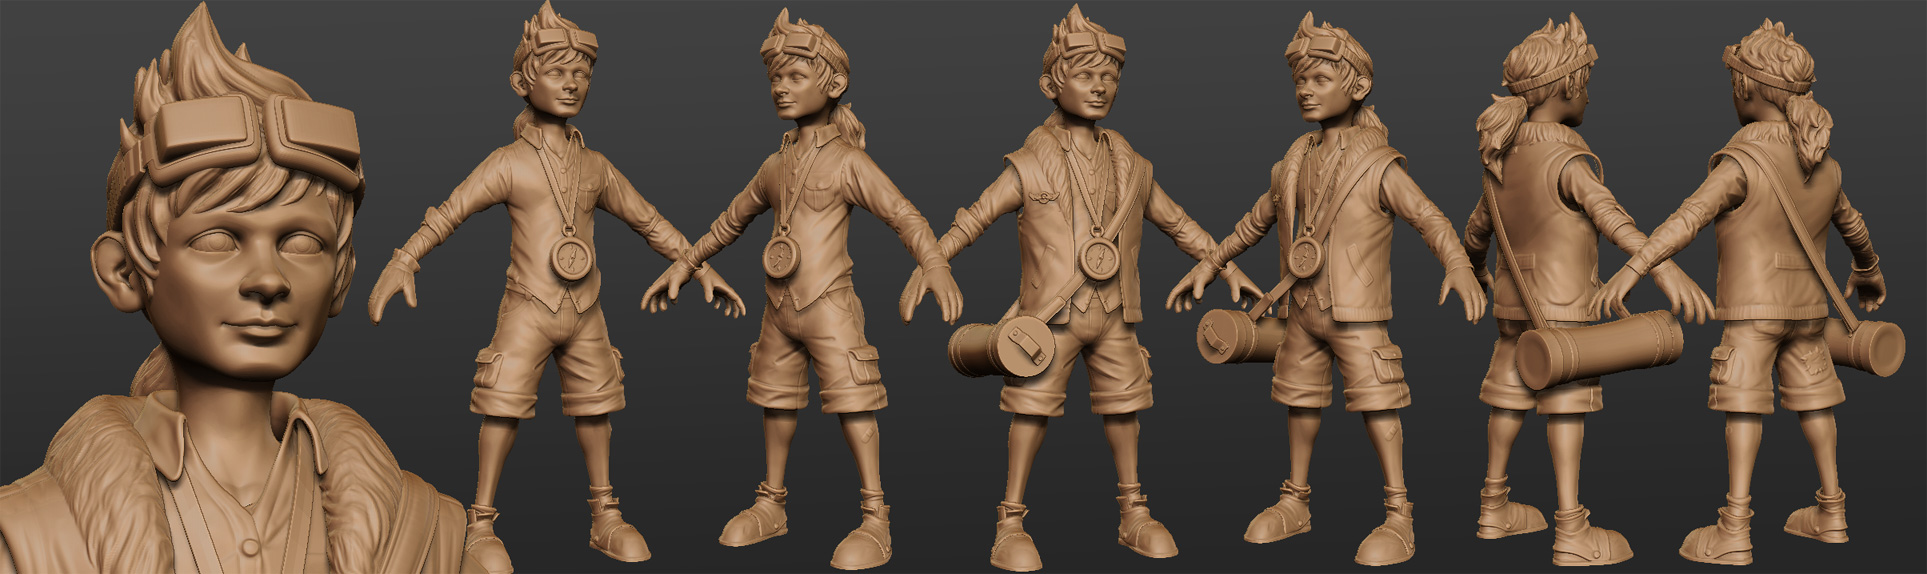 the zbrush sculpt
he wants to be a postman just like his father was (more about that story part later


only one of them is modelled yet.
the first demo will take place on one small part of his home island, the harbour of said island

we are currently working to get the rough framework to be ready to add more
environment and gameplay, so the first demo will mostly be just about the artdirection, you will be able to walk around look at stuff, do some veeeeeeeery basic gameplay (really not much, so don't expect too much).
so i guess i just opened a junk yard for all our stuff, going to post a brief history of the enemy design later in a seperate post, i guess this is enough for now to give an overview.
you can see some of the other stuff over at moddB:
http://ww

w.moddb.com/mods/airborn