Best Of
Re: [UE5] Stylized watermill
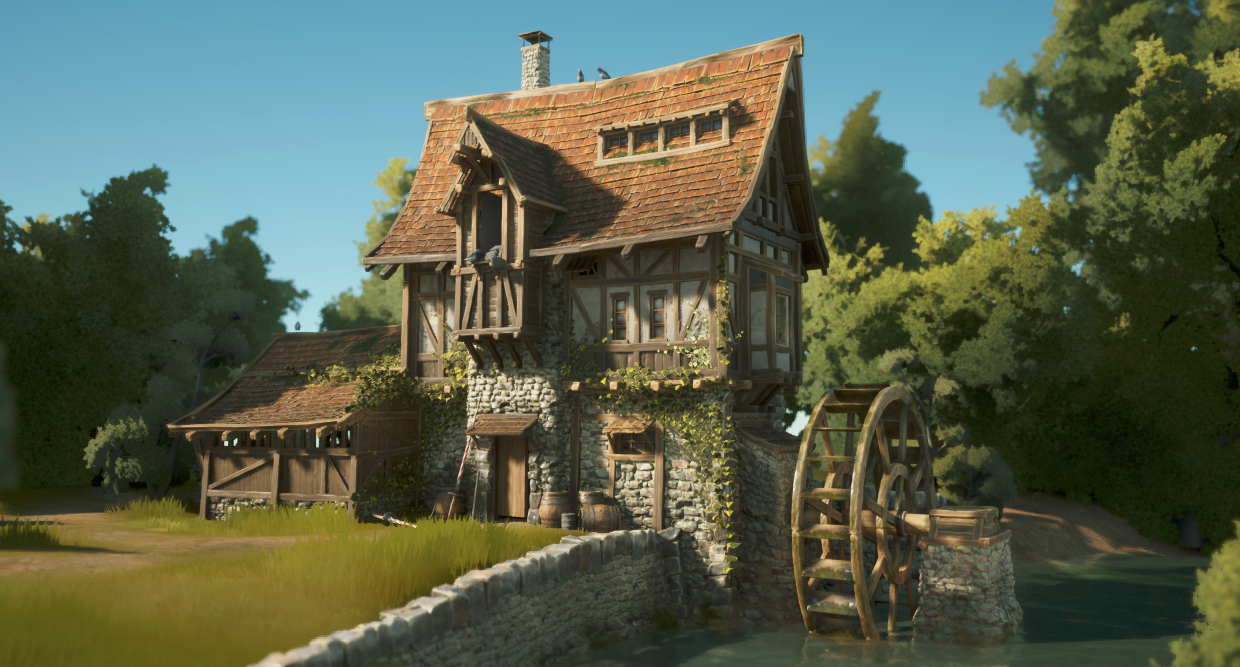
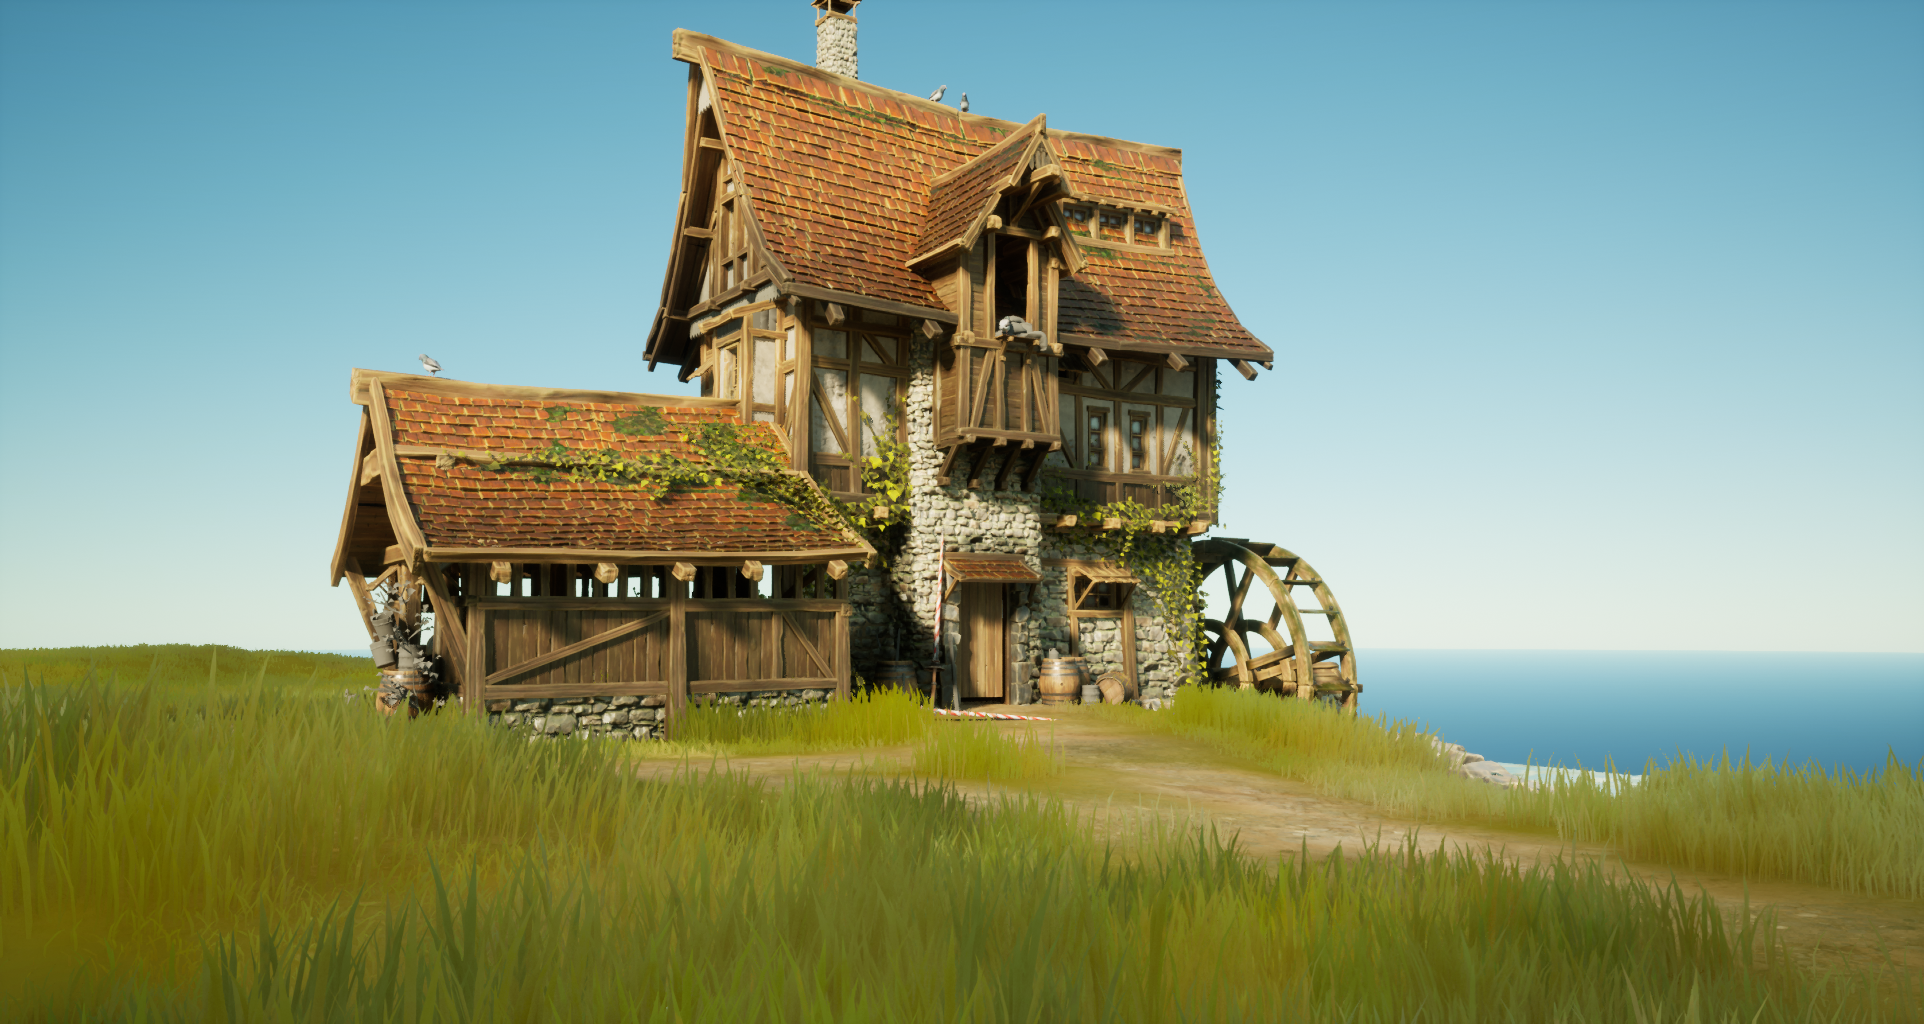
Little update on the tree background: still trying to get something not too eye catching but still pleasing or the background! I got rid of the color variations for now but they will definitely be back, to get some yellow ish or red ish trees as well back there
 Olingova
Re: AI Art, Good or Bad? A (hopefully) nuanced take on the subject.
You said it yourself, "his sincere desire to continue to draw and become an artist because that's how he feels most connected to others and regulates his own well being." — he sounds like a true artist, someone who needs to do art for his own human reasons. This should never be discouraged, even if it becomes unlikely as a career. Art has its own value, separate from the capitalist rigamarole.
 Joopson

Re: AI Art, Good or Bad? A (hopefully) nuanced take on the subject.
This thread has been a pretty good read all around. Sad, funny, ironic, depressing, and uplifting all in one. How fun. Some random thoughts to toss into the fire. Some of this will be rehashed shit in slightly different words, I just feel like writing again:
I think the whole "AI doesn't store data - nothing is stored, so nothing is stolen!" argument is hilarious. How would we define storing data? A piece of technology that holds information in a form that allows it to display, deliver, or have a user access that information at a later time? If AI can "learn" something well enough that it can reproduce it - then it's fucking storing the data. Maybe not as a .jpg, maybe not in a way that can be easily searched in a traditional "files" sense, but it's a technological thing that can retrieve data and allow you to access it (afghan girl being a solid example). That's fucking storage - might be non-traditional storage, might not be wholly reliable storage, but it is storage nonetheless. Next you're going to tell me my brain doesn't store data, because you can't access my memories with a Windows OS.
Another thought - I am just sick to fucking death of the whole "AI is good, it lets everyone express their ideas!" Spoilers, ideas are useless. Dime a dozen. Nobody gives a shit about ideas. Ideas are not impressive, ideas are not uncommon, and a significant majority of ideas are not unique. "Boy wizard with dead parents goes to wizard school, fights bad wizard who is like the baddest bad wizard". "Hot guy with cool voice and silver hair and like, doesn't age fights demons and monsters and stuff and also is in love with powerful magic lady who also basically gets to stay young and hot forever and they run into djinn and witches and elves and wraiths and all the supernatural fantasy stuff". Don't give a shit. The execution of the idea is what matters and being reliant on AI means you're not executing it (or at least, not a substantial part of it) - and consequently, you don't get credit for it.
I think that's something only actual artists can really appreciate - what it means to actually know your idea. To actually know what you want it to look like, or at least to have to consciously make every decision in its creation. Most people don't actually realize how unfamiliar they are with their own idea, their own "design". Until they try to actually create it. Then they realize, "Oh shit, I don't actually know what this guy looks like, in detail. I don't know how tall he is. I don't know where the seams on his clothes are. I don't know how long his arms are compared to his body. I don't know what kinds of buttons are on his shirt. I don't know what the lip of his boots looks like exactly. In what...style, should this be depicted in? What actually makes that style work?"
But once you do know - once you have designed it, once we can see Geralt of Rivia or whoever it is in detail - how that was executed, then it becomes something of value. The execution is the value. The journey of that execution, and how that impacted the final result - that is its identity. When you make it, you own it. When you don't do that - it's not yours, and I don't give a shit about it. You don't get artist points for picking the right prompts and personally selecting the results anymore than I get points when I type some shit into google images. Even if I spent a really long time on google images.
Final thought:
Funnily enough, if you actually know what you want - if you actually have an idea, down to the details - I can't tell that AI's really any faster at all. In the bit of testing I've done - I've never been able to get AI to actually show me what I want. And by the time I get even remotely, sort-of-kinda-eh-I-guess-it's-similar, I could've just done it myself. I've seen many pro-AI folk actually use this exact same argument, "It's really hard to get AI to show you exactly what you want - it took days to get it to generate _______!"
And that's something that actually strengthens my distaste for AI works - because it is so incredibly difficult to get AI to generate EXACTLY what you had in mind (assuming you had something very specific in mind)...
Then, chances are - if they're an AI "artist" - well...we're not actually seeing their designs - what they had in mind, are we? So they want credit for... not executing the work, AND credit for showing us something that's only sort of close to what they had in mind?
Hahaha.
No.
Actual final thought:
It does warm my heart to see the discussion here on Polycount. I feel quite proud to know this community, and to have been so molded by it. I appreciate everyone sharing their thoughts on the subject, even though it's kind of a shitty subject.
 Two Listen


Re: [UE5] Stylized watermill
Hello!
I started to tweak some luminosity and contrast and also started the work on the foliage; still a lotttt to go but I really like that first pass altough mayeb a bit too cartoony! I think some more grass variation with details and flowers, plus little rock will help to unitize a bit everything.
For anyone that might be interested, the account and videos of Victoria Zavorodhnia is a real gold mine! ( https://www.artstation.com/akbutea )
Olingova
Re: Tech Artist - What are you working on: FOREVER Edition!
Hi all, I'm working on using a Python port of the Clipper Lib (by Angus Johnson) to clip Maya curves and use the result for extrusion (in this case to simulate semi-random bricks):

PS: long time lurker, first post here ;D ... hey, how come my gif doesn't show/play "inline" but I need to click on it?!
EDIT: Oh... I just had to upload it as image 😅
 azrafe7
Re: WIP - Maz 537
My thread is kind of dead,so I've decided to give it a bump.I've worked a lot on the model and I've updated the results on Sketchfab constantly,it's taking shape slower that I tought but I will get there eventually.The thing is it has a lot of parts,and even if they are simple shapes like bolts,cilinders,etc. it still takes a lot to retopo them manually.Anyway,I will repost the Sketchfab link,even if it's just a post above 😁
 andreygheorghe
Re: What Are You Working On? (3D) 2022
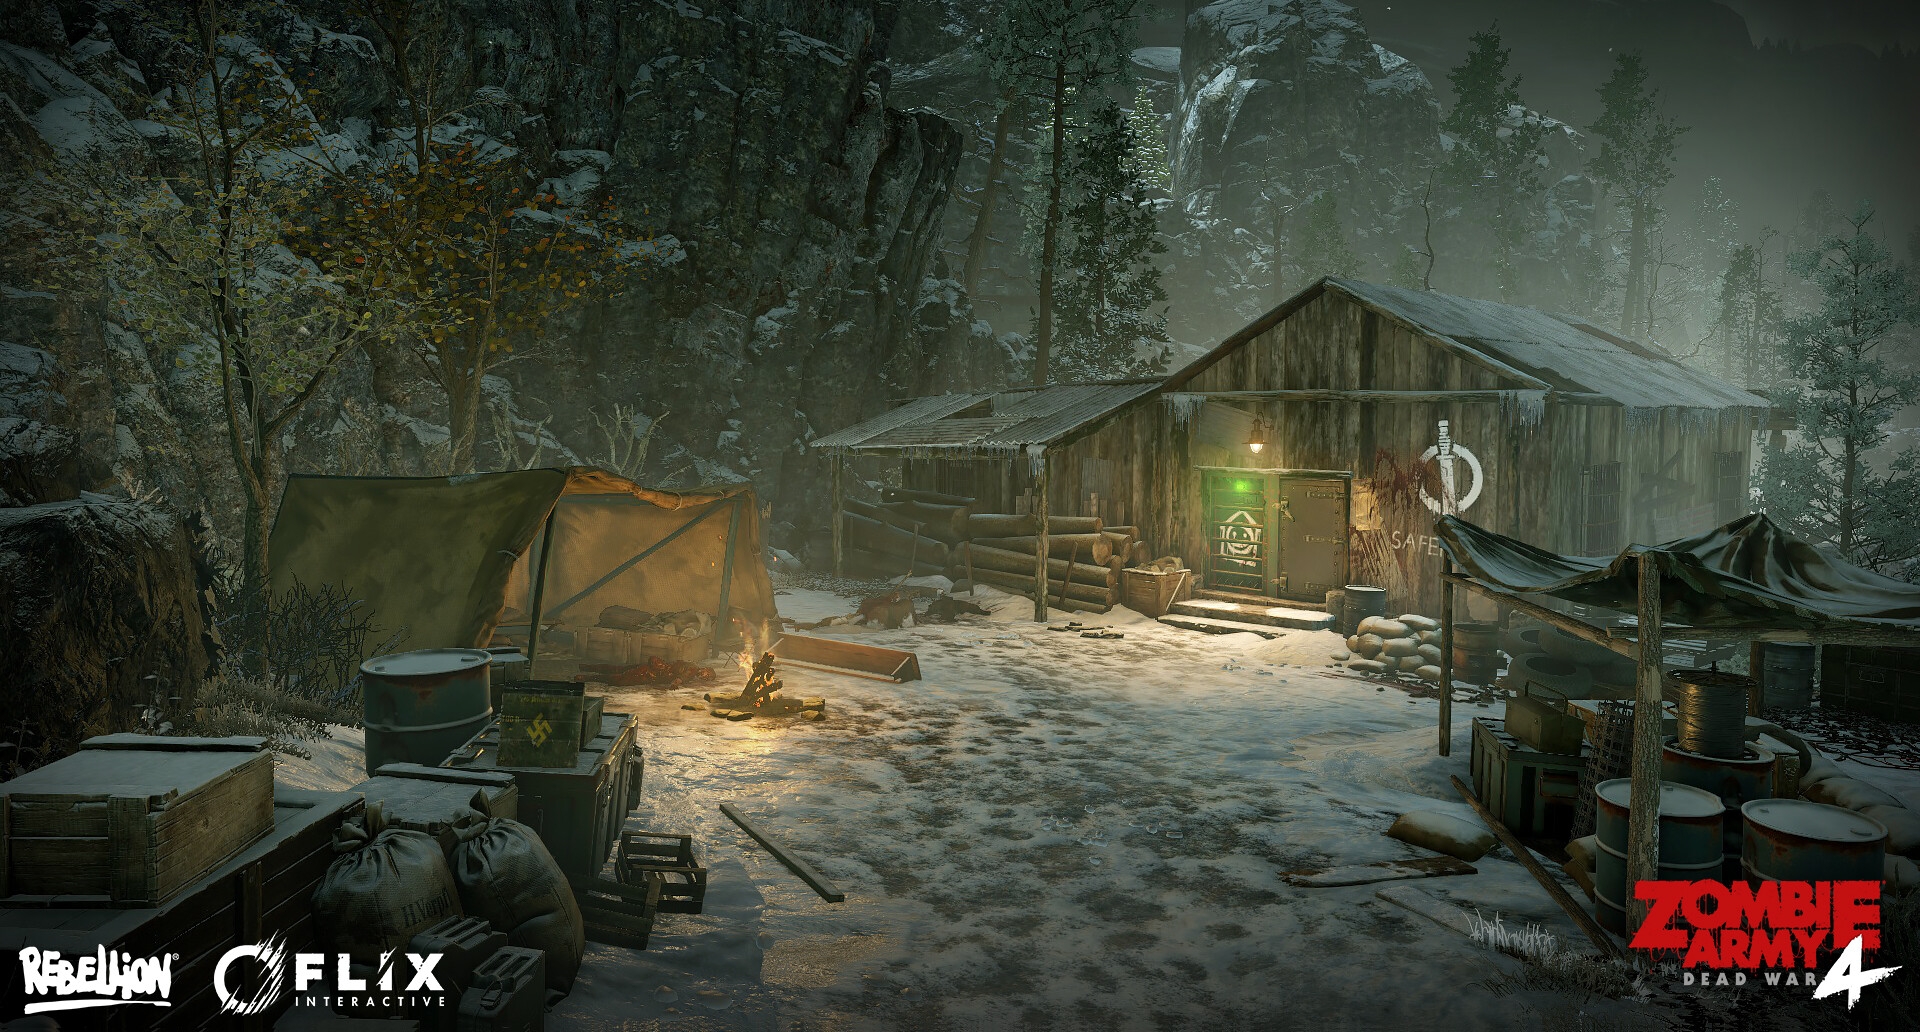
One of my environments I made for Zombie Army 4 which I just got round to adding to my artstation! 😄