Best Of
Re: Sketchbook: Stephanie Nieves
Incoming update dump (it’s a little image heavy)!
Okay, so, it’s been some time since the last post, but throughout these few months, I’ve been chipping away at this project. A lot has evolved!
First thing that’s noticeable is that the room looks very different, particularly in design. While working through my asset list, I realized the models themselves were...lacking. Nothing wrong with simplicity, but they felt a little too basic, and it really wasn’t pushing me in the ways where I felt like I was learning new modeling techniques with Blender. I think I was just playing it too safe? The textures were looking alright, but the models themselves didn’t have personality on their own. While I’m not going super crazy with the stylization, I still want each part of the room to feel like it has its own shape and rhythm, if that makes sense. So I went back to the drawing board (literally) and whipped up a new concept to use as part of my reference.

Voilà! New & Improved!
And here’s what the right curved wall would look:

And here’s the original for comparison (lol)

I’m much happier with the new design, and honestly it’s a lesson learned that concept design is a whole beast of its own skillset, and I shouldn’t take it lightly, haha. When I went back to further iterate on the room, I spent some time looking at various old tech and retro interior and furniture design, trying to understand what were some of the common shape languages found during these time periods (furniture ranging from 50s - 70s, and the technology design mostly based on 70s through 90s, with a few modern bits mixed in). I didn’t want to create a strict time capsule of any particular era, but more looking at a distant (unrealistic) future that carried over alot of the elements found in these decades. Basically a “best of” in terms of retro design, in my opinion.
These are some brainstorming drawings I made during this process:
I thought about what other parts of the ship would look like using this aesthetic, and what materials and shapes would be found depending on its location and function. Part of the galley to the left, and part of the study (now part of the bedroom) to the right.
Also, some cases:

Time for some actual in-engine stuff! There’s still plenty of work left to do, but already I feel more confident about this new direction.


Everything in this scene has been modeled and UV’d in Blender, and the various different shapes allowed me to try different things regarding modifiers, curves, sculpting, and even some simulation (for the bedding and pillows). I’m definitely a lot more comfortable with the program now. And Substance Designer! All textures here (that don’t include text or highly graphical elements) have been created using the node-based system. There are for sure several situations where Painter would’ve provided a quicker solution for some assets, but for the case of just becoming more familiar with Designer, I think the results aren’t that bad. P:
Below, here are some closeups of props and materials that are furthest along in terms of progression.


Even more below, are some iray renders of smaller props. Because of how little screen space they take, I decided to keep them relatively low poly.


I took one of the artifact props and uploaded it to Sketchfab, if you want to tumble it around!
Annnnnnnd I think that’s it so far.
If you made it to the end, thanks so much for checking this project out! If you have any feedback, please feel free to share, as I would appreciate any critiques from eyes other than my own, haha.
I try to work on this project as much as I can, and I will be posting a little more frequently so that I don’t have to create large posts such as these. I don’t have a set schedule or anything, but at least once or maybe twice a month would be a goal!
 Undertopian
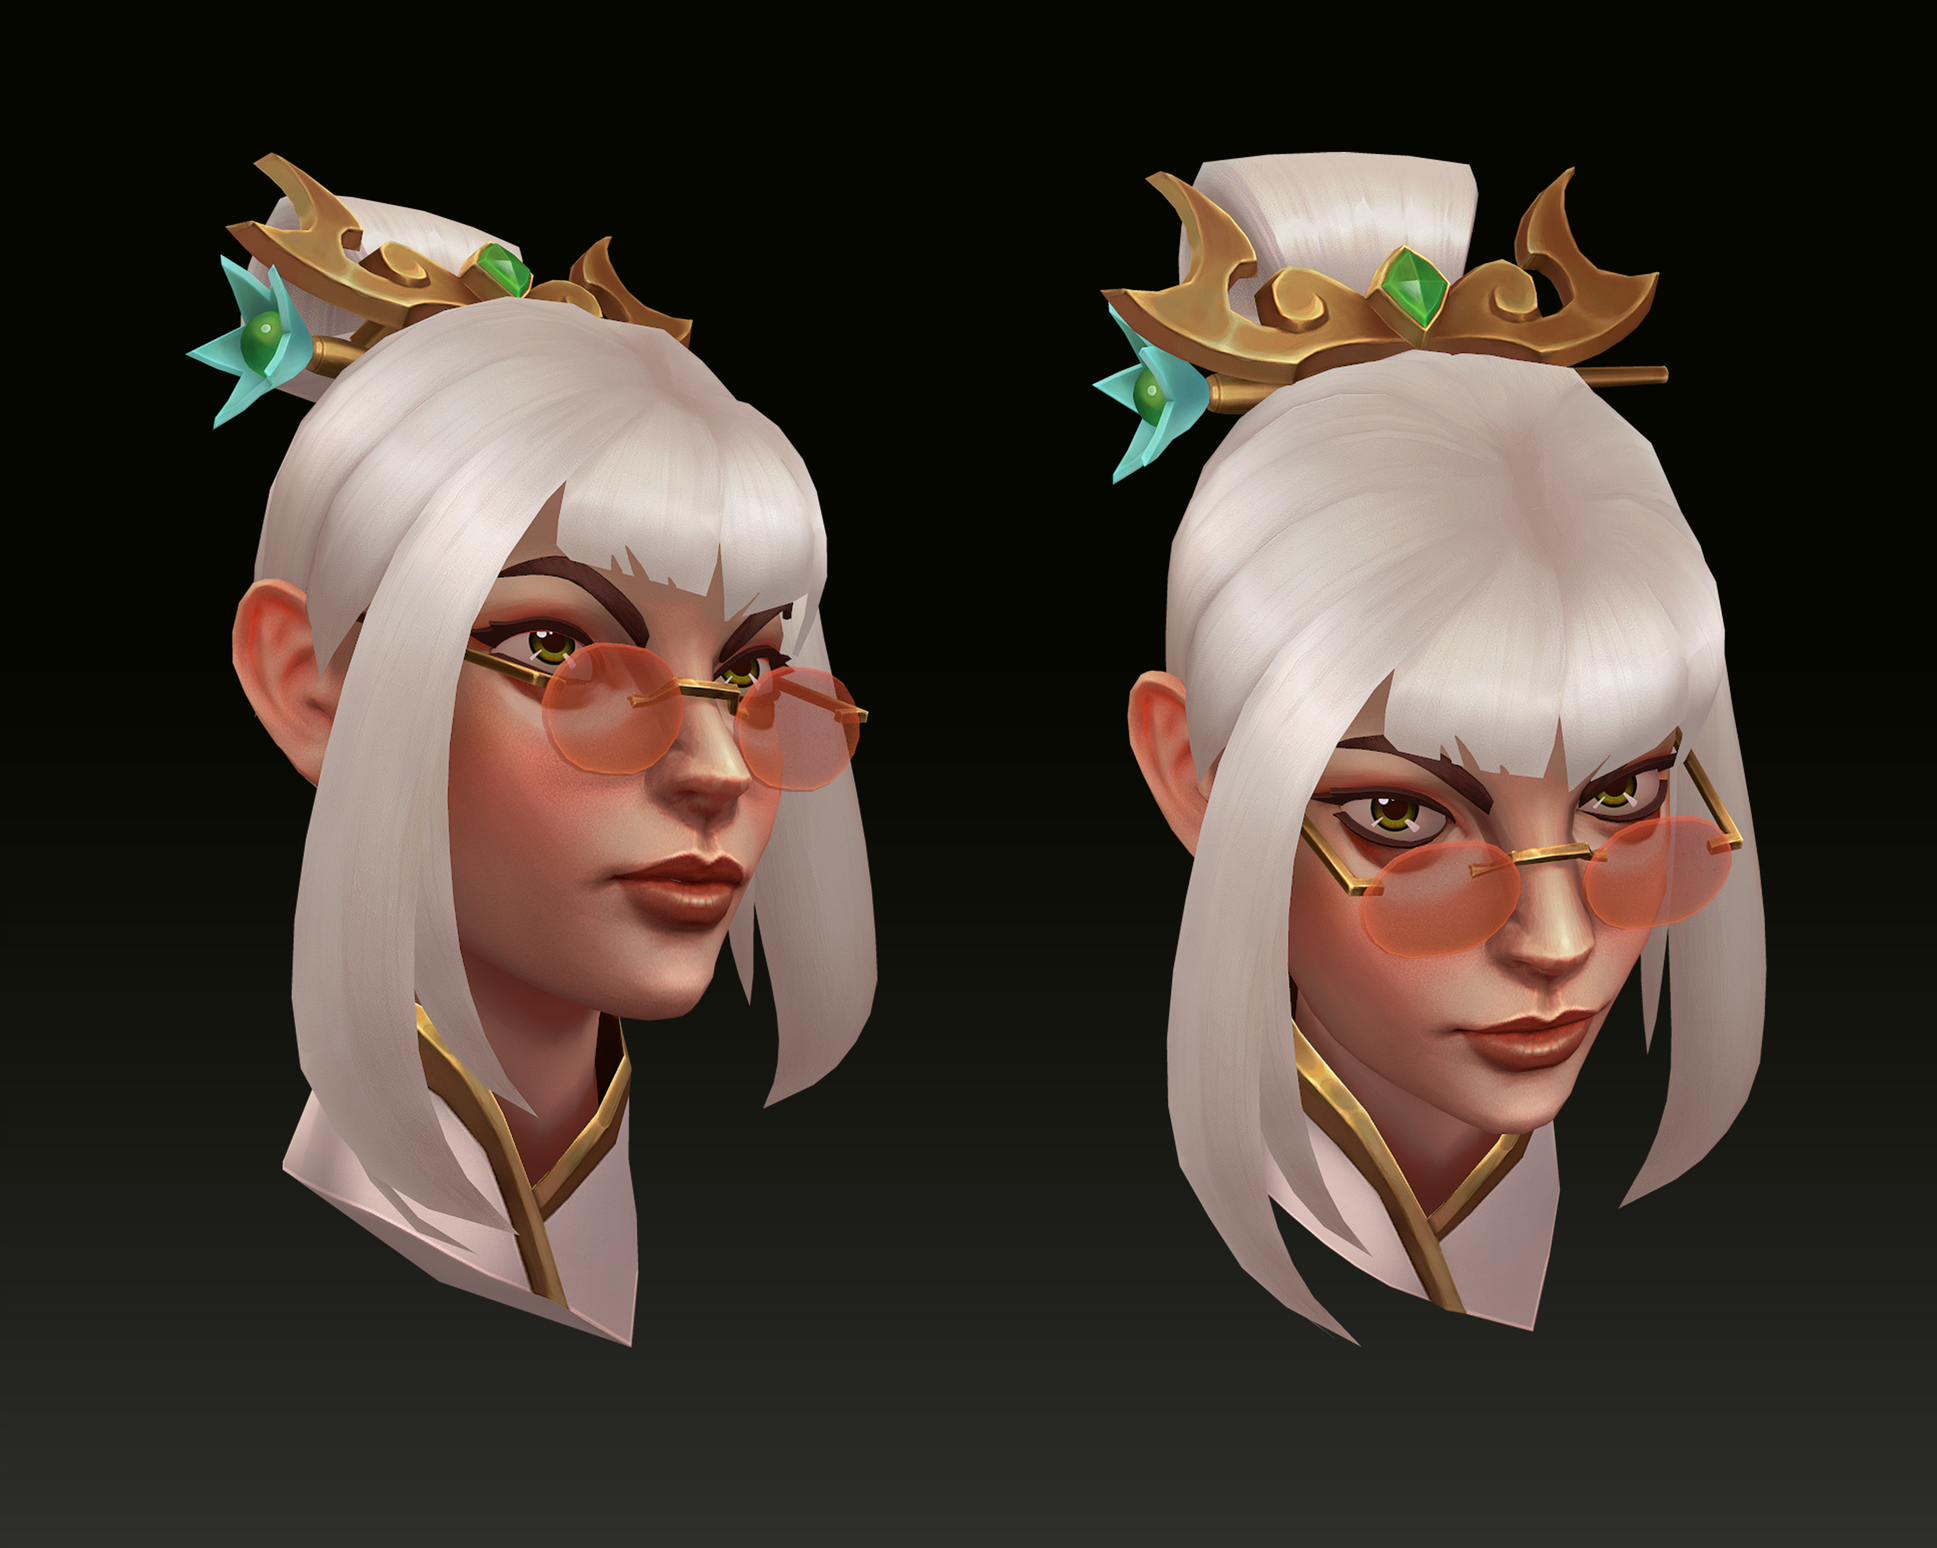
Re: Show your hand painted stuff, pls!
I've always wanted to try hand painting and I finally gave it a shot by this concept of Christopher Hayes
https://www.artstation.com/artwork/RanaE
Artstation link of project : https://www.artstation.com/artwork/4XV08Y

Re: Learning to use expensive software in order to reduce foreign competition?
Well, you started your thread with "Is it a good idea". This is a question. Therefore, people are replying to you. ¯\_(ツ)_/¯
Also, while Blender used to be the "poor mans" 3D software, the reason why it is becoming so popular now isn't just because it's free, it's also because it is running in circles around Maya and Max when it comes to core modeling features and realitme viewport fidelity. There is literally no reason for any modeler to learn Maya, Max or even Zbrush these days if they only need to model, sculpt and render.
 pior
pior
Re: Learning to use expensive software in order to reduce foreign competition?
that is silly
a : subscription costs are low enough that anyone earning can afford software
b : piracy
Re: How The F*#% Do I Model This? - Reply for help with specific shapes - (Post attempt before asking)
@macaron10 Looks like the basic topology flow should be workable. Running the support loops around the perimeter of the shapes will sharpen the outer profile but redirecting the loops across the flared cap will produce a softer, rounder profile at the end of the quillion. The blade and hilt sides of the cross guard aren't perfectly symmetrical in the reference image. So adjust the basic shape first, until everything lines up with the reference, then add the support loops with a single bevel operation.

@count23 If the edges aren't creased then it seems like the smoothing artifact is likely caused by the support loop that's directly behind the spherical cap. Uneven segment spacing near curved surfaces can cause unintended pinching artifacts when subdivision smoothing is applied. Moving that edge loop away from the shape transition should resolve the artifact.
Although it may not be necessary, it should be possible to simplify the mesh a bit further and that will preserve the segment spacing on the wall of the larger cylinder. Which will help reduce the possibility of smoothing artifacts appearing there. The example below shows what this could look like.

@kuronekoshiii The mesh in the original post looks like it should be fairly straight forward to remodel but if the mesh provided by the client is a lot more complex then it may make sense to take a slightly less conventional approach. If none of the proposed solutions will work within the project's constraints: another option would be to redirect the loop flow, as shown below, then manually move the highlighted edges in along the normals until the subdivided surface evens out.
There isn't a lot of geometry to work with. So, the results of manually compensating for the mismatched segments won't be perfect but that trade off might make sense if the only alternative is scrapping a complex mesh. If the customer expects artifact free subdivision and the supplied mesh needs to be re-worked then that's something they should probably be charged for.

Re: Show your hand painted stuff, pls!
Hi everyone, long time no see. Here is my latest handpainted lowpoly.
Concept by Blake Byun (https://twitter.com/BlakeByun/status/1283319956612866051/photo/1)
More high resolution picture and 3D view at: https://www.artstation.com/artwork/14oy9G
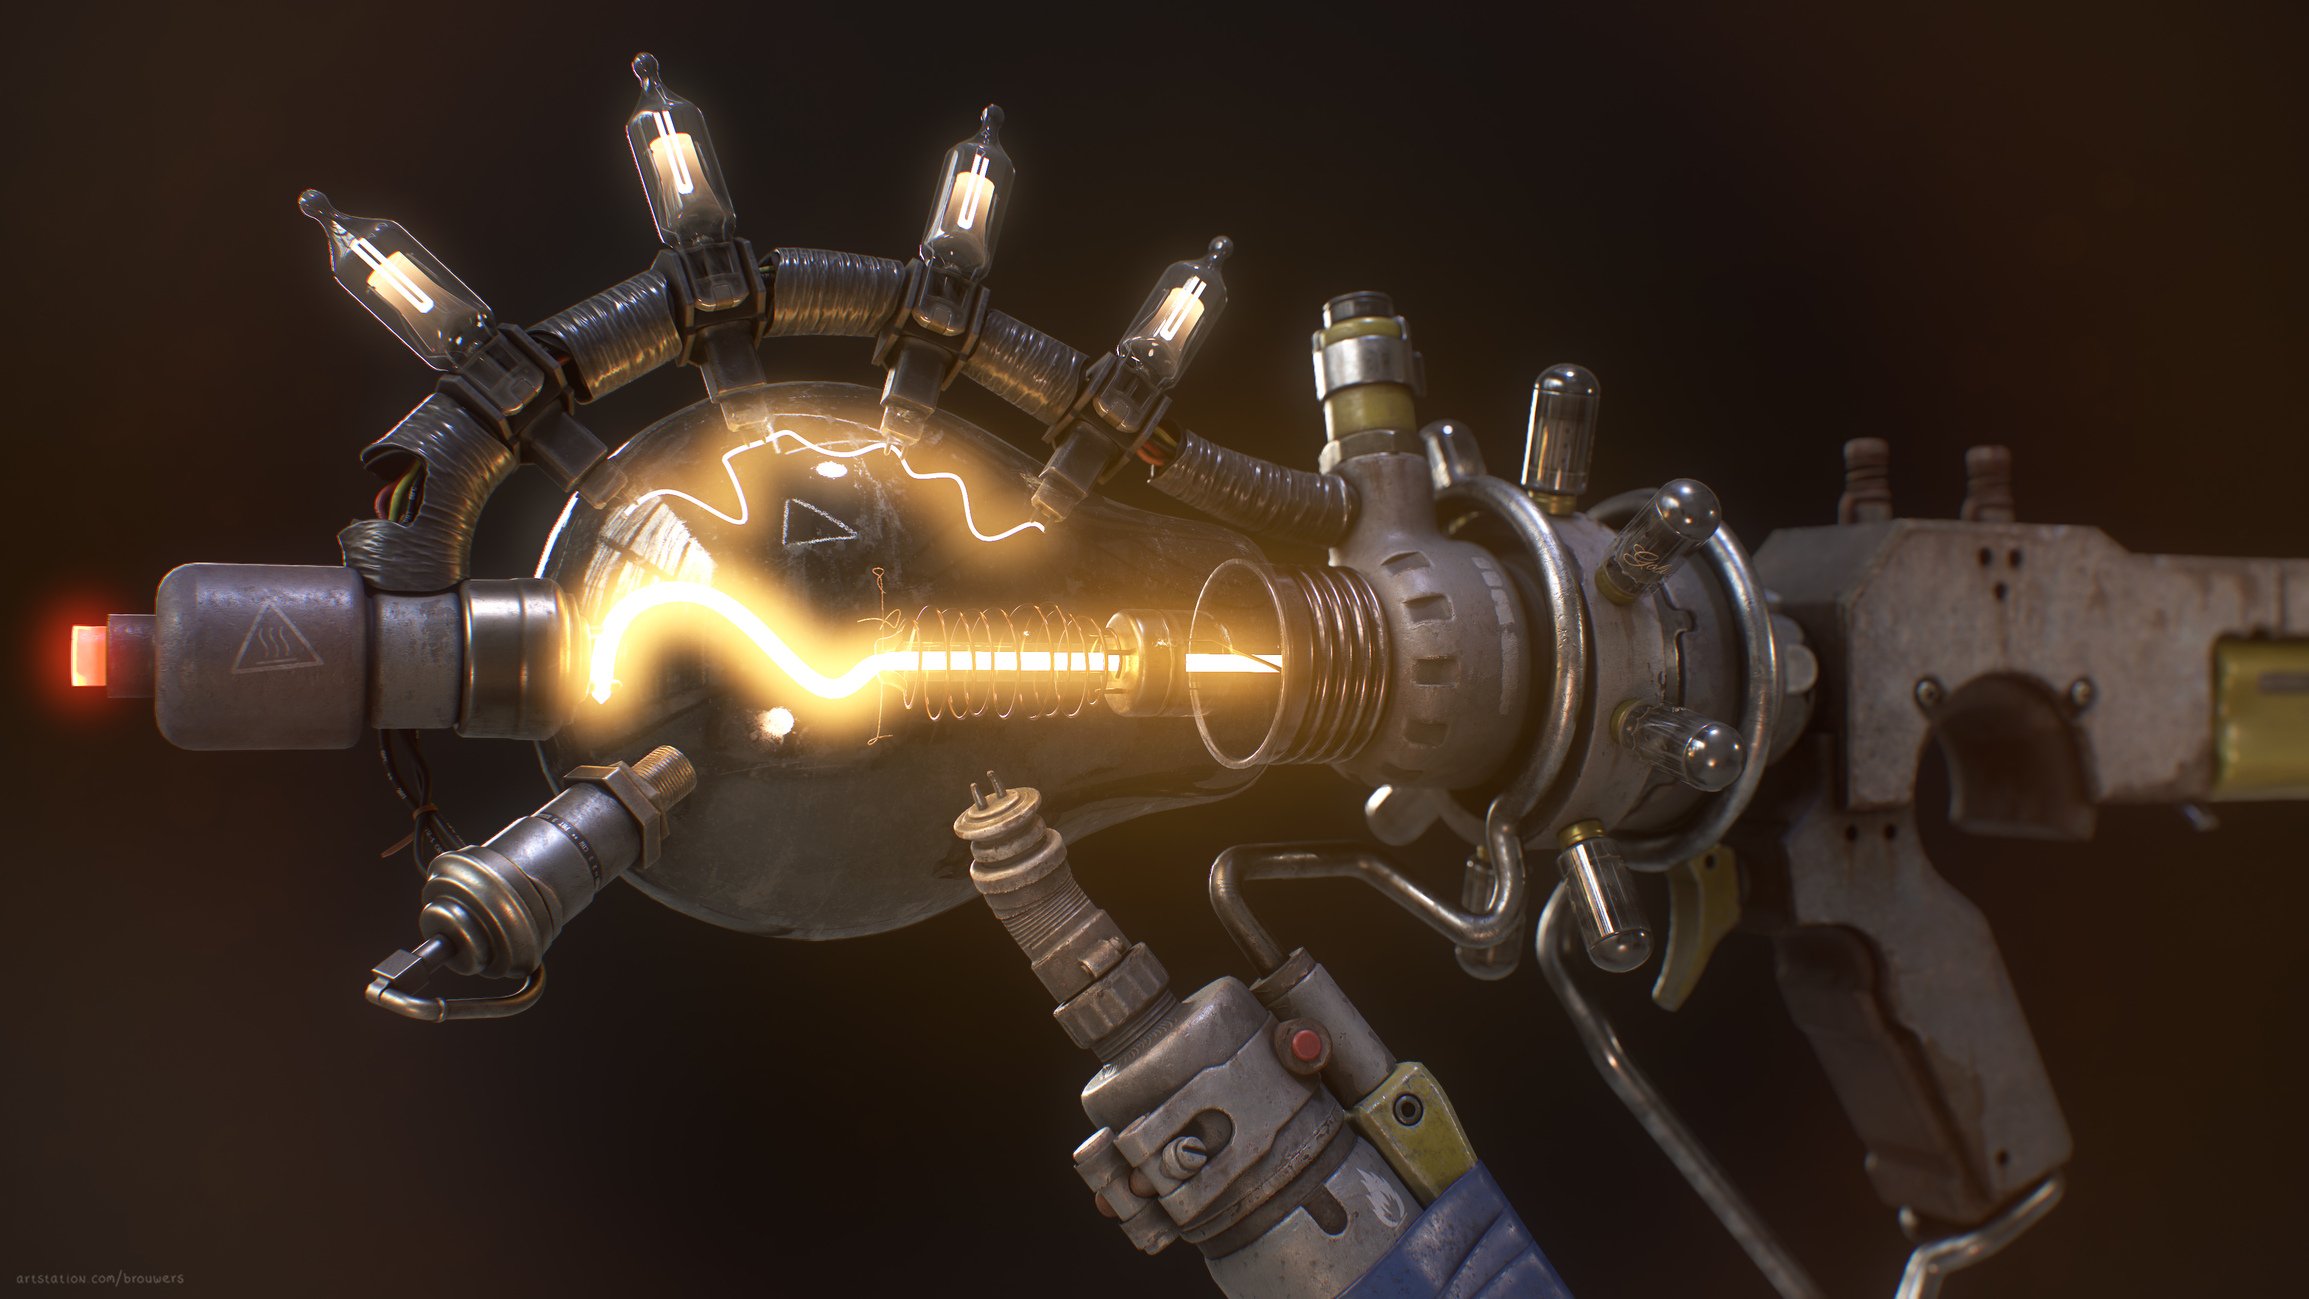
Re: [FINISHED] Mad Science Gun - Seeking feedback
I’ve been experimenting more with the glow settings and when comparing to the old version I have to agree, there really was no power behind it. I’m having a hard time finding a sweet spot though, I feel it’s easy to have too little or too much glow.
Either way here’s what I came up with, I'm curious to know what you think.


 JorisArt
Re: Shelter. WIP
Hi!
I didn't post anything for a long time, so here is my piece that I working on right now. It's kinda middle poly, then I will easily transform it to high poly and low poly. And will make a bigger post about this piece after it will be finised. Andrew Averkin's kitbash pack was soooooo useful! I used it as a Lego parts to find my idea, used a non uniform scale to make some parts fit their places, then remodeled all from scratch to make it nice and clead and easy to work with.
The funniest part ahead. UV, baking, texturing. I realy like this part)

 Ask
Ask
Re: Brutal Knights - Game Project/Learning Experience
Got around to making a rough new animation for the footsoldier enemy. Still needs some polish and adjustments but for now it does the job.

I also setup some tracking functionality for a bit of added challenge.
This attack also activates super armor so it takes a little more to stagger the enemy and allows the attack to complete creating more of a threat.

 Bolovorix
Re: How The F*#% Do I Model This? - Reply for help with specific shapes - (Post attempt before asking)
Toby3D said:I'm trying to figure out how to make holes in a cylinder with booleans, and I just can't get it to look good. I've been checking this thread, google and a few other places, but I haven't found any solution yet. As you can see, there is some weird shading around the holes. I played around with different cylinders, trying out to change the amount of sides on both the main piece and the boolean, but nothing really changed.
I did play around with hard / smooth edges and giving the whole model hard edges fixes the shading, but of course that isn't a solution since I want it to be a smooth cylinder.
Is my cylinder simply too low? Is there a problem with the topology? Is it perhaps some tension?


 wirrexx