Best Of
Re: How do I create elastic and taut meshes?
Good advice.
Just to illustrate and briefly add to what's already been recommended: simple elastic and fabric components can generally be created with some basic subdivision modeling. Keeping things relatively simple and letting the subdivision smoothing do most of the work is what makes this process more efficient. Using modeling operations that synchronize the relative movement of adjacent mesh components or insert new loops, along an arc between two existing points, will help keep the surface flow of the whole mesh relatively even. Tools like bridge, loft, proportional edit, soft selection, path deform, latice, FFD, etc. can be used to speed up the workflow.
There's also more than a few different ways to approach the modeling process. Here's a couple of workflow examples. One approach is to model the end points of the shapes individually, rotate them into position then connect them with a modeling operation that will insert new geometry in an arc between the two shapes. An alternate approach would be to model the entire shape flat then move it into position using a curve or lattice based deform operation.
Below is an example of what the process could look like when modeling the end points first then connecting the shapes. Start by establishing the basic shape profile and topology of the end points. Rotate and deform the open end of the shape, with proportional editing fall off enabled, to fit the underlying surface. Bridge the edge loops at the open end of the shape and adjust the arc between the shapes until it looks appealing. All of these modeling operations are done on a single sided mesh to keep things simple. Mesh thickness and support loops are added with solidify and bevel modifiers, respectively.

Below is an example of what the process could look like when modeling the entire shape flat and deforming it along a curved path. Start by establishing the shape's entire profile and topology layout. Add mesh thickness with a solidify operation. Insert a curve and adjust the shape so it creates a smooth path between the two anchor points for the strap. Deform the strap along the path and add support loops with a bevel operation.

Recap:
Keep things simple when blocking out the shapes. Use tools that can deform or generate geometry along an arc between two points. Rely on the subdivision to smooth everything out.
Additional resources: below is a link to a more in-depth look at using a similar process for stiff fabric components of hard surface models.
https://polycount.com/discussion/comment/2771257/#Comment_2771257

Re: The Bi-Monthly Environment Art Challenge | July - August (79)
Looks good for the short amount of time!
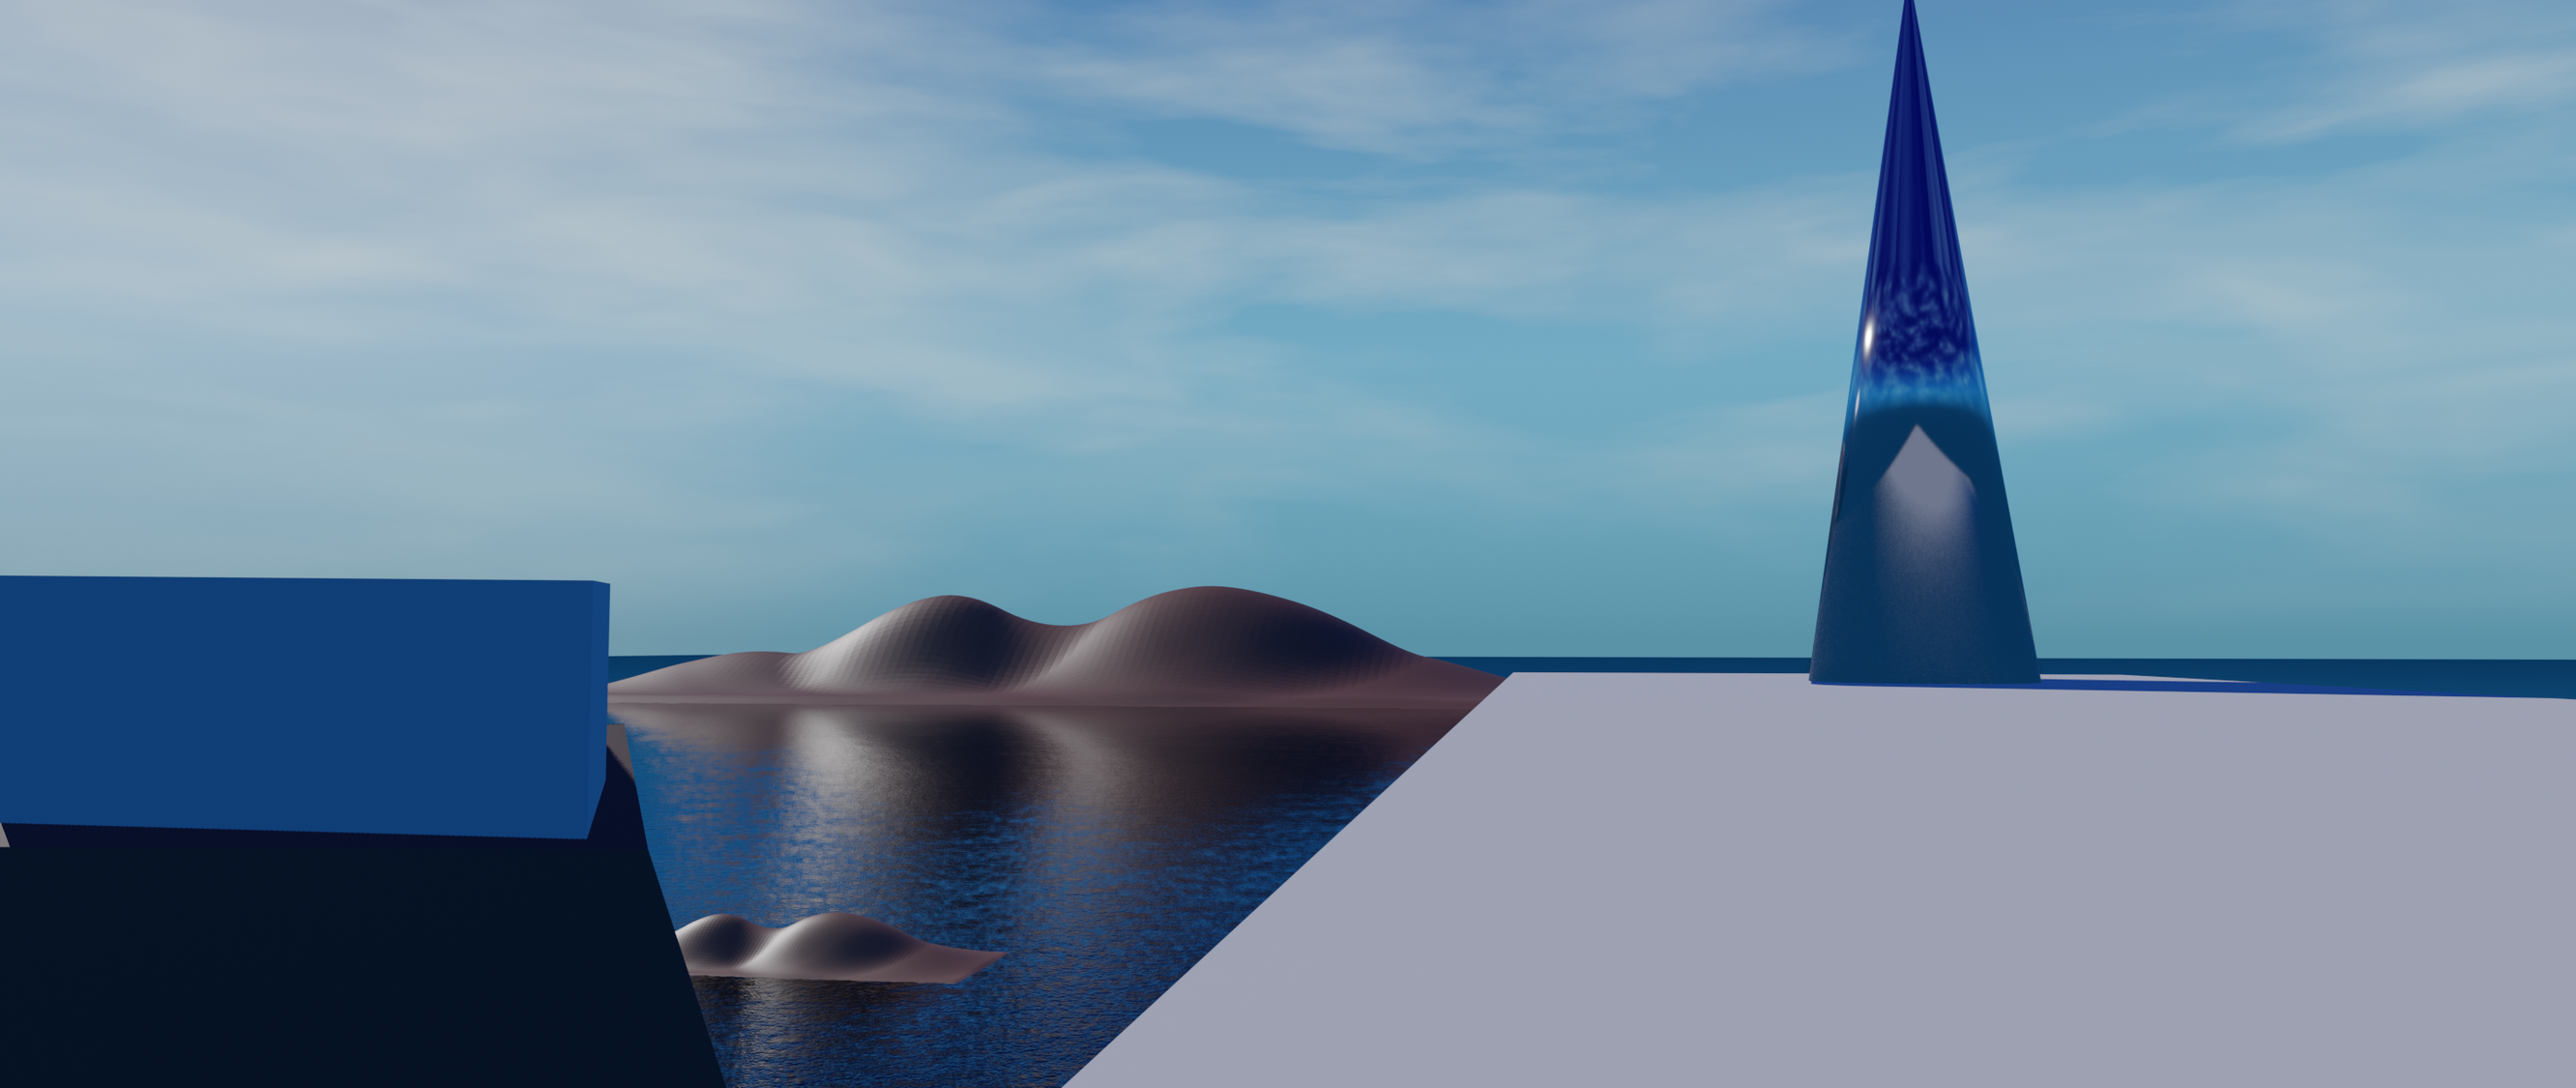
I think the main difference between the concept art and what you got so far is actually the colors. In the concept the white pops way more also because it has this nice red/ochery tint, especially in the water canal. The ocean gives this great dark blue contrast (I know you already said you're not happy with the water yet) and the cliffs in the bottom left (and middle island) are redish. I think what could help you a lot is some sort of warm light coming from the camera. The cliffs and left white wall are in the shade yes but they get alot of ambient light in the concept. Also your left white wall is prettty blue, especially at the top - a warm light from said direction could maybe help out in that regard as well.
Overall the far away island takes the focus in your render because it is rather bright and your white foreground and left cliff + wall don't pop as much as in the concept. I'd probably fix that first and postpone the foilage part till the end. Instead having the background blurry could help a lot. I'm not an expert with cameras but I think you know what I mean when I say having the focal point closer to the very foreground and keeping the image rather sharp until the middle cliffs/island between the boats and slowly have it blur out more and more until it reaches the distant island.
Edit: And don't be stingy about polys in the foreground! Those corners in the water canal send shivers down my spine haha.
Re: The Bi-Monthly Environment Art Challenge | July - August (79)

Just started this week. Working on getting the composition right.
Re: Show your hand painted stuff, pls!
Hey everyone. Love painting food so I made this !
Twitter here : https://twitter.com/DetectivePacha
https://sketchfab.com/models/e9ea5d3bbdf0498cbcafd6f50cce2c7b/#UNIQSKFBVANILLA
 TinyPacha
Glowing Sheet Ghost


Hi my name is Nick, working on becoming a character modeler for video games. This is one of my characters for a simple haunted house game, made using Maya, Zbrush, and Affinity Photo. I would like to hear people's feedback on it.
C&C Please and Thank you!
Re: The Bi-Monthly Environment Art Challenge | July - August (79)
I've been wanting to take a crack at the Wind Harp scene since the beginning of the month---originally I was going to do it in a game engine, but I kept running into roadblocks (mostly hardware related) So I went ahead and did it in Blender again. Since my last two attempts at the Bi-Monthly environment challenge took way too long for me to finish, I decided I was going to try to finish the scene (or at least get it into a more-or-less presentable state) in one week.
Day 1:
Day 3:

Day 7:

Working fast like this and not hyper-scrutinizing everything was a lot of fun! The biggest issue I had was the water, and I'm still not very happy with how it looks. I also had trouble with lighting in Eevee, and then with volumetric fog in Cycles.
When I pick this up again in a few weeks, the next steps I can think of are: Finish the material for the harp object, replace the skybox/clouds, completely re-do the cliffside in the bottom left corner to better match the concept art, Improve the material for the white platforms (trim sheet maybe?), add foliage to the larger island, and add the boats and birds to the scene, and maybe the fruit as well.
 jgarrison
Re: Sketchbook: Frank Polygon
Subdivision sketch: soft hard surface.
This write-up is a brief look at using basic modeling operations to create a base mesh for stiffer types of soft goods. Complex folds and detailed wrinkles can be added to the base mesh using textile specific sculpting and simulation tools but the tradeoff is these processes tend to require a fairly dense mesh.
Simple fabric details, often found on smaller, less complex parts of some hard surface models, can also be added to the base mesh by using some creative subdivision modeling techniques. The details may be a bit softer with this method but the simplified mesh tends to use a lot less geometry and the surface can still be detailed later with fabric specific tools.
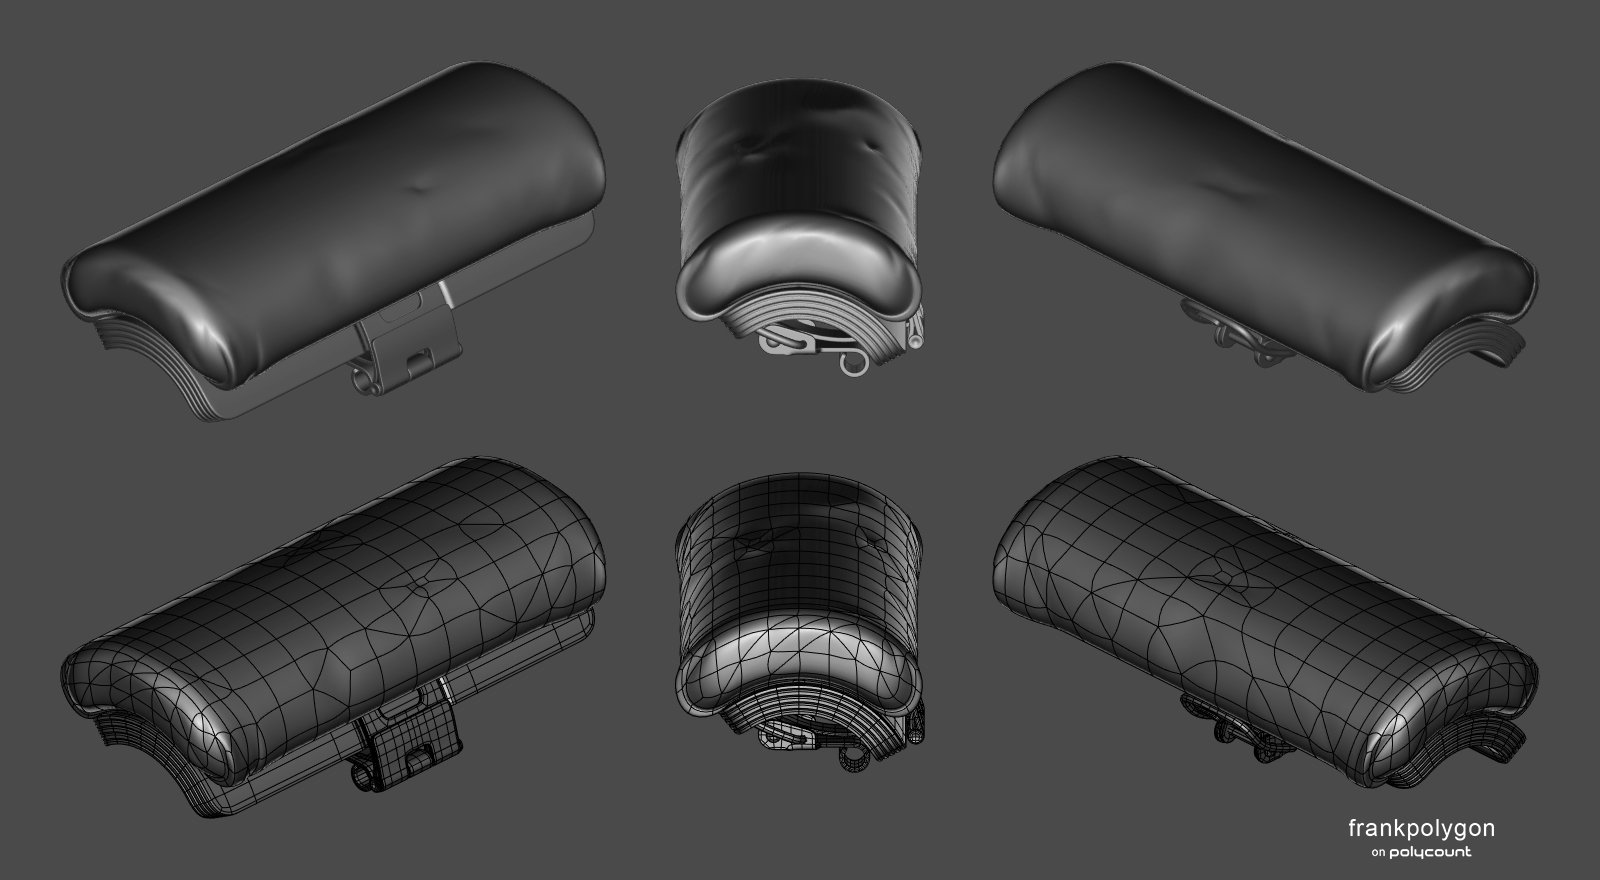
Modeling fabric products with a subdivision only approach does have some significant limitations but can still be an efficient way to create simpler shapes. Certain types of stiff fabrics like foam, leather, plastic, etc. tend to be used for more utilitarian or geometric designs and often have less pronounced fold details. Below is a preview of what can be achieved by making some quick changes to the topology of a simple base mesh.
Starting with hard surface shapes, that are already well defined, will help establish a sense of scale and proportion for the fabric parts that are attached to the rest of the model. The underlying hard surface components can be created using basic modeling operations like solidify, bevel, loop cut, etc.

Blocking out the fabric parts is fairly straightforward. Start by establishing the basic topology flow around the shape's profile. Extrude and add loop cuts to create a relatively consistent quad grid. Enable subdivision preview and adjust individual edge segments to form the basic shapes along the surface of the mesh. Create additional geometry to support complex surface features by using inset or loop cut operations and continue adjusting the shapes to match the references.
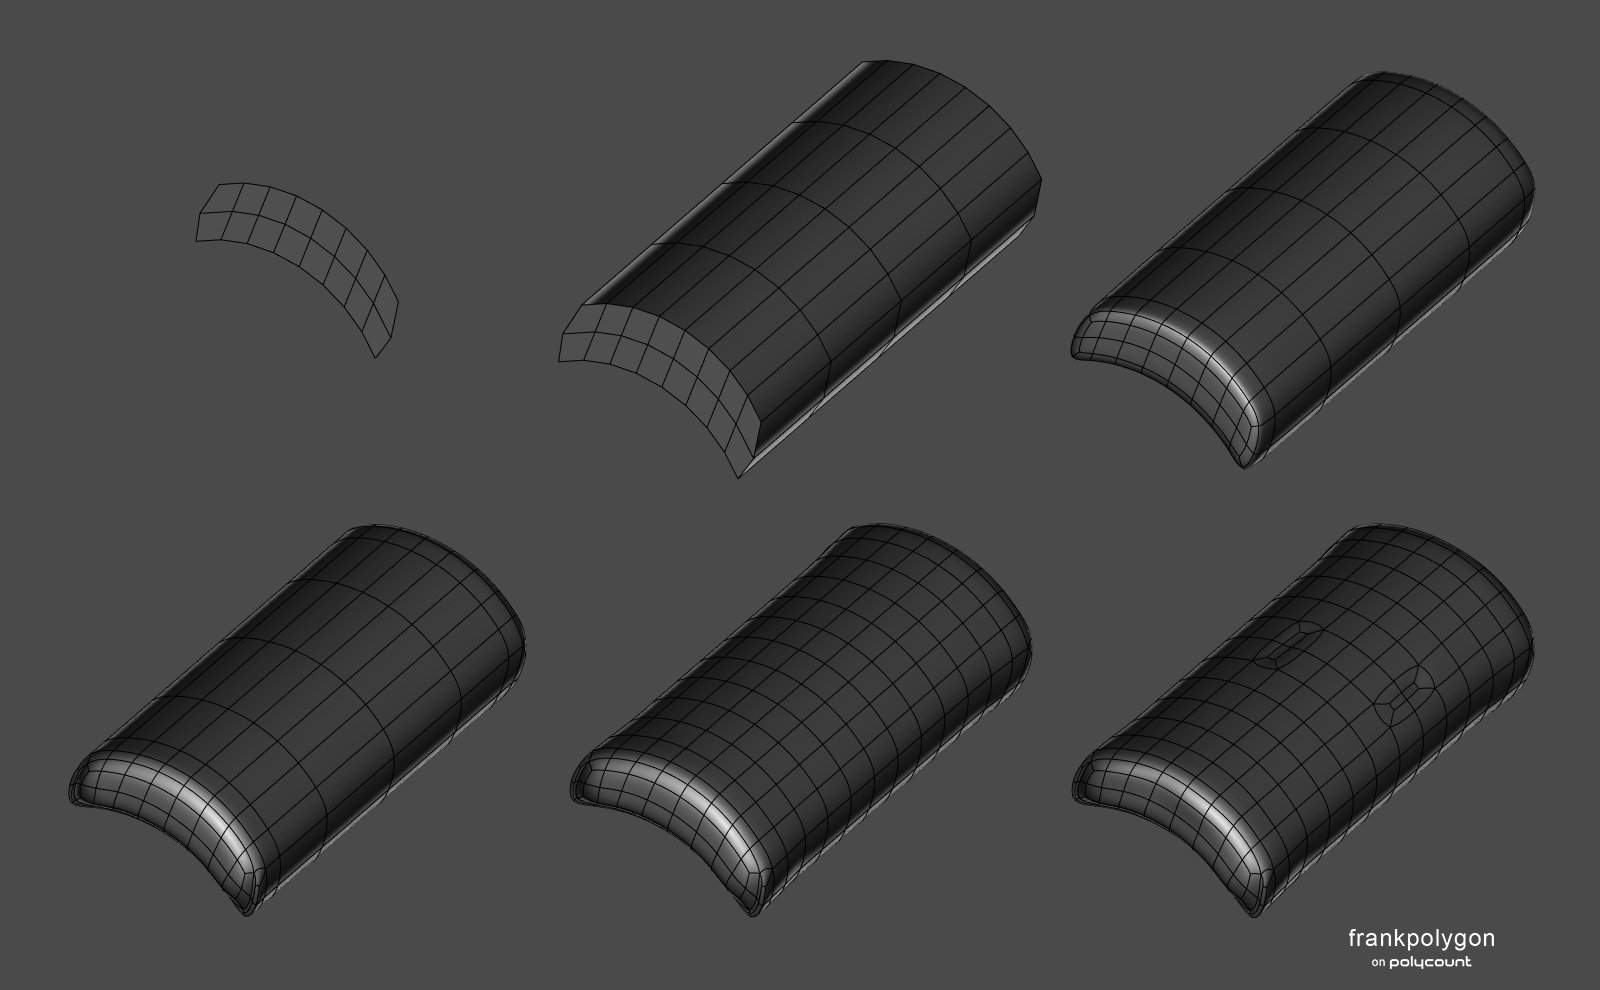
For softer fabrics, the quad grid mesh produced during the block out can be used as a base for sculpting or simulating fine details.

For stiffer fabrics, it's possible to create minor creases and ripples by triangulating sections of the mesh then randomly selecting individual edges and moving them into or away from the the surrounding surface. Dissolving individual vertices or edges and redirecting adjacent loops will also help produce subtle folds and wrinkles. Tools that are able to make random selections and move geometry relative to the surface normals can make this a fairly quick process.

The example below shows the final base mesh and subdivision previews. A few more details have been added by triangulating other sections and moving some of the new edges away from the existing surface. While it is possible to continue adding details by sculpting in high frequency details like micro folds, pores, weaves, patterns, etc. adding those types of micro details with texture overlays tends to be a bit more flexible. For this type of heavy fabric, the unsubdivided base mesh can also be used as the low poly model. Which can help save a bit of extra time.

Recap:
Applications like Blender, Marvelous Designer, ZBrush, Etc. provide a variety of different workflow options for modeling fabric parts. Deciding which approach should be used for a project really just depends on the complexity of the components and size of the surface details. While a subdivision only approach can be a quick way to model stiffer types of fabric, blocking out the basic shapes of soft goods can still be useful when using a sculpting or simulation workflow. It can be helpful to avoid adding unnecessary complexity to both the model and modeling process but it's also important to evaluate how the model will be used and chose a workflow that can be used to efficiently create accurate shapes.
