Best Of
Happy New Year Polycount!
Hope you all had a productive and exciting year. We here at Polycount are wishing you all the best in the coming year!

 Eric Chadwick
Re: What Are You Working On? (3D) 2022

Here is one character model for 3d Printing that I have created recently while working as freelancer.
 loshmiii
Re: What Are You Working On? (3D) 2022

cars are really hard to get right, but I figured I would learn the techniques re weighted normals etc and I think its improving. currrentyl around 120,000 tris, but totally unoptimised so far. each panel has 1 subdivision + a bevel modifier/crease values and weighted normals
 Ruz
Ruz
Re: What Are You Working On? (3D) 2022
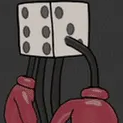
Reliving the "good ol'days", with this one.

Made up a small challenge for myself (in my sketchbook thread turntable there for more) to attempt to make a complicated model, using the restraints of say: Q3A (1999 pc game) I plan to attempt the style they had also, anyone can join in also, pick any design that seems complicated and do your best with 1000 triangles, if it has accessories(weapon) create them within reason, 1-2 hundred triangles(not polys) this can be an infinite challenge or limited till next year, April so those that want to mess around as well can, i will post final in the lowpoly thread.
Did this for fun since i do not see many games reclaiming these limits, perhaps the "phone" ? i do not play the game anymore since I'd have to trust servers people are making but other than that, if i could reload/relaunch the old days i'd put this guy in the game and might, with the "new", refurbished HD texture pack and see what can be done with that old engine as far as designs go. (didn't want to clutter the thread (lowpoly) with w.i.p.s. and i haven't seen anyone posting lowpoly things in w.a.y.w.o. threads)
Working on the critics on the other w.i.p. V.B. Might do a 180 and do something alternatively to make it easier on me for V.B. which might end up also being creative & could start a trend which is the idea (an obvious thing that seemingly might not be so obvious).
Hopefully i get to be able to do that. Anyway nice work all.
 iam717
Re: Is there a protest going on right now at Artstation?
I don't speak for all of Polycount's management, so don't take my replies as 'gospel'.
However I do think it's important to take a measured approach with large issues like this.
There are definitely a lot of emotions running high in the community around this. The artist side of me wants to fucking destroy all the AI bros masquerading themselves as true artists, I mean seriously those people can fuck off with their job-destroying bullshittery.
But the moderator side of me wants to tread carefully and evenly, and not make fast decisions.
GAN-generated content has not taken over our community at this point. In fact I'm hard-pressed to even find anything here, at least outside of these discussion threads. If or when we start to see these kinds of pieces posted, then we'll want to deal with it, in context. The Polycount community has always been great at rooting out plagiarism and art theft when we see it. I don't currently see any way to automate this.
At its heart, Polycount has always and will continue to be firmly on the side of content creators. And as a community we rely on each other to identify issues as they arise, and work on them together.
Eric Chadwick
Re: Is there a protest going on right now at Artstation?
Should we prohibit all AI art, period? Only allow when clearly attributed? Allow unless demonstrably infringing on a specific pre-existing piece?
Going to chime in with my $0.02. I feel a kinship with Polycount, and I would like to share my thoughts with that feeling in mind.
I have always been drawn to Polycount more than many other communities - even as a 2D artist, because polycount has always respected the craft, and it has always respected honesty. You didn't come here for asspats and likes, you came here if you wanted the truth. And as a secondary benefit, you got a lot of great examples of how to conduct oneself in the industry, among peers. I think a lot of people feel this.
As a result, I don't think there's much to worry about regarding an influx of AI art to deal with here - at least not in the immediate future. "Illustration generators" remain the most easy-to-access and most successful sort of AI work at the moment, and not only is Polycount's 2D section light on activity at a base level - the AI artists seeking their instant gratification and "oohs" and "aahs" from strangers will not find it here. For a time, at least, a case-by-case approach is probably practical enough.
That being said, my hope is that Polycount will continue to respect the craft, and respect honesty. At a minimum, any AI generated content should be declared such (honesty) - and if you're going to call it yours to the point of posting it here - there should be some substantial human involvement/alteration/etc (craft). I wouldn't mind a rule that declared simply, "We prefer works crafted by people. If you're posting AI-generated content, the expectation is that you declare as much and that you show some of your involvement in the process." I would also hope that site administrators eventually - if possible, will be looking into the tech-side of things to eventually protect anything uploaded to polycount from getting scraped. I don't expect Polycount to be at the forefront of this movement, but staying educated can only benefit us.
My preference would just be to not allow AI-generated content. If it's more prompt than paint, if it's more generation than sculpt, I don't care to sift through it. Go post it on your instagram. But I'm not sure such blanket-style bans are polycount's style, and I also don't know that they would be needed - so perhaps that's a bridge we cross when we come to it.
 Two Listen
Re: What Are You Working On? (3D) 2022
so started working on detailing the leather jacket, watching the guerrilla games workflow really helped alot
still i would love to get some feedback guys here: https://polycount.com/discussion/231612/tom-hiddleston-game-character-personal-project#latest
Now am wondering which workflow to go about making the stitches?
is it better making them in zbrush as with curves? or better leave it for later in substance painter?

 ibrahim05
Re: The Bi-Monthly Environment Art Challenge | November - December (81)
@Pep_mepla this looks really awesome. The details are great! This looks like a good hard surface practice.
@Fabi_G and @Kruskebunken thank you very much for your feedback. I took another go at the textures and the environment based on your comments. This is my final go at this, as I want to start the next project. It was a good practice and I hope to make more challenges in the future.


 YairMorr
Re: Sketchbook: Frank Polygon
Subdivision sketch: studying shapes and simplifying subdivision.
This write-up is a brief overview of a simple, shape based approach to subdivision modeling. This approach, with the primary focus being to create accurate shapes that define the loop flow paths, can help streamline the modeling process for most hard surface objects.
Working without enough information to visually interpret the shapes tends to add unnecessary frustration. So, start the modeling process by researching and gathering different references. Which can include things like background information, images, measurements, videos, etc. These references should be used as a guide for modeling real world objects and as a baseline for evaluating the form and function of design concepts.
Look at the references and think about how the object is made and how it's used. This will provide additional context that ties the real world details from the reference images to the creative narrative used to guide the development the artwork. Something that also helps inform decision making during the modeling process and provides inspiration for developing the visual storytelling elements that carry through to the texturing process.
Analyze the shapes in the concepts and references. Identify the key surface features and observe how they interact with each other. Establish the overall scale of the object then figure out the proportions between the different shapes that make up the surfaces. Use this information to come up with an order of operations for blocking out the basic shapes. If necessary: draw out the basic primitives that make up the object. Highlight flat areas, curved areas and the transitions between them.

Most topology flow issues can be solved during the block out. Which is why it's generally considered best practice to: Use the edges of the existing geometry as support for shape intersections whenever possible. Use the minimum amount of geometry required to create reasonably accurate shapes. Use a segment matching strategy to maintain uniform edge spacing when joining curved shapes.

Develop the block out in stages. Keep things relatively simple for the first few iterations of the block out. Larger shapes should generally be defined first, while also keeping the smaller details in mind. Focus on creating shapes that are accurate to the references then solve the major topology flow issues before adding the support loops. Overall mesh complexity can also be reduced by modeling individual components of the object separately.

Let the shapes define the loop flow. Some features may have curvature that influences or restricts the loop flow of adjacent surfaces. Block out those shapes first then adjust the number of segments in the adjacent surfaces to roughly match the edges where the two shapes intersect. Any significant difference between the edges of intersecting shapes can usually be averaged out between the support loops.

With this iterative approach to blocking out the shapes then solving the topology flow issues, the edges that define the borders of the shapes become the loop paths. Which means most of the support loops can be added by simply selecting those defining edges and using a bevel / chamfer operation to add the outside loops. Alternately, loop cuts and inset operations can also be used when the support loops are only needed on one side of the edges that define the shapes.

This shape based loop routing strategy tends to require little manual cleanup and can be mostly automated using modifiers. Something that helps make hard surface subdivision modeling much more approachable. The examples in this write-up show how this basic workflow can be applied to a moderately complex, plastic injection molded part which has a mix of soft, lofted shape transitions and hard seam lines. Which are commonly found on a variety of different hard surface objects. So, the same sort of approach will generally work with most hard surface modeling workflows.
Recap: Analyze the shapes in the concepts and references. Develop the block out in stages. Let the shapes define the loop flow. Match the segments of intersecting shapes. Use the existing geometry to guide the loop paths. Solve topology issues early on then add the support loops.
Re: The Bi-Monthly Environment Art Challenge | November - December (81)


Happy holidays everyone!!!
I wanted to thank you for the feedback, it was really helpful. However, I must call it a day with this one. My goal was to practice more my hard surface skills and learn to use blender's boxcutter addon.
Given the time left, I won't be able to retopo and texture the model, but so far the experenice was great. I'll try to make this challenges more often and with more time.
Stay safe guys!
 Pep_mepla