Best Of
Re: Airbørn
the fuzz was something we experimented quite a bit with. while i am not perfectly happy with what we have in the end, i am pretty happy overall.
we thought about doing it similar to how we did fur on crash bandicoot. with planes placed by hand, transferring normals and UVs. but with that you usually have these weird spots where you can look flat on the plane, which i didnt wanna have here. you can do the best job in the world placing these, but you will always have these moments where the illusion breaks, no matter how much time has been spent
like here on the chest of crash:

So i thought it would be nicer to have this done with particles. It was a bit tricky to set up the shaders but @katzeimsack found the solution for it.
So what we do is spawn 3 different particles on the mesh, based on a RGB mask that tells the particle system "spawn particle A here, B here and C there"

I used to paint these masks but turned out, some randomized camo patterns work just as well.
then we grab the normals, roughness, metalness etc from the mesh it spawns on and apply this to the particle


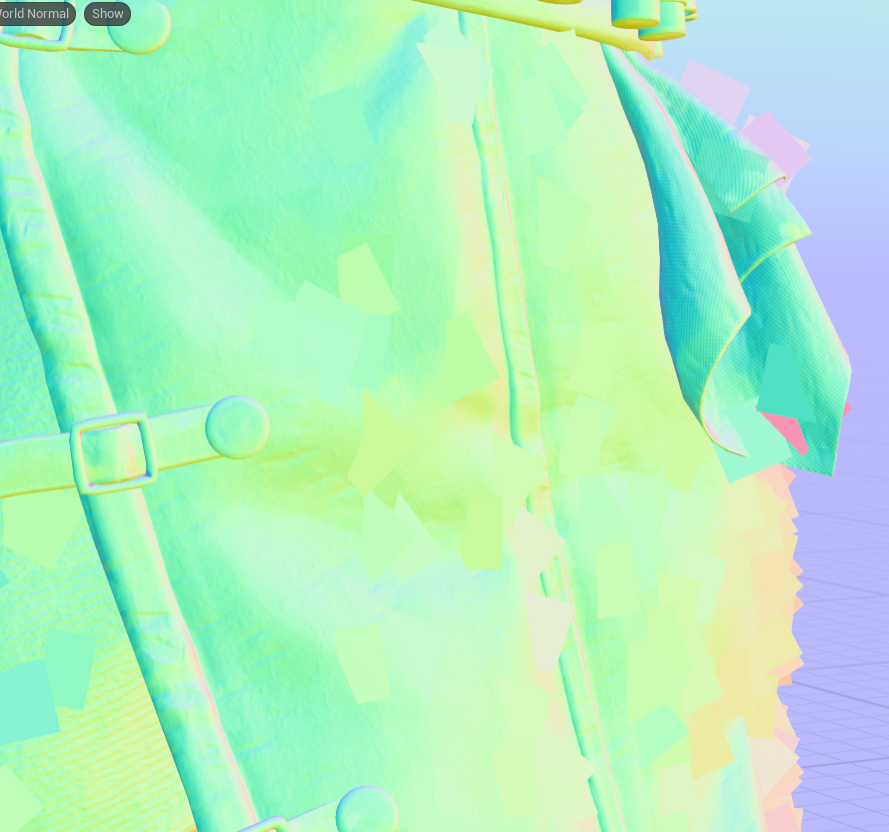
blend them into the mesh using dithered pixel depth offset (like the moss above)

after that we apply one of the 3 different alphas to the particle UVs, randomize rotation and scale within some boundaries and

the result is this:
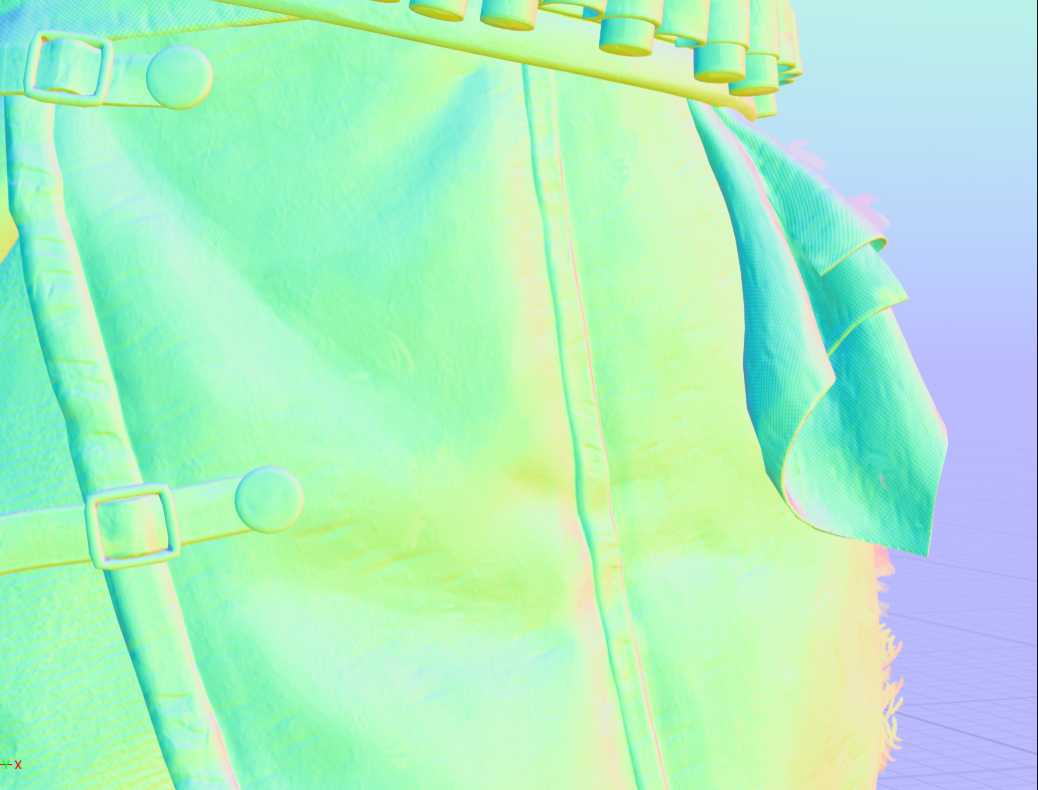

the downside is, the particles are spawned at random locations. An alternative would be placing them by hand in your dcc like the fur but orienting them to the camera like the particles in unreal. so we have perfect control over placement. but yeah, lot of manual work for that :)

for the future i would limit the random rotation as well so we do not have occasions like above where a shape floats on top. but it was good enough and we are never thaaaat close.
 Neox
Neox
Re: How would you land your first 3D job TODAY?
Tbh.
Make avatars for pay for VChat and VTubers

Re: The Bi-Monthly Environment Art Challenge | November - December (81)
Hello everyone,
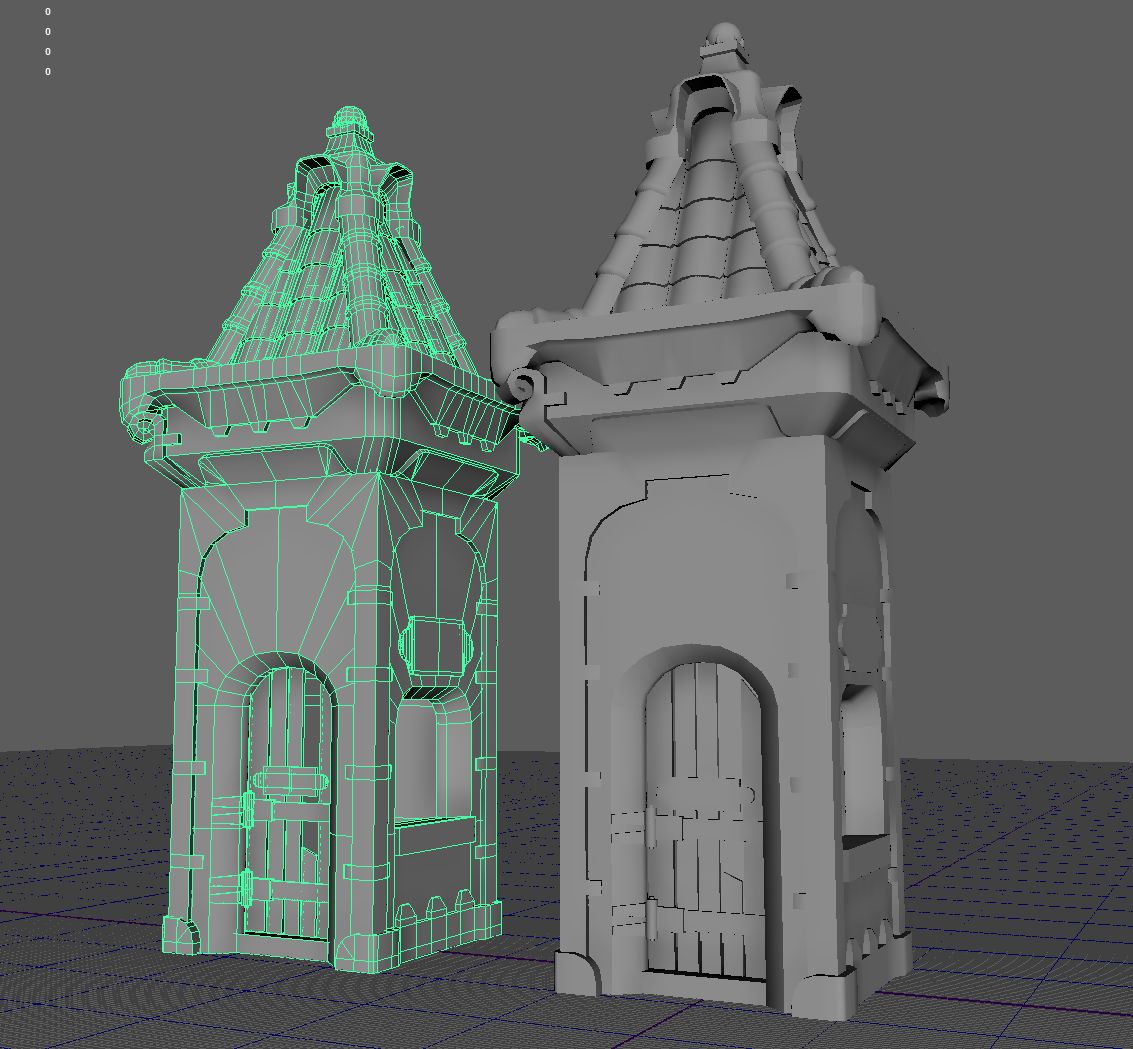
Here's a quick WIP. I've decided to challenge myself with the hard surface environment. Today I finished working on the geo, which is currently a combination of final lowpoly and some mid-poly for sculpting. I'm planning on sculpting mostly everything. Most of the objects will have bespoke textures. I'll use trim sheets with some parts, like the wood or metal beams. I'll see if I can get away with 3 materials for the walls and the tower.
I'd love to hear your feedback!
Thanks!



 YairMorr
Re: How The F*#% Do I Model This? - Reply for help with specific shapes - (Post attempt before asking)
@solitudevibes There's a couple of different ways to approach modeling a lighter hood. A direct approach would be to block out the major forms with a simple quad grid then subdivide to create the necessary support geometry for the holes.
@wirrexx explains this modeling process, with a great visual example, in another thread. Though the shape of that hood is slightly different, the same basic principles can still be applied here.
It's also possible to model the shape using floaters or boolean operations. Which approach makes the most sense really depends on the technical requirements for the final model. There's a few recent examples of how to add details to curved surfaces using these modeling strategies. So, it's probably worth taking a look at some of the previous pages in this thread and finding some write-ups that show how to add circular cut outs to curved shapes.
For the hand guard: When modeling objects with complex shape intersections, it can be helpful to start the block out by analyzing the references and color coding the major forms and important shape transitions. Finding and studying reference material, like drawings, images, videos, etc., is an important part of the modeling process. Gather enough reference material to develop a working understanding of the relationship between the shapes that make up the key features and the shape transitions between the major surface planes.
Keep the initial block out relatively simple. Focus on creating the larger forms first then start adding smaller details. Maintain co-planar geometry for all of the individual surface planes that were identified previously. Continue working through all of the forms in the references. Try to resolve most of the major topology flow issues by matching the segments of intersecting shapes. Additional edge loops and final support loops can be added once the block out is complete.
Below is an example of what this process could look like when using booleans to create the primary features and bevel / chamfer operations to generate the curved shape transitions. The top cover and a few shapes on the inside have been omitted for simplicity.

Analyzing the reference images, identifying the shapes that make up key surface features then constructing the surface planes and generating consistent transitions between the shapes is a large part of hard surface modeling. As long as the geometry that defines the shapes remains relatively uniform the shapes themselves should define most of the loop flow. Which is why time spent gathering references and working through multiple iterations of the block out phase is usually paid back later in the modeling process.

While some shapes are relatively obvious, it can be helpful to get a second set of eyes on the references, shape analysis and block outs. Posting shaded and wireframe images of previous modeling attempts makes it easier to provide focused feedback. Which is an important part of working through difficult shapes that aren't turning out as expected. Though often much slower, it's also helpful to look back at previous attempts and break down the process to find what worked and what didn't. This sort of self reflection isn't always fun or easy to do but it's a significant part of growing as an artist.
@hututuzhang @bittermelon Welcome to Polycount. Consider checking out the forum information and introduction thread.
@hututuzhang There's a write-up on the previous page that covers a similar shape. This thread has a lot of great examples of different approaches to modeling. While some of the examples won't match any given question exactly, most of the basic modeling principles are the same and the order of operations can usually be modified to fit a specific 3D DCC. So, it's generally worth the time to take a look back and try to find a discussion about similar shapes or topology problems.
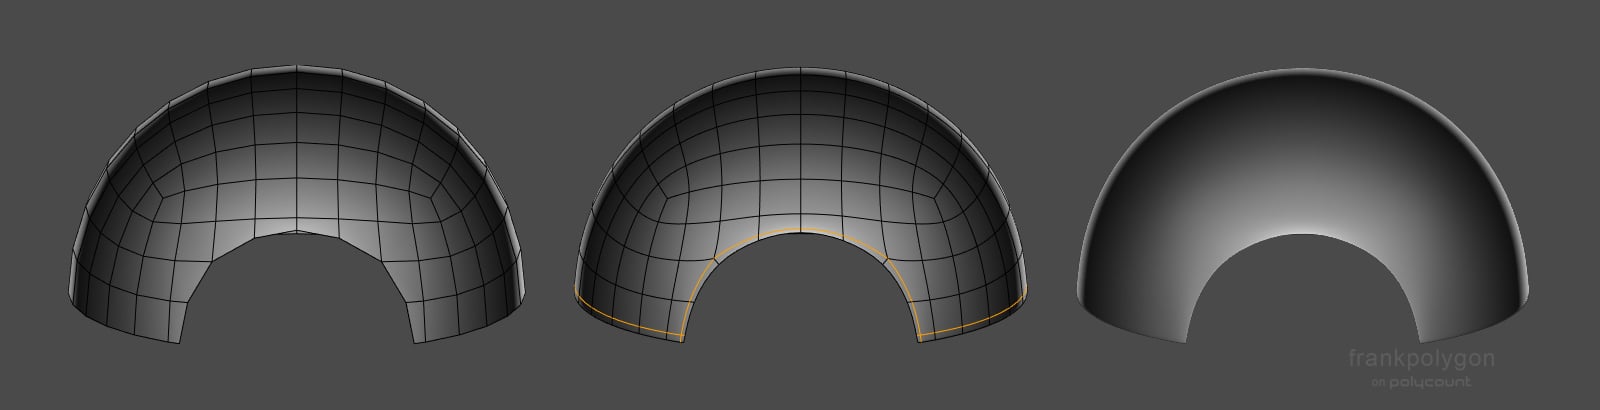
@bittermelon A few recent discussions in this thread have touched on cutting shapes into spheres and hemispheres but one of the simpler answers is to use a pair of perpendicular support loops that run around the perimeter of the shape and cross near the corners. Moving these support loops closer to the edge of the cut out will tend to sharpen it. Below is a basic example of what this could look like. Other, application specific, approaches like creases could also be an option but may not work well for certain types of modeling workflows.
 FrankPolygon
Sketchfab Spotlight | November 2022

A collection of the latest and greatest pieces from Sketchfab users
 Sean VanGorder
Re: How The F*#% Do I Model This? - Reply for help with specific shapes - (Post attempt before asking)
@Deqa Automotive modeling is it's own specialist discipline but most of the basic principles of subdivision modeling are still relevant. @sacboi has provided some helpful guidance and links to some great write-ups about car modeling in a recent discussion.
It's often helpful to block out the larger shapes first then confirm that the mesh subdivides cleanly before adding secondary details, like cutouts for the doors and windows. Below is an example of what the modeling process could look like.
Break down the shape of the cab into individual planes then round over the transitions. Keep the geometry relatively consistent yet simple. Edge loops can be cut in and dissolved as required but flat surfaces should be kept co-planar and curved surfaces should have uniform segment spacing whenever possible.

Since these types of trucks tend to have a lot of flat surfaces, the same sort of block out process can be used to create a variety of different cab shapes. The important thing is to focus on creating accurate surfaces that are co-planar and consistent transitions that are fairly smooth. Keeping things relatively simple during the block out will also make it easier to solve shape and topology flow problems.
 FrankPolygon
Re: The Bi-Monthly Environment Art Challenge | November - December (81)
Hi guys, I had dropped 3d more than 5 years ago, maybe almost a decade, so I wanted something easy to test if I still remembered how to model or to re-learn it in the process, so I've attempted the chair here :) (using 3ds max)
it's only the "mid poly" model with a bunch of OpenSubdiv applied so not game ready, but that wasn't meantioned in the rules so hope it's ok
I think I've made the seat too long x°D

 マルコ
マルコ
Re: WIP - Maz 537
@Grubber Thank you man!The wireframes are a bit of a mess since it's still on high poly phase,but here they are 😁 :
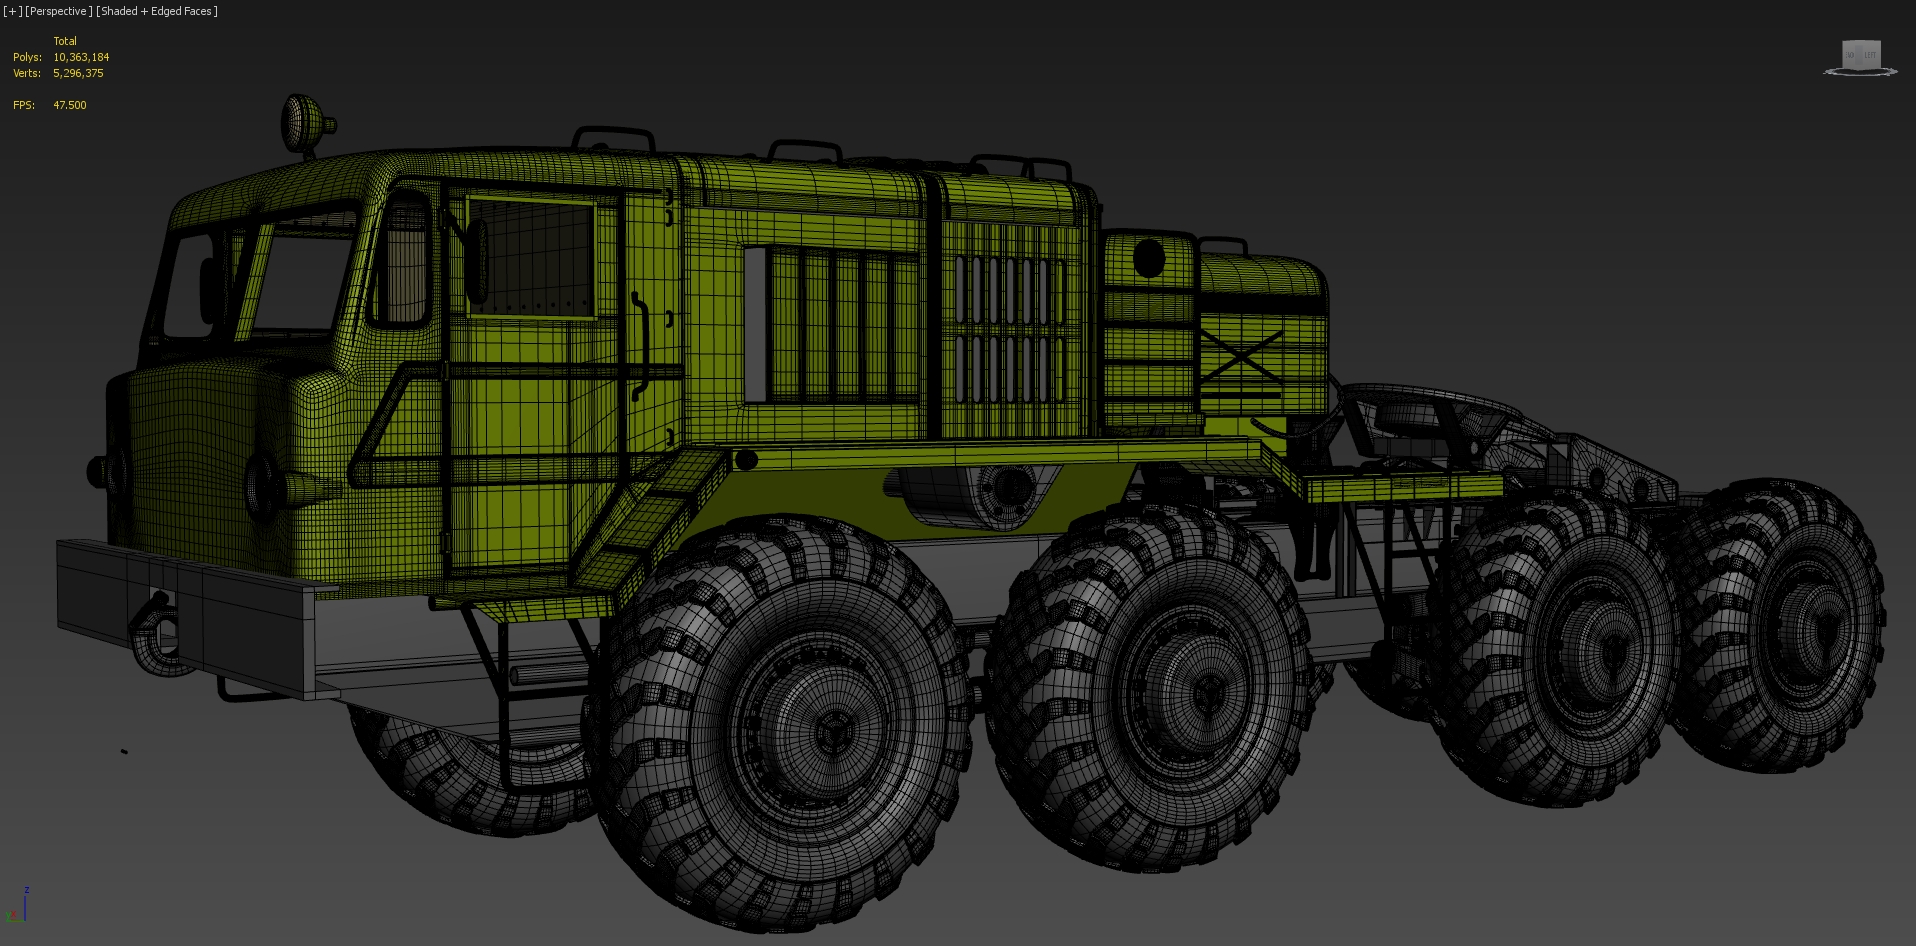


 andreygheorghe
Re: Community Incentive: Earn $STYLE Token while testing the Protocols’ Alpha Version ⚡️
woohoo, cant wait to contribute to pyramid schemes that pray on unregulated spaces to sap hard earned money from gullible people ! i love how all these tokens\whatever always have _protocol or something when the ones banking are the founders\family on their "fair launches". Regulation cant come soon enough.
 Joao Sapiro
Re: [WIP] Transport Miniverse
Finished a new locomotive and did some tweaks on the oil tank car.

Made a progress GIF again:
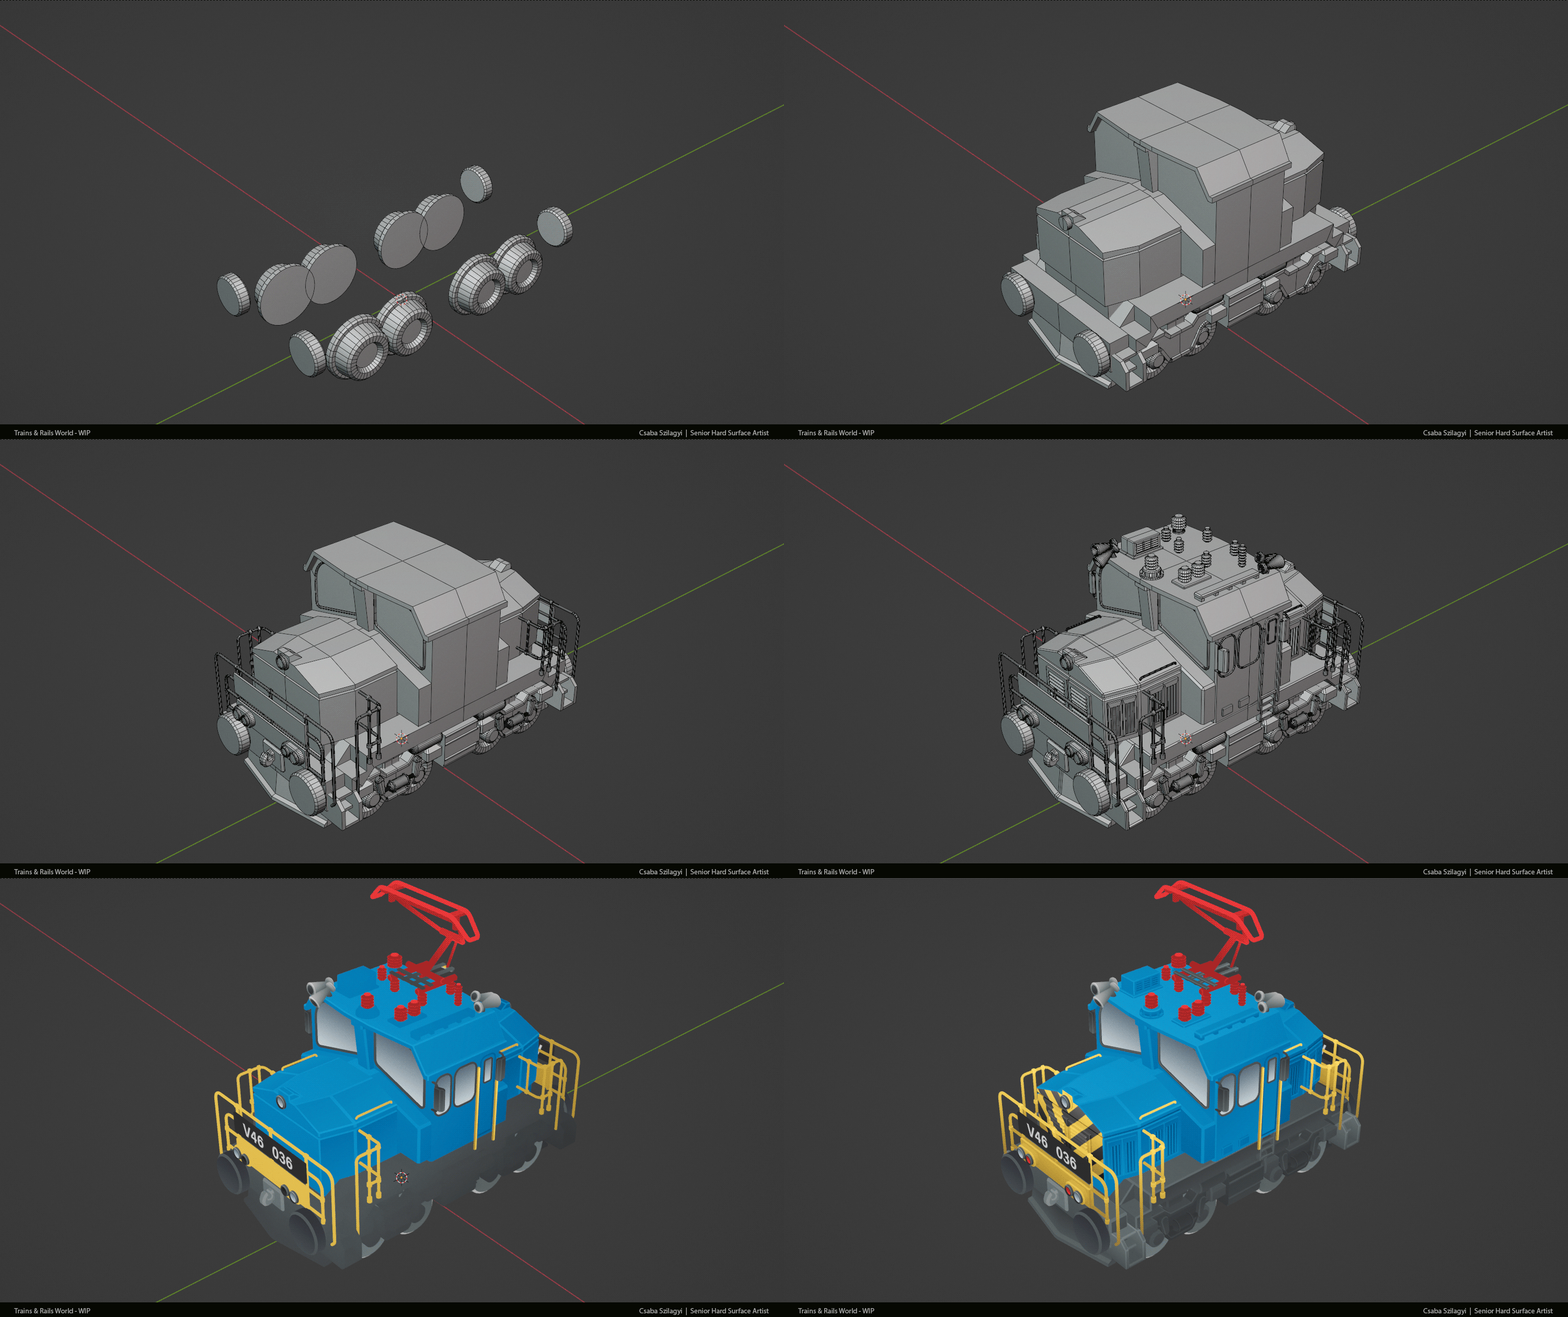 CsabaSzilagyiArt