Best Of
Re: Learning Blender and Texturing
And then from there, you have filters to limit things around a given axis (tapping x y z with or without shift), and in different spaces (double-tap). And as an added bonus there is no need to hold down the click while performing the transform, that's great for your wrist.
Do not rebind anything until you've completely learned how to do all that. Check this out :
 https://www.youtube.com/watch?v=LfoIKlHFD6Y
 https://www.youtube.com/watch?v=WW4af0ZK5gM
Having used Max and Maya for years before moving to Blender, this revolutionary (IMHO) way of moving things around in space struck me as way more efficient and faster than any other software. It takes root in oldschool keyboard-centric CAD, and it's been in Blender since forever.
"Aside from the software itself, also the confirmation you could compete with someone professional in a better known tool while using Blender, even from a productivity point of view."
Yes, confirmed.
The only (massive) issue is that there is no proper documentation maintained for Blender, meaning that new users have to hunt around for info like the above - and some may miss it completely. This is very unfortunate but it won't change anytime soon.
 pior
pior
Re: Sketchbook: Rima


Re: The Bi-Monthly Environment Art Challenge | May - June (102)
The only issue I see with this method are little polygonal diamond shapes where the metal arcs are damaged: either it's the contrasting color in vertex color, or sharp edges, or both, but they look a bit too sharp. Especially compared to the similar shapes baked into the normal map.
I realize these are supposed to create interest in silhouette, so I wonder how to properly utilize them with a trim map like this. Simply make them smooth?
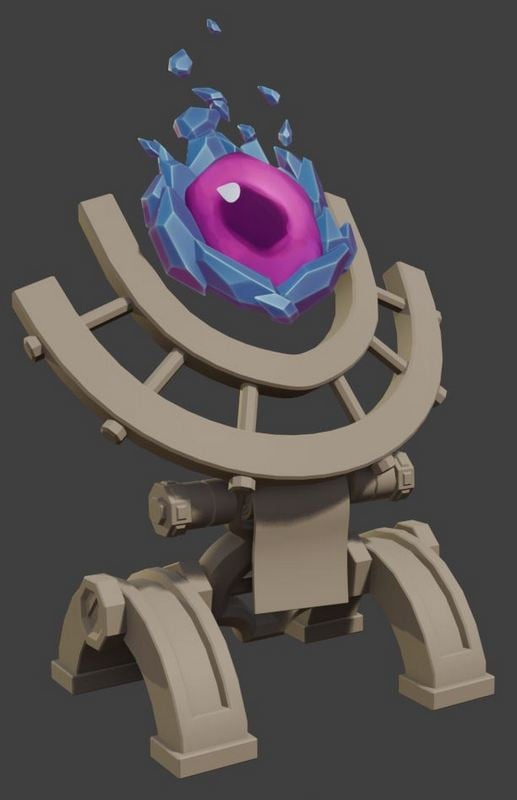
As per your suggestion, I shifted things around a bit to make the eye more prominent
There were some issues with the engine I was going to use - UE 4. I had to give up eventually - it crashes every 10 mins on the new system, (seemingly) at random, and I really don't want to re-install anything at the moment, so... Godot it is! Not that I was particularly invested in UE - I only rendered a model that one time in it and don't know anything basically. Plus Godot is much-much faster to launch.
Testing export/import: the textures are only some baked normals, very basic colors and simple curvature generators.

 stray
stray
Re: The Bi-Monthly Environment Art Challenge | May - June (102)
model
 Fabi_G
Re: Handpainting Normal Maps pixel by pixel (100% Photoshop - 0% HighPoly)
Hi everyone,
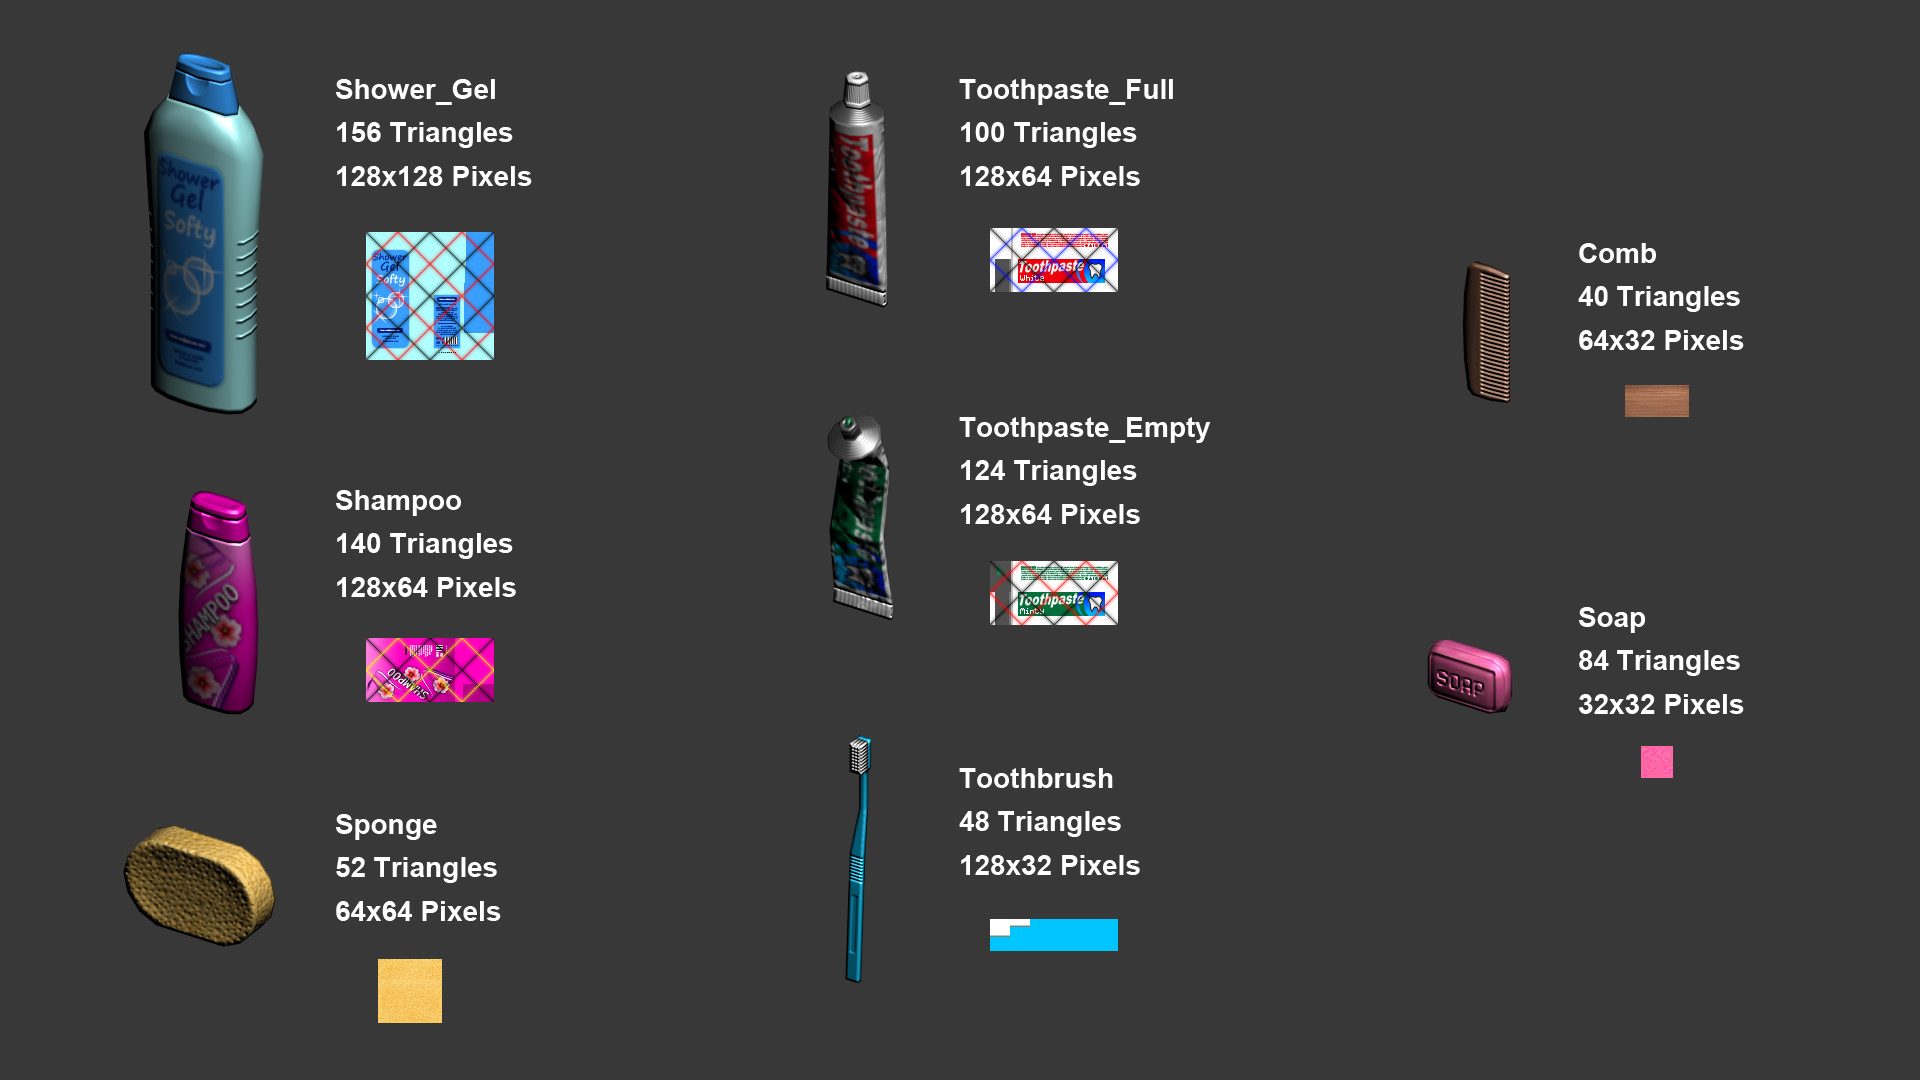
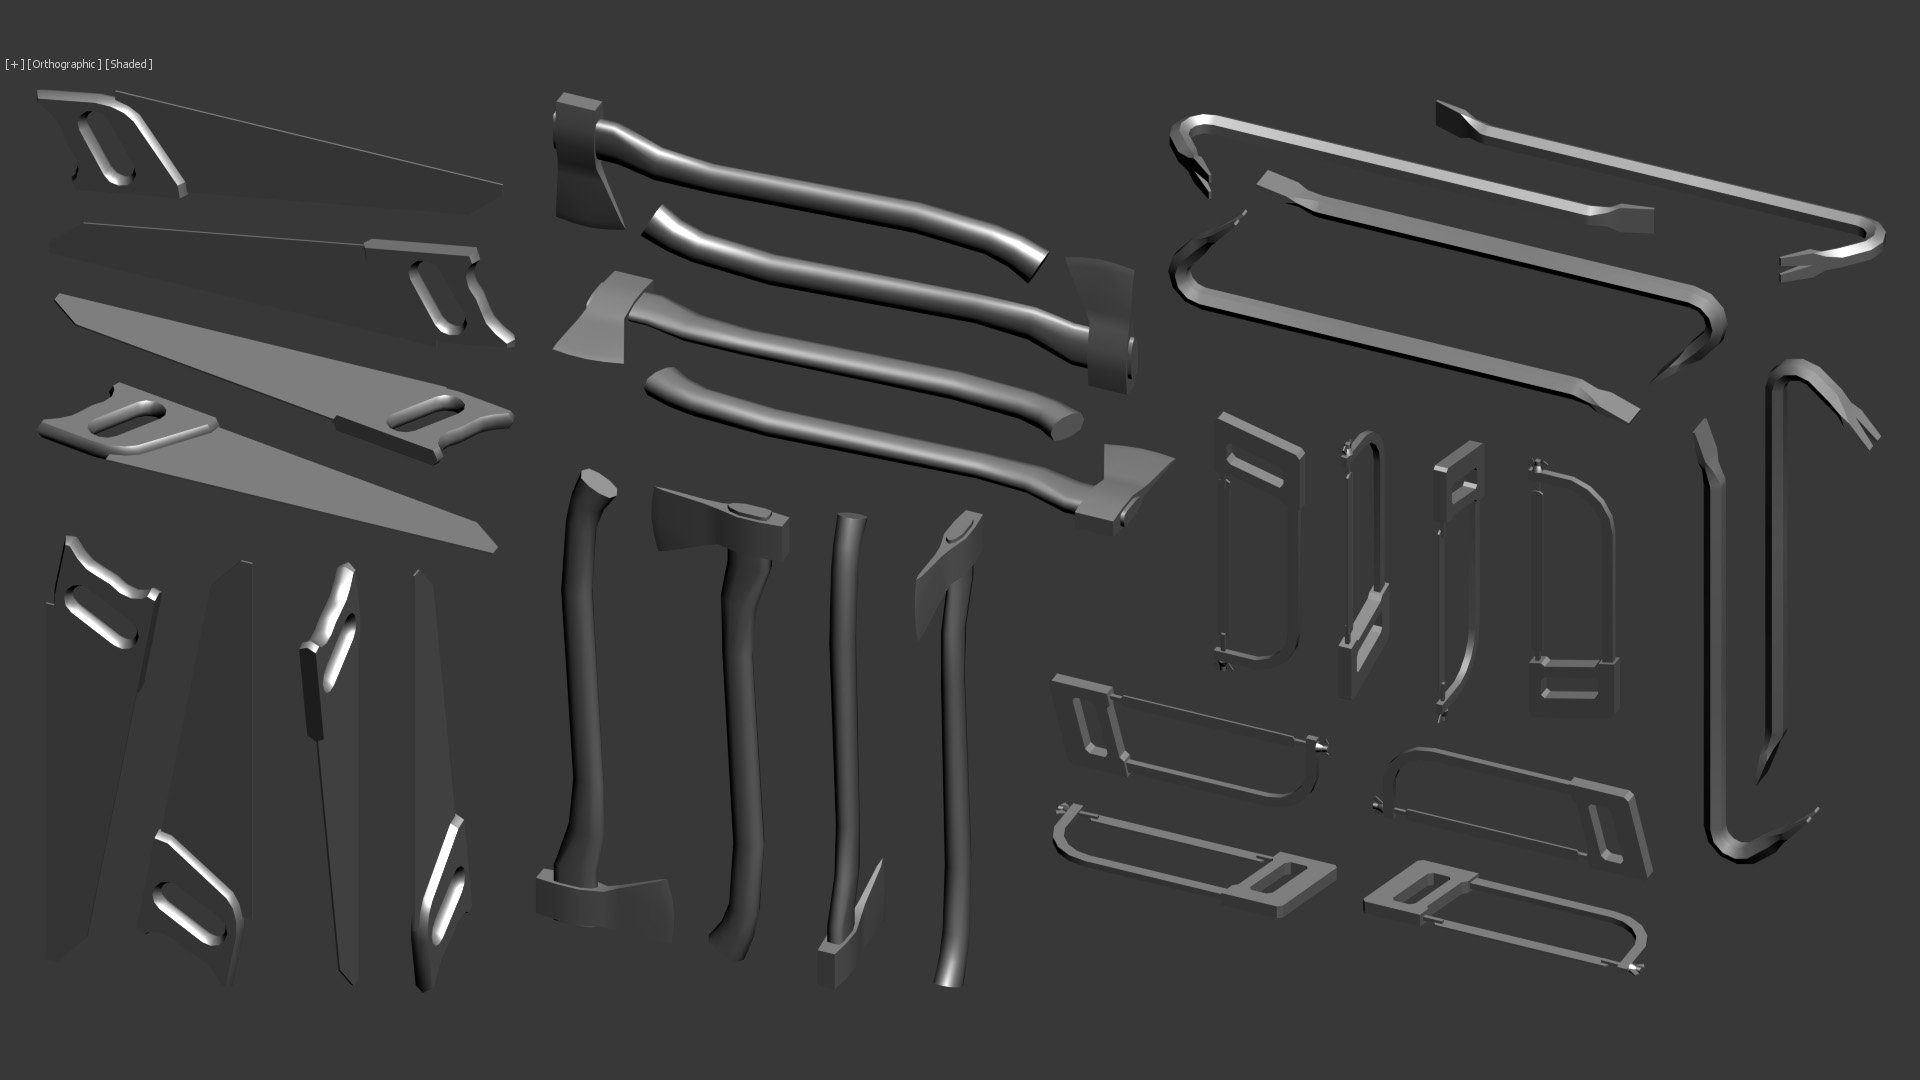
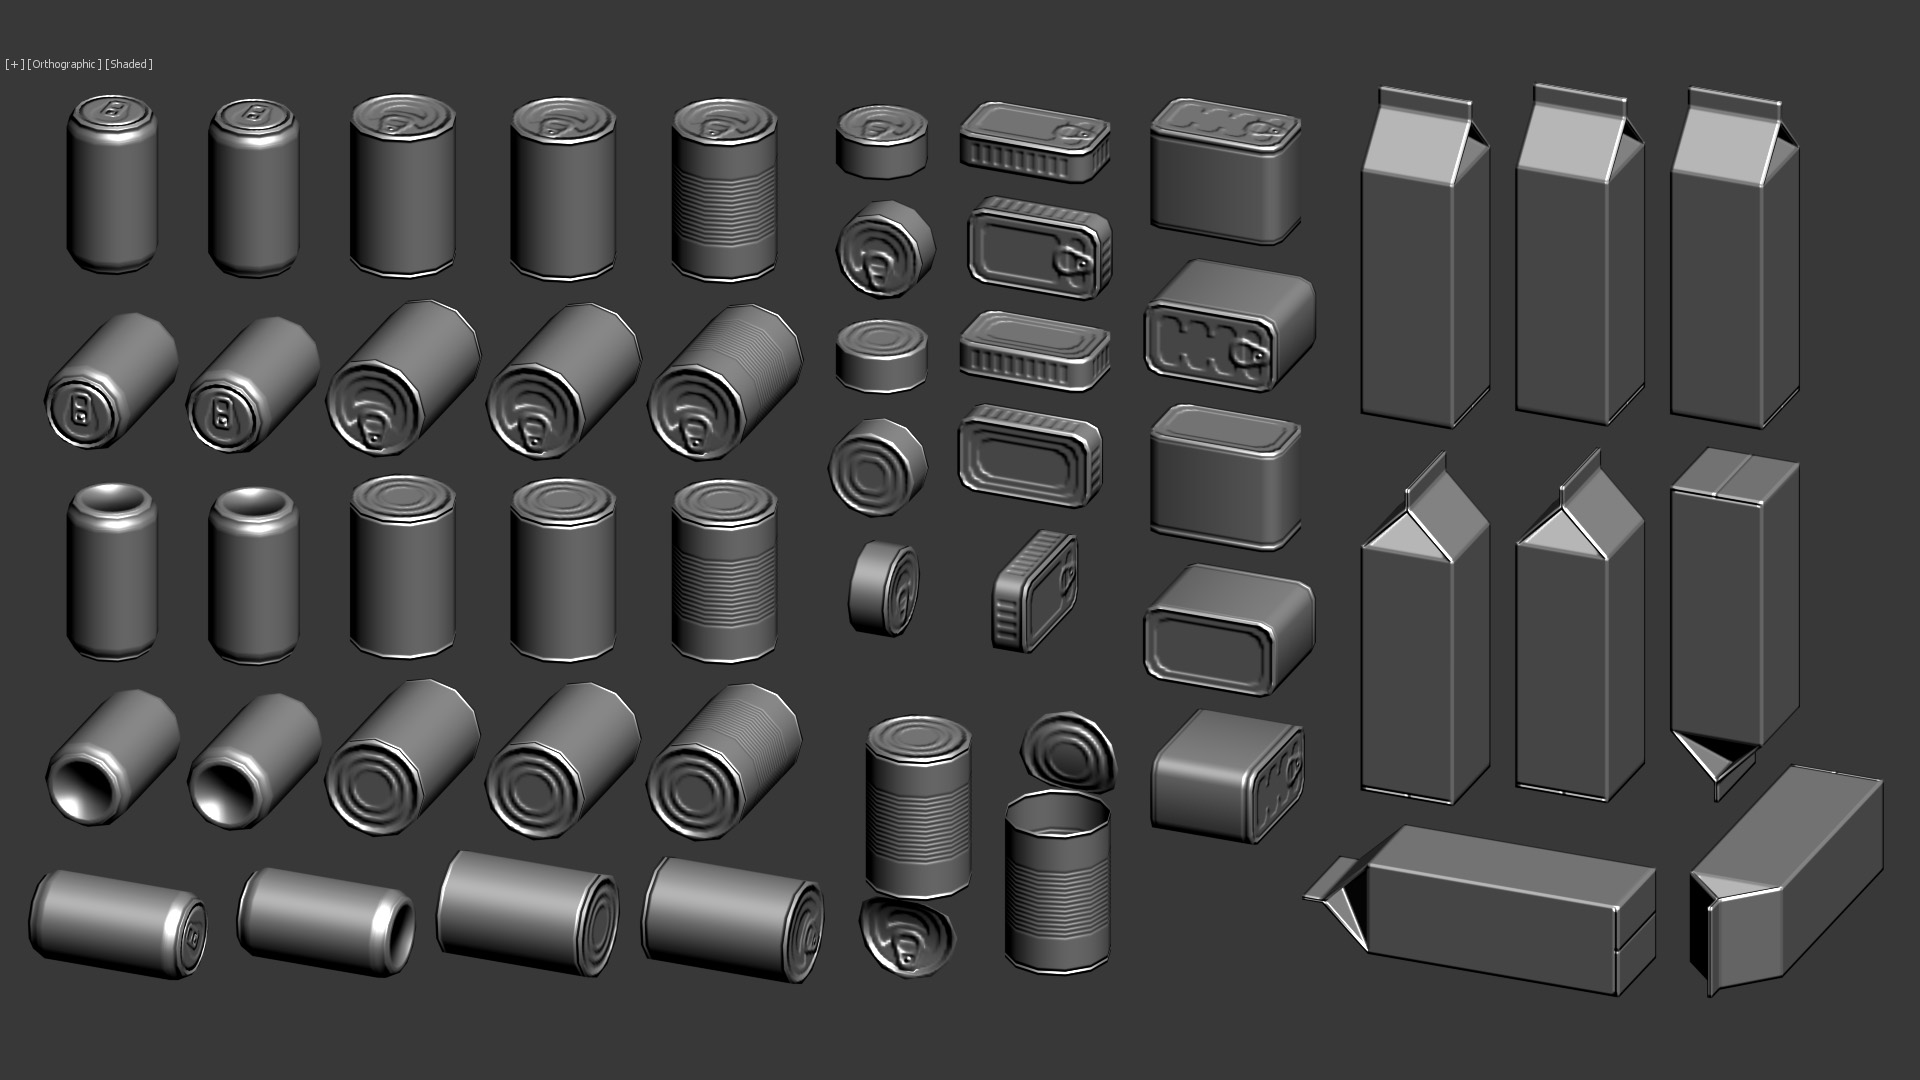
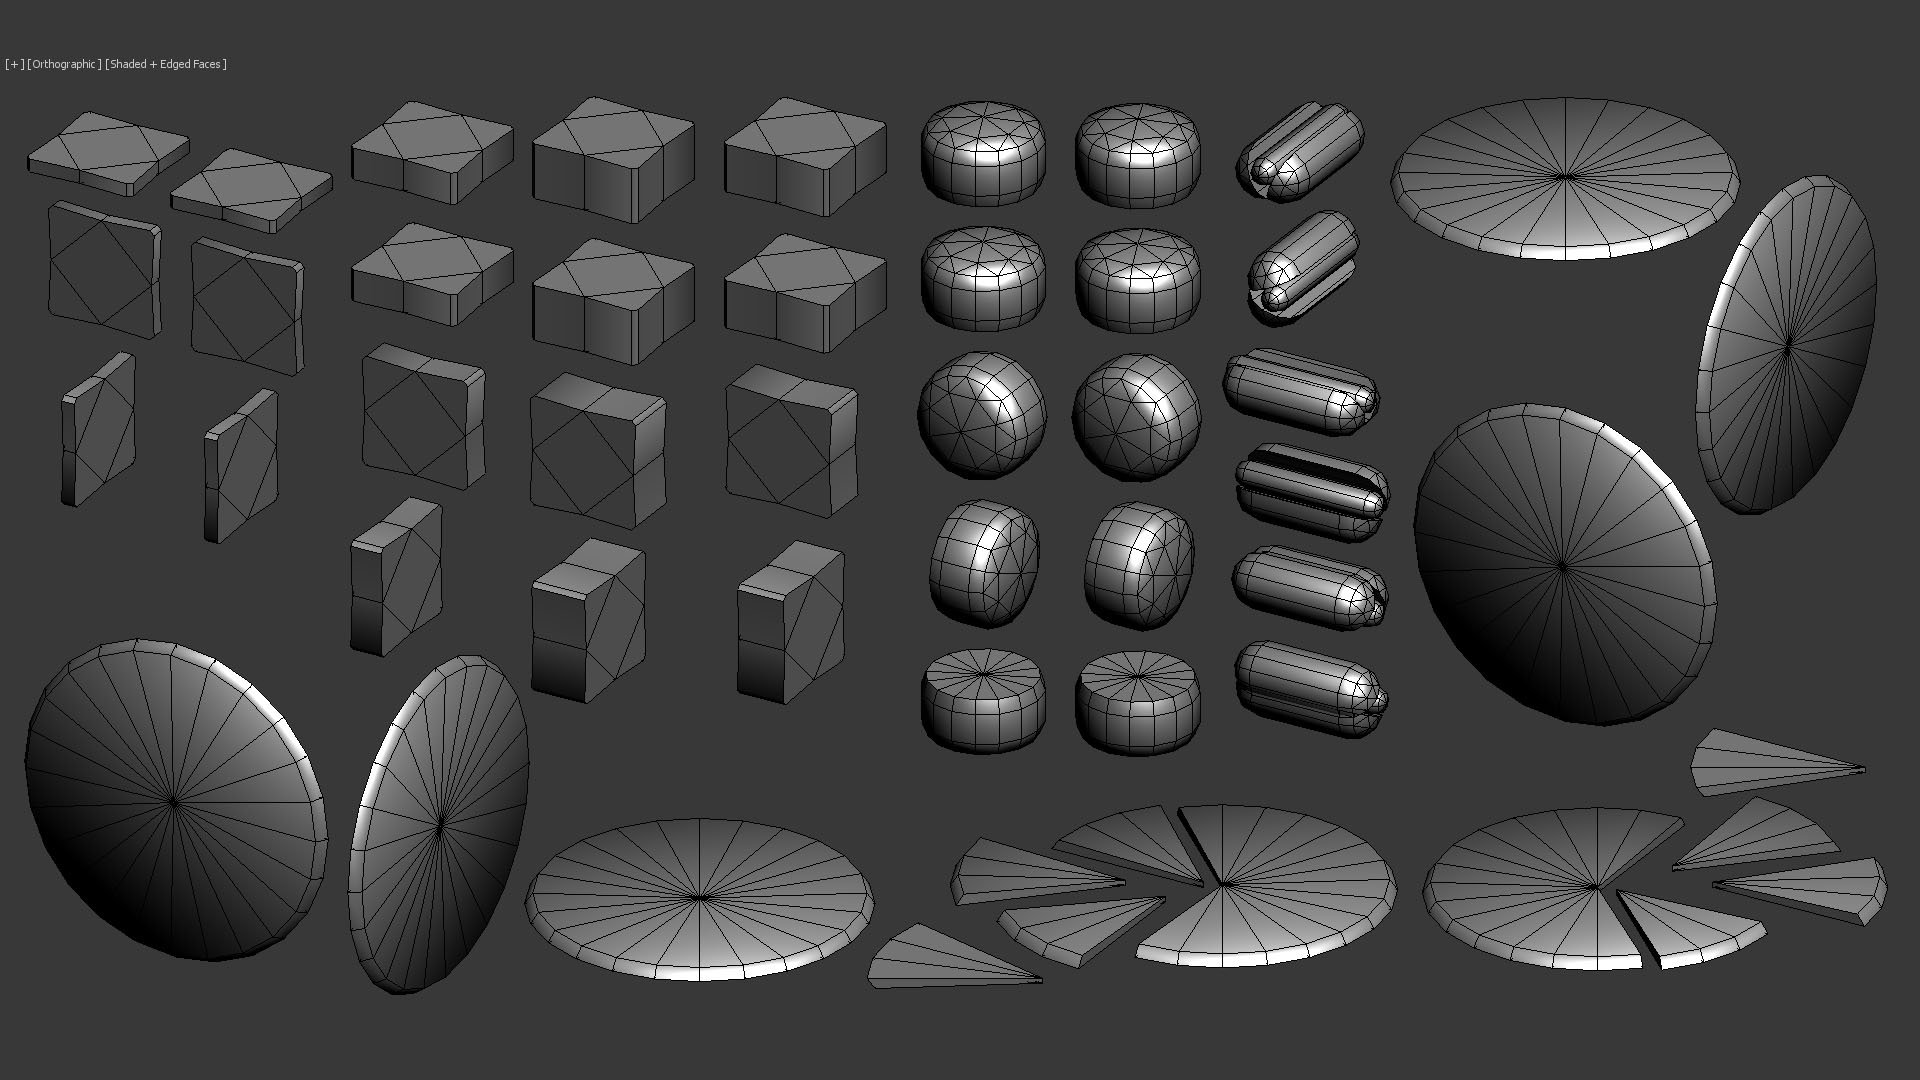
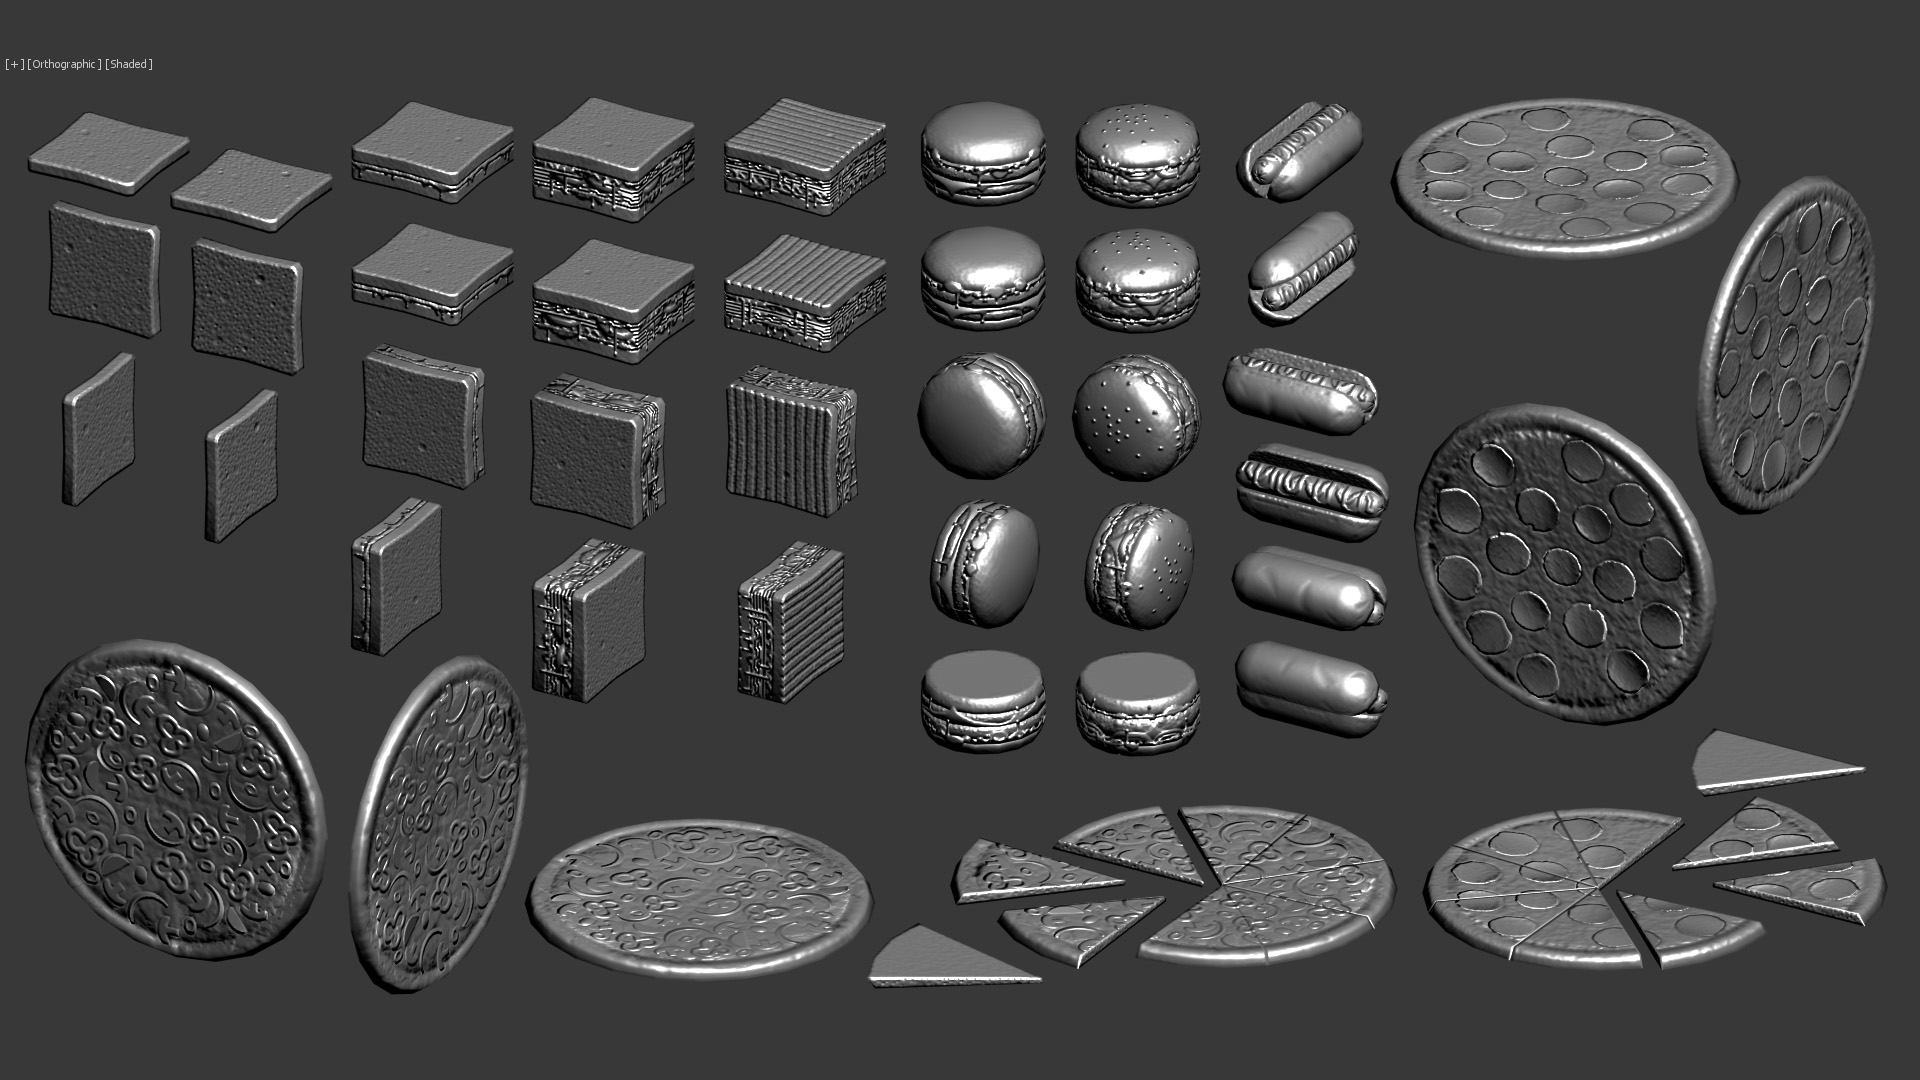
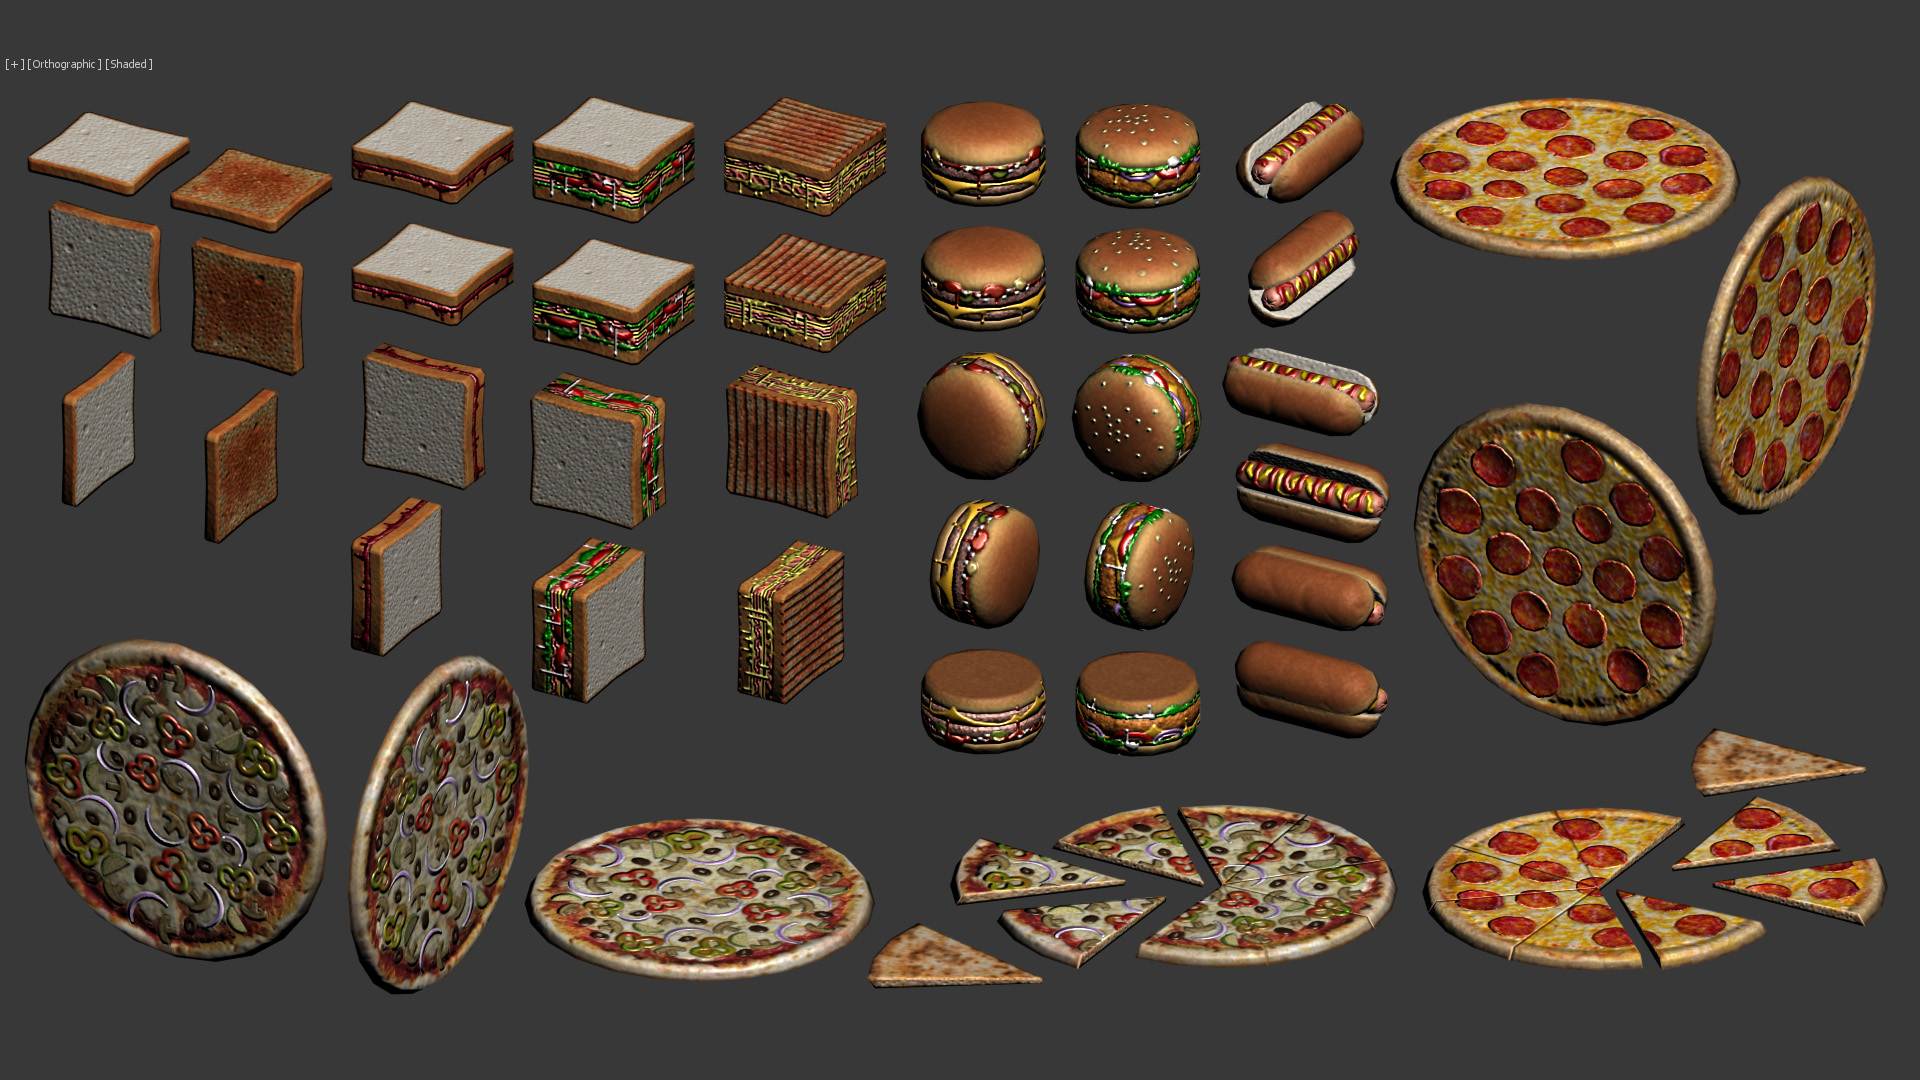
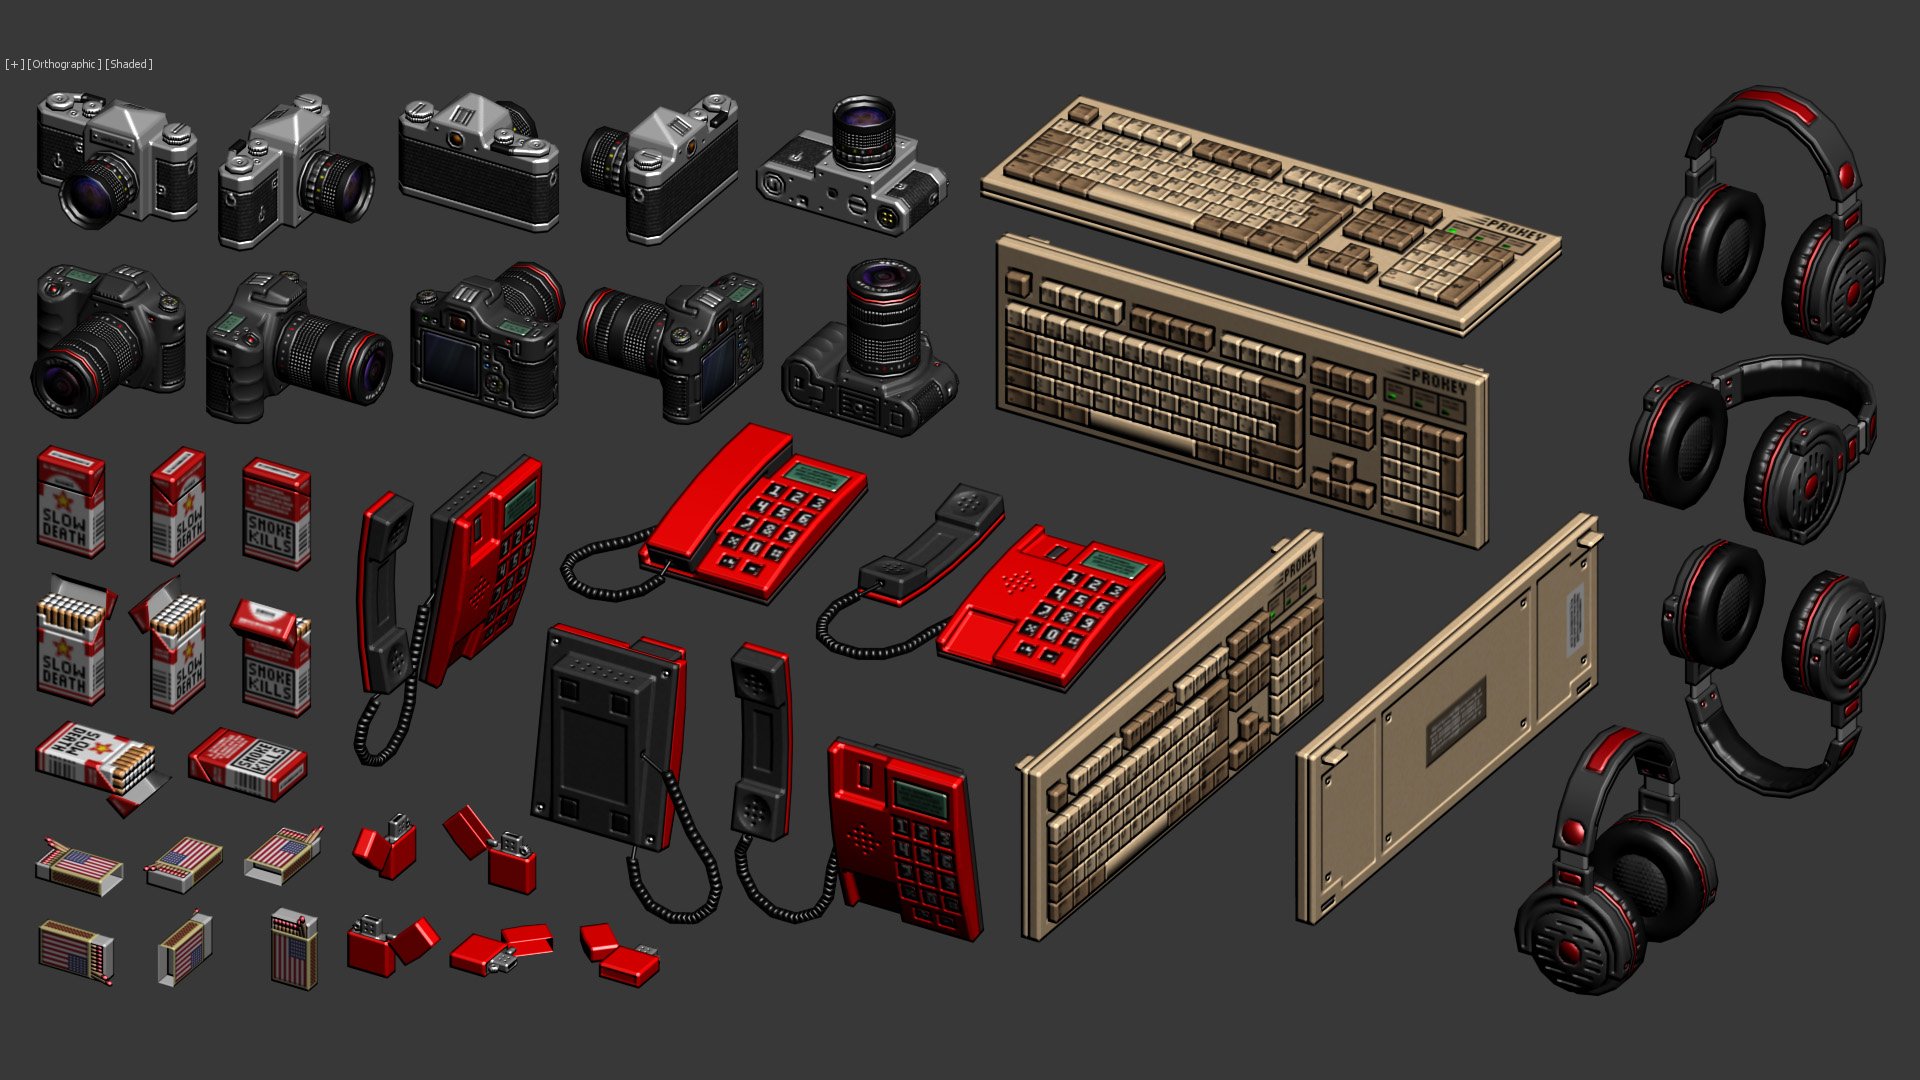
I love to handpaint normal maps using just photoshop without doing any highpoly at all. I only do this when the polycount is kept quite low and the texture size is as small as possible.
When I work like this 90% of the work is done with the pencil tool in one pixel size (not the brush tool). The rest 10% of the work is done using any tool that photoshop can provide. I also have the "NVidia normal map" filter, but I barely use it. I only use it when I handpaint an organic "height map" and I whant its normal map, or when the UVs contains alot of diagonals. But when I use this filter I never use the resulting image, because with the texture sizes I'm working on are very small, the resulting image that the filter produces usually is quite blurry and messy. So, whenever I use the filter, I only use the resulting image as a reference to then paint my own normal map.
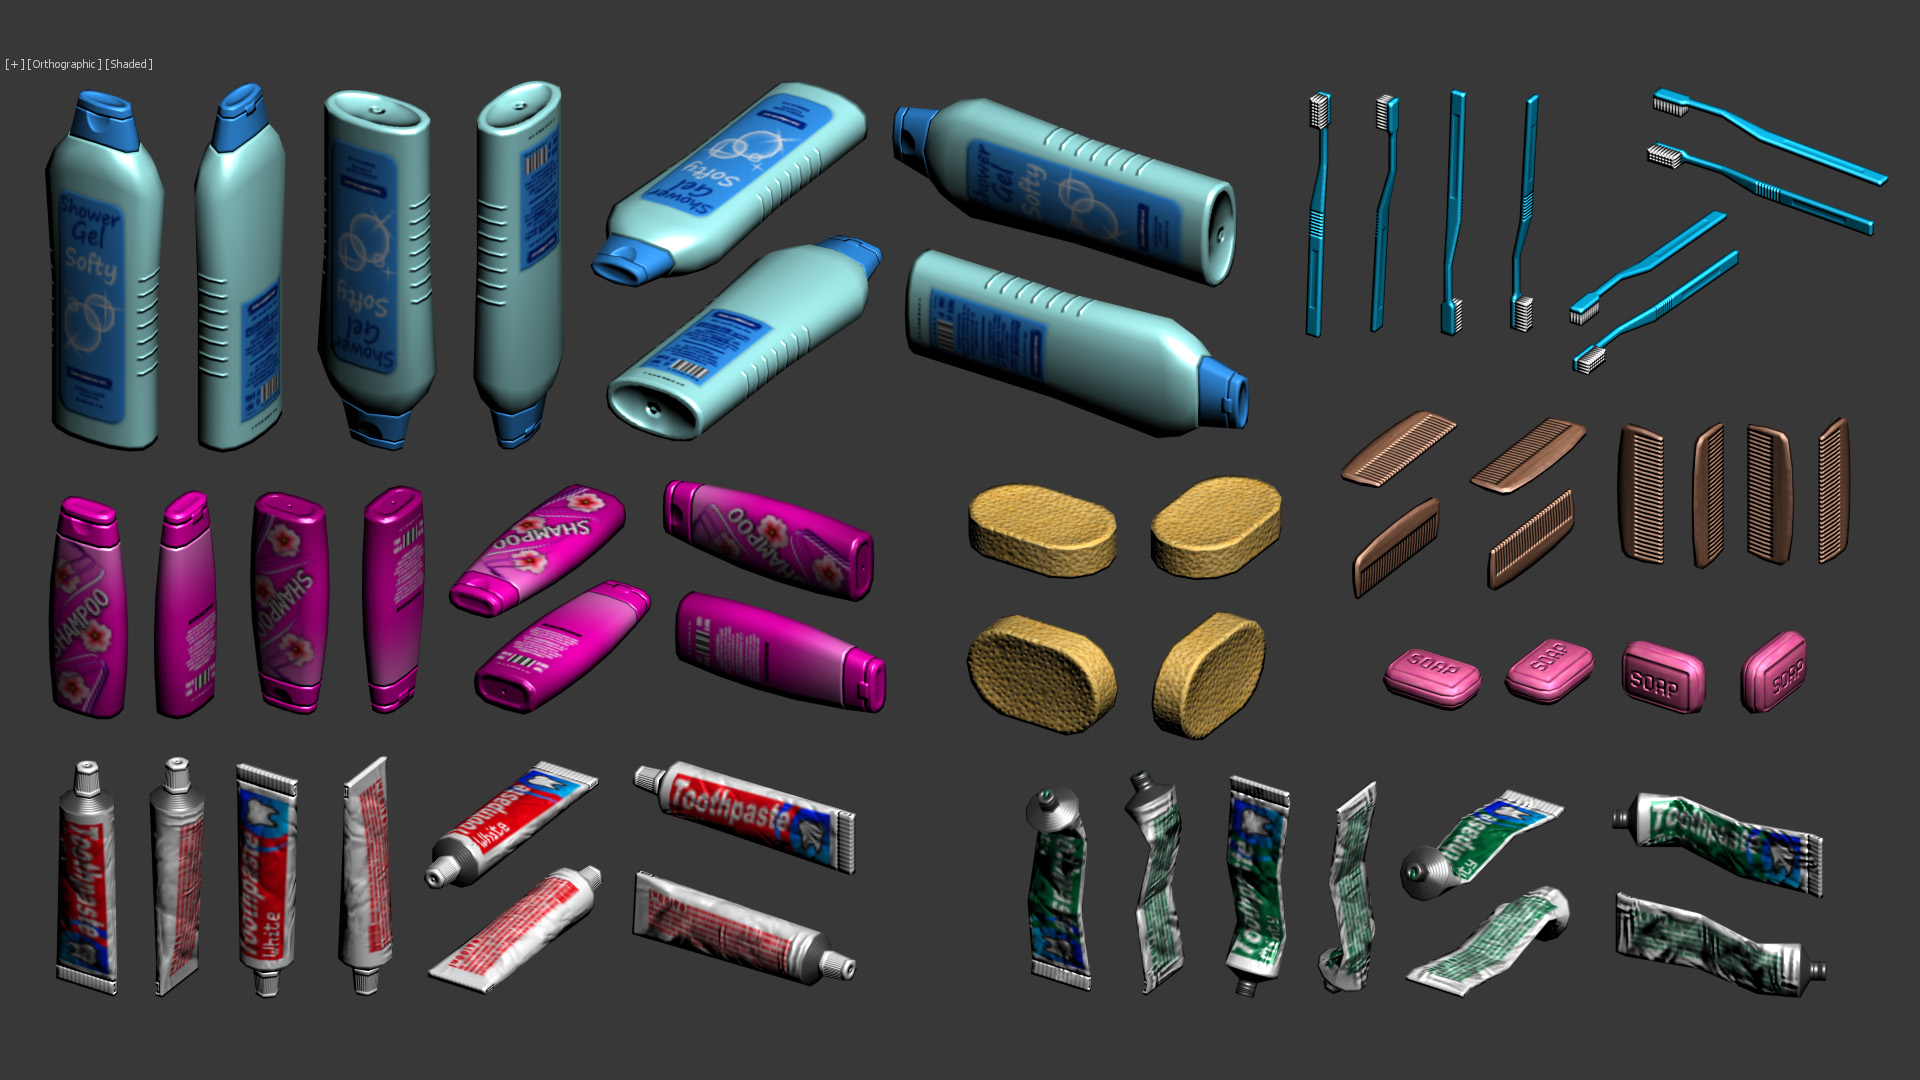
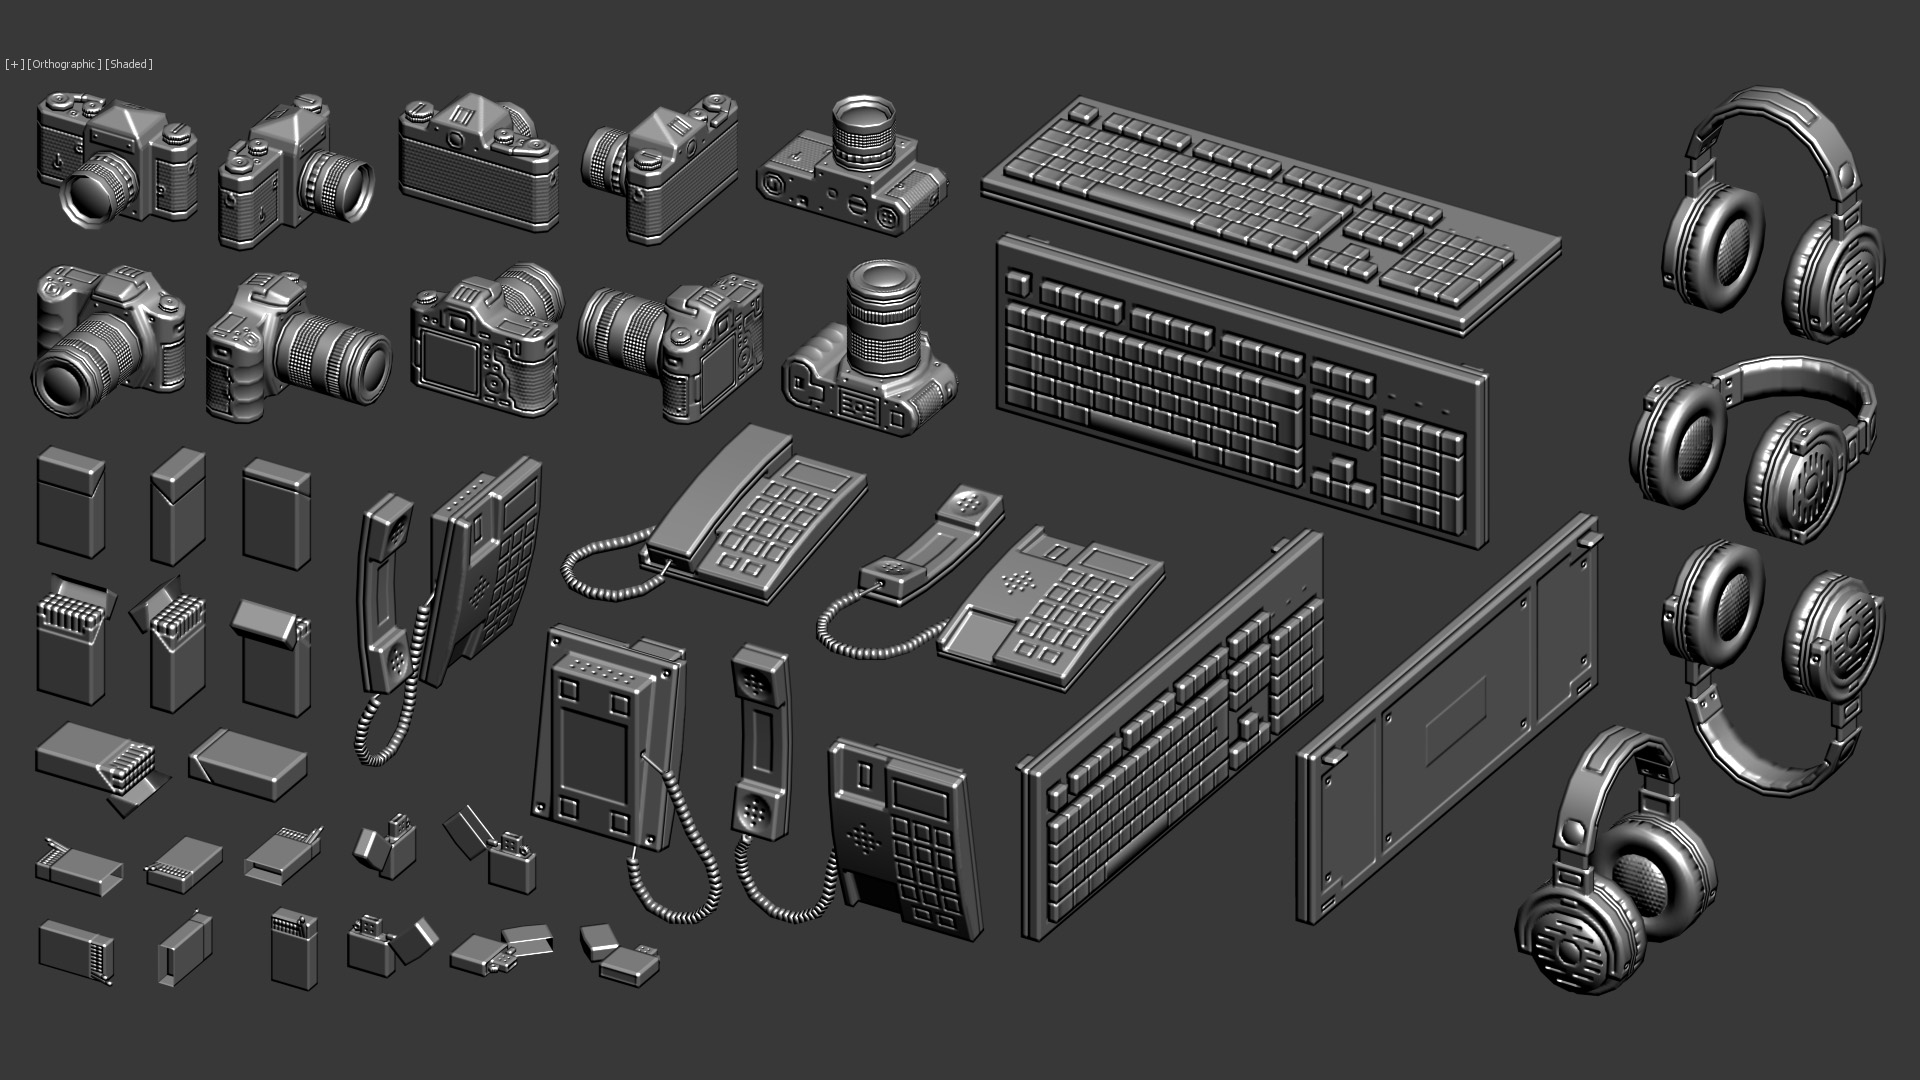
The images I'm going to show you are my own projects, they are not done for any actual game or anything. I just do them because I enjoy it so much. The first images I'm going to show are basicaly simple objects, and then I will show more complex objects at the end. The shaders I use for this are very simple, they only use difuse map, normal map and specular map. The screenshots are taken directly from 3dsMax, not using any game engine.
I hope you like it!
Bathroom:
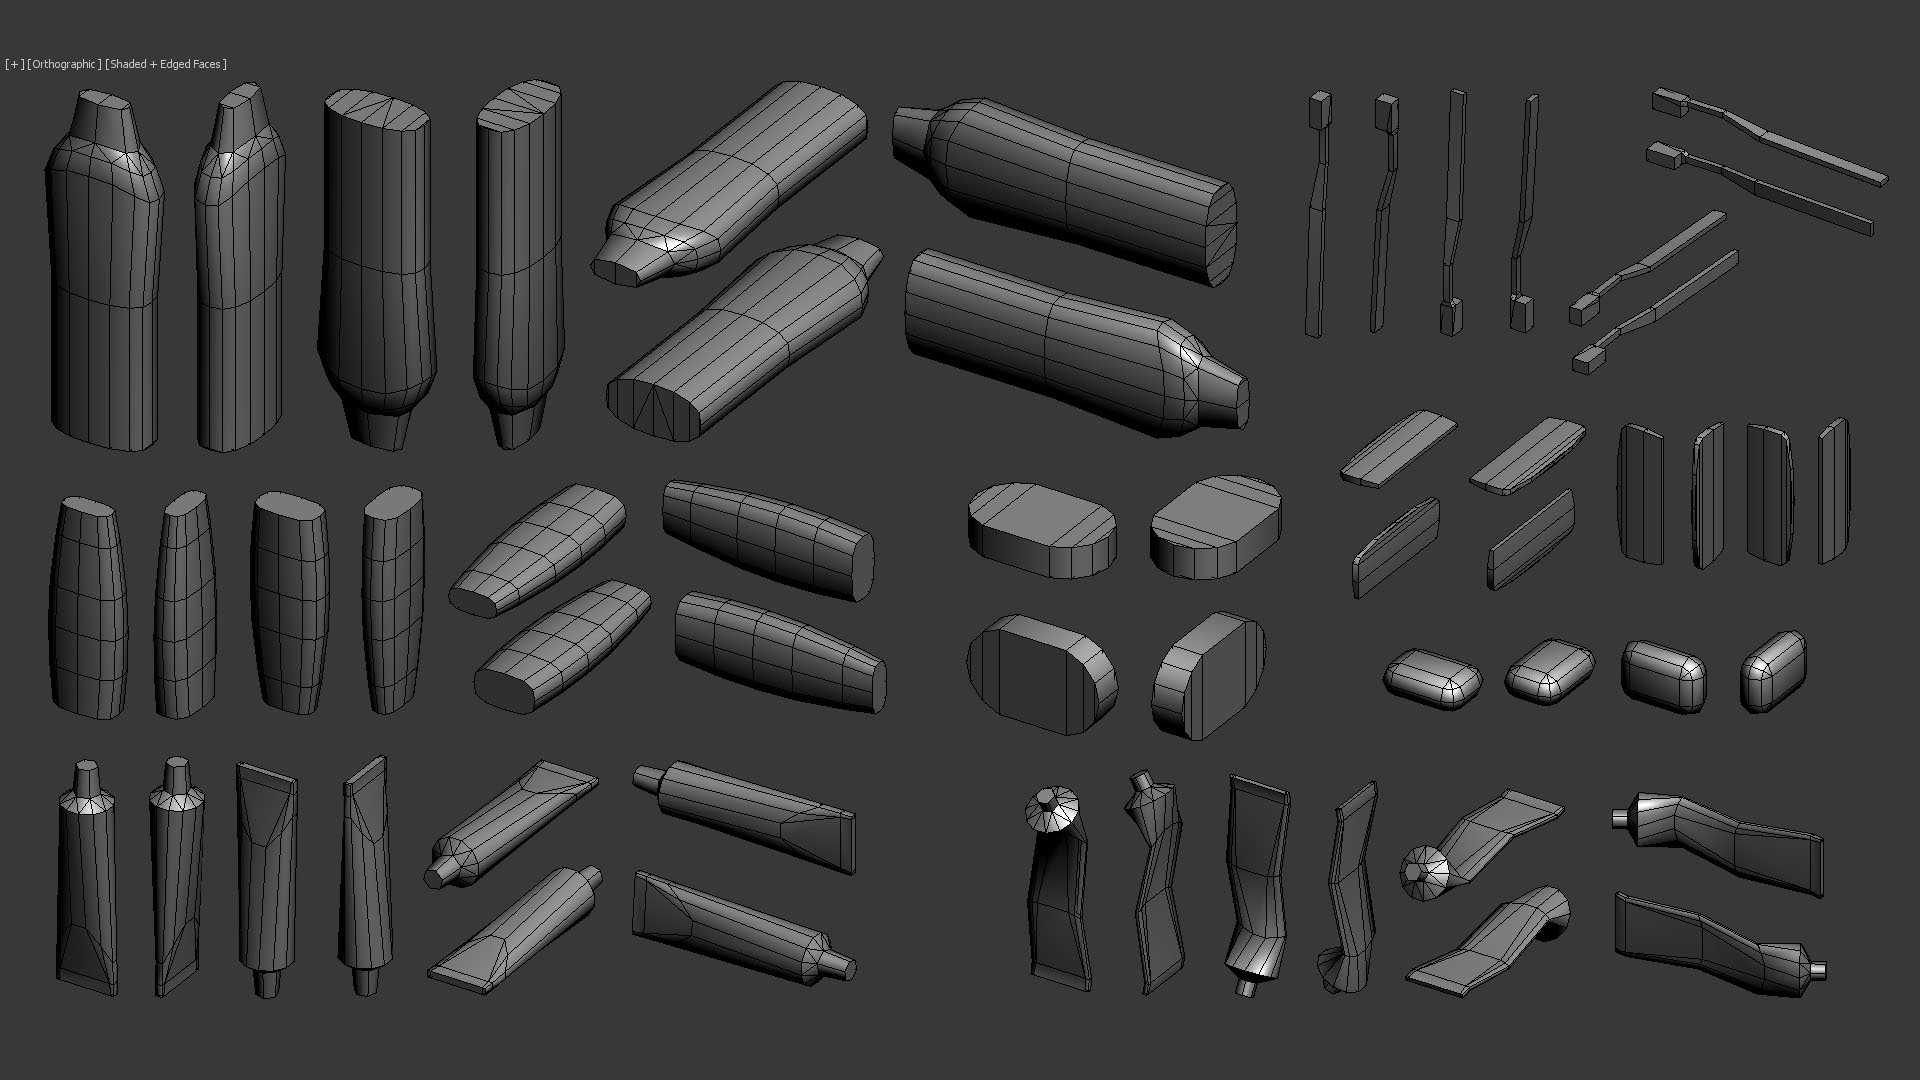


Tools 1:


Tools 2:


Food 1:


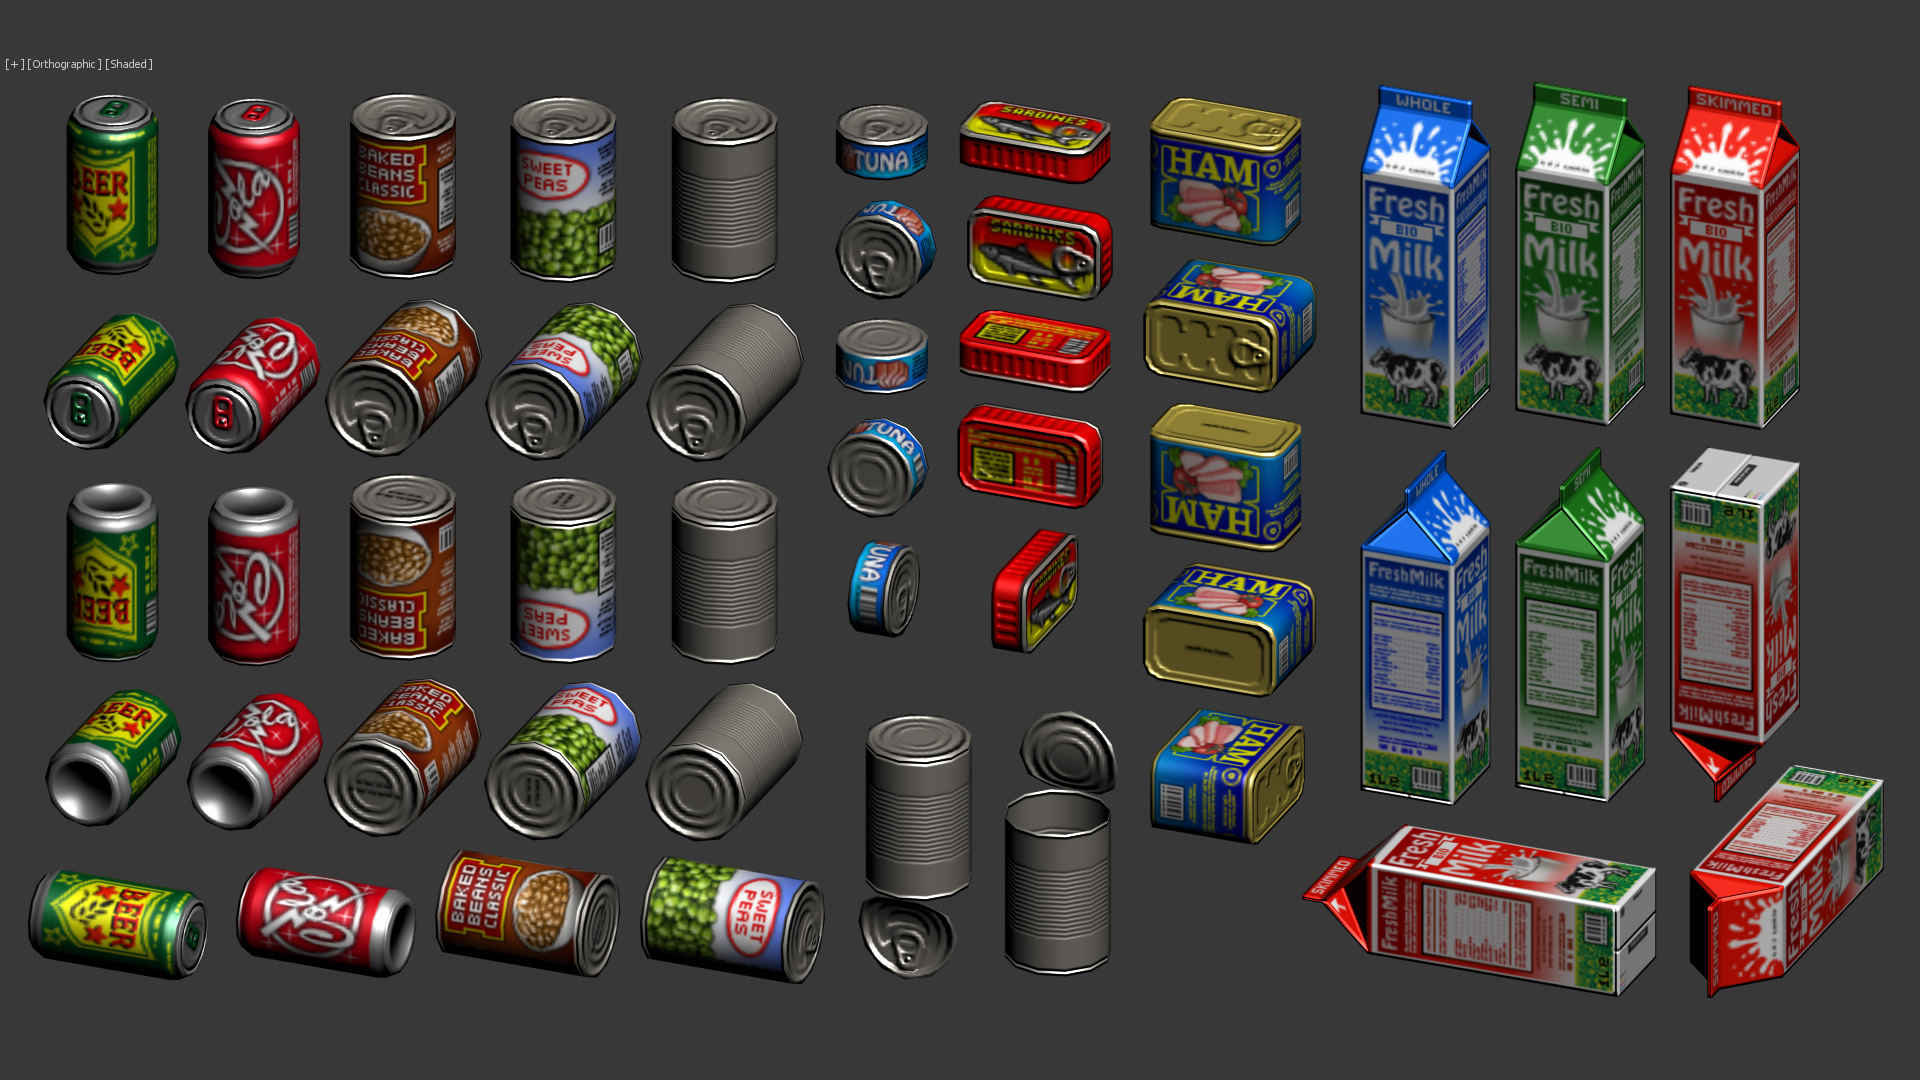

Food 2:


Livingroom:


Scorpion Evo3 :


H&K MP5:
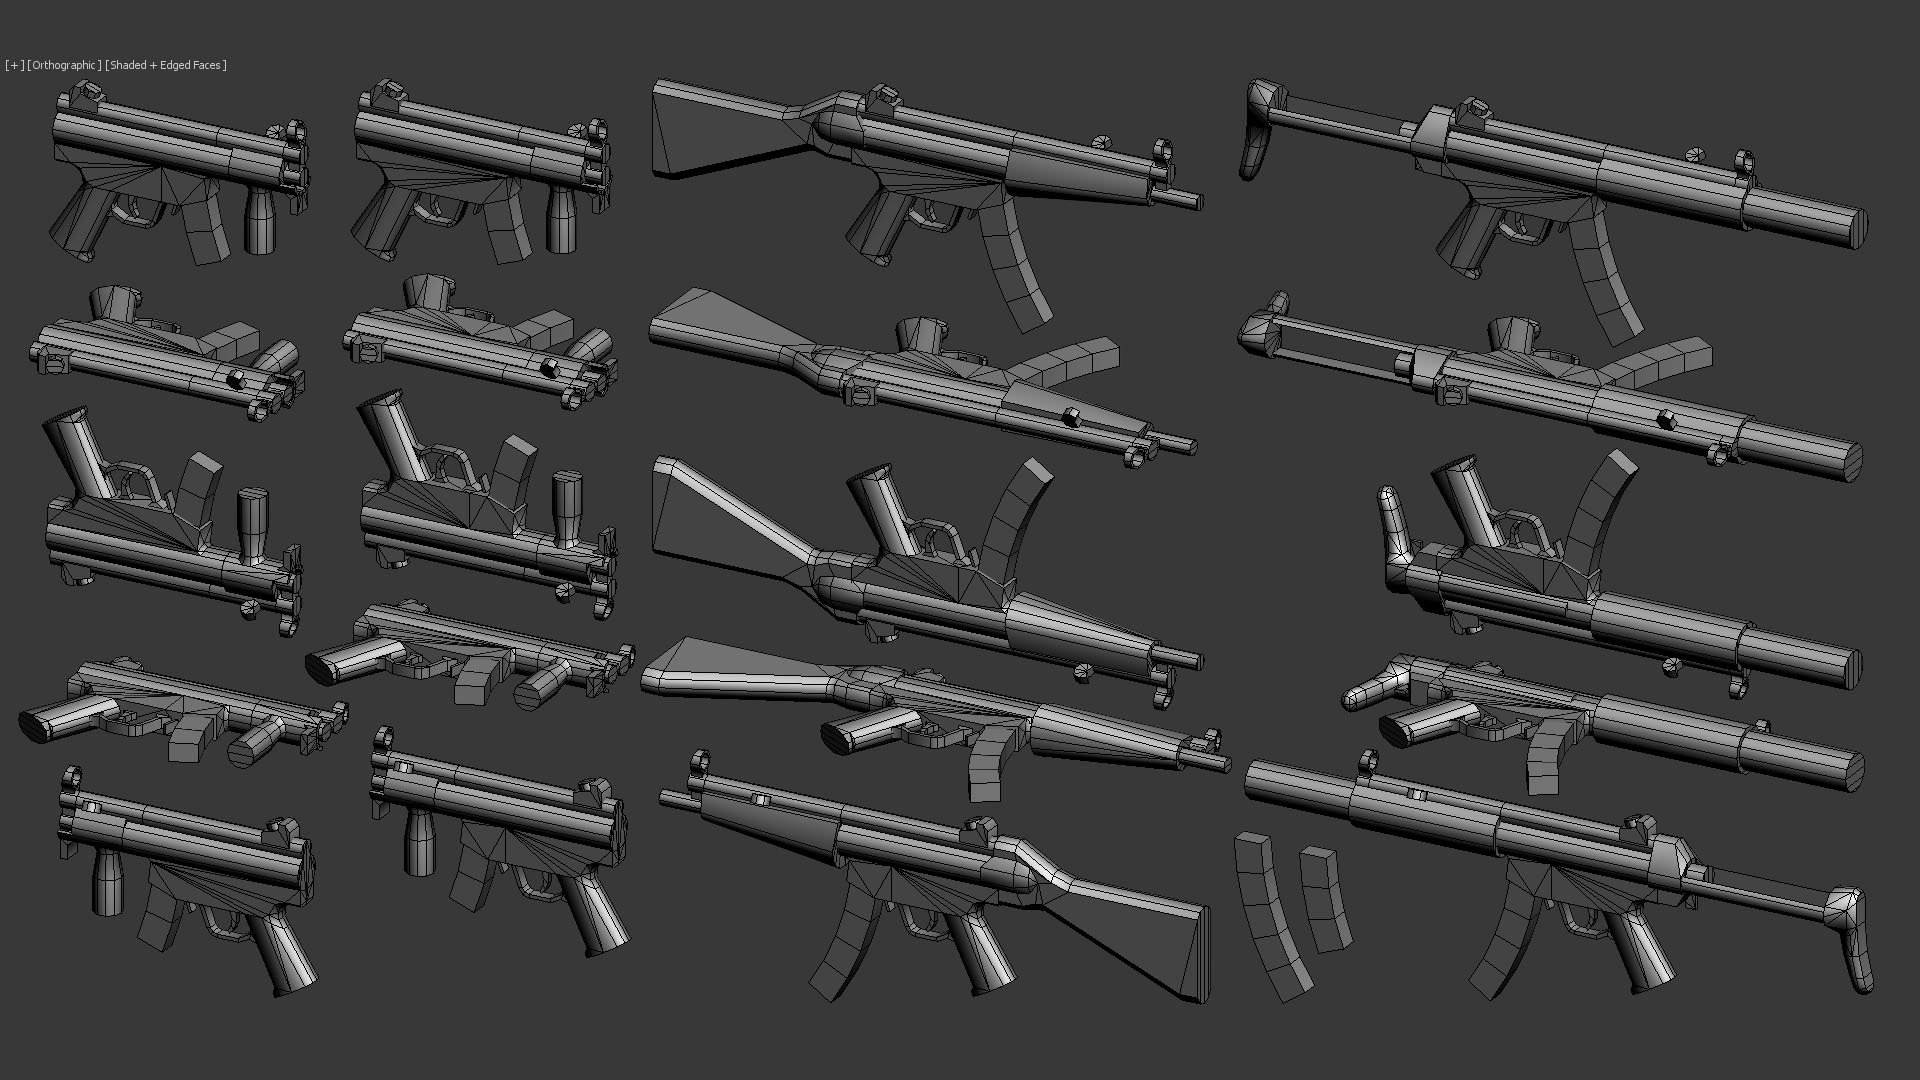


More guns:
I like guns, so I made a few. Polycounts and texture sizes are consistent with the rest of the objects.

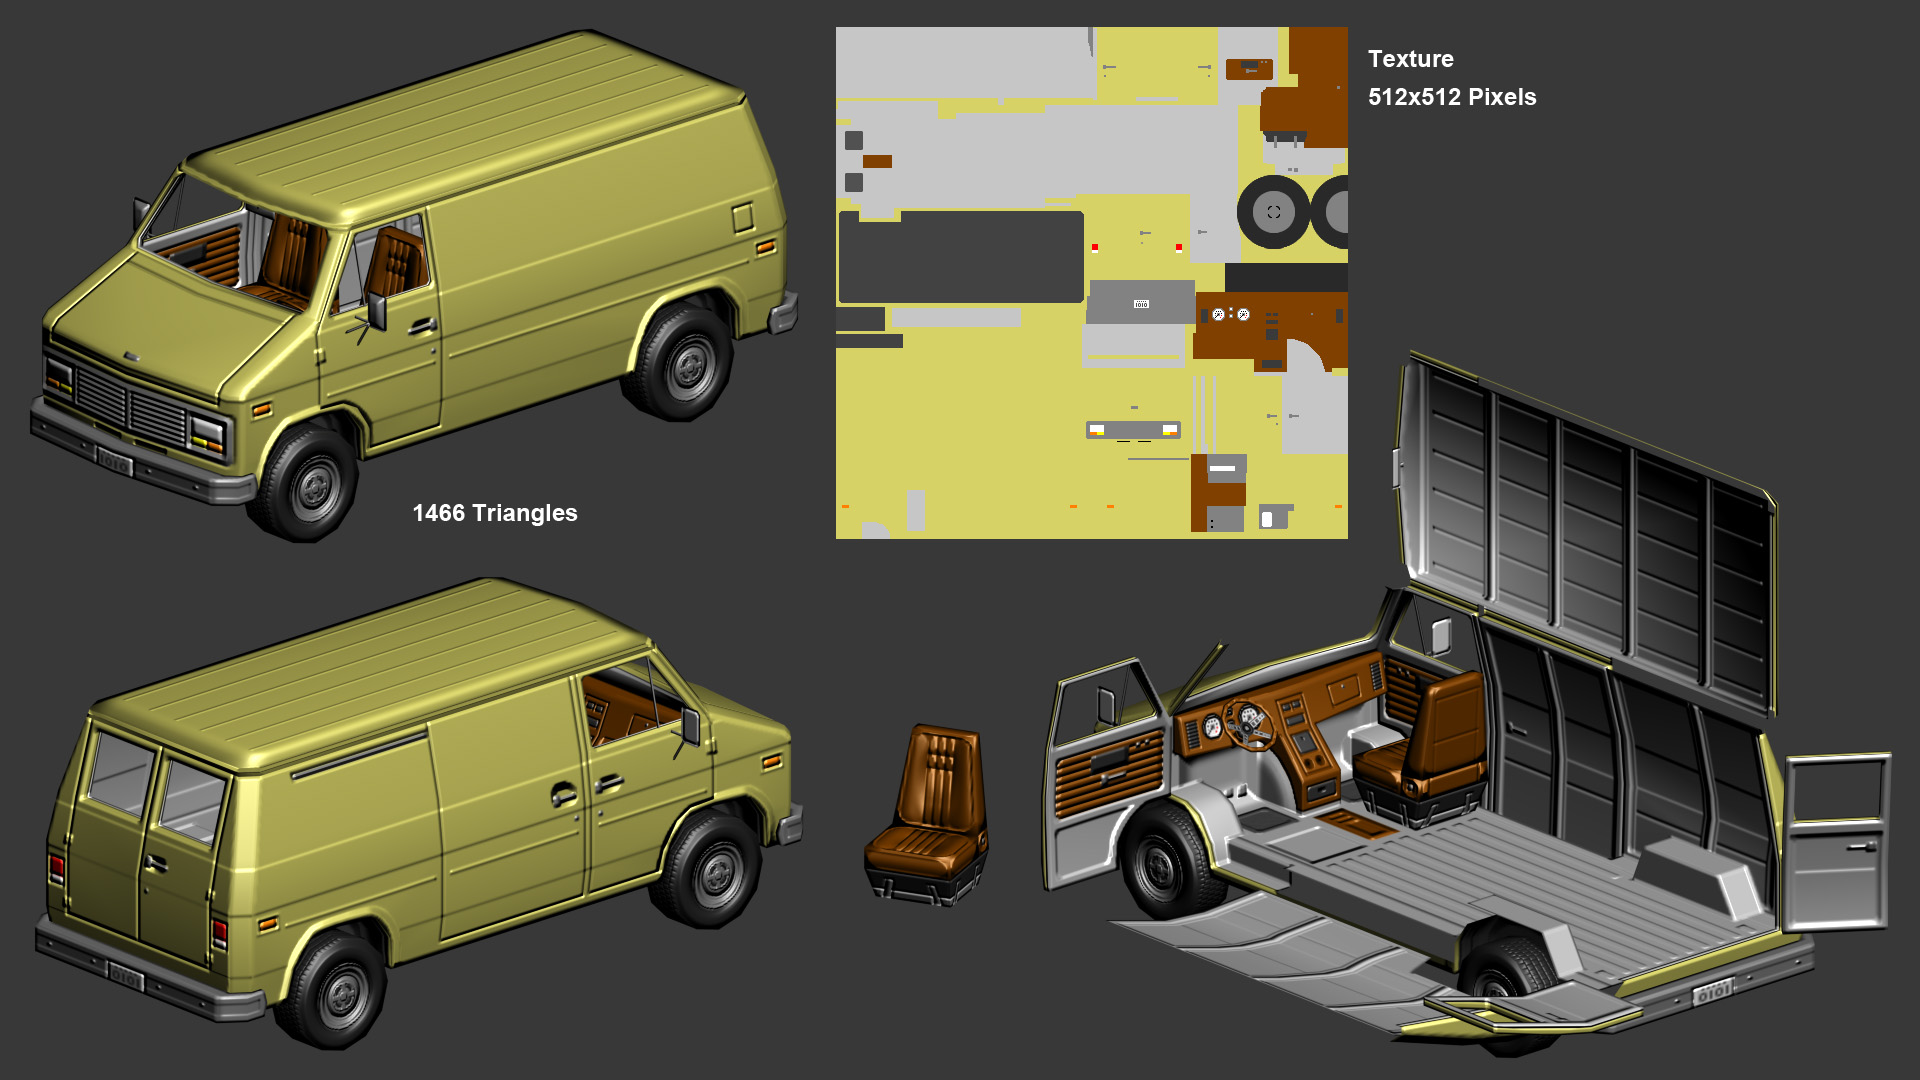
Vehicles:
There is something I whant to say for the last object. I did this object and the normal map back in 2011. Since then I have improved alot, so today I would have done things quite diferent. I'm not particularly pround of the underneath part of it, but at that moment I was already too bored with the object, so I kept it as it is. Also, I never did the difuse texture, so I've created a very simple one just to show you how it could look (No specular map here). Still I think is good looking enough to show you.


Re: Game Development Thread: Artists & Developers Who Consistently Share Valuable Insights
https://simonschreibt.de/
 Eric Chadwick
Re: Sketchbook: Rima

