How do I go about fixing these baking distortions on a stylized character

polycounter lvl 9
So I've been trying to fix these distortions when baking but I'm facing a dead end, I'm afraid. I was wondering if the experienced folk around here could advise on what would be the best way to tackle them.
I tried to add some support edges here and there but didn't have much of a success.
Surely, this question has been asked a ton and I hope you'd be patient with me on this one. The technical aspect of 3D is new to me and I'd like to learn as much as I can.


Replies
Overall you need to let go of the idea of baking begin a blind "retopo then UVs then hit bake" chain of events because it really isn't. The quality of the result almost fully depends on the way the lowpoly geo is built ... just like with old school "pixel based" texturing on ps1/ps2 era models really. You will not be "fixing" these distortions, you'll need to model your low with them in mind in the first place. But of course if this is your first time with all this this is a bit of a chicken and egg thing :D
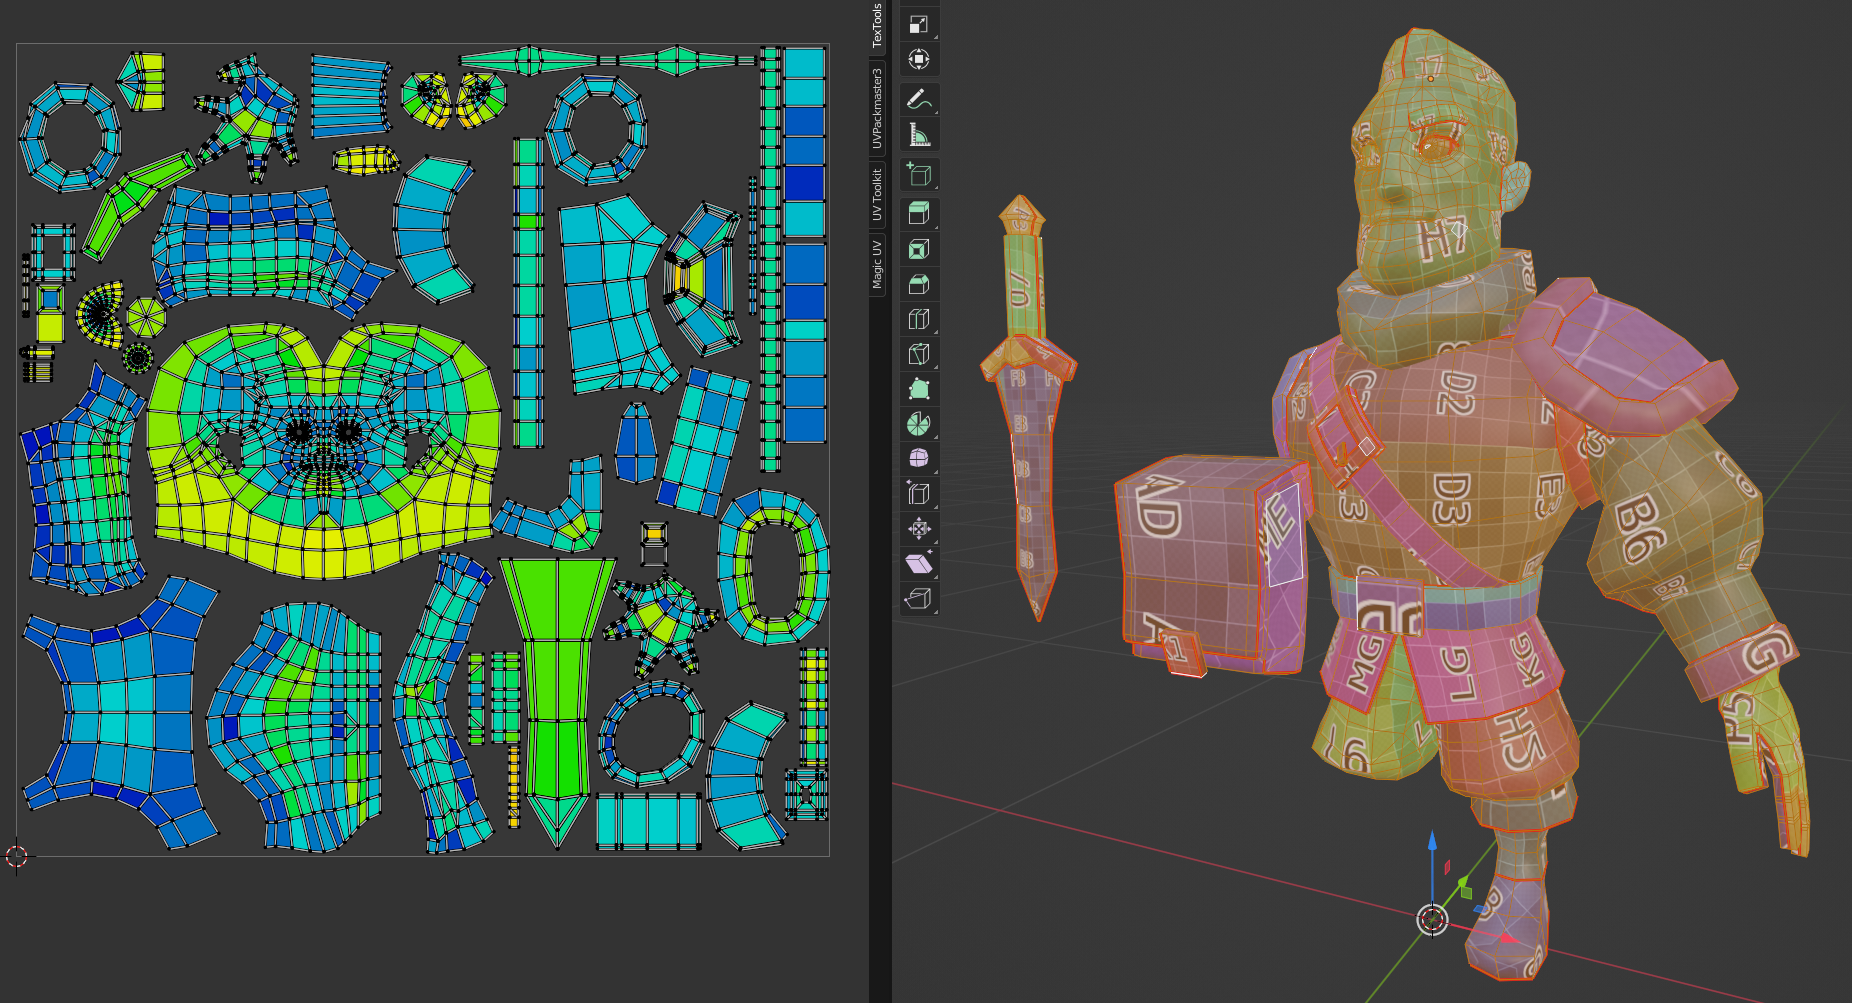
Here's an extreme example of the principles above :
Also note that this model didn't even use a highpoly to bake from - the whole look comes from applying the principles above + adding a nmap bevel all around the panels. But of course it could receive baked highpoly details too.
One last remark : once your lowpoly and UVs are taking shape you can also take a few minutes/an hour painting in landmarks with a simple brush, just to get a feel of how the texture distortion will behave.
I can only recommend the study of models from Nintendo games, they are extremely tight in all these areas. That's the beauty of them always developing on low-end hardware, as it forces them to make pristine assets that look good even with lowres textures (while avoiding the pitfall of spending days on highpoly models).
Thank you for the extensive response! The more I work on this one, the more I realize what you said about precision on the low-poly side of things. Frankly, I was more focused on keeping the silhouette and polycount budget in check and thought (I guess a little arrogantly) that I'd be able to pull it off with baking a few normal maps and blending them together.