Home 3D Art Showcase & Critiques

Advice on making my video tutorials

Phil_Fury
polycounter lvl 11
Offline / Send Message
Phil_Fury polycounter lvl 11

Hi,

I teach game art and recently started making tutorials for my blog at Escape Studios. I would like to hear any tips or feedback on my tutorial so far, and tips and tricks for making and releasing a video tutorial. 

I am new to making video tutorials for a larger audience, and my first attempts are going through many iterations. So, I am sharing some suggestions and will update this thread with my progress.

1.       Is the tutorial worth making? how useful is it compared to other methods.

2.       Name your tutorial effectively and include an eye catching and descriptive thumbnail.

3.       Distribution channels are important! You tube, Facebook and Linkedin have so far been the most useful, but this is going to be down to my personal network. So, advice on this would be very useful.

4.       Duration of the tutorial is important, really good content takes time to explain. Speeding up videos can be intimidating for people trying to follow the material. The idea of a video under 20 minutes seems to have more appeal to an audience, but people will tune into a long tutorial if the subject is of high enough interest.

5.       Keeping the information organised in the tutorial is very important, especially when like in mine includes a few subjects in a single video. I have been making a written document to go with each tutorial and including time stamps on the YouTube video. But consider a shorter and more focused tutorial than an entire development process from poly 1 to final animated asset.

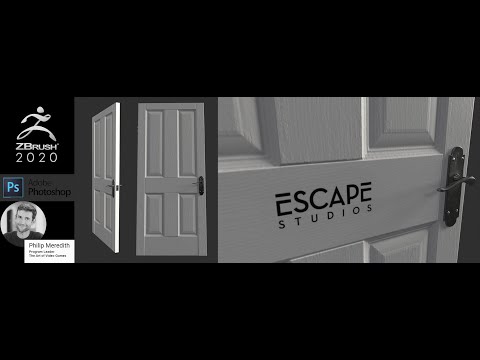
Below is my tutorial so far the first part of a trilogy on an environment art workflow, starting with Zbrush hard surface modelling, then quad draw, UV mapping, Substance Painter and Unreal Engine animation of the final door, I will update here as I learn and make new content.

https://escapestudiosgamesart.com/2020/03/06/game-ready-door-tutorial-part-1-zbrush-hard-surface-modeling-and-photoshop/

The video tutorial can be viewed here: https://www.youtube.com/watch?v=NupE-ruN958

Any feedback on my tutorials so far would be great!

I am also interested in improving the list so any advice on circulating a tutorial and making sure the process is worth while.


Replies

  • kanga
    Options
    Online / Send Message
    kanga quad damage
    I am interested in improving the list so any advice on circulating a tutorial and making sure the process is worth while.

    Why would I model hard surface in zB?
    Who is this aimed at?
    How are they going to find the information?

    Just my opinion, but I would model in zB because there are things I can't do in a standard 3d modeller. I would model a door in a 3d modelling package. So what is the aim of the tutorial? Is it about making a door or is it about exploring alternative techniques that offer better results in less time? With the advent of the modelling brush it became possible to insert a cube and edit it using a lot of standard modelling techniques. Not all though because I still cant cut an edge. Here are some experiments I did:
    Not bad but nothing I couldn't do in a standard 3d prpgram.
    The second attempt was better but required a combination between Max and zB.
    Using Max's super booleans and noisemaker and polish by groups in zB I could take a block in from Max and fully detail it in zB. I could never have created the super clean elongated circular slots in the barrel cover by standard modelling for instance.
    Finally stuff yo can only make in zB that would drive you mad using standard techniques:
    Entirely modelled in zB. Try modelling those sculpted cuts in the body using standard techniques. For designers and previz folks Keyshot is a must.

    I learnt all my modelling via youtube, online courses and experimentation. Youtube has been a large part and the search is key.  The door itself is an example, not really the goal, so I would revisit the title. If I enter zbrush hard surface modelling in the youtube search it returns loads of results, so how is your tutorial superior or more effective? Game artists are only a part of the equation. Game engines are being used by all sorts of professionals as a communication tool.

  • Eric Chadwick
    Options
    Offline / Send Message
    Moved from General Discussion into Career & Education.
  • Phil_Fury
    Options
    Offline / Send Message
    Phil_Fury polycounter lvl 11

    Excellent response @kanga , and I totally agree with your points regarding using the right approach for the model, this door could just as easy be created in a standard modelling program.

    Thank you for sharing your work on this thread, very cool! and your message made me question my approach to making tutorials.

    I have finished the second part of my tutorial today, and i did include some adjustments based on your advice. I did add some time stamps to help navigate to UV mapping or baking, and I also write a blog post that t would help someone navigate through the video.  

    https://escapestudiosgamesart.com/2020/03/10/game-ready-door-tutorial-part-2-maya-quad-draw-uv-mapping-and-baking-in-substance-painter/

    I do think I could have made the videos shorter and in chapters on specific areas, and maybe explored the individual functions more, and I will consider this when picking the thing to make in the next tutorial. I am not sure a generic door as a hero feature is really going to pulling in the crowds.

    This is the final bake which was good for the time spent. I agree that this kind of work might be better done in Blender or Modo, but I do like the live Boolean and Re-meshing options, I tend to rush through thee hard surface in Zbrush picking up random variation helps make it feel more realistic as a wood door, but not as accurate as other Boolean functions that you used on your weapon. 


    Thanks Kanga for your advice on video tutorials and hard surface modeling.  I will update this thread to include your feedback.


  • kanga
    Options
    Online / Send Message
    kanga quad damage
    Really nice texturing. That is fer sure one kickass door!
  • Eric Chadwick
    Options
    Offline / Send Message
    Moving this again, sorry. This has become about a specific tutorial, not about how to make tutorials in general. So, 3D Showcase makes more sense.

    About the door asset, you should examine woodgrain on a solid-wood door, the grain goes horizontal on all the cross pieces. (we have some in our house, stained pine)


  • Phil_Fury
    Options
    Offline / Send Message
    Phil_Fury polycounter lvl 11
    Thanks @Eric Chadwick , what a great reference for the door model, would you mind if I used this reference in my next video tutorial i Substance Painter? The nice thing about doing a door is it is usually pretty easy to get reference material, but I do like the shape variation in the wood panels and gloss on that door. I do have a bit of wood grain direction in the individual planks as you can see below in a render of just the base color in Zb, but I could push that a lot more like your ref, and get more color into the wood. Cheers
  • Eric Chadwick
  • FrankPolygon
    Options
    Offline / Send Message
    FrankPolygon grand marshal polycounter
    Less of a critique and more of a commentary but adding to what Eric has already said:

    If visual accuracy is important for realism then replicating the appropriate grain orientation of each component is important because (in the real world) it effects the dimensional behavior and strength of solid lumber. In contrast to this, engineered wood products are generally more dimensionally stable and the grain direction is less of an issue.

    Changes in moisture content and temperature will cause wood to expand and contract. How the log was sawn will also influence whether the lumber bows, cups, twists or warps. This behavior is something that has to be accounted for in real world designs and that's why most wooden objects have to be made a particular way. Each component requires a specific grain orientation to maximize strength and dimensional stability. If it were done any other way then the seasonal changes would cause the object to literally rip itself apart.

    When working with wood grain textures there's two things to look out for: grain pattern and grain direction.

    The overall grain pattern of solid lumber is largely a product of the log's orientation when the lumber was cut. There's a few different ways to cut lumber but the three most common are: plain sawn, quarter sawn and rift sawn. Plain sawn lumber produces less waste but is weaker and less stable. Quarter sawn lumber produces more waste but is stronger and more stable. Rift sawn lumber is kind of in the middle. There's also the elements of cost and availability: Plain sawn lumber is cheap and widely available. Rift sawn lumber cost more and is somewhat less common. Quarter sawn lumber is expensive and relatively rare.

    The grain direction of solid lumber is influenced by how it was cut and determines which orientation will provide the most strength to resist a a given type of force. Grain direction (grain types) is a bit of a complex topic but the basics are the face and edge grain run parallel to the long fibers of the wood and end grain is perpendicular to the long fibers of the wood.

    Face grain and edge grain boards are relatively strong and take stain well. The face is usually limited by the diameter of the tree and the edge is limited by the length. End grain boards are extremely weak, prone to shattering, don't take stain well and are limited entirely by the diameter of the tree. Any sizeable end grain board would have to be an engineered wood product. Face grain and edge grain make up the majority of the visible grain on most wooden objects. End grain is usually only visible on the ends of boards and other lumber products.

    So why is any of this important?

    The species of wood and the overall grain pattern can be used to communicate the age and value of objects. For most background props and environments this probably isn't something that's going to require a lot of research or thought but for anything outside of a contemporary timeline it might be worth digging into what materials and methods were popular at the time. For certain projects this can really help build the atmosphere and immersion.

    While there's a lot of room for artistic choice with grain patterns, grain direction is something that should always match the real world object. Solid wood construction has been around for a long time and is still widely used so most people are able to recognize when something is a bit off with it.

    Like Eric pointed out the horizontal lock rail and bottom rail should have a grain orientation that's perpendicular to the vertical stiles. Even face grain lumber becomes weak if the board is too wide and too thin. Wood also tends to expand more along it's width than it's length. Having a vertical grain direction on the rails would cause problems closing and locking the door with seasonal changes. This is why the rails are face cut boards turned perpendicular to the stiles. Since the vast majority of solid wooden doors are made this way it's something that's easy for people to pick out.

    At this stage it might not make sense to go back and change the wood grain on the high poly but it could also be an opportunity to show how flexible it can be if a change request came back from an art lead. Learning how to adjust the model to simulate other wood species and add knots or doing a damage pass would also be interesting topics to explore.
Sign In or Register to comment.