Polygons' edges are seen after baking
Hello everyone!
I cannot figure out the issue with polygon edges being seen on the low poly after baking.
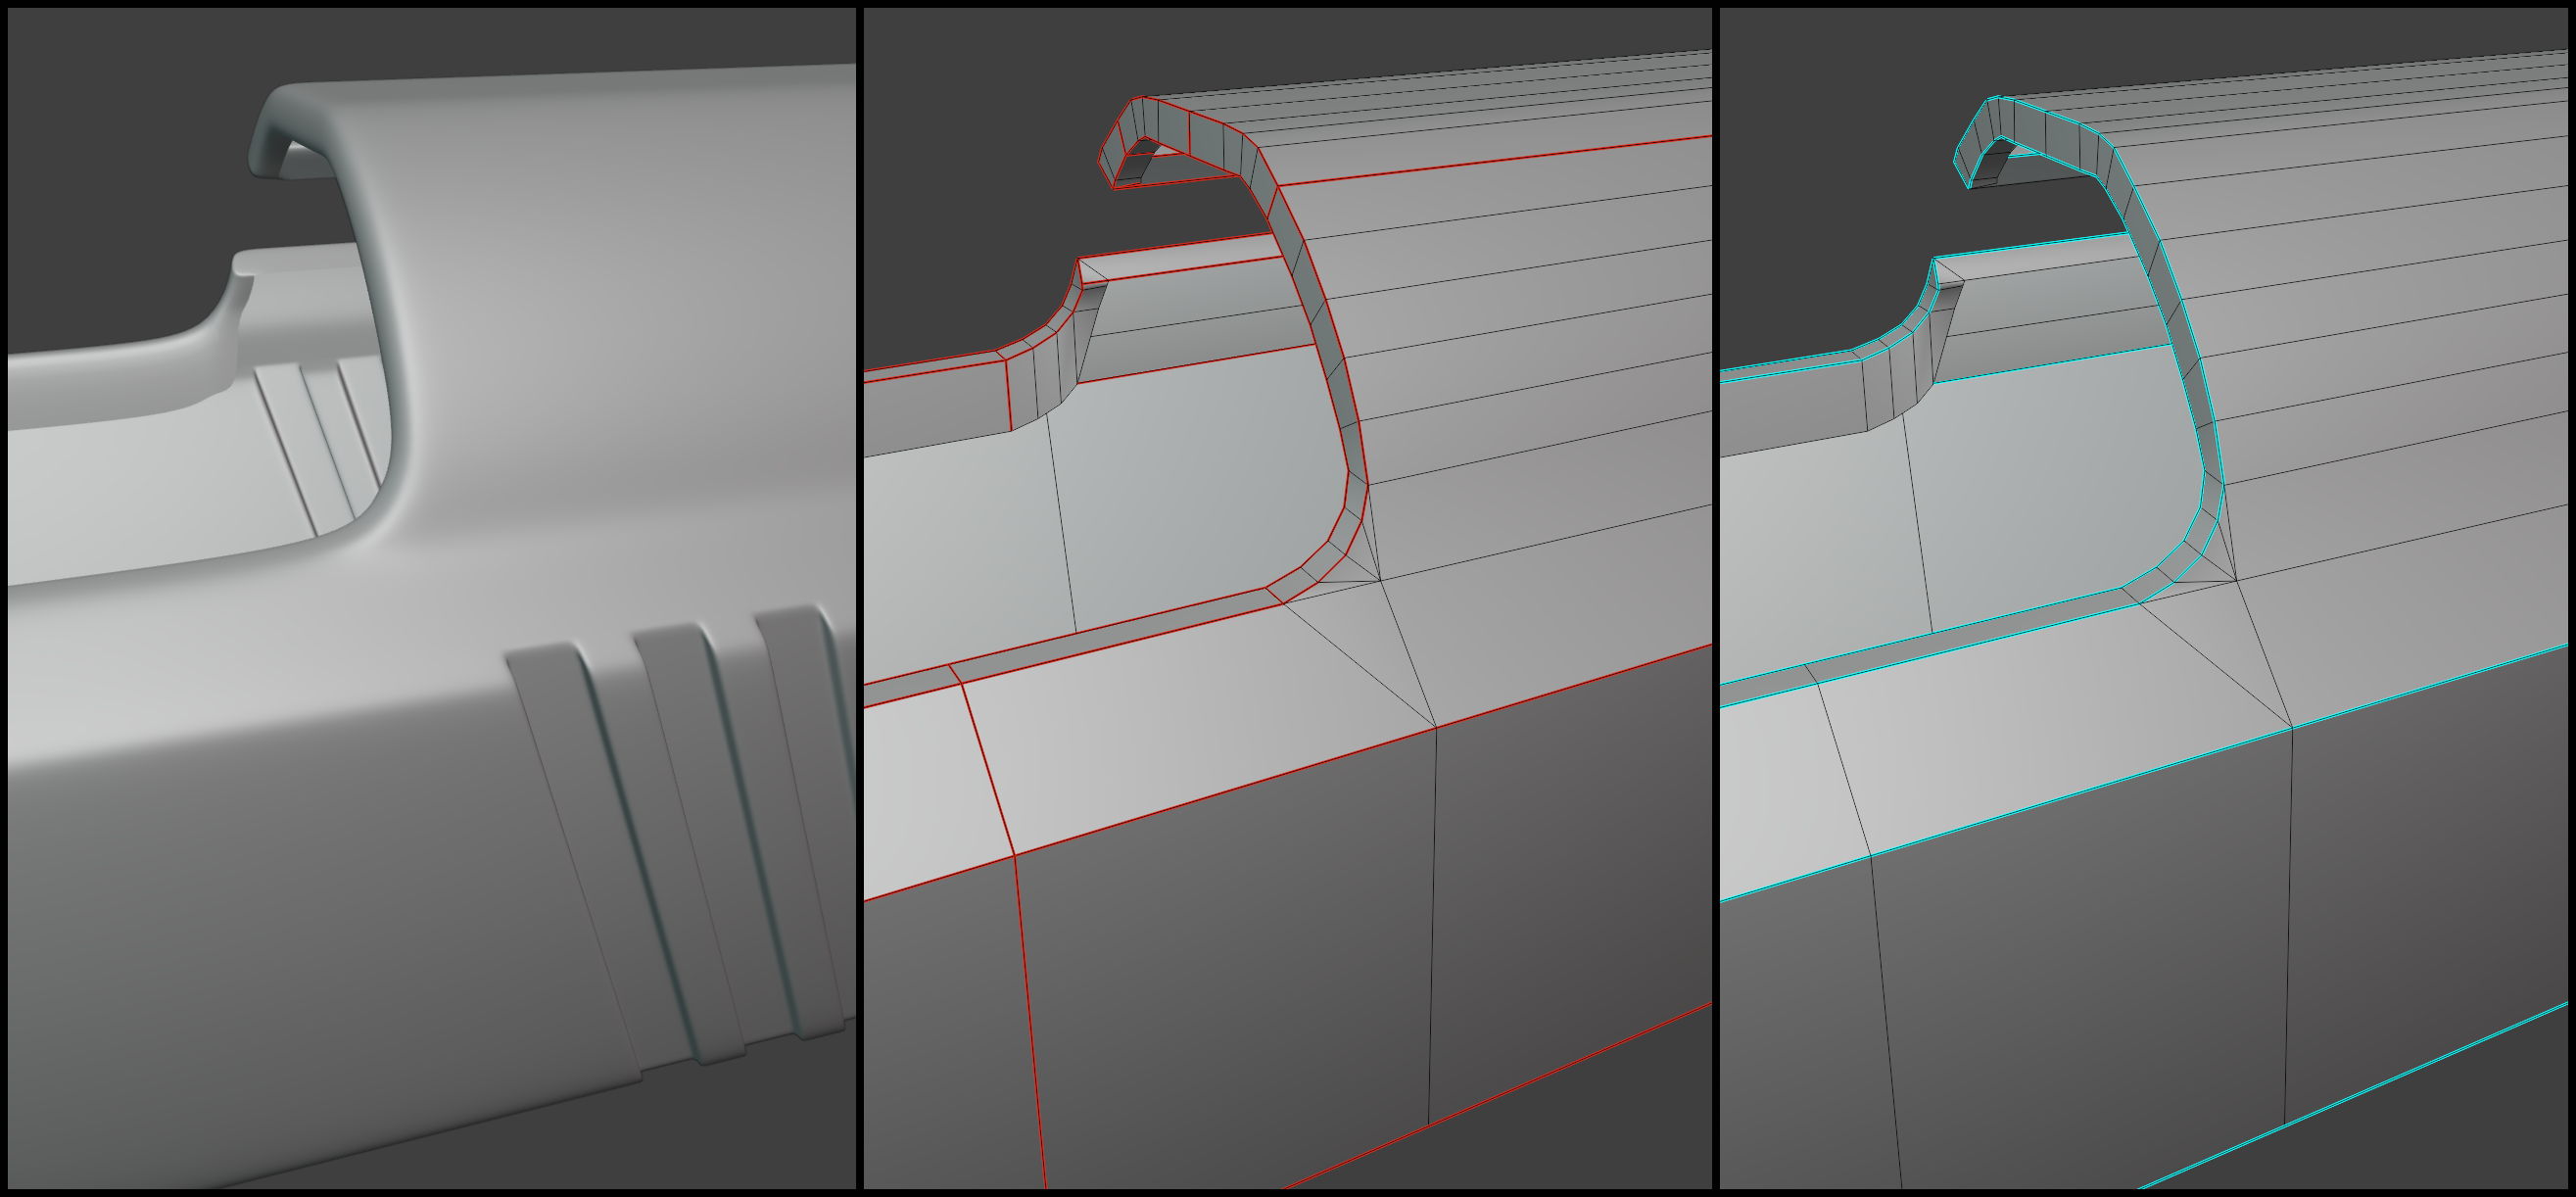
Here's the high poly and low poly models (Blender). These are the seams and sharp edges that I have now:
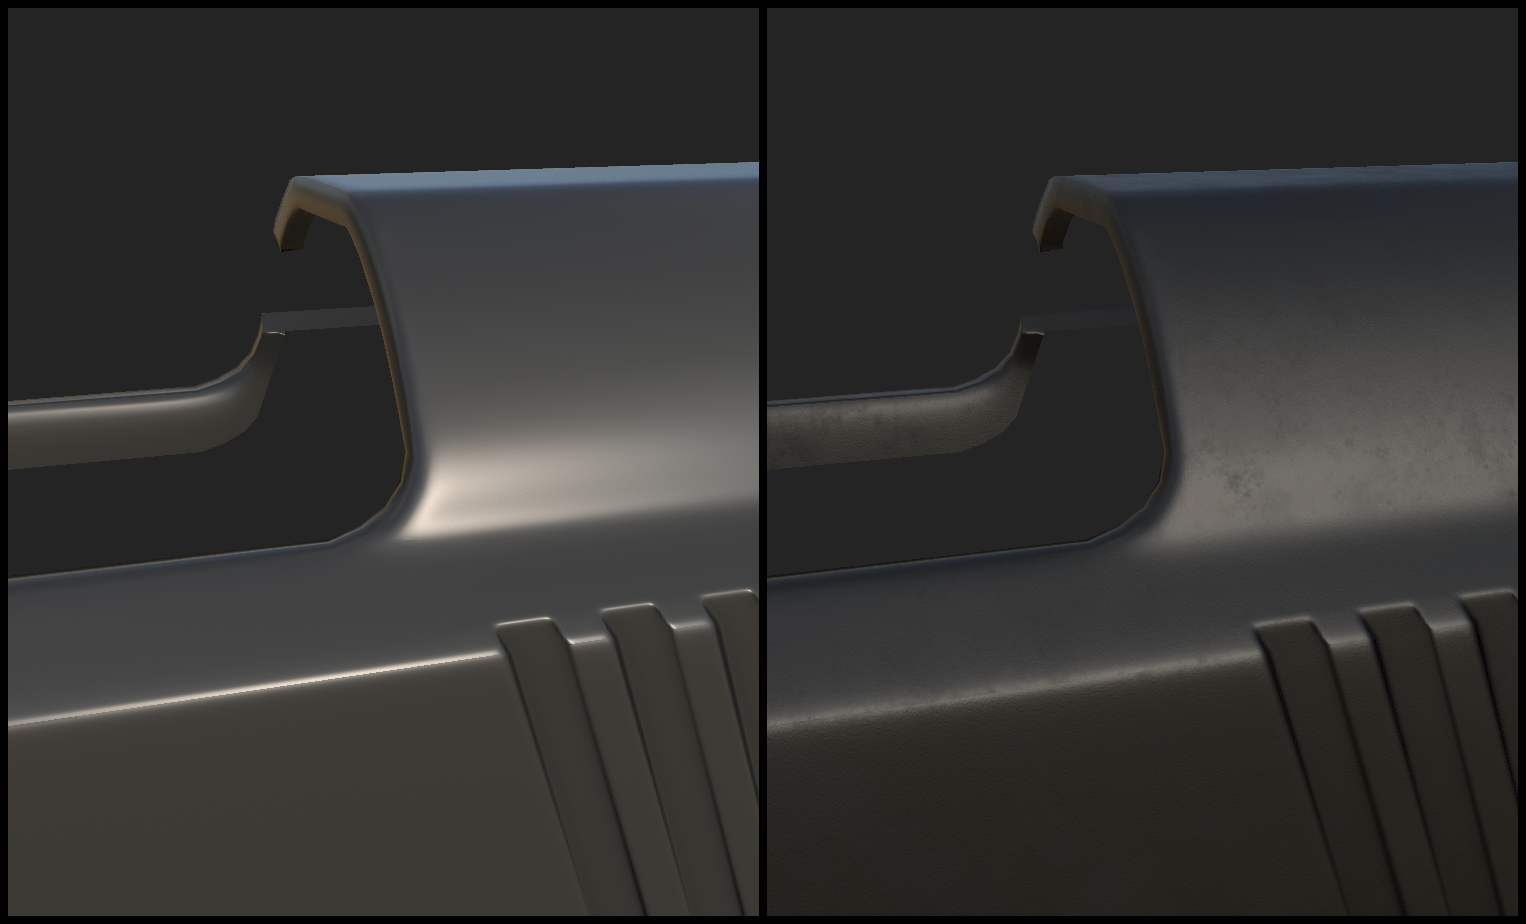
Once the baking is done (Substance Painter) and a simple layer (just a color or a variation with roughness texture) is applied, the result looks like this:
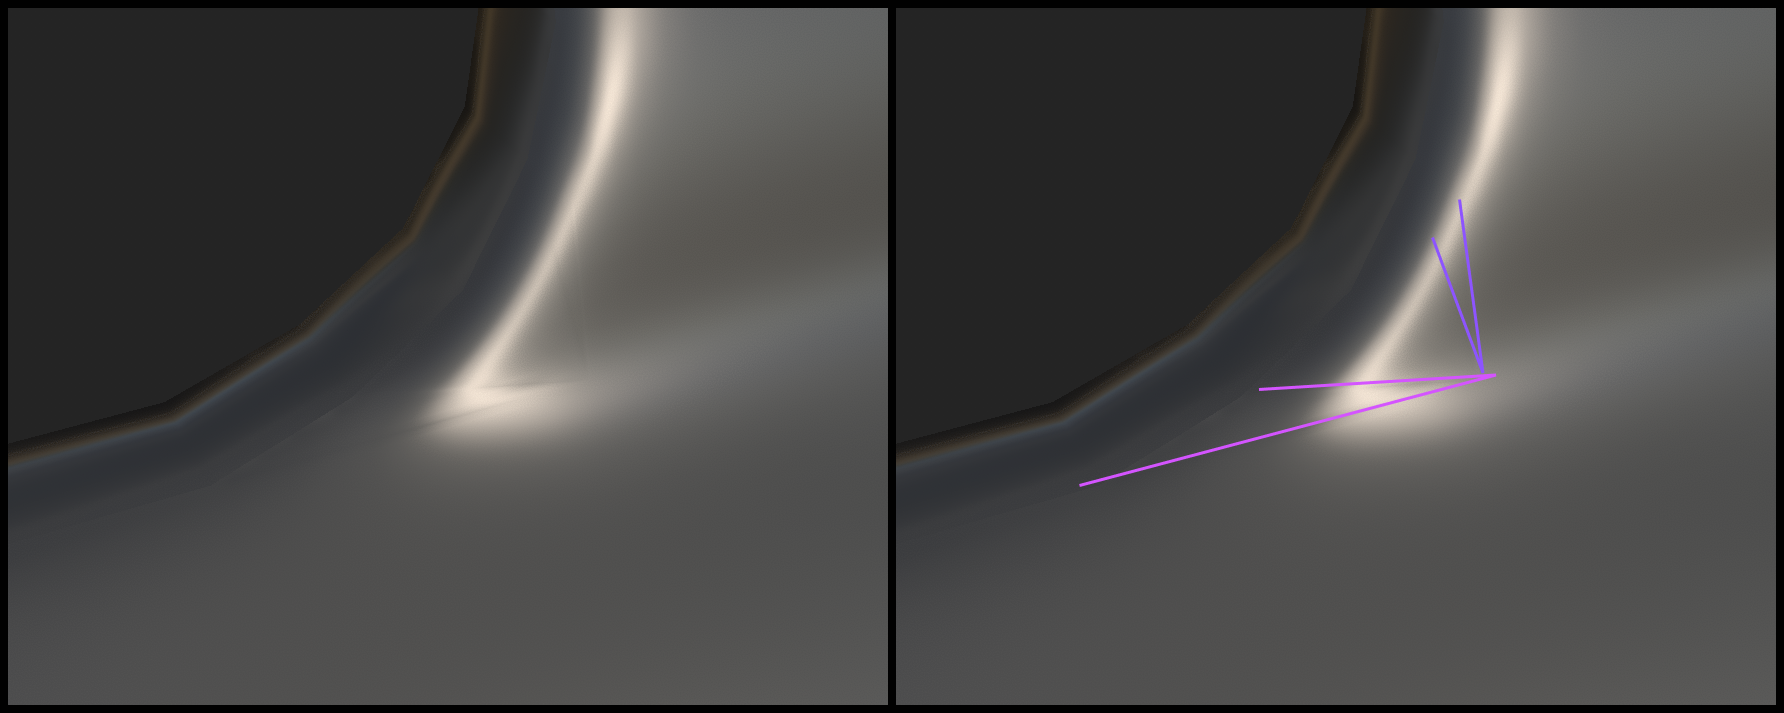
Since the model is not intended for extreme close ups, the amount of geometry is quite limited. However, the fact that there are some artifacts bothers me and I'd like to figure out why it happens here and how can I deal with it (hope the images are not compressed too much; I highlighted the areas just in case). Behold the tris:
I tried to Google the issue and found a lot of good practices how to deal with such things. For example, the issue here - Triangles showing on bake/normal map - is quite similar to what I have. Also I tried to use sharp/smooth edges, use the Weighted Normals modifier.
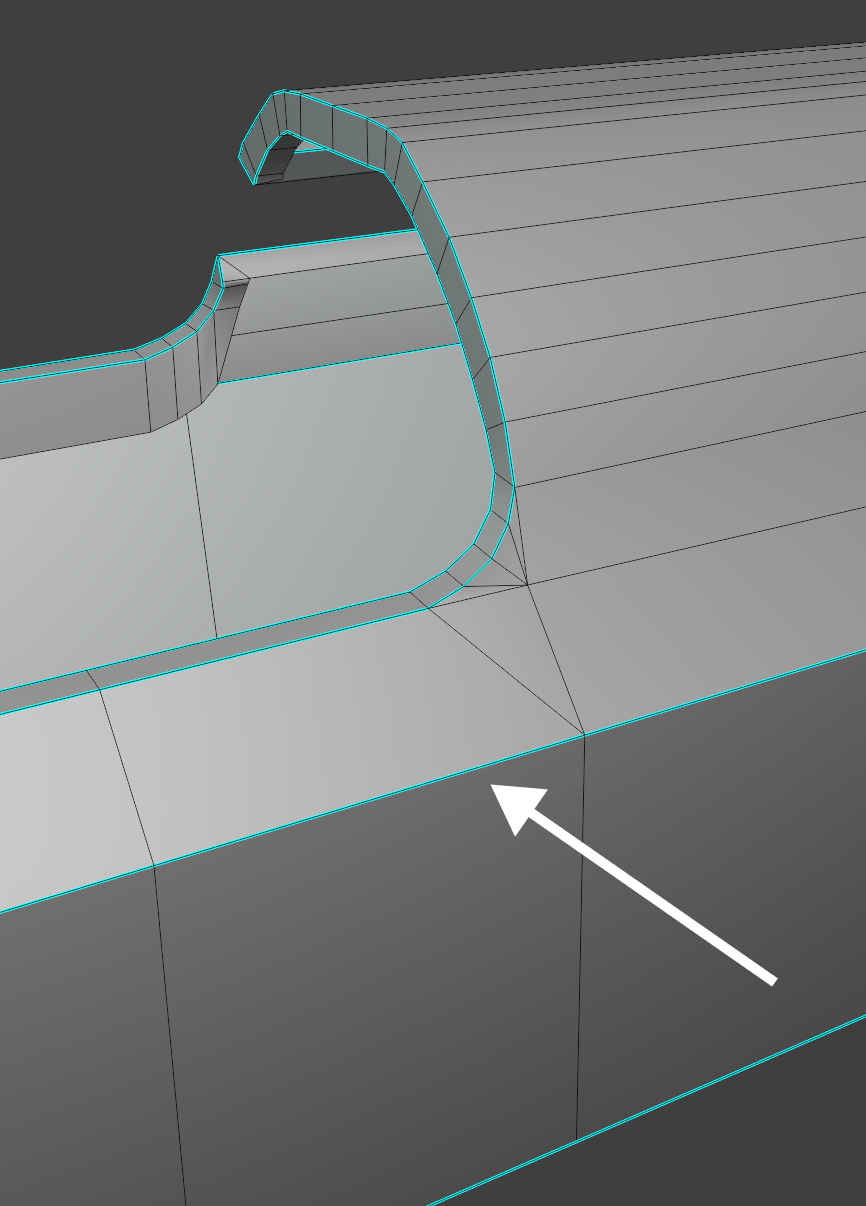
I've been tweaking the seams and sharp edges for a while now to get rid of the visible edges. For example, initially I did not have these edges (see the white arrow) sharp, and there was no seam, but I had to add them to improve the shading a little bit:
Also I made sure that the faces are all flat:
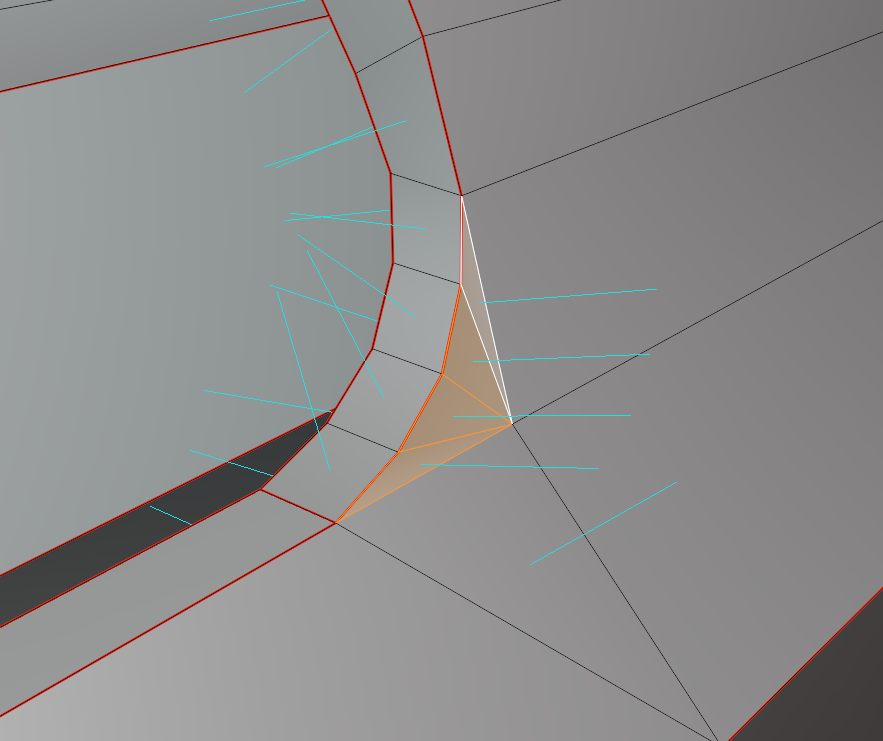
Overall I managed to get rid of some of the tris in other parts of the model - in those cases the sharp edges helped. However, these tris are still here.
And the part that confuses me a lot. There are two "curves" - on the left and on the right side.
- The left one is actually ok, as it does not bring any artifacts and looks ok after baking.
- The right side has bad shading, and I cannot actually remove the small triangles, as I want to preserve the curvature.
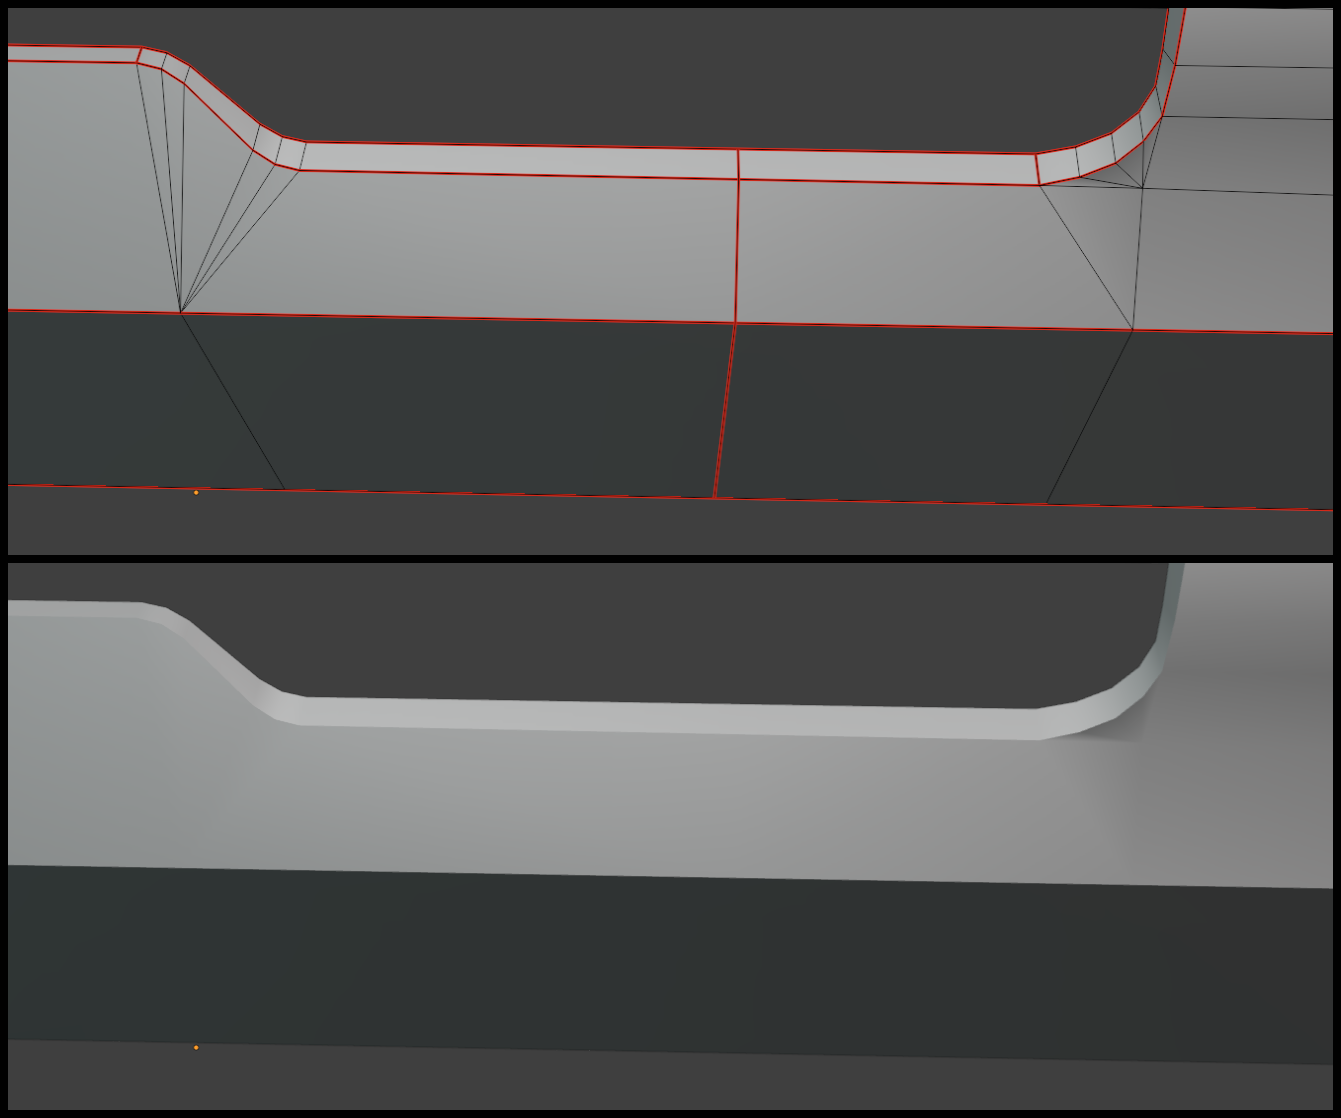
After baking the left part does not have visible polygon edges, while the right side does.

What am I missing? I tried different UV island variations, sharp and smooth edges, and even a slightly different topology in the area. I would really appreciate your help! Thanks!
P.S. I already created a similar topic some time ago, but the model there was made in Maya, now I am trying Blender.
I cannot figure out the issue with polygon edges being seen on the low poly after baking.
Here's the high poly and low poly models (Blender). These are the seams and sharp edges that I have now:

Once the baking is done (Substance Painter) and a simple layer (just a color or a variation with roughness texture) is applied, the result looks like this:

Since the model is not intended for extreme close ups, the amount of geometry is quite limited. However, the fact that there are some artifacts bothers me and I'd like to figure out why it happens here and how can I deal with it (hope the images are not compressed too much; I highlighted the areas just in case). Behold the tris:

I tried to Google the issue and found a lot of good practices how to deal with such things. For example, the issue here - Triangles showing on bake/normal map - is quite similar to what I have. Also I tried to use sharp/smooth edges, use the Weighted Normals modifier.
I've been tweaking the seams and sharp edges for a while now to get rid of the visible edges. For example, initially I did not have these edges (see the white arrow) sharp, and there was no seam, but I had to add them to improve the shading a little bit:

Also I made sure that the faces are all flat:

Overall I managed to get rid of some of the tris in other parts of the model - in those cases the sharp edges helped. However, these tris are still here.
And the part that confuses me a lot. There are two "curves" - on the left and on the right side.
- The left one is actually ok, as it does not bring any artifacts and looks ok after baking.
- The right side has bad shading, and I cannot actually remove the small triangles, as I want to preserve the curvature.

After baking the left part does not have visible polygon edges, while the right side does.

What am I missing? I tried different UV island variations, sharp and smooth edges, and even a slightly different topology in the area. I would really appreciate your help! Thanks!
P.S. I already created a similar topic some time ago, but the model there was made in Maya, now I am trying Blender.
Replies
Should they be aligned/not flipped, etc.?
What do you mean by "custom vertex normals"? In Blender: select a vertex, press R and press N - then you can rotate the vertex normal and actually play with its shading?
Has its perks, but doesnt work on every mesh, works better the more planar a mesh is
Functions to modify the vertex normals manually, with vertices selected in edit mode, can be found under "Mesh > Normals > ..." - or shortcut "alt + N":
To flatten the vertex normals, you would copy the vertex normal vectors of a plane to the selected vertices. You might have to split hard edges manually in oder to edit their vertex normals indepent of each other, never did that manually in Blender.
Alternatively, the "Data Transfer" modifier can be used to copy shading from one mesh to another.
To keep everything very simple, you could make that lower edge hard (and split UVs) to control the shading. I would probably try this first. (Edit: something like this:
Again, its a possibility. Doesn't mean its the ultimate measure in this case. Look at the low poly without normalmaps, there is a pretty hefty shading difference in that area. The normal map tries to compensate that, but likely cant because there isnt enough pixels to create the needed gradients.
On top even if there was enough resolution. Once compressed, the issue might come back in engine.
Minimize the low poly shading and you'll have this under control
More shading errors if the baked normal map tangent space isn't synced with the engine
More shading errors if there's not enough resolution
More shading errors the heavier the texture compression
More obvious shading issues on LOD1+ if sharing a normal map
Higher disk space usage once the normal texture is compressed to disk
None of these are bad enough to ruin an asset, but just things to keep in mind and reasons to pay attention.
The images below are just an example of how it can be used. In this particular case I copied the vector from the face and applied it to a single vertex (though it looks bad now):