(WIP) Character set in Environment
I'm currently working on a project that will hopefully help toward my portfolio! I'm working on a discipline I want to go into - Character art, and a discipline that I struggle with - Environment art.
The fable game series inspired me to pursue this direction of career path, it was the reason I went to university and the reason why I'm wanting to better my skills at a better uni for a MSc! For this project I wanted to make a tribute for the series. I wanted to create a character and environment that had its similarities.
I wanted to create a witch. I thought a witch would really suit the aesthetic and that I could add my own touch to it.
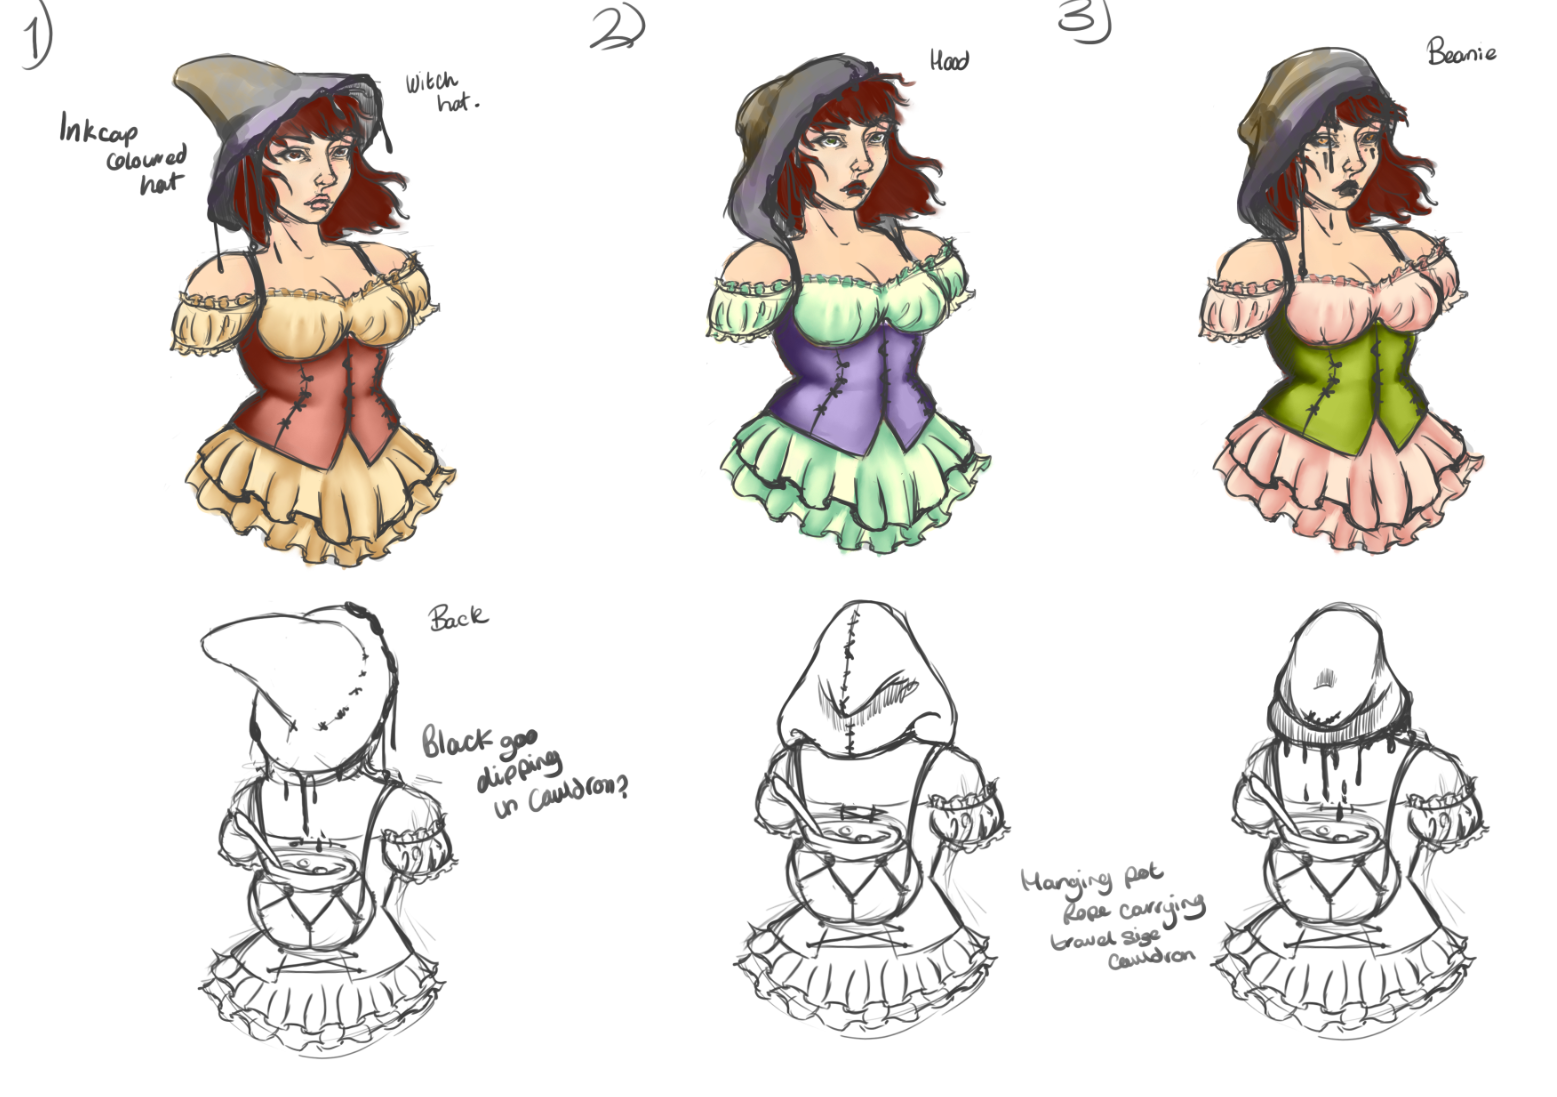
These are some of the original concepts I set up toward her production. I wanted her to suit a whimsical nature loving theme. I researched different looking mushrooms as I wanted her hat to resemble one! The inkcap mushroom suited best as I thought it would suit the narrative of is she friendly? is she foe?
The next part was to start on production and this is her final sculpt, in Zbrush;
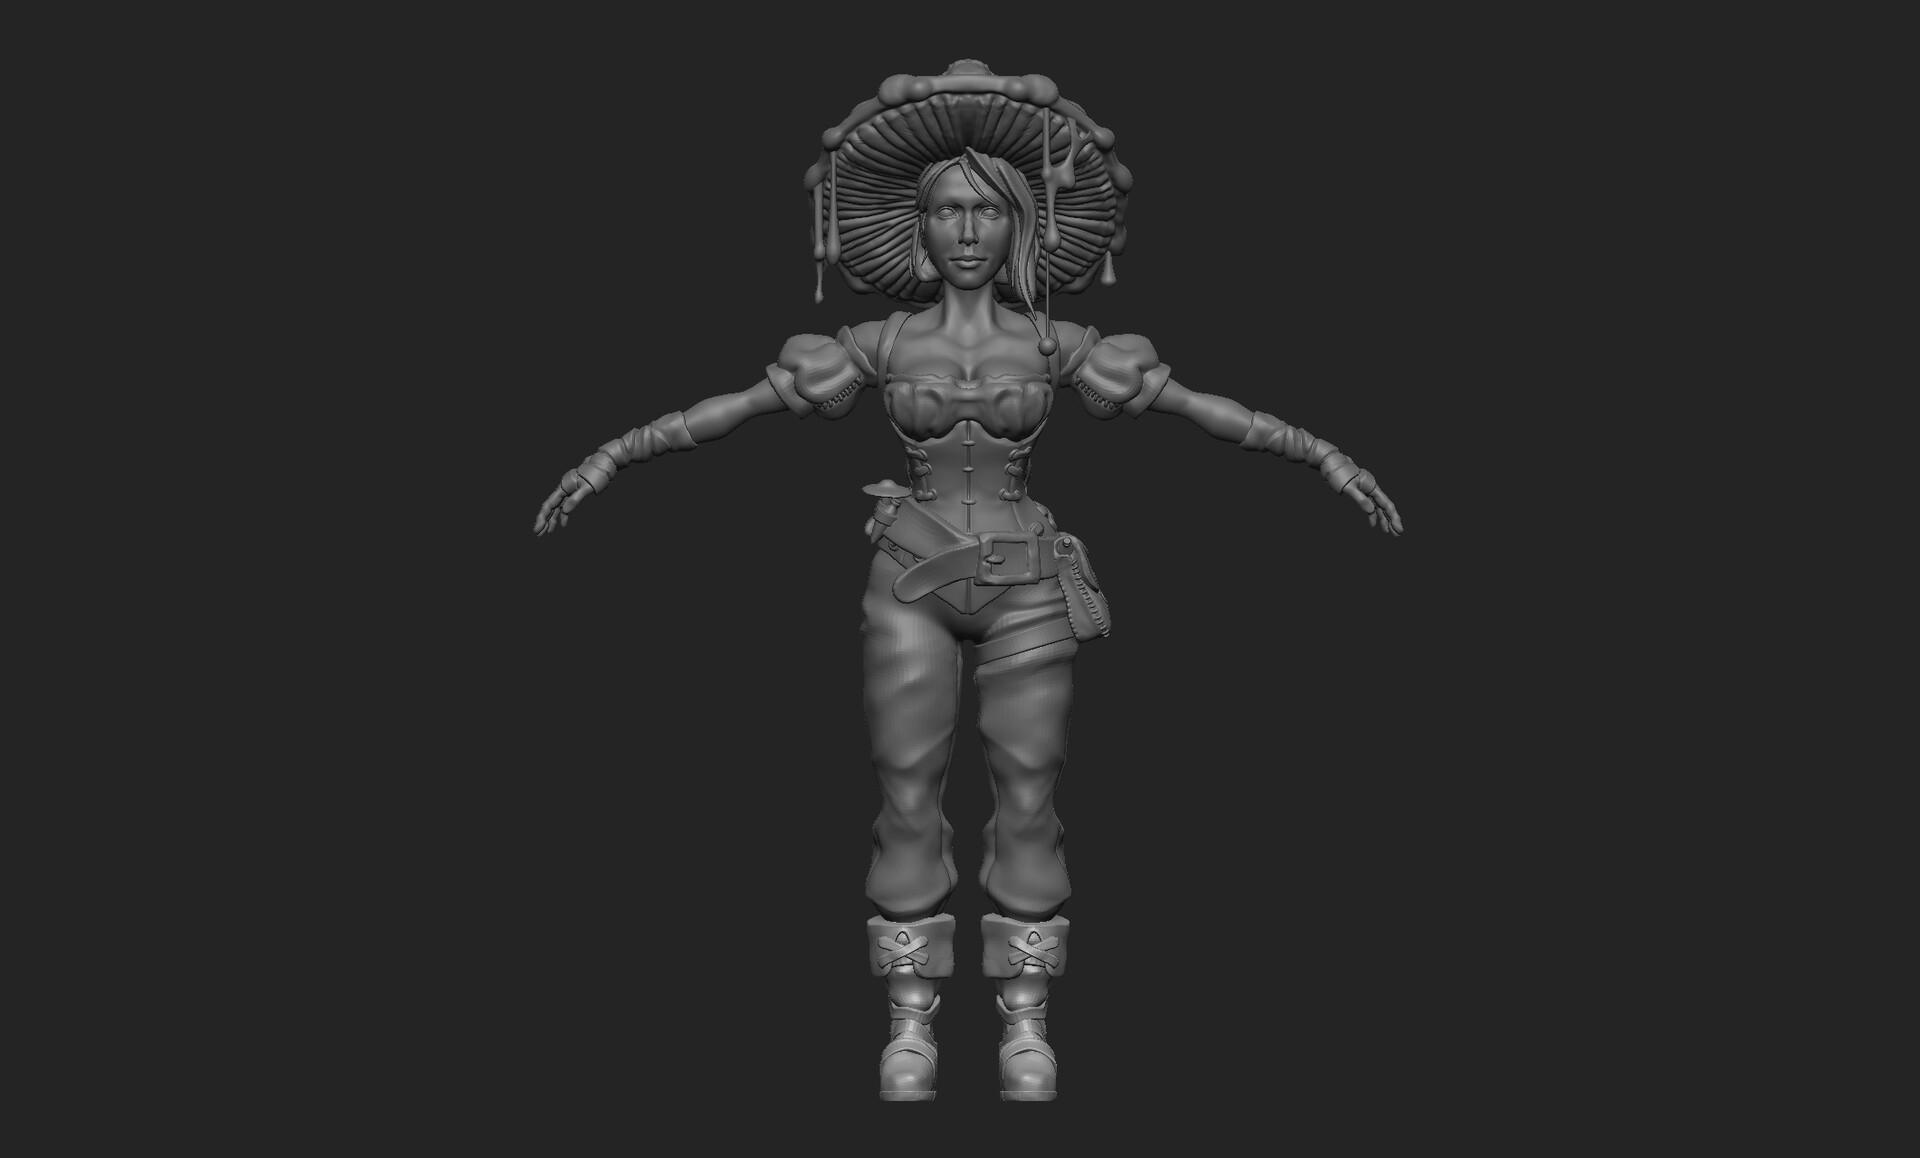
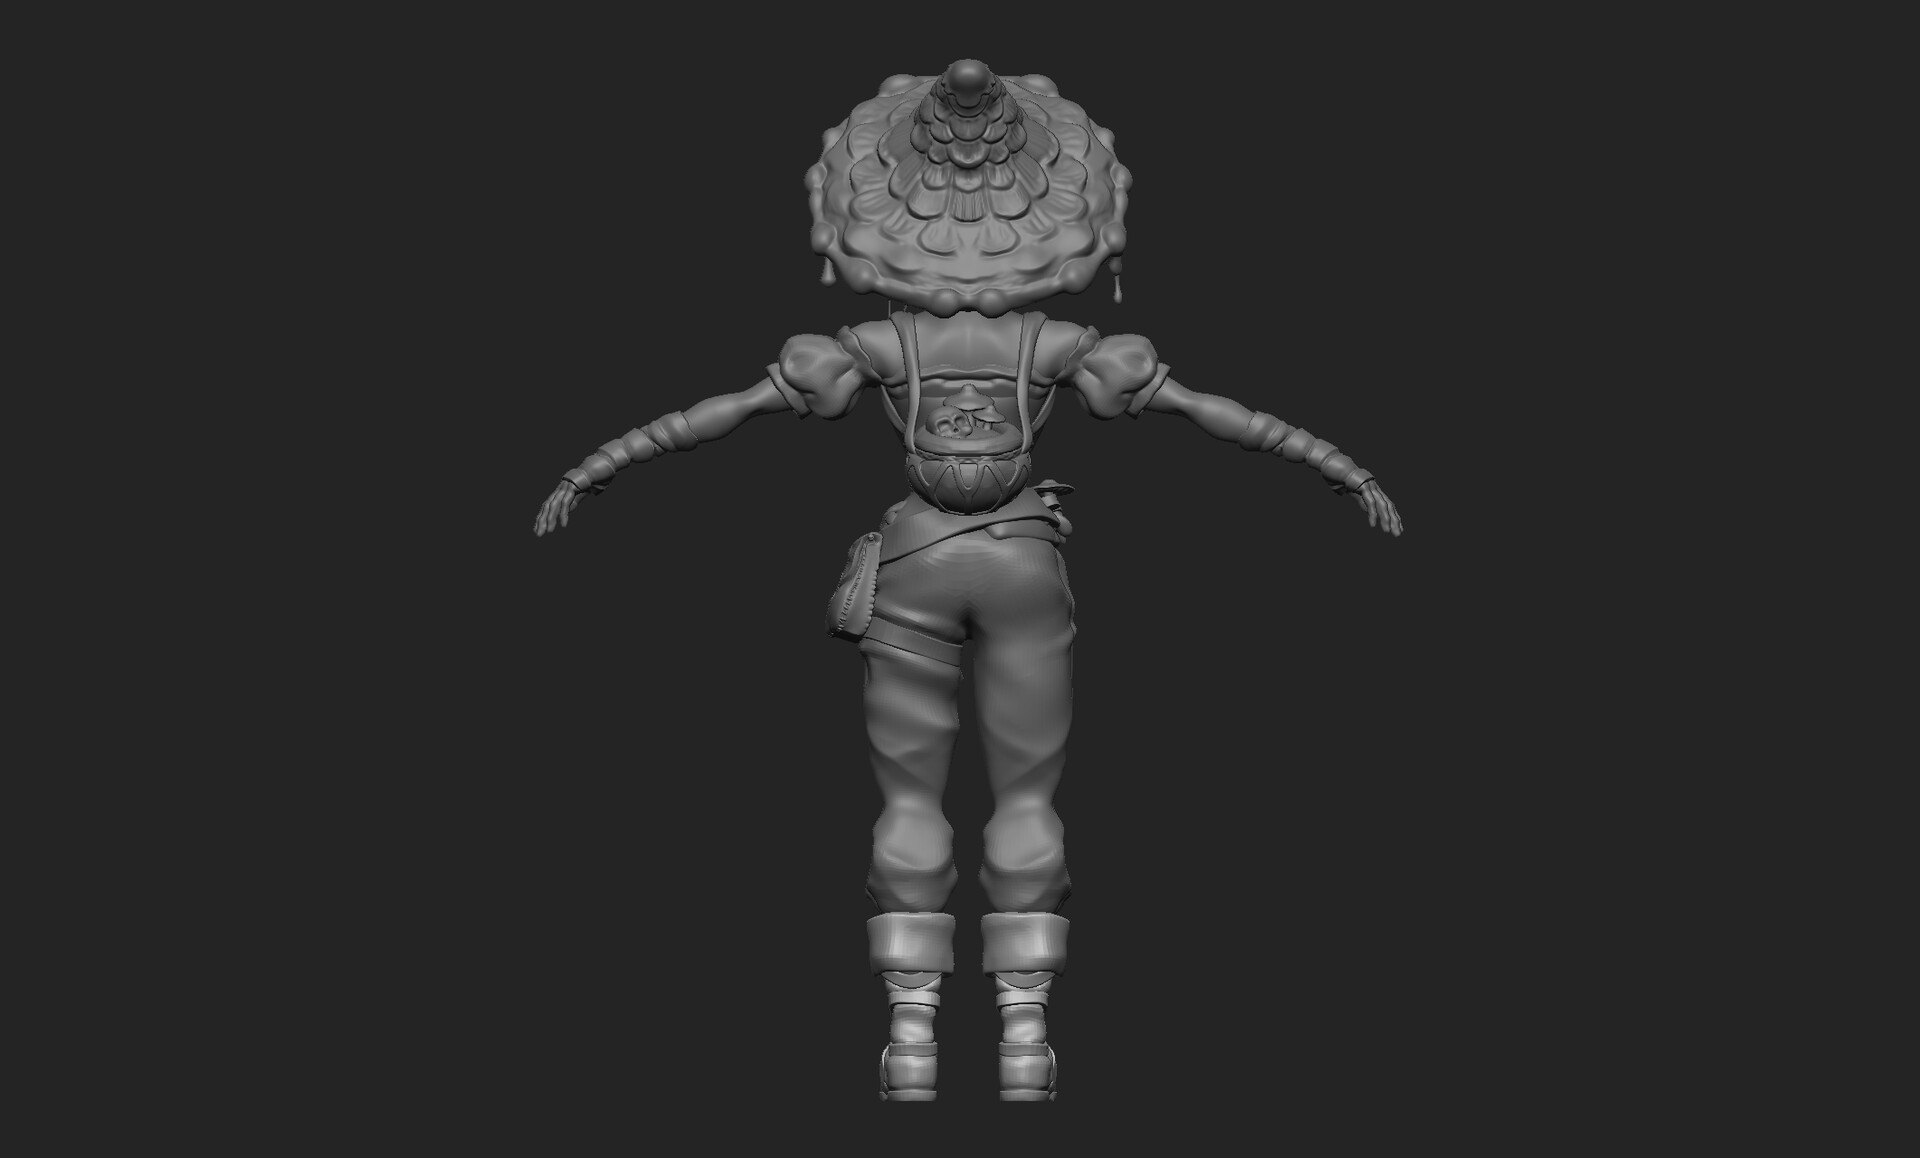
I realise her sculpt isn't as highpoly as it could be, this is due to my PC pretty much running on fumes at this point. I'll hopefully, and unfortunately, be coming into inheritance soon and will be able to produce better highpoly characters in the future!!!
For the environment, as I'm not 100% skilled in this area I wanted to keep it small. I don't know much in the form of blueprinting so I thought it would be best to stick to what I know and create a diorama level where she can be posed doing something in the middle.

I really loved the first idea as it involved the demon door aspect from the fable series. There were 2 demon doors in Fable 2 I absolutely loved! The main one in Oakfield which contained a home you could buy, the second in Bloodstone - mainly for the winter aspect, before the DLC came out for the game it was one of the only places that had a winter theme.
Moving on, I have started working on a block out and have just been building on from there, I'll hopefully be updating this as I go along.

I sculpted the demon door head and tried to replicate the demon doors background but currently this is what the block-out looks like. Very basic and definitely needs more refining but I feel it an okay start
The fable game series inspired me to pursue this direction of career path, it was the reason I went to university and the reason why I'm wanting to better my skills at a better uni for a MSc! For this project I wanted to make a tribute for the series. I wanted to create a character and environment that had its similarities.
I wanted to create a witch. I thought a witch would really suit the aesthetic and that I could add my own touch to it.
These are some of the original concepts I set up toward her production. I wanted her to suit a whimsical nature loving theme. I researched different looking mushrooms as I wanted her hat to resemble one! The inkcap mushroom suited best as I thought it would suit the narrative of is she friendly? is she foe?
The next part was to start on production and this is her final sculpt, in Zbrush;
I realise her sculpt isn't as highpoly as it could be, this is due to my PC pretty much running on fumes at this point. I'll hopefully, and unfortunately, be coming into inheritance soon and will be able to produce better highpoly characters in the future!!!
For the environment, as I'm not 100% skilled in this area I wanted to keep it small. I don't know much in the form of blueprinting so I thought it would be best to stick to what I know and create a diorama level where she can be posed doing something in the middle.
I really loved the first idea as it involved the demon door aspect from the fable series. There were 2 demon doors in Fable 2 I absolutely loved! The main one in Oakfield which contained a home you could buy, the second in Bloodstone - mainly for the winter aspect, before the DLC came out for the game it was one of the only places that had a winter theme.
Moving on, I have started working on a block out and have just been building on from there, I'll hopefully be updating this as I go along.
I sculpted the demon door head and tried to replicate the demon doors background but currently this is what the block-out looks like. Very basic and definitely needs more refining but I feel it an okay start
Replies
It might be beneficial to block out the full character/costume in the concept phase if your machine is bogging you down while working in zbrush.
On the subject of costume, her clothes feel more indicative of a town commoner or tavern barkeep than of a witch with some sort of reputation. There's lots of Fable art online too if you ever need some reference...including some really lovely Fable Legends concepts and models (for a somewhat modern-ish take).
The narrative for this character isn't to be the Main playable one. I wanted her to be a NPC that helps a playable character on their journeys, possibly a healer type what with the cauldron, similar to Garth/Hammer/Reaver. Regarding sizes, I wanted her to follow standard proportions for a female which is around the 7-8 head estimate depending on how tall I wanted her. She's at around 7.3 heads.
Definitely agree her arms could be a little more chunkier, when I have the chance, I'll aim to change her up a little, adding flesh on her arms, possibly remove her cauldron and set it as a prop instead.
I'm really happy you pointed out the clothing as that was the main intention, I didn't want her to fully stand out of the crowed regarding her attire. That being said my intention of her colour scheme would be what defines her from normal NPC to a character that you'd want to approach, if that makes sense? I still want her to suit that mushroom theme, so I'm aiming for her corset to be red with cream lacing, and her hat to follow the inkcap colours! I am worried with colour schemes as I've always struggled with this as a skill! It's never made sense, however, I have found some explanations that set an algorithm to it all that's currently making sense to me so I aim to implement it!!
Regarding the Zbrush issues, I've continued to plod on and retopped her to a lower poly count in Maya, I believe Zbrush had her in the 200/300k poly count but she's now within 12k. I've tried looking for a direct answer to what counts as a mid poly model, from my current knowledge I've known mid to be around the 10/20k margin, anything above counts as High Poly AAA count, how accurate that information is I'm not sure, as reading separate forum threads have a range of different numbers.. Someone suggested 100k to be low poly, and that baffles me!
It is one of the first times I've retopped a full character in a very long time, and I'm very happy with the results. There are some areas I could have definitely done differently like the hands. I retopped the hands first then retopped the arm wraps separately because I thought it wouldn't mess up the topology, and doing this has lead to a lot of issues regarding skinning. In future if I ever work with gloves/arm wraps I 100% intend to keep the models together and not separate.
Texturing;
Originally, I was having issues with her bake. Using Substance Painter, I noticed that areas that attached to other areas had this weird looking connection which created odd shadows and all in all didn't look amazing. A friend suggested I do something called an 'explosion bake' and the results were spot on!
I've started to follow tutorials on colour blocks for the face to make sure I get the human look right. I started with a pinkish/red base, in other areas applying a yellow base and in other areas a blue base;
For her clothing I used the Disney Colour wheel to help determine the meaning behind the characters colour scheme, to make sure I wasn't unknowingly making her look 'evil'. I want her to seem like an approachable character!
And this is the final finish of her texturing, placed into UE;
The environment is slowly coming together, I've started on creating the separate assets to suit the area, as well as adding brickwork to the demon door to frame it a little better
For the landscape textures, I've found some really nice tutorials from 3Dex on Youtube/Gumroad which I've started to also work on in designer to suit the environment a little better in making adjustments compared to the tutorial suggestions.
The waterfall I've had to slowly give up on. I was starting to run out of time for this project and as I'm not 100% in understanding UE I felt a waterfall maybe a little too big of a task to create. I looked up at some references of demon doors in their 'habitat' through the first and second games and came across this nice screenshot;
It's a little bigger then what I intended my own diorama to be like bit it fits the aesthetic and altogether works with what I'm trying to recreate. Plus less need for Niagra particles.
So this is what the environment started to develop into.
More updates to come!
For the environment, her pose isn't brilliant with regards to silhouette posing, this will be changed in the rendered images of just her. But for the environment I feel it suits the narrative;
I overlayed a diagram of 8 heads tall figure as a point of reference. (Scaled so that the head and facial features match your model)