Best Of


Re: What Are You Working On? (3D) 2026
Looks really nice. Only crit I have is the leather gun holster seems a bit shiny, compared to the boots and the belt. Not reading so much as leather. Maybe give it more variation in the roughness texture?loshmiii said:This is character outfit that I have created as part of freelance contract. After project was completed, I did some rework to improve it and this is the result so far. I'm still trying to improve it here and there so any feedback would be great.
 Eric Chadwick
3 ·
Re: Sketchbook: Tits
More updates,
Currently taking some online drawing class from Watts atelier of the arts,
I've never actually properly learned drawing so figured it was the right time to try. I'm working on drawing fundementals II right now.

I've also went a couple time to do live drawing/painting in montreal, I went to the 3h long pose so I have time to attempt painting in gouache,
heres a couple of attempts.
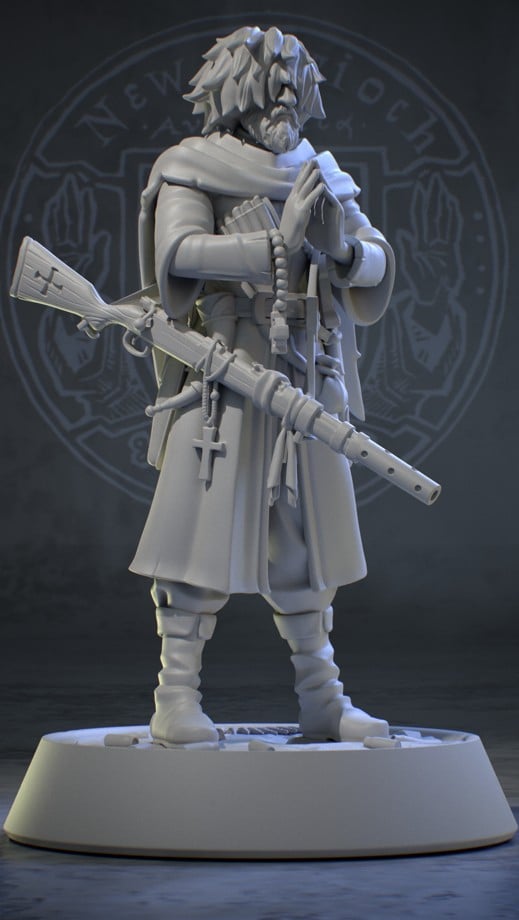
Otherwise for the first time in a decade long hiatus from 3d personnal work, my partner asked me if I could sculpt a little bust for him since he loves painting miniature. So I sculpted this little guy for him and we 3d printed it yesterday.


Currently taking some online drawing class from Watts atelier of the arts,
I've never actually properly learned drawing so figured it was the right time to try. I'm working on drawing fundementals II right now.
I've also went a couple time to do live drawing/painting in montreal, I went to the 3h long pose so I have time to attempt painting in gouache,
heres a couple of attempts.
Otherwise for the first time in a decade long hiatus from 3d personnal work, my partner asked me if I could sculpt a little bust for him since he loves painting miniature. So I sculpted this little guy for him and we 3d printed it yesterday.
 Tits
Tits
3 ·
Re: [ W I P ] _ Datsun fairlady (subD)
Initial plan was modeling just car with body but something bring me to make more. Now, plan modeling full car xD
many as i can
More modeling shapes of car. Blocking interior, engine system, base with transmision system:
many as i can
More modeling shapes of car. Blocking interior, engine system, base with transmision system:
 Djyver
4 ·
Re: Create a Luxury Napa Deli Interior | $500 Cash + Sponsor Prizes
Im sorry but this contest seems a lot like trying to get underpaid real estate archviz work from artists disguised as a contest.
The judges include "A Digital Platform for Real Estate business that develops Software, Hardware, Digital Architecture, Marketing and Communications." ( on the website of TECMA solutions ) as well as most of them beeing real-estate studios\content platforms.
I might be wrong, and i hope i am, but would be shitty to see the winner have his work actually come to life based on the contest and beeing paid 500 bucks for it.
 Joao Sapiro
5 ·
Re: [WIP] Churchill MK VII Tank
Hi again. ") A small update. I've added a baked lowpoly for the tracks cover and two types of jerrycans in the back, but now I feel that I've hidden all the beauty beneath it. Maybe I'll try to make two variants of the model in the end, one with the tracks covered and one without the cover, hope the UV resolution will be enough to do this. And I badly need to add some metal imperfections on the normal map, because as for now, the cover looks boring.
A small update. I've added a baked lowpoly for the tracks cover and two types of jerrycans in the back, but now I feel that I've hidden all the beauty beneath it. Maybe I'll try to make two variants of the model in the end, one with the tracks covered and one without the cover, hope the UV resolution will be enough to do this. And I badly need to add some metal imperfections on the normal map, because as for now, the cover looks boring.
I've also found a couple more useful walkaround videos, they indeed are helpful. I wish I had found them sooner, just should've searched for Churchill model in general, not specifically for Churchill VII.
Inside The Tanks: The Churchill - World of Tanks
I've also found a couple more useful walkaround videos, they indeed are helpful. I wish I had found them sooner, just should've searched for Churchill model in general, not specifically for Churchill VII.
Inside The Tanks: The Churchill - World of Tanks
Evolution of The Churchill Tank | "No Damn Good"?
Churchill TANK Restoration
Anyway, just wanted to post an update on the current progress. I hope by next time I'll do some optimization and improve the highpoly with imperfections and etc.
Churchill TANK Restoration
Anyway, just wanted to post an update on the current progress. I hope by next time I'll do some optimization and improve the highpoly with imperfections and etc.


 tystnad
3 ·
Re: How The F*#% Do I Model This? - Reply for help with specific shapes - (Post attempt before asking)
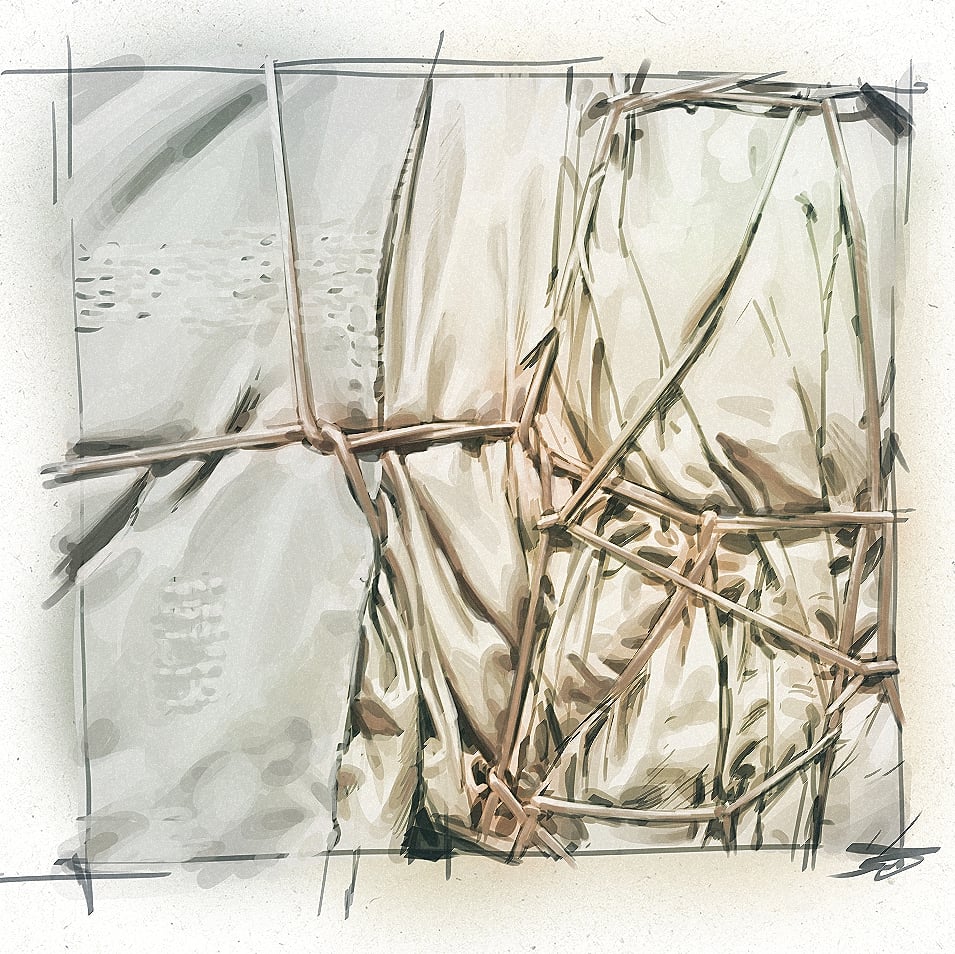
HAWK12HT said:Oh well here we go again, I must be missing some crucial step making this Trionda ball. [...]
Here's one possible solution to modeling this ball, I'm using 3ds Max. I start with a sphere primitive and trace the pattern in orthographic mode with splines:
You can then either conform those to the sphere or use any other modeling method to get the curvature. After fiddling with the shapes a little bit, you can quickly see that you actually need only one half of the curve to get the whole pattern going. Here is the essential spline: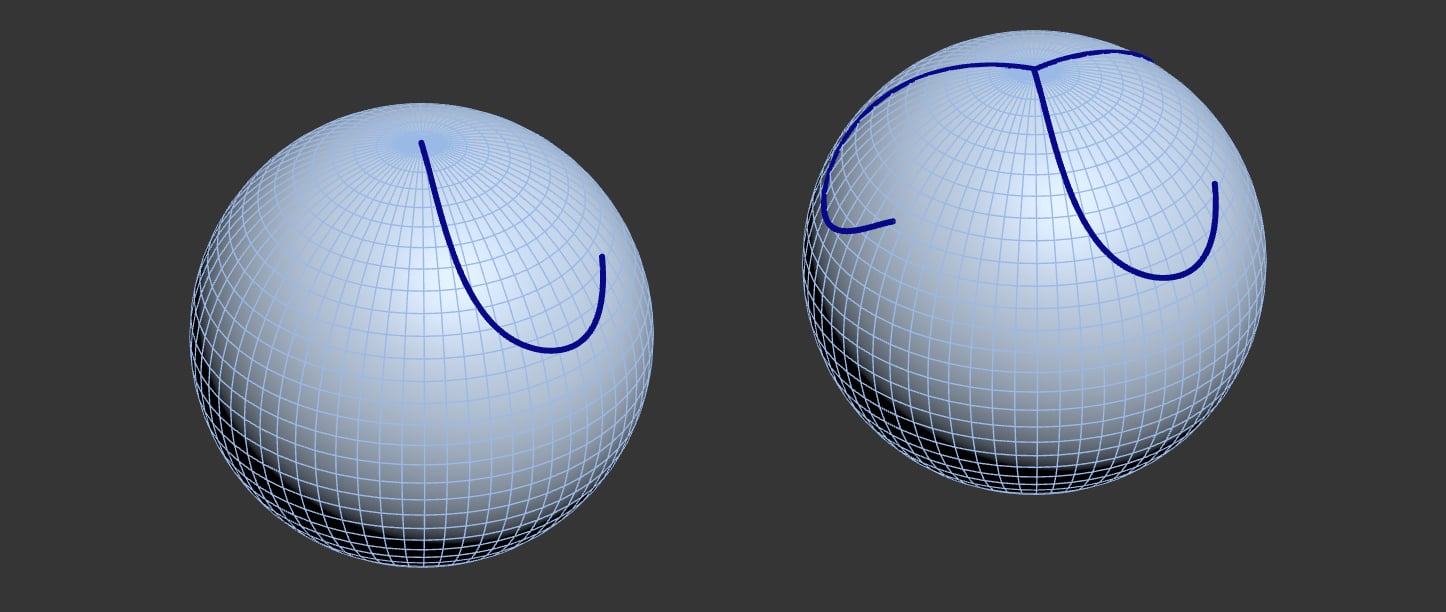

Using mirroring and the angle you already mentioned above, you can revolve this pattern around the sphere, creating 3 additional instances of it (don't forget to mirror to get the S shape). Now I'm using the splines to cut one section out of the sphere, not worrying about topology or anything, just need the shape:
Depending on the quality you're after, this is basically it - you can autoretopo/zremesh this to get better topology and copy this around 3 more times to get the ball. If you want good seamless subd-topo, it get's a bit fiddly. It's very hard to make a seamless alignment for so many points, so you can simplify the task by taking advantage of radial symmetry and instancing. Cut the shape at the center in 3 instanced pieces and construct the whole sphere out of those instances. Now you can only work on one and start your retopo while having a live preview of where the vertices align.

Here is my end result which can be improved (topo should be a bit more even for better shading), but I think for the sake of process demo it serves its purpose:
Hope this helps.
 kosh3d
10 ·
Re: What Are You Working On? (3D) 2026
 sacboi
3 ·