Home 3D Art Showcase & Critiques

Apocalypse Seer Concept

1
Hi all-

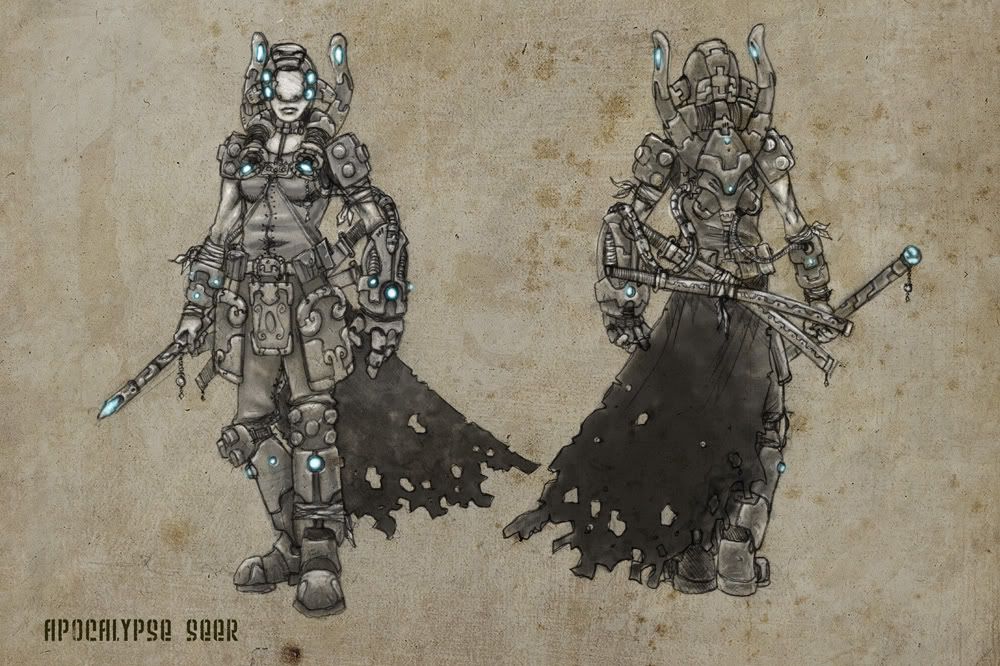
I am starting my next piece of work now, which is a lowish tech sci fi female character. The concept is that good ol' chestnut, a world that suffered some sort of cataclysm that fractured society and technologiy creating a more disparate and feudal world. Inspirations are Dune, Mad Max and WH40K. This character is a seer, one who can harness energies to predict the future and weave fate. Seers are mystics but also good combatants, as their foresight allows then to see the course of a battle and gives them the ability to react and strike with supernatural skill. Yadda yadda yadda... :)

The point of the project from a personal challenge perspective is to create a female character, and mix up some detailed hard surface work with more organic forms.

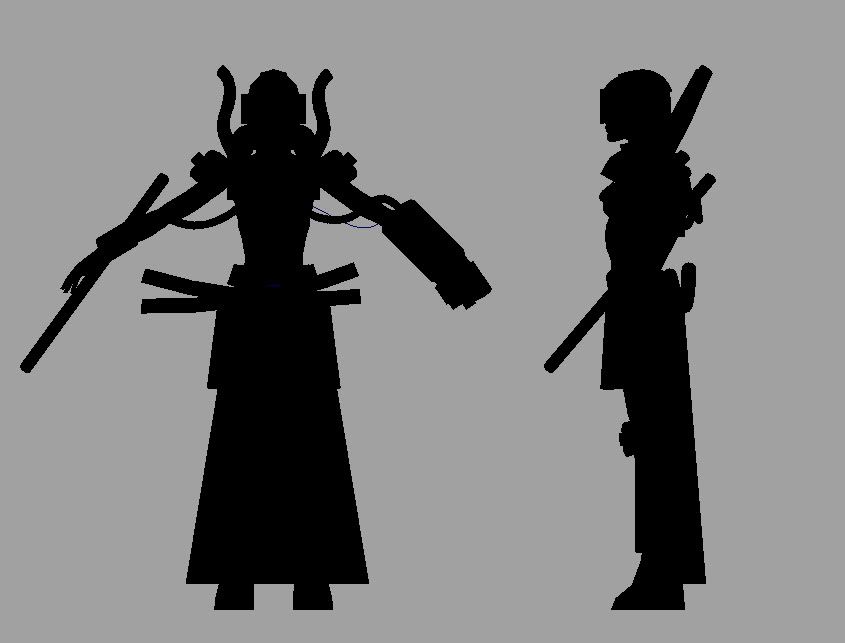
Here are the initial concept sketches, plus a sillhouette rough I knocked up in Maya to get a rough feel for proportions. In the iterests of honesty and fair play, I would like to point out that some of the shape ideas for the leg and neck armour pieces came from a small sketch in ImagineFX- I don't have it to hand for the artist name, but I acknowledge a big up to whoever it was :)

The concept:

seer_concept.jpg

And the sill:

seer_block_sill.jpg

I would welcome any constructive obs before getting too far into this- it's going to be a fairly detailed sculpt so I want to balance larger forms and mid-range detail with the finer work.

Thanks for your time!

~P~

PS The sillhouette helmet is different from the sketch whilst I figure out which I prefer!

Replies

  • samgriffiths
    Options
    Offline / Send Message
    Great concept, what kind of colourscheme are you thinking about?
  • praxedes
    Options
    Offline / Send Message
    thanks. She'll have her clothing and cape in worn leathers, and the armour will look like it was once burnished metal with bone coloured ceramic overaly, but this has been worn down by time and the elements. Her skin will be very pale, in contrast to the sand-burned tones you would expect, which is a measure of her condition (the seer power creates a wan, bluish skin). The main scheme will therefore reflect oranges and reds, but with some striking blue and cream contrasting colour...at least in theory! I plan to do some overpaints when the model is progressed so all of the above may change :P

    ~P~
  • praxedes
    Options
    Offline / Send Message
    Update- started the armour around the neck- dropped into ZB just because Maya crashes if I smooth everything :) No major detailing yet, just the main bits for this area in Maya- lots of surface detailing, rivets and wiring will go on top... female is still a ref mesh! I don't like the neck strapping and will be re-doing that area!

    armour1.jpg

    Cheers,

    ~P~
  • Zotter
    Options
    Offline / Send Message
    I'm really liking the detail on the tubing. Though one question, are the tubes supposed to be coming out of her nipples, or is it pure coincidence?
  • ArcticNova83
    Options
    Offline / Send Message
    Her suit is powered by breast milk.
  • praxedes
    Options
    Offline / Send Message
    LOL- you have discovered the scret of the lactonic armour! No, it's coincidence, and shouldn't be so obvious with the other detailing added, as she's wearing sensible clothes!

    Cheers

    ~P~
  • praxedes
    Options
    Offline / Send Message
    More updates...

    redesigned the neck brace, much happier wit this version which echoes the front clasp and also the planned leg designs.

    Also got a good way into the backpack section. Note the crazy exploding centre of the fans, caused by some star shaped polys which I need to fix. The arm surrounds are standins and it all gets tied together by the nounting points for the "horns".

    Cheers!

    ~P~

    armour1-1.jpg

    armour2.jpg

    armour3.jpg
  • stoofoo
    Options
    Offline / Send Message
    stoofoo polycounter lvl 18
  • Sage
    Options
    Offline / Send Message
    Sage polycounter lvl 19
  • MoP
    Options
    Offline / Send Message
    MoP polycounter lvl 18
    Cool stuff, keep it up!
  • Ferg
    Options
    Offline / Send Message
    Ferg polycounter lvl 17
    smooth moves man, diggin the progress
  • praxedes
    Options
    Offline / Send Message
    Not much time today; doing household stuff with my wife :) between painting the shed and painting the bathroom, however, I have a small update- added the "horns" on the back pack and some detail/linking from the backpack to the arm rings. Still no ZB as of yet, holding back on that until the whole main model is complete :)

    grab4.jpg

    grab5.jpg

    grab6.jpg

    grab7.jpg


    Those clusters under the fan intakes on the backpack are connection points for the robotics on her arms, btw!

    Note- this ref female mesh is NOT the basis for the actual head model, I'll be building that separately- this one looks way too happy :)

    ~P~
  • praxedes
    Options
    Offline / Send Message
    oh- I'm pondering which part to work on next...something relaxing and easy like her shoulder pads, or get into the funkiness of her helmet and faceplate? :)

    ~P~
  • praxedes
    Options
    Offline / Send Message
    Final update today- went the easy route and built a shoulder pad :)

    grab8.jpg

    grab9.jpg

    tomorrow I plan to really crack the helmet and faceguard!

    ~P~
  • praxedes
    Options
    Offline / Send Message
    More progress, should anyone be following :)

    Got a lot done on the face this morning, hoping to have the helmet finished today :)

    grab10.jpg

    grab11.jpg

    grab12.jpg

    As I get more comfortable with the workflow I'm adding in more stuff, so I'll be doing a sweep over the early peices to bring them up to speed with wiring and so forth. Once the helmet is done, I'll be building the arm and bracelet peices.

    Cheers all,

    ~P~
  • praxedes
    Options
    Offline / Send Message
    Final update for today-

    helmet pretty much finished, although I am debating whether to add decoration to the sides. I feel not, as I want the front to be the "sniped" detail and draw the eye.

    Moved away from the concept for the back of the helmet, to use the pipe moif rather than more overlapped panelling. It gives a nice sill, so I'm happy :) Poly count is getting scary now, mainly because I keep converting sub-D surfaces to polys so I can get nice sharpened details in without extra loops messing up the smooth curves. Up to about 1.1 mill, and Maya is groaning in the viewpoint somewhat, so I think I may start splitting the model out into separate files!

    Peace out,

    ~P~

    grab13.jpg

    grab14.jpg

    grab15.jpg
  • HolyMonkey
    Options
    Offline / Send Message
    The whole armor design sorta reminds me of a cow.... with the horns and the milk powered suit thingy, anyway looks really good! :) Goodluck with the rest!

    only thing I can contribute with is perhaps maybe adding more detail on the jet-pack area, according to the concept its suppose to look plain, but it might look better with a bit more detail perhaps? ;D
  • 00Zero
    Options
    Offline / Send Message
    i think it works by sucking the milk and then spinning it at near light speed in the mini particle accelerator around her boobs and then once enough energy has been gathered, it shoots it through the big tube over her shoulder and into her jetpack.

    cool stuff
  • P442
    Options
    Offline / Send Message
    P442 polycounter lvl 8
    reminds me a bit of Hajime Sorayama. Very nice
  • praxedes
    Options
    Offline / Send Message
    mooooo! :D

    I may take the small pipes away from the chestpiece as it is clearly a distraction :P

    I just googled Hajime Sorayama (I'm such a dunce) and found it to be most excellent, thanks for the heads up! Ironically the design is meant to AVOID being typically "sexy-fetish" armour which I find unrealistic. I suppose not having any clothes yet may be contributing to this, but I will mainly sculpt them up in ZB and figured the hard stuff would weigh the cloth down and press in, so I wanted this done first!


    Thanks for th input!

    ~P~
  • praxedes
    Options
    Offline / Send Message
    The progress grinds ever on...not had much time the last few days to do much, but blitzed some today. Fixed the "nipple pipes" for something less-obvious- and built pretty much all of her big robo-glove. It is just lacking the connector that hooks the cables up the the main body- I'll do the cables first so I can get the placement down nicely. Re-rendered the images in ZB using the Grouce mat that snefer recommended, cos it looks fab (ZB donloads, it's a metal mat if anyone is after it).

    Here we go...


    grab19.jpg

    grab20.jpg

    grab21.jpg

    grab16.jpg

    grab17.jpg

    grab18.jpg

    Cheers all

    ~P~
  • wasker
    Options
    Offline / Send Message
    wasker polycounter lvl 7
    Looks cool! Are all these hard surface parts modeled in maya (or equivalent) and then brought into Zbrush?
  • praxedes
    Options
    Offline / Send Message
    Hi- yup all in Maya so far. I put it into ZB for posting because for some reason I cannot, absolutely cannot render ANYTHING from Maya using Maya or mr...just crashes every time. So ZB is currently my only rendering solution lol!

    But so far, no actual ZB work has been done :) Saving that till all the hard maya work is over- but with the glove done I think the most complex parts of the design are now in the bag. Looking forward to goofing them up in ZB :) Gonna add some detailing to the backpack I think, as per HolyMonkey's suggeston :P

    Cheers, ~P~
  • praxedes
    Options
    Offline / Send Message
    argh curses! My wife has just pointed out that the thumb cannot be opposable in it's current set-up, so off I go to redesign that joint :)

    ~P~
  • Stertman
    Options
    Offline / Send Message
    cool.. like this model alot.. arms looks good=)
  • whats_true
    Options
    Offline / Send Message
    whats_true polycounter lvl 15
    Hi- yup all in Maya so far. I put it into ZB for posting because for some reason I cannot, absolutely cannot render ANYTHING from Maya using Maya or mr...just crashes every time. So ZB is currently my only rendering solution lol!

    I was sure wondering how you were getting such great lines in ZBrush lol

    Its looking fantastic. That arm is sick!
  • praxedes
    Options
    Offline / Send Message
    Am moar updaytz :)

    Did some work on the head which I am happy with, and some on the shirt which I am less happy with- still needs some working over to get the weight of the cloth right with the folds and the tension of the traps, which isn't there yet, and theres some horrible, horrible mess where I moved the belt. I may have to drop to a much lower division to fix it- we shall se if the detail holds... enjoy!

    ~P~

    grab26.jpg

    grab27.jpg

    grab28.jpg

    grab29.jpg

    grab30.jpg
    ~P~
  • beartraps
    Options
    Offline / Send Message
    beartraps polycounter lvl 8
    Awesome stuff!

    Would u mind explaining what u do for tubes in maya?
  • praxedes
    Options
    Offline / Send Message
    Hi- thanks!

    For tubes I use two methods, depending on what I want. For a plain, smooth surfaced tube, I create an EP curve and move the control points around until the curve follows the path i want the tube to take. Then I create a poly cylinder and move it to the start of the curve, rotate it to match the orientation of the curve and select the end faces and the curve. Then I do an extrude, going into the extrude options and choosing "extude along selected curve" and setitng the extrude divisions to about 30. This produces a nice tube which subdivides really well. Also,, with this method you can create several cylinders, combine the meshes and choose all the faces to extrude, and you'll get a group of tubes running nicely along each other. Just make usre the pivot is centred befor doing the extrude.

    A ribbed pipe is slightly different because you can't get the ribbing through an extrude. So I create curve again, and a poly cylinder and set it up with one "rib", add in some edgeloops to define the rib when smoothed, and I'm ready to go. Choose the curve and the cylinder and go into animation- motion paths- attach to motion path and the cylinder connects to the curve. Then it's animation- create animation snapshot. Play with the frame settings and Maya generates multiple copies of the cylinder along the path, spacing dependent on the frame settings. The advantage of this method is that the new group of objects is selectable in the outliner as a group, and if you alter the curve path you can select the group and do an update animated snapshot and the group realigns to the adjusted curve- cool! This technique is also how I do all the cable holder objects. The only thing is that non circulr objects tend to rotate oddly on the curve so it's not so useful unless you don't mind manually rotating them- okay for clips but rubbish for tubing! Both methods I learned from watching slipgatecentral's excellent video on the making of his DW IV winning entry Nox.

    Apologies for the length of this reply- I assumed you'd want to the method in detail but if not, sorry to drone on!

    Cheers,

    ~P~
  • HolyMonkey
    Options
    Offline / Send Message
    Naw man! It's great that you share your workflow with us ! :) awsome tips, keep going it's looking really good!
  • praxedes
    Options
    Offline / Send Message
    More updates- doesn't seem like I've done much, but I did several resculpts on the clothing before I got something I was happier with. I've also added in detailing the the robo-glove fingers- I could have done this in the texture but this is at least 50% an exercise in getting my Maya skills better, so I did it in the mesh :) Added in the waist armour plates today- need a detail pass and linking to the belt but I'm pleased with them. I've got a boot half done but I need a break from looking at it, so I'll go take a walk and maybe update it later :) Also got the flesh hand sculpt done, so there's a closeup !

    Cheers!

    ~P~

    grab31.jpg

    grab32.jpg

    grab35.jpg

    grab34.jpg
  • Frog
    Options
    Offline / Send Message
    absolutely beautiful

    love the details on both hands

    something funky goin on with her thumb though.
  • praxedes
    Options
    Offline / Send Message
    which one?

    And thanks!

    ~P~
  • HolyMonkey
  • dolemite
    Options
    Offline / Send Message
    this is awesome. The way its hooked up makes me think it's titty-powered jets or something.
  • praxedes
    Options
    Offline / Send Message
    cool thanks HM- I think actually it might just be I modeled it kind of hyper extended cos previously I have had bake issues with fingers to close together- I'll take a look at the proportions and see how it looks posed- maybe it'll need redoing!

    Today I completed her boots, trousers and kneepads, and got a goodly way into her katana. I'll post updates of all of the above when I have them on the ZB model. Currently awaiting the ZB 3.5 update cos it handles high poly counts better and I'm bumping at the ceiling of what my rig can handle right now!

    PS Shame on you dolemite!

    ~P~
  • praxedes
    Options
    Offline / Send Message
    oop lag related double post sorry

    ~P~
  • praxedes
    Options
    Offline / Send Message
    This is probably my last WIP update on the hi poly model- the next one should be the finished hi poly. I've added in boots and trews :) I have also done her katana save for a detail pass, and am currently building her staff, various connecting belts and buckles, and her cloak-cape-thing. I think I am going to do the fabric pretty much entirely in ZB, going to trey using mesh extract to get some excitingly tatty edges which will be alphas in the low res!

    Cheers,

    ~P~

    grab37.jpg
  • Zotter
    Options
    Offline / Send Message
    Oooh, haven't checked this one in a while. Looking real nice I'm really digging the combination of the mechanical look on most of her armor mixed with the ornate designs on her thigh pads.
  • praxedes
    Options
    Offline / Send Message
    thanks man- I'm looking forward to adding the cloak thing which will really balance out the design :)
  • praxedes
    Options
    Offline / Send Message
    arg arg arg should NOT be using ZB 3.5 without good reason- decimation master doesn't work in 3.5 and tools made in 3.5 won't open in 3.1 so I just hit a poly cieling and will have to redo a crapload of wok in 3.1 grrrrrr
  • praxedes
    Options
    Offline / Send Message
    Hi poly model is teh compleetidnezzz :)

    Sword and staff were pretty simple to do, but that cloak was...arrgghhh...I just could not get a shape I liked for the main form, never mind detail. I ended up using a cloak pattern my wife had, making that rough shape in Maya and usingnCloth to connect it around the waist, then ran the ncloth sim and grabbed the frame that looked best, but even this needed a lot of tweaking afterward! Oh well, it came out okay and blances out the form nicely.

    Low poly now...OMG!

    Peace

    ~P~
    grab38.jpg

    grab39.jpg

    grab40.jpg
  • praxedes
    Options
    Offline / Send Message
    original concept, reposted for direct comparison:

    seer_concept.jpg

    went down to one sword because- well, how would she weild two with that glove on?
  • Wahlgren
    Options
    Offline / Send Message
    Wahlgren polycounter lvl 17
    One sword is for slicing and one is for dicing?
    To bad. I thought the two katanas made it look more interesting. I understand your point though and it makes sense. :)
  • praxedes
    Options
    Offline / Send Message
    Well- clone subtool is there for a reason my friend :) Although I briefly considered making oneof them whatever that short blade carried with a katana is called, in the end I placed the staff holder so that the overall sillhouette maintained the look of the art.

    TBH it'll come down to poly count on the low, as an extra katana would be a copied mesh sharing UVs with this one anyway so she can have 50 swords if I have the budget, but she's going to be "DW safe" and around 10K I hope.

    cheers!

    NB Forum spellcheck doesn't know katana- offered "Satan" instead :)

    ~P~
  • beartraps
    Options
    Offline / Send Message
    beartraps polycounter lvl 8
    praxedes wrote: »
    Hi- thanks!

    For tubes I use two methods, depending on what I want. For a plain, smooth surfaced tube, I create an EP curve and move the control points around until the curve follows the path i want the tube to take. Then I create a poly cylinder and move it to the start of the curve, rotate it to match the orientation of the curve and select the end faces and the curve. Then I do an extrude, going into the extrude options and choosing "extude along selected curve" and setitng the extrude divisions to about 30. This produces a nice tube which subdivides really well. Also,, with this method you can create several cylinders, combine the meshes and choose all the faces to extrude, and you'll get a group of tubes running nicely along each other. Just make usre the pivot is centred befor doing the extrude.

    A ribbed pipe is slightly different because you can't get the ribbing through an extrude. So I create curve again, and a poly cylinder and set it up with one "rib", add in some edgeloops to define the rib when smoothed, and I'm ready to go. Choose the curve and the cylinder and go into animation- motion paths- attach to motion path and the cylinder connects to the curve. Then it's animation- create animation snapshot. Play with the frame settings and Maya generates multiple copies of the cylinder along the path, spacing dependent on the frame settings. The advantage of this method is that the new group of objects is selectable in the outliner as a group, and if you alter the curve path you can select the group and do an update animated snapshot and the group realigns to the adjusted curve- cool! This technique is also how I do all the cable holder objects. The only thing is that non circulr objects tend to rotate oddly on the curve so it's not so useful unless you don't mind manually rotating them- okay for clips but rubbish for tubing! Both methods I learned from watching slipgatecentral's excellent video on the making of his DW IV winning entry Nox.

    Apologies for the length of this reply- I assumed you'd want to the method in detail but if not, sorry to drone on!

    Cheers,

    ~P~

    dude... thank u so much!! :)
  • praxedes
    Options
    Offline / Send Message
    hehe NP glad to help :)

    ~P~
  • praxedes
    Options
    Offline / Send Message
    Started the low poly mesh. This version isn't fully optimised because it's modelled for a good bake- those pipes at the back have WAAAYY more loops than they'll finish with, so that they followed the curves of the hi res nicely. I'm pretty pleased with this bake, though there are a couple of small issues to fix up in PS.

    ~P~

    headtest.jpg
  • ErichWK
    Options
    Offline / Send Message
    ErichWK polycounter lvl 12
    Maaan. that is one clean as hell bake. Super interested to see this done.
1
Sign In or Register to comment.