Adventures With Trim Sheets

Hey everyone,
I am new to the polycount community! I am in the process of working in games as an environment/prop artist and I am also in the process of really learning and understanding trim sheets. I figured my first post could be about what I have learned about trim sheets so far and eventually building a scene using MOSTLY colour variations of one trim sheet on both scenic elements and props.
So please feel free to comment, add words of wisdom, tear me down a bit if needed, and perhaps this could be useful to someone else in the future..
Thanks everyone!
So I started by following, fairly close, a tutorial series by Tim at Polygon Academy on youtube, https://www.youtube.com/watch?v=DipfrjCgYW8
He has the best info I've found so far on basics of trim sheets, understanding technique, etc.
I started with a basic breakdown of a 4m x 4m plane, broke it down into useable sections, separated into 7 main trim areas, then broke down a few of those even more

I then proceeded to extrude my sections into the depth I was after and deleting faces I did not need, making sure to keep faces on any bricks I had decided to have sculpted edges on.
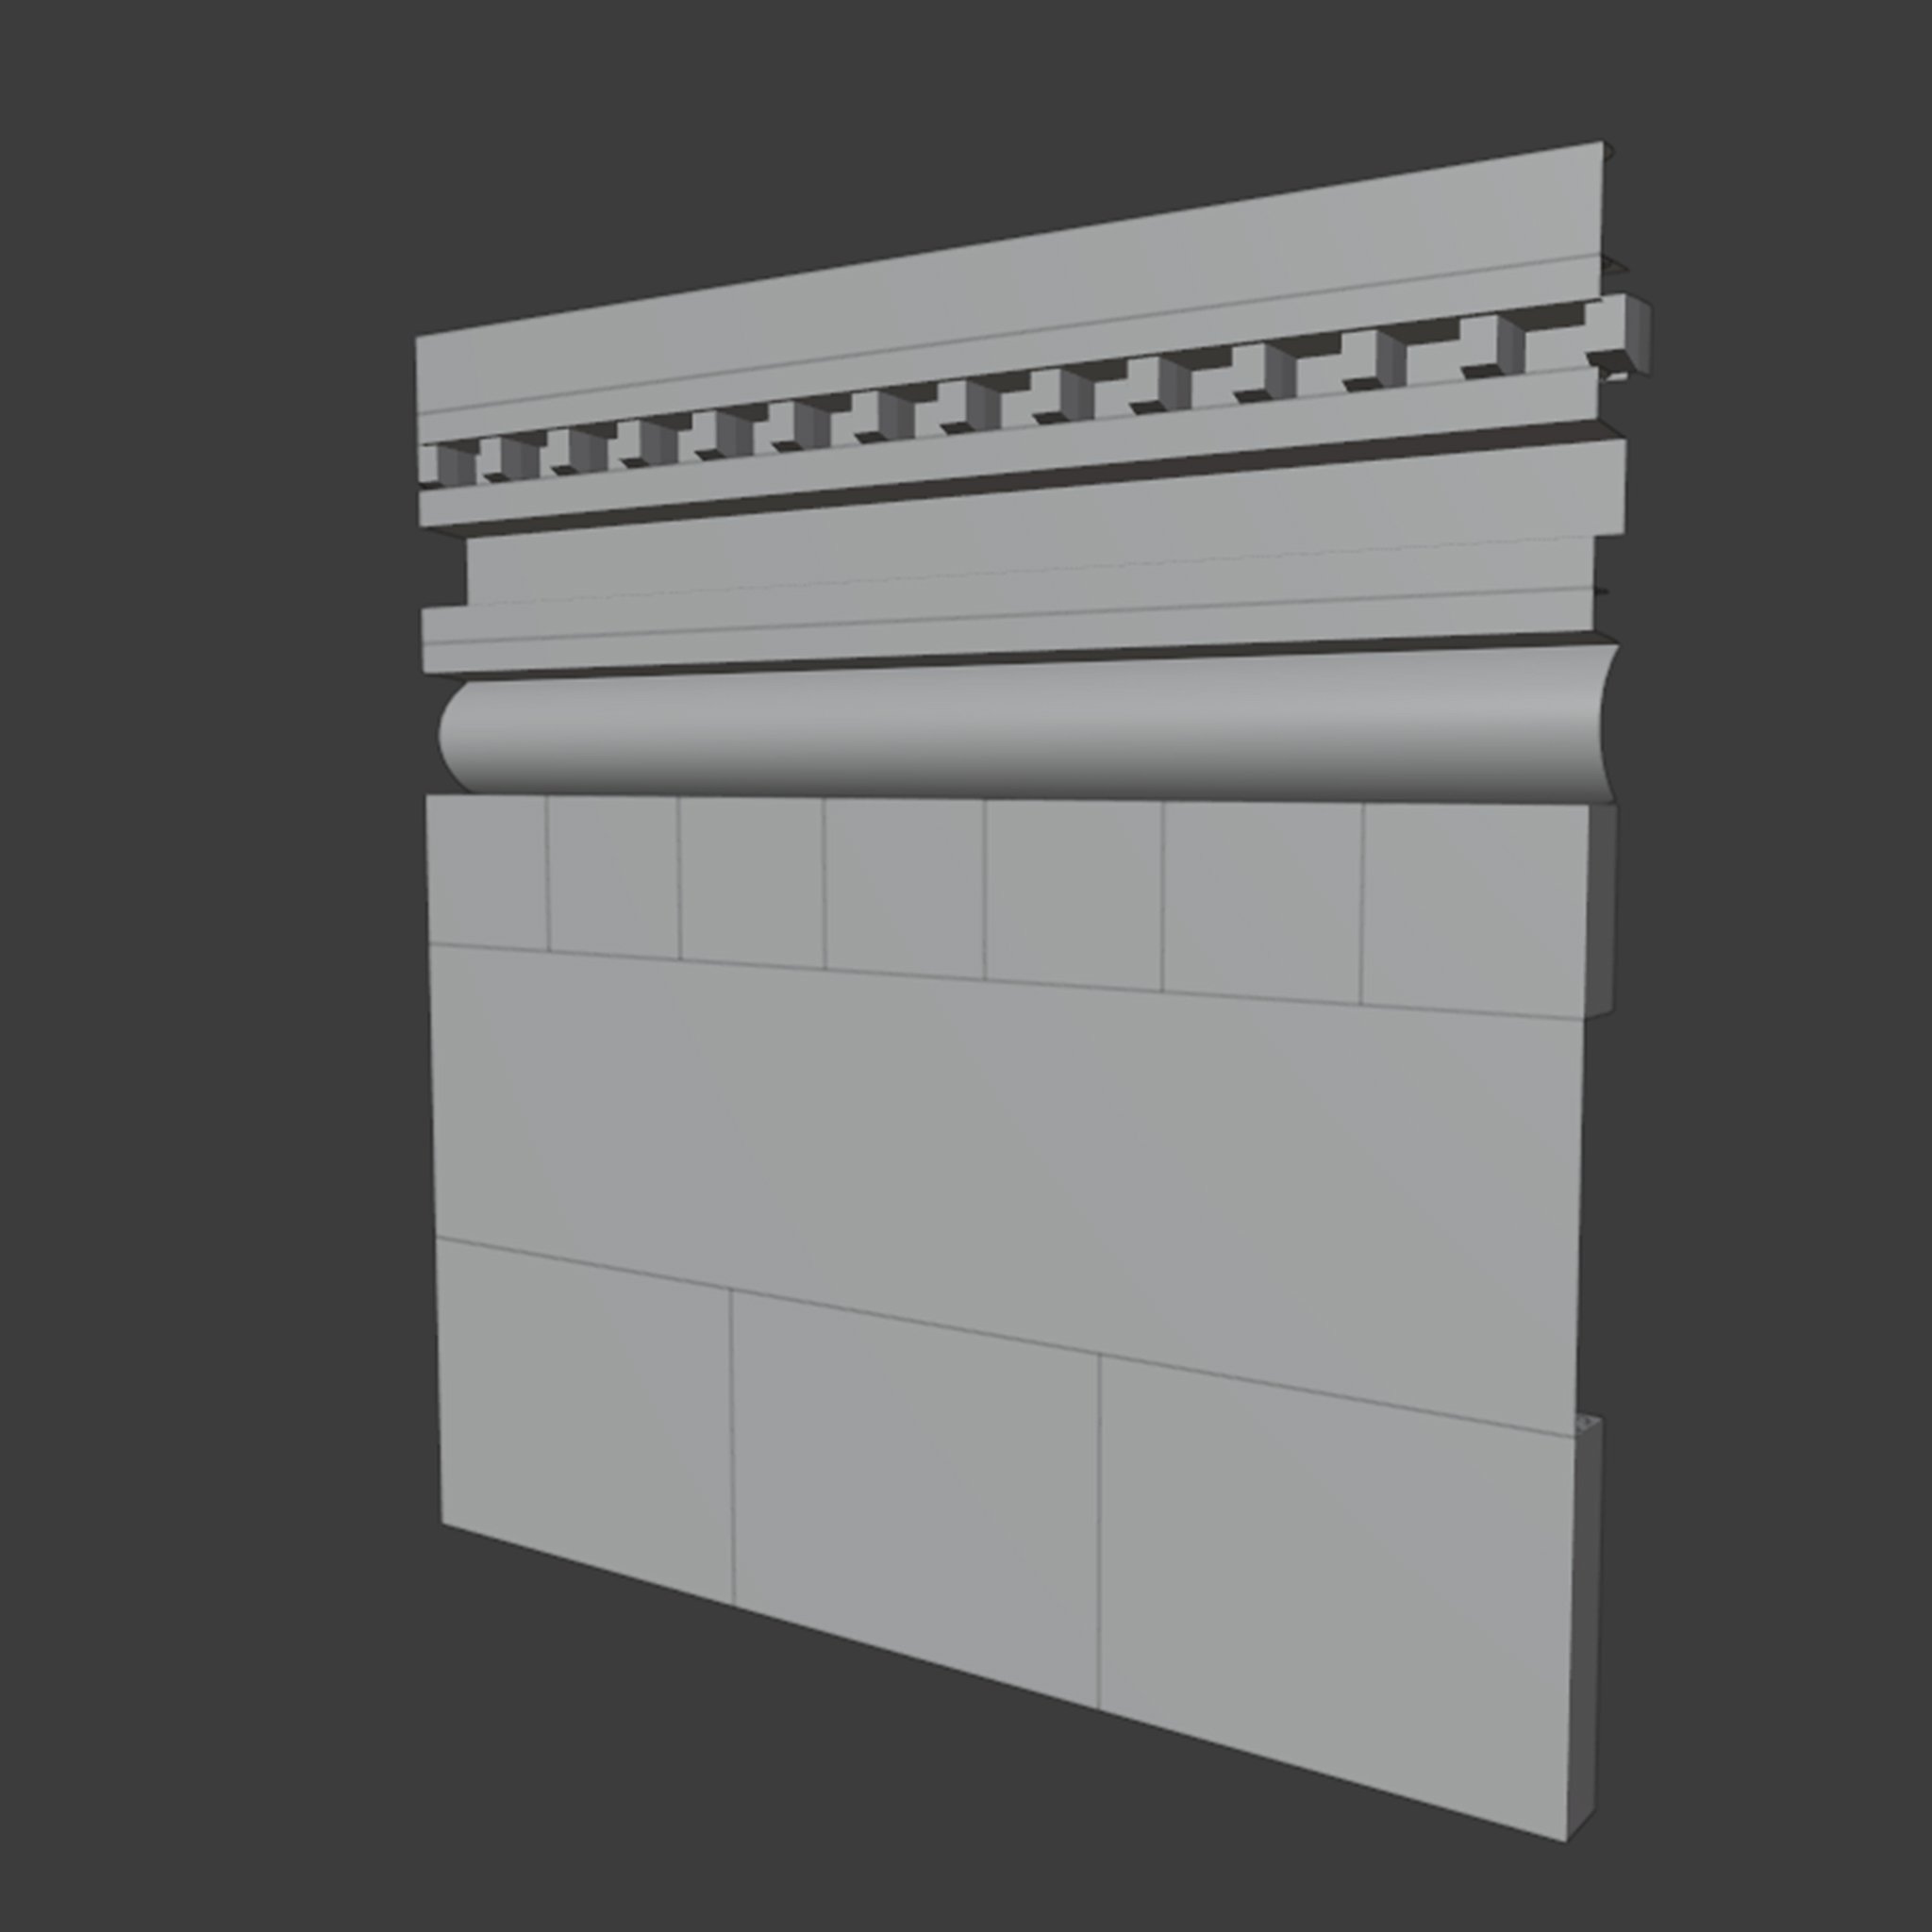
Next, I went to work sculpting everything in Blender. It was an ordeal at first, I'm new to tiling techniques and working with many different sculpting sections at once, but it started to click and in the end it didn't take as long as I feared, a few hours really, until I was happy enough. Found a few rock brushes for some of the smaller details, but otherwise the scrape tool was my best friend, with a little clay strips here and there. Of course there were still a few tweaks after seeing how it tiled.

EDIT: (forgot to put this in before)
Before exporting my high rez mesh for baking, I tiled on either side on my sculpts copies of the opposite sides to solve the AO problem that will arise during baking. Those lines seen will not be there when baked.

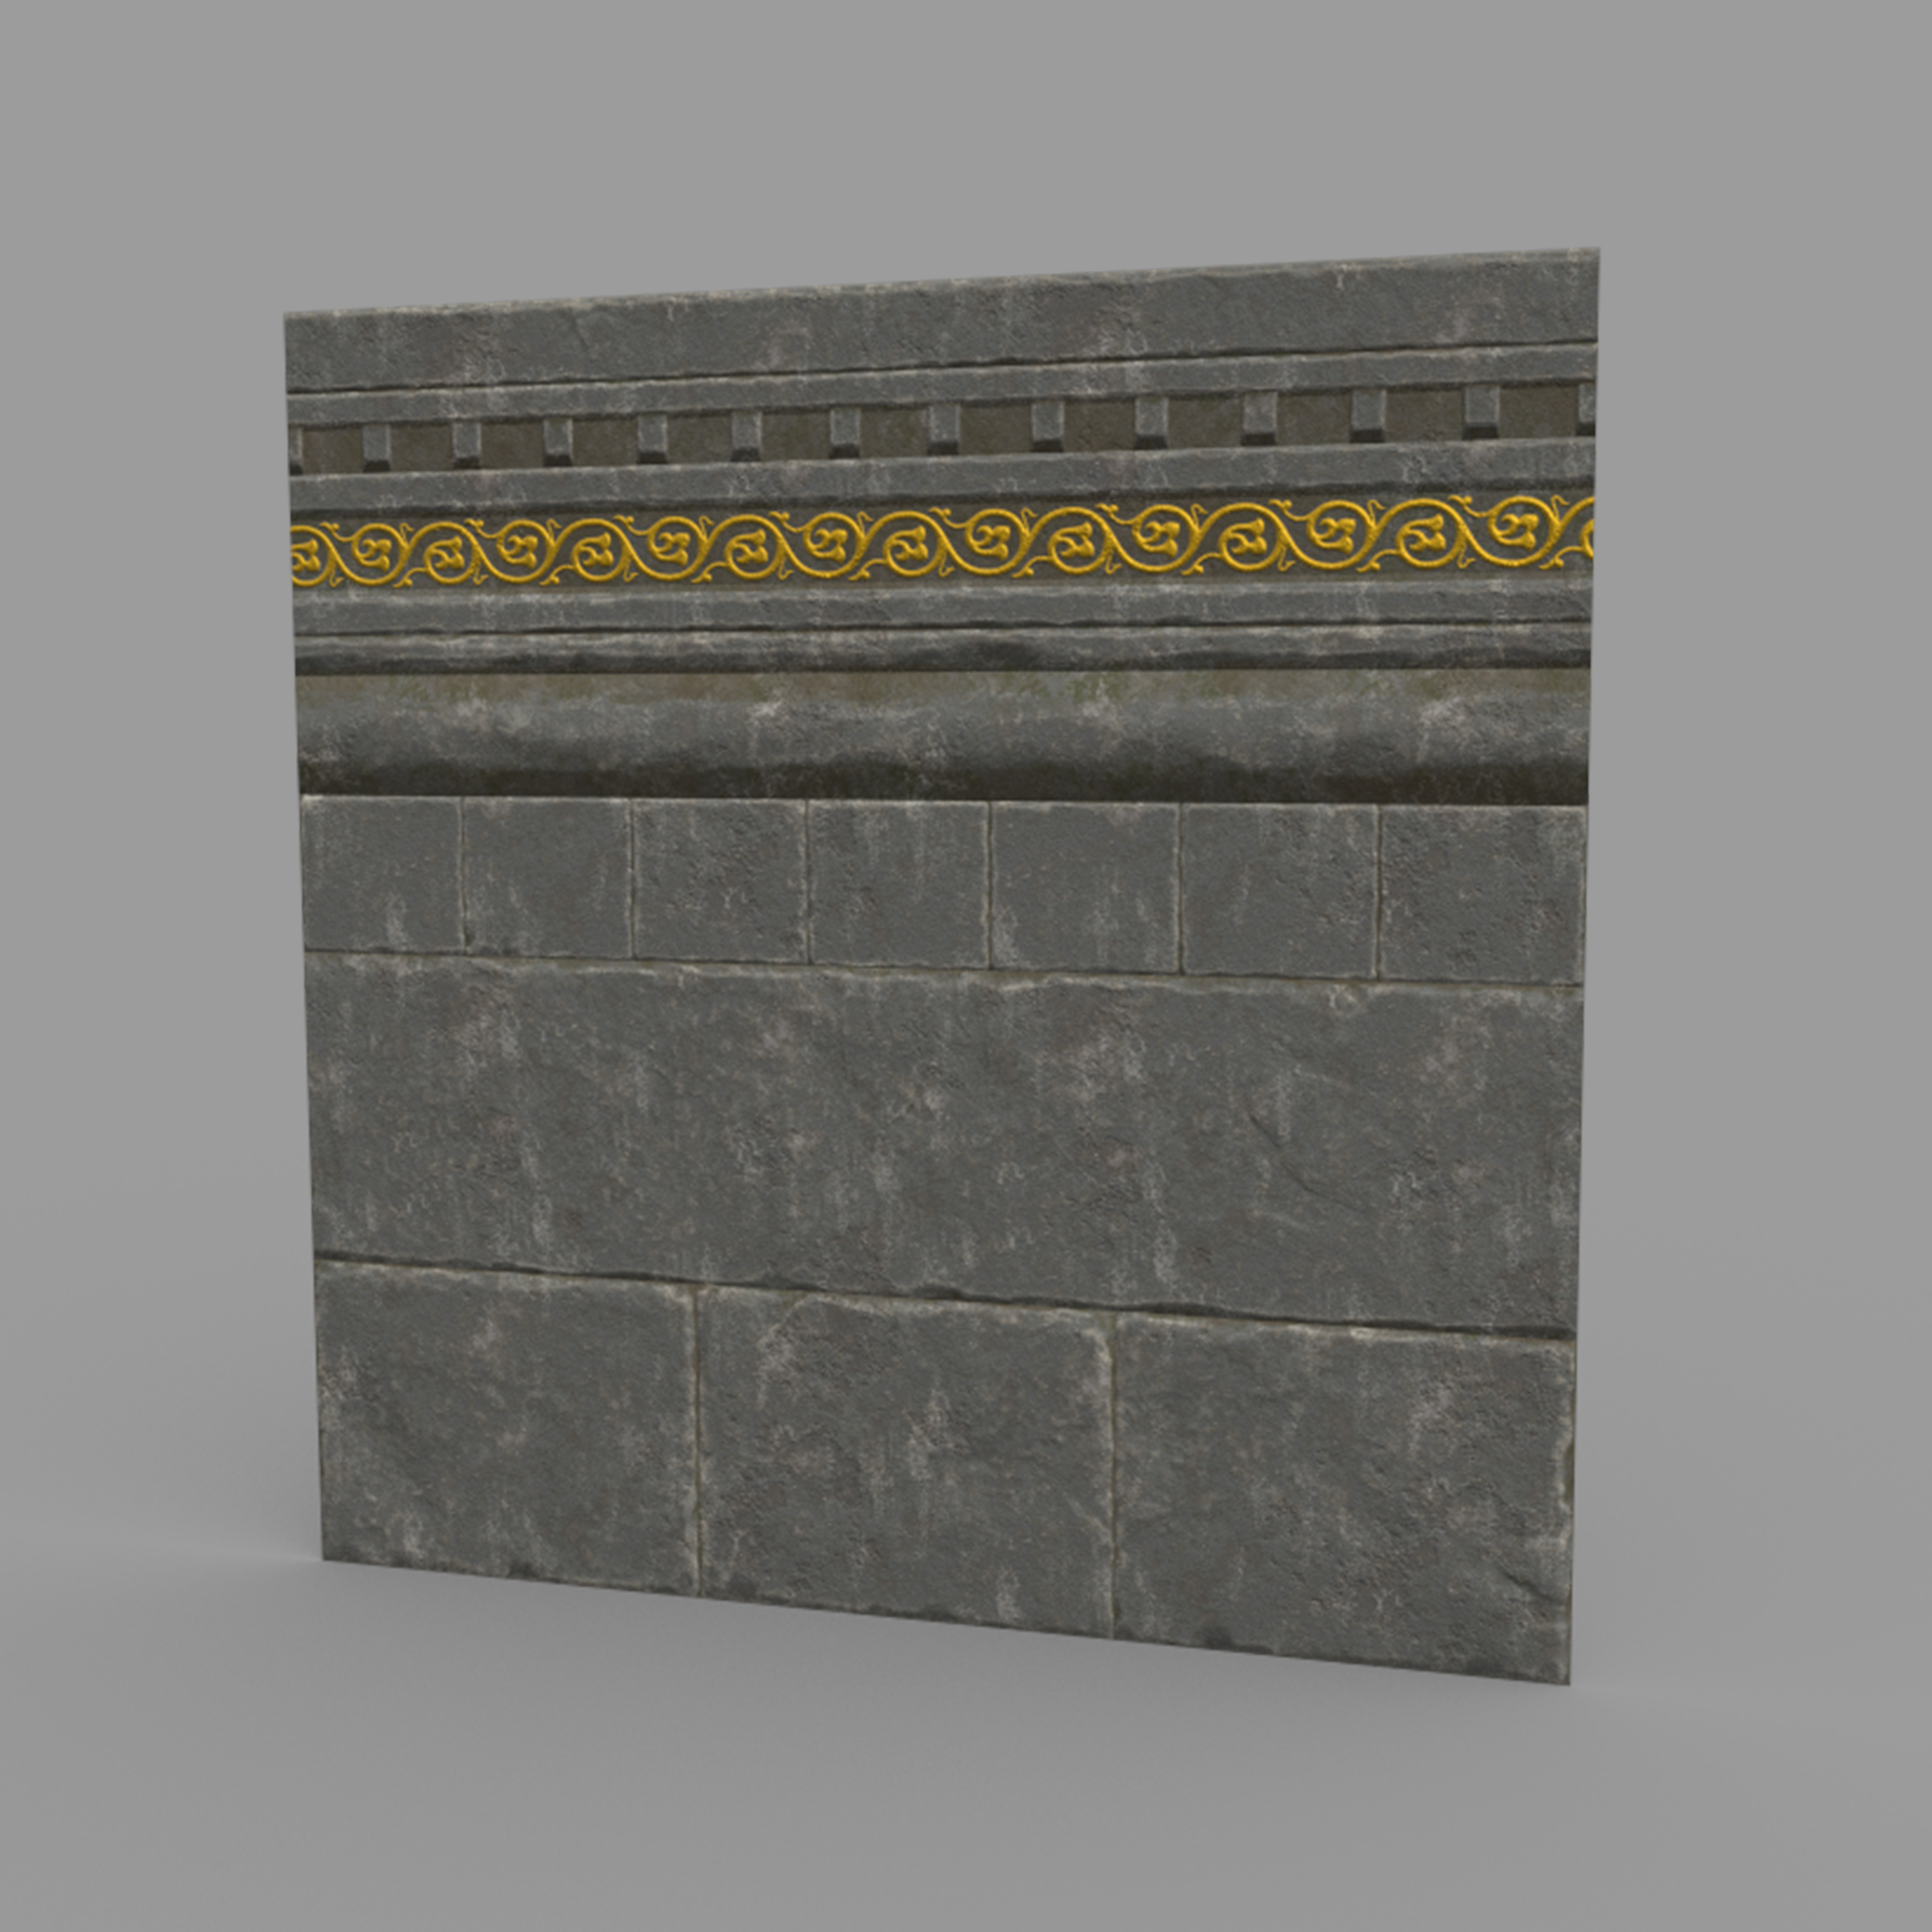
Next was baking and painting! I did that in Substance painter. For my for ornate section, I had purchased a library of tileable textures from artstation, found one I liked, and ended up doing all the tiling work in photoshop on the UV's, creating my base colour, metallic, roughness, and height maps all in photoshop and bringing them into Substance. It worked suuper well, had tons of control, and I didn't have to deal with sculpting that tiling detail.
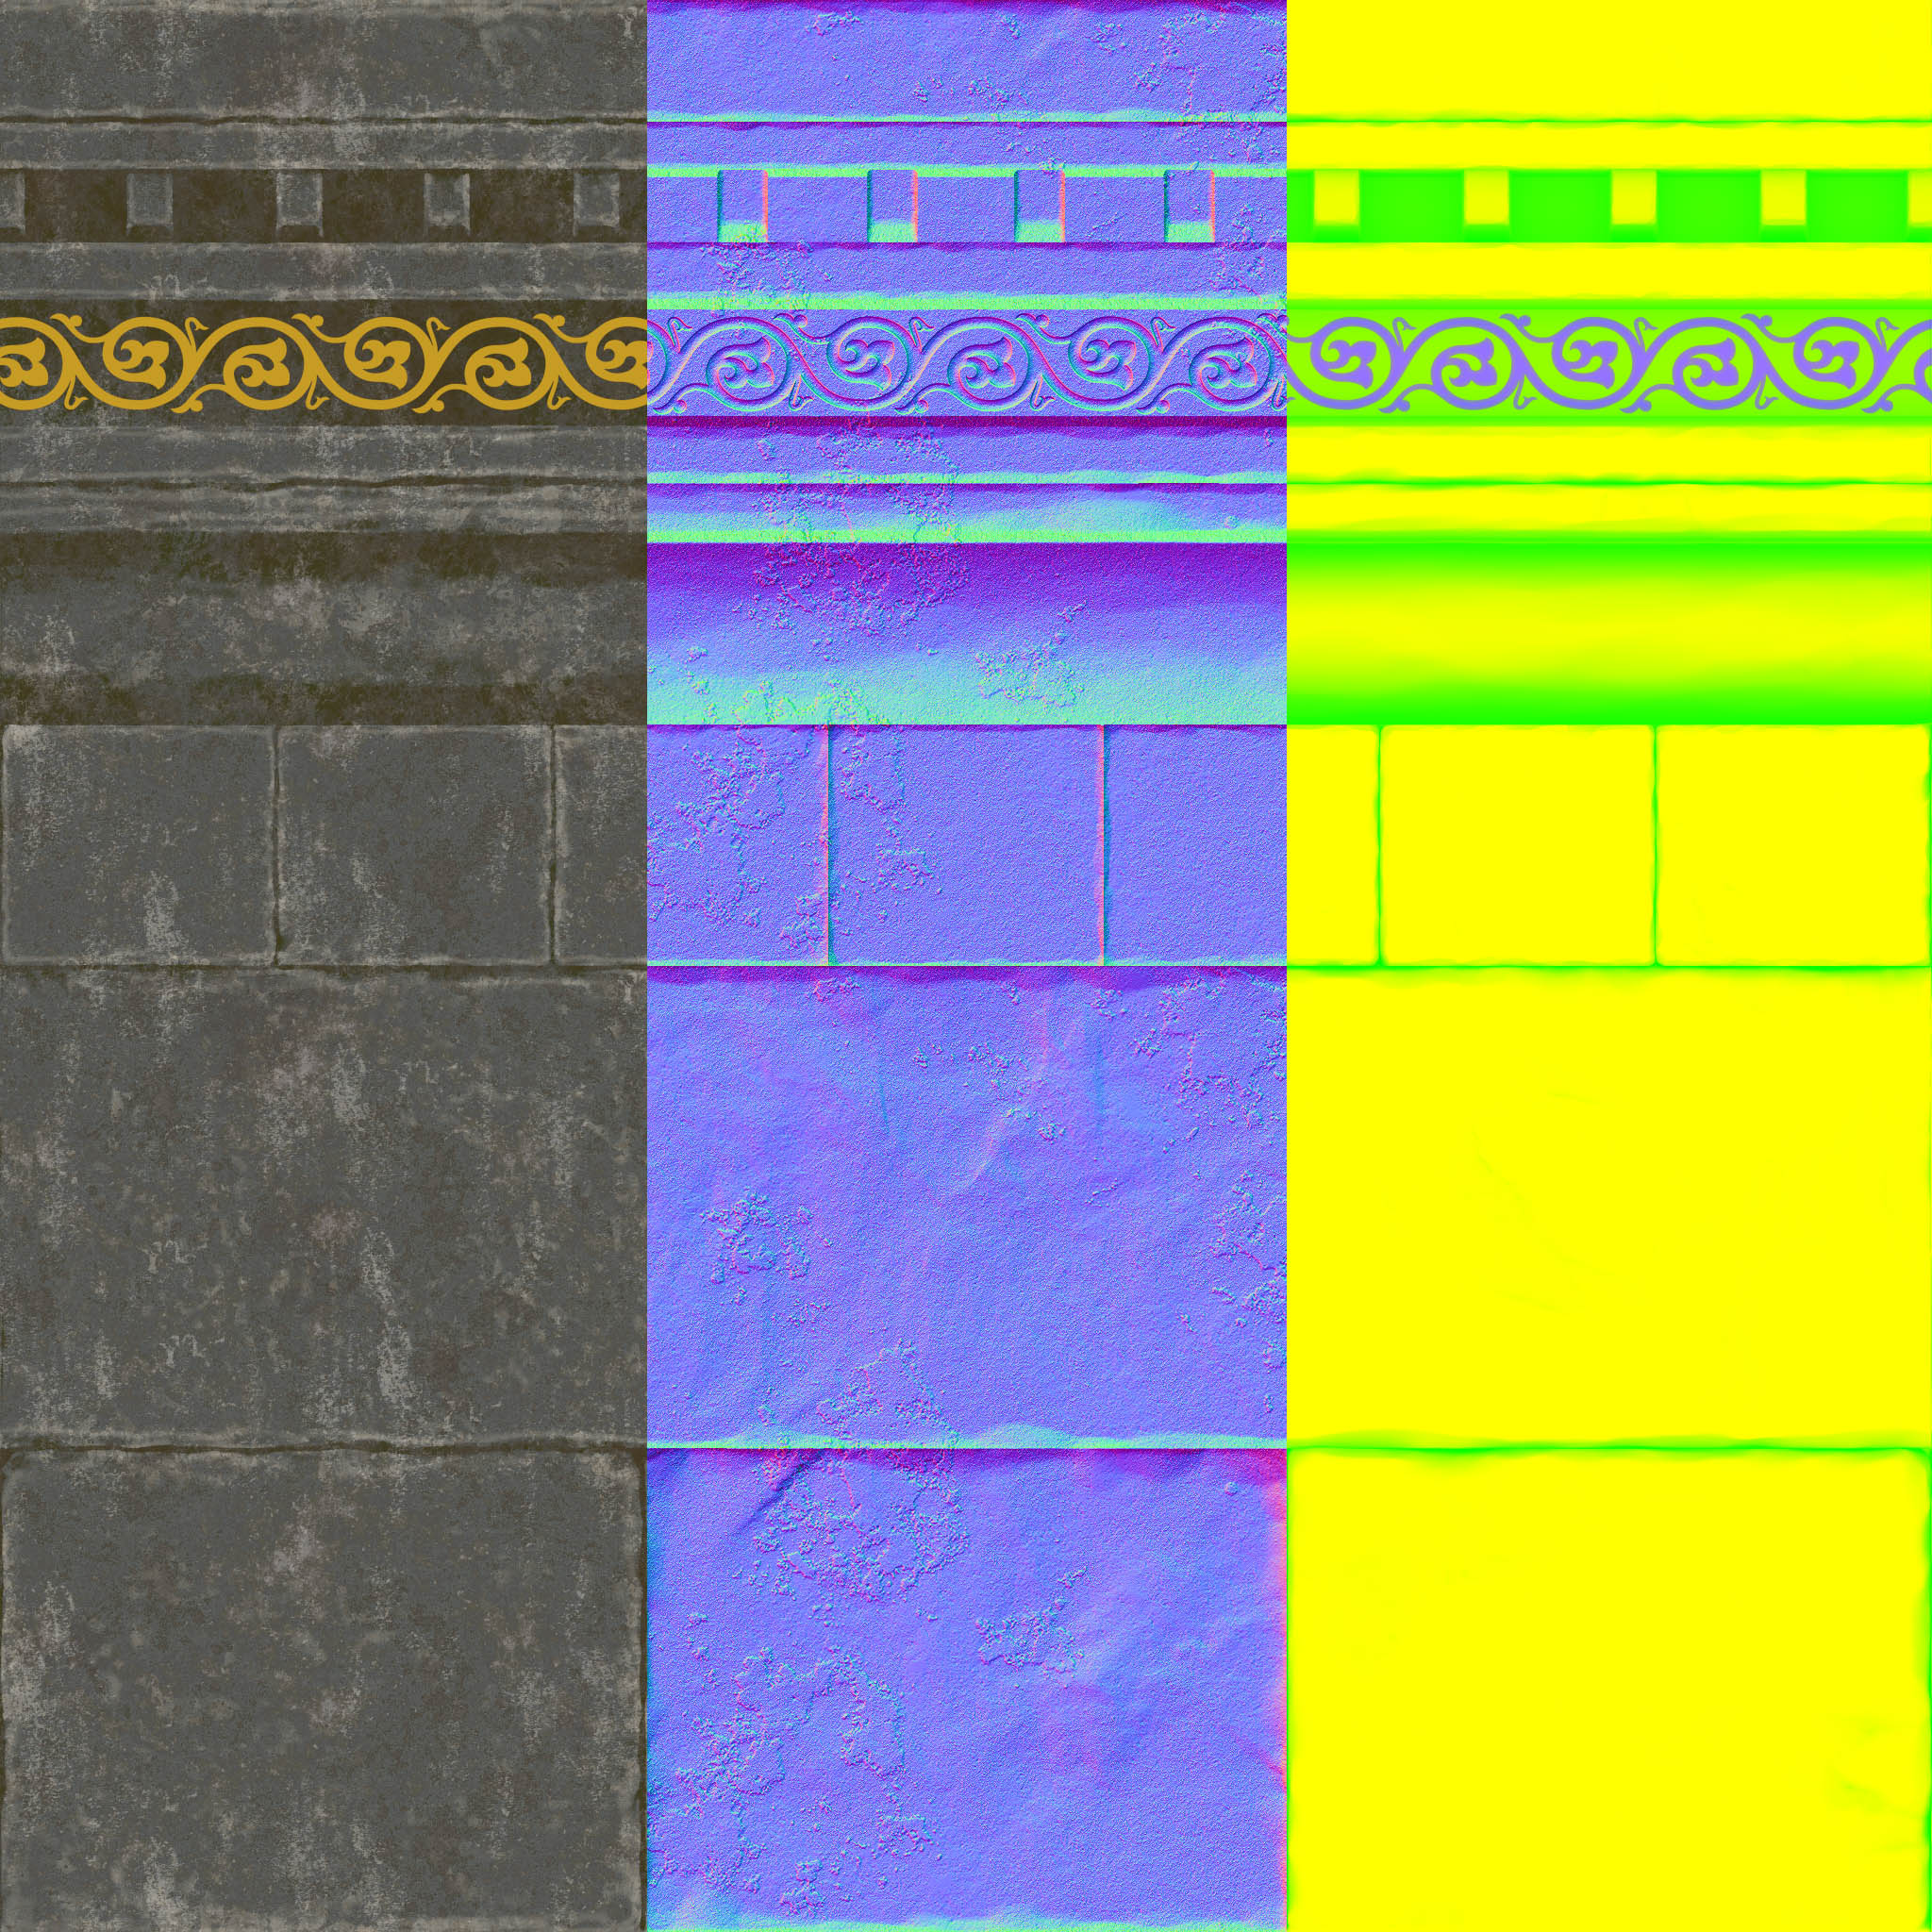
Here are my maps
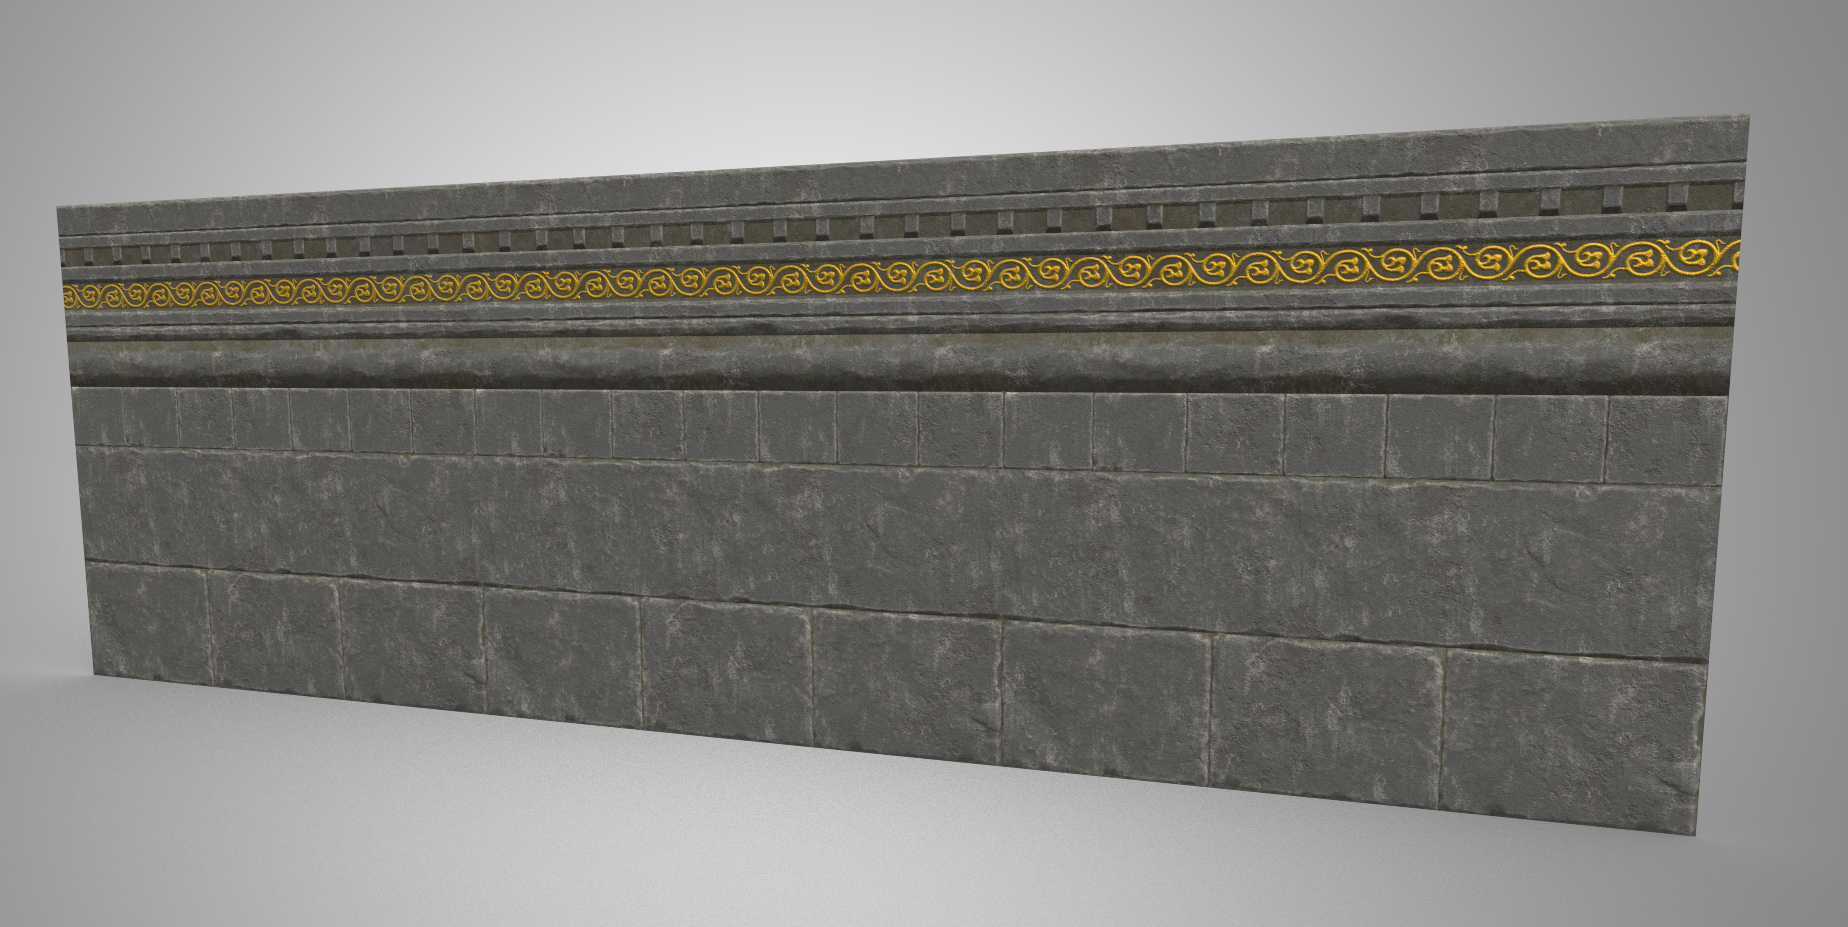
Here it is tiling!! I let out a sigh of relief when I saw it was finally working.
Next was getting my new trim on a basic shape. I chose round as I felt it was a good first challenge to line everything up, unwrap properly, and get an interesting result!

Here are my UV's. They look terrible. But they work.

And here is my final result of my first real venture into trim sheets! Just a quick Blender render in cycles. I managed to line up what I wanted to line up, get my bricks working in my favour, and show off most aspects of my trim.

My plan next is to start planning and building a scene with this trim in mind. The final result will be in UE, I imagine. But either way I will keep adding to this post as I progress!
Again, if you can add to this or have feedback, I am alll ears!
Thanks!! :)
Replies
Hey nice test project!
I think currently the faces on the top of your test structure and the adjacent sides look like they have tiles applied to them instead of solid beveled bricks. You could improve this adjusting those parameters 1) mapping, 2) reasonable wide, clean 45 degree bevels (more flesh to map UVs to), 3) make sure you don't have AO baked between trims (could split bake plane and use "match by name" when baking in painter).
to 2) Although it's old by now, check out the bevels in sunset overdrive.
Keep it up 🚀
Awesome!
I did bake with duplicates of each poly next to each other to avoid the AO issues, (I didn't add that to the text, but I will) but perhaps it also didn't go as well as planned. So would you bevel each applicable tiled brick before sculpting on the trim, or are you referring to the model the trim is being applied to? Because you're right, it does look a little more "flat" than I had intended.
Thanks so much for the feedback!!
Yes, I treat edges of highpoly with 45 degree bevel along trims before adding the damage.
UPDATE 1:
Here is my 1st update from my trimsheet project.
So far I have decided on a bit of a theme. I stumbled up on the work of Shahab Kashvargir https://www.artstation.com/shahabkeshvargir and used his work for reference.
I settled on a pseudo dwarven cave theme and came up with this:
Everything except the lower base of the tower and the surrounding rock wall was 1 trim sheet with multiple colours. I changed the patterning from my original trim sheet above to fit the concept a little better. It's been an interesting work flow trying to find new ways to use the trim sheet. The mouse statute was a project of mine from earlier that I chucked in. Probably will keep it, worked out alright.
The next step is refining. I'm going to make a new sheet with decals, make better flames, and refine the texture on the rock wall, as it's not tiled correctly and was placed in painter on a baked out wall I sculpted quick.
I also need to work on my lighting and try to get some particles in there. So far this is all done in Blender, but I will be putting this in UE.
I'm not TOO sure on the emissives yet, maybe I'll mask them out more so they aren't as crisp? We'll see, I guess!
Here is the picture from Shabab I grabbed a lot of inspiration from.
I welcome feedback! Thank you!!
Hey, looks cool!
I think the emissive parts clash a bit with the fire bowls and make it harder to focus. You are right, the borders are quite harsh and maybe they could use some sort of pattern too?
It would shorten the poles along the bridge, to have the platform visually more the center piece. Could have chains hanging between them, acting as a sort of railing.
Placing some scale reference like weapon and shield could help to make the scale more clear.
Attempt to illustrate my suggestions (removed the glowing bits and added glowing monolith to keep the color but focus attention. You could control intensity/opacity of glowing bits with vertex paint for example to guide players attention):
Keep it up!
Wow, thanks!! Great suggestions! Yeah, definitely like the smaller pillars and the monolith in the middle.
UPDATE 2:
Took @Fabi_G suggestions to heart and I'm super happy about it. Ended up making another trim with more decals to make it more interesting, added the monolith, a sword and shield, added some webbing, fixed up the rock texture and the fog. Also finished the path leading away and added some atmosphere. Feels like it's starting to have a story.
Getting close! I think if I were to do more, it would possibly be some texture/vertex painting or something for some dust/grunge, or possibly take it down a destructive path and add rubble and such.
Thanks for looking!