Home 3D Art Showcase & Critiques

[WIP] Generic Car for Realtime ArchViz

MeshMuti
polycounter lvl 2
Offline / Send Message
MeshMuti polycounter lvl 2
FINAL UPDATE:

I'm considering this done, the last post has a small post-mortem, thanks to all, see you in the next one.

I'm documenting my process on designing and building a generic car (sedan) as a prop for use in realtime ArchViz, or games I guess, specifically in UE4.

All and any critique is always welcome, be it design, modeling, goal of the project etc.
This is my second time going through this process and I feel I need the exterior input to avoid making mistakes I might not even know I was making.


The goals are as follows:
- Exterior realism as a static prop first, this means good reflections and extra time and geometry (1x Subdiv) spent on reflective areas, which leads to the compromise...
- Simple interior and no moving parts, plastic body panels will follow FWN and medium poly workflow.
- Design wise I intend to focus on creating a generic asset as a background piece to compliment and provide scale to archviz scenes. The frustration with archviz and cars are that you either get flashy hypercars that distract and feel out of place in typical archviz scenes or existing vehicle designs that can be problematic in terms of licensing (and price), or again, distract from your scene.


This is the base shell for the body panels at 3x Subdiv.
I intend to use the method of shrinkwrapping all other panels onto this mesh to control the form of the individual panels.

The design is a mash of mid range sedans out there, modeling over photos of various models of cars as well as just freestyling and building in details I feel will work. Again, the intent is to avoid any specific brand identity.


The wireframe of the Base mesh at 0x Subdiv.
I'm not to sure about the wavyness of the front bottom lip and the amount that it juts out, but I will probably replace it with a plastic panel.
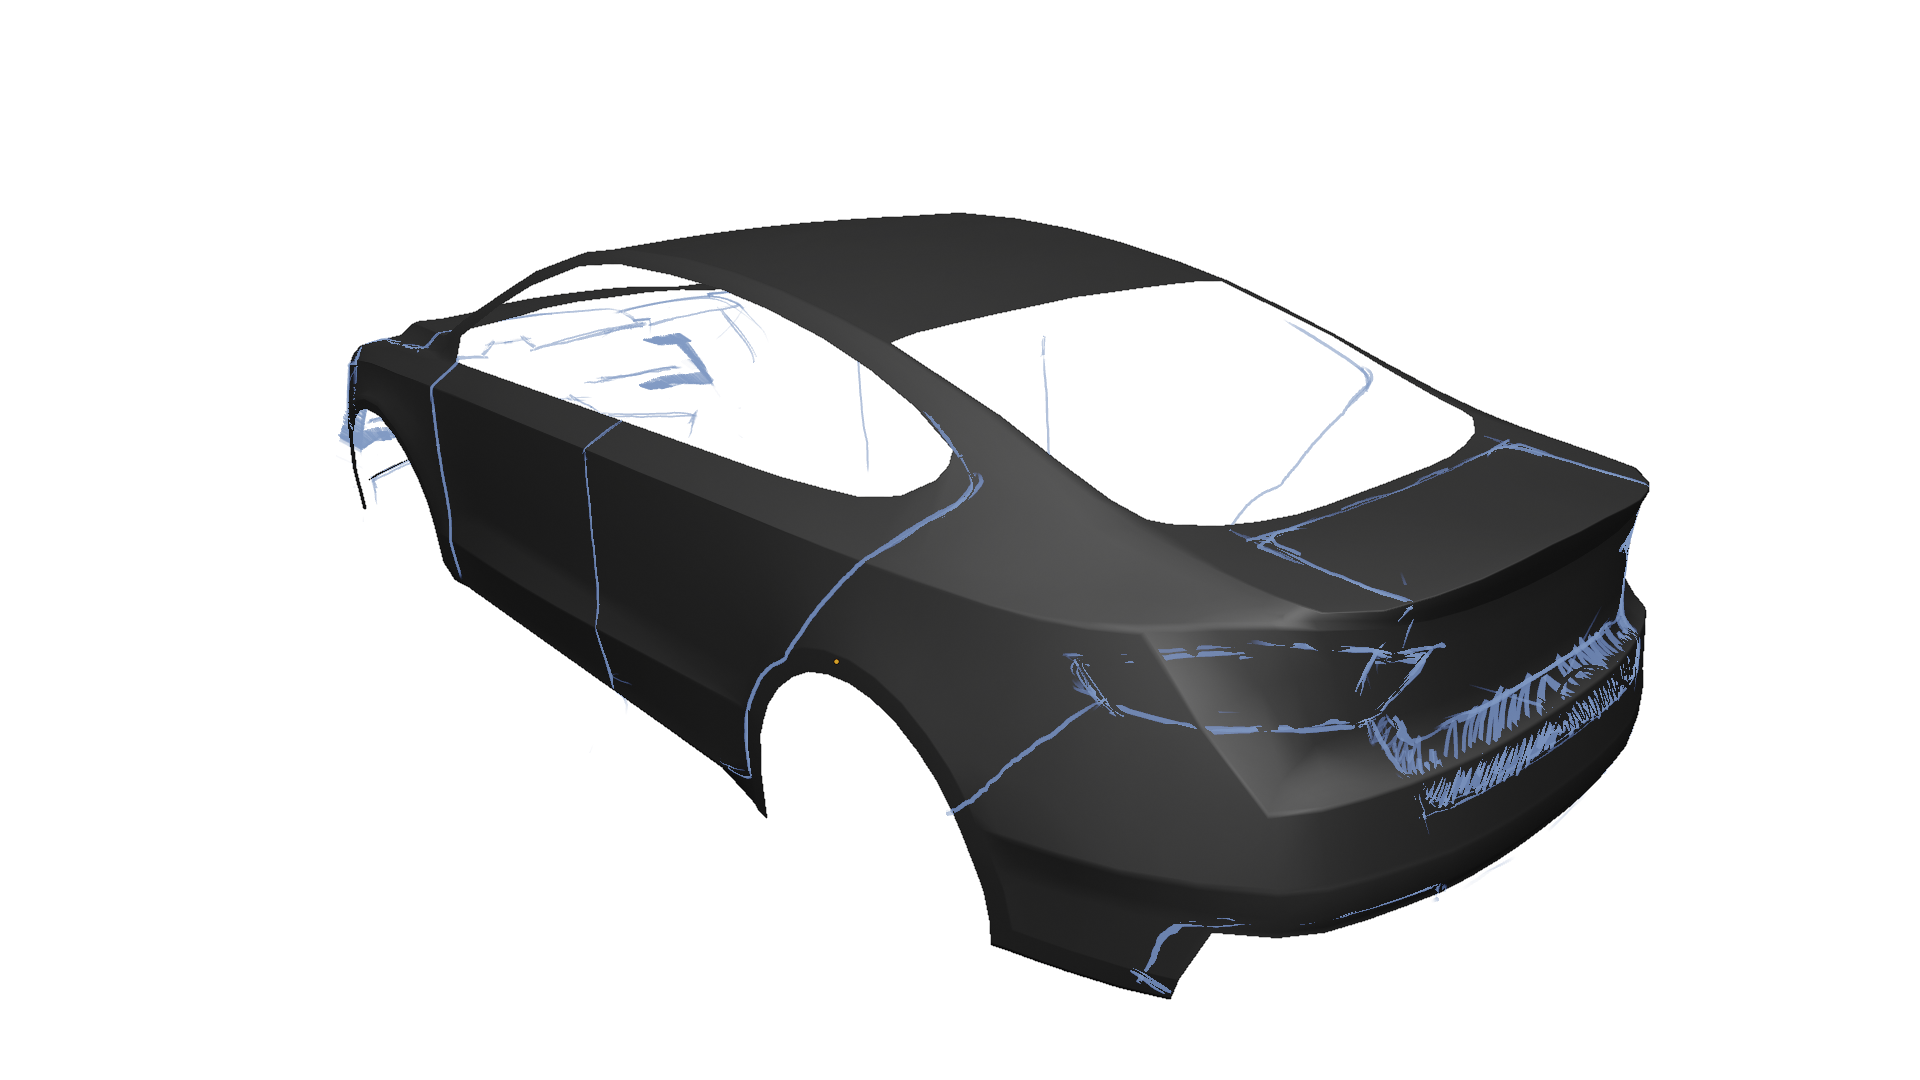
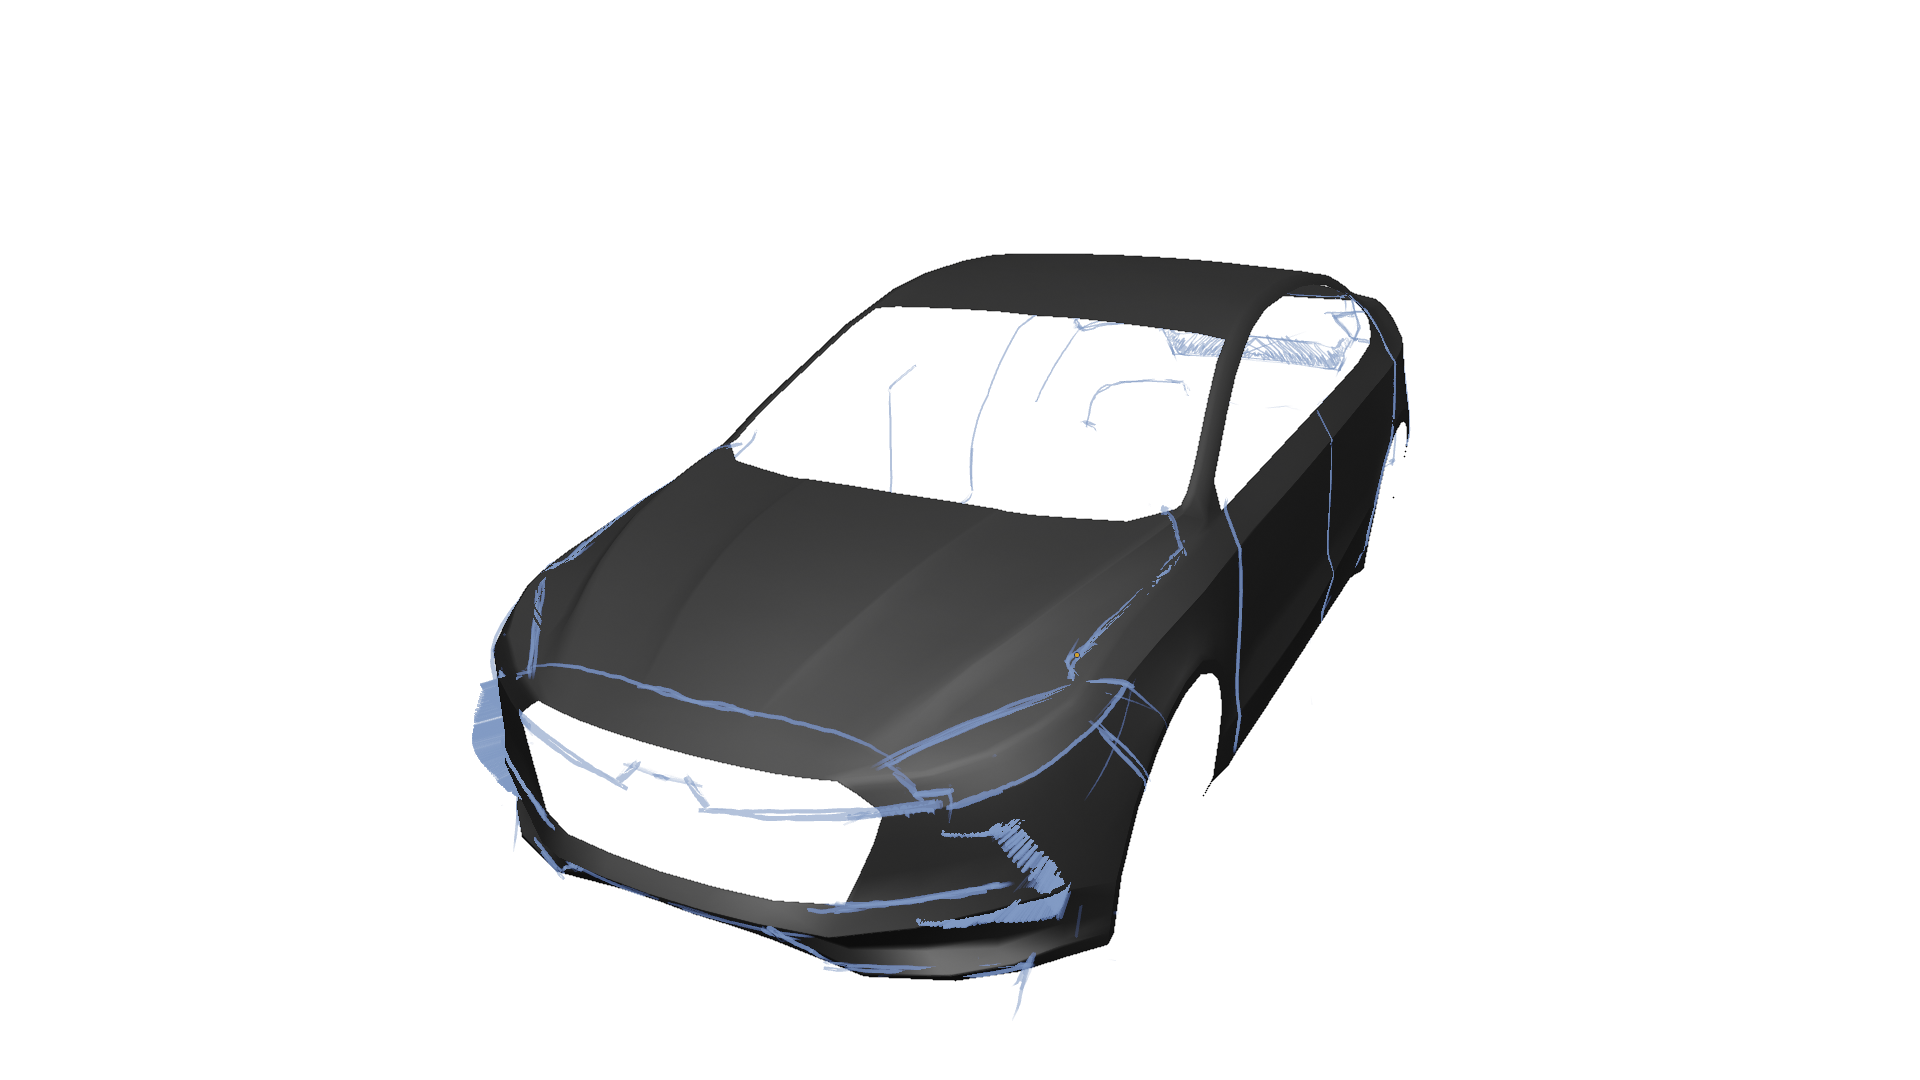
First sketch onto the mesh, setting out the panel gaps and getting a feel for the design and proportions of different elements.
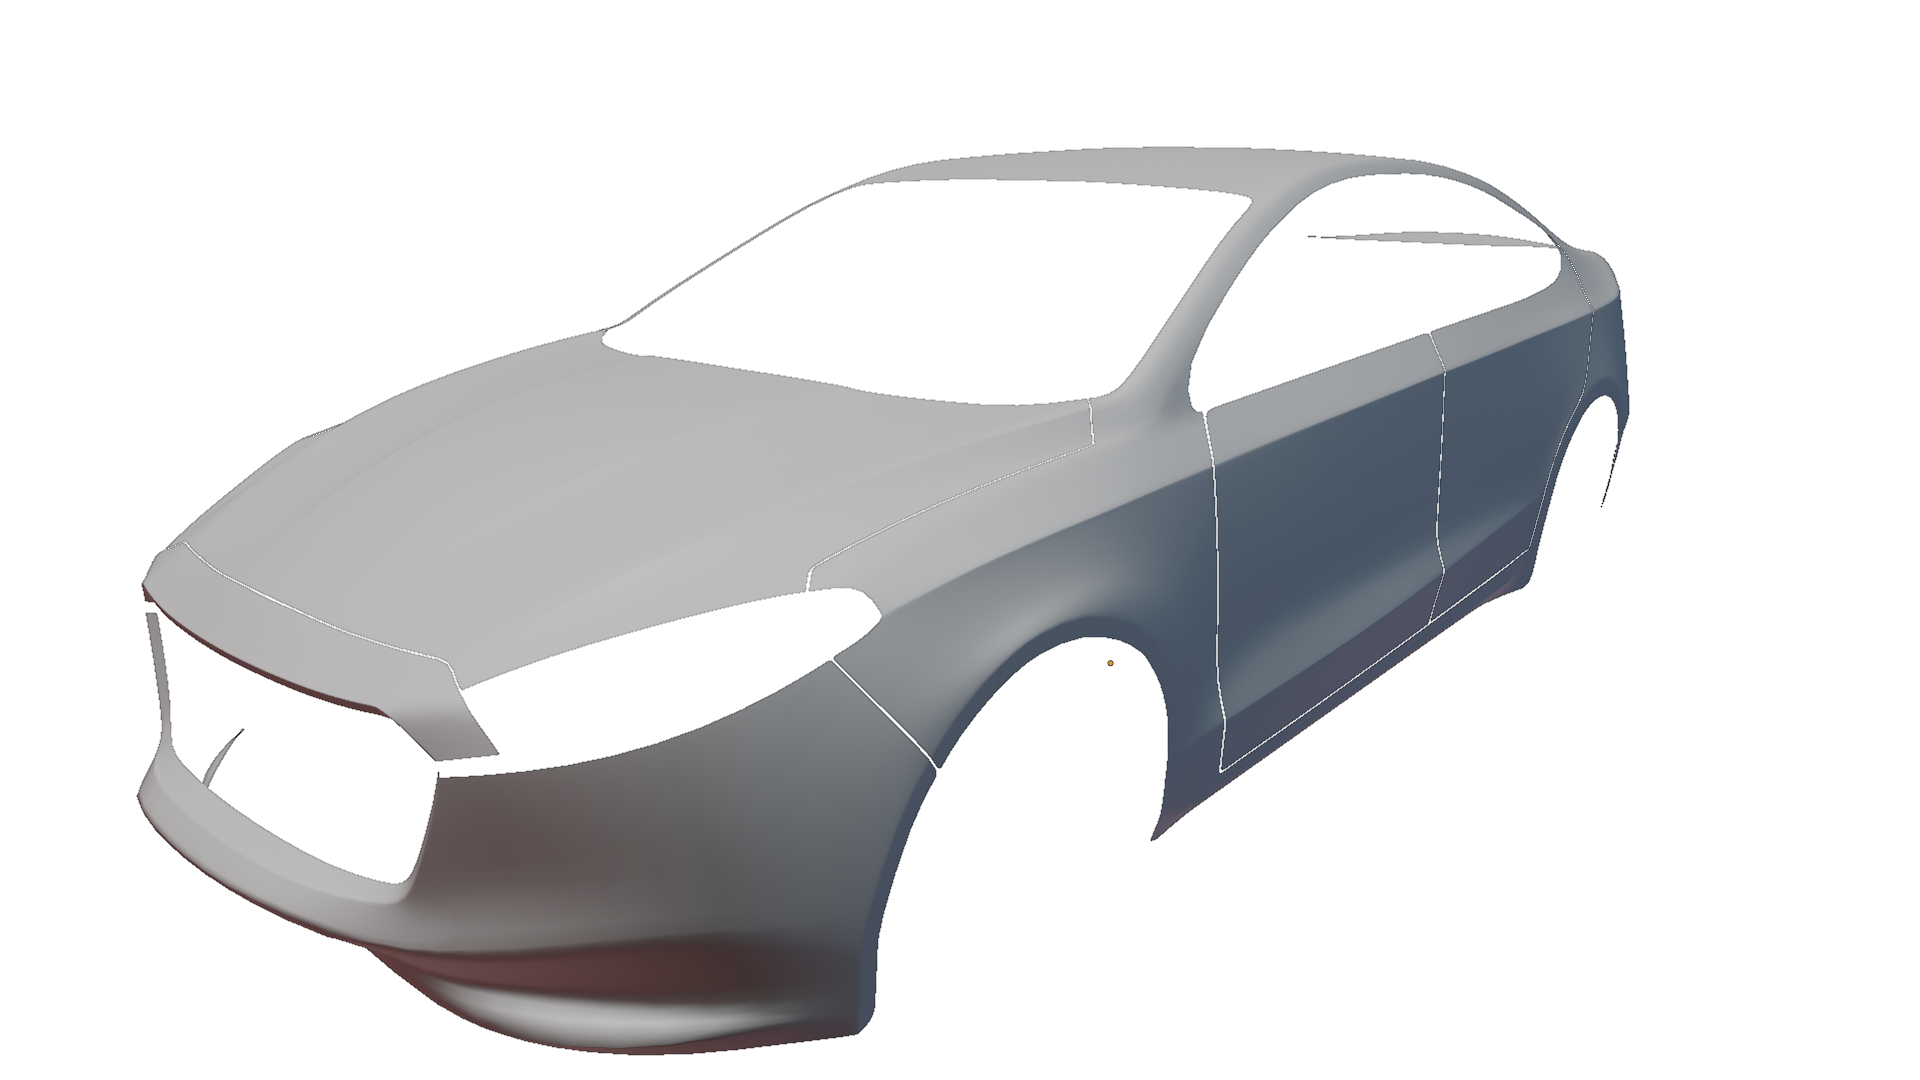
The front does feel Mercedes-y, which is strange because there is no Merc' in my reference images, I'll see how it looks when modeled.

The panels with their new edge loops and geometry for most of the car set out, still have to do the back light cutouts and panel gaps for the boot (trunk).


Replies

  • MeshMuti
    Offline / Send Message
    MeshMuti polycounter lvl 2
    Okay, worked on the rear panel lines and cutouts.I'll take a look at the geometry with fresh eyes again tomorrow, but in generela I feel I got lucky with the way it turned out.
  • MeshMuti
    Offline / Send Message
    MeshMuti polycounter lvl 2
    Worked more on the back, added the bottom of the boot lid, and the bottom diffuser with a slot for reflectors


  • 3DKlassen
    Offline / Send Message
    3DKlassen polycounter lvl 4
    Looks good so far! Also looks like a Tesla and a Ford Fusion had a baby, Thumbs up so far
  • MeshMuti
    Offline / Send Message
    MeshMuti polycounter lvl 2
    Thanks a ton 3DKlassen, yeah the Fusion is such a middle of the road(heh) design, I did have a look at it when setting out the proportions.

    Back to progress:
    Finished the windows and all the little filler pieces around them.
    All these pieces aren't subdivided, but extruded and beveled and with FWN applied.


    Also tweeked the rear bumper, it feels a little too busy as is, but I'll take another look once materials are applied, the bottom bumper area should become less distracting once it's a matt dark plastic.

  • MeshMuti
    Offline / Send Message
    MeshMuti polycounter lvl 2
    Me: I'll quickly knock out these side mirrors....

    ... one eternity later ...


  • MeshMuti
    Offline / Send Message
    MeshMuti polycounter lvl 2
    This is the final geometry of the side mirror, including the filled gaps and beveled edges to the gaps, with all modifiers applied. The same process will be done for the rest of the car, this is:

    Apply subdiv -> Thicken (extrude) the panel edge -> bevel the edge -> apply FWN -> fill the gap with faces (to prevent light leak and seeing through the panel gaps) -> clean geometry to get rid of unnecessary geo created by subdiv.

    Finally these faces in the panel gap, including the 'walls' of the panel gap will have their own islands on the custom lightmass UV layout to ensure the panels have clean baked lighting later.


  • MeshMuti
    Offline / Send Message
    MeshMuti polycounter lvl 2
    Okay, first things...
    fixed a bit of pinching on the side mirror that was driving me insane.


  • MeshMuti
    Offline / Send Message
    MeshMuti polycounter lvl 2
    Then I got back to work on the front, tried sculpting out a design with a trackball, which was interesting, but it was all I had.

    From there I got roughly the same shape modeled. I should have looked at this earlier, which would have allowed me to use the base mesh more as a safety net. This was more complicated to model than it had to be.

    The feel from this was however too busy and soft for the rest of the design, so I cleaned it up and flattened it out somewhat.

    This feels like a good position to work from to design the grille and lights, I might move back to combining the lights with the grille if some nice resolutions for that awkward gap comes up.
  • MeshMuti
    Offline / Send Message
    MeshMuti polycounter lvl 2
    Working through some options for the headlamps.
    The last image seems like a decent concept to start moddeling and see what comes up through the 3d process.
  • CybranM
    Offline / Send Message
    CybranM interpolator
    I really like that you include your thought-process with images and not just the current state of the model. The concept drawings are also nice :smiley:
    Looking forward to seeing more
  • MeshMuti
    Offline / Send Message
    MeshMuti polycounter lvl 2
    Quick update, modeled the lights based on the sketch above. Still deciding where the running lights can fit, but will probaly keep it inline with the concept.
  • MeshMuti
    Offline / Send Message
    MeshMuti polycounter lvl 2
    I have spent way too much time on these headlights already, but...
    The running lights are finalized, I might keep the bottom part of the lights as a seperate light layer if it feels like too much.
    I'm calling the detail work on the rest of the light design finished as well, i'll clean up any odd details with the modeling process:

  • MeshMuti
    Offline / Send Message
    MeshMuti polycounter lvl 2
    @CybranM , thanks for the kind words.

    I've always liked it when people show their process and thinking, It's almost more work than the final product and it often just goes missing.
  • MeshMuti
    Offline / Send Message
    MeshMuti polycounter lvl 2

    Calling the headlights done, I still need to add a layer of normal information, but that will be done later in NDo

  • toxicsludge77
    Offline / Send Message
    toxicsludge77 polycounter lvl 5
    This thread is a joy to watch. I'd love to be able to model vehicles. Or weapons. Or anything ;)
  • MeshMuti
    Offline / Send Message
    MeshMuti polycounter lvl 2
    I'm trying to keep a consistant concept runnign through the design of the front elements and using it to inform the final details. Still not to sure about the form and necesisty of the horizontal slats in front of the main grille, but I'll model it out and see if inspiration happens in 3d.


    @toxicsludge77 the Master Car Creation In Blender tutorial by CG Masters (https://cgmasters.net/training-courses/master-car-creation-in-blender/) is an amazing course to get into modeling cars.


  • Joejoemaster
    Offline / Send Message
    Joejoemaster polycounter lvl 4
  • CharlieD
    Offline / Send Message
    CharlieD polycounter lvl 11
    This is pretty cool to see come along.
  • MeshMuti
    Offline / Send Message
    MeshMuti polycounter lvl 2
    I was struggling with the front and completing the grille area.
    Moved away from a mesh-type grille fill as shown in the quick concepts, I just don't think I'll have the vert budget to accomodate the 3k-4k verts in such a mesh.

    The forms of the front just didn't gel:
    the core issue, I feel, was trying to force the 'blank' areas to both sides of the numberplate. The negative forms created between these areas and the lip around the grille area is just poorly defined. Also, the lip and angled frame to the blank areas were competing for the same space, material and forms.
    So I changed my approach to the grille:

    The shape is made more subtle, as a cutout in the materials of the grille fins, I feel like this gives the design a slightly more refined feel while still picking up the lines from the concept driving the forms.

    Also, I was missing the number plate.

  • MeshMuti
    Offline / Send Message
    MeshMuti polycounter lvl 2
    @Joejoemaster Thanks man!

    @CharlieD Thanks for checking in, I hope to keep things interesting, also, please call me out on any mistakes or shortcuts.
  • toxicsludge77
    Offline / Send Message
    toxicsludge77 polycounter lvl 5
    Thanks @MeshMuti I have had my eye on that course for a while. Once I get some available funds I plan to snap it up :)
  • MeshMuti
    Offline / Send Message
    MeshMuti polycounter lvl 2
    Okay, finally feel finished with the front for now.
    Remade all the placeholders and added a bit of detail on where the reflective part of the fins end.

    I'm off to go do some mediocre sculpting in zbrush.
  • MeshMuti
    Offline / Send Message
    MeshMuti polycounter lvl 2

    Okay, working on the rear lights.
    Think I've got a fairly clean result, but I'll see what I missed once I start in 3d.
    Trying to get some deep cuts in the light layout, but I'm not convinced I'll get the glass to follow the cuts.


  • MeshMuti
    Offline / Send Message
    MeshMuti polycounter lvl 2
    I've roughly modelled the forms of the rear lights into their positions.
    Mostly happy with the proportions and the way it reads, now it's just the world of cleanup and detail modelling.
    I'm going to need so much more coffee.
  • MeshMuti
    Offline / Send Message
    MeshMuti polycounter lvl 2
    Final (I hope) mesh of the tail lights are done.
    The Normal details are still missing, but the quickest way I can think of to get that layer in is through NDo.
    This would include checker patterns, ribs, grooves etc.

    Oh, and there are also doorhandles. The front one looks a little misaligned.


  • MeshMuti
    Offline / Send Message
    MeshMuti polycounter lvl 2
    Adding wheels makes it look less like a disembodied head.
    I just did some pretty basic wheels and blocked in the tires to get a feel of it with better context.
    In the future I would add wheels and a groundplane aerlier.

    Anyway, here is the wheel geomerty, if someone wants to tear it apart, please do: 2k verts

  • MeshMuti
    Offline / Send Message
    MeshMuti polycounter lvl 2
    I just wanted to post how I fixed a bit of problematic geometry.
    I'm busy finalizing the body geo, and came across this little problem area:

    To fix this I created a new piece of geometry from the verts surrounding the panel gap:


    The verts on this panel are relaxed using looptools, and subdivided.
    I then did a data transfer to transfer the normal information of this new panel to the verts directly surrounding the panel gap:

    With the new normals, the result is a much cleaner flow over the panel gap, without any extra geometry:

    I'll update with the body geometry soon hopefully.
  • MeshMuti
    Offline / Send Message
    MeshMuti polycounter lvl 2
    I've finished moddeling on the car, I'll do a post on that soon. In the mean time I've been working on an environmnet to present the car in.

    The environment has a few considerations:
    - Show the asset in different light conditions - full natural - indirect natural - artificial ligting (night)
    - Allow somewhere for a "showcase" bar tipe light to reflect of curves
    - Allow for veiws of the asset from different directions, including from an elevated position.
    - Stand on its own as a modular environment, ie any other asset can be placed in the setting (sculpture etc.)


  • lluc21
    Offline / Send Message
    lluc21 polycounter lvl 5
    MeshMuti said:
    I just wanted to post how I fixed a bit of problematic geometry.
    I'm busy finalizing the body geo, and came across this little problem area:

    To fix this I created a new piece of geometry from the verts surrounding the panel gap:


    The verts on this panel are relaxed using looptools, and subdivided.
    I then did a data transfer to transfer the normal information of this new panel to the verts directly surrounding the panel gap:

    With the new normals, the result is a much cleaner flow over the panel gap, without any extra geometry:

    I'll update with the body geometry soon hopefully.
    Very cool technique, I didn't know you could transfer normal information from one geo to another. Will use this in the next projects for sure.
  • MeshMuti
    Offline / Send Message
    MeshMuti polycounter lvl 2
    @lluc21 Let me know id I should go throught the steps in a a bit more detail, these images just show a general approach.
  • MeshMuti
    Offline / Send Message
    MeshMuti polycounter lvl 2
    I thought I was done with the moddeling bu there was another piece I just couldn't let go.
    Around the hood and side mirror there was just too much bending and pinching.


    And the cleanup:
    The problem here was just bad geometry, no fancy tricks:
    I just reduced the nuber of verts inthe area, and established some cleaner support loops.

  • lluc21
    Offline / Send Message
    lluc21 polycounter lvl 5
    MeshMuti said:
    @lluc21 Let me know id I should go throught the steps in a a bit more detail, these images just show a general approach.
    Thanks, the general approach was enough for me to look up how that data transfer modifier works in more detail. 
    I'm really liking the design, looks generic yet interesting. If anything I'd say that the rear door goes too far back, with that protrusion on the C pillar it looks flimsy.
  • MeshMuti
    Offline / Send Message
    MeshMuti polycounter lvl 2
    For the sake of closure I'm logging the final result here.
    This projects has been finished for a while, just haven't gotten round to updating this thread.

    This is a shot of the car in UE4, in little showcase environment that aims to place the car under diffferent lighting and context scenarios, as well as providing veiwing opertunities.


    Some shots of the final geomerty:
    Vertex count 44,025 verts.

    The material in UE4 is set up to allow for adjusting the amount of dirt on the exterior. I feel this is important to ground the asset in the environment to avoid a sterile feel.
    The dirt involves general splatter from below, Waterspots on the windows and tops of surfaces and general spots and dirt from the front, all cotrolled through masks.

    Material close-up:

    Finally, just a progress gif of the environment creation process:


    This is just a quick overview, if anyone has any questions ot comments, plaese crit and ask away.
    Thanks to all for watching and commenting, happy new year!
  • Obscura
    Offline / Send Message
    Obscura grand marshal polycounter
    Hi. Turned out nicely especially compared to the little amount of geo you used. There are a few things that bugs me a little bit. The wheel cutout looks a bit angular to me. Also, the antenna on the top-back has very high geo density compared to the rest for no obvious reson.
  • MeshMuti
    Offline / Send Message
    MeshMuti polycounter lvl 2
    @Obscura, Thanks for taking the time.

    The wheel cutouts are a bit of a headache, maybe someone can help me out here, because once you start with extra geomentry in the cutout it has to resolve somwhere in the mesh. There isn't a lot of space or flat area around the arch to collapse loops so this is my current compromise. I'll look into it a little more and will do an update if I find a solution.

    The antennea is a mistake that I'll fix. I think it's because it's so close to eye level, and you see it in profile, that the low res version was too obviously low res. So I subdivided it and never optimized it again.
  • lluc21
    Offline / Send Message
    lluc21 polycounter lvl 5
    MeshMuti said:
    @Obscura, Thanks for taking the time.

    The wheel cutouts are a bit of a headache, maybe someone can help me out here, because once you start with extra geomentry in the cutout it has to resolve somwhere in the mesh. There isn't a lot of space or flat area around the arch to collapse loops so this is my current compromise. I'll look into it a little more and will do an update if I find a solution.

    The antennea is a mistake that I'll fix. I think it's because it's so close to eye level, and you see it in profile, that the low res version was too obviously low res. So I subdivided it and never optimized it again.
    In regards to the wheel cutouts, wouldn't it be possible to add more edges, then merge them with triangles just above it? Then to avoid shading issues use a data transfer modifier like you did on the panel changes maybe.
    This is what I mean for the wheel arches https://www.artstation.com/artwork/vzrmY , but here it doesn't seem like he used custom normals.
Sign In or Register to comment.