Home Technical Talk

3DS Max 2018 Render to Texture headache and hopeful replies.

polycounter lvl 4
Offline / Send Message
jldragon polycounter lvl 4
Been a long while since i Posted here.. so will try to keep it to the point but if i wander off  subject or post turns south to rant, I appologize in advance

I am trying to create a normal map or of the like as close to any of the normal maps shown below so that i can finally get all of my 3d models finished so that i can move forward on my mods.. this is the last part in the process and having to do long version manual creation via photoshop has become too long term, i am seeking an alternative solution to the mapping of the 3d models.

What I am requesting.
The correct process using 3ds max rendering setup, and render to texture settings for which map selection would achieve a similar output of a normal map in a possible possible step by step via text and or video using my 3d model wheel with possible explanation what i was doing wrong and or missed.

Basics...
I create vehicle mods for wargaming.net's World of Tanks. sometimes full overhaul of the tank vehicles, track  to wheeled conversions, etc..
Forum Post below.
Software Used:
3DS Max 2018 ( w/ MaxtoA V. 3077, Max to Substance plugin installed)
Photoshop 2019 w/ Nvidia DDS Utility

I have reset 3ds max to all default settings (deleted ENU folder and resstarted 3ds max) to ensure no rendering settings have been modified.
So here is some images and such for comparison and hopeful understanding.
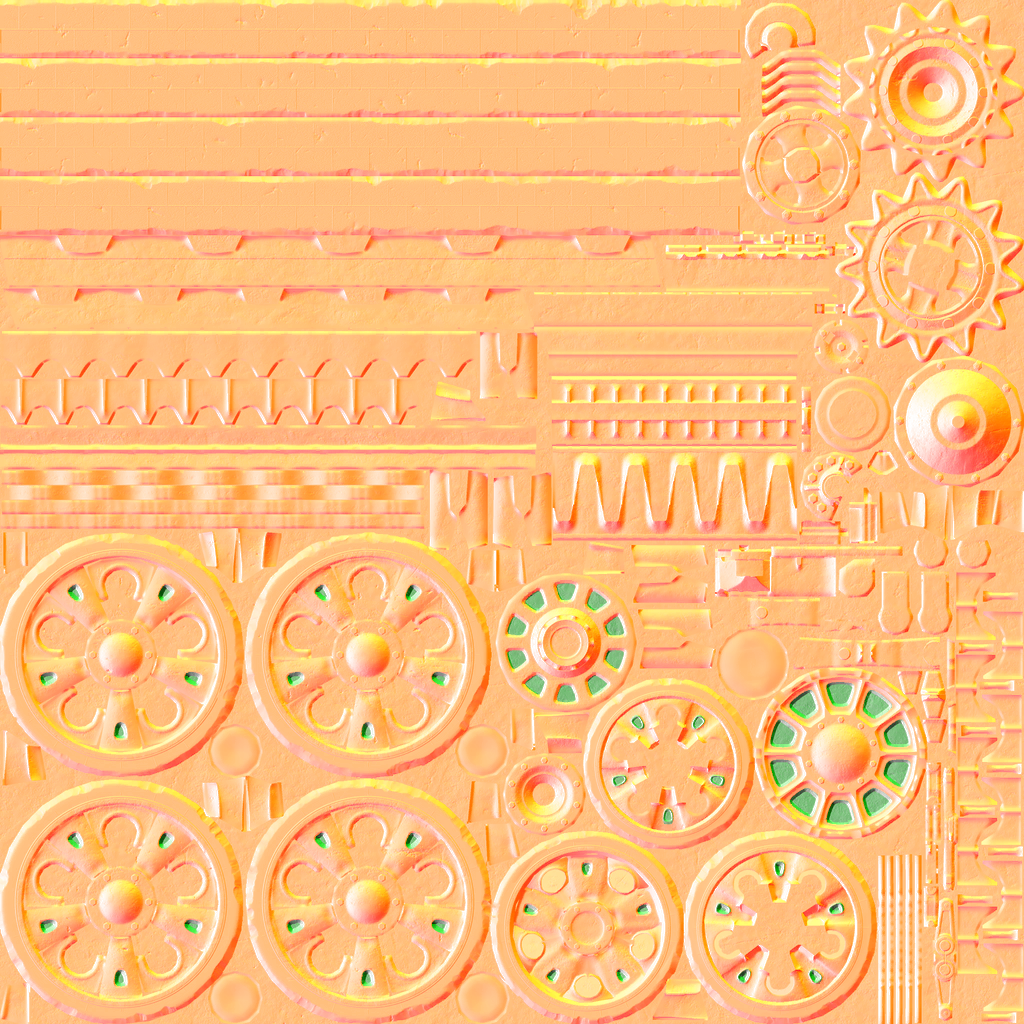
these are considered the normal maps that are used in World of tanks that I am trying to create for my 3D models. Which from what i gathered are now considered "classic" vs the overkill rainbow style based normal maps that are used more.


What i have tried and or done. (Used all Default values of 3ds max rendering setup and renderers unless specified by the countless video tutorials i have followed and tried with 0 success)
Imgur Link with some results good bad and Down right WRONG...
  • Low to High Poly complete map using skylight. and reverse of the same high to low
  • low to high poly projection. and reverse of the same high to low
  • low to high poly arnold with several variations of lights, shaders, etc..I keep getting super Rainbow bright maps or horrible large shadowing on diffuse maps,
  • I rendered every map option in the above at a 512 dim.
  • Vray low to high, with / without lighting of almost all options. omni, photometric, skylights
I would appreciate as little run arounds as possible.. been over 3 weeks of it and running out of hope.

I hope that I have not left anything out and ALL Possible details that your may need to possibly reply with my requested information.. I'm 100% stuck at this point with over a dozen 3d models wheels, tank bodies, panels, large caliber weaponry that are waiting for me to complete and start using and or sharing with the commmunity.


Replies

  • jldragon
    Offline / Send Message
    jldragon polycounter lvl 4
    ok seems the zip files didnt attach.. reattaching.
    Type 59 Default .DDS files
    and 3d Test wheel Model

  • Eric Chadwick
    I think you need to boil down lengthy posts into "Answer First" format. Start with your question, then add clarifying detail. Otherwise, tl;dr.

    It looks like your question is "how do I make a normal map in this style?".
  • jldragon
    Offline / Send Message
    jldragon polycounter lvl 4
    I think you need to boil down lengthy posts into "Answer First" format. Start with your question, then add clarifying detail. Otherwise, tl;dr.

    It looks like your question is "how do I make a normal map in this style?".

    Understood and yes you are correct, how do I create a normal map in this style?

    what I forgot to take into account was that this would be considered a classic normal map from when wargaming.net first started this game back in 2011.  Which they still use this normal map format.
  • jldragon
    Offline / Send Message
    jldragon polycounter lvl 4
    I will edit all the unnecessary clutter from this post when I get home from work tonight to clarify what I am needing and or requesting with only the minimum amount of details that you require.
  • poopipe
    Offline / Send Message
    poopipe grand marshal polycounter
    Surely it's just had the blue channel stripped out and saved as a 2channel map? 


  • jldragon
    Offline / Send Message
    jldragon polycounter lvl 4
    I think you need to boil down lengthy posts into "Answer First" format. Start with your question, then add clarifying detail. Otherwise, tl;dr.

    It looks like your question is "how do I make a normal map in this style?".
    ok shortened the post and yes I am trying to create a normal map using 3ds max renderer with any available option possible that will yield a much more desirable result
    poopipe said:
    Surely it's just had the blue channel stripped out and saved as a 2channel map? 


    seems that way yes. and yet as you can see by the attempted fails, 3ds max rendering output is rainbow overkill.. no idea how to fix this nor create a map in the :Style" like either default map i posted.
  • poopipe
    Offline / Send Message
    poopipe grand marshal polycounter
    I see.
    That normal map.is in world space or object space. 
    I'm not sure you can bake a tangent space map  using Arnold (couldn't find a way to do it in maya at least) 
    Bake your normals using the max scanline renderer

    Alternatively use xnormal, substance, marmoset, knald etc.  To do your bakes,  they're generally better at it

  • monster
    Offline / Send Message
    monster polycounter
    Only use Arnold for the AO, render the rest with Scanline with supersampling. Arnold hasn't been fully integrated into the baking workflow yet. (I think that's being worked on.)

    https://github.com/mikeoverbay/TankExporter/blob/master/!_Tank%20Exporter/shaders/tank_fragment.glsl I found this WoT shader online, it seems to corroborate what you describe. If that really is the shader, there’s good news and bad news. Bad news is that nothing will render the normal map like you need it. But you can probably whip up a photoshop or substance designer tool that converts it to the correct format.

    Render a regular tangent based normal map then swizzle the channels like so... (And this is how the zip file you provided is setup.)

    R = Camo mask I think...
    G = Red Channel Inverted
    B = unused
    A = Green Channel

    Alternatively, enable Camo Mask in the shader options (somewhere in the games material) and it will unpack it as a regular tangent based normal map that you can render out of any program. (Line 180 of that shader.)
  • jldragon
    Offline / Send Message
    jldragon polycounter lvl 4
    • Only use Arnold for the AO - Understood
    • But you can probably whip up a photoshop or substance designer tool that converts it to the correct format.: -  if you mean convert the .PNG into a .DDS.. Nvidia DDS Utility Plugin for Photoshop.. Taken care of
    • Been using swizzler for over a year as well with Tank exporter. Its what i use to extract the tank models from the game directory, edit in 3ds max and reimport back into the game directory to be used in the game
    • Alternatively, enable Camo Mask in the shader options (somewhere in the games material) and it will unpack it as a regular tangent based normal map that you can render out of any program. (Line 180 of that shader.) - Not sure what you mean for me to do with this..
    • I am by the far the dumbest person when it comes to coding.. its like french, german, and spanish jumbled together to me..I can try read it but dont have a clue what the hell I am looking at..
    • render the rest with Scanline with supersampling: -  should this be done with a low to high poly? projection? etc? and which scanline option? with adv. lighting, no lighting, radiosity. etc..
    1. Render a regular tangent based normal map - tried a str8 render to texture with global supersample turned on in the render setup and material editor Selected normalsmap from the add option. set as PNG. SHould I have done something different?
    2. Getting a single color solid purple tone flat image.. no contours, mapping of any sort.. just an overall outline of the test wheel. what should i have done differently? low to high poly? projection?
    3. (And this is how the zip file you provided is setup.) - refering to the test wheel model or the CH_01 Type 59 zip? if the test wheel model. as per the screen shot images i linked from my imgur acct.. then it was in arnold. which will not allow a normalsmap to be rendered unless you chose arnold_N. Not sure where to turn on tangent space map for arnold.
  • monster
    Offline / Send Message
    monster polycounter
    @jldragon You are overthinking and over analyzing this process. You are also making up terms like "rainbow" and "classic" normal map. It's making it hard to follow. Read more...

    Here's what I recommend.

    1. Ditch 3ds Max as a baker. From your set of screenshots on imgur I can see the options and settings are overwhelming you.
    2. Download xNormal, it is free and will bake the diffuse, normal, and AO you need with fewer points of failure.
    3. You need a high poly model to generate the maps that will project onto the low poly. You mentioned you had a high poly model, but the wheel file you provided only has the low poly.
  • jldragon
    Offline / Send Message
    jldragon polycounter lvl 4
    Understood and that is what I plan to do. from the mini tutorials I have been watching that involved the Arnold render to texture process using only a single model that could be considered either high or low poly. Therefore why I only uploaded a single low-poly.model
  • jldragon
    Offline / Send Message
    jldragon polycounter lvl 4
    I'm hoping that when I try to use xnormal I will get a better result
  • Mark Dygert
    Yep, RTT in 3dsmax is a mess, it is in desperate need of an update, avoid it at all costs. Bake in anything else, personally I prefer Substance Painter where I do most of my material/texture work these days.
  • jldragon
    Offline / Send Message
    jldragon polycounter lvl 4
    well all i can say then is ty all very much for really trying to help me get this to work.. I will report my results and hope they are better then what 3ds max RTT was...

    I have not tried SP2 yet in terms of Baking textures.. That would be another process of watching countless more videos.. UGH.. i dont how much more my brains would be able to handle.. I've already lost sight of the end goal and going to have to reboot my process so I can get back on track of it all..
  • jldragon
    Offline / Send Message
    jldragon polycounter lvl 4
    ok so still same question applies.
    "how do I make a normal map in this style?".
    with the below files and videos..
    Should i be doing a low to high poly bake?
    should i be doing a High to low poly bake?

    I have attached the actual 3d model wheel that ai am trying to create the normal for that i will be using on the game model

    Twheel.zip includes 2 models in .FBX format, no animation, lights or camera
    Both are UVunwrapped, solid object models.. model parts have not been detached in any way.

    Twheel_base (base form of the model which i think can be used as the low poly?)

    Twheel_offroad - This is my finished 3d model that i want to use. After maps and texturing
    (would be considered the high poly?)

    models are centered on each other but not to 0,0,0 on the axis of the scene

    Just like 3ds max.. several videos of how to go about baking the normal map using Xnormal


    Which one of these would be the best route for me to use to yield best results?
    Less complicated would be greatly appreciative..
    Or would any of you who have or still uses Xnormal would be willing to suggest a best case scenario tutorial / video that would be considered a more desirable approach of baking my normal map?


  • Eric Chadwick
  • jldragon
    Offline / Send Message
    jldragon polycounter lvl 4
    ok so I decided to take the night off.. spend some time with the critters (2 pups, 1 cat, and 4 birds (dont care for the birds) and my loving woman to totally take my mind off of the delimma I've been facing. Woke up this morning with a whole new clear mind and decided to start from the basics with my model from where I left off. Did some searching and along with the notes and all the help from you guys, I managed to find several things that i never addressed that were causing some problems that I completely overlooked and or didnt think to research.
    Found this page
    • DIagnosed my 3d model
    • fixed the UV islands layout so that was continuous instead of mirrored
    • corrected the spacing between the islands
    • Set the appropriate smoothing groups

    Read up on how to create a low poly from high poly. Turns out Prooptimer was the key.
    Cloned my end result model as a copy, renamed _low
    edit poly > ProOptimizer > Reduced by 50%

    Then decided to fallback to the scanline render to texture, which in my original first attempt was very close to what i wanted.
    Used this video
    I followed all the steps EXCEPT for the one part when he instructs you to turn on cast shadows. I negated that part and continued the video. and I dont recall if he mentioned turning on Light tracer, But that was vital to have turned ON.

    1. I decided to try something for a workaround in the RTT
    2. Stuck with completemap output
    3. Selected default color background and recorded the RGB (128,128,255)
    4. Opened material editor and assigned that color as my diffuse color.
    5. Back to RTT > selected the default color background and increased R and G value by 12 (offset the color for RTT

    got ALOT closer to my end result.. Feeling VERY happy about the progress.
    Went back to the 3DS MAX help page and continued to read on the Render to Texture

    Started tweaking each value by small amounts as per reading which each setting applies. This is my current end result, which is VERY CLOSE to what I wanted.
    Now its just a matter some more minor tweaks.
    improve within photoshop or possibly continue with my settings and try projection from this point to see if the results are better.
    projection didnt render much better results and required more attention for clean up then I wanted.
    At this point, I will move on photoshop, add some style effects, multiply, some contrast and should be perfect :)

    When all done what happens next  is all downhill from here! :) HAPPY, HAPPY, JOY, JOY!

  • jldragon
    Offline / Send Message
    jldragon polycounter lvl 4
    Just want to REALLY THANK YOU all for all your information, help and input.. I was extremely close to some real considerations of uninstalling and giving up. everyone who contributed to this post helped me stay focused.
    So in regards to all this, I am attaching my Render setup settings for those who might be attempting the similar.
    Setting are for Scanline Rendering.

Sign In or Register to comment.