Home 3D Art Showcase & Critiques

Monthly Environment Art Challenge - January & February 2019 (58)

1
greentooth
Offline / Send Message
kadeschui greentooth
Welcome, all! Time for our first Monthly Environment & Prop Challenge for 2019!

Thanks to all the great suggestions for this Challenge - all of which were chosen by you guys and gals!

Remember if you don't finish in the time allotted, just keep plugging away and post when your work is finished. There's always some good progress that falls off the radar - we want to see your work! So keep going and finish those pieces!

Without further ado, here are our options for Challenge 58:
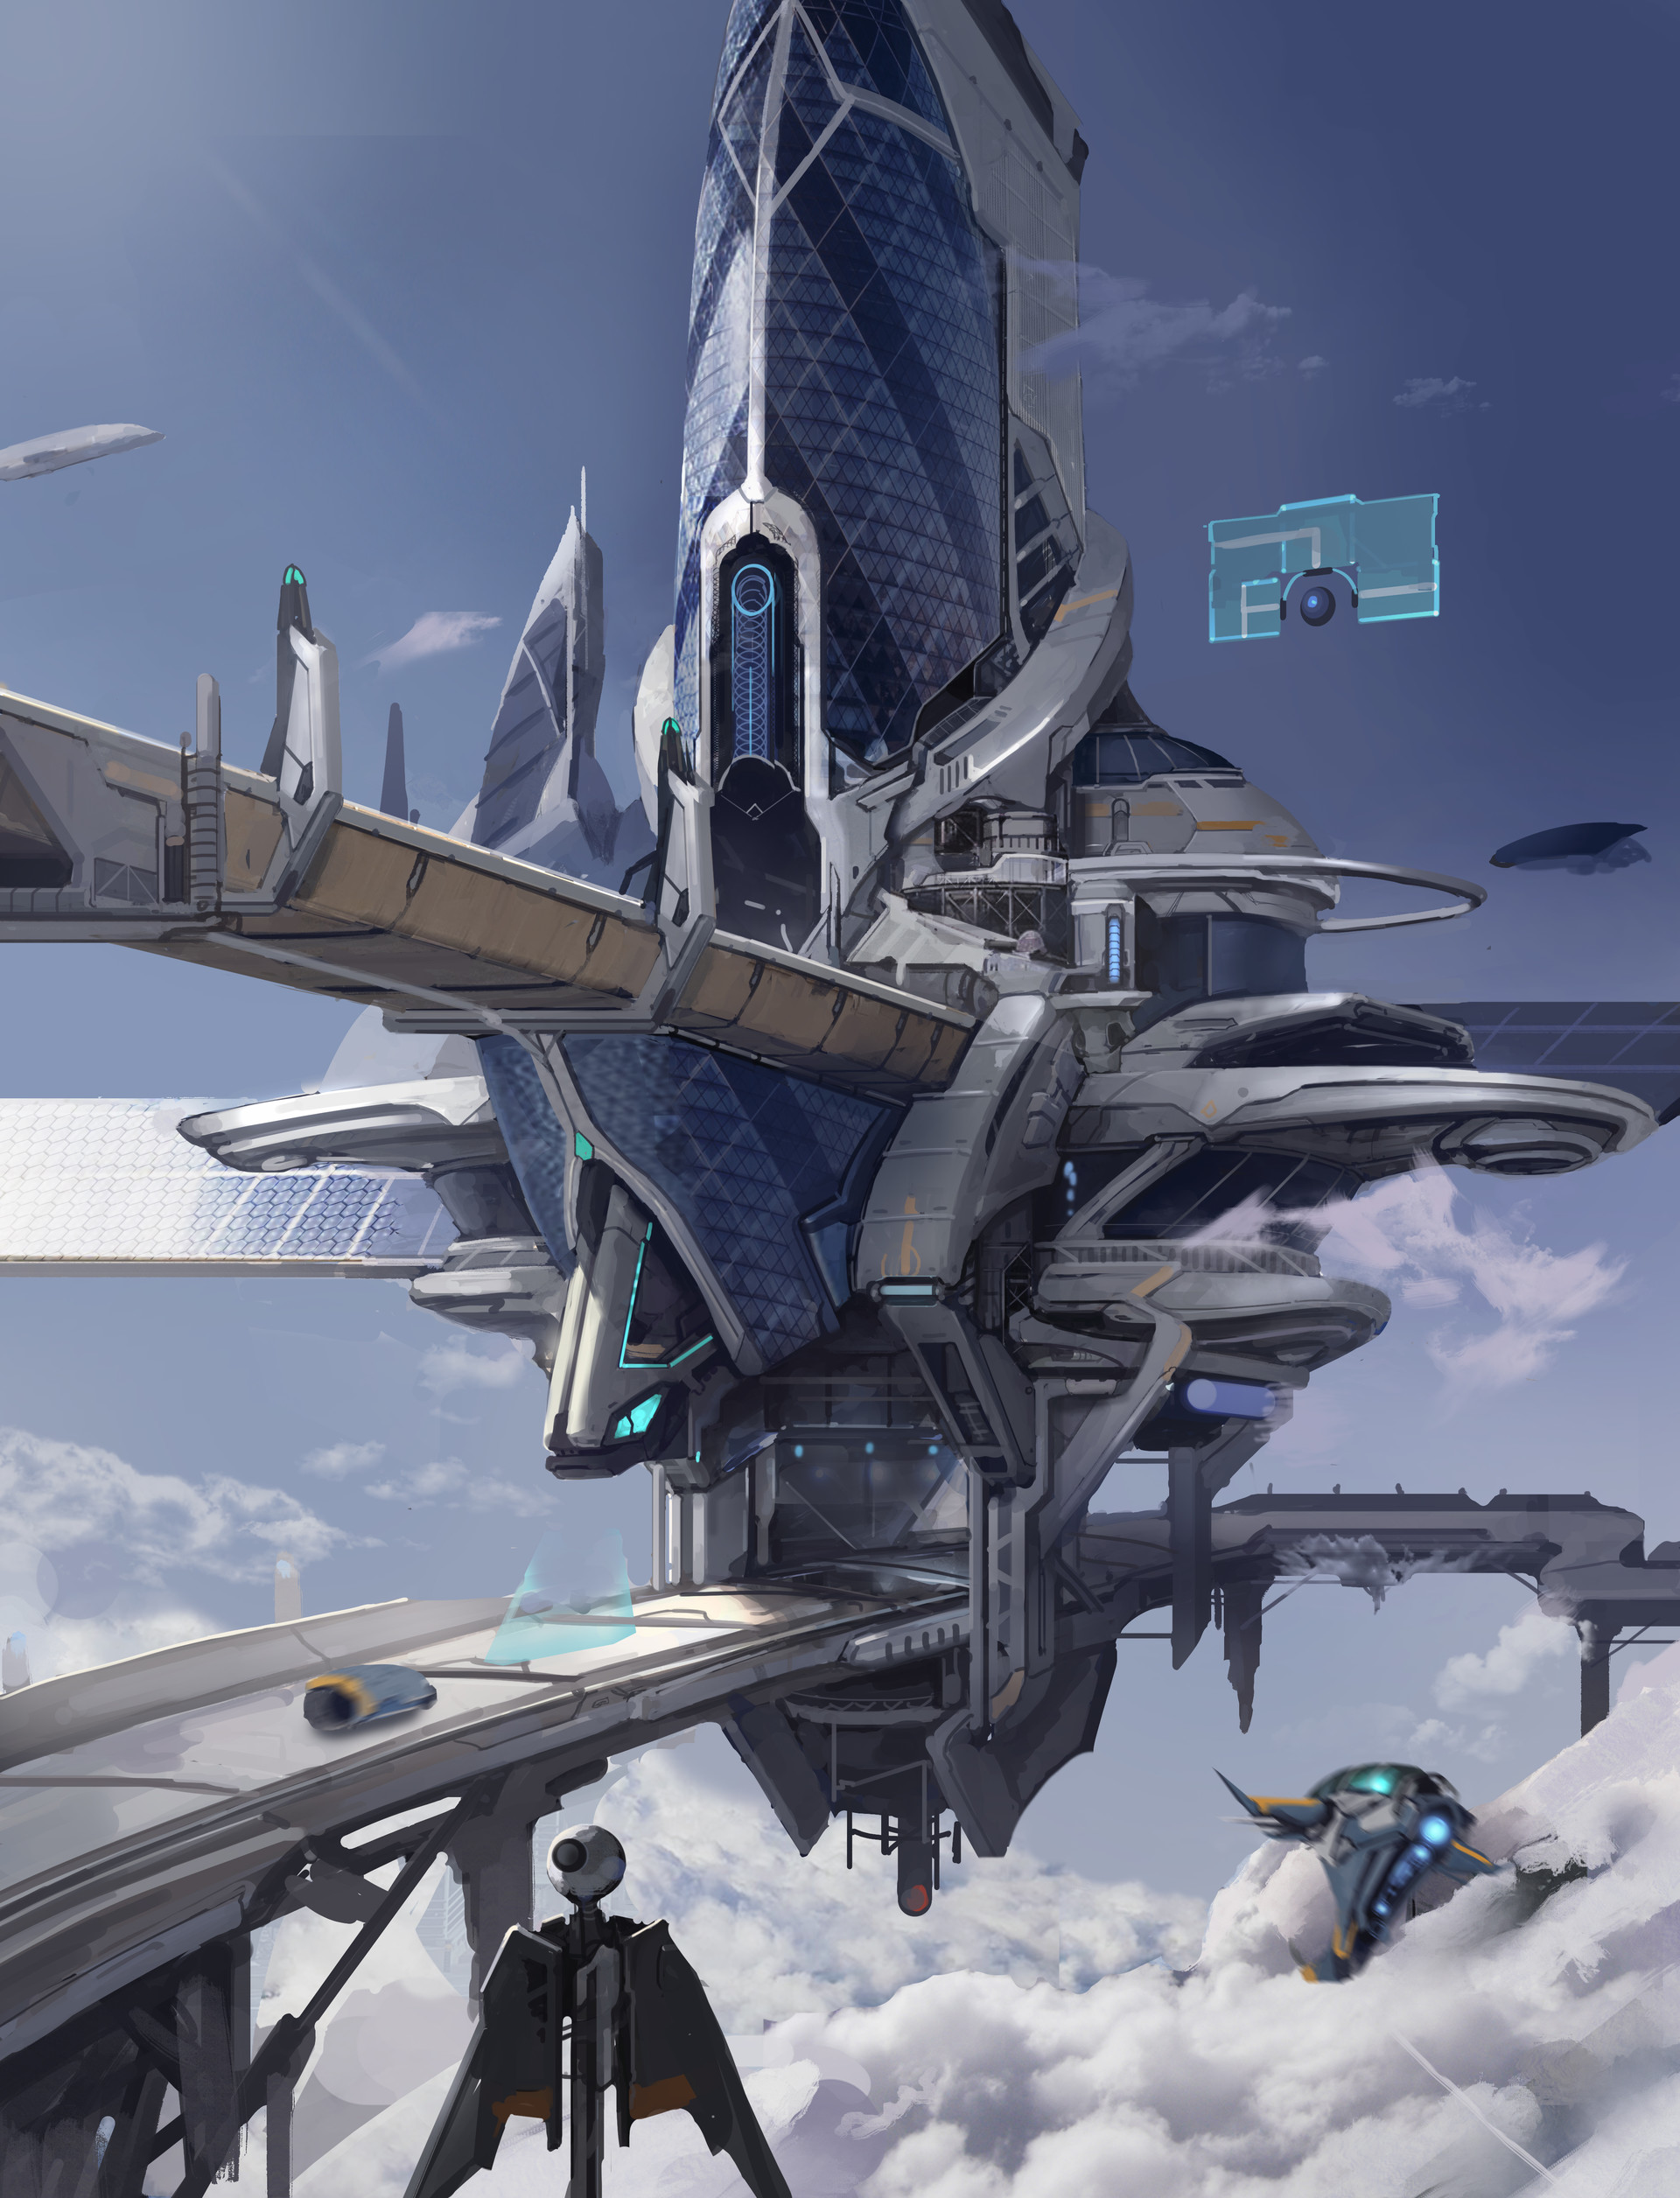
- ENVIRONMENTS -

HARD SURFACE CATEGORY:


artist:https://www.artstation.com/artwork/Ozl2K

HAND PAINTED CATEGORY:
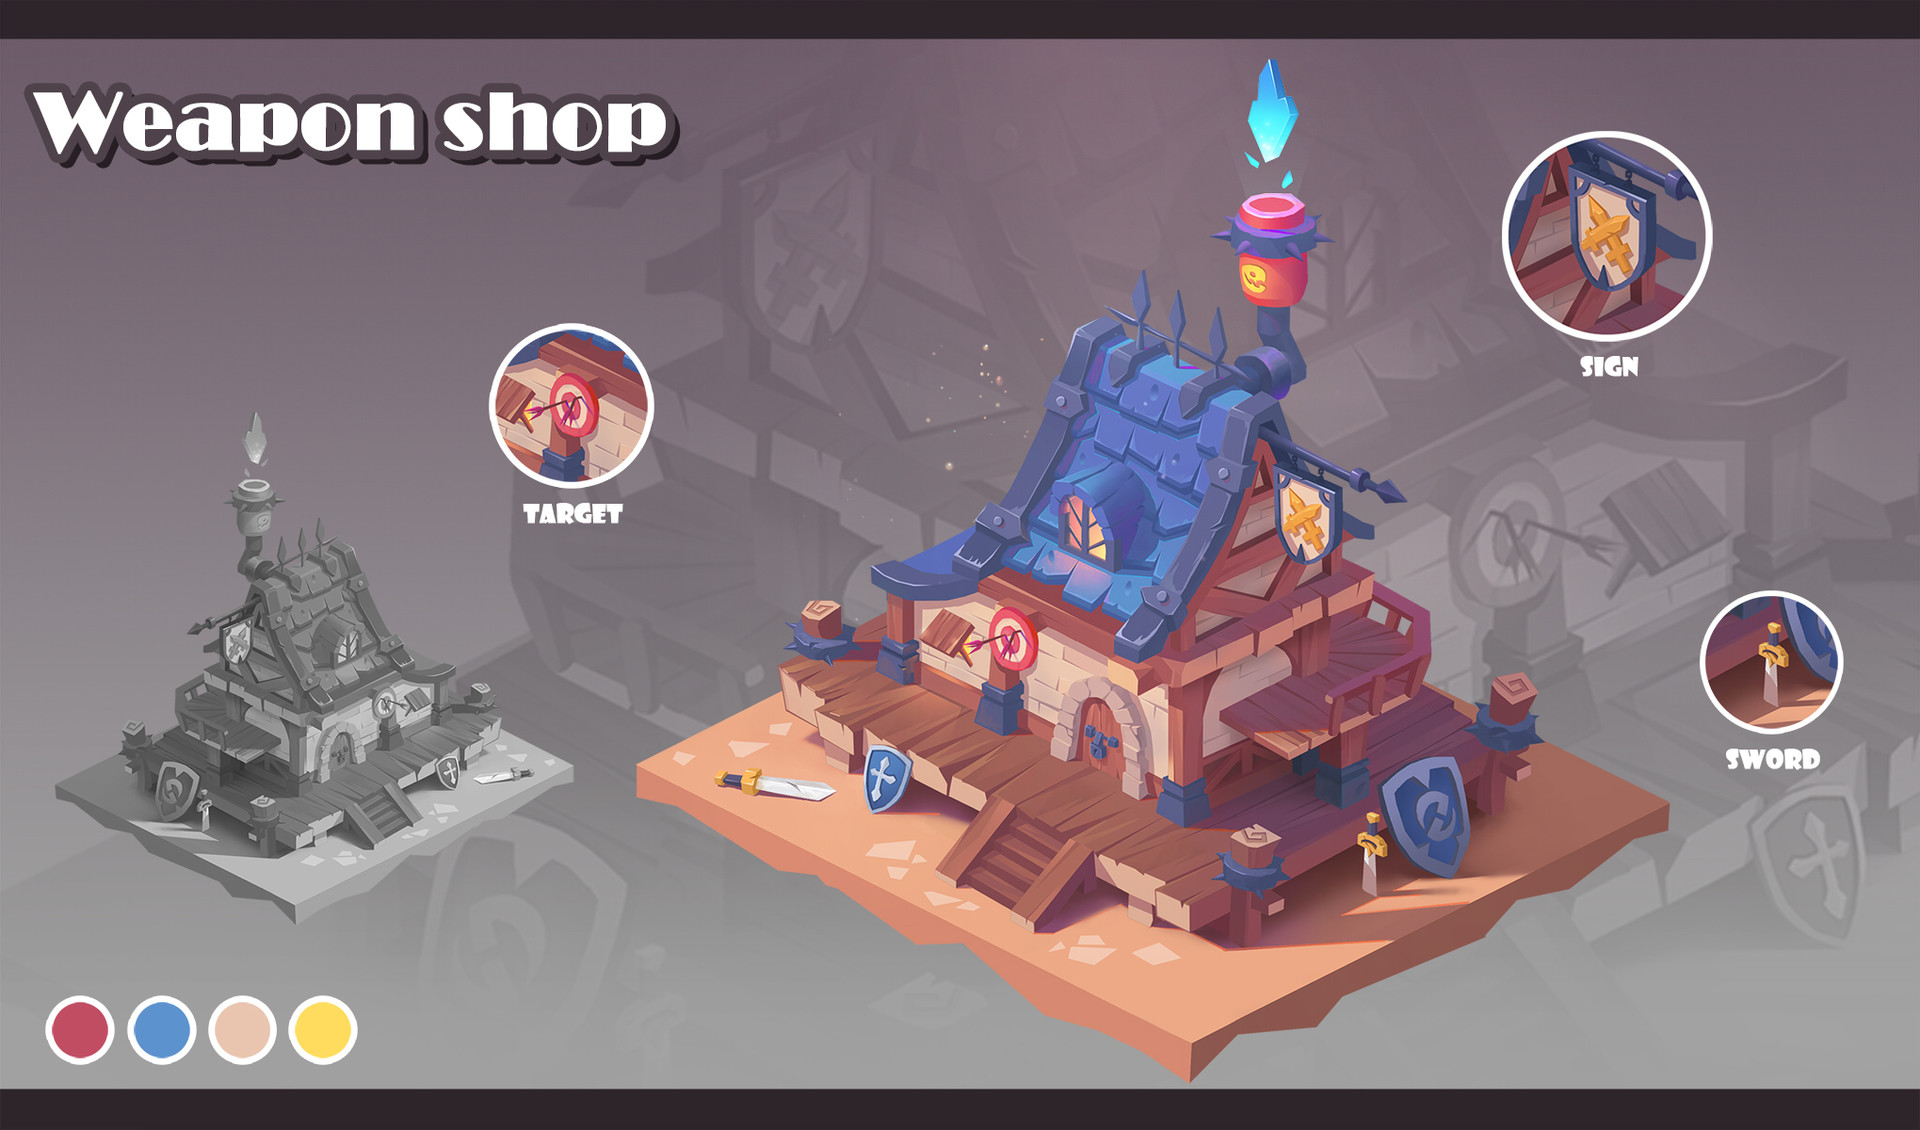
artist:https://www.artstation.com/artwork/G2kEN

- PROPS -

HAND PAINTED CATEGORY:

artist: https://www.artstation.com/artwork/BnJ3l

HARD SURFACE CATEGORY:

artist: https://www.artstation.com/lapo21


If you want to change up either concept a bit, as some people wanted, then feel free. Interpret these concepts to your liking.


Please read all the rules before starting.

When you are just starting out making a scene, it can seem complicated or imposing, so take the time to break it down. 

Think about how you can re-use assets, re-use textures, break it down as simple as possible and plan it out. A lot of people will break it down in their own way when they start out their challenge. Gather some reference images as well for different parts of the scene, maybe gather some refs and make it your own.

Take your time planning and blocking out, it will set you up for success later on.

Here are some specifics.
  • Try to post one critique for every post that you make. This will make for a better learning environment and help us all grow as artists.
  • You must use a game engine to present your work. Unreal Engine and CryEngine are very common engines that can be used but feel free to use any alternatives that you want. (Marmoset Toolbag is allowed as well)
  • You must try your best and finish as much as you can in the time frame provided.
  • Post what you are working on in this thread so that way it's a more centralized place for advice and critique. We don't need to have 1000 disjointed threads littering the forums. 
  • I would strongly encourage you to go and look at other games and see how they make their assets as well as get concept art to give it your own feel, but it must stay very close to the concept, if not super close. 
  • Well, that's about it. If you think that any rules should be changed, or there should be new additions to the rules, please let me know. As always, please feel free to provide feedback / suggestions in this thread or by messaging me directly.

All that matters is that you learn while being able to effectively critique others, as well as accept critiques on your own work. Remember to have fun. Cheers!

Replies

  • Mossum
    Offline / Send Message
    Mossum polycounter lvl 2
    Nice concepts!
    This is my first time doing the challenge and I am really looking forward to it! I have chosen to do the handpainted prop and will start with it today :)

    Cheers!
  • Nick_Medukha
    Offline / Send Message
    Nick_Medukha polygon
    Hi everyone! Great concepts! I decided to model a hard surface prop, and seems like Im stuck at the beginning - could somebody explain me how should the golden thing of the handle scale in width? I see that from the left it starts pretty wide, then does it need to convert to the cylindrical shape at the bottom part, and also how wide it will be on the part when steel part attaches?


    here is the part I am concerned about, and here is the how i see it - 
  • Decordova360
    Offline / Send Message
    Decordova360 polycounter lvl 9
    @Nick_Medukha
    I think its fine, it reminds me how some of those fancy door knobs look
    Image result for style door handle
    Image result for verticle style door knob
    Image result for verticle style door knob
  • Nick_Medukha
    Offline / Send Message
    Nick_Medukha polygon
    @Decordova360 thanks a lot! Now I understand how it should look like!
  • AndySC
    Offline / Send Message
    AndySC polycounter lvl 5
    This is how I've taken it. I followed the roundness of the handle and included some variation to the width for more visual interest.
    Modeled with a flat circle top and bottom, extruding four edges around the curve and using a solidify modifier for the thickness. With the solidify modifier it's very easy to go back and edit.

  • Mossum
    Offline / Send Message
    Mossum polycounter lvl 2
    @AndySC Wow, that looks great! Really nice job. :)

    I have started blocking out the handpainted prop, just to get an idea of the whole shape. I have been a bit unsure about the back of it and in particular the upper part where the wings and heart shape are. Right now I am thinking about doing that part flat on the back while the lower part around the sphere will be shaped all around, anyone having other ideas about this part?


  • Nerdicon3000
    Offline / Send Message
    Nerdicon3000 polycounter lvl 8
    @Mossum I think maybe you should pop the heart out a bit more and then just mirror the whole top piece for the backside. It's just a suggestion, feel free to do what you think looks right.

    I just did a quick blockout of the hard surface environment. Just getting some of the larger proportions right before I start going into the details

  • VNinja
    @Nerdicon3000  Nice block out! How did you manage to get the perspective spot on? I’m struggling to line up my block out in Maya LT. Any tips? As I'm having trouble with the block out, I've decided to start creating some substance designer materials. I started with the Solar panels in the back. 

  • Gustavo_Elliott
    Offline / Send Message
    Gustavo_Elliott polycounter lvl 4
    Hello fellow polycounters! This is the second challenge I have participated in and enjoyed it a lot the first go round. I have decided to create the stun Baton first off and maybe do the hard surface environment if I have time. I feel I have been making good time on the stun baton. Here is my latest in-progress screenshot of the high poly so far, I am welcome to critique or any feedback at all, thanks in advance!
  • Nerdicon3000
    Offline / Send Message
    Nerdicon3000 polycounter lvl 8
    @VNinja I was having a bit of trouble too so what i did was created a long cube and matched it to the top walk way. If you want me to go step by step and more in depth on how I match perspective in maya just say and I will happily give you more details. Great start with the solar panels by the way! 

  • VNinja
    @Nerdicon3000 I see, If it’s not too much trouble could you go through it step by step please?  Thanks I still need to work on the roughness 😅
  • Mossum
    Offline / Send Message
    Mossum polycounter lvl 2
    @Nerdicon3000
    Thank you for your feedback! It is a good idea :) And very nice blockout you have going on there!
  • Nerdicon3000
    Offline / Send Message
    Nerdicon3000 polycounter lvl 8
    Actually I found a video that is similar to my method.

    https://www.youtube.com/watch?v=iqQdverK7ak

    I also create a new camera by going to the create menu. Then I select the panels menu in the viewport, go to the perspective submenu and select my new camera. Then I go to the panels menu again and go down to tear off copy. This gives me a new viewport that is only looking through the camera I created. That way I can go back to the original camera and place objects onto the scene and make small adjustments to my camera to match the perspective up.

    If that is all a bit much just go with what he did in the video.

    I also try to make sure I set up your grid for what engine you use. I use UE4 so 1 unit = 1cm. Getting the grid right will help with materials later on as well. Just go to the display menu and grid to change.

    Hope some of this stuff helps.
  • VNinja
    @Nerdicon3000 This helped a lot! Although I have a question. did you align the grid to the top walkway or the bottom one? 
  • Nerdicon3000
    Offline / Send Message
    Nerdicon3000 polycounter lvl 8
    For me i left the grid in the middle and aligned the scene with two long cubes for the walkways. They are both directly parallel to each other so if the perspective is right for the top you should be able to duplicate it and bring it down and it will match the lower walkway if you bring it back a little as the walkway bends a bit.
  • Neel_Parekh
    Offline / Send Message
    Neel_Parekh polycounter lvl 5
    This is my 1st polycount challenge. Decided to do hand painted env category this time as I have never tried this style. Started with blocking.
    here is my ArtStation Proflie: https://www.artstation.com/neelparekh


  • AndySC
    Offline / Send Message
    AndySC polycounter lvl 5
    I'm progressing well so far. I've nearly finished modeling the top, then it'll be back down to the ridged wooden looking cover (again). I've tried a few ways of making it but nothing has seemed 'easy'. A quick sketch/rough should help me figure out how many loops I'll need to get the curves while extruding the ridges.

    @Mossum I think mirroring the top part as Nerdicon3000 suggested would work well. Also the large red heart looks '3D' rounded out towards the camera and that area looks flat in your blockout.
    While it may not qualify as hand painted, It would be interesting to see the red parts as gem/glass shaders.


  • Metagon
    I began with a humble breakdown to give me an overview and to assess the scope of the project.


    Parts of the Handle:
     Wooden Handle
     GoldenHandguard
     GoldRinghandle
     Trigger
     TriggerCyl
     TriggerBk

    Parts of Mid:
     MidBridge
     MidBall
     MidConnector
     MidConAttacher
     MidWire

    Parts of Wand:
     WandSheath
     Wand
     WandRing
     WandWires
     WandEndpiece
     WandWireConnectors

    Parts of Wand End:
     WandTop
     WandConductors

    Update:


    I will probably end up thinning the trigger down. I'll also let Substance handle the screws along the handle as it'll save me baking them.
  • Gustavo_Elliott
    Offline / Send Message
    Gustavo_Elliott polycounter lvl 4
    Hello again friends, a few days later and I am just about finally done the High-poly, my next step is the smaller parts such as the various screws, nuts and bolts. I am going to export the handle and main piece under the power dial to Zbrush to insert the details that indicate the power-level, after such I shall begin optimizing for the low poly. The hardest part so far has been the yellow venting halfway up the model, finding out how to make it look alright from many angles has been a challenge for me and may prove to be the time-taker of this project as it may require further iteration. Let me know if you see anything out of place with my model, critique is always welcome.

    p.s. I can upload other angles, I'm just trying to take it easy on everyone's internet.
    Now... time for feedback...
    @Metagon That trigger already looks quite thin, almost to the point where it looks out of proportion to the hand guard, it is my impression the the trigger should be slightly thinner than the guard, yours however looks like it would break with a hearty squeeze. I like how you made to parts going around the guard at the front of the trigger, I took a slightly different approach and put the trigger off to the left just a bit and bent the guard out of the way of functionality.

    @Neel_Parekh    Nice blockout, welcome to the monthly challenges, interested in seeing your end result!
    @Nerdicon3000 Nice blockout! I am very interested to see how you progress with this, looking forward to the end result.
  • AndySC
    Offline / Send Message
    AndySC polycounter lvl 5
    @Gustavo_Elliott Venting? I was looking at it as decorative ridges around the wooden(?) cover. 
  • Gustavo_Elliott
    Offline / Send Message
    Gustavo_Elliott polycounter lvl 4
    @AndySC yeah I mean I guess it could be taken either way, I just thought it looked goofy the way I had it, I just wanted to make them look functional somehow instead of the large noodles I had attached to the side of the baton. The shapes just didn't work right for me before, I'm still fighting to make it look right from all angles, definitely good practice and studying of form.  But yeah, I mean the "vents" don't have holes running anywhere for anything to be vented lol so call it what you will... vents... decoration.... all I know is it has been a challenge getting it right
  • Metagon


    I built more around the trigger and added tapers to some areas to make them more interesting.

    Everyone's work looks good so far, so I've not felt the need to critique.
  • Larry
    Offline / Send Message
    Larry interpolator
    Hello everyone! Great progress so far! This is my take on the steampunk prop! This time i extruded inside all the intersections, so all the parts that are connecting, they realistically seem to click together. I could have said that phrase better but i can't find better words for it right now :neutral:  


    @Gustavo_Elliott Your handle doesn't really look cylindrical, did you make it flatter on purpose? Good job on making all of it so fast, but if i were you i would take some more time on a couple of the pieces like the handle, to make them more interesting. Except from the working bits, all the rest should be interesting on their own. Steampunk stuff generally have ALOT of ornamental decoration on visual places

    @AndySC That is a nice take on the top side, although you could also add some variation to all those cylinders you have there. Every cylinder has the same radius, so, adding some variation to the thickness and the radius would go a long way!

  • VNinja
    It's taken me a while but with the help from @Nerdicon3000 on matching perspective, I've finally done the main block out :smiley: I'll add in the smaller parts as I continue to model. My next step will be applying the substance designer material I made for the solar panels after I make some alterations. 


    Everyone has made great progress so far! The critique I was going to mention has already been mentioned. @Neel_Parekh Nice start on the block out!

    Edit: So I've run into an issue where My height map is displaying wrong in substance painter. it works fine in substance designer shown below. Does anyone know how to fix this? 


  • Larry
    Offline / Send Message
    Larry interpolator
    Finished the block out! Really happy with the shapes overall, most of the pieces seem interesting on their own as well! Making the low poly now and off to sculpting!
  • Quibees
    Offline / Send Message
    Quibees polycounter lvl 4
    Hello, everyone!  I`m a bit late, but I hope I can finish at least one piece till the end of february, Made some blockout, wings are still in progress :3

  • Quibees
    Offline / Send Message
    Quibees polycounter lvl 4
    Some progress. I`m done with modelling for now, quick umwrap (symmetrical for front/back). Will try to start texturing. Made some general bakes + gradient :3

  • Larry
    Offline / Send Message
    Larry interpolator
    For people who are struggling with how to bake the hard surface prop, you probably need more than 1 texture set (i did 3) and dont forget to straighten your uv shells, and smoothing groups by uv shells, for optimal bakes!
  • wirrexx
    Offline / Send Message
    wirrexx ngon master
    Larry said:
    For people who are struggling with how to bake the hard surface prop, you probably need more than 1 texture set (i did 3) and dont forget to straighten your uv shells, and smoothing groups by uv shells, for optimal bakes!
    The Main piece is very symmetrical, to be efficient you could just split it and delete half of it and texture that IMO. So many elements that are Copy pasted. So those could be deleted and re-added after baking and texturing. 3 Texture sets are overkill for that object! Only pieces i would not do in half , is 1. The handle 2. The Safe /Stun piece (maybe they are one)? =) But that's my OP.
  • Larry
    Offline / Send Message
    Larry interpolator
    wirrexx said:
    Larry said:
    For people who are struggling with how to bake the hard surface prop, you probably need more than 1 texture set (i did 3) and dont forget to straighten your uv shells, and smoothing groups by uv shells, for optimal bakes!
    The Main piece is very symmetrical, to be efficient you could just split it and delete half of it and texture that IMO. So many elements that are Copy pasted. So those could be deleted and re-added after baking and texturing. 3 Texture sets are overkill for that object! Only pieces i would not do in half , is 1. The handle 2. The Safe /Stun piece (maybe they are one)? =) But that's my OP.
    Symmetry especially in the main piece would be extremely visible. For other small bits and parts it might be okay,but i modeled most of the small parts differently.And even doing 3 textures, to have a nice texturing quality, all my 3 sets are at 4k. It depends on what you want your end result to be, for me for a portfolio piece, i will now actually try to make 4 different textures instead of 3, and then try to scale them down to an atlas.
  • Larry
    Offline / Send Message
    Larry interpolator
    by the way, can someone help me on how to bake these holes properly? Like, showing the void, emptiness, and not a material. Is that possible or do i have to model them?


  • Decordova360
    Offline / Send Message
    Decordova360 polycounter lvl 9
    Larry If the holes will not be visible, just dont model them in.

  • Lokthar
    Offline / Send Message
    Lokthar polycounter lvl 7
    @Larry I guess you're baking with substance painter right? 
    If you use Marmoset youll have the chance to paint it out and avoid skew details like this one!
    https://marmoset.co/posts/toolbag-baking-tutorial/
  • Decordova360
    Offline / Send Message
    Decordova360 polycounter lvl 9
    @Lokthar
    If he has Marmoset, but Im probably confuse to the question, @Larry Are you referring to the vents on the side or holes that are open with these parts


  • wirrexx
    Offline / Send Message
    wirrexx ngon master
    Larry said:
    by the way, can someone help me on how to bake these holes properly? Like, showing the void, emptiness, and not a material. Is that possible or do i have to model them?


    Either you cut in the geometry and then bake, or you use alpha, which is more expensive. Ask yourself "are the holes visible?" if yes, cut them in..If they are visible from far away, paint them black!
  • Larry
    Offline / Send Message
    Larry interpolator
    @Decordova360 you can see in the baked result (white mesh) in substance painter that the normals for the vent are baked but not the hole itself, so i was wondering if there is a way to bake that area, and make it absorb all the light, resulting in a total black area. I cannot use marmoset. So i guess i have to model them, but the material is see-through from the inner side, and i want the inside to be total black. I don't want the messy way and model a whole box in each vent hole. It will be visible on a table on a portfolio piece
  • Decordova360
    Offline / Send Message
    Decordova360 polycounter lvl 9
    @Larry
    So you want the vents to appear realistically making it bevel or extruded inward. It would probably be best to model it in. If that is not an option, suggest leaving it a black albedo color with no reflection or microsurface detail and or Bake out a height map, and in whatever renderer, have the vents form base on height map.
    Also where is it going to be rendered in?
  • Lokthar
    Offline / Send Message
    Lokthar polycounter lvl 7
    @Larry
    For what i Understood you're trying to make a portfolio piece, so push it more with Uv Set then also with texture resolution, but if you're doing for game, you still need to ask yourself a couple of question, how big this piece is? Will the player ever see it? how far the player camera will be from the weapon? stuff like that...
    Did you try to bake the AO, i think with that map that holes area will be pretty dark...otherwise you can model those as @Decordova360 suggest but it will be a waste of polys as 
  • Decordova360
    Offline / Send Message
    Decordova360 polycounter lvl 9
    If its a hero asset, which from the concept it would seem to be one, create it as such if you're focus on it being a game piece. However tbh, you should focus on making it as badass as possible for a portfolio piece, I understand we all need to try and make it work for a game, like the  polycount, which is not an issue like one time decades ago. Try to make the work/render stand out as much as possible pushing as much detail as you can. Whenever you're given a position, you will be given guidelines as to what can be done and how it should be in the particular studio and project. Dumb-down an asset is not that hard and the same goes for textures which LODs come into play a lot. So I recommend pushing the asset as far as you can and go all out, get as much detail. You want to stand out against the crowd. And this is for everyone. :D 
  • Gustavo_Elliott
    Offline / Send Message
    Gustavo_Elliott polycounter lvl 4
    @Larry hey man, I would just model those details in so you aren't at the mercy of your normal map's texel density, also this being a portfolio piece makes it quite necessary to push detail like @Decordova360 said... I am doing my baking in marmoset and will be done soon at which time I will post the progress.. I took a medium-poly approach to some of the smaller pieces even though it would sometimes go overboard poly-wise but it gives you much better bakes having the edges beveled a bit... especially on 90° corners.
  • Larry
    Offline / Send Message
    Larry interpolator
    Thank you guys for the replies, i'm really not sure yet but i will try to model them later on, after i see the final textured model.
    @Gustavo_Elliott my baking is perfect, i sculpted some pieces and just turbosmoothed others, not having any problems there.
    @Lokthar i baked the AO from the high poly but still doesn't show up like a void in the low poly :/ maybe i will try to paint on top of it.
    @Decordova360 it's definitely gonna be on sketchfab, and in artstation. It would definitely be a hero asset, as all weapons are seen from up close. I made 4 set of uv's and made an atlas that will be at 4k, i'm pretty okay with the overall texel density and the shape of the weapon. However, i would like some critique on the texturing, i actually tried to texture it 3 times, since i'm really bad at it. At the moment i don't know how to improve it texture wise.Something looks off to me and i don't know what it is, it seems too flat, no? 

  • Decordova360
    Offline / Send Message
    Decordova360 polycounter lvl 9
    @Larry Could you provide more screenshots of your current render, especially more close-up shots of the asset(s) and rotate the light showing up the roughness/microsurface detail. The brush metal between the handle and gold design and wood seems good, i like how u have light dirt, maybe a little more along with some rust and heat burns. From current shots, i would say tile the texture more, but If possible, can you provide more close up screen shots.
    Thanks :D 
  • Larry
    Offline / Send Message
    Larry interpolator
    @Decordova360
    I actually textured it 4 times the past few days, asked for critiques,and ended up hating it ,but no1 really gave a helpful way to tell me what was wrong with my texturing.I got some discord replies that said it doesn't have enough contrast. So after going through it on photoshop trying to get a more visually interesting result, i ended up finding a really helpful trick. GRAYSCALE

    Apparently all the colors trick your eye, so if you turn it to grayscale you can find a better way to understand which values can change to make it more interesting. So i ended up re-texturing it into this. No dirt pass yet.

    This is the interesting part, and visual trick that really helped me get more values straight, and get better contrast.

    coming back later with the dirt pass for s'more critiques!
  • daehong
    I don't mind using my pictures, but you have to revise artstation link.
    https://www.artstation.com/daehongjang
  • SashaNodia
    Offline / Send Message
    SashaNodia polycounter lvl 5
    Deleted original post
  • Pixelbit
    Offline / Send Message
    Pixelbit polycounter lvl 4
    Hey, all. First time posting on Polycount! I decided to go with the second environment. Figured it'd be a good place to start. Here's a blockout i've worked on so far: https://i.imgur.com/smCsNVi.png It's not an exact 1:1. Need to work on proportions, sizes and shapes, etc.
  • Gustavo_Elliott
    Offline / Send Message
    Gustavo_Elliott polycounter lvl 4
    Hey all! I just wanted to post a progress update -- I am currently in the rough texturing phase and I'm going to take my time here to make sure I get things looking as good as they can be. For now, I am mostly working off the default substance mats as a base and whatever I feel does not stand to par -- I will make myself in substance designer. But anyway, I have a doctors apt shortly and want to post what I have currently - thus the reason for the untextured bits...
    @Larry -- Your piece is looking so good! I love the custom work on the hand-guard,, how did you do it? sculpted with an alpha??
  • Finnn
    Offline / Send Message
    Finnn greentooth
    @Gustavo_Elliott , that looks great already! If you want to stick more with the concept, you can adjust your colours to fit the concept.
  • Finnn
    Offline / Send Message
    Finnn greentooth
    Larry said:
    @Decordova360
    I actually textured it 4 times the past few days, asked for critiques,and ended up hating it ,but no1 really gave a helpful way to tell me what was wrong with my texturing.I got some discord replies that said it doesn't have enough contrast. So after going through it on photoshop trying to get a more visually interesting result, i ended up finding a really helpful trick. GRAYSCALE

    Apparently all the colors trick your eye, so if you turn it to grayscale you can find a better way to understand which values can change to make it more interesting. So i ended up re-texturing it into this. No dirt pass yet.

    This is the interesting part, and visual trick that really helped me get more values straight, and get better contrast.

    coming back later with the dirt pass for s'more critiques!
    That's a really cool trick Larry! It makes the contrast alot easier to see.
    I've seen a technique for creating Diffuse Maps in Substance Designer once, where the artist took the reference and lowered the color depth to a point where only very big shemes were visible. It is always good to try and see things from different perspective and scale. Observation is very difficult skill but also verrrry important. Remembering your idea for sure !
  • Gustavo_Elliott
    Offline / Send Message
    Gustavo_Elliott polycounter lvl 4
    Thanks a lot @Finnn... I normally have to take extra special care in the area because I have a color deficiency, thus meaning I can't see small differences in shades of similar color. I see browns, reds, blues and purples a little differently than other people so it really helps having someone to give critique on that! Thanks again for reiterating how much focus I should put on the color theory of the model.
1
Sign In or Register to comment.