The Heart Game
polycounter lvl 2
It's a bit difficult to explain what this project is all about.
For many years I’ve been doing mostly still image artwork, and during the time of creating one of those still images, I had an idea that it would really be cool to actually be able to experience what was taking place in the image instead of only having the still image. One thing kind of led to another as I had ideas for things, and I realized there were a whole bunch of ideas I have had for images, and other things I enjoy doing, like playing music, painting, coding, that were all kind of converging and could fit together into this one single work of art. It's really turned into a whole new way for me to do artwork.
Although I'm using a game engine to create it, I'm not really trying to create a game. I'm more trying to create a painting that you can walk inside of, very much what being out in nature is like in the real world. So I guess in the end, the game engine is like a paintbrush, and I’m not necessarily trying to make a game, but a piece of art that is experiential.
Downloads
Since it's not something that I'm planning on trying to sell, I thought it would also be fun if you could play the game while I'm making it, so you can find the link to the working game, or artwork") , here: http://www.artoflightandmotion.com/downloads
, here: http://www.artoflightandmotion.com/downloads
Purpose of the Project
And that’s it really; it was a bit long, but now you know why I’m making it and what it’s about.
Real moon cycle
Real day/night cycle based on latitude
Teleporter room to travel around the landscape
Wind movement in sync with audio
The heart is such a fickle thing, the way it seems to mirror what’s been put in.
Yet I find that, as others bring pain to me in the coldness of their hearts, my heart cares less and brings pain to others, and that which I hated so much, I have become in other’s eyes.
It is said that we should love our enemies and bless those who hurt us.
Is there any other way to live?
If I give pain for pain, am I not just the same as them?
But can I ever love again?
The risk of pain can be so great,
To open my heart and give.
But this heart must come alive, to let love in and breath again.
So let the doors fling wide, and let my heart beat again
For that is true life, when my heart beats and love flows through.
I do not always get to choose the things that happen to me, but I can choose who I want to become and the heart I want to have.
So who do you choose to be?
Music in the game
Game Design Document Folder
Here you can find out more about what I plan to add to the artwork, and check in to see where the overall game is headed. As I have ideas for things, I'll be updating things below and in this folder here: https://www.dropbox.com/sh/fyfmyqpsx3if708/AAByzAGRfJrKdipuS6NOnVx2a?dl=0
Story in the Artwork
See Story Overview in above folder.
Overview of the areas in the map
I thought I would try using SketchFab as a visual game design document, so here you can see the entire map as I have it so far and what I’ll be working towards in each area.
If anyone has ideas for improvements, I would be glad to hear about them
As a note, SketchFab seems to run quite slow in Safari, so if you’re using it and it’s going slow, Firefox works much better.
For many years I’ve been doing mostly still image artwork, and during the time of creating one of those still images, I had an idea that it would really be cool to actually be able to experience what was taking place in the image instead of only having the still image. One thing kind of led to another as I had ideas for things, and I realized there were a whole bunch of ideas I have had for images, and other things I enjoy doing, like playing music, painting, coding, that were all kind of converging and could fit together into this one single work of art. It's really turned into a whole new way for me to do artwork.
Although I'm using a game engine to create it, I'm not really trying to create a game. I'm more trying to create a painting that you can walk inside of, very much what being out in nature is like in the real world. So I guess in the end, the game engine is like a paintbrush, and I’m not necessarily trying to make a game, but a piece of art that is experiential.
Downloads
Since it's not something that I'm planning on trying to sell, I thought it would also be fun if you could play the game while I'm making it, so you can find the link to the working game, or artwork
To tell a little about the purpose of it and the core of what it’s about, it’s a work of art that is all about the heart and having an open heart versus having a closed one, but since it’s experiential, I really just want to make something that opens your heart while playing it and maybe even brings a bit of healing or respite from the difficulties in life, if that’s possible. I think in the end, being able to have an open heart and knowing that we are truly loved and accepted as we are, that we are okay, is what we all long for the most, but can be one of the most difficult things to keep and accept, because it makes us vulnerable to being hurt again. But it’s also one of the most important things to have in life and effects everything we do. This whole idea of the heart changing is central to what this game is about. Love coming in and flowing back out again, and that when the heart is closed off, it blocks the love from flowing.
For me, it was Jesus' love that opened my heart and keeps on opening my heart each day. His love has changed who I am as a person, and I don't really even know how to describe what it means and the reality of His realness; but when you really encounter, not a religion, but the existence of this person Jesus in your life, everything changes. There is know way to ever go back to an existence without Him, and He's as real as someone standing in front of you. It's like, my goodness, He's real and alive, and what's more, He completely knows me, yet loves me so deeply, and I'm worth so much to Him. A lot of days, it's really tough to keep my heart open with all the difficulties that come in life, and all the things that come from all of us interacting with each other, but that's just kind of the way life is when we have free choice to hurt or look down on each other. Yet, in spite of those things, I know everyday that I am forever accepted and loved by Him just the way I am, and that love has a way of opening my heart again.
It's
why He gave His life on the cross was because He loved each of us so
much. As
the prophecy that was written about His death seven hundred years
before He came says, "Surely He took up our pain, and bore our
suffering, yet we considered Him punished by God, stricken by Him,
and afflicted. But He was pierced for our transgressions, He was
crushed for our iniquities (sin or evil we do to each other); the
punishment that brought us peace was on Him, and by His wounds we are
healed. We all, like sheep, have gone astray, each of us has turned
to our own way; and the Lord
has laid on Him the iniquity of us all... After He has suffered, He
will see the fruit of His suffering, and will be satisfied; by
knowledge of Him, My righteous servant will justify many, and He will
bear their iniquities." (Isaiah 53:4-6, 11, with footnotes) It
really was His incredible love for each of us and His heart's desire
to bear the consequences of our evil so that we could have eternal
life with Him,
if we choose to be with Him, and it pleased Him to go through what He
did, looking back upon what He had done and being satisfied. It just
always makes me so sad though that so many people miss out on getting
to really know Him in their lives, Christian and non-Christian alike.
They don't know what they're missing out on ![]() . He really is the
one who everyone is searching for, if they would only ask to know Him
and make Him the ruler of their hearts, but that's another story
. He really is the
one who everyone is searching for, if they would only ask to know Him
and make Him the ruler of their hearts, but that's another story ![]() .
.
To get back to the main topic though, really the entire CG industry is based around all of us wanting to be loved for something that we’ve made. It’s one of the things we all long for the most in life. For me, it’s such an absolutely wonderful thing to wake up everyday being loved by God. To know that you are loved so completely changes everything in life, and I guess it just seems like, out of all of the things we live for in life, if there is anything I would like to do, it would be to be a part of opening someone else’s heart to be able to care and love again and, in some way, know that they are loved as well.
This rather old interview with someone explains this heart change quite well too: ttps://www.youtube.com/watch?v=63vM7NcrB-oAnd that’s it really; it was a bit long, but now you know why I’m making it and what it’s about.
Things in the Artwork Already
Real-time seasonal transitionsReal moon cycle
Real day/night cycle based on latitude
Teleporter room to travel around the landscape
Wind movement in sync with audio
Latest Screenshot or Video
Videos:
General Overview of update 016, with newly added grass:
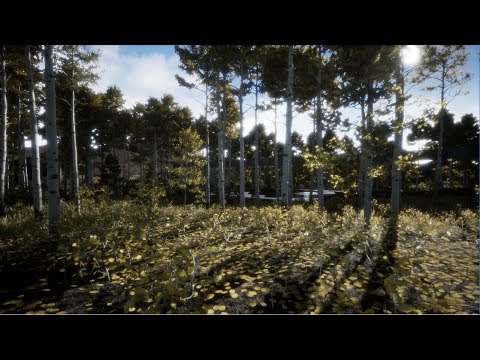 https://www.youtube.com/watch?v=FA6JKEL3hjg
Groves with new Aspen trees:
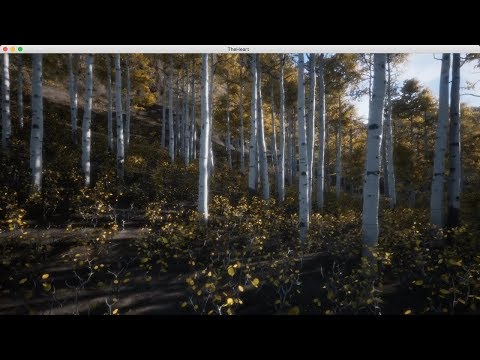 https://youtu.be/HuMh2h9wDLU
calm wind:
 https://youtu.be/BCNiM9m9dzo
Teleport room:
Previous new feature videos can be found here:
https://vimeo.com/album/4878887
and here:
https://www.youtube.com/watch?v=HuMh2h9wDLU&list=PL-_P0RsBj4ZAabEOFbcqFls7HRpY5xgl1.
Screenshots:


Poem at the Heart of the Project
The heart is such a fickle thing, the way it seems to mirror what’s been put in.
Even mirroring the things we hate, when shouldn't we want to become the opposite?
Yet I find that, as others bring pain to me in the coldness of their hearts, my heart cares less and brings pain to others, and that which I hated so much, I have become in other’s eyes.
It is said that we should love our enemies and bless those who hurt us.
Is there any other way to live?
If I give pain for pain, am I not just the same as them?
And if I am the same as them, can I ever be against them?
But can I ever love again?
The risk of pain can be so great,
and what I need the most I run away from.
To open my heart and give.
But this heart must come alive, to let love in and breath again.
For if I am to love again, I must first let love in.
So let the doors fling wide, and let my heart beat again
To let your love flow in and flow back out for others
For that is true life, when my heart beats and love flows through.
I do not always get to choose the things that happen to me, but I can choose who I want to become and the heart I want to have.
So who do you choose to be?
Inspiration for the Project
If you would like to go deeper and read about the philosophy behind the artwork, as well as the inspiration for it and the game’s story mentioned below, you can read all about it here: http://www.artoflightandmotion.com/about-the-gameMusic in the game
Just a short word about the music, so far all of it has been done by me, but for the most part, they aren’t actually composed songs, just music I play spontaneously. Even though it is spontaneous, they usually do still end up sounding very nice, for the most part, and it’s always really neat to see the kinds of songs and melodies that come out. I think so far the piano sessions have turned out the best. Also, it’s not the best of audio quality since I only have my laptop’s mic to record it with.
You can find some of the music on SoundCloud here: https://soundcloud.com/user-304480598
Things I could use help with
Right now, the main thing I need help with is just testing it while I’m creating the game, and letting me know how well it’s running. I try to heavily test everything out as I go along, but I’m still not going to find all of the bugs. So it would be great if others could test it out and let me know if they find anything, or even just let me know how well it seems to be running on their computer.Game Design Document Folder
Here you can find out more about what I plan to add to the artwork, and check in to see where the overall game is headed. As I have ideas for things, I'll be updating things below and in this folder here: https://www.dropbox.com/sh/fyfmyqpsx3if708/AAByzAGRfJrKdipuS6NOnVx2a?dl=0
Story in the Artwork
See Story Overview in above folder.
Overview of the areas in the map
I thought I would try using SketchFab as a visual game design document, so here you can see the entire map as I have it so far and what I’ll be working towards in each area.
If anyone has ideas for improvements, I would be glad to hear about them
As a note, SketchFab seems to run quite slow in Safari, so if you’re using it and it’s going slow, Firefox works much better.
Free Resources
Last but not least, here is a folder I started containing any free resources or explanations for how some things are created in the game that I thought might be useful for people. Right now it only has the explanation for how the seasons work, but eventually it will probably be quite full of things as more of the artwork gets developed:
https://www.dropbox.com/sh/v03321o6yk41zx6/AABeZJFVSCkImy-XB50CLCYga?dl=0
That's
everything with the artwork/game, so enjoy ![]()
Replies
Just to bring it up to date, here is the latest update showing some of the things I have added, including some more features for the music, the first ground texture made for the game, and for now, just a basic day/night cycle.
It took quite a bit longer than I expected to make the first ground texture that will be used for the pathways, but at least now I’ll have a system for creating the other ones that should make it go faster. The great thing was that I was able to create a seamless texture from scratch in Blender, so it should also make for a good base in creating the next textures. Here are how the models look in Blender:
I think for the next updates, the plan is to try to fully make one small area and get all the different systems like rain and wind working for that area. Then, as I’m making the other areas, I’ll have most everything worked out already. The next thing I’ll be working on is creating the first aspen tree. I’ll be sharing the first part of that within the next few days.
I just wanted to give a small update on how the aspen tree is going. The first bark texture is sculpted and painted. It will be a bit higher resolution once it's in the game.
With the aspen tree, since the bark is so distinctly different in different areas of the tree, I’m planning on doing three different sculpts for each type of bark, then combine them in a texture atlas and use vertex colors as masks when they are on the tree. That way I should be able to get a large amount of variation in each tree while still only using three sets of textures, but I’ll have to see how it goes… It will also help take away some of the tiling. The only other way I could think of to do them would be to do a different sculpt and painting for each tree, which would end up being quite a few more textures in the end. If anyone else has ideas for what they've done in this kind of situation, feel free to expound.
Next update is done! I have the second bark type sculpted and painted. I'll show some other kinds of peeled bark when the other aspen trees are done. I also have the trunk in the game with the method of mixing the barks all figured out. I'm using a combination of the vertex groups and an image texture to do the masking. I think there are a couple things I’ll change in the sculpts, but at least everything is in there and working. I'll update the download files later when I have a few more things done.
One thing I wanted to share that I thought could help somebody else, and I thought was pretty cool at least, is I figured out a way to be able to create two masking images in just one image channel. So with an image that has an alpha channel, I would be able to get a total of 8 masks instead of the normal 4. The way it's done is by first filling the channel with a solid color that will be 50% grey when it's used as a mask. This will split the image into two images. Just as a note, I guess probably something to do with color space, but in Krita, I had to use a luminance value of 25 instead of 50 to get a result of 50% when the channel is used as a mask in Unreal. Then you just use a value that's above 50% grey for one mask, and below 50% grey for the other mask. You can see it below, but when in the editor, just subtract .5 which will make the grey and anything under it a value of 0 and anything above it 0 to .5. After this, clamp the values to cutoff what's below 0, then multiply by 2, and voila the texture will be a value between 0 and 1. To use the other mask, you just invert the texture first, then follow the same steps. It wouldn't work for everything because you basically have half the amount of histogram color values, but for using it as a mix between two different textures like I'm doing, I haven't been able to tell any difference. It would also work well for blending things with vertex colors, since you could go beyond the 4 vertex color slots.
I've also been working on implementing all of the sun and moon calculations in Kleiner Bear's complex day/night cycle seen here: https://www.youtube.com/playlist?list=PLRj2My38wl9bcycvj_NssOy2f-cFNzPKH When I'm done with that I'll add a way to make it so the user can rotate the game's compass to be able to change where the sun rises, change how long the day is, and make a way to change what latitude the environment is at, making for some interesting and varied sun rotations, like at the polar circle. It will also be nice that the lighting will be changing throughout the year instead of just the same lighting every day. I’m also planning on trying to implement a way for seasonal changes to occur with the vegetation depending on which season it is. I already have some ideas for doing that, but I'll have to see how it goes.
The last bark sculpt is done! For this last sculpt I’m using it as kind of a kit-bash texture where I can use the vertex groups and an image mask to add or take away those black areas that the aspen bark has. It’s funny after doing this one to look back on that first sculpt I did and to see how undetailed it was, when at the time I thought it was looking nice. I suppose that’s what happens when you’re learning new things.:) To show where it’s mixing, the circles on the image below go a little bit above where the mixing of textures is happening.
I also had an idea for the way the texture is UV mapped that almost completely takes away any signs of tiling, just by switching where the seams start. You can see how that looks in the two images below. The line on the side shows where the texture ends and repeats again. The idea was that at the point the texture would have started tiling going up the tree, the cut for the UV seam switches to being on the other side of the tree. So it basically rotates the texture so you see the part of the texture that would have been on the other side of the tree. I had only thought of doing this after I had done the sculpts and painting, so there is a barely visible seam, but it’s fairly high up the tree and can only be seen really close up to it. I circled the seam in the image below. Although, for the next tree type, I’ll hopefully be able to create the texture with that in mind and take away that seam.
There was one thing I found out that I thought I could share because it might be helpful to someone. I found out Blender works really well for creating Texture Atlases and being able to cut up textures automatically without having to go in an image editor every time something changes, cut it, then recombine it in the texture atlas. With the way I have it set up, it also automatically creates a 2, or however many pixels, padding or bleed edge around each texture so there aren’t any visible seams in the final model. It’s a bit of a strange workflow, but the results are really nice and makes having to change anything in one of the textures pretty simple.
The way it works is that I set up some rectangular planes that you can see in the image below, with one centimeter equaling one pixel in the final image. This way you know exactly where each pixel of the texture is going to be in the final image and makes things a bit easier when doing the padding around each texture that I talk about below. Each separate plane will equal one texture or a part of a texture in the final texture atlas.
Next you line up each of the model’s UVs with the texture you want assigned to that model. So with my bark textures that are 2048 x 8192, I want to split each one into two in order to recombine them and make a square texture of 4096x4096. To do that I set the UVs for the plane at the top left in the image above, to be the bottom half of my 2048 x 8192 texture, and the one right next to it on the right side to be the top half of that texture. Then I apply the texture onto the model using an emissive shader in the materials. To get the final texture, I just set up a camera set to Orthographic mode with the edges of the camera lined up with the edges of the large plane that represents the edges of the texture atlas. Then I just do a normal render of the models at whatever resolution I made the models to be, in this case 4096x4096, and turn off anti-aliasing so that the two pixel border around the edges talked about below won’t get blurred.
To get the two pixel padding, you just inset a new line of vertices 2 cm from the outer edge, or however much of a pixel padding you want to have, on all sides, but leave the UVs on top of each other. Hopefully you can see what I mean in the images below.
What this will do is stretch the texture when it’s applied on the model, but it will only stretch it on that outer edge, leaving a padding of 2 pixels that is almost the same color as the pixel right before the UVs start to stretch the texture, which takes away any seams on the final model. The close up result can be seen below.
Hopefully all of that makes sense.") The really great thing about all of this is that it automatically cuts and pads any of the textures. So if you need to adjust something in one of the textures, all you have to do is make the adjustment, update the texture in the object’s material, then just do a quick render of all the texture atlas models together. It's really been a nice system so far for making texture atlases.
The really great thing about all of this is that it automatically cuts and pads any of the textures. So if you need to adjust something in one of the textures, all you have to do is make the adjustment, update the texture in the object’s material, then just do a quick render of all the texture atlas models together. It's really been a nice system so far for making texture atlases.
I also figured out a way to use just one material for all of the objects and have the textures be applied to them using some object masking techniques, but this post is already rather long, so I thought I would share it in the next update. Normally you would have to use a different material for each texture in the atlas since each plane needs a different texture and then change the material on the plane for each type of map, but I found another way that makes things a little simpler.
Next update I’ll be working on the leaves for the tree, and I’ll have an updated file with the sun and moon in the game!
Just wanted to do a small update on the game. There are new game builds that can be downloaded, so you can try things out for yourself, but the sun and a preliminary moon are in the game now with controls for the latitude, length of day, and the rotation of the game’s compass. I did a recording of the changes below, complete with the rather interesting polar circle sun rotation") . Right now the game’s calendar is set to be in July, so the sun’s position will be a bit different from what can be seen outside right now. I’ll have it so the user can set the calendar in one of the next updates. You can also see the trunk of the Aspen tree in the game if you play it.
. Right now the game’s calendar is set to be in July, so the sun’s position will be a bit different from what can be seen outside right now. I’ll have it so the user can set the calendar in one of the next updates. You can also see the trunk of the Aspen tree in the game if you play it.
One other exciting thing is that I was able to figure out the system for doing Winter to Spring seasonal transformations on the leaves using two mask textures that, combined, will make it look like the leaves are growing from the branch over a period of weeks. I’m not done modeling the leaves and branches that will be baked into the final texture, so I don’t know for sure how it will look in the final texture, but I have been testing it out on the models in Blender, and I’m pretty sure it will work all right. I really give the glory to God on this one if it does.") I’m just not that smart to figure it out on my own.
I’m just not that smart to figure it out on my own. ")
Lastly, here is the rest of the previous post that shows the material setup I used that made it easier to create the texture atlases in Blender.
Here is how the overall material looks:
and here is one section of the material that is duplicated to the other sections:
and here is what is inside the node groups:
The basic idea for it is that it creates a mask for each texture by using the Object’s ID number. So each time a different texture is added to the texture atlas and applied to one of the objects talked about in the previous post, you just assign a different ID number to those objects with that texture. Then in the material, the Object Info node is able to retrieve all of the ID numbers for all of the objects.
One downside though is that, because the Object Indexes can only be integers, all of the objects will be white if you use the node directly since they are all over one. So, in order to use it, you have to isolate the objects that have the number you want to use by using the node group in the second image above. Basically it leaves any values greater than or less than the value you want black, then multiplies them together, leaving only the objects with the ID you want as white.
It’s fairly self explanatory if you try it out, so I won’t go into the details, but one important thing to remember is that you’ll want to have the incoming value you want to isolate a little bit less than the value you want. So if you want the objects with an ID of 2, you’ll want to use a value like 1.9. This way the only numbers that are left white are the values between 1.9 and whatever value comes out of the add node in the node group, which would be 2.1.
The great thing about it is, once you have all of it setup, all you have to do to pass a change from one of the textures to the final texture atlas is hook up the appropriate set of nodes for that texture atlas, like normals, diffuse, etc., and click on render.
I guess that’s it. On to the next adventure!
Next update is done! I’ve mostly been working on going over the landscape again and trying to finalize everything as much as I could before I would start adding vegetation to it. Also worked on taking a lot of the large noise out of the high poly sculpt and getting the larger forms more defined. You can see a before and after below. Next thing I’ll be doing with it is cutting it up into tiles and using the Dynamic Topology sculpting mode to polish it a bit more. I think it should work well as a way of creating the final landscape meshes because I can have more vertices in the areas that need more detail, like the cliff edges and streams, and less vertices in the rest of the landscape.
I also thought I would try using SketchFab as a bit of a Game Design Document for the environment. That way everyone can see the bigger picture of what’s going to be in the environment and what goes where, and I’ll be able to update it as the game progresses. You can read more about it in the For You the Viewer section of the description, but I thought it would also be a good way for others to be able to give ideas for what could be in the different areas. I was able to get a little bit of a day/night cycle in there as well when the animation is turned on, but if it’s running too slowly with it there, let me know and I’ll take it off.
I’ve also updated the first post with some other new things, as well as a list of things I’m planning to add to the game. So take a look and let me know what you think.
model
Lastly, you can see the progress I’ve made so far on the aspen branch that I’ll bake to a plane below. I’ve finished creating the branch and right now I’m working on modeling and putting textures on the leaves. I thought I would model 6 unique leaves altogether, then arrange them into several different bunches for each direction that the end of the branches go in: up, down, sideways, then duplicate those bunches over the branch. I have three of the leaves done so far.
Just wanted to give the next update on the game. I have all the controls done for being able to change the time of year and time of day in the game. This will allow me to test the seasonal changes on the aspen tree and get that working. As far as coding goes, I'll be working on adding temperature changes next, so that I'll be able to add correct wind to the game because apparently, in the research I've done, the wind's strength is caused by how fast the temperature and air pressure changes.
I also finished modeling the leaves and putting them on the aspen branch that I'm using to bake onto the final meshes used for the tree's branches, and then finished putting those baked meshes onto the tree as well. I don't have it in the engine yet, but you can see how that looks in Blender's viewport at the bottom.
There is a certain look of some aspen branches that, when you look at them from the side, it almost looks painterly and similar to how it looks when you dab a large paintbrush onto the canvas with the bristles going perpendicular or straight into the canvas, giving it this interesting feel. I tried to recreate that with the branch and the final meshes that are on the tree, and I think in the end it worked out fairly well. They both seem to have a bit of that painterly feel in certain areas.
The tree as it is now turned out to be about 8,000 triangles, and will be about 7,500 after I do a few more things, which is rather high, but I wanted to have a version of aspen that looked very full for the areas next to meadows and things where there is more sunlight, so this will be the highest poly version. The other trees will be either a lot shorter and full or as tall, but only have leaves at the top.
I guess that's it. I'm going to wait and update the game build in the next update when the tree is inside the game, so right now it's still the same version as before.
View from a lower angle:
Quite a few things have happened since the last update.
First off, I just wanted to say that I have the aspen tree inside of the game now and there are new game builds available for download in the Download section of the first post if anyone is interested in seeing it in the game. There are also some screenshots of how it looks in Summer below. All of the transitions are also working inside of the materials, but as I was thinking about it, I realized that, since the latitude can be changed, the timing for the transitions really needs to be determined by the temperature instead of a fixed date, which brings me to the next exciting thing that happened.
There were some boxes of books that someone gave to my parents a couple weeks ago, and I just kind of randomly picked one up to see what some of them were about, and the one I picked up was an old Earth Science textbook that has all of the data and explanations for how temperature, weather, rain, wind and all of that kind of stuff works on the earth. I just thought that was pretty cool to find a book like that just as those were the next things I was going to be working on. It’s already had some very invaluable information as well that I haven’t been able to find anywhere else in my research online.
So all that to say that I have quite a bit of the seasonal temperature changes figured out and should have the leaf transitions in the game on the next update! For now I just put some screenshots of the middle point of the transitions below.
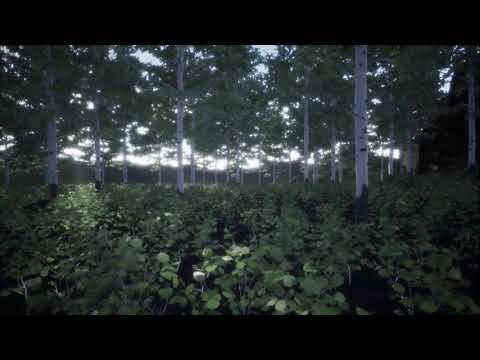
Winter
Spring
Summer-Fall
Fall
Fall-Winter (a few artifacts around the leaf edges that I'll have to get rid of)
Something else that was very cool is that someone was getting rid of an old 100 year old upright grand piano and let me have it for free. Before I was only able to play the piano when I was at my grandparents house, which is why there is only the one spontaneous session in the game right now, but now that I have a piano here at my house, I’ll be able to play it all the time. So I was able to record another spontaneous session that consists of 5 songs altogether and is about 17 minutes long. I thought I would also start putting them up on SoundCloud so that if anyone does enjoy listening to them, they won’t have to play the game to hear them.
It can be found on SoundCloud here: https://soundcloud.com/user-304480598/spontaneous-piano-session-2 and the new track can be found in the game under the “All Piano” playlist, Song: “Session 2.”
One last thing is that I had some ideas for maybe some puzzles that could be in the game. To give a bit of backstory, in the Old Testament of the Bible, there are these really incredible, almost letter puzzles, that when you skip the same amount of letters over and over again in the original Hebrew text, it actually spells out hidden words and sentences that are about the text you are reading.
For example, when you read Isaiah 53:10 (which is a prophecy about the Messiah coming as a suffering servant and taking God’s anger against the evil we do to each other upon Himself so that we can be with Him) in English it says, “But He was pierced for our transgressions, He was crushed for our crookednesses. The chastisement of our peace was upon Him, and by His stripes we are healed.” But when you look at it in Hebrew, if you start at the beginning of the verse and count 12 letters over and over again, it spells out, “Yeshua (which is the original Hebrew name of Jesus) is my name.”
In this particular area of Isaiah 52 and 53 that were about this prophecy of the Messiah, you can also find the phrases and names, “Let Him be crucified”, “His cross”, “Gushing from above, My mighty name arose upon Yeshua(Jesus), and the clouds rejoiced”, “In His name as He commanded, Jesus is the way”, “Herod”, “Caesar”, the names of the two high priests in Jesus’ time: “Caiaphas, High Priest”, “Annas, High Priest”, “Nazarene”, “His signature”, the names of the disciples, and many, many more things just by counting an equidistant, or same, number of letters over and over again. Quite a few of them even overlap in the same verses as well. And this would have all been written over 700 years before the Messiah, Jesus, is supposed to have come and anything in the New Testament transpired.
I think what’s cool about it to me is that it’s not something that you can try to make into what you want it to be either because it’s just counting the same distance of letters over and over to make each word. As far as I know, it’s also the only manuscript in the world that you can find these things in, not even the New Testament or any other Hebrew text, only the original Old Testament in Hebrew, and it’s literally all over the entire Old Testament.
Anyway, I thought a simplified version of something like that could make for a really cool puzzle in the game where the player has to find the amount of letters to count somewhere in the game so they can decode a message hidden inside of something found early on in the game, and the player would all of a sudden realize that there were all these hidden puzzles inside of something that seemed a bit unimportant before.
That’s all for this update. Congratulations if you made it through everything") It was difficult to try and pack so many things into a single post. There are actually some more ideas I have had but I thought I would wait until the next post to share them.
It was difficult to try and pack so many things into a single post. There are actually some more ideas I have had but I thought I would wait until the next post to share them.
Just as an addendum for anyone else as fascinated by the letter puzzles as I am, another interesting letter puzzle can be found in the first five books of the Bible, called the Torah in Hebrew, which means instructions or law. With this one, you start at the first T in Genesis, and count every 50th letter, and what you get is TORH, or Torah in Hebrew. You also get TORH when you count every 50th letter in the second book, Exodus, as well.
Interestingly, you can basically do the same thing for the fourth book, but instead of starting with T, you start with the third H, and when you count every 50th letter it spells HROT, which is Torah backwards. The fifth book is the same only you start with the third H in verse five and count every 49th letter.
Now to go back to the third book in the middle of the other four, when you start at the first Y and count every 8th letter it spells YHWH, which is the original Hebrew name of God. When you combine all of it together with the way Torah is spelled backwards and forwards around YHWH, it’s as though it’s saying that the Torah is like an arrow that points to YHWH. TORH, TORH, YHWH, HROT, HROT
It’s just really a lot of fun finding out the kind of hidden puzzles there are that were put into the different texts.
Well, I can’t believe I’m saying this, but the seasons are in the game now and everything is working! There are new game builds available here: http://www.artoflightandmotion.com/downloads, so try it out if you’re interested and let me know what you think. There were quite a few times that I got stuck trying to figure out how to do things, especially with adding the ability to change latitude and go to the southern hemisphere where the seasons are opposite of the northern, but eventually I had ideas and got everything working. It’s a bit of a miracle to me, to be honest, to have no previous coding experience and be able to figure all of this out, which is why I said a few posts back that I really give the glory to God if it does work out because my goodness, does it ever get complicated")
Here is the video that shows the seasons. I added subtitles to both videos to make it easier to understand what I’m showing.
As I’m able to generate more detailed day to day temperatures, I should be able to get the season start dates more accurate, but amazingly, even with how it is right now, it’s pretty close to when the seasons start in the real world, just a few weeks off, at least in my latitude. That is one thing I could help with, if anyone is interested, is getting the seasons right for each latitude. You can find more info about it in the first post under the "Things I could use help with" Section.
I also got the moon working, which was another thing I had to figure out some really crazy stuff to get looking right because of it basically needing to be transparent on the side with a shadow, so I couldn’t have it just be lit by the sunlight. It was made even more difficult because one of the material nodes I used says the coordinates it needs are in World Space when they actually seem to be in Local Space, which took a little while to figure out. Thank goodness it all works though!
Here is the one that shows the moon:
Also, if anyone is interested in knowing how any of it works, I can try to put together a summery about it, but it could get long, so I wouldn’t want to spend the time if no one needs it")
Another thing is that, over the many months I've been working on the project, the first post had become a bit piecemeal. So I rewrote pretty much everything to fit with where the project is at currently, and it's much more clear and concise now. I also added a philosophy behind the game section that’s really worth reading if you have the time.
All in all, I think this update turned out to be a bit of a milestone because I know that the concept is going to work and the foundation elements have been laid. Now it's just to keep on refining it and adding to it.
I also did another Improv piano track that I haven’t added to the game yet, but it can found on SoundCloud here: . I was experimenting with trying to use both hands at the same time in the music much more, so some parts got a little bit difficult for my brain to handle, but it turned out okay still. Around 12:00 minutes and on is a really nice area. Having never really had music lessons, it will take a little while to get used to using both hands with the rhythms and melodies. I don’t have a recording studio to record them, so you’ll also have to ignore the background noise in some areas.
As I had said in the previous post, I have had some ideas for an interesting story in the game that I’ve updated the first post with. The main purpose of the game would still be just creating an experiential work of art that opens the heart to be in, but there would also be a story you could follow if you wanted to. The idea would be that you are inside of an older person’s memories, and going back through his life to events that happened that closed down his heart and working through those things that happened in some way. I had already planned on having several different houses in the game, but basically each house would be a place that this person lived in through his life, and you would go back in time to certain dates when the person lived in this house and solve puzzles that would be for that specific time period that would reveal a part of his life story, and work through opening his heart again in a certain area of his life. With having seasons, latitude, and a realistic sun position, I think it could also make for some really interesting puzzles having to do with time and where the sun or stars would be at certain latitudes and times of the year. Also, just a really interesting environment being able to change the entire look of the map with different seasons or even what direction the shadows are going in.
That's all for now. Thanks for looking!
Next update is done! The main thing is that the new landscape is in the game now! There are new game builds that can be downloaded so anyone can see it. On the next update, I thought I would add a way to teleport to the different areas to make it easier to see them as I'm working on them.
For this update, I've been working on getting the landscape more fleshed out, trying to concept out how the different rocky areas will look together and making sure all the streams go downhill.
The dynamic topology mode has, so far, really been the perfect thing to use for what I'm doing. With it, I've been able to create natural rock bridges and overhangs, and basically just create whatever I wanted, while still having complete control as to how dense the vertices were. Another really great thing is that I'm able to cut up the landscape however I want instead of having a grid, so there are large sections of the landscape that won't even be rendered since they are behind other parts of the landscape. Even further, the streams and rivers are cut up into smaller sections, so I should be able to make it pretty detailed in the end since only a small part is visible at a time. None of this would have been possible if I had used the landscape abilities that are in the Unreal Engine. One caveat is that, after everything was cut up, I found out Unreal looks at the bounding box of the mesh to test if it should be rendered instead of if the actual polygons are visible, so hopefully in future landscape updates I’ll be able to cut it up in a way that keeps this in mind and make it even better.")
Also, since I could control how dense the vertices were anywhere in the landscape, I have been able to make the landscape more detailed while cutting the final triangle count by about half of what the original landscape was. From about 6.5 million to about 3.5 million. Interestingly, it also cut the size of the download for the game by about 200mb.
Here is a screenshot of how I cut up the landscape, and the density of the landscape at Level of Detail 0:
, and here are some screenshots of how some of the areas look so far inside the game:
There is another new spontaneous piano session in the game under Session 4 and on SoundCloud here:
I tried to do a lot of, what I like to call, note cascades, and it really turned out pretty. I also found out that the way I was reducing noise in the audio was really distorting some of the notes, but with this new way of doing it, everything is much more clear.
I've also been working on getting a plan on how the weather system is going to work, but it's still in the concept stage, so there isn't much to show. Just graphs of how it all connects together.
One last thing that was kind of neat that happened a few weeks ago is that, as you know, windows 10 always has a random image display at the log in screen, but the interesting thing was when I turned on my computer one morning, I was surprised to find this image of a waterfall that was very close to what I had already sculpted out for a waterfall in my landscape. This isn’t the image I had seen, but you can see the waterfall here: https://www.shutterstock.com/image-photo/panorama-waterfall-haew-suwat-khao-yai-582538609?src=mPrt_8EndBgLAwPCxDlAbw-1-7 and here is what I had sculpted in my landscape: It even has the archway that I had put over the outgoing stream. I thought that was a pretty cool thing to have happen, that I'll now have a pretty good reference image of this area that I had basically just concept sculpted from imagination.
(I actually had this update done about a month ago, but things were still busy and I forgot about posting it here. I should have another one ready in the next couple weeks as well.)
Things have been pretty busy since the last update with other things coming up, and I had some health issues that prevented me from working on things as much as I would like to, but all things considered, there is still quite a bit that got done.
I’m also happy to say that the teleporting works, but it’s not quite done yet, so I’ll wait until the next update to share new game builds. There have been some neat things to share with the vegetation as well, but this post is so long, I’ll wait until next time to share it.
The main thing for this update is I have been working on designing and modeling that room for teleporting to various areas. Since I'm not very good at drawing, I have to do all my concept work with the 3D models. So it took a little while, and many variations, but I think I finally arrived at a design that will be pretty nice in the end. The original design that I came up was going to be a circular room a glass dome in two pieces for the ceiling. Since the entire game is meant to be an art piece as well, I had the idea that it would be really neat to have paintings on the walls that the player would then teleport through. Here is what that original design looks like in the engine:
The idea being that you would be able to select a place to go to, then the two dome pieces would rotate around until they arrived at the painting. After this, the painting would change from being an impressionist painting of the game, into being a live look at the level. Then you would teleport to being next to a painting, hanging on the wall in one of the buildings. So it would feel like you were actually walking into the painting. As I got to thinking about it though, I realized the building would make a really great observatory for any star type puzzles, and I probably wouldn't be able to make a better one. So I decided to try to come up with a new idea for the teleport room.
As I was trying to come up with a concept for it, I remembered another idea I had a few months ago, that I had forgotten to write down, that I thought it would be really neat to do like an art gallery up in the clouds for the main menu. Then when the player clicked on play game, it would allow them to walk around in the art gallery, walk up to a painting, and go inside of the painting, into the main game world. I realized both the teleport room idea and that main menu idea would work well together, so this was the starting point for the new building.
It took quite a few iterations to start getting a look that I liked, and to be honest I don't normally design fantastical types of things") , but I think it could be a very pretty room in the end. While I was designing it, I kept seeing all of these things hanging from the ceiling and rotating around, almost like a chandelier or prisms hanging from the ceiling. As I started trying to go this direction, things started to come together more and more, and here is what I have so far inside the engine. Blender’s booleans helped tremendously to cut the holes in the ceilings glass grid:
, but I think it could be a very pretty room in the end. While I was designing it, I kept seeing all of these things hanging from the ceiling and rotating around, almost like a chandelier or prisms hanging from the ceiling. As I started trying to go this direction, things started to come together more and more, and here is what I have so far inside the engine. Blender’s booleans helped tremendously to cut the holes in the ceilings glass grid:
Here is the rest of it that's in Blender still with some very basic lighting:
The idea for the building is to have a wall of some kind in the center of the building with a shaft going to the ceiling, driving the rotations for all the gears. Then as the gears are rotating, they rotate the pieces hanging from the ceiling, which have the paintings on them, and as the player gets near a painting, the hanging wall would face the player and stop rotating. Then the painting would become the live version of itself. On the wall in the middle would be the poem from the description, kind of symbolic of it being the heart of the paintings, and the thing driving the possible story piece for each building.
Here are some shots of how the paintings look with a live version of the painting showing the game world:
and here is one in the game world that would be hanging on a wall in a building:
For right now, since the project is also an experiential art piece, I’m thinking that the best thing would be to have the live version flat, like a painting, instead of like an actual portal where it looks like you’re looking through a window. If anyone else has any thoughts about that, feel free to let me know. Here is what it looks like from the side:
I also had an idea of doing these doors along the two long walls that could be rotating at random amounts, making it feel like the wind is blowing through the building as it's up in the clouds. The other idea was to have the doors in the middle start rotating first, and gradually rotate the other doors open, almost like an accordion effect. Then have them all close again starting at the far ends and going towards the middle, almost like the building is breathing, or love flowing in and out like it talks about in the poem. I'm not sure which one to go with yet though.
Since it's going to be up in the clouds, the whole thing has been heavily inspired by clouds, with the way they move and change, and having something like rainbows in the clouds with all of the color wheels. Right now anyway, in that image up above, it's kind of neat too that the glass frames seem to mostly disappear when you're at the other end of the hall, as though you could walk off into the clouds. As part of all of that, I was thinking of having the glass color be a bit fuzzy around the edges, kind of like a rainbow effect:
So all in all, I now have the concept work done for two buildings and I have the teleporting all working. Hopefully I’ll be able to do more with the environment soon after the teleport room is more finished.
Here is a video I made of everything as well:
I also added my first sound effect to the game!, which is the wind for the TeleRoom.
And there are four more spontaneous piano sessions in the game now, as well on SoundCloud here: https://soundcloud.com/user-304480598
Here is the stuff I’ve been working on with the vegetation. I want to try to do as much experimenting as I can at this early stage, and figure out what will give the best results before I make the rest of the models.
First thing is I’ve been working on trying to figure out how to approach the other smaller kinds of aspen trees. As I have been studying the trees more, I’m finding that the main difficulty is trying to get the verticality in the leaves and branches. It’s not really something I had thought about before, but when looking at trees you see that the branches all come out horizontally while the leaves all fall down vertically from them, and this way that the leaves come down vertically is what makes us able to see the sun’s direct light on the tree from the ground. The difficulty is you can’t really have that very well when you’re using large planes for the branches and leaves.
From what I can tell, normally this is solved by having many different leaf planes going in random directions, but with the way you can see the branches in the winter, I don’t think that would work very well for this.
I realized too that this is the main reason that the larger trees have such a small area where you can see the light on the leaves and can look a bit splotching sometimes, because I only have the horizontal part of the branch and need to add the vertical part of the leaves as well:
So I’ve been trying to figure out some very low poly ways that I can get this leaf verticality that you can see the light hitting the leaf, especially for the trees that are down on the ground at eye level. And again, part of the difficulty is that the leaves have to be touching a branch, since you can see them growing from off the branch in Spring. Here are some leaf clusters that I have been working on with all of this in mind. The black lines are the shapes that the texture will be on when it goes on the tree. The top right clusters are made to go vertically on triangles for the large trees, while the other smaller clusters and branches are for the aspen saplings:
So far I’ve been able to get something that I think should work quite well for the almost bush like saplings. It seems to have a pretty similar profile to some of the pictures I have seen. What seems to work best is to have a quad made into two triangles that would only have three or four leaves on it, then you make the edge splitting the quad in half, higher than the other two vertices, making a V. You can see this with the bottom right clusters. Then you just keep rotating them as you go along the branch. Here is how it looks: (the vertex count includes some other meshes in the view that aren't visible)
Other thing is I was able to figure out a better way to have the leaves disappear for the fall. I had been doing it though a texture mask that had a random value for each leaf that looked like this:
, but the problem was it was leaving bits of leaves floating in the air. So I manually assigned a color to each leaf, and now it looks like this:
The main thing to notice is the darkest leaves are in the front and will disappear last, while the brightest are in the back and will disappear first. This way it should disappear back to front and not leave any bits of leaves around.
Another thing with this fall transition is there are rings being left around the leaves as they disappear, and I finally figured out it was being caused by Unreal’s compression settings. You can see the large blocks it was creating here:
I found out though that if it’s set to a normal map compression setting, it’s higher quality and doesn’t cause these:
I haven’t tried it yet, but right now the plan is to store the mask in the Blue channel of one my Normal maps, and it should get rid of the ring around the leaves.
So all in all, once everything is implemented, the trees, and next vegetation I work on, should look quite a bit better.
For this update, I’ve mainly been working on implementing the ideas I had for the seasons and teleporter options I mentioned in the previous update, and I also got my first Aspen bush/sapling done! There are a few things I’ll have to adjust with it, but for the most part, I think it turned out quite well. The SketchFab landscape in the first post has been updated too.
Dudecon, on Blenderartists, also had a great idea for having the sunlight intensity change as the seasons change, which I was able to add on this update, and I think really adds to the atmosphere of the world. I will probably be adjusting it further as I get more things done, but at least the code is in there. I also worked on the lighting for the shadows a bit.
There is another spontaneous piano session found here:
You can see the things I have updated below, as well as a few other more real-time things in this video:
Here are some general screenshots of how things are looking:
And here are some screenshots of things I have updated:
Difference in sun intensity, depending on seasons and latitude:
Notice how bright the lit areas are in summer, even though it’s the same time of day for both images.
Trees no longer leave bits of leaves behind when the leaves fall off:
Leaves change color at the plant’s edges first, the way they do in nature:
After adding the verticality to the branches and leaves that I mentioned in the previous post, you can see the light hitting the leaves much better now, even when under the tree. Overall, each branch looks much fuller as well:
I also found that having a mesh similar to what is below can help a lot for the profile at the top of the Aspen bushes. It keeps things from looking flat at the top:
Also, here are all the final shapes I used for the bush. So far the two triangles in a V seem to look the best, so I’ll be adding more variations of those to the bush with different leaf textures on them in the future:
Spring leaves growing:
For the next update, I’ll mostly be working on code behind the scenes. There were some things that I had done when I was first starting out, and still learning, that I really need to fix before adding more code. I also thought I would start doing a writeup about how the season transitions work, but I don’t know how complicated it could get, or how long it might take, so no promises there
Strictly Unreal related:
(
One last thing I wanted to share is an idea I had for creating references to other blueprints in Unreal’s “Blueprint” coding system. As anyone who has worked with the blueprints knows, it can be difficult to get references to other Blueprints, especially for Widget-Actor interaction. The way I had been doing it was to create the widget in say the character blueprint, and store a reference to it there as well, but then I would have to get a reference to wherever I had created the widget if I wanted another blueprint to interact with that widget. The difficulty was that I ended up starting to have references to things scattered throughout the code, and it just wasn’t very easy to interact between Blueprints.
The idea I had though was to have all my references stored in the Game Mode class, then if I need one of the references in another class, I can just get it from what’s stored in the Game Mode, since the game mode can be accessed anywhere. The way I did it was to have one actor class that is just used for Reference Storage. Then when this class is instanced inside of the game world, I assign all of the other actor classes that are in the game world to variables in this class, using public variables that I can set up in the editor. Then I just use a get all actors of class node in the Game Mode, and set it to get that Reference Storage class that’s inside of the level. So now the Game Mode has access to all the actors that are inside of the game world, via that Reference Storage class. I also use a get all actors of class node to get a reference to the character, since the character is only instanced after the game starts.
Next thing is I create all the widgets in the Game Mode class as well, and store them in a variable at the beginning of the game. Then when I want to add one to the viewport, I just get the reference to the widget that is in the Game Mode.
So now, if I need to communicate back and forth between a widget, an actor, or the character, I just cast to the game mode and get the reference stored there, and I’m able to access any actors in the game and any widgets in the game, from anywhere in the game. And I only have to look for the reference to it in a single place, instead of many references scattered all over. I don’t know if it would be considered the proper way to do it, but so far, it seems to be working out pretty well. There could be some difficulty with it if you have separate levels you are loading, but I think it might be possible to just have the Game Mode get different references for each level.
)
Thanks for looking!
First addition is that the teleporter room is inside of it’s own level now, which loads and unloads from memory. That way it’s not taking up computer resources when the player isn’t near a teleporter. It took a while to get it working because of the way the teleporters need to be linked in the code, and since the ones in the teleport room don’t always exist if they haven’t been created yet, it was causing problems for the ones in the landscape. I finally got it all working though.
The biggest visible thing though is I was able to implement moon phases for all the lighting at night, both for the actual moon light and the ambient light. So the brightness of the nighttime corresponds to how much the moon is lit now. While I was working on this, there was another really interesting thing I was able to add that I hadn’t thought of before. When I was looking up information on the brightness of the moon at different phases, I ran across this article that had a graph of how bright the moon is during each phase, but also how bright it is as it gets higher in the sky: http://home.earthlink.net/~kitathome/LunarLight/moonlight_gallery/technique/moonbright.htm
After seeing this, I realized I hadn’t implemented any kind of atmosphere to how bright the sun and moon are throughout the day or night. Then I realized that’s the real reason why the sun is a different intensity during the winter, because it doesn’t rise as high in the sky and the light has to travel through more of the atmosphere. So after implementing that, the intensity of the sunlight throughout the day is governed by how high it is in the sky and the intensity of the winter light behaves more like the real world now. The way I had been doing it before was according to the temperature, so the colder the average temperature was, the less bright the sun was. It worked pretty well in the end, but this other way is definitely much better and the brightness ended up being about what I had set it to before. I’ll also be able to add modifiers to the brightness according to things like humidity later down the road. All in all, adding those two things made all of the lighting quite nice, and you get much more of a sense of time of day. Here are a bunch of screenshots of the different intensities:
Twilight to Afternoon:
Intensities in Teleport Room:
Winter:
Morning to Afternoon - Fall:
Moon Intensities:
No Moon:
Half Moon:
Moon at Different Heights:
Horizon:
Moon Up Higher:
Unreal related
There were a couple things on the code side of things that I thought could be helpful to someone.
The first one is about the skylight. It turned out to be a bit of a challenge trying to get one skylight to work for both the night and day because the skylight needs to be able to recapture the environment when the lighting is changing during sunrise and sunset and at night vs day, but at night, all it captures is black, so I had to have a way that at night I could increase the intensity to get a little bit of fill light, then lower the intensity as the sun was rising and the sky was becoming brighter. It also needs to have a different intensity at night that is based on both the moon phase and a separate calculation for the atmosphere based on the moon’s position instead of the sun. Here is the final result I arrived at:
Hopefully it’s fairly self explanatory for anyone used to working with blueprints. Basically it uses the sun’s Y rotation to figure out whether it’s day or night, then interpolates between the value needed for day and the value needed for night during a certain transition phase. Although the result looks simple, getting to this point was quite difficult with all of the different factors that have to be accounted for and took a lot of trial and error.
The other idea is about loading streaming levels. Normally for doing things like loading a saved game, I put all the code inside of a function in the Game Mode class. Then whenever the game needs to load or save data, I just call that function, but I’m not able to do that with the streaming levels because they have a timer associated with them that can’t be used in a function. I was going to try doing it with a Macro, but they can’t be called in other Blueprints because of the way Macros work. So the idea I had was to put all the code associated with loading the level inside of the Game Mode. Then wherever the level needs to load, use a Blueprint Interface to execute the code in the Game Mode whenever the level needs to load. Here is how it looks in the Editor:
It really works quite well, and is almost like having a function that can be called anywhere. I realize it’s probably not the most amazing idea
I think that's everything. As I had mentioned before, I thought I would try to work on wind next. Now that I have low-growing bushes that won't get much wind and tall trees that get a lot of wind, I'll be able to experiment with getting the wind intensity right for both.
Thanks for looking
Even though there isn’t too much new stuff, I went ahead and updated the game builds if anyone is interested in hearing what's done of the wind so far. I'll do a video of it once the trees are blowing in the wind. Since I don’t have any weather implemented yet, in order to change the wind speed, you’ll have to go to the weather tab inside of the in-game options menu, accessed by pressing the E key in-game. I also did a bit of preliminary work on getting the trees to move in the wind. It’s going to take a lot of experimenting, and it’s also all very new to me, but from what I can tell of it so far, it might be possible to get some pretty neat effects with it.
Also, I have the text for the first section of the write-up for how to do the seasonal changes done, but still need to add pictures. You can see the progress so far here: https://www.dropbox.com/sh/v03321o6yk41zx6/AABeZJFVSCkImy-XB50CLCYga?dl=0 There are probably a lot of spelling errors in it still
I didn’t know if anyone would be interested in this or not, but I just found out that one of the stories I had mentioned a while ago, and that is talked about in the Inspiration section, that also partly inspired the project, was put up on YouTube. So if you would like to see part of what inspired the whole project and what continues to inspire it, you can see it now. It’s a very, very old interview
Now to talk a bit about the audio, the beginning of the adventure started while I was working on implementing the audio using Unreal’s audio engine. There was something I was looking up how to do, I don't remember what, but as I was searching, I ran across this tutorial on YouTube about using an external audio engine to do the audio in a game:
From there, I also started looking up dedicated audio workstations to see what kind of options are out there, and I ran across one called Reaper that's a full fledged audio workstation for only $60. This is one of those things that I'm incredibly glad I ran into and bought. I had been using Audacity to try to work with the audio before, but after working with Reaper, my goodness it's incredible the kind of stuff you can do with audio. That kind of ties in with the other thing I learned about audio, that there aren’t very many places to find good audio for free out there, that will right away work with what you’re doing. One really amazing place I found worth mentioning is https://www.zapsplat.com/ ; they really have a ton of free, very high quality sounds done by audio professionals.
Back to my audio, so far, I’ve only been able to find one piece of audio that has the sound of aspen leaves in it, and it's only in strong wind as well: https://freesound.org/people/juskiddink/sounds/78955/. This is where having Reaper has been a huge help. I definitely wouldn't have ever been able to do what I've done so far with the wind without it. One of the biggest things that helped was having a real time equalizer, which made it possible to adjust frequencies and immediately hear what I had changed while the audio was playing. This made it possible to isolate the sound of the leaves:
After they were isolated, I could then layer them on top of each other to make it sound like there were more of them. Here is what it looks like for the calm wind. The leaves on the first 4 tracks are from the piece of audio mentioned above. Then the Far Off Leaves are from another audio file. The track at the top is some audio I decided to mute and not include in the final mix:
Since the wind sound was no longer with the leaves sound, I was also able to use other files for the wind that sounded calmer. This all gives a very large amount of control over the final sound of the wind and leaves. You can see the wind on the bottom track:
Reaper is also great with the way it automatically crossfades sound clips together, which makes two audio clips sound like they're one clip. This is used a lot in the Strong Wind audio and makes it easy to split a piece of audio and put the pieces wherever you want them. The crossfades are the red areas:
Now, about getting it all in the game, right now the plan is to have different wind sounds play for each different area type; one for aspens, one for pine tress, one for meadows, and so forth. They have such distinctive sounds that I thought it would be worth it to spend the time and create unique audio for each. In order to have all of that work, I had to create an easy way to automatically select which audio to play in a certain area, then do all the setup work for that audio, like telling it what season to start in, or what the wind speed is on each frame, and things like that. In order to do that, I also had to be able to get a reference to the audio actor in the gameworld, otherwise I can't tell it what to do. So I ended up creating a blueprint with a sphere trigger, and attached the audio actor to the blueprint:
Then when the player enters the sphere trigger, the sound starts playing, the setup work can be done on it, and a reference to the audio can be stored somewhere. One of the really neat things about having the sound inside the blueprint is, since I would be able to easily get a reference to every sound actor, I was able to have it be a 3D sound instead of a 2D sound played through a single, global audio actor. So as you go out of the Aspen grove and turn the player's head, the sound of leaves comes from the direction of the Aspen grove.
I think that's everything new for now. Congratulations if you made it through all of that text!
There are two videos this time.
One shows the wind movement at different wind speeds and showing the wind’s transition from summer to fall:
The other one just sits in one place while the wind is blowing calmly:
Just as a note, I only have the strong version of the wind done for the fall and none for the winter. I also went ahead and redid the fall sound that I had been using since it was one of the first wind sounds I was working on and it wasn’t as cohesive with the summer sounds.
Another neat thing is the direction the trees sway changes based on what direction the wind is coming from. It’s subtle since there isn’t too much sway, but it’s still noticeable. It’s also noticeable with some of the other wind effects going on.
The only thing that’s not quite working with it yet is the branches don’t move up and down with the leaves. I found out I’ll have to use another vertex color for that, but with the bark I’m already using two vertex colors, plus another one for another wind effect, so I’ll need to do the bark differently without vertex colors to free up another one. The good news is I had an idea for doing it with a Flipbook node in Unreal, and each tree will have a random texture assigned to it in the end. This was something that I was already planning on trying to figure out something for because with the way I have the bark texture currently, each tree model I make can only use one bark texture for the bottom, and to get any kind of variation, I would have had to make duplicates of the same tree, then change the bottom bark texture on each one. It just wouldn’t have been a very good method and would have taken up a lot of time. With this method everything will be randomized after the tree is in the level, so I can just create maybe two tree models for each type of Aspen, and all the trees will randomly have all the variations of texturing.
There is also another short poem on the wall in the teleport room:
What does it mean to be good?
To be good is to live by a law of love.
It is what raises up instead of destroys,
to care about others instead of ourselves,
to give instead of take,
to not use or abuse people for our own desires,
to use your hands to help instead of hurt.
But there is another kind of goodness,
a goodness that does destroy instead of raise up.
For though there is goodness in this world, there is also evil.
When evil comes, what does someone who is good,
do with those who choose to do evil?
Do you allow the evil to continue, hurting and using others?
Or do you end the evil, and allow it to hurt no more?
For how can it be good to allow the unlove, forever?
Such is God’s heart too, that no one would perish,
but if we are not willing to love or care about others,
then what other option is there, but to end that evil by ending us?
People wonder, “How can it be good to destroy a nation?”
To which the question is, “How can it be good to allow people to endlessly hurt each other?”
So out of love Goodness builds up,
but out of love Goodness also destroys,
and such is what it means to be good,
to live by a law of love.
One last thing I almost forgot about that is somewhat related to this is there is a pocket watch I’ve been working on for someone, for probably the last 6 or 7 months now, that uses a 3d model of the earth and moon to tell time with. The really cool thing is it uses all the real data of the earth and moon to calculate all of the animations. Eventually I would like to be able to have something similar inside of the game to change time with, but for now I put it up on SketchFab here:
model.
It’s just kind of a neat thing that I didn’t know if anyone might enjoy seeing or make them smile. I probably wouldn’t have been able to create all of it if it weren’t for doing all the work on this game.
I think that’s everything in this update. The next update I’ll be working on finishing the other wind sounds and adding the randomization to the trunk texture that I mentioned above. Thanks for looking
The next update is ready! I’ve been doing a lot of Spring cleaning lately, otherwise this would have been posted sooner") , but in spite of all
that, the Aspen wind is finally done and I think the audio and
movement should be pretty much in sync. There are new game builds
that can be downloaded
here: http://www.artoflightandmotion.com/downloads
, but in spite of all
that, the Aspen wind is finally done and I think the audio and
movement should be pretty much in sync. There are new game builds
that can be downloaded
here: http://www.artoflightandmotion.com/downloads
and I did some more relaxing videos with the new wind sounds. This first one is just sitting in one spot with the Fall wind blowing:
This next one is also sitting in one spot with the calm, Fall wind, but I tried experimenting with having some of the spontaneous music playing for several of the sections:
I didn’t do any recordings for the Winter wind yet, even though it’s in the game, since there isn’t too much to look at during the Winter right now.
There was someone who gave me a post process material for Unreal, which was very kind, that adds a little bit of post process sharpening, so that’s in the game now. It’s subtle, but still works quite well and makes the small details stand out just a little bit more, adding more clarity overall.
Also, the idea I had for the bark randomization worked out, so all of that is in the game too. I had to redo the way that the sculpts I made for the bottom were laid out. Originally I had each bottom piece in a strip like this:
then I was using vertex colors and a mask to put a certain piece of that strip on the tree mesh. The new way I’m doing it, I separated out each piece into it’s own separate piece that is one third of a strip, like these two:
and I have six of them altogether that are then randomly assigned to the mesh using a little bit of math in the material UVs that randomly translates the UVs. Since I have a lot more space to work with though, having basically two strips worth of space instead of only one ( 6 one-third pieces = 2 strips), I’ll have to do some more sculpting work on them so they aren't so empty. After getting them into Unreal, I also realized some of them are a bit too unique and you start to notice them while walking around, so I’ll have to work on them a bit more to get them looking more similar to each other, so it’s not too noticeable. I thought I would try to do just one on each update or something like that so I don’t get too bogged down in just redoing things over and over. All together though, the new system works quite well and ended up being about 30 less material instructions as well; so that’s a bonus.
I’ve also had some more free time lately, so I was able to record some more spontaneous piano playing. You can find that here and in the game (Sessions 10-12 are the new ones): https://soundcloud.com/user-304480598
With that free time, I’ve been working some more on the explanation of how the seasons work too, so that’s still coming") . Right now I’m working on
the explanations for baking everything into textures to use in
Unreal.
. Right now I’m working on
the explanations for baking everything into textures to use in
Unreal.
The next thing I’ll be working on is trying to do a couple more variants of the Aspens. I still need to do a full grown Aspen where the leaves are just at the top of the tree, and I also need to do some that are about mid height between the full grown Aspens and the bush type Aspens. After those are done, I should be able to start experimenting with putting them over the whole landscape automatically and see how that goes.
Thanks for looking!
First thing is I had ideas for another poem, as well as a few others that aren’t quite done yet. This poem is all about the answer, that I’ve found at least, for the purpose of life on earth, and very much goes with the rest of the poems. It was too long to fit on the back of a teleporter, so It’s inside the game on the floor of the teleroom for now, under the teleporter marked Aspen and also here:
To find the answer, we must go back to the beginning,
For when God made man, man lived by His law of love,
So He created a world where people could choose
And it isn’t about what we build or doing great things,
And this choice is laid out each day in everything we do,
It’s a choice between taking or giving,
But when we chose love or evil,
People always wonder,
But that is the real choice we make,
And if we don't want goodness,
Isn't it good to let people have what they want?
For we reap what we sow,
And if we only want to do evil,
And so each day, by our actions and words,
Such is the purpose of the Earth,
I don’t even remember what I was looking up when I ran across it, just one of those times of randomly running across a video while looking for something else, but part of the poem came from a video I had seen just recently of a man in Africa who had died for 3 days, and was actually in the mortuary, then miraculously came back to life. I had actually seen some of the video a number of years ago, but I hadn’t seen him talking about what he experienced while dead. If I remember right from the video I had seen, they had even gotten to the stage of completely replacing all the blood with formaldehyde to preserve his body, so he was definitely completely dead. That’s why at the end of the video below, where they show the actual footage of him coming back to life that they caught on film while they were just recording everyone mourning and praying around him, he is kind of dazed and staggering, because the formaldehyde was still in him when he just all of a sudden woke up, and it was miraculously being replaced by blood again over the course of a few minutes, I think it was.
Whether you believe the story or not, there is a part of this video talking about what he experienced while dead, where an angel was telling him about reaping what you sow, and that, if he was really going to die at this point in his life, he wouldn’t make it to heaven because he had not forgiven his wife, and that because of that, God would not forgive him. I thought that whole concept would actually fit quite well in the poem, so that’s where the couple lines about reaping what you sow came from. It’s actually something in the Bible as well, in Galations chapter 6, verses 7 and 8. Here is the video: ttps://www.youtube.com/watch?v=i_EHdydFUkw
The next thing is, I got the bark for one of the bottom pieces of the Aspen tree re-sculpted and in the game. It’s really a big difference from what it was like before. I think the main problem with how it was before is I had tried following the reference image too closely and the whole thing just looked too perfect in the end. With this new one, I tried leaving things more messy and really focused on the silhouette that was being made. It turned out a lot better. It also helps to have more practice
and here it is in Unreal:
The other large thing was getting another taller sapling done. I had to add more leaf cluster types on my main texture in order to do it, so it took a while to make, full of experimenting with different alpha cards and branches, seeing what works and what doesn’t. I had textures that work for being under the leaves, like with the trees, and ones for above the leaves with the small saplings, but nothing for being at eye level. I’m thinking that it will work well for meadowy clearing type areas in the middle of the Aspen grove, and just areas that get a little more light. The next one I’ll be working on is a mid range tree between the tall ones and the saplings that can go at the edges of a grove, where there is more sun, and I’ll also be working on the Aspens that have leaves only on the top.
Here are some images of how the sapling looks in Blender:
and Unreal:
There were also some small tweaks here and there, but they really made a big difference in how everything looks. The first tweak was I made the branches a little thicker. During the winter, most of the branches on the alpha cards with the leaves were disappearing because of being too thin. So I thickened them up and it really helps. Here is how it looks now:
The other thing was the normal maps weren’t working properly on the leaves, and they looked pretty flat. So I got those working correctly again, and also added more texture to the leaves and increased the strength of the normal map, so they’re looking quite a bit better now and feel more 3D. Here is how those look:
Someone had an idea to add Distance Field Ambient Occlusion to the game, and I was able to get that working. It really adds a lot to the lighting in the game. It makes a nice contrast between the lit and dark areas and also adds more variation to the shadowed areas. There seems to be a glitch with my landscape pieces where it makes black splotches everywhere, so I had to turn it off for now on the landscape, but I have it on all the plants. Thanks again to Dartanlla for the idea. Here are some images of that:
One last tweak was I had a simple idea for adding a bit of randomization to when the transitions start on each tree, so now everything changes at different times and feels much better and more natural. You can see it easiest in the Fall transition:
Another thing is the Fmod sound system doesn’t have a way to do rectangle audio zones, which would really help for streams and some of the areas with trees. I was finally able to get one working with the blueprints though, and that is what is being used in the new area I added trees to for testing purposes. I wasn't sure how helpful it would be to anyone, but if anyone would like to see how it all works, I would be glad to do a post about it. Just let me know. You can faintly see the large box as well as the small box inside of the large box, which represent the audio zone, in this image:
This area can be found by going through the Aspen teleporter, then going in the opposite direction of the cliff, until you see the mountain pictured in the image below. The new area is then behind that:
One more thing is, I got quite a bit done on the explanation of how the seasons work and put pictures with almost everything I have so far. I had to rearrange things and rewrite a lot of things when I started adding pictures, but hopefully now someone will be able to follow along well enough to recreate it. I almost have everything done up to the point of creating the Unreal material. The explanation can be found here: https://www.dropbox.com/sh/v03321o6yk41zx6/AABeZJFVSCkImy-XB50CLCYga?dl=0
So yeah, there is a lot that happened since the last update
Thanks for looking and I hope you enjoy what's been made of the artwork so far!
The interesting part is going to be placing everything in the level in a way that feels natural, and later on, also keeping all the trees and different biomes feeling cohesive together. I have pretty clear ideas for how certain areas will look, but the rest of the areas I’m not completely sure about. So without further ado, here is a video of being in the groves while changing the lighting and just looking at how everything feels so far. The first grove is of the one that has the teleporter in it, where I added a few boxes that start to give an idea of the house that will be there. The second part is of a different area that tries to give an idea of what the Aspens will feel like surrounded by other trees in a forest:
Probably one of the most exciting things that happened with the project is something that actually happened last update, but there were already so many things to talk about, I thought I would share it with this one. What happened was there was an old friend who was upgrading to a new computer and gave me his old one! Even though it’s pretty old, it’s still a pretty nice computer; one of the old large Mac Pro computers with Xeon processors and 12 cores, which is better than the newer laptop I was using. So I was able to upgrade it with a new graphics card and everything is working quite well. My laptop I was using was really starting to have a hard time working in Unreal, so it was really an incredible blessing and intervention by God that came at just the right time; right before I started adding all this foliage and right before I’ll be putting the foliage on the landscape. The friend who gave it to me didn’t even know about any of the difficulties with the game! He had just been feeling God wanted Him to get a new computer and that he was supposed to give me the old one. I should be able to finish out working on the entire game with it as well!
I also figured out what was wrong with the Distance Fields creating black splotches on the landscape. I realized I needed to turn on double sided distance fields since they aren’t enclosed meshes, and that fixed all the errors. For now, I just turned it on for the ones that have trees under them, since I have to do them each one at a time, and I don’t know for sure yet if I’ve figured out the best way of doing the landscape. So I didn’t want to spend the time yet.
I had ideas for finishing another poem too that’s in the game. I almost had it done on the previous update, but not quite. You can see it here too:
People’s opinions can give worth for a season, but people’s opinions change in time,
what was once popular in one season, matters little in the next,
and all that is left is the wondering of how worthwhile any of it ever was to begin with.
To say that Van Gogh was once unpopular in his time would be an understatement,
yet his worth changed when he was no more,
and may change again in a generation not yet born.
Could it be the number of people that love you?
But do they love you or the image they have created of you,
and will they still love you when you are no more who they want you to be?
As the curtain fades, what is left of the crowd, the worth?
If they don’t still love you, how much were you truly worth?
Will they sit with you as you die?
Some would say that worth is power,
the ability to be above and control others.
But what happens if you lose power over one,
or someone else controls more pawns than you?
To live by a currency of people is to have a worth that is always changing,
to be worth less because others are worth more,
and to live in slavery to others,
because even one has the power to change your worth forever.
And so you might control an entire atom called earth.
In a universe full of atoms,
you still only have an atom’s worth of worth.
One could say that they’re worth something because they made it in life,
and found success in the things they did.
The belief that you were good enough to make it,
and worth more because others couldn’t.
But what has been gained by that success?
Are you not the same person you were before?
Though it may feel good to look down on others,
are we truly better,
or are they just a mask,
used to hide the things we look down on in ourselves.
And though you may succeed in some things,
you’ll fail in others,
and others will look down on you,
when they were good enough in the things you weren’t.
So is there really any worth in the end?
And if that’s the measure of you’re worth,
then how much are you worth after bankruptcy?
So what is true worth, if all the worth in life can shift in the sands of time,
ebbing and flowing in the waters of life?
Is there any hope?
Yet I find, not just a person, but a God who loved me for who I am,
that before I could ever even try to be good enough for Him,
I was loved and worth so much,
He put me aside and was tortured in my place.
To be worth everything when you have nothing,
this is true worth.
And though the world’s currency of value will always change,
this is a worth that stays the same,
condition-less love that will remain.
It’s a worth that’s just about you, not what you do,
nor the monument of your own greatness,
and the way that people look at you.
A worth not based on quantity,
not tied to a currency of value,
and infinitely more valuable than any other,
because you don’t have to attain it,
or have anything to have it.
It is freely given,
without charge.
Rich or poor, in sickness or in health, failures and success,
that love will always be the same;
a worth that remains, a love that does not change.
True love, true worth,
will I ever be the same?
In many ways, the poem is really the story of how we try so hard on the earth to try and get people to love us and feel like we mean something and are worth something, but even if you gain that worth, you can gain so much in the world and yet have so little in the end. Yet with unconditional love and His love, you don’t have to do anything to gain it or attain it, He just loves you. That’s what makes His love so special; that it is completely free. It’s a worth that’s real and solid and doesn’t change because it’s so much about just us, instead of what we’re able to do. With first hand knowledge, I’ve experienced both in my life, and I can say that there is no comparison to His love that is so completely without conditions and just so full and un-lacking. It’s even a bit scary because you have no control over how much He loves you, and there’s nothing you can do to change it, it can only be humbly accepted. A very humbling love.
So anyway, that’s some background of the poem and I hope you enjoyed it
For the next update, I’ll work on one of the bottoms of the Aspen bark, and also be experimenting with the landscape, trying to see what the best option is performance wise. The real difficulty is there will be so many different types of trees and areas by the end that will need different textures for the ground, that I think I’m going to have to figure out a way to do a mixture of static meshes that are separate from the landscape, as well as have a large landscape that has the materials for things like streams and paths that need to be the same throughout the world.
I actually had this update ready about a month and a half ago, but forgot about posting it here with how busy things have been. Here it is now though")
The next update is done! There were some things that came up, so I didn’t have as much to work on things as I usually do, but even so, there were still some important things that happened. I was actually going to do the update last week, saying how I had done some testing and decided to go with the Unreal landscape for the ground, since it seemed to be almost the same FPS as my own landscape, but then I tested the game on another computer, and decided I better do even more testing of things") . So long story short, I’m actually going to go with my own landscape using Static Meshes, but I’m doing it differently than I was before. If it is helpful to anyone, here are the results of some of the testing I did that made me decide to go with my own landscape, and how I created it. I also didn’t update the builds this time since there isn’t really anything new to see yet.
. So long story short, I’m actually going to go with my own landscape using Static Meshes, but I’m doing it differently than I was before. If it is helpful to anyone, here are the results of some of the testing I did that made me decide to go with my own landscape, and how I created it. I also didn’t update the builds this time since there isn’t really anything new to see yet.
For the first test, I tried out using the landscape that can be made in Unreal using a Heightmap, and also tried using the new things that Epic had added to it since I last tried it. With that I was getting about 73 Frames Per Second, with everything on the highest settings and only having the landscape in the scene, which is about the same as what i was getting with my own landscape made in blender and imported into Unreal as separate models. Both were being limited from going any faster by the “Game” thread part of Unreal’s rendering.
After that test I had thought that, since they were about the same FPS and it would be easier to work with in the end ,I might as well go with Unreal’s landscape. So after getting all of that done, and being just about ready to do an update, I then tested it on another computer that had a weaker GPU, but this time I got quite a large difference between my landscape and the Unreal landscape, where my own landscape was about 10 Frames Per Second better, I think it was. The thing about this though was that it was being limited by the “Draw” part of Unreal’s rendering, which is the part that gets all of the objects and various other things ready to send to the GPU. So if you’re being limited by that, it would partially have something to do with the amount of objects in the scene, which was true with the tests I did because the Unreal landscape had about 200 separate pieces to render, while mine had only 80 some, as well as a smaller triangle count. That gave me an idea that maybe if I did really large tiles, and only had maybe fifty of them, I could get even better performance than either option. So here is how I set things up in Blender. First I made one square tile that was subdivided a little bit just to give a bit of geometry to work with for vertex groups and things like that:
Then I made a grid of 48 of these tiles altogether that are about 1.2 Km on each side. With that, there is also the actual model that is being sculpted on, to create the landscape:
Then each of the 48 tiles are heavily subdivided even more and projected onto the sculpted landscape using a modifier that doesn’t ever get applied, so if there are any changes to the sculpted model, it will automatically update on the tiles.. You can see the faint outline of the tiles in this image:
Doing it this way it picks up all the details of the landscape, but everything is still in a nice grid that will fit together with each other, and I can push and pull around the sculpted landscape without the actual grid of squares being moved around. After it’s projected, a decimate modifier is used to bring the polycount down, but still keep the shape of the landscape. Finally, there is a Data Transfer modifier that just transfers the vertex normals from the landscape to the very edge vertices of the tiles. This makes it so there isn’t any visible seam between the tiles. Altogether, the whole process is completely non-destructive and updates automatically with any changes made in the landscape sculpt, since only modifiers are used to change anything. Here are the different settings used:
So now I have 48 tiles altogether in Unreal with all the quality settings set to maximum, and the results of testing them on the computer with the lesser GPU are that I get 48 FPS with being limited by the GPU at about 21 milliseconds for each frame, with only the 48 tiles in the scene, which is a little better than what I had with my previously made landscape. Then with only the Unreal landscape in the scene, I got 33 FPS and about 30ms on the GPU thread.
On the other computer that has a better GPU, I get about 83 FPS with the tiles, while being limited by the Game thread at about 11.5ms per frame. Then with the Unreal landscape, it’s still at about 73 FPS, while still being limited by the Game thread at about 12ms. So the grid of tiles ended up being about 10 frames per second better with that computer, and about 15 with the other one! I’m not actually sure why it helped so much on the better computer, since as far as I know, the “Game” thread doesn’t have anything to do with rendering models, but for some reason it really helped quite a bit.
So in the end, I decided that it would probably be best to go with the custom made tile grid. Even though it is going to be more difficult to work with, I think the extra FPS you get from it are worth it, and I’ll be able to use those extra frames to add other things that you notice a lot more. So that’s a little summary of the whole setup and how things turned out with it.
A couple other ideas I tested and got working are that, irrelevant of which landscape I’m using, I think I’m going to try using a separate model for both the stream beds and the paths, instead of trying to do the texturing for those as part of the landscape. The main reason for doing it with the streams is that they can be quite different from each other with how sharp the edges are. Like with this picture of a meadow, the edges go straight down, which can’t really be done with just the landscape, but can be done when using a separate mesh:
https://pixabay.com/en/brook-meadow-wilderness-stream-1031675/
The other reason for doing it with both the path and the streams is that there can be a lot of variety with how the textures look, and it seems like it would be quite boring if it was all the same texture throughout the level. The problem is that if I was doing it with just the landscape, I wouldn’t be able to add very many textures, since you’re limited to only 11 textures in a material, and I need to use the textures for other things. I’ll be using texture atlases as well, but I would still run into that 11 texture limit. So doing it this way, I’ll really have a lot of freedom to do lots of different textures for the paths and the stream beds, while also freeing up space on the main landscape for other textures and things.
To actually do it, all it takes is just creating another more rectangular grid model in Blender. Then you can create a bezier curve as a way to place the grid onto the landscape, by adding a curve modifier on the rectangular grid . After that, you just project the vertices of the rectangular grid onto the landscape, like I did with the 48 tiles, to make sure it follows the landscape in the up and down direction. As the last thing, I then just used the Data Transfer modifier again to transfer the vertex normals from the landscape onto the edges of the path or stream model, which makes the shading seamless between the transition. Here are the settings for the path. The stream is pretty much the same. I also added a decimate modifier, but I’m not sure if I’m going to keep that:
Then on the edges, I’ll just use vertex colors with the height textures I’ll be making later to blend between the landscape and the path mesh, using transparency to do the blending. In the end, it will look and be almost the same as if I was blending between two different textures using only the Unreal landscape. I’ll still have a little bit of work to do when I make the final meshes to make sure the landscape doesn’t intersect it, but here is how the basic idea works out in Unreal:
Something else I did on this update is I separated out the large rock features from the landscape grid of tiles. The main reason for doing this is, since I’m projecting the tiles on to the landscape only in the up and down direction, I can’t have any overhangs in order to do that. I also wouldn’t be able to have them with the Unreal landscape either, since you have to bake a Heightmap in order to create the landscape in Unreal. So they are separated now and will be ready to eventually create into final cliff faces and such. Here are some images of how that turned out:
Only the landscape without Rock Features:
Landscape with Rock Features:
I also figured out how to get the transition between the landscape and the top of the rock features pretty much unnoticeable. There are a few that will need more work, but I’ll work on those when I’m working on the final models. For most of them, you really can’t tell at all:
One last thing on this update is I also, almost, got another lower Aspen bark piece sculpted:
Something I wanted to show on the previous update, but didn’t have room to show, was all the trees shown together in Blender, since I think all the types of trees are done now, and it’s just working on variants next. So here is one of each size of tree all finished, with wireframes:
Another thing from the last update is a little bit about applying the leaves to the trees. In the end, I found the best way to do it was to create a bunch of small branches and bake those into a texture atlas. Then after putting the texture on planes, or maybe a plane and a few triangles that could change the shape a bit, I used them as almost kitbash pieces to create a large branch that looked good at all angles. Afterwards the large branch can be duplicated over and over again onto the tree using an instanced, or linked, model. Doing it this way, you can create nicely detailed branches, but you only have to create a few of them, and if you need to change something on one of them, all the duplicates update as well. Here are some screenshots of the large branches I made for the medium sized tree with a height between the saplings and the full grown trees:
One last thing is I also got the explanation of how the seasons work to the point of starting to explain how to create the Unreal materials to create the final effect. So slowly but surely, it will be done eventually")
The main things I’ll be doing for the next update are creating the texture for the landscape to use under the aspen trees, making the flat plane mesh and textures to use as the last LOD for the Aspens, and also then putting the trees on the whole landscape. After that, I should be able to start adding small details and fleshing out the game world much more. So that will certainly be exciting!
Finally got the next update ready! I may have tried to do too many things at once for one update") . I
went ahead and did new game builds for this update as well:
http://www.artoflightandmotion.com/downloads,
so if you want to see some of the things I talk about below, you can
try it out. One of the builds is with a normal amount of trees
that I've been doing in
previous updates, with
a few large clumps of
trees to get a sense of
scale in areas,
and the other one is with trees covering the whole map, which I talk
about below. I
also go into more of this below, but one
thing to note before trying the one with a dense amount of trees is
that it
doesn't run on my laptop that has a GeForce 650m, but it does run
well enough at
around 30
- 60 fps on
almost the
highest settings on my main computer that has a GTX 1060,
which I hear is equivalent to a 980 or 970.
So probably a 900 series graphics card and above should run after
playing with the settings a bit
and possibly the 800 series as well. Also,
whatever equivalent AMD GPUs
should run okay too, but I've not tested them.
So just to let people know, the test with lots of trees isn't going
to be playable on all
computers.
. I
went ahead and did new game builds for this update as well:
http://www.artoflightandmotion.com/downloads,
so if you want to see some of the things I talk about below, you can
try it out. One of the builds is with a normal amount of trees
that I've been doing in
previous updates, with
a few large clumps of
trees to get a sense of
scale in areas,
and the other one is with trees covering the whole map, which I talk
about below. I
also go into more of this below, but one
thing to note before trying the one with a dense amount of trees is
that it
doesn't run on my laptop that has a GeForce 650m, but it does run
well enough at
around 30
- 60 fps on
almost the
highest settings on my main computer that has a GTX 1060,
which I hear is equivalent to a 980 or 970.
So probably a 900 series graphics card and above should run after
playing with the settings a bit
and possibly the 800 series as well. Also,
whatever equivalent AMD GPUs
should run okay too, but I've not tested them.
So just to let people know, the test with lots of trees isn't going
to be playable on all
computers.
A lot of the time for this update was spent working on the landscape some more. I kept having all of these small problems that meant having to change the way I was doing the whole landscape, which took a while to do each time I had to change it, but in the end I figured out a way to get through each problem and the performance of the landscape is even quite a bit better than it was! I thought it could help someone out, so if anyone is interested in that, you can find a summary of everything I tried for it in the post that will be right below this one. I could be wrong, but in the end, I think doing the landscape this way might be the only way to have so many trees, with the seasons on them as well, and still have the game be playable on a mid range GPU. So it's really a big blessing to have figured out so much with the landscape. Here are some other things that I've been experimenting with since the last update:
________________________________
As I mentioned above, one important thing I tried is covering the whole landscape with trees, and I'm very happy to say that even with it covered in trees, it's still playable on my computer at 1920 x 1080 with almost everything at the highest settings. For the test, I added trees more densely than they will be in the game, and also added the undergrowth very densely in areas. I was planning on adding the undergrowth over the whole map, but it was taking several hours to add it to each landscape tile, because of it adding around 2 million bushes each time, and since the bushes are only rendered around 100 meters around the player, it didn't seem to be making any difference with performance each time I added them to a tile, so I stopped at around 10 million bushes. The final count for all the trees was around 1.3 mil.
Now for the results of the test, the worst it seems to get is down to about 12 FPS during the winter, from the branches being transparent, and about 20 FPS during the summer and fall, but it seems to only be right when the sun comes up in the morning, but isn't quite visible, and the whole map is shadowed. Then as the sun keeps going up, the FPS go up as well, into the 30s or above. So there is definitely something I'll have to look into with that. For the most part though, performance is on average 20s or above when everything is on the highest settings, which seems quite good for how big of a landscape it is and how many trees and bushes are on it. I also don't even have the best graphics card you can get, and if someone had a better one, they would get even better performance. If the shadow quality is turned down to medium, which turns off shadows for the foliage in the distance and makes the close shadows a little more blurry, the FPS goes quite a bit higher into the 30 - 40s and above as the worst it gets, which still looks good and is pretty playable. So really an exciting test with some good results, considering how dense everything is! Here are some pictures of that, and a bit of fun covering the whole landscape in trees") :
:
________________________________
There was someone who mentioned things felt a bit too tiled in the world, which is quite true, and although there isn't a whole lot I can do right now, because I haven't created all the other models, I tried experimenting with changing the density of the vegetation, making some areas really dense while others are more sparse, and trying to pay attention to how much light areas might get. So hopefully it feels less the same when walking around. Those experiments can be seen easier in the game build without trees covering the whole landscape, if you go through that painting labeled Aspens. Here is an image that shows a bit of that:
________________________________
I also did a little experimenting with getting the look I've seen in some images of right before you enter an Aspen grove from a meadow or something like that, and there is a feel of the leaves almost being painted with the end bristles of a paintbrush. It just feels quite painterly with how the leaves look like they are in splotches. So I tried seeing if I could get that kind of feel and it seemed to turn out well. I wish they were a little more splotchy, but it's not too bad for all the limitations there are in a game:
________________________________
Another thing that can be seen easier in that game build without all the trees is I got the texture done for under the Aspen tree areas, using Blender to create it. I went with kind of a dried muddy look for the ground, with dead leaves and sticks laying everywhere. Here is how it looks in Unreal:
I'll probably have to change the previous path texture I made to fit better with the Aspen areas, but this is the path going through the grove:
________________________________
With that, I’m happy to report that the idea of using a separate mesh for the path and stream beds does indeed work, but there is one Material setting to know about to get it to work called Dithered AA. The main problem in Unreal with trying to do transparency that fades out is you can't have nice shadows being casted onto the material as well. The only way to have those shadows is to use the Opacity Mask input in the material that's used for things like leaves to cut out the leaf, but the drawback to that is the surface can only being either completely opaue or completely transparent. Apparently a way to get around that though for when you want it to fade is to turn on Dither Opacity Mask in the Material settings:
or do it manually with a function like this:
Here is how it looks up close on the path:
There is a little bit of banding that occurs from how it works, but it's not something that's very noticeable. One nice thing about using the separate mesh is I may be able to use tessellation on them without having much of a performance hit, since they are separate low poly meshes. That would be quite nice for having large rocks on the path, as forest paths tend to have at times.
________________________________
The billboard meshes for the last LOD on the trees are also in the game, which can be seen in those above images of all the trees covering the map. They really turned out quite well and you can't really tell when they transition very well. The only thing I haven't figured out yet is how to do the transition during the winter. Because of the way Unreal works, it makes a lot of the branches completely transparent on the normal tree meshes as you get further away from them, then when it switches to the LOD boards, the tree becomes much more opaque all of a sudden. There are a few things I've tried for that, but so far they haven't worked very well yet. Thankfully it's only noticeable when you're going from a meadow type area into a tree area though, so it may not be too big of an issue in the end. Once the pine trees are in there too that don't lose their leaves, it will be even less noticeable.
________________________________
So all in all, it was an important update, and I know the art/game will still be playable even when everything is covered in foliage. There were also really a lot of neat ideas I had for doing different things on this update. I don't mean to make anyone feel uncomfortable, but I feel a bit like saying, "This update brought to you by God," haha, "without whose support, none of this would be possible." Really the whole game has been that way too with so many ideas for things that I know didn't come from my own ability to figure out.
So at this point it's kind of an open slate of what I'll be working on next. I'll just be adding all those fun details to the Aspen areas, mainly just trying to create the Aspen area fully to figure out all the systems that will be needed for all the other areas. I may start working on some of the buildings too, which would be quite fun. So stay tuned")
Here are the things about the landscape mentioned above for anyone interested in that.
The landscape I was working with from my previous update, where precut tiles with a high density of polygons were projected on to a sculpted landscape, then decimated afterwards to bring the polycount back down, ended up not working in the end because it wasn't really able to pick up the smaller details of the sculpt when I added the path into the sculpt. It was mainly the way the path can kind of cut into the ground a little bit from being walked on all the time. So that meant having to go back to using the sculpted landscape where I was able to sculpt certain areas like the path with a finer density of triangles and still export it that way. The downside of this though was that the edges of each tile were all jagged because of the way the Dynamic Topology mode in Blender that creates geometry as you're sculpting works only with triangles. So the edges of each tile looked like this:
The problem with that became apparent in Unreal when I used the automatic LOD generator to create the LODs for each tile. When it creates the LODs at the really low amount of polygons, it takes away all of those triangles and leaves a somewhat straight line, but one that is a bit wavy. So you end up with lots of holes between tiles that are quite visible. So to fix that I ended up using the knife tool in Blender to cut actual straight lines through those triangles for each tile edge:
That way the edges would still be right up next to each other when the LODs were made.
To do any sculpting work, you then just recombine the tiles you're working on, do your sculpt work, cut the triangles that changed while sculpting, then separate the tiles again.
This ended up working quite well in the end and really combined the best of both the projected landscape, which had straight edges for each tile, and therefore straight lines for the LODs, and the sculpted landscape, which could have small details in specific areas.
The other really great thing I tried with it was to do custom settings for each of the generated LOD meshes in Unreal. It takes more time to set up, since you have to set things manually, but with the straight lines on each tile, you can get away with taking down the triangles in the mesh by very large amounts and also have it change to those LODs a lot closer to the camera than with the automatic LOD generation. This helped quite a bit because I was able to have the first LOD go down by 33% of the original mesh, then the next one down to 6%, and the last one down to 1.5%, or only 4,500 triangles for a mesh that's originally around 300,000 triangles. This really cuts down on the amount of triangles being rendered for something that isn't really seen much, which allows for adding more things that are seen to the game. You also can't even tell when the meshes change either.
One really nice thing about all of it is I can also do a separate material instance that only mixes between basic colors, instead of mixing between all the Diffuse, Normal, etc. ground textures. So the further away tiles have a lot fewer instructions. Here is a view of the shader complexity to see that, where the darker green has more instructions being processed:
Since the LODs reduce the amount of triangles so heavily, there is also not much overdraw from triangles occupying the same pixel and therefore rendering the same pixel over and over again:
Also here is a view that shows the LOD meshes where white is LOD 0, red is LOD 1, green LOD 2, and blue LOD 3:
The last thing that needed solved after all of that was to do the collision mesh for each tile. With the way Unreal does the LOD generation, you don't have control over how many triangles it takes away in different areas, so the path was basically being taken away completely for the collision mesh. To solve that, I just used Blender's decimate modifier with the vertex group settings to control how much the path gets taken away, so it ends up like this:
Then you just import that as one of the LODs on the landscape, choose to use that LOD for collision, and you have good collision again.
I think that's everything of how the landscape is set up now. Hopefully it helps somebody out!
Next update is done! I went ahead and did new game builds as well found here: http://www.artoflightandmotion.com/downloads One of the biggest things this update is I finally finished the explanation of how to recreate the seasonal changes that are inside of the artwork/game! That can be found here: https://www.dropbox.com/sh/v03321o6yk41zx6/AABeZJFVSCkImy-XB50CLCYga?dl=0 and more permanently in the Free Resources section in the first post. So if anyone has been interested in knowing how all of that works, you can finally see it!
Another big thing on this update was getting the system worked out for having leaves on the ground that appear and disappear during the Fall. It took a while to create everything for it, as it often does when you're doing something new, but the effect seems to work quite well in the end and adds a lot to the scene. There were also a few times that I wasn't quite sure if it was actually going to work, but I kept having ideas for things and it does
One of the biggest problems I had with it was getting the meshes to flow with the terrain and along steeper hills. Previously, I had an idea of using a heightmap of the terrain that I made in Blender to then displace each vertex according to the heightmap, by first bringing all the vertices to point 0 on the Z axis (or Y in other programs). That way everything is flat. After that I subtracted from that point 0 to bring all the vertices down to the lowest point on the landscape. Then you can just multiply the Heightmap by a large amount, and add that to the previous calculations, which gives Displacement that lines up with the actual terrain.
This almost worked, but I was still having problems that I wasn't really sure how to solve, as can be seen in this image of how the leaves look like stairs:
Initially I had thought that the problem was the texture resolution wasn't high enough, which seemed reasonable because of how it looked pixelated, but I was already using an 8192 x 8192 texture size and couldn't reasonably go any bigger than that with how much GPU memory that would take. While thinking about all of that, I all of a sudden realized that I could actually shrink the area that I was doing the Height map for. Originally, I was trying to do the whole map in the texture, as well as some area around the map, so that 1 pixel would equal one meter in the game world, but I realized I only needed a Heightmap for the playable area, which was only about 4000 meters. So shrinking the amount of area I was doing a Heightmap bake for increased the pixel resolution. To my dismay though, it still had that stair stepping in the same places, which meant it wasn't a resolution problem. I should also mention that because I needed two displacement maps of the level to make things work for on top of the large rock features and under them, I was using the RGB Displacement Map compression settings in Unreal that allow for multiple color channels, and which I thought should work just fine for Displacement Maps like this. I was also always saving the images in 16 bit, rather than 8 bit.
So after that I thought it might be something with the actual way it was rendering in Blender, and when I looked at the texture, I noticed that it had that banding in the same place as what's seen in unreal. It's very faint and difficult to see, but if you move this image around a bit while looking at it, you can start to see the banding going on where it looks like there are flat surfaces going up the hill instead of a smooth gradient:
So after discovering this I started trying all kinds of different things in Blender to see if I could get rid of the banding, using things like dithering, which only added noise to the displacement in Unreal, but still had the banding clearly visible. I also tried blurring the texture a bit, which did help, but then all the details get lost and it still has banding, even though it's less pronounced. So at this point I had tried pretty much everything I could think of but to no avail, the banding was still there. Then as a fluke, I was messing around with different things in Unreal, and I tried using the HDR compression settings and all of a sudden, everything magically worked
As far as I can tell, the reason things weren't working before is that the RGB Displacement compression setting takes the texture down to 8 bits instead of leaving it at 16 bits, while the HDR setting leaves it as 16 bits. The really weird thing though is that, with the HDR setting, it still has the banding going on before the texture gets compressed, and it's only after you apply the compression that the banding goes away and it's using the values that are actually in the texture instead of some kind of compressed texture, which seems quite opposite of what you would think it should be. It's also quite interesting that the banding that can be seen in the texture in the image above isn't actually affecting anything like it seems it should have been, even though it's in the exact same spot as where the banding was in Unreal. So there are a lot of things with it that I don't understand why it's the way it is and it's kind of a Duct Tape solution in the end, but at least it works
So just kind of an interesting story of compression in Unreal and if you want to have an RGB image for Displacement in what I think is also 16 bit, the HDR compression seems to be the only one that actually does this. It's possible the displacement compression that says 8/16 bit would work as well, but I haven't been able to get it show anything but a white image when I try it, whether or not I'm using an RGB image with three channels, or a Black and White image with only one channel. So I'm not sure how that one actually works.
There were a few other things that happened as well in this update. One was the Aspen bark texture I was working on a few updates ago is finished. Here it is in Blender and Unreal. I was going for kind of a damaged look where it seemed like some of the bark was starting to being ripped from something pushing out from within, like I've seen in some photos:
With that, I also had an idea for rearranging the Bark texture atlases so that ones that have more unique damage to them, like that one above and another one I had made, appear less often than a couple of the others that I'm going to be re-sculpting that won't have any damage on them. This way the forest should feel less like things are repeating and damaged ones like above shouldn't ever be right near each other.
Another thing that happened is after doing that test with all the trees last update, I started getting into a bit of performance profiling. After playing with things a bit, i think I found the main culprit for the strange changes in performance when the sun is at a low angle versus pointing straight down. Apparently to do the shadows, the light source has a depth pass that is basically the same as the camera's depth pass, only it's from the light source's viewpoint. I think this is then used to help produce the shadows later on in the rendering pipeline. In order to do this though, the computer has to calculate where all the different model's triangles are in the scene, but do it from the light's perspective instead of the player's. I think also if there is transparency on those triangles from the material setting, it also has to calculate triangles through other triangles that are seen because parts of the material are transparent. So when the sun is down low, there are a lot more triangles being processed because the light source is looking through lots of meshes all at once. Then the higher the sun gets in the sky, it's looking through fewer and fewer meshes, so there aren't as many triangles being calculated. Here are a few images of the tests I did. These first two are of the shadows at their highest quality settings and you can see how both the amount of triangles and the time it takes to do the shadow depth pass both skyrocket at sunrise versus midday, while everything else stays pretty much the same: (This is with shadows on their best settings)
Afternoon
Morning
The same thing is happening with Medium Quality Shadows, just not as big of a jump because there aren't as many shadow fulstrums being used, or rather times the shadow gets calculated:
Afternoon
Morning
The interesting thing about this is that I tried putting the cull distance for the foliage, which is the distance from the player that the foliage stops being rendered, at a really small amount, so it was only the trees right next to the player that were still being rendered. In the end it didn't actually have any effect on performance. So to me that means that it's only the vegetation right next to the player that's causing the really low performance, which is both a good thing and a bad thing. It's a good thing because it means that having the whole map populated by trees isn't going to be a big issue. It's a bad thing though because it means that really all I can do to have better performance is to not do things super dense. I wasn't planning on that anyway, but it does mean I'll have to be careful of how dense the vegetation gets.
As part of that, I also added a bunch of options for the shadows in the options menu, so people will be able to decide what things they want on or off instead of it being decided for them by having only one slider. The smaller Aspen bushes also having LODs on them now, which helped more than I thought it would with performance. Since they were being culled if the camera was far enough away from them, I didn't think they would need them, but I guess they still did. It actually helped with them staying more visible in the distance as well because I was able to add a slightly changed material for the ones in the distance that wasn't as transparent, which made Unreal keep showing pixels from them longer, instead of just culling them because they weren't contributing to the view enough.
A rather interesting thing that happened that made me go on kind of a rabbit hole adventure
So that was a neat thing that the blog article I ran into just a couple weeks before kind of gave me a place to start when I realized I would need to do that too.
I guess that's everything for this update. Until the next one
Finally have another update ready! That's the trouble with starting such long projects is that you usually start them when things aren't too busy, but life isn't always that way, so you have to kind of let things ebb and flow") .
.
For this update, the main thing I added was the grass. I added new Game Builds here if you would like to see it: http://www.artoflightandmotion.com/downloads , and here are some images of how it's looking:
I spent a lot of time experimenting with it, trying to figure out what the best method might be for it in the end, working with the way the season's function as well. In the end, I went with kind of a mix between small grass cards and individual blades of grass. One of the main difficulties with the grass is that, when you add seasons into the mix, the grass has to start disappearing in Winter, and if you're using only grass cards for it, then you run into massive amounts of transparency as you might only have one blade of grass still visible on the card, but since that one blade is there, you can't move the card out of view. So you end up with a very huge amount of calculations that have to be done each frame because there is so much transparency. Although going with the route of having one blade of grass per card, you can just move that card somewhere else in the level when that blade needs to disappear. The downside of course is that you also have more vertices that need to be rendered. So in the end I went with having between 1 and 4 blades of grass visible on each card, then just had that whole card disappear, even when there were 4 blades of grass on it when it came time for it to do so.
To talk a bit about performance, here are the results of some of the tests I did. I forgot to take screenshots of all of the original tests I did, but here is something I threw together real quick to show the end result of those tests. To start off, here are some of the meshes that I tried:
On the left, it starts out with 4 vertices on one card, then goes to 6, then 9, and lastly on the right, the final model I used for the blades of grass with 359 vertices. For the test, I did it in the early morning part of the game, when performance is the worst because the shadows are so long, and I also did it right when the transparency would be the worst, during the time that the grass goes from being dead to growing again in the Spring, and you have to make the dead grass transparent so that it can look like the grass is growing again. A few more things to note is that I did the tests while in the Unreal editor, so there is a little worse performance because the editor is still open. I also did it with all quality options turned on to their highest setting with 1920 x 1080 resolution. Lastly instead of painting new models onto the landscape each time, I would just replace the model in the foliage settings to make sure everything was in the same place and there were the same number of models in each test.
Now for the results, with the 4 vert card, I got around 53/54 - 69/70 FPS. With the 6 vert card, I got basically the same, maybe a half FPS less. Lastly the 9 vert card had about 51/52 - 68/69. Here is where things get quite interesting though. When I tested the grass blades with 359 vertices, the performance I get is 51/52 - 68/69, which is amazingly the same as the 9 vert card, with maybe just less than a half FPS worse.
So altogether the grass blades actually give about the same performance as the cards, even though there are so many more vertices. I believe the reason for this disparity can be seen here in the shader complexity view, which I believe shows something to do with the amount of instructions the GPU is doing in one of it's cycles. I'm not sure exactly what those cycles are, but if there are more that need to be done than the max amount for a cycle, or 2,000 instructions, it has to do them in it's next cycle, which means the frame can't be rendered as fast because it has to wait for the next cycle. To show all of this, Unreal has a view you can look at that goes from 0 to 2,000 for each pixel. First, here is an image of what I was testing looked like in the normal game view:
Now here is how that looks in the Shader Complexity view with the single bladed grass. While there are some areas that start to get a bit white, meaning a very large amount of shader instructions are being done for that pixel each frame, it's not too bad for how much is going on in the scene:
The grass cards however are really bad:
Keep in mind too that the white just shows up to 2,000 instructions being done, but the actual amount that has to be done can be quite higher in total. So with these cards, who knows how many instructions are having to be done. I believe this is where the disparity comes in, because even though there are less vertices to render, there are also far more instructions to do on each pixel.
Something to mention with this is that I didn't have a texture for the grass cards when I did the testing because I would have had to change the final shader I made to do it. So they are fully transparent, but with how little the grass would actually be there at this stage, it wouldn't effect performance that much, if any. So altogether, in this case, having cards instead of blades of grass is only a couple FPS better, but that's only if you replace it by just one of those cards. In a more real world case, when using a 4 vert card, you would usually have at least two of those cards intersecting each other, per bunch of grass, to make it more 3D, which brings it to at least 8 verts per bunch. Many games now days also even go further and use the 6 or 9 vert cards instead, and putting several per bunch, which would bring the vertex count even higher, and would actually start to create even worse performance than the grass blades because of how much transparency there is, and the addition of more verts than I tested with. So it's really quite a result to the test that having such a large amount of vertices could actually work better than cards with less vertices, simply because you don't have such a huge amount of transparency.
As a note, since those tests were all done while the editor was open, it's not a very good indicator of what the final performance is. To find that out, I did a build of the game and the final performance in the final built game seems to be above 60 FPS at 1920 x 1080, no matter where you are, what season you are in, or how low the sun is. So that's definitely quite good. There is a really weird spot though when the sun is pointing in a certain direction, and you're looking directly away from the sun that it all of a sudden goes down into the 40s. Somehow it seems to be connected with the Distance Field Far Shadows, and I believe the trees that are way out in the distance, but I really have no idea what is going on with it because their shadows shouldn't even be being rendered when the player is looking away from them. I think I'm going to have to learn some more performance profiling to figure it out, using a program like RenderDoc.
One last thing to mention if anyone wants to replicate this is the 359 vert grass bunch takes up about 1 square meter of space in the game. So you have on average about 450 vertices per square meter, because they can overlap a little when painting them in Unreal. I should mention too that probably the only reason I can get such performance altogether is because of those earlier tests I've been doing with not using Unreal's landscape system, but going with a static mesh landscape that I import from Blender. Without that, performance would probably be down into the high 40s at this point as the best.
Now that all of that is explained, there are some other things I've added to the game. One thing is I also came up with a way to have dead grass on the ground in meadows and places like that, where it would just look strange to have nothing there when there isn't snow on the ground during the winter. What I was trying to replicate is this kind of idea, only for right now, with shorter grass: https://pixabay.com/photos/landscape-early-spring-2083440/
Here is another image of the basic idea I'll be going towards as I get more grass types created, where it will be a bit like this image at first, but as the winter progresses, more and more dead grass will fall over from the snow, and eventually most of it will be lying on the ground like the above image: https://pixabay.com/photos/fog-foggy-nature-scenic-forest-1122507/
Here are some images of how that is looking in the game. It's still not quite the way that I wish it looked, but at least the method for doing it has been all figured out. Since they are on the ground, I also went ahead and used cards for these:
One other pretty cool thing for the grass is I was able to figure out a way to have the grass blades go away over the course of the entire winter, instead of just before the year ends. To give a little explanation about why this is a really neat thing, the way I have been doing the seasons was to start off the shader in a state of being in winter at the beginning of the graph. So there are no leaves or anything like that. Then as the year progressed, I would gradually override this with the Spring leaves growing into full leaves, then override that with the Fall colors on the leaves, then override that with the leaves disappearing and the whole thing going back into winter. So it was a very linear sort of thing of just overriding each effect as the year would count up in days, but there was no way to have any effect overlap from one year to the next year, and for instance, the leaves on the ground had to all disappear by the end of the year so that it would match with the starting point of having no leaves at the beginning of the next year.
The problem with this whole thing though came with adding the grass because it doesn't look right when you have just a barren wasteland without any grass during the winter, and all you have is a texture on the ground. So I had to add a way for the grass to basically halfway disappear by the end of the year, then in the next year, continue where the other year left off and finish disappearing right before Spring, when the grass would need to start growing again. My goodness, things definitely got a bit complicated there for a little while trying to do that") . Mainly because of how much the
transparency and colors have to change throughout the year, and some
season effects have to basically happen at both the beginning of the
material shader, then also occur again at the end of the shader when
winter comes. It worked out in the end though, so that's good
. Mainly because of how much the
transparency and colors have to change throughout the year, and some
season effects have to basically happen at both the beginning of the
material shader, then also occur again at the end of the shader when
winter comes. It worked out in the end though, so that's good ") .
What's great about it is that now there is much more continuity for
the entire winter season, and I can also add the same thing to other
things, like those leaves on the ground, which I think really do add
a lot to the way the winter months look.
.
What's great about it is that now there is much more continuity for
the entire winter season, and I can also add the same thing to other
things, like those leaves on the ground, which I think really do add
a lot to the way the winter months look.
A couple more things that happened are I got some more Aspen bark sculpted. For these, I was doing a very generic sculpt that could be applied on a lot of the trees. This way the more unique sculpts feel more unique when you see them, and the main thing is that you don't really notice that you're looking at the same textures as much while walking around, unless you're actively looking at the trees. I was also able to use some of the generic black "eye" areas I had sculpted from other bark sculpts, then add unique black "eye" areas around them. So that saved some time. Here is how those look. The second one is only partially finished, and the lines show the area that will actually be on the tree, as well as what parts would be visible when you can only see a quarter of the tree at a time when it's applied on the tree:
The other thing was I finally found a solution to the way the branches on the trees would disappear during the winter as you got further away from them. This is something that I have been struggling with for quite some time, and the solution actually came as I was researching different ways of doing grass. In the end, it has to do with the Mip textures in Unreal. These are basically LODs for textures that make the texture resolution smaller as you get further away from it. I found out the problem was that the Mip textures were getting too blurry for branches to still be visible as you got further away from them. So I adjusted the Mip bias in the Material Editor for that texture so that it would use a more high res than normal texture, and it all works fine now. No more disappearing branches!
And I guess that should be everything for this one. Until the next one")