Old IBM Datacenter Environment Piece

polycounter lvl 15
Final Shots + Fly-through:
(Unreal Engine 4) IBM 1980s St. King Datacenter


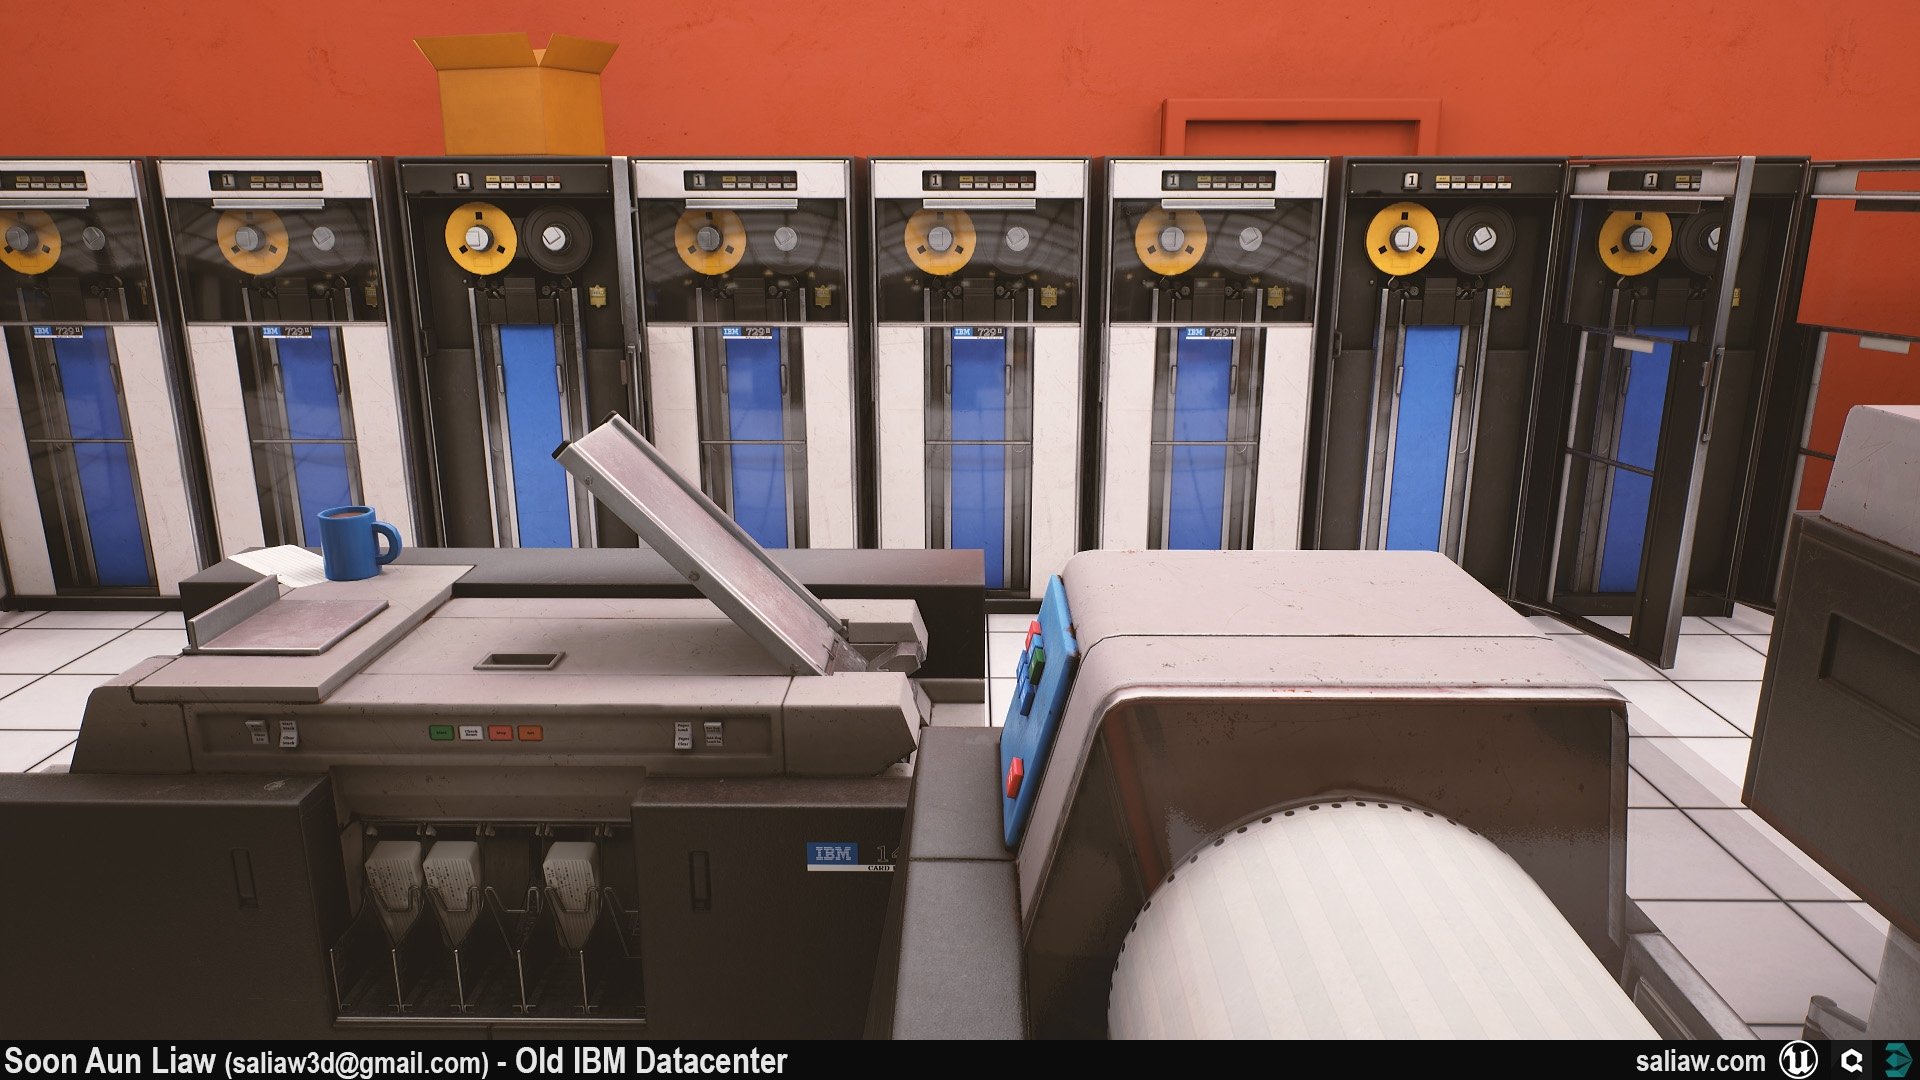
Finally decided to make a topic about it to post high-res shots. I started working on this for at least for a few months (took way longer than intended). This piece is based of the IBM datacenter in Toronto in around 1964. Found this image and decided to make this for my main portfolio piece. Was fun (and sometimes frustrating) to find reference images for each of the various machines used for this piece.
Planning to go through most of the 1400 Series machine assets and do a 2nd texture pass on them and than I will most likely call this one done. Was an overall good experience in practicing different stuff but one thing I should have probably tried here was to have a set of material layers instead of having each asset have unique textures for each of the hero assets.
Will probably post some breakdowns once I'm done with this. As always, critiques and comments are welcome.


(Unreal Engine 4) IBM 1980s St. King Datacenter
Finally decided to make a topic about it to post high-res shots. I started working on this for at least for a few months (took way longer than intended). This piece is based of the IBM datacenter in Toronto in around 1964. Found this image and decided to make this for my main portfolio piece. Was fun (and sometimes frustrating) to find reference images for each of the various machines used for this piece.
Planning to go through most of the 1400 Series machine assets and do a 2nd texture pass on them and than I will most likely call this one done. Was an overall good experience in practicing different stuff but one thing I should have probably tried here was to have a set of material layers instead of having each asset have unique textures for each of the hero assets.
Will probably post some breakdowns once I'm done with this. As always, critiques and comments are welcome.
Replies
All the texturing is done with Quixel DDO.
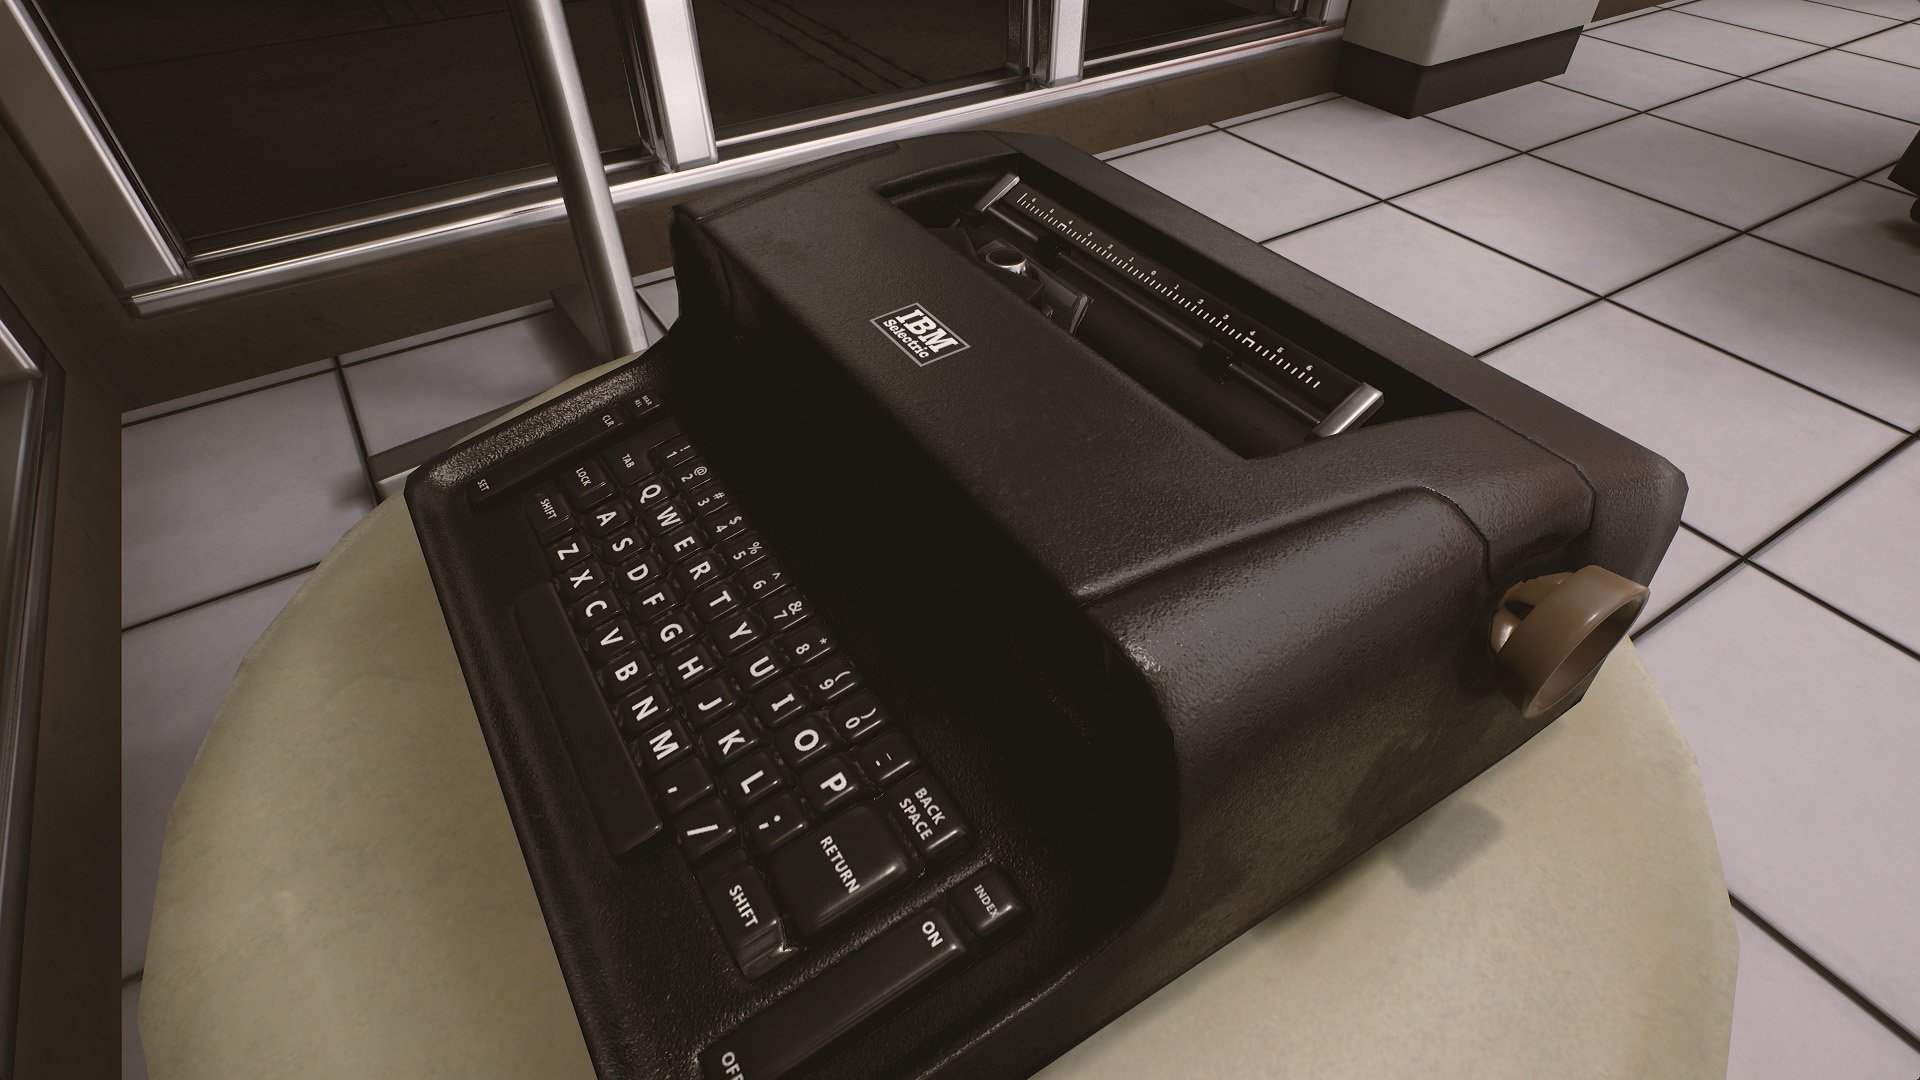
My only crits are with the Selectric, the key profile looks like just smoothed boxes, whereas in reality, it's more of a hollow spherical shape; see:
The font is a bit off too, this one is a pretty good approximation of early typewriter fonts.
Other than that, it looks fairly good; are you going to colour grade it to be more like the reference image?
As for color grading I'm currently not fully set on my current LUT, but I'm more than likely to stick to how it looks like right now, I'm not sure and I might play around with it somemore. There are actually a few variants I've seen for the main reference image I'm using but the main I probably would not go full-orange like the original reference.
edit: oops, image was too widescreen...
Images also in artstation: https://www.artstation.com/artwork/nNvJo
I will try to highlight some things I did for my scenes that might not be noticed easily. I apologize if my explanation seems cumbersome. If you want to know more information on something in particular for the scene just let me know and I'll do my best to either explain or show it further for you.
The scene: (relatively straightforward)
A quick general view of the wireframe for the meshes
For non-hero meshes I decided to use looped edges so that I do not need to have normals made for them and still achieve a nice lighting result and have them use only a single smoothing group to make them have nice visual edges for them (At the cost of increased triangle count I sped up my process to achieve "nice" edges for random parts of the building)
I baked my lighting for this scene using bounce lighting from light card. Using this method and achieving good results relies on good UV lightmaps that are stitched together for the edges to get good shading and I needed to crank my lightmap resolution to about 2x pass the general resolution (red color in lightmap density view) to remove some unsightly shadow bleeding (not really necessary but I wanted to make the scene look as good as possible).
I cranked up the world lighting settings based on an archviz guide (I can't seem to find my source link at the moment :X ). I did not need to change my lighting production bake setting as Koola does for his scenes (the improvement for my scene in particular was minimal while increasing my bake time by about 5-7 hours).
For my material setup I used one master material that controls more or less everything I need for the assets, a glass shader, and a shader for the ceiling lights. No crazy shader math going on in here, most of the stuff used for my material just allows me to easily tweak and modify how my assets look like with instanced materials.
Master material controlling almost everything in the scene:
Light Tube Material (does not use any textures):
That's about all the major things I wanted to point out in regards to what I did in the scene. Thank you for reading this and comments and questions are gladly accepted.
.....any chance you could post a bigger screengrab of the master material? :P
@ZacD I actually did try to use box capture actors for the 729 unit (the elongated box mesh with the window on top) especially since that one has a flat planar window so the distortion from the sphere actor is noticeable. I never got the box actor to play nicely though, as box reflection blended horribly for me. Because of how close my meshes were together, I either got box distortion, terrible reflection seams or even bad prioritization over which box reflection gets drawn over. Working with box actors was a colossal pain for me and I decided to trade off some slightly sphere-warped reflections over just general functionality. It could be that I just suck at using Box actors I guess, but I never got them to work decently.