Life is Strange - Max Caulfield [FINISHED]
greentooth
LATEST:


")


Main Goals:
PROGRESS:
(occasional lomo filters and lousy Instagram compression are for reinforcing the character only of course!)


Maxine Caulfield
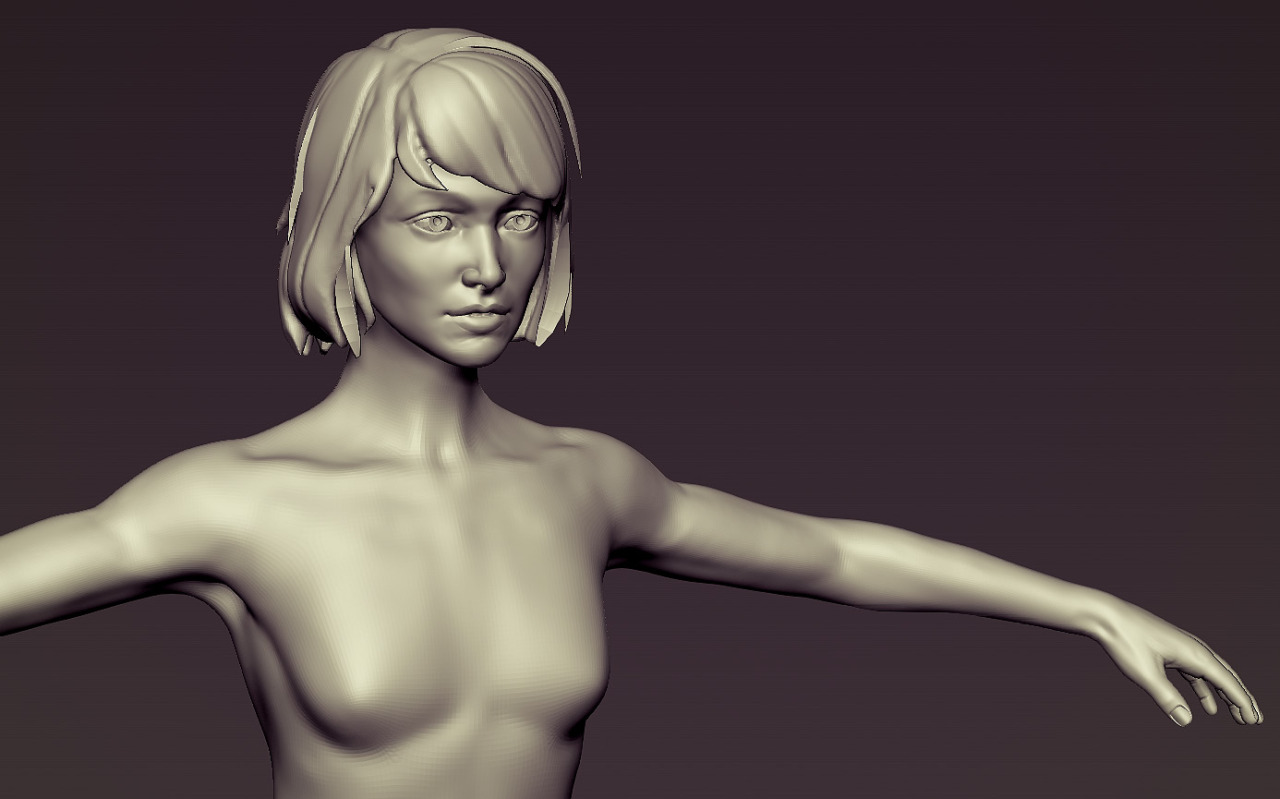
Life is strange is a great game and while I like the visual style a lot, I'm interested in what a more realistic version of the main character would look like. I've chosen her outfit from Episode 3 as it's my favorite and looks like good cloth practice.Main Goals:
- Likeness
- Practice creating believable clothes using Marvelous Designer
- Proper low-poly hair cards
- (her) Camera
- Put her into Unreal 4 and make use of the "new" hair, cloth and eye shaders
- Play around with cloth physics and other stuff
PROGRESS:
(occasional lomo filters and lousy Instagram compression are for reinforcing the character only of course!)
Replies
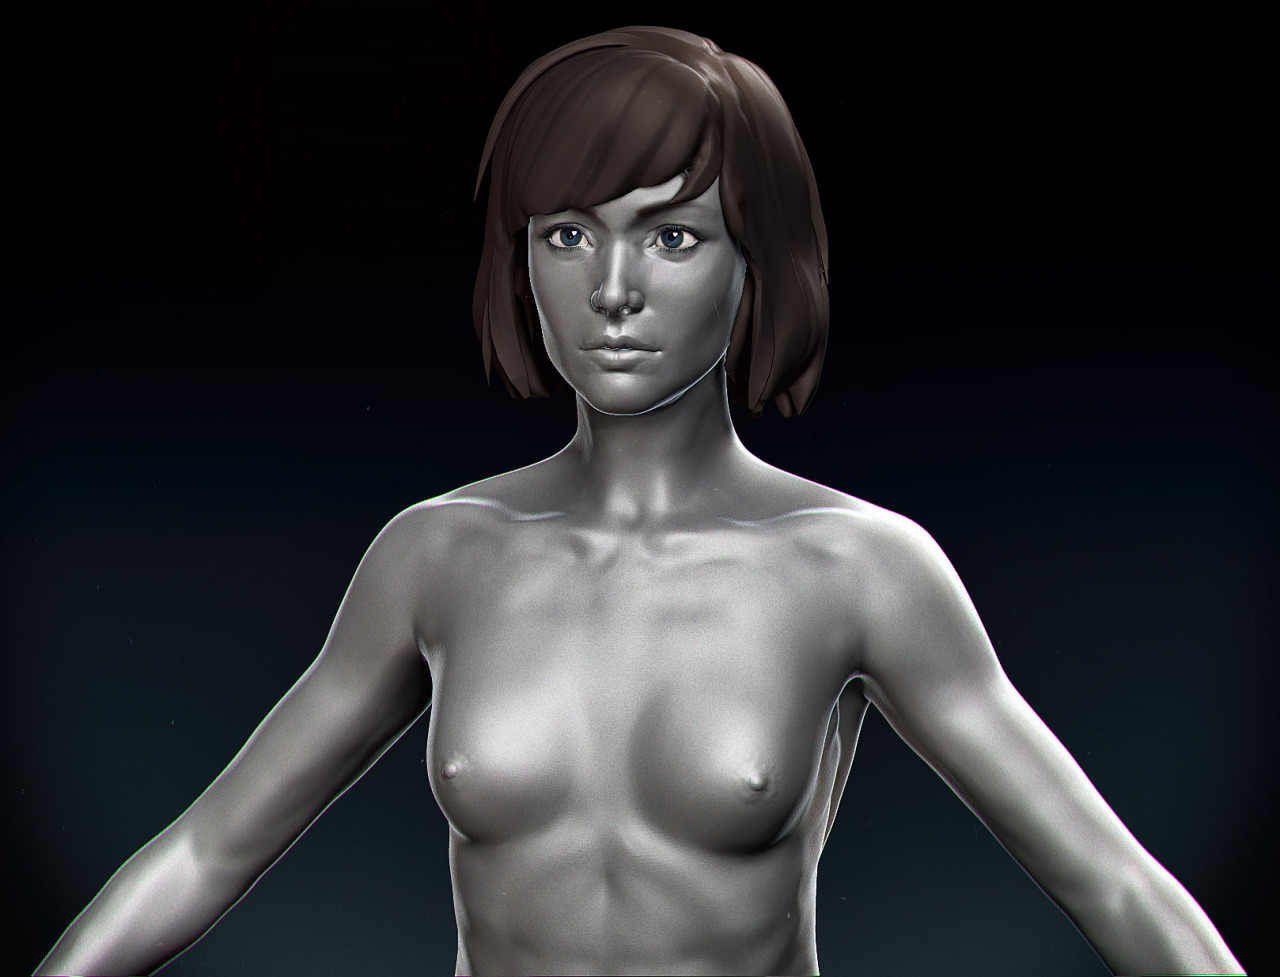
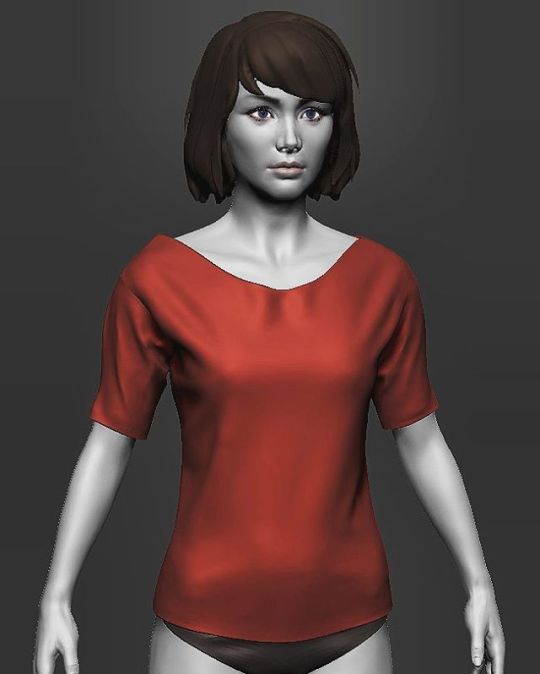
Anyway, I'd suggest to model some underwear if you're going to simulate something in MD, because of the possibility of nipples poking through. Like Tectonic mentioned.
Good point. The red shirt was just a test I put on an older version of the model which, apparently, had nipples. The newest version does not (see most recent picture) and is, as far as I can tell, not creating any simulation problems.
Here is some serious progress on the clothes:
Sorry, wrong picture. :awesome: This should be more constructive:
Otherwise I like it a lot. The face and hair likeness isn't there yet; but I do like how the face and hair look, ignoring that it's meant to be Max.
You're right. I should have mentioned though that this was just the initial simulation with no sculpting ontop of it. I redid much of the garments but couldn't get the tucked in tank top to simulate right:
So, now I'm re-sculpting many of the folds. I think the shirt and the area around the cuffs of the pants turned out OK and don't need as much adjustment as the rest.
I did a lot of work on the pants. The ripped parts will also receive some hair cards on the transitions during the texturing process to get some more depth. I still have to put some secondary detail/folds in there, especially where the seams happen.
Right now the seams are actual 3D geometry from an InsertMesh Brush on a separate subtool. It gives nice detail although I'm unsure about whether it will be necessary for the final bake or if it is better to just project them onto the pants mesh using a separate sculpting layer. Also, it might become cumbersome if I need to change proportions/introduce more folds.
I'm interested in hearing your thoughts/workflow tips on that.
The shirt also received some love. The folds on the arms were too intense.
After sculpting all the details (seams are to follow) I made copy of the mesh, deleted the subdivisions and subdivided again from the first level just to compare and see if I made any sharp details which could end up disturbing the overall image. Any thoughts?
Also, buttons!
EDIT: I will check the face again tomorrow. I think it looked better before
I wish I could focus on my version of Max, but I'm too occupied with my bigger project, but soon!!
@Lucospade She is about 7.5 heads tall, currently, so the height should be OK. The shoulders might be too narrow though. I'm going to check the measurements for that. Thanks for pointing that out!
High poly is mostly finished now. It only needs some detail sculpting on the arms and the neck/chest area. Retopo is also in progress!
Apart from that, details on the skin which are unique, those work.
Retopo!
I'm unsure about the topology of the pants cuffs. Maybe I should just use regular loops instead and triangulate them to fit the flow better? On the other hand, most of the deformation will be on the ankle, so it shouldn't be that much of an issue.
If you're going to use just cylidrical loops (which is always better), that needs a bit higher density mesh.
Rigging wise either one of those are good ways, except the latter one costs more polygons. The current topology definitely needs improving. For example the left ankle has a nasty big pole vertex with 7 edges arising from it.
Also, I would probably add one extra middle loop along the thickness line of the shirt, to average the 90 degree angle.
@FourtyNights Cool, thanks for the advice. I'll adjust the topology accordingly.
In the meantime, I've done some hair tests. These are baked from FiberMesh and then put into Unreal. What you see in the end of the video is a light map which I've baked onto a second set of UVs. Similar to what they did for Uncharted 4. Regular baked + screenspace AO for the strands might be enough though in the end:
Layout and bakes are not final! These are baked from FiberMesh
I've had a go at FiberMesh for actual hair card generation too. This was done in one evening with minimal adjustments. Useful for quick blockouts but, as it turns out, there is no way around placing them by hand though if you want it to look properly, though. So, I will redo them this weekend.
@FourtyNights I've fixed the shirt in the meantime.
FiberMesh gave me a pretty good starting point but I ended up doing the final placement of the cards in MODO with a divided viewport (very useful for previewing).
Further failed attempts at hair/fur systems for hair card generation are documented here:
Still need to adjust the topology of the lower part of her pants a bit as it's producing artifacts:
As a bonus, I've put her into Mixamo and tried out some animations to test the topology. Here is a quick test rendered inside Toolbag:
Adobe owns Mixamo. I personally use Adobe Creative Cloud, so I don't have to worry about it but I've heard from others who aren't subscribed and also seem to have full access to the tools (probably because it's in beta right now).
Feel free to try it out. It's proven to be a huge time saver in our current university project so far!
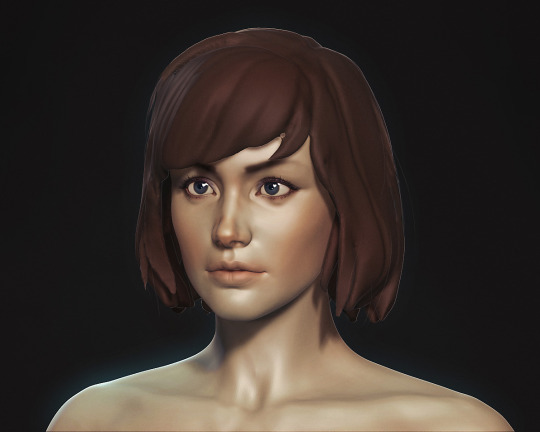
Got started on some actual skin/eye textures. Will put her in UE4 after I fix those. Colors need improving and eyebrows need more density:
Right now, head and upper body are two separate meshes/materials. Wanted more resolution on the head. I will be merging them both to get rid of the seam and simplify baking though.
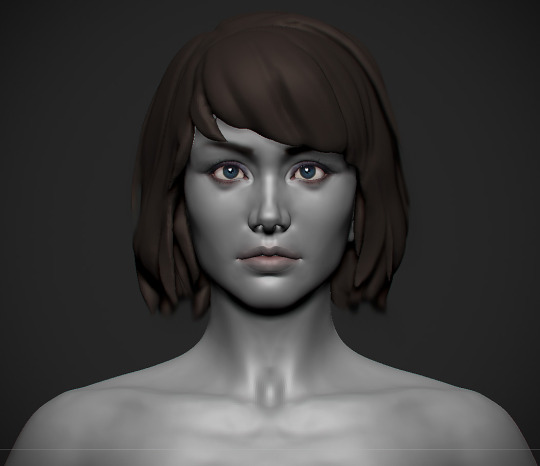
Merged head and body, rebaked everything in Marmoset, finalized texture/material distribution. Now working on clothing and skin textures in Substance.
Cavity on the head is too much and material is missing some color roughness variation. I like where the eyes are going though.
Should be able to finish the textures within a week. Then rigging + presentation stuff.
Redid her shirt motif. Will probably make it a tad less defined in the end but it's nice to finally have something there that's nut just an image from the internets:
I've also made her a camera!
Skin: looks better in the most recent images but I can't see the face. As of the last images with the face, there was VERY little color variation which made it look like a flat color. Spec was also lacking so her whole face looks very flat and lifeless IMO. Add in some nice colors, reds, blues, purples, yellows in the proper color zones and bring some life into her face.
Eyes: These also lack depth to me. Are you using the shell method? this involves having the iris on an inner sphere with another sphere wrapped around that to represent the reflective surface of the eye. The iris would be concave on the inner sphere with the outer sphere cornea popping out. You can also add a thin layer of polys to the lower lid to represent a wet layer. Similar to the wet layer you can add a shadow to the upper lid to really set the eyeball into the socket. I would also emphasize the darkness at the edge of the iris and blur it. You could probably desaturate the blue a little as well.
Clothes: The texturing looks great but I think you could have benefitted from tertiary folds to sell the materials. Most cloth materials except for maybe super smooth things like silk would have a lot of these smaller folds. If you looks at stuff from Last of us, Uncharted, etc you will understand what i mean. Basically these are smaller folds that you would see in the areas that would deform a lot. WIth clothes, that's essentially everywhere lol.
Hair: The hair cards aren't bad but it looks like she got a haircut from someone who doesn't know how to cut hair. You have some very short cards coming from the top of her head. She has midlength hair and even with layering, the shortest hairs probably wouldn't be as short as you have them. It looks especially bad towards the top of her head.
I think is really coming along but these things will help a lot IMO.
agreed on all points, this is very valuable feedback!
Skin: I was planning on going back to the skin. Right now there is only very slight influence from the curvature map ontop of the PolyPaint that also has not a lot going on.
Eyes: I'm already using the two shells and the waterline. I'd tried to add depth using parallax before (left) but it didn't really look that great. So, now, I've just indented the geometry of the inner shell instead (right). Will go back to the texture later. What do you think?
Clothes: Didn't even think about the microfolds yet. Good point! Her tank top should benefit from that the most.
Hair: Might have to go back to haircard hell once more I guess!
Improved the skin, eyes, eyelashes and tank top:
Next up is some folds on the shirt and fixing the hair. Gotta finish this before I push it of another few weeks/months and then find new stuff which needs fixing. Happens every time.
The character is rendered in Marmoset and the environment in Unreal and both are then composited together in Marmoset.
Light probes are generated via NVIDIA Ansel so that the lighting lines up between the two apps.
And I use HDR screenshots in linear space from Unreal, so that I can do the final tone mapping/color grading in Marmoset, too.
Character's shadows are rendered in Unreal as well.
My friend Lenz was kind enough to let me borrow one of his awesome environments for the presentation: https://www.artstation.com/lenzmonath
Unreal Engine 4:
Unreal Engine 4 background with Marmoset Toolbag character:
The character looks very different because I changed the pose inbetween and had added the face rig after creating the Unreal mesh (needed different eye setup) and haven't bothered updating it since. It's just for shadows and conforming the lighting of the character to the scene.
Would not recommend this workflow as it takes very long but the Unreal material editor really isn't any fun on my machine, so it wasn't an option. Lesson learned: Next time I'll determine beforehand in which engine I want to present the character and set it up there.
Tests with the HDRI from Ansel:
And hair physics using NVIDIA APEX Cloth:
Finally finished!
I've learned a ton of stuff on this project. Thanks everyone in the thread for words of criticism and encouragement. It really helped in making this a better piece!The apartment environment was kindly provided by Lenz Monath with the cardboard boxes from @Shyralon
Thanks, guys!
The background in the first two shots I constructed myself in Marmoset using mostly their assets and a few of my own.
Hope you enjoy!
Btw, I'm also planning to study some rigging with my next project, because I'm a total noob when it comes to that. As much as I really liked her facial expression blendshapes in general (super cool additional skills to have), with her blinking animation, upper eyelids look a bit weird when closed, because of that "stretched crease from the original eyelid position". But still I love the rig on eyes though, how the eye moves eyelids at the same time, cool.
Where did you make these blendshapes in the first place, in Maya or ZBrush? Usually I project my new low poly topology (a pretty dense AAA mesh) to my original sculpt by having both low and high for simultaneous blendshapes I can use for baking differences in details. Also, having properly closed eyelids with smoothed out crease.
Thank you @floon !
Hey, thanks @Pav3d !
@FourtyNights Thanks man! I could have done a way better job with the eyelids. Didn't make them deep enough and, subsequently, the pose I used for baking wasn't optimal.
I'm also not that good at rigging. I use a ragtag process involving Mixamo, Advanced Skeleton and some scripts and rigging interfaces from the Stop Staring book by Jason Osipa. I should have gone with the workflow you described: Initially, I wanted to use wrinkle maps. So, I started sculpting a combination of shapes in ZBrush, baked them to a normal map and then used the lowest subdiv as a base to taper the individual blend shapes from. I ended up readjusting a lot of the shapes in Maya though after the fact because they didn't work so well on their own.
Anyway, gonna add the proper creation of blendshapes in ZBrush for my next character project, just to see if I can do it.
Congrats on finishing
@Tits Thanks so much, Marie! Your Ellie character from a while back is actually part of what inspired me to do this fan art piece.
@TeriyakiStyle Thanks, man!