How should I texture character's hair?
Hello everyone!
I decided to post as I believe here's the place I got the biggest chances of a good answer.
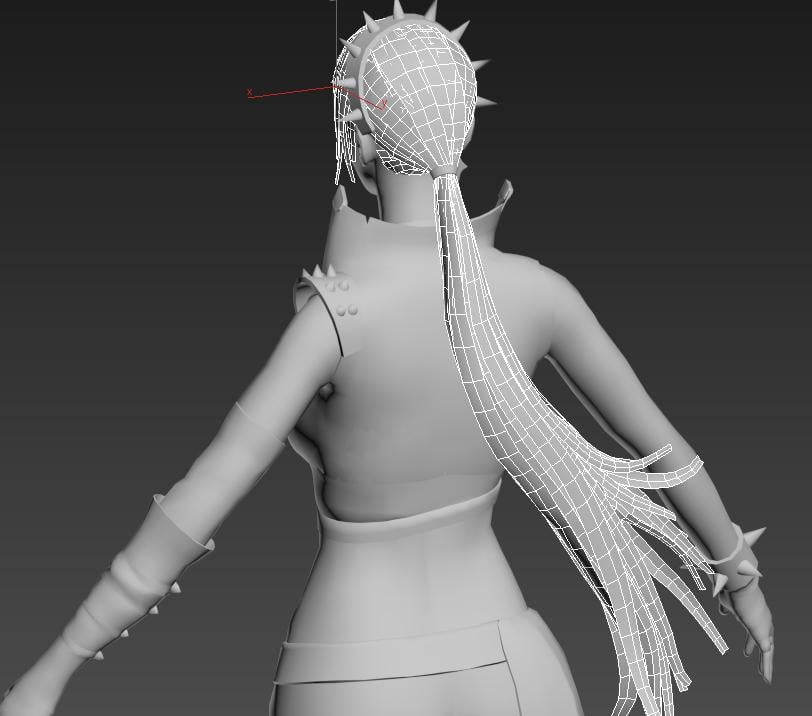
I'll cut to the chase, I want to texture my character's hair. Previously I was doing it by hand, meaning with PS I layed out the shadows, midtones and highlights and then make an alpha map. This time though I got so many hair strands (planes) and doing that would take A LOT. I imagined there should be another way.
Here are some shots of my character.


Here are the UVs of them (I also have some other stuff unwraped but detached them for the pic), not sure if that's the correct way of laying out hair.

As you can see painting them by hand would take hours and hours, I believe it's a waste unless there's no other way.
I am quite new to the 3D world so anything you have to say is really welcomed, thanks a lot!
Cheers,
-Dan
I decided to post as I believe here's the place I got the biggest chances of a good answer.
I'll cut to the chase, I want to texture my character's hair. Previously I was doing it by hand, meaning with PS I layed out the shadows, midtones and highlights and then make an alpha map. This time though I got so many hair strands (planes) and doing that would take A LOT. I imagined there should be another way.
Here are some shots of my character.


Here are the UVs of them (I also have some other stuff unwraped but detached them for the pic), not sure if that's the correct way of laying out hair.

As you can see painting them by hand would take hours and hours, I believe it's a waste unless there's no other way.
I am quite new to the 3D world so anything you have to say is really welcomed, thanks a lot!
Cheers,
-Dan

Replies
I understand what you're saying and I'll definatelly do it in the future. Although, I used a hair strand Curve insert brush in Zbrush to make these, meaning i do not have exact control over the shape and polycount of the final "hair card".
I got that you suggested I make a couple of hair strands and then duplicate them and place them in new places, I did try that in the past but then I find it hard to place them to a new place, as the curve brush is easy when I just draw over the head.
Thanks again guys, looking forward to learn new tricks and tips.
And always google before asking, and check the Polycount Wiki! http://wiki.polycount.com/wiki/HairTechnique
@Mightypea There are only a few hair tutorials out there and in fact I've checked the wiki, didn't mention anything I didn't know. I was actually wondering about the specific technical parts, like do you handpaint the hair or apply some real life textures? What about the Alpha map, what kind of brushes do you use in PS to make them. Stuff like that.
I'm currently trying out GMH2.6 and it turned out decent-ish. I'll upload the results later on this thread.
Thanks again guys, sorry for my inexperience!
-Dan
A lot of the technical advice anyone could give you here depends on the rendering engine you'll be putting it through. You're going to have a ton of sorting issues if you don't get your rendering order of the plans correct. Especially if there are cards that curve around and have to render against themselves. There are things like choosing 1-bit alpha vs 8-bit alpha. What type of shader are you going to apply to it? Are you going to double side the geo through the shader or through the cards? etc.
You can overlap any uvs on anything. It doesn't matter if they have exact geometry or not.
You probably need about 5 unique hair textures. You can always bake ambient occlusion to the model verts to make the hair appear to have more variation and depth.
Personally I would lay out the hair texture first and fit my uvs to that. Keep the hair flow in the same direction. Generally roots to tip. I would use 8-bit alpha on the outer hair cards and the ones that break silhouette. Then I would use 1-bit alpha on the hair cards that hug the scalp.
There's a lot of advice that could be given, but we would need more context for the model.
Also you don't necessarily need to stretch. Just move the UV shell around on your hair texture and find the best placement and size for each hair strand.
Thanks a lot for the tips @skankerzero @a3D , I'll definatelly try the overlap method next time.
Here are the results of the current model, took me some time to get it "right", I believe it's acceptable for now, onto the next work to level up.
You can also check it in the online viewer if you want to ^^
http://www.danaosc.com/Marmoset/Liona.html
Cheers everyone, thanks once again and have a great day!
If I want to lay my above UVs of hair like so:
How should I do it? I doubt it's done manually, at least I hope not :P
Edit: I know there's a way to do in Maya (as the tutorial states) but i was wondering if we can do it in 3ds max too.
If you haven't seen this tutorial already, it's rather high level but it might answer some big-picture questions for you.
http://www.3dartistonline.com/news/2015/04/how-do-i-create-real-time-hair-for-games/
Also, if you end up doing another character like this again, feel free to try out my own zbrush hair strip brush:
http://tmblr.co/ZrZZpw1v7TVoP
Also I am super thankful of the brush!
http://help.autodesk.com/view/3DSMAX/2016/ENU/?guid=GUID-9E98AEAC-F06F-4FAD-9091-DCD30AC9BB26
Woop, how about that, looks very nice although giving slightly different results than Maya, meaning I need to kind rescale but awesome nonetheless, thanks a lot mate!
I've never tried out UVLayout, does it give the result as in the pic above?
We have a different app for each thing and I kind of dislike that but I guess it's better have apps excelling at stuff
Cheerio~
Different software for different things for sure, but with UVLayout and iPackthat, uvmapping in Max seems so archaic.