RGCA - Best One-Minute Movie/Best Use of iClone - Adolf - HOME - A Sci-Fi story

vertex
Hey Guys
I'm Adolf Navarro again. I finished my second project.
See also my first project "The legends of Auria".
http://www.polycount.com/forum/showthread.php?t=153508
https://youtu.be/JTdoNxvRbXU
This one is called HOME, and is based on a Sci-Fi idea I had some time ago. I wondered how it could be the colonization of a new world if we don't have the "hyperspace" or other "tricks" to make available the immense distances of the cosmos.
It will probably be a one way ticket trip and, in consequence, the expedition should carry with everything they were going to need to establish new settlement.
My partner Izara suggested me the idea of the children embarked that will grow up during the travel. This is a Sci-Fi story, so I imagined a kind of suspended animation chamber that takes care of the bodies while they grow up in a continuous induced sleep. The chamber feeds them and processes the residues while a myriad of electrodes stimulate the muscles and induces a kind of "mental virtual reality" on the passengers, where they have the feeling to be living their youth, while their are trained in their future jobs.
I imagined a group of 50, five years old children, put on suspended animation and a crew of 8 senior people taking care of them that will get old during the travel. A travel that will take 19 years for the spaceship traveling at half the speed of light, but it would represent more than 100 years for the people that remained on Earth.
All hoping to find an Earth type world where to establish a first colony and prepare the terrain for the next expeditions that hopefully, will arrive 100 years after to have received the confirmation that, there is another home out there waiting for us...
We have just uploaded the video on youtube
https://youtu.be/iXafk6of9o0
Now I'm going to prepare the posts explaining the processes involved...
Cheers!
Adolf
Replies
Development of the elements of the story...
The Crew
First, I designed the crew uniforms. A clean a functional one, to be used inside of the space ship, and another one more suitable for dirty works on the field.
For the Spaceship uniforms, I created the fabric textures on Photoshop I used them in the iClone clone-cloth components. I differentiated the "senior" members dressed on red from the "cadets" dressed on yellow.
I used the standard G5 characters, Chuck and Gwynn. Using iClone6 I created new faces using pictures of real people as template, and changed the facial features and the proportions to obtain the final actors.
For the activities on the field, I used the game character Sarah previously exported as fbx. I used 3DStudio Max 2011 and the plug-ins provided for Reallusion to create the "Lower Body" and the accessories for my standard G5 characters.
For the Upper Body, I just changed the materials on the previously made Clone-Cloth, obtaining this "fatigue uniform" much tougher and well adapted to the field than the spaceship's suit.
The Space Ship
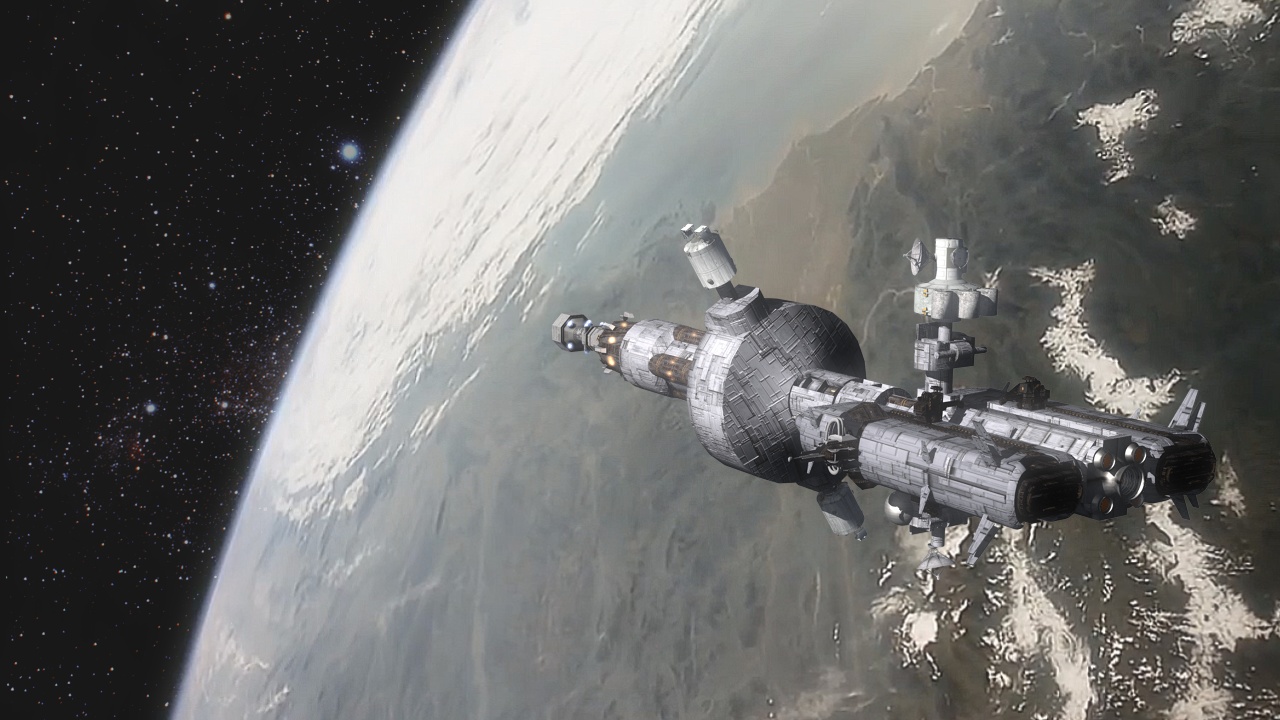
The Odysseus is the mother ship of the expedition. I assembled several parts detached on 3D Studio, from models designed for other purposes and applied the textures created with Substance Player on iClone, in order to obtain the final aspect of the ship.
In addition, several other ships are attached to the Odysseus ready to be launched once arrived to its destination...
I used Google sketch up models imported on 3Dxchange that I slightly changed adding some details here and there and the I created again the seamless textures using Substance player. The exception is the Shuttle that comes directly from Dystopia without further modifications.
Some examples of how they look on the clip...
The Sets in the Odysseus
I created four different sets to be used inside the mothership, mostly using the "Outer Space" Set props with additions from Google Sketch Up. All re-texturized. I collected several HUD videos from youtube and prepared them to be the "high tech" information showed on the screens.
The Virtual Reality training room, one of the virtual scenarios where Michael has been growing up in suspended animation... it was rendered in iClone with an HDR effect in order to maximize the "glowing dreaming effect" and the view from the window is a panel with an animated texture of real footage of the Earth used as Diffuse texture with no shadows and a 100% of self illumination.
I rendered the scene as PNG's sequence and I used Sony Vegas to add several filters to the generated clip, until I obtained the desired effect...
And this is the final look of the scene...
The suspended animation chamber's room, kept the glowing effects, but the "newsprint" was no longer necessary as it was "real".
For the interior of the chamber I placed a monitor, a mask and several "Soft Cloth" props from the iClone template. I attached to them a ,(previously detached from other prop), stethoscope and I rotated the resulted elements placing the pivot points on the chamber's connections. As the soft cloth were anchored in both edges, the result was a nice "zero gravity" soft movement of the wires when the electrodes are detached from Michael's body. I also applied "Soft Cloth" properties to the strep bands of the mask to maximize the effect.
The bridge's design is not really functional, but it needed to be spectacular, showing a real footage image of the surface's planet and lots of screens representing intricate and complex operations.
All the HUDs on the screens have been added to the props as a Diffuse texture directly in iClone, while the main window has a transparent material due that the sequence would be rendered as a group of PNG files with alpha channel allowing Sony Vegas to mix the video with planet view as a lower layer not loosing quality in the process.
In any case, while working on the scene, I used the same background video clip as iClone video background in order to synchronize the prop and camera movements. Just before to render, I deactivated the background video, and I changed the iClone background color for one similar to the most predominant color on the video background, This is important, because if not, the PNG files kept a remaining aura of the iClone's background color, caused by the anti-aliasing effect in the rendered images, and it looks really bad when mixed on Sony Vegas.
The last set was not actually inside the Odysseus, but in the landing module's cockpit. Except for the chairs, I used almost the same props that in the bridge but I changed the materials obtaining a different look. Even the frontal window is just the ceiling panel with an opacity map in order to make certain parts transparent.
In Sony Vegas I added again the video background in a layer below the rendered images and I also added a "Rays" effect to simulate the beams of light falling from the above.
Time to disembark... In the next post I'll show you how I made the sequences on the surface's planet.
Cheers!
Adolf
These are the sequences "filmed" on the planet's surface...
The Landing
After to find a nice video background for the landing module. I started adapting the vanishing point of the iClone's camera to create a convincing perspective effect.
The composition of this scene is quite simple. Besides the landing module, I just used some bushes included in the new itree Botanic Pack for iClone6 to hide the landing site. The particles play a big role here as they have to show the power of the anti-gravitational engines raising dust and shaking the bushes while the big ship is landing.
In order to simulate the dust spreading from a central point to every direction, I needed to create three "Puff" particle effects on iClone. I changed the wind directions on each one to create the effect that the dust is moving away from a point just under the ship.
I also used the "Rocket" particle, conveniently converted in a kind of steam. I attached an emitter pointed to the ground, to each one of the landing gear that, at the beginning of the sequence, was almost hidden inside the ship. In a moment of the landing, the steam seems to be released, activating a mechanism that deploys the pillars down out of the body's ship.
On Sony Vegas I use parent tracks to apply common effects to its children tracks. I added a "Light Rays" to the parent track to homogenize the light in the scene. I applied a more powerful "Rays" effect on the child track with iClone's render to create a kind of power energy beams emanating from the ship. Problem was that the beams arrived until the bottom of the screen ruining the perspective. I solved it, duplicating this layer just below without the "rays" effect but masked at dust level. Now the bushes seemed to be hiding the point where the light beams are hitting the ground.
The Settlement
Here, I wanted to show the hectic activity while the colonists start building their facilities. I created a ground prop in iClone that hid the ground of the background video and mixed it with debris and grass patches to transmit a "Work in progress" feeling.
Here is the first apparition of the ground vehicles, that will be recurrent in the coming scenes. I used a couple of nice and detailed 3D models I found on the Internet, and worked on the textures to make more real their aspect.
I used several paths to synchronize the movements of the Shuttles and the ATV while the particle emitters added realism and bustle on the scene.
Finally, a "Glow! and a "Light Ray" effect in Sony Vegas helped to integrate the iClone Render into the real background image.
Exploring the Swamps
Now the exploration of a whole new world starts!... I found this amazing video background with the vegetation reflected in the water acting as a perfect mirror and decided to create an scene with it.
I created a kind of "alien crocodile" attaching some fins from iCLone's "Monster Pack" to a crocodile non human character I already had. The most interesting is that the crocodile and the other animals in the pack came with their respective imotions so it would be easy to include them in the project. Once again I used paths to control the movements of the props. (In this case the jet-bikes). With them is much easier to synchronize the choreography of the moving elements of the scene.
Then I defined an iClone's water element to create the reflection of the jet-bikes. I changed the water properties to achieve a high reflection level and changed the size, and the speed of the waves to create a slightly distortion on the reflection.
I made two renders... One with the green background and the water activated and visible. And the other with a white background and the water deactivated and therefore, invisible.
It makes sense when mixed in Sony Vegas, because I used the render with the green background and the water with a chroma key and a color correction to integrate the jet-Bike reflections on the scene colors, while the other render was placed in a top track preserving the color of the elements.
Walking with Dinosaurs
This scene presented a some interesting challenges. First of all, I didn't have a model of a walking dinosaur, but I had an Elephant with its imotions instead, so I made transparent the material for the Elephant's head and I attached in its place, a dinosaurs character without motions that suffered the inverse manipulation. (Making the body material transparent except for the neck and head). As the camera view shows the animals from the back, this clumsy solution worked surprisingly well. (Obviously, I used the same skin material in the visible parts of both characters).
As iClone6 momentarily deactivated the useful "Drop Shadow" mode, I needed a terrain prop that properly received the shadows. After my experience on "The Legends of Auria", I decided to create a big patch of terrain and centered in its texture, making it as similar as possible to the present in the video footage. I used a masked portion of a picture obtained from the background video to create seamless diffuse and displacement maps using the Substance Player App. Then, I applied the materials in a tessellation surface provided by iClone. I tiled the diffuse map to 10x10 but I adjusted the tiling of the displacement map to just 2x2 and the displacement strength to just 54. These parameters hid very well the tile pattern from the ground view. I finally applied an opacity map that faded the borders of the prop integrating it whit the background.
I cloned four tessellated surfaces and scattered them on the proper places as showed in the image below...
Then I had to create a convincing movement for the ATVs while they were jumping and running over that irregular terrain. To do that I used the iClone's "Prop Puppet" tool going to the advanced label and allowing a rotation level of just 10 for the X and Y axis. After some training previews, I recorded a decent movement in real time using my mouse to simulate the ATV's jumps.
Having already in mind the characters riding the vehicles, I created a dummy box and I attached the ATV's body to the dummy and constrained it to the path I had previously created. At this point, the empty motorbikes looked nice, moving and jumping along the scene with the walking "Dinophants".
To adapt the character's movements to the ATV's jumps I created four more dummy boxes. I linked two of them to the bike hull and placed them where the character had to put his feet. I linked the other two to the steering and placed them where the character had to put his hands.
Then I used iClone's "Reach Target" tool on the hands and the feed of the character to force them to reach those positions. Finally I linked the character to the dummy used to follow the path, resulting in the character's limbs automatically following the jumps and the steering of the ATV while the rest of the body tried to remain static following the path. I refined the body and neck movements and the problem was satisfactory solved.
Another round of particle effects added the final touch and the scene was ready for the usual filters on Sony Vegas.
OK! I'll finish in the next post...
In this scene I just had to adapt the jet movements to the camera view, but I wanted to give an extra touch and used the same trick to force the pilot hands to reach dummy boxes linked to the edges of the steering wheels. So, when moving the steering wheel, the character limbs were following that movement, seeming that there was actually the character who was moving the steering.
I also added a display with a video texture in the instrument panel that looked very cool in motion.
The Runaway
In this sequence I just wanted to use a nice raptor imported from DAZ with its pack of motions. It already looked quite alien, so no big changes were required.
I also added a brachiosaurus in the backgriund, but as it came without motions I had to animate it "by hand" moving painfully every neck section as if it was an old stop motion movie.
Once again the paths and the particle emitters helped a lot as well as the vegetation provided by the iClone Botanic pack for iC6.
Transporting the expedition material
Here, I used the physics engine to create a point to point constrain between the box with the supplies and the jet-bike transporting it. It caused a natural moving typical in the objects suspended from another ones.
I completed the effect adding a soft cloth band acting as a rope that I linked to the transported box.
The creature's cave
Here, I used a super-cool glowing alien creature imported from DAZ with its pack of movements. The election of the right aperture angle for iClone's camera has been crucial to obtain a nice matching with the camera panning of the real footage used as background. I tested several apertures and finally, a 28 millimeters matched with the fish eye distortion present on the background video.
In Sony Vegas I played with the levels of the iClone render track until they matched the complicated backlighting on the cave's video and I added a slightly lens flare effect in the cave's entry that unified the light conditions of the scene.
The Ancient Ruins
How would you react if in an alien planet, suddenly, you discover the ruins of an ancient civilization? Well, the fact that the temple seemed watched by giant snakes make it more trilling.
I chose this scene to end the trailer using again the nice plants and trees of the botanic pack for iC6. The snakes and their movements were also imported from DAZ.
I changed the texture of the pyramid, (From the wonderful Mayan pack), to match with the moss present on the rocks and the ground. It made it look older and deteriorated.
I finally added the mist in Sony Vegas among the usual filters and the clip was completed...
I hope you enjoyed the Clip and my explanations. If you have further questions, please, don't hesitate to ask me trough this forum or emailing me to:
adolf@antareus.com
Thanks guys...
Adolf