A bit about my Workflow.
polycounter lvl 17
Hi everyone ")
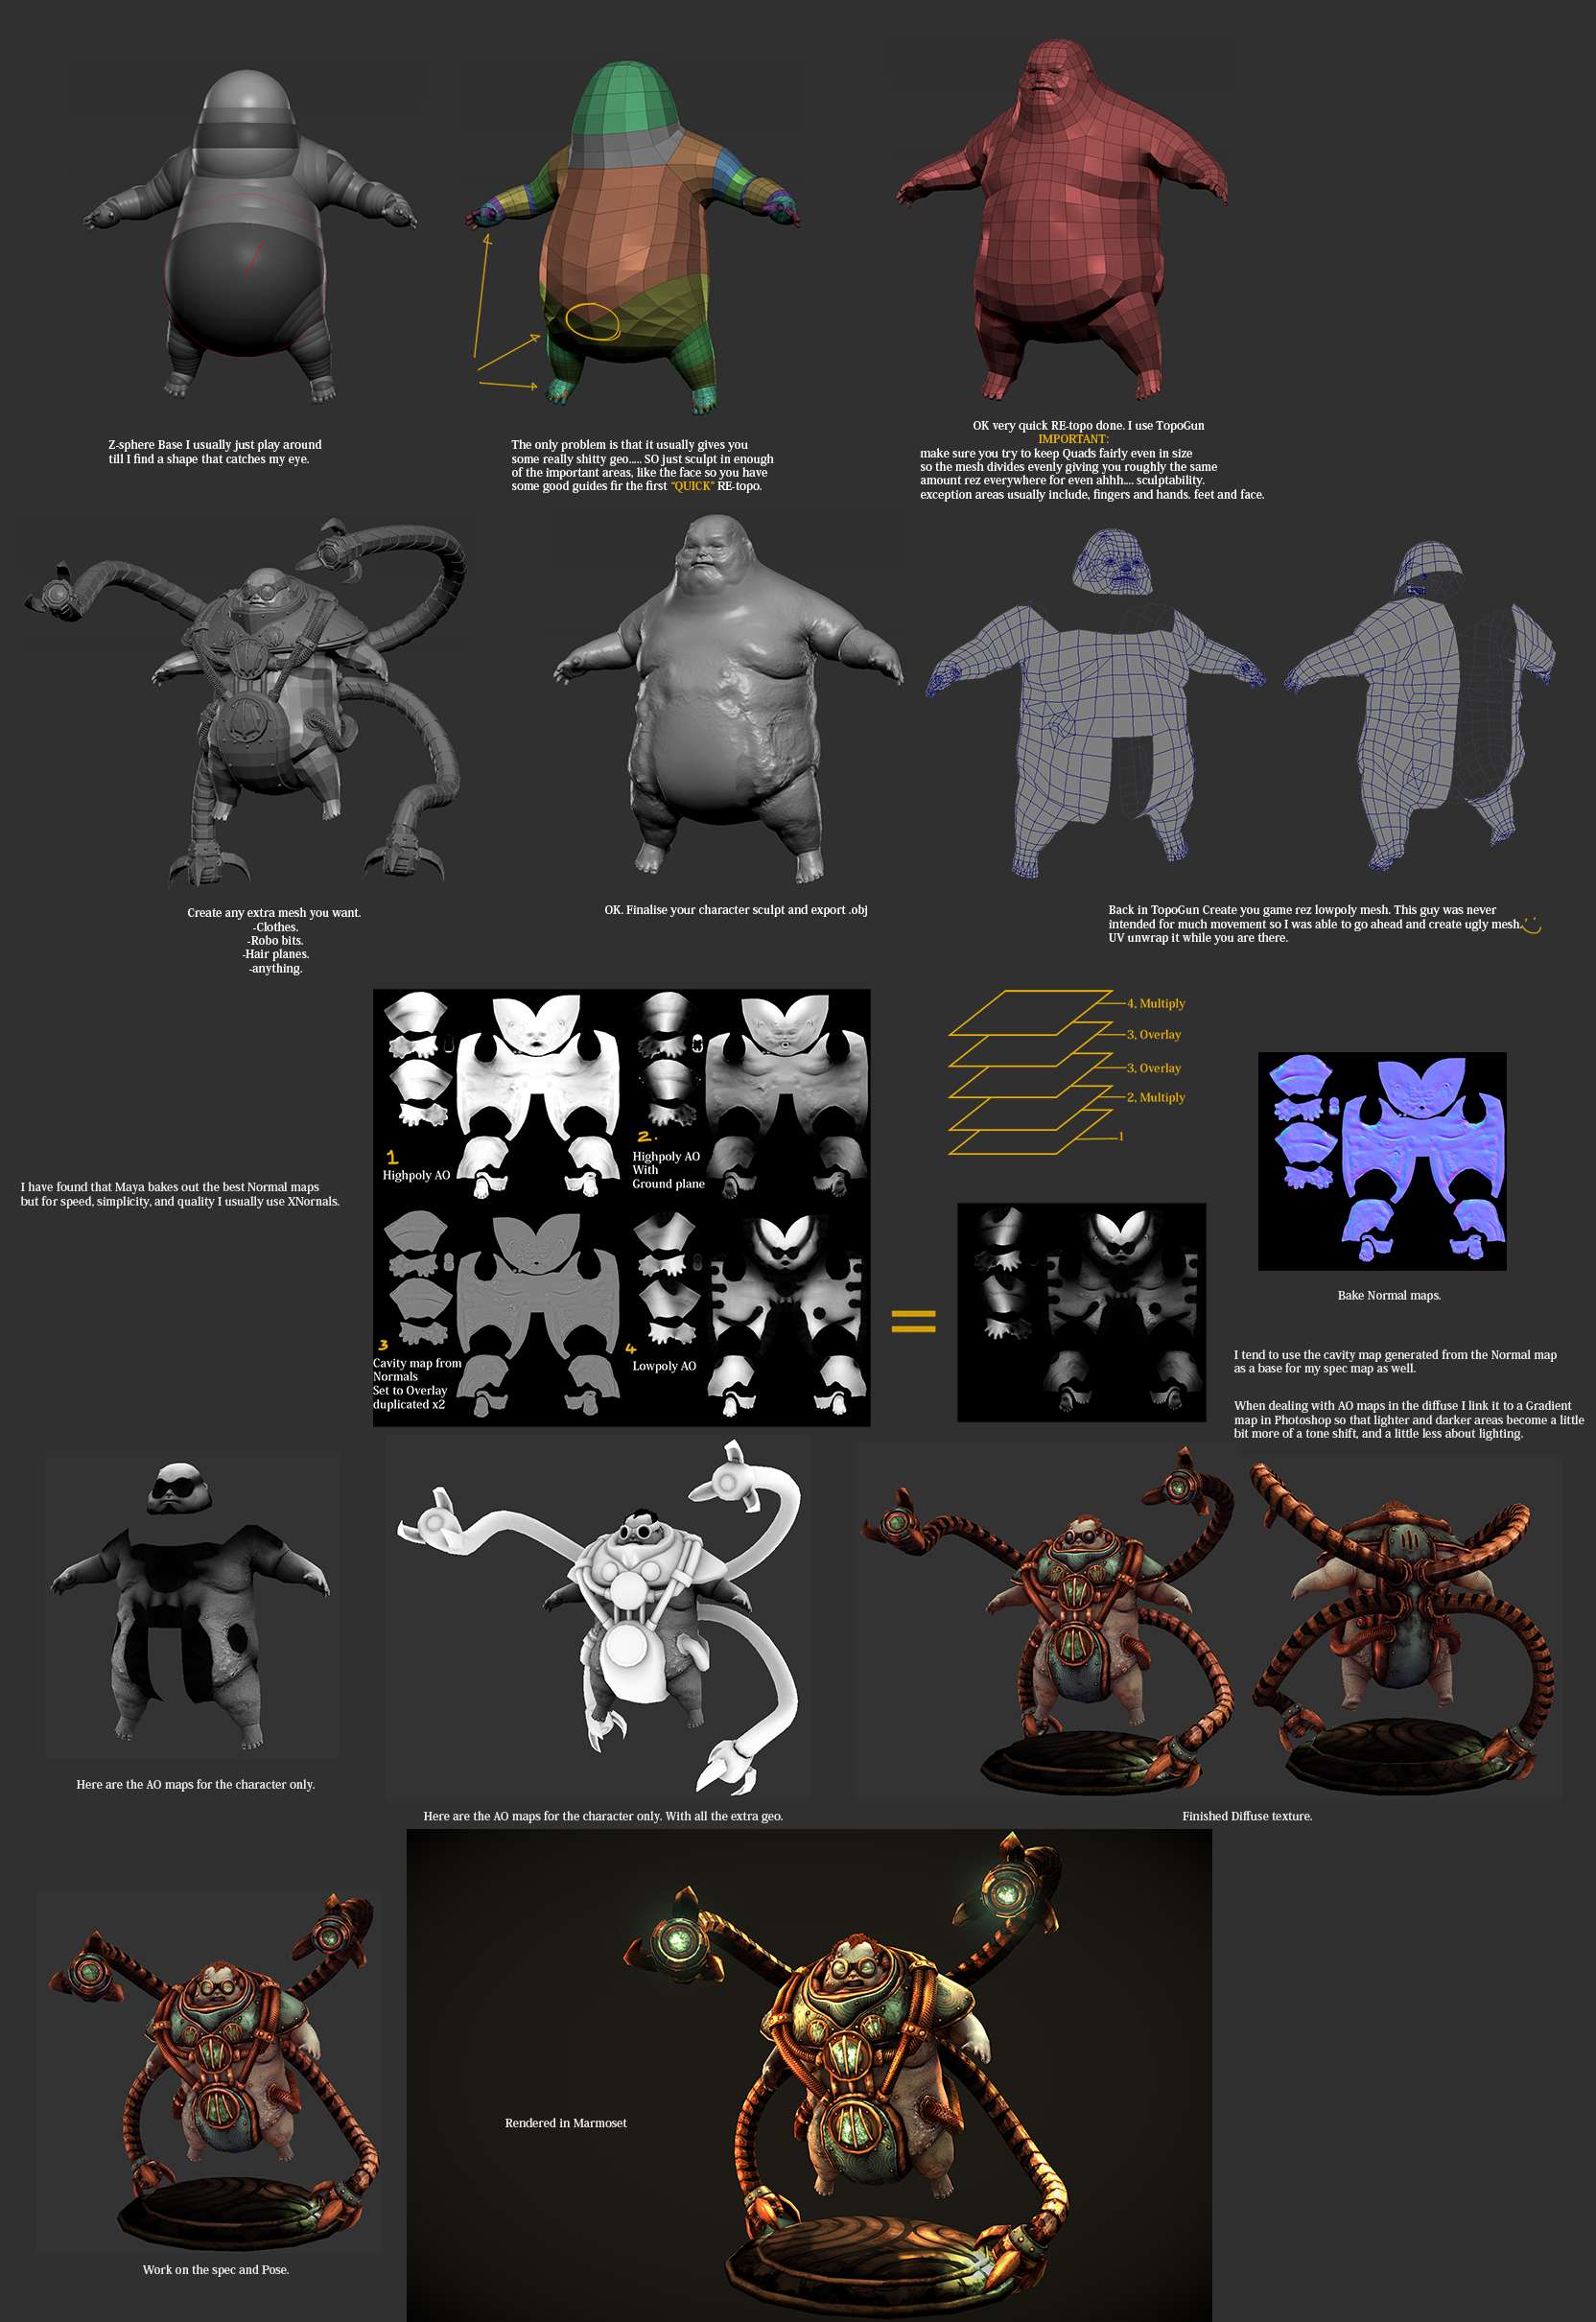
newto3d asked to see a bit about my workflow a long time ago and I am sorry to say I got stuck in Comicon and totally forgot. I put together this little image last night and I hope it helps. I am not saying it is the best way of working, in fact I doubt it is, but it is how I am going about stuff at the moment and will no doubt change as I get more experience. Anyone out there who cares enough to give me extra tips and advice I am all ears. My sole aim as an artist is to continually improve myself and inspire others (if possible)
This is how I went about creating the Dr Baron for my Comicon entry. It was supposed to be about my CHERRY "Zombie ate my pants" character but I deleted a heap of my early work in the great clean up of some time last week.
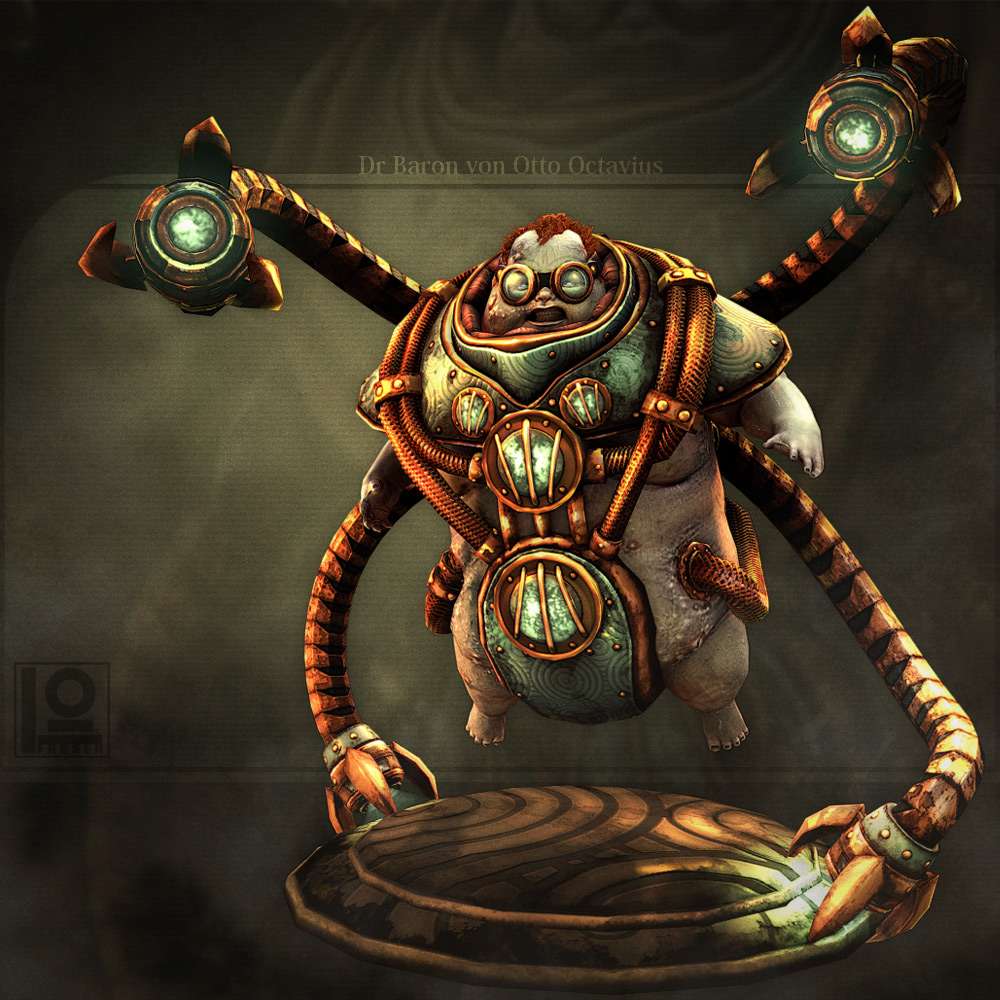
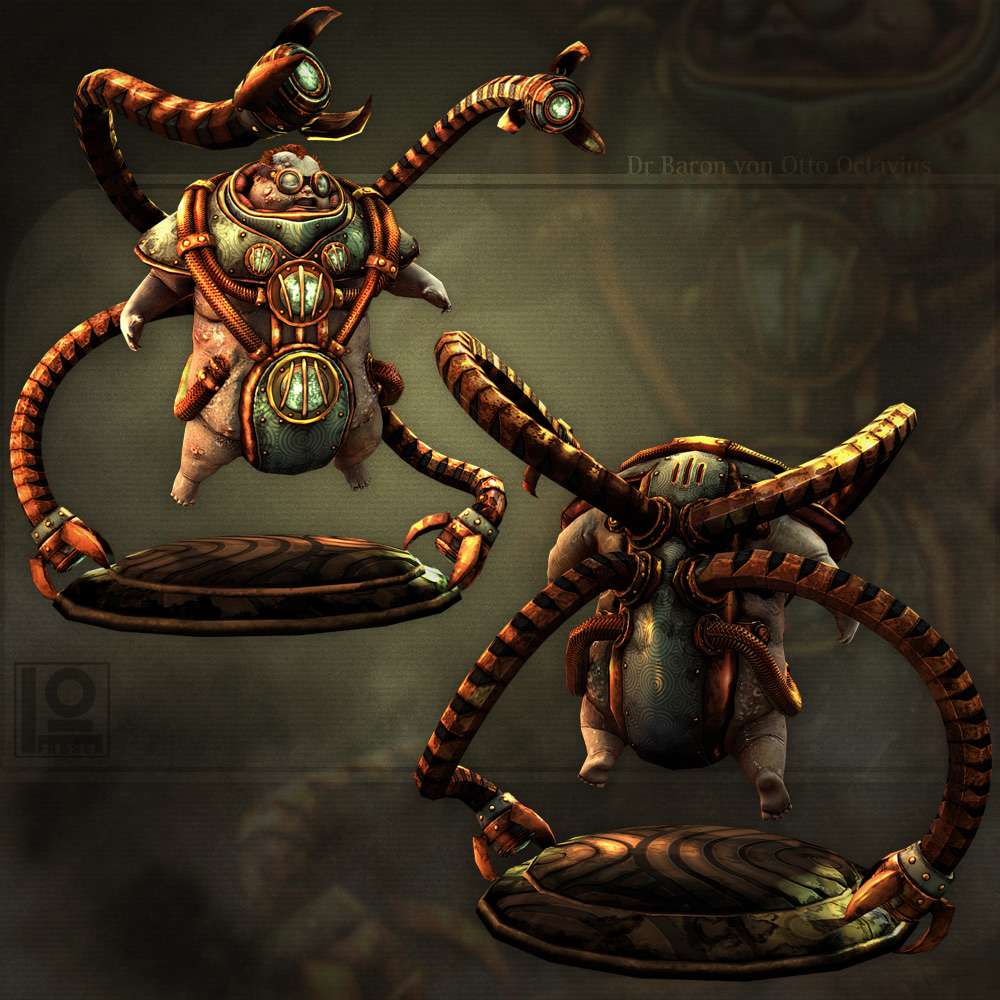
and some of the results.

Thanks for looking if you did
and sorry newto3d for taking so long but I hope this helps.
newto3d asked to see a bit about my workflow a long time ago and I am sorry to say I got stuck in Comicon and totally forgot. I put together this little image last night and I hope it helps. I am not saying it is the best way of working, in fact I doubt it is, but it is how I am going about stuff at the moment and will no doubt change as I get more experience. Anyone out there who cares enough to give me extra tips and advice I am all ears. My sole aim as an artist is to continually improve myself and inspire others (if possible)
This is how I went about creating the Dr Baron for my Comicon entry. It was supposed to be about my CHERRY "Zombie ate my pants" character but I deleted a heap of my early work in the great clean up of some time last week.
and some of the results.
Thanks for looking if you did
and sorry newto3d for taking so long but I hope this helps.
Replies
That groundplane AO thingy is Ace!
It looks awesome and thanks for sharing
@jordan.kocon with this i can help! Xnormal > Tools tab > Normal 2 Cavity > done!
@ jordan.kocon: @ Next: is 100% right, but I used the NDo cavity from Normal action. Just as quick and just as good
Nice job on the model. He kind of reminds me of a Garbage Pail Kid version of Doc Ock.
This actually helped! I go about the concept in 2 ways, Either create a base mesh, or create a mesh from z-spheres and edit mesh I dont re-topo entirely. I will try to use this one you suggested on my next project.
You really managed to get the rashes/skin to look nasty, good job on that
One question though, did you bake down all the arms separately and already posed? Or did you bake just one arm in a neutral pose and then later copied it 3 times and posed them into their final poses?
Have you messed with the new dynamesh at all yet? It's really awesome, I could see it replacing the zsphere/remesh stage entirely.
What you are doing with the AO is also new to me. Thanks for sharing.
Model itself looks amazing. Love the skin details. Orange hair does not really pop out considering all the rusty colors you have going on there. I also love how good the stomach area looks considering how low poly it is - I guess you needed the geo for them tentacles.
Awesome character man.
By using the AO as input to a gradient map, then using a blending mode like overlay or soft light, you can change the effect of the AO from being just darker shadowing to shifting the hues and or saturation of the underlying diffuse to get effects softer, or more desireable than simple shadowing.
FYI you could also use an Inverted AO map as a mask for a hue and saturation layer so you can shift your shadows cooler or warmer, as well as desaturate them, like real shadows.
- BoBo
care to share the tips how you do the robot`s hand or hard surfaces on zbrush?
Ben Mathis aka poopinmymouth:
http://www.poopinmymouth.com/tutorial/gradient_map.htm
EarthQuake:
http://dev.polycount.com/forum/showthread.php?t=81562
Thanks everyone. my lunch break is over but I will get back to try and answer other questions a bit later tonight.
Thanks again
@ OrganizedChaos: No I have not tried dynamesh, I am sorry to say I know very little about it. From what I do know it looks very interesting, I might have to give it a shot, thanks.
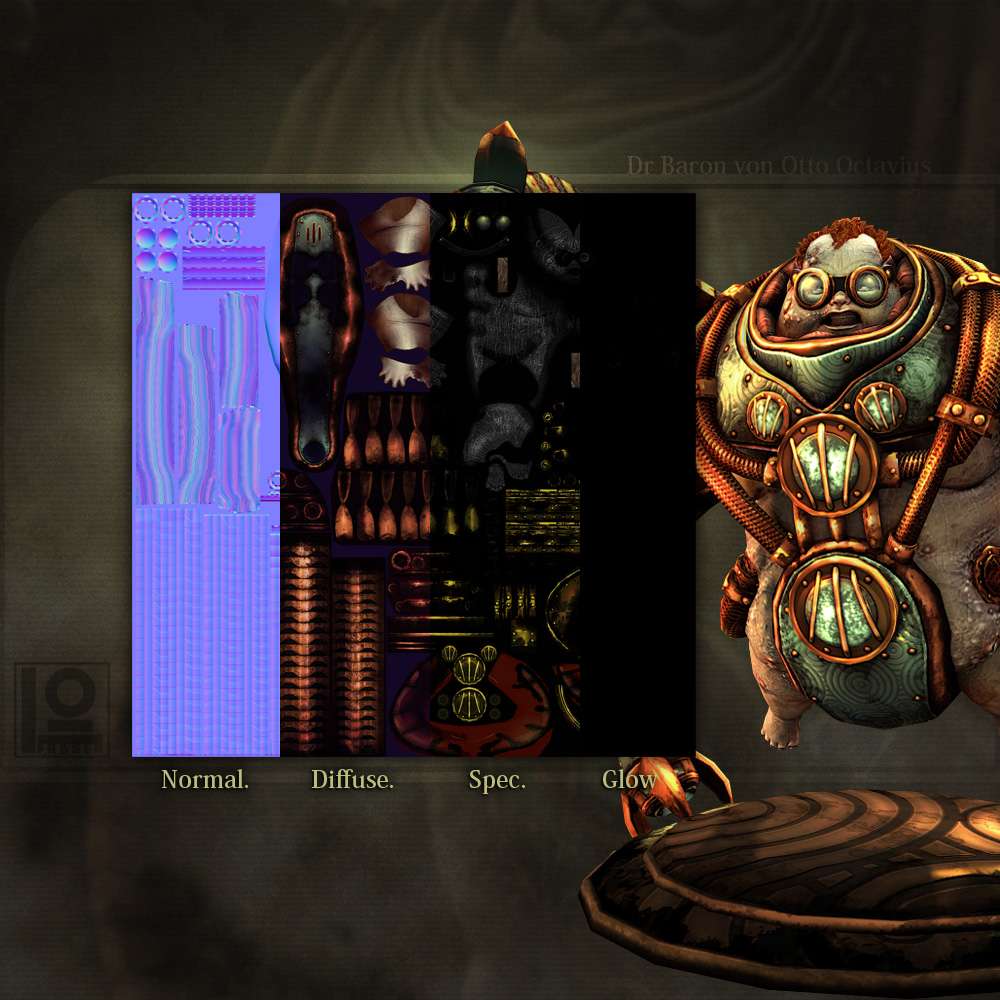
@ Macattackk: (this is pretty much copied from my DA site) I tend to have the AO in a folder set to Overlay in photoshop. Inside that folder is the AO bakes, and above that is a Gradient map "Adjustment layer". I like having adjustment layers because if you need to change something later on you don't have to try and remember all of your previous settings. ALSO you can mask out sections of one Gradient map so another one shows through eg... you would want one gradient map for the skin and another for the metal and another for cloth, etc... That is it. ALL of those things go into a folder set to "OVERLAY"
That is how I do it, There are other ways of doing it but I like this way best, and it is NON destructive too. I can make a quick diagram if that is more helpful too.
As for nDo, There is no real reason I used that to create my cavity maps. I mean it IS super quick, but I was just giving it a go.
@ dustinbrown: Thanks for the kind words man
@ Vailias: Yep that is pretty much how I do it. I will have to try out that inverted AO as a mask for hue and saturation though THAT sounds pretty killer. Thanks for the tip :thumbup:
@ afisher: Thanks man, I loved your entry by the way, saved it to my inspiration folder the second I saw it.
@ BoBo_the_seal: hahaha me too, Thanks man.
@ azchtein: Thanks
Thanks again everyone