Facial Modelling
polycounter lvl 14
Hi guys
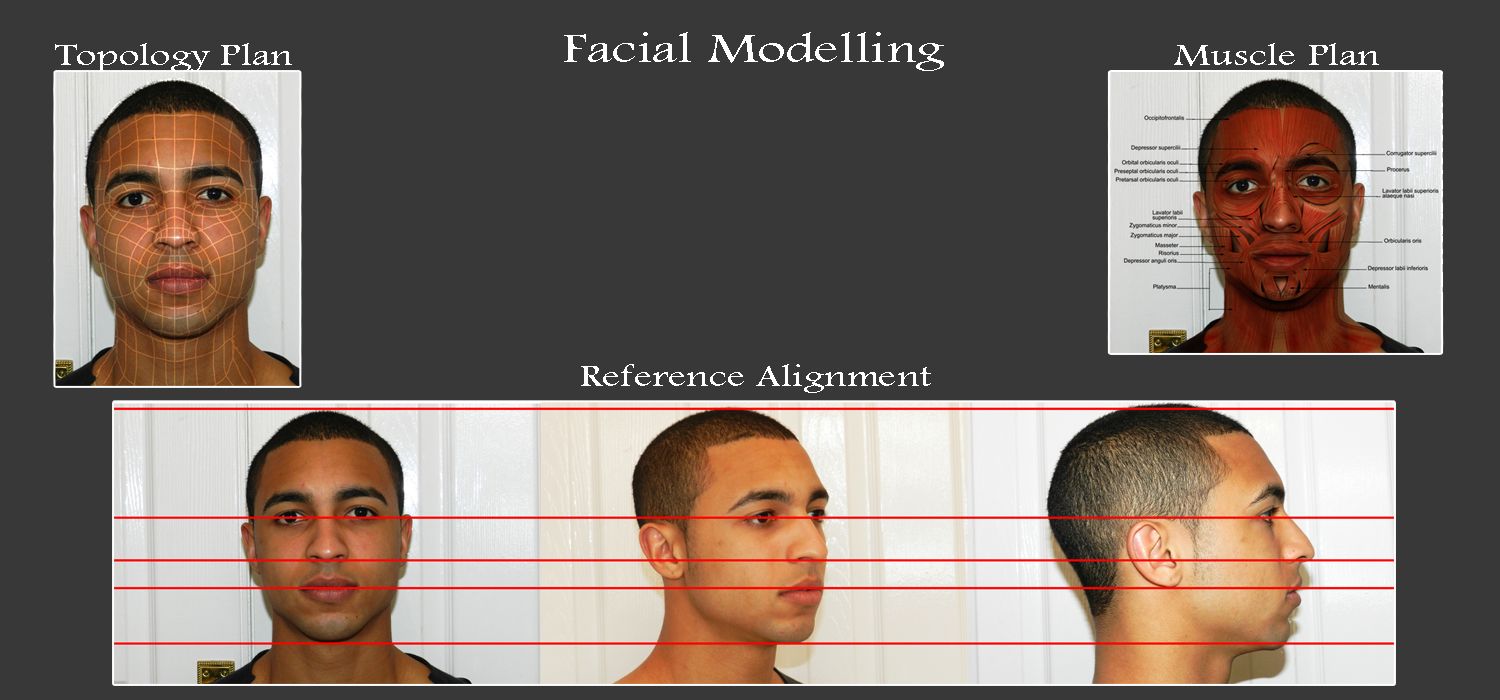
I'm currently working on a project that requires me to model my head using photo references in 3ds Max and to then sculpt in the fine details in ZBrush.
At this point I have modelled the head so the next step is to attach the ears.
If you guys could give me some feedback on what could be improved it would be extremely useful.
Thanks.
 Cheers guys.
I'm currently working on a project that requires me to model my head using photo references in 3ds Max and to then sculpt in the fine details in ZBrush.
At this point I have modelled the head so the next step is to attach the ears.
If you guys could give me some feedback on what could be improved it would be extremely useful.
Thanks.
Cheers guys.
Replies
Thanks again.
Cheers Biofrost!
Feedback is appreciated
cheers
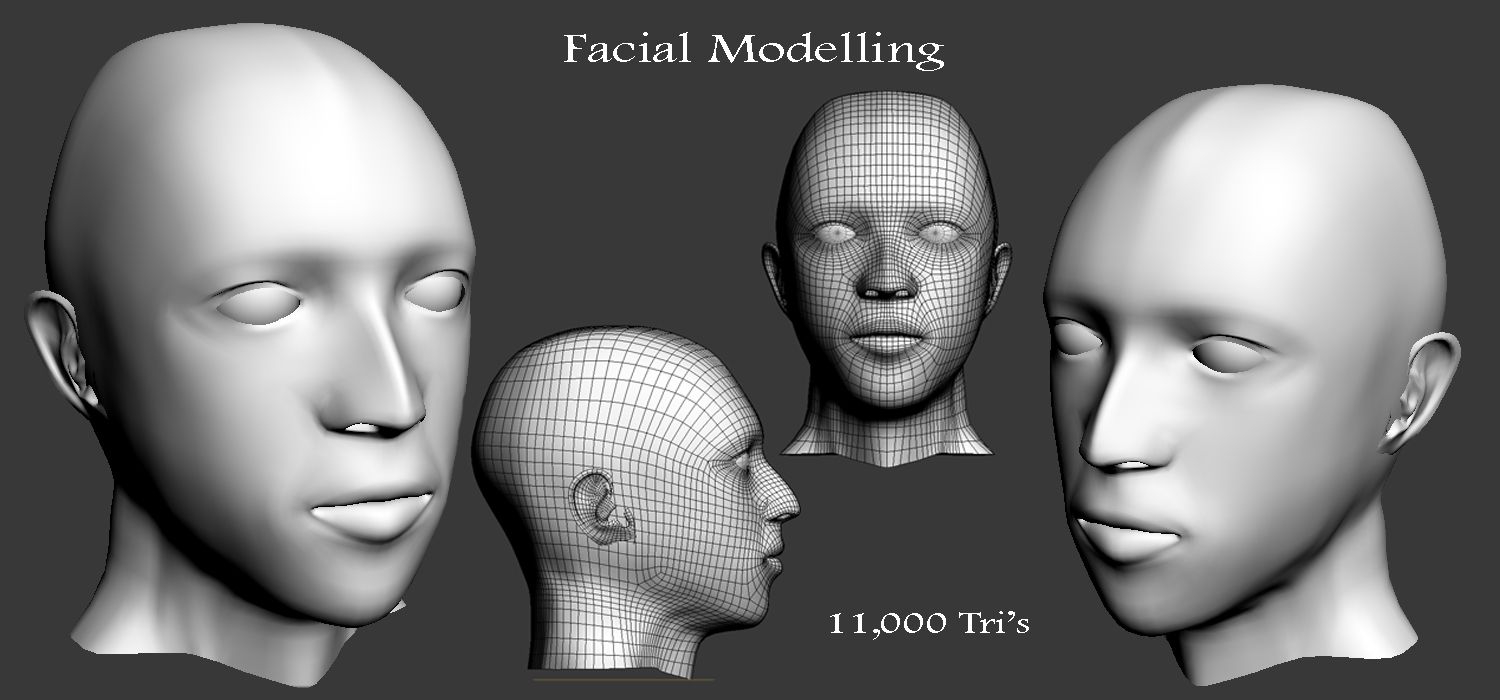
This is where i'm currently at with my model.
Feedback is appreciated
Topology in the face as well needs work! I would recommend killing half of the geometry making it easier to work with!
Keep going though!
Just in case you don't know ZBrush's spotlight will really help you get a photo-realistic texture on that model.
Yeah I was thinking of using spotlight as its a nifty little tool
anyway this is how my model is currently looking
C&C more than welcome
thanks
My next step is to produce a normal map and to model the eyes which I think I might struggle with as ive never done either before, so if anyone has any tips or tutorials it would be appreciated, thanks
Feedback is more than welcome, thanks
You look like you've got maybe a normal seam on the side of the neck, can't really comment without seeing the normal map and unwrap.
I'd adjust the lighting to show off the surface detail and pores that I can see in the sculpt, I'd push the hair out as well using Ndo or similar with a height map based on the hair.
How are you representing the skin? Are you using dx11 (http://udn.epicgames.com/Three/ScreenSpaceSubsurfaceScattering.html) or something more simple like transmission. You might end up having to remove more of the lighting information in the texture depending on which of these you use.
I'd also adjust the eyelids as they are making the eyes look a bit odd, the overall shape is not quite right, also the photo texture is at odds with the eyelid at the side and top. The eyeballs are too white at the moment, I've found that greys, yellows and blues in tiny amounts help on the white of the eye as do blood vessels in small amounts. Check this out although not directly relevant you can see some of the maps and applications. (http://www.thegnomonworkshop.com/store/category/167/Free-Maya-Tutorials)
I'd also sort out the dark shadows on the lips too, whether that's lighting, texture or normal.
Certainly coming along and a great improvement so far!
With regards to the mouthsock, teeth and tongue they are not of high importance at the moment as I dont plan on animating the mouth of the model. However, if time is available towards the end of the project they might be produced.
I totally agree about the normal seam on the neck, the eyelids and the shadows on the lips need a lot of work.
With regards to the shaders, additional work has now been carried out displaying the results of using the DX11 sss shader (as shown in the images below)
Since I last posted I have slightly adjusted the model/textures and composited all of the models into a UDK scene.
Anyways here are the results of my testing.
Head With A Standard Shader
Head With The DT3D Skin Shader
Head With The DX11 SSS Enabled
Head Produced With FaceGen With Standard Shader
Scanned Head Which Was Retopologized With Standard Shader Applied
In addition to this a little YouTube video has also been created to give you a further insight into the creation of the modelled head.
[ame="
Feedback on which head looks most visually pleasing would be appreciated
Thanks again guys!