Unwrap Stretching help

polycounter lvl 14
Hey,
I am trying to unwrap a tube for a mario level recreation and I am having problems with stretching on the model:
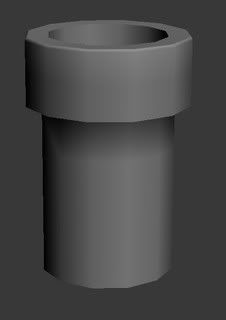
Model:
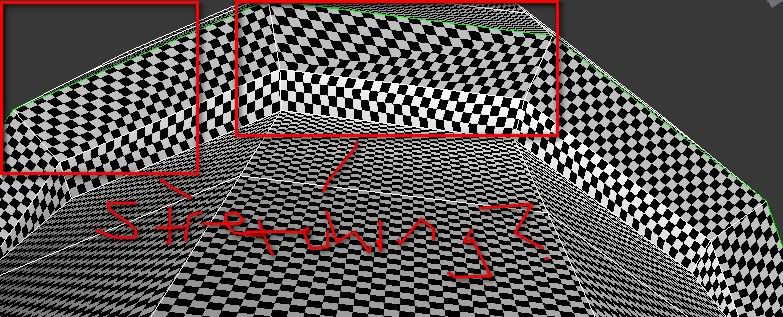
Stretching:
Anyone know how to fix this? any suggestions ( I am using 3ds max btw)
Thanks guys
I am trying to unwrap a tube for a mario level recreation and I am having problems with stretching on the model:
Model:
Stretching:
Anyone know how to fix this? any suggestions ( I am using 3ds max btw)
Thanks guys
Replies
Just do a planar map on those faces and make sure they have the same shape in the UV editor as they have in 3D view.
It's because you stitch them, it probably changes the shape of the face in the UV editor so it isn't the same as in the 3d view.
It would really help if you show your UV's
As the image shows max is trying to fill up the red part of the poly to match up with the UV layout, you have to imagine that max always renders triangles, which explaines why you get that seam in the middle, and as you can see, the 3d poly in my drawing is showing you the same pattern.
Just imagine that you have a cloth on your kitchen table in the form of shape 1(in the drawing), when you take those 2 lower corners and move them to make the cloth the same shape as 2 you are going to get folds all over the place, in 3D you get these folds.
You have to notice how the horizontal lines on those poly's are still ok because you didn't change the upper and lower edge shape. So if you are going to add something that has a very stretched pattern like wood or a simple border you won't see any stretching showing up on the model.
I´m curious, what exactly do you want to do with it in zbrush?
Then again, if you don't plan on it being seen from other angles it might not matter much anyway (and in this case you'd be wasting time worrying about minor stretching on the bottom). Plan out the angle and distance it will be seen at, and go from there.
As an aside, zbrush doesn't really care about the UVs when it comes to painting and sculpting, so really you could just create the sculpt first and worry about the UVs later once you have something you can bake and test to see if it will actually be a problem or not. If it works, booyah. If not then you just change the UVs and rebake.
Nothing wrong with your UV's, propably all fine in your engine if it has modern GPU handling (corrected mapping) of those things.
If it still persists (depending on how your engine handles those things) you can subdevide things to even it out: