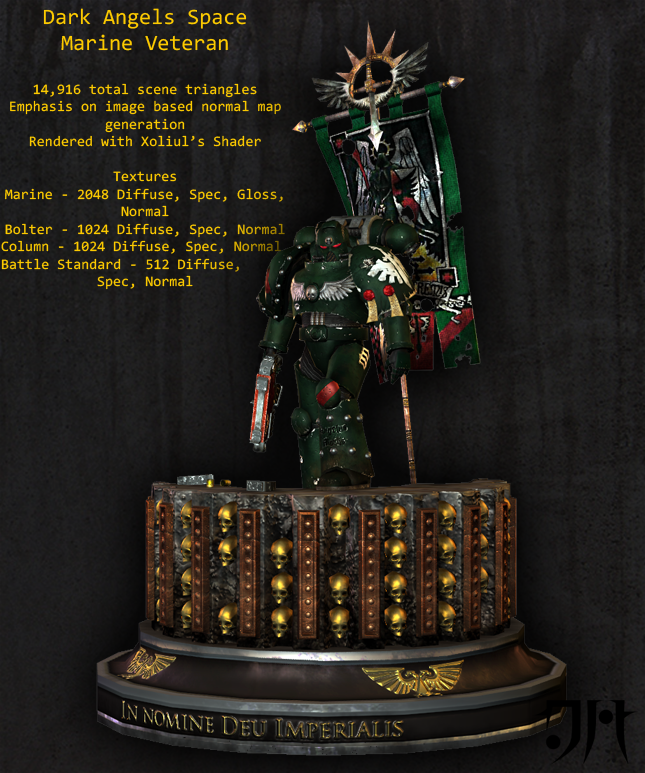
Dark Angels Marine Squad
EDIT: Posting new images up here in addition to inside the thread.
Veteran with a mini environment.
Original Post:
Alright, it's not really a squad, more a trio, but trio just sounds a bit silly.
I started modeling the base model for these Space Marines during the summer after I picked up the new 5th Edition Codex and thought it would be good practice. The initial idea was to be able to have a single, fairly detailed model that could be more or less modular by adding/removing pieces to individualize the character while maintaining a somewhat modest triangle count. After some months I finally got back into the project and have been hitting it with a decent amount of gusto in between looking for work.
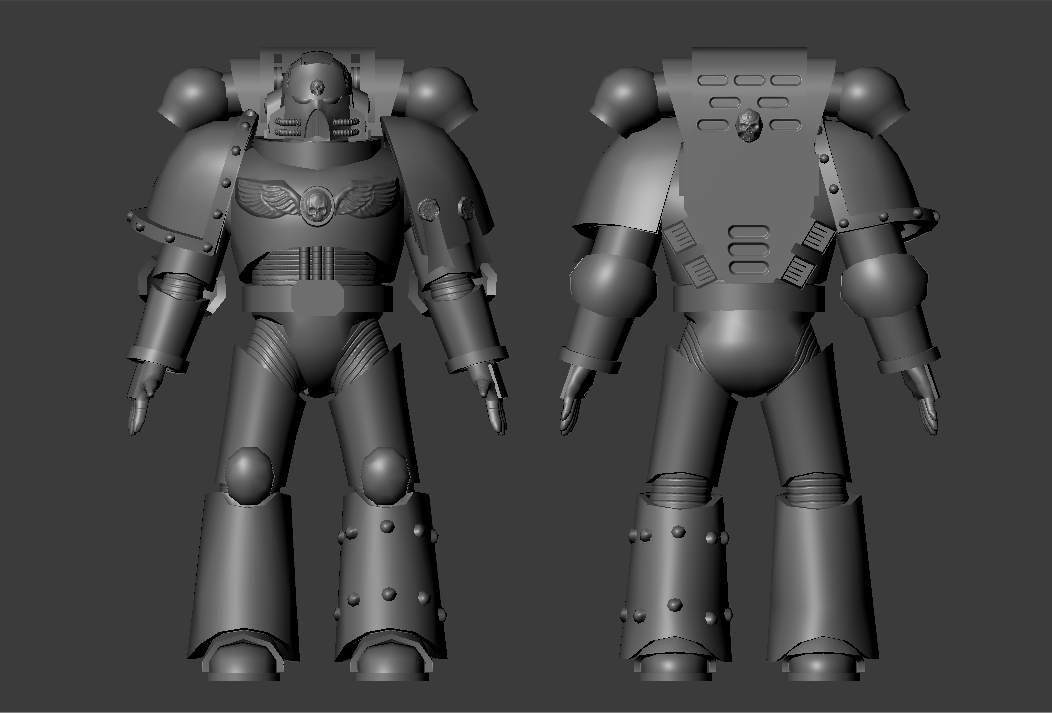
So far, I'm just working on the "test bed" Marine, the Marine Sergeant/Veteran who maintains the closest similarity to the template model. The template model is 7354 triangles, the Veteran spikes it to 8436 (thank you, cylinders *grumble*)
For right now, I'm posting wires, normals, diffuse, and composite. Reference images and UV sheet on request, or perhaps a later post. I'm mainly looking for pointers to either optimize or just to give the project that extra nudge in the right direction. Keep in mind that nothing here is final. There are some things that I might bang my head against a wall if they need to be changed, but whatever makes it better.
Some notes: Biggest thing is there is no real "High Poly" mesh. The wings, skulls, and purity seals are all zBrushed from low poly models, the hoses do have high poly iterations, but the entire undersheath, backpack holes, and laurels on the helmet are done with nDo and some Photoshop trickery. Secondly, Maya's Mental Ray AO bake left me with some fantastic UV seams showing up, and I may end up scrapping it for an xNormal bake. Lastly, yes, there are individual vents in the vox filter and on his backpack. That was a choice I made early on, normal maps just can't seem to cut it for detail that goes very deep. It raises poly count, but I want the model to look good up close, whereas the Dawn of War models tend to break down at a close look.
Wall of images incoming:

Veteran with a mini environment.
Original Post:
Alright, it's not really a squad, more a trio, but trio just sounds a bit silly.
I started modeling the base model for these Space Marines during the summer after I picked up the new 5th Edition Codex and thought it would be good practice. The initial idea was to be able to have a single, fairly detailed model that could be more or less modular by adding/removing pieces to individualize the character while maintaining a somewhat modest triangle count. After some months I finally got back into the project and have been hitting it with a decent amount of gusto in between looking for work.
So far, I'm just working on the "test bed" Marine, the Marine Sergeant/Veteran who maintains the closest similarity to the template model. The template model is 7354 triangles, the Veteran spikes it to 8436 (thank you, cylinders *grumble*)
For right now, I'm posting wires, normals, diffuse, and composite. Reference images and UV sheet on request, or perhaps a later post. I'm mainly looking for pointers to either optimize or just to give the project that extra nudge in the right direction. Keep in mind that nothing here is final. There are some things that I might bang my head against a wall if they need to be changed, but whatever makes it better.
Some notes: Biggest thing is there is no real "High Poly" mesh. The wings, skulls, and purity seals are all zBrushed from low poly models, the hoses do have high poly iterations, but the entire undersheath, backpack holes, and laurels on the helmet are done with nDo and some Photoshop trickery. Secondly, Maya's Mental Ray AO bake left me with some fantastic UV seams showing up, and I may end up scrapping it for an xNormal bake. Lastly, yes, there are individual vents in the vox filter and on his backpack. That was a choice I made early on, normal maps just can't seem to cut it for detail that goes very deep. It raises poly count, but I want the model to look good up close, whereas the Dawn of War models tend to break down at a close look.
Wall of images incoming:
Replies
I would also be curious to see your texture flats.
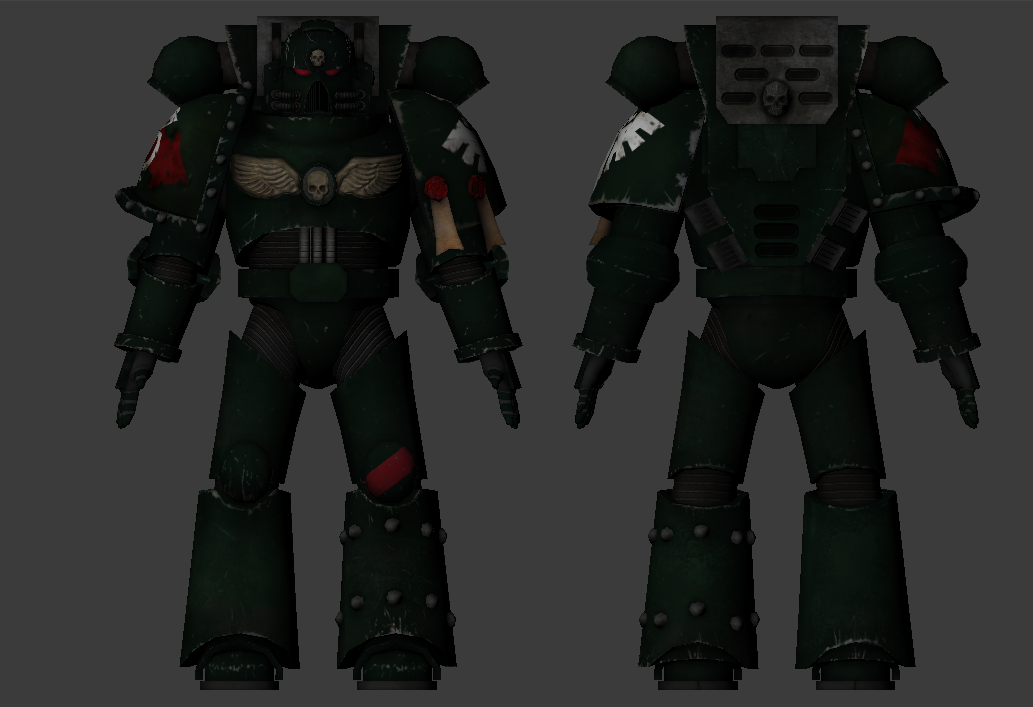
Finally, why don't you try putting in a 2 or 3 lights setup, it's a bit too dark in the final pic.
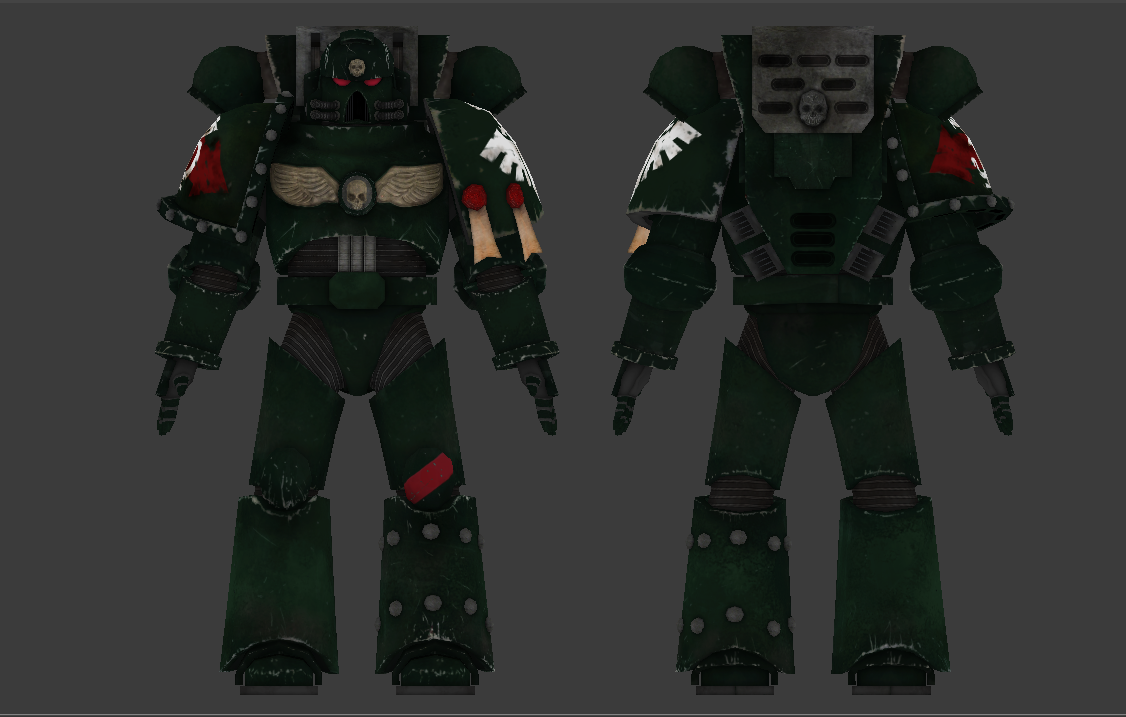
@t4paN, That last image is Maya default lighting, just to show the interaction of the diffuse and the normal map. I totally agree with that being too dark. Also, here's the texture flat. I had a bear of a time trying to pack it, and I'm sure that I could optimize it further, but I think I just lack the practice. Arms, upper legs, and a lot of smaller details are just stacked UVs, Anything with it's own UV shell was kept that way to allow for individual detailing, which with this model I'm not taking too much advantage of, but still opportunity to.
Thank you both for your responses, they proved very helpful, and will post updates when I can.
I also made a new set of wings by making a high-poly in Maya and baking that on, went by a lot faster than zBrushing a new mesh. I'm uploading both the new and the old normal test images for a comparison. I think the wings look a helluva lot better now with a much cleaner mesh. In time, I'll put in some hours for zBrush, but I suppose now is not it.
New:
Old:
Here's a close-up of the chest:
I'll be adding in some bolter dents later after I sculpt some out of a plane to be used as "modular" pieces for the high poly library, it's all on the list of "to do's".
Changes: zBrushed a plane and made bullet holes which were then projected onto the model. Made a Work-in-Progress detail normal map. Scrapped the old paintjob and made an faster process. Made some details for the right shoulderpad.
Diffuse isn't as far along as the last one, but the amount of time it took me to repaint the green is leaps and bounds faster than the last one.
I'm hoping that by posting incrementally will help me keep track of my own progress on the model and my own abilities as well as hopefully snagging some helpful critiques while I can easily make changes.
Now for the image dump:
@whats_true, is this along the lines of what you're looking for?
Changelog for this post: Added text to the diffuse, "Angelus Mortis" on his leg and the Oratio Dominica on the purity seals. Added in more paneling details on his leg and belt buckle, more grime added, cleaned up the diffuse some in terms of layout and look, updated normal maps and made a spec map.
Images incoming:
The top image will be posted on the first page as well.
The following is a 3-point lighting test for the textures, rendered in Mental Ray. I have yet to get the hang of Maya's Depth of Field controls, and I'll see what I can do to learn how to render in Max and present things with Xoliul's shader.
I may update this post with non-blurry images later today.
In the meantime, I've unwrapped and thrown a texture on the Bolter (to be readdressed, I'm not happy with the way it turned out) and started getting a render setup ready to go so when I get the textures just the way I like them and build his pedestal, I won't be spending hours trying to get a decent render out of it.
I'm still running into UV issues along particular seams, so I may end up having to go into CS4 (ugh) to take care of that, but it might also be Maya, I'll have to run some more tests to figure it out.
Incoming gigantic image:
Good job :]