Forklift [wip] TF2
polycounter lvl 17
working on this for a couple of my tf2 maps.
Just over 1500 polys, still have a few to add and some tex work to get done. Zero Gear got me into doing vehicles, X-normal got me doing ao tex bases, skipping normals on this.
I'll try and get some wires up soon.
Trying to stay close to tf2 style and NOT get carried away with perfection (I've noticed so many ugly tex things and whatnot with that games objects and nobody seems to notice/ or care).
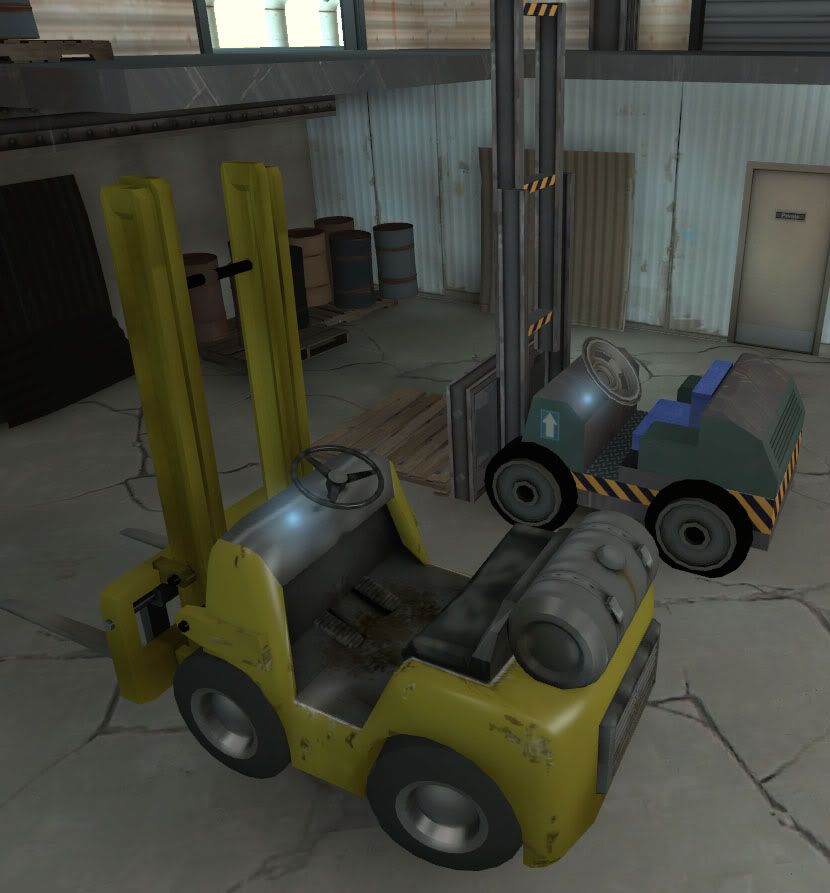
This pic is in game next to a brush based placeholder forklift. It was in a 'no custom content' tf2 center cap point contest map. Looks like I might take that contest too") still have a few days of voting so anything could happen.
still have a few days of voting so anything could happen.
Anyway, Since I am turning that into a full map and have a 'hoover dam' map to finallize I figured I'd get this done.
Haven't modelled anything substancial for months... Got kindof burnt out for awhile. My workflow was a little slow but fun to model again.
Just over 1500 polys, still have a few to add and some tex work to get done. Zero Gear got me into doing vehicles, X-normal got me doing ao tex bases, skipping normals on this.
I'll try and get some wires up soon.
Trying to stay close to tf2 style and NOT get carried away with perfection (I've noticed so many ugly tex things and whatnot with that games objects and nobody seems to notice/ or care).
This pic is in game next to a brush based placeholder forklift. It was in a 'no custom content' tf2 center cap point contest map. Looks like I might take that contest too
Anyway, Since I am turning that into a full map and have a 'hoover dam' map to finallize I figured I'd get this done.
Haven't modelled anything substancial for months... Got kindof burnt out for awhile. My workflow was a little slow but fun to model again.
Replies
The texture work looks like a good start but I'd definitely get more texture onto those wheels, and the dashboard is just crying out for some nice cartoony over-sized dials and levers.
Yeah, the dials and levers are a big part of the wip
I kindof pushed the end of my day off just to get an in-game shot.
I need to finalize the smooth groups too.
Looking at it I think the steering wheel needs to be a bit larger.
Not using a bevel isn't saving you that much, but what you gain is pretty significant.
The texture has a few areas that look a bit too real world and not painterly.
- The pedals.
- The dirt on the floor boards.
- The scratches look photo sourced and the damage is kind of random. Localize it in places that make sense and make sure it more or less matches damage on other vehicles, the yellow dump truck in hydro comes to mind.
- The bench seat looks a little real world-ish with its wear.
- Also check out the shaders and VMT files for some of the vehicles and metal objects in TF2.
- Know that even if you never plan on animating your object you can put bones in your object and weight certain pieces to those bones and then assign materials according to those bones. For example if you want the tires and seat to react like hard rubber and not like metal, weight them to one bone and set up the QC file to use the right material.
I do need to get a wireframe up but won't be home til weekend. Places like the edges of the 'doorways' are already beveled, and the back corners have several bevels (I based this off a shoddy hard to see pic of some real old forks-not an exact match but I think pretty close).
For this quick ingame test I just copy/pasted a vmt. In fact I'm not sure where it even originally came from, probably a metal item due to the shine.
I'm glad you thought the damage looked photosourced. That was probably my first try at chipped paint/rust. I've always heard alot here about placement of that stuff (which I tried to follow). Thus chips in corners/around where players feet would be.
I didn't look at the dump truck but will specifically look at it before I work more.
I never know you could change areas props with the use of bones. I'm gonna have to look into that. Any idea if there is a tut on that?
TF2 damage is a bit more simplified Scratches are more like clips of flat gray color minus the surface noise. There are also subtle and not so subtle shifts in hue/sat brightness/contrast done with hard square brushes. The dish in hydro next to the dumptruck is another good place to observe this type of varied hue/sat brightness contrast.
Around the bottom of things you'll probably get a slightly darker color then the rest of the material, this simulates wear, water stain and splash back from the ground/dirt and alittle bit of AO.
Rust is often a flat reddish brown color with very little or no visual noise.
Sometimes there is a lighter color that outlines it, but often its just left on its own. Same goes for scratches, they are normally pretty big chips, but reveal a flat gray color.
And then there are paint patches.
Also did you do any mental ray AO baking? Sometimes Xnormal gives really great smooth results but the AO in TF2 is a bit chunckier like the AO in MR. Might want to noise it up or play with the settings?
Will deffinetly take it all into consdieration. The material/bone thing sounds easy enough, thanks again for pointing that out.
Haven't had much luck at all baking to textures in Max7. And my settings in Xnormal came from my Zero Gear stuff but I can deffinetaly get different results, it took me awhile to tweak it for ZG, the results I was first getting are probably alot closer to what you described.
The AO they use on the TF2 models is really noisy across the board, even on characters and hero props like the bomb cart. If you're using xNormal and getting really smooth results, you could just take it into Photoshop and use a noise filter on it to make it fit in a little better.
Giving the entire thing a subtle gradient so things are darker at the bottom of all the vertical surfaces will keep the model from looking like it's floating. It'll also keep large solid-color surfaces from looking boring without having to resort to decals and other details.
I have all the tools too for importing/exporting and all that. I use the photoshop plug for exporting.
I want it to look good and fit in the game for sure, but I'm also trying to find a balance in work in real time (as if I worked at Valve). I could spend days tweaking the tex, but I won't. I still have to finish an arena map and get it out of beta (with this model) and finish the map the model is shown in (5 point cp) and probably squeak out a few new objects, along with playtime and map test days... Just never enough time.
Always great getting pointers from you guys though. I could work at it for hours trying to get it right or ask you guys and be set on the right path before all those wasted hours.
Here are pics of the wires and uv's as promised. Still have some stuff to add=empty space uv
I did a little work on the uv after I grabbed that, but didn't do the texs work to match yet.
The dashboard is now seperate and aligned horizontally so I can get clean details there and crisp edges.