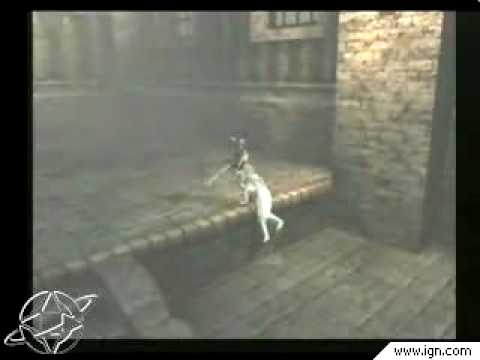
shadow creature shader
On my current project i want to make some enemies that resemble the shadow creatures in Ico. I have no idea really where to start on the shader for this. The target engine is UT3. Anyone have any suggestions where to start or could point me to some good UT3 shader tutorials?
Check out this vid if your not familiar with ico. shadow creatures in question appear at about 1:25. [ame] http://www.youtube.com/watch?v=YSXwreNIuYE&feature=PlayList&p=0BBC0359F8CFF0A6&playnext=1&playnext_from=PL&index=27[/ame]
Check out this vid if your not familiar with ico. shadow creatures in question appear at about 1:25. [ame]
 http://www.youtube.com/watch?v=YSXwreNIuYE&feature=PlayList&p=0BBC0359F8CFF0A6&playnext=1&playnext_from=PL&index=27[/ame]
Replies
I have some old footage of it back when ico was being transitioned from ps1 to ps2 dev somewhere, ill see if I can dig that up sense I rememebr it being alot clearer
edit: nevermind, the production footage I have mostly just shows the original enemies before they became shadows
btw, the model i'm doing this with has less than 500 polys :P
The additional advantage to this approach is that you could increase or decrease the particles as well as their parameters based off what the model does. If it gets damaged particles could fly off, or if he gets angry he can puff out with particles.
This breaks up the problem and also makes the shader you have to create simpler. It can basically just be an animated texture.
If I were going to make a 'smokey' character shader, I'd start with some kind of inverse fresnel on the whole guy (so you have interesting soft falloff along the edges), mix that with a scrolling smoke texture with some DUDV texture warping for smokey wobbles. Some particle trails would help for sure. If you have the time, try some flowing 'ribbons' with a translating smoke texture, you might get some good results with something like that. (I'm envisioning something like the Dementor's from Harry Potter).
http://edusworld.org/ew/ficheros/2006/paginasWeb/making_of_sotc.html
great article renderhjs, thanks.
Wow thank you for that. The game amazes me even more after reading through that article. Always been curious how they did a lot of that stuff.
Inverse fresnel is nothing fancy, it's the same thing as a regular fresnel term, you just invert the result, so instead of getting 'brighter' as normals face away from the view, they get 'darker'. In the shader just do something like color * ( 1 - fresnel ) or you can do a lerp(color1,color2, fresnel). If you're not familiar with shaders in general, it may sound kind of strange, but it's super simple to set up in something like Unreal, ShaderFX, or Mental Mill.
so that's a fresnel shader, so a reverse one would darken the edges? sounds very promising. now to look up the DUDV texture warping you mentioned.
edit: lol, i did a google search for "DUDV texture warping" and the first result was this thread.
Some talk of it here http://tech-artists.org/forum/showthread.php?t=423
How to achieve fresnel illumination in 3dmax2009 just like in Unreal3 from the tutorial - http://www.wonderhowto.com/how-to/vi...editor-197044/.
It can also be used to help create rim lighting.
The fresnel term is really a 0-1 range based on the camera to surface normal dot product
I think the math goes:
(((LookDirection dot Surface normal ) *-1) +1) ^FresnelStrength
Which, if applied to specularity or diffuse, makes pixels brighter the closer they are to being perpendicular to the camera's look direction. The FresnelStrength exponent serves as a sort of focus for the effect. Higher exponents make only pixels very close to perpendicular get any measurable brightness.
So for an inverse fresnel effect its effectively just
(LookDirection dot SurfaceNormal)^FresnelPower
for UT3 this requires actually hooking up the math to invert their fresnel term.
Fresnel node hooked to multiply node by negative 1 constant, then hooked to an add 1 node, then hooked to a power node with a parameter or constant going into it.
I cooked up a demo shader pack for ut3 that does all this with comments in it so you can know what does what. Mess with it a bit and see what you can find. I included one of my character models in the pack with the shader applied to it so you can see how it would look on a character
http://vailias.com/files/Smoky_Shaders.rar
Here it is applied to my Xan model
and here it is on a Krall on a different map
edit: Link fixed
Mistyped.
Fixed now.