Baking problem (or understanding-problem?)
my highpoly look like that:

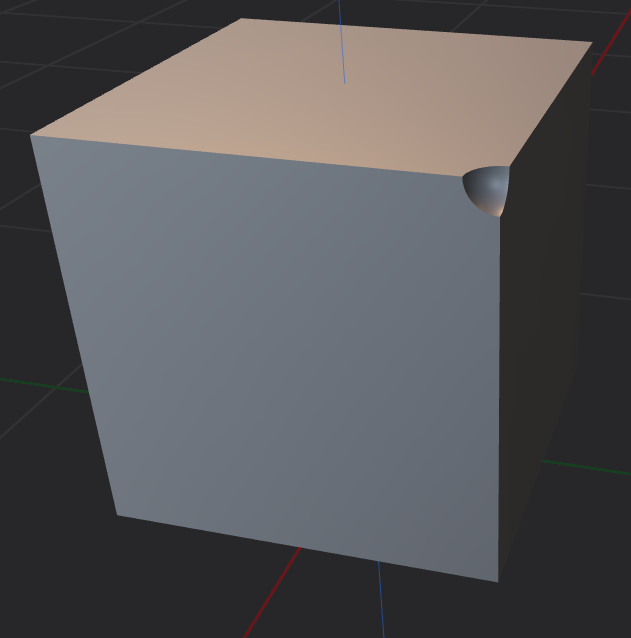
My baking problem lies in that round cutout.
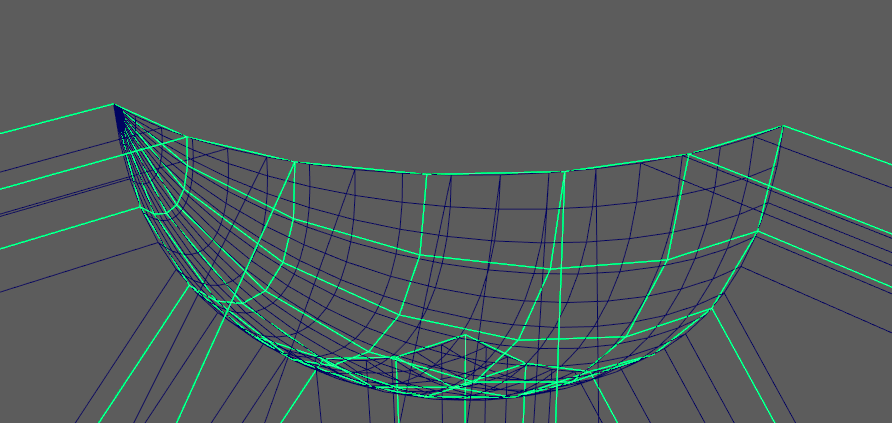
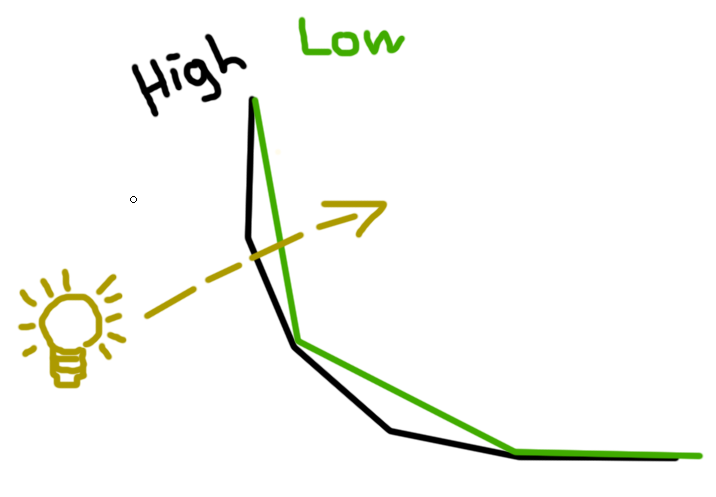
Here you can see the topo of both (green is my LOWpoly)
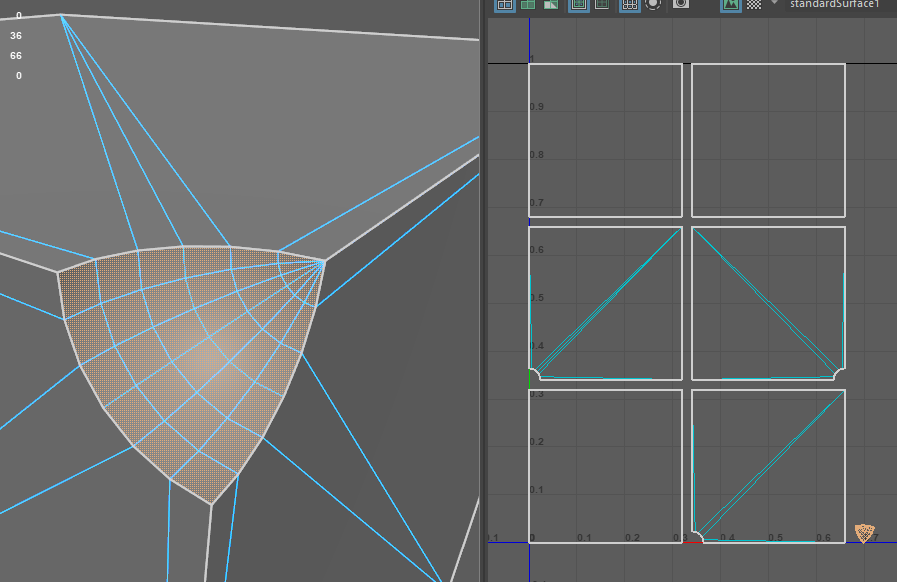
This is the UV of LOWpoly:
These are my marmoset-baking settings + result:
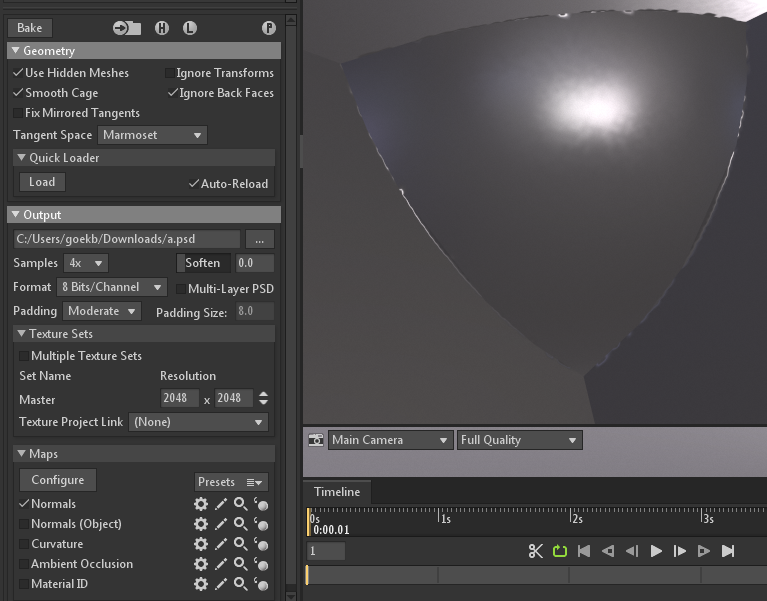
as you can see its very ugly ^^
what i now dont understand is, why is it like that? and what can i do to prevent such beautiful baking? ^^
I am pretty sure it has to do with lowpoly, that the high and low poly meshes don't match closely enough.
Like the baking like "shoots through":
but how to handle that issue?


My baking problem lies in that round cutout.
Here you can see the topo of both (green is my LOWpoly)

This is the UV of LOWpoly:

These are my marmoset-baking settings + result:

as you can see its very ugly ^^
what i now dont understand is, why is it like that? and what can i do to prevent such beautiful baking? ^^
I am pretty sure it has to do with lowpoly, that the high and low poly meshes don't match closely enough.
Like the baking like "shoots through":

but how to handle that issue?

Replies
One solution would be to use your UV space more efficiently (cut that corner area out and give it most of the texture space).
But the real question is why are you doing this? What is the goal you are trying to achieve?
With curved edges, sometimes it`s an option to have more geometry at along the border closely matching the hp, collapsing edges in areas that are less-silhouette defining.
imagine a tv remote controller.
it has round buttons.
now the LOWPOLY does not have so round smooth buttons, instead i would use a cylinderform with maybe 8 sides.
and i am sure, i get the same problem i guess -.- 😅
goekbenjamin with sharp edges or ultra-tight bevels, you're basically giving the texture two extreme choices of pixels to choose from, 0 or 255, black or white, this face or that one. It's very bi-polar. But with a softer bevel, it gives you a range of values to soften the gradient. So absolutely bevel your high poly and apply smooth edges to everything and subdivide it.
1) You need a supporting loop around the edge of the bool, on the high poly so it sub divides and smooths well, but I would add it to the low poly also so it gives you a few anchor normals near the edge to help the gradient form. Otherwise your next nearest normal is on the oppoite side of the object, across a LOOONNG polygon.
It looks like this loop was missing and instead you just set the smoothing to hard. So yea, don't be lazy =P
2) Like Eric pointed out, you're only using a handful of pixels to capture some pretty complex curved details. Your texture is 2048 but you're only using maybe 32 pixels. Maybe stack and offset some shells so you can take more advantage of the UV space? You're only using half the sheet, so why not scale things up?
3) I would probably weld (3) to all of the (2)'s and make a giant T out of your shells and then weld the boxes to the T that way you have as few open edges as possible. Also increase your padding to the moon and give your shells more space from the edges of the layout, you should never go right up to the boarder of the texture, leave yourself some space otherwise "the void" will bleed into your open edges and onto your faces.
4) You can also add another loop farther back were the normals would be pretty consistent and should bake seamlessly. You can break off that large island and scale it up to capture that corner better, like Eric suggested. This will throw off your texel density and introduce a seam across those faces, but if that corner is really important, it might be worth it. I would do that as a last resort, if everything above was still failing.
5) I REALLY don't like that corner (very lazy modeling) that came from the pole at the top of the boolean'ed sphere and it is making a triangulated mess. I would have made a squad-sphere (cube + subdivide with smooth) and then snap and bool that, into the corner. It keeps everything quad'ed lowers the poly count and smooths and bakes better.
If it was a more complex object and it would take a significant amount of time to remodel, I might leave it alone if it looked decent after textures were applied, but on something this simple, dude... do it right.
I just wrote this up for a client, might help you...
Modeling with Face-Weighted Normals
For fast real-time rendering and small file sizes, it is best to use as few vertices as possible while maintaining necessary detail.
Flat surfaces with smooth bevels.
Each vertex of a 3D surface has one or more "vertex normals" which contribute to the shading (shown below in green). These normals can be manipulated with tools in 3ds Max, Blender, Maya, etc. and the modified normals are supported in most game engines.
Bevels can be added, and vertex normals can be adjusted for clean shading.
Left to right in the image above:
With this technique, the transitions in smooth shading are confined to the beveled faces of the model, resulting in clean well-ordered shading with a minimal number of vertices. Face-weighted normals are a good choice for flat surfaces with curved bevels along the edges to create the illusion of rounded bevels but using very few vertices.