3ds max: Symmetry modifier causing Normal map issues (RESOLVED)
Hello, I have been experiencing issues with my normal maps ever since I installed 3ds max 2017.
No matter what model I am creating I always run into this problem. In fact I can easily recreate the issue with any model as I have demonstrated below.
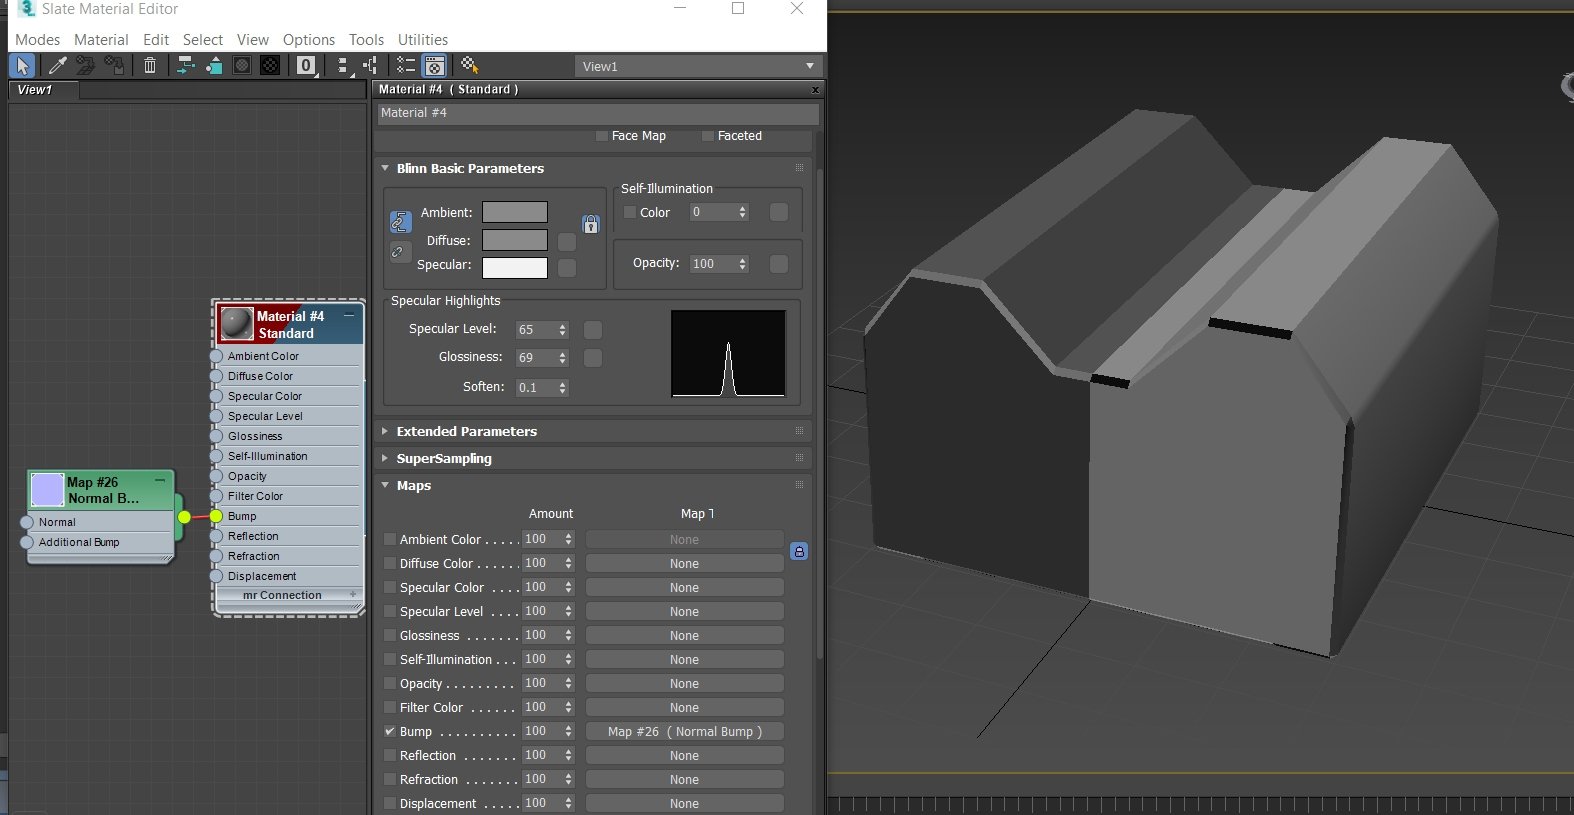
The problem is that whenever I apply a symmetry modifier to any model and collapse the modifiers (problem still remains without collapsing symmetry modifier) and if I apply a normal map to the material (even without adding an actual normal map to it just the normal bump map option it creates a clearly visible problem).
Its like the symmetry is messing up the lighting effects even after been collapsed and even after I try to weld vertexes the problem remains. Iv also tried flipping the green and red channels and just about everything else. Iv also tried flipping the normals of the model and the polygons on both sides but it just makes the problem look different not better, I have also tried different smoothing groups and still to no avail. I have Also tried adjusting the systems gamma/LUT setting as I read that helped someone before but the problem remains.
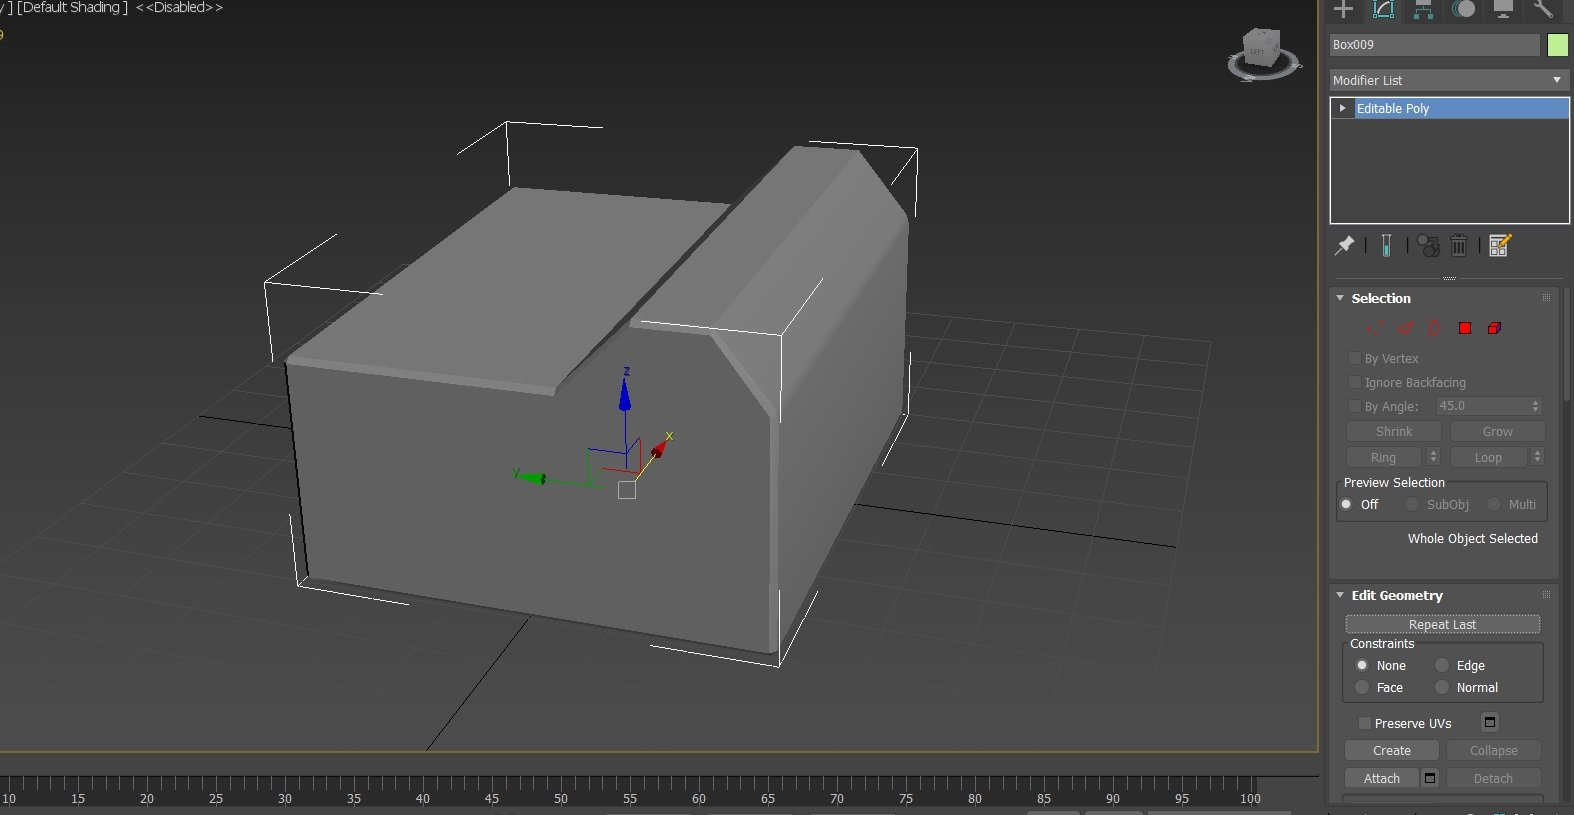
Iv attached 2 images to show the problem which can be easily re-created. The 1st image without the normal bump map and symmetry modifier and the 2nd image with the symmetry modifier and normal bump map applied.


This issue doesn't seem to affect my models in game engines or sketchfab ect, which I have been able to work around and just ignore, but it means I cant render any decent images from 3ds max itself ,and also when I try to bake maps in substance this error seems to affect the bakes the same way which is annoying and mainly why I'm looking for a solution to this problem.
Any help at all is appreciated.
Thank you guys.
No matter what model I am creating I always run into this problem. In fact I can easily recreate the issue with any model as I have demonstrated below.
The problem is that whenever I apply a symmetry modifier to any model and collapse the modifiers (problem still remains without collapsing symmetry modifier) and if I apply a normal map to the material (even without adding an actual normal map to it just the normal bump map option it creates a clearly visible problem).
Its like the symmetry is messing up the lighting effects even after been collapsed and even after I try to weld vertexes the problem remains. Iv also tried flipping the green and red channels and just about everything else. Iv also tried flipping the normals of the model and the polygons on both sides but it just makes the problem look different not better, I have also tried different smoothing groups and still to no avail. I have Also tried adjusting the systems gamma/LUT setting as I read that helped someone before but the problem remains.
Iv attached 2 images to show the problem which can be easily re-created. The 1st image without the normal bump map and symmetry modifier and the 2nd image with the symmetry modifier and normal bump map applied.


This issue doesn't seem to affect my models in game engines or sketchfab ect, which I have been able to work around and just ignore, but it means I cant render any decent images from 3ds max itself ,and also when I try to bake maps in substance this error seems to affect the bakes the same way which is annoying and mainly why I'm looking for a solution to this problem.
Any help at all is appreciated.
Thank you guys.

Replies
-Add a normals modifier and reset all the normals.
-Weld all verticies with small weld size.
-Reset Xform and collapse the model. Then check the face direction by turning on backface culling.
-Add uv modifier and collapse.
Let me know if anything worked. If not can you post the model so we can experiment?
Iv tried all of those ideas on the model I am working on at the moment.
None of them worked to resolve the solution however.
I can't understand what the problem is, all I know is that symmetry and mirror are the cause of it.
and yet I never had this problem with earlier versions of 3ds max. The model looks perfect in unreal and sketchfab. even when i apply the normal map in substance it looks fine, but causing problems when baking maps in substance painter. it looks like this even with no normal map applied but with an empty normal bump map slot. Its very odd.
Below is a screenshot of a section of my model with the uv maps and showing the problem with the normal map applied.
I can provide the fbx for this section if that could help?
unless you or someone else has other solutions to try.
I'm about to get off the tube at home so I might go into more detail then. I don't know of any way to fix this in Max but the "hack" method. Basically, you take your UVs and move the symmetrised half UVs to a other patch, mirror them, then set your texture to mirror. This will have correct tangents.
I tried moving the uvs over to the other uv island and flipped them horizontally but the weird bug still remains.
I had suspected this is not exactly the same problem as mine as I am not overlapping any of my uvs to save space or anything.
Even when I try to select inverted uvs nothing gets selected so none of my uvs are inverted until I flip them horizontally myself.
I'm unsure in this instance sorry, this is just Max's weird tangent woes becoming apparent again.
And the problem seems to occur wherever the seam lines in the uvs are located.
For instance if I used a cylindrical unwrap the problem remains but only effects the lighting at the seams.
as seen below.
So I guess symmetry/mirror isn't the problem after all?
When I render it the problem is there, but only renders the problem when any normal map is inserted into the normal bump slot. The seam/weird lighting will appear in the viewport with or without a normal map plugged into the normal slot.
Baked my maps in 3ds max. But from what I can see it doesn't matter what normal map you plug in, it could be a default normal map blue flat color and the problem will still be clearly visible.
I have been able to ignore it until now because the normals look fine in game engines and sketchfab ect but now I am trying to learn substance painter but this 3ds max problem is effecting the map baking procedure in substance.
Edit: There was also a command line switch or similar for the tangent base a few versions back iirc, so maybe that would be something worth looking into.
I have even tried downloading other peoples models from sketch fab and when I apply a normal map to them it makes them look odd too, , it seems hopeless. I know If I even try to create a simple object it will still effect the model once I unwrap it.
Maybe my 3ds max is just messed up? But seems odd that it would just be this one thing that's messed up in the programme.
* (Though gamma 1 should that in theory, but who knows what's going on in regards to texture loading.)
I did disable the gamma completely before but it didn't seem to change anything
This time I disabled it and re applied the materials and seems to have solved the problem!
Thank you @Noren and everybody else for all the help.
I really appreciate it!
They do all point outwards but they also pointed outwards before I disabled the gamma/lut correction.
Its such an odd thing.
Here is a before and after of the whole model. As you can see it was messing up every section of the model not just the body or head ect. Again thank you all very much. Hopefully my headache will disappear also ha ^_^
I think I may have left the normal map without an actual normal map to show it was still causing an issue before applying the normal map.
Now lets hope substance painter can bake maps from the model without issues next ^_^
Thanks again guys! ^__^