combine meshes to continuous mesh
polycounter lvl 11
I'm trying to combine several meshes of a low poly model to be better able to UV-unwrap. There are more than 100 small meshes scattered over one large mesh. See this screen (part of the whole thing):
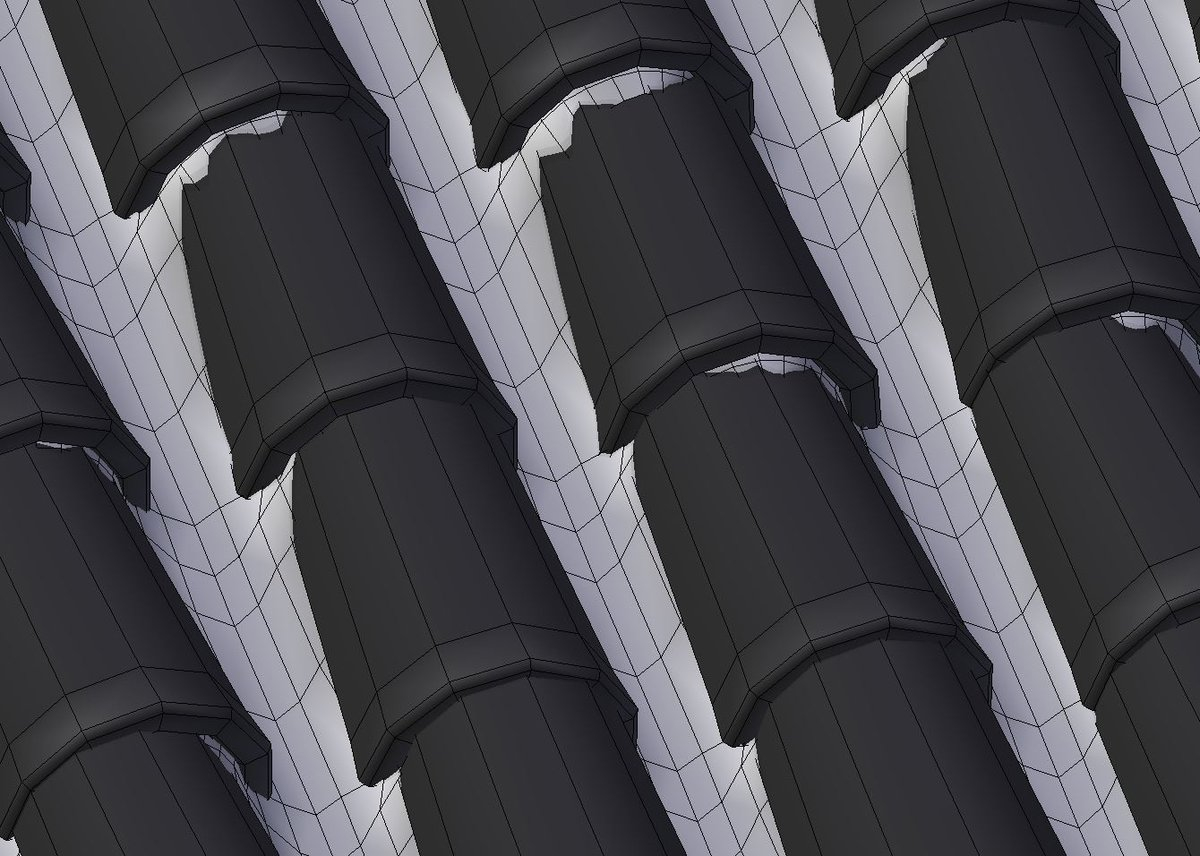
I would like to have one continuous mesh with somewhat decent topology to only have one UV-island in the end.
I have tried several things, but was not able to get a reasonable final mesh. Does anyone of you have any suggestions?
I would like to have one continuous mesh with somewhat decent topology to only have one UV-island in the end.
I have tried several things, but was not able to get a reasonable final mesh. Does anyone of you have any suggestions?
Replies
I'm using Blender. I have a low density subdivided plane with a particle system that spawns a tile (dark grey meshes) at every vertex of the plane. It also randomly rotates every spawned mesh. A displacement modifier offsets all vertices of the plane by a small amount for additional variation.
I'm using the same technique for both the highpoly and lowpoly versions of that roof. By using the same particle system but a different set of spawned roof tile meshes I get the same placement and rotation for both versions.
If I were to do it by hand, I wouldn't only have to touch as many of the 180 tiles as I think I need to once, but twice. Once for the highpoly, once for the low...
How is the end result going to be viewed? In a game, third person camera, running across the roof? Looking down from high above the roofs, rendered in Blender?
Tiles are typically overlapped, not using grout or concrete between them.
Uncharted used pretty simple meshes:
You can see how some of the tiles are offset a little bit. I want to push that a little farther as I want the building in my scene to be more rundown. You can also see the grout between the tiles. There are inverted tiles beneath that, but you dont see them.
This is going to be a modular roof element for a scene in a game engine (UDK at the moment, considering switching over to UE4, although that should only affect later stages of texturing). The mesh is going to be viewed from below, but also from a flying camera on the same height as the roof. The camera's distance from the roof will be about 5-10m.
I would like to have my mesh a little more detail than the one from uncharted. I would especially like have the thin front sides of the tiles modeled out so the mesh reads better when viewed from the ground level.
http://wiki.polycount.com/wiki/MultiTexture
I would use a tiled mesh.
If you want your tiles to look skewed or just give them some variation lighting-wise you could also consider using a macro-normal. It is essentially a small texture with randomized normal colors that uses less tiling than your actual textures and, hence, by covering a bigger area, can help avoid an overly repetitive look.
Scott Homer describes it very well in his tutorial (Vertex 2): https://ryanhawkins.gumroad.com/
Breakdown - Roof
Hope this helps.
I see the benefit of using macro normals, but I still haven't given up on the idea of one continuous mesh for grout and tiles. I have found a cool script for blender that automatically vertices at the intersection between two meshes. I'm trying to find a way to use that along with clever topoogy on my mesh.
@s1dk: I'm not too sure if what you are demonstrating happens in-engine, or while creating modular mehses in the editor. So far, I planned on creating a much bigger module with many more tiles to prevent tiling.
Is what you are showing in '1' actually the only one module you used for an actual scene? If so, I might get away with producing a much smaller module myself, weld all the pieces together by hand and then use vertex painting and macro normals to hide the tiling.
I ended up using a boolean operation to fuse tiles and grout. I had to clean up afterwards manually, that why I reduced the tile number to 42 (from 180).
The overall process was this:
- sculpt hp meshes of ~15 tiles
- set up particle system to place tiles randomly on vertices of subdivided plane. the number and placement of vertices dictates the number and position of the tiles. A displacement modifier added some variation to the placement.
- use the same particle system to place lp meshes for the tiles. these meshes should be air tight to enable boolean operations
- sculpt the grout as a separate object
- decimate the groutmesh to a density that is suitable for a lowpoly. add thickness to the mesh to make it air tight for booleans.
- use a boolean modifier to fuse the two meshes. clean up for better topology/even mesh density/etc.
- to make it tile, i had to go in and edit the edges of the grout highpoly mesh by hand/with the blender sculpting tools. I then adjusted the lp mesh to fit the hp again.
this is what the result looks like:
lowpoly mesh wires:
lowpoly uvs:
lowpoly with normal map and AO (this mesh tiles in both directions to make it modular):
this might not be the best way to do it in a production environment, but it worked and so far I think the result looks quite good. Next up: texturing