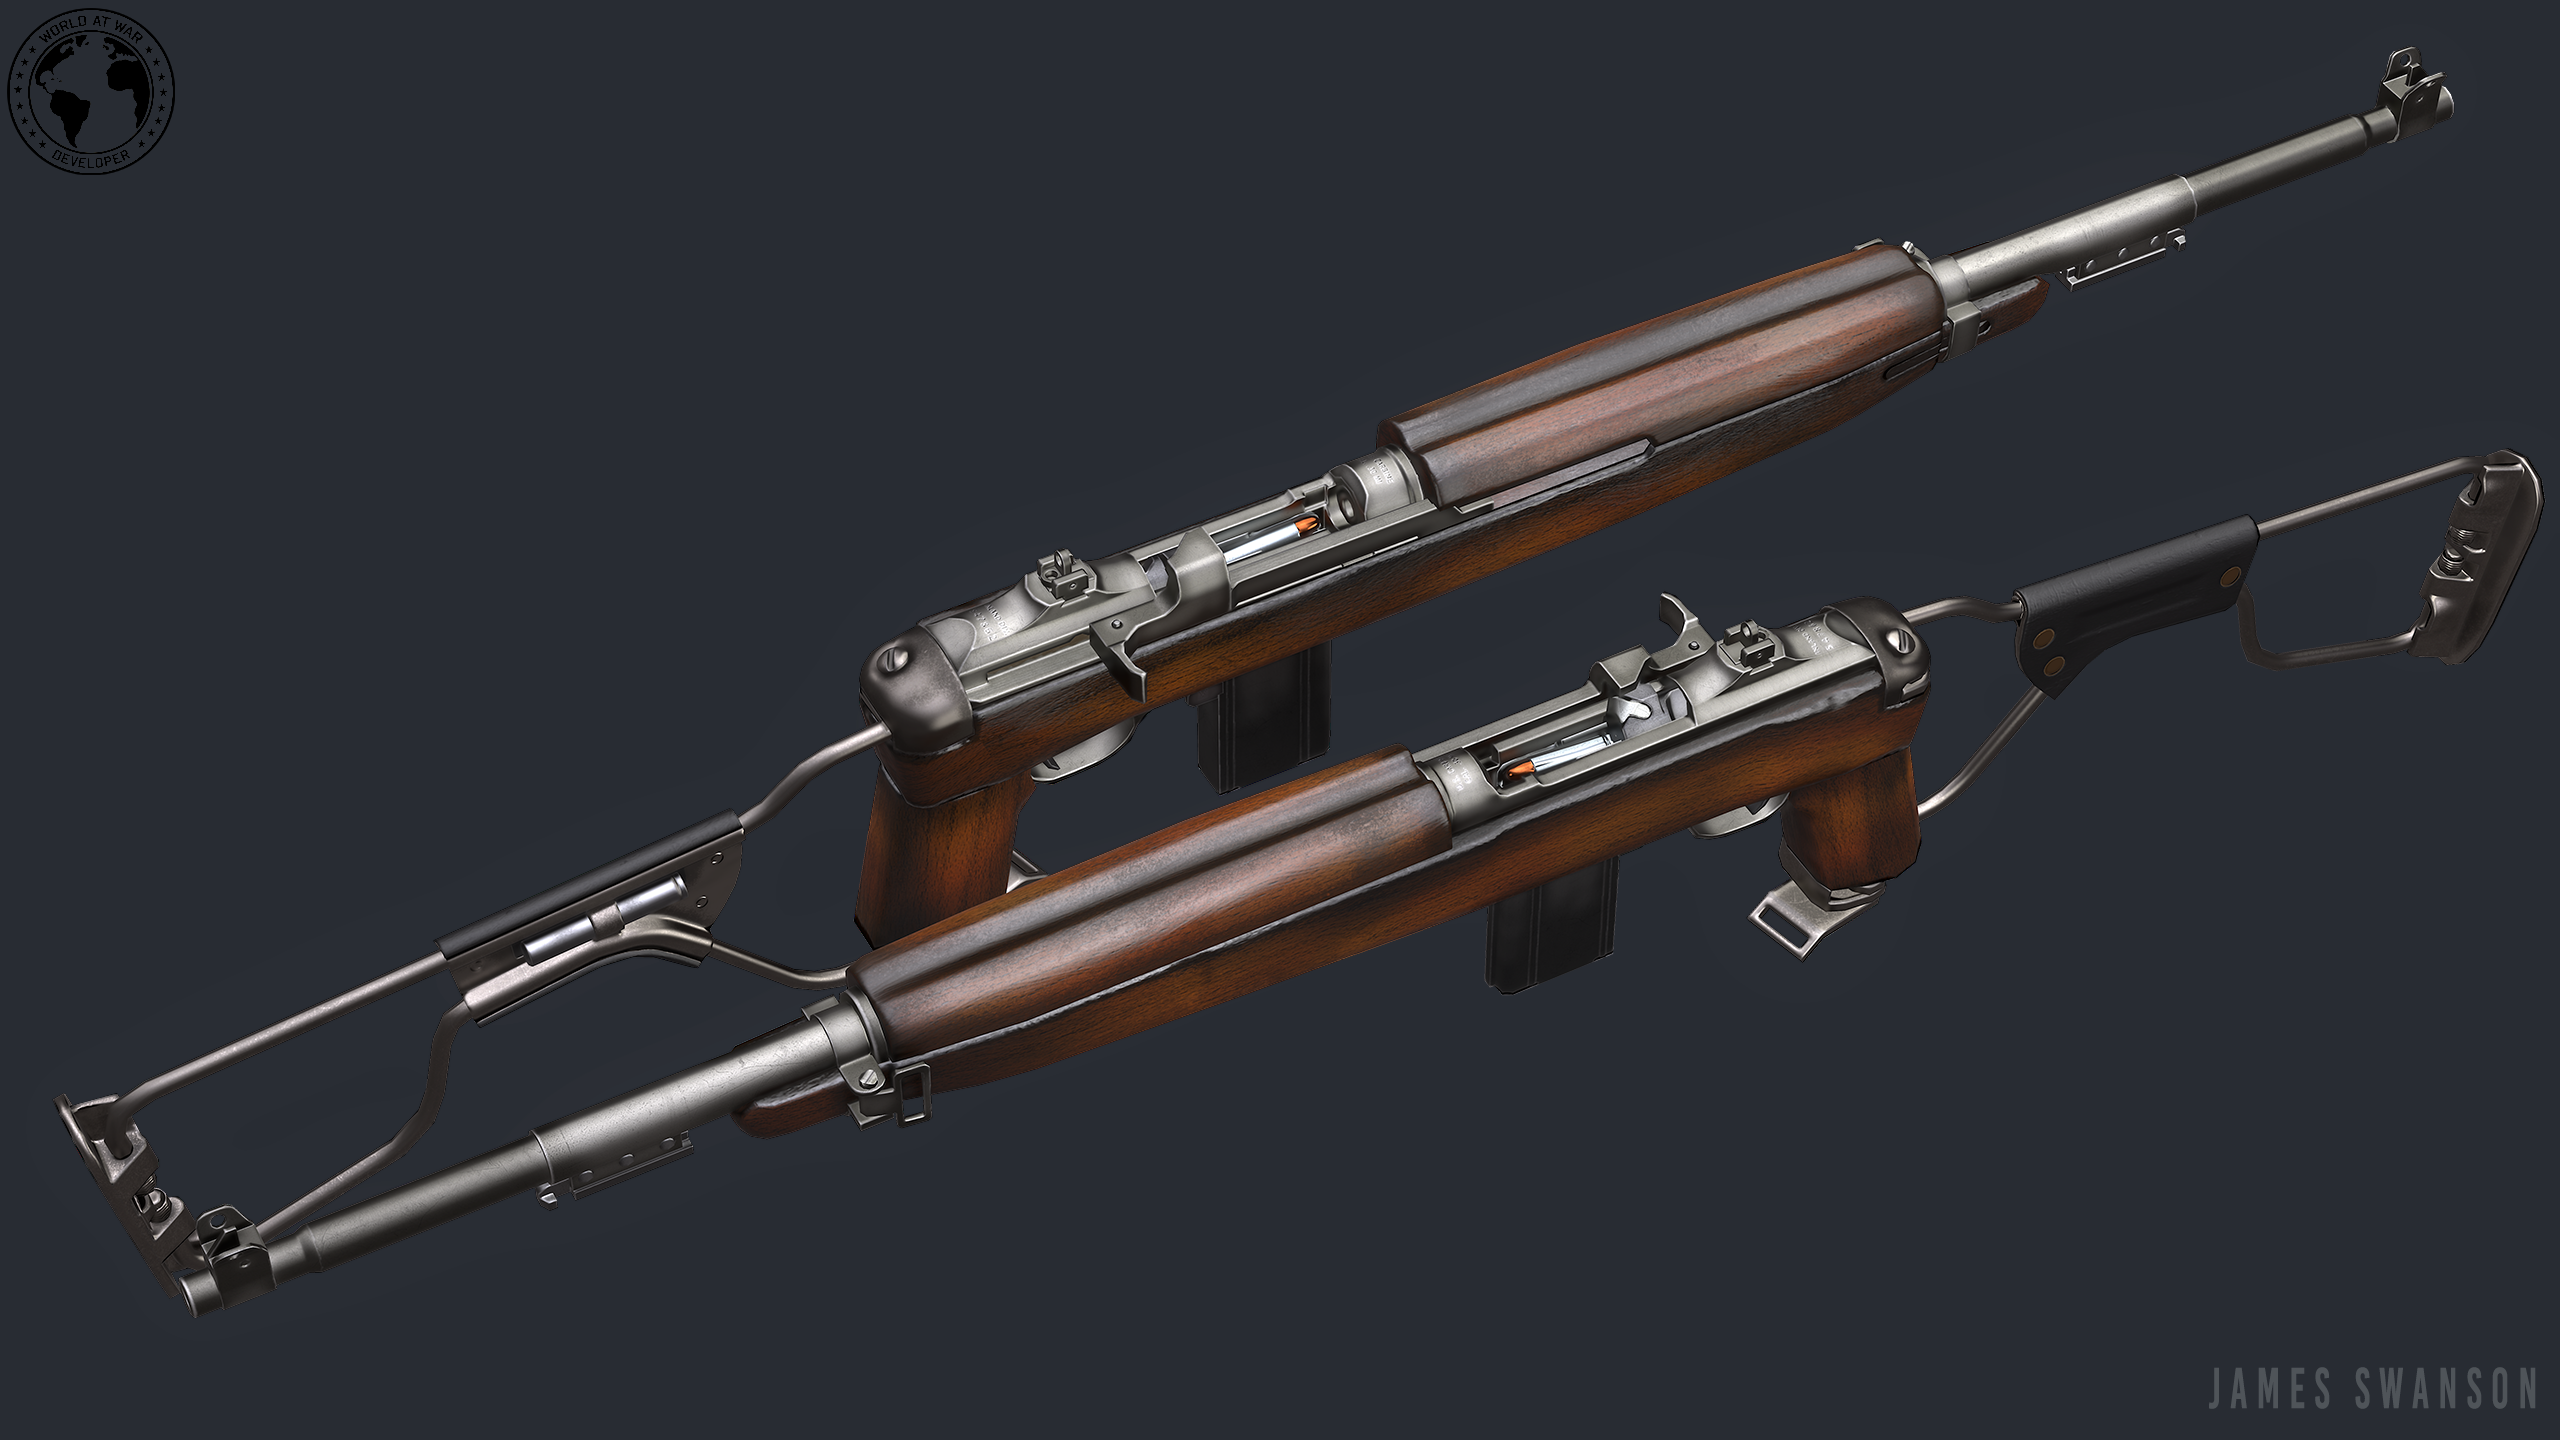
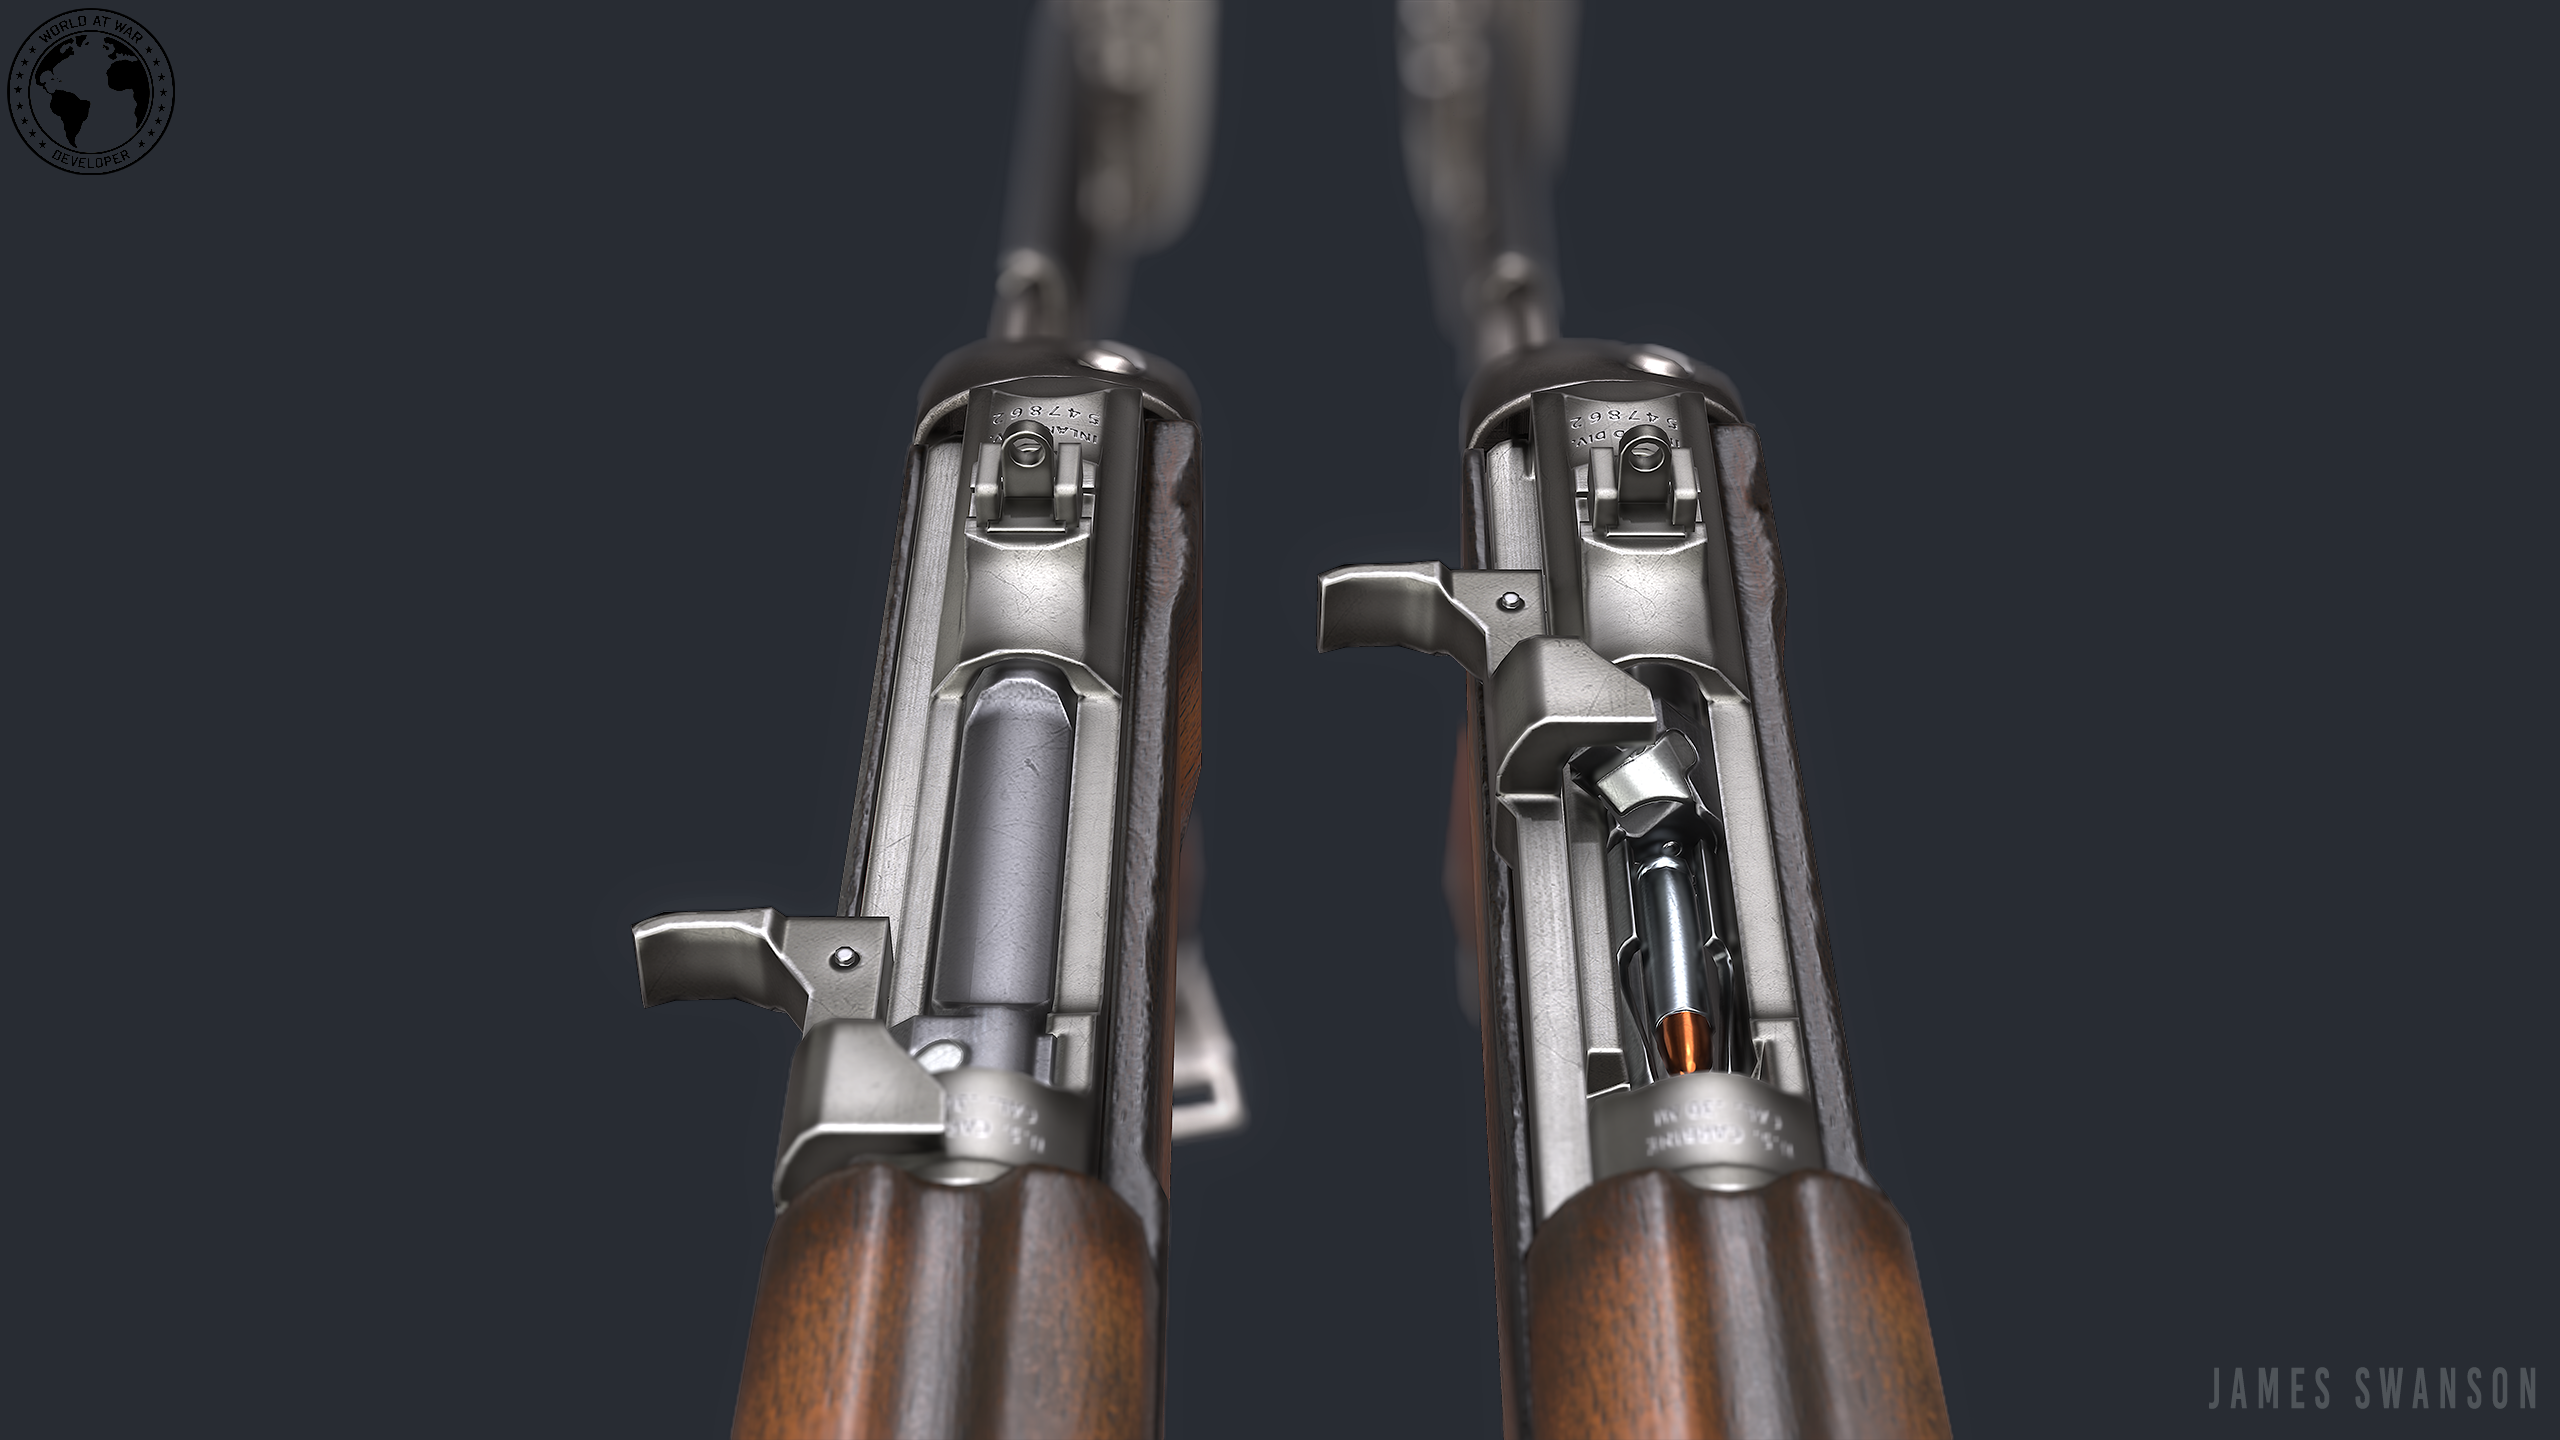
I marked few areas where you could take a closer look, overall shape is nice (maybe a little bit too wide). I ll check rest of the model later -_-
And texture
wood texture is pretty good (what kind of wood was used for this weapon in ww2?)
edges are too bright imho(look for more references), and with this kind of scratches bayonet is looking like it was damaged right after painting (when the paint was still fresh) also i would change metal base color (under the paint) for something darker
mozilla firefox has some programs for bookmarks backup, maybe chrome has something familiar (i'd like to model and texture that gun later )
Thanks for the crits! I went back and made that contour a little pointier. I also elongated the op rod (the middle circle on your picture), since it was a bit too short. I also made the curve of the hand guard a bit less square. Now it looks more like the reference. I also did the folding stock. Here's my HP
progress so far:
Soon I'm gonna bring the wood pieces into Mudbox to add some damage, but I've never used Mud before so it'll be an adventure. I also took a look at the bayonet and adjusted the textures following you crits.
]
Here's the bayonet so far:
As you can see, it's not much different from my previous one, but I did reduce the brightness of the scratches, and I darkened the base metal. I also took away some of the blue tint to the metal as I thought it was a little too much. Lastly, I reduced the amount of dirt on the wood to make it less cloudy/chaotic.
Update: I modeled an M8 rifle grenade launcher with the M9A1 HEAT grenade. I'm planning on modeling a smoke grenade, as well as a flare and possibly a frag.
@Dwalker Thanks, I'll look into that. I had trouble finding a good ref for the size of the bullet. This is the only reference of the ammo with the gun that I could find:
@Odeca Thank you! I did model the original flip sight but I was told to also model the adjustable one.
@Thanks! Whenever I turn on local reflections, the reflections are really grainy/low res, but I'll look into that. Anyways, breaking for the day but I just finished the HP rifle grenades:
Yeah it will be a little low res in the viewport, when you export out a rendered image it super-samples and improves the quality though. If you export crazy big like 3840x2160 and then resize to 1080 it looks better as well.
@Odeca I feel like an idiot for googling "abitious", thinking it was a word I didn't know
The project is a multi-era FPS called "World at War", not to be confused with Call of Duty: World at War. I'm just making some guns for them since I have no experience with a team. I'm not sure where it'll go, but it's a lot of fun, so I'll keep doing it.
Edit: I enabled local reflections and downsampled from 3840x2160 to 1080p. I could've used a scene with more shiny metal, but I think it looks better:
Alright so I've made a picture showing all of the different elements that will make up the gun. I'm confused as to how I should break it up though. To get all of the elements+notes in one image, I made it 4k, so a link is here
So basically, I'm wondering how guns are split up in video games. I was thinking of doing one texture for every one of the elements on that image (excluding the full gun on the bottom). Then I could utilize the most texture space no matter what gun config I'm using. All of the elements would be:
-5 rifle grenades
-MK2 grenade for use alone, as well as use with the adapter as a rifle grenade
-Base mesh that never changes (hand guard, receiver, etc) I included the small flip sight in the base mesh since that's what the user would get by default, and it takes up a very small amount of UV space.
-Adjustable sight attachment
-Rifle grenade mount
-Bayonet
-Full stock assembly
-Folding stock assembly
So 12 totally different textures in all. The resolution could range from 2k to 512, depending on the size of the asset. I'm just not sure if this is the right way to do this. Should I be jamming all of the accessories into one large texture? I don't want to unwrap all of the models, bake, and then figure out that my method is dirty/inefficient.
I think that's not a big deal, I'd personally go with sight attachments, bayonet and rifle grenade mount in the same sheet, just because I fid it more easy to texture everything togheter rather then jump over a file to another.
So let's say you are going to split these 3 I mentioned: assuming you are going to make Diffuse,Normal,Specular,Gloss it's about 12 different textures in total.
Having them in the same sheet makes them 4 instead which is kinda less confusing IMO
I just find it more pratical to avoid split things that ain't going to be re-used on other models as well
I was just worried that using all those textures would be inefficient or something, but since it's just a matter of making the texturing process a little more confusing (having to switch between files and whatnot) I think I'll just do totally different textures for each element since that way I'll utilize the most UV space. Starting the LP process right now.
Hey dude, sure thing. I'm not sure how much these will help you but anyways, HP on left, LP on right:
Knowing that the receiver needs to fit into the cavity, I used the shape of the receiver (from a top-down ref) to trace the hole. I didn't bother creating an actual base inside of the cavity since that's never seen and it'd be a waste of time. Make sure you have a support loop on both the inside and outside of the cavity. If you're doing a gun like this, you'll want to make a cavity for the trigger guard as well. I'm not sure I understand your question with the cage
Sure thing. For the receiver, I started in the chamber and worked my way to the outside. I used the inside of the chamber as a template for the bolt so that they'd fit nicely together.
I tried doing the outside first, but it got too messy when I got to the chamber, so I redid it, this time making the chamber first priority, and then I worked my way outward. The rear of the receiver is the last thing I did, and since there were some flat faces, I was able to get away with some ngons, which I wouldn't be able to do if they were in the chamber. Hope this helps. I'll clarify anything, just ask!
As for the blade, I'm using a metalness workflow for UE4, so I can't edit the spec level of nonmetals. Do you think taking the gloss of the wood down would help? As for the grain, I do have some coming through in the normal, but I could sharpen it a little bit. Thanks for the crits.
Hm, try using more polys and bevel some parts to get a better silhouette, I dont know if you want to use it in first person, but it looks pretty sloppy in FPV so far, dont be scroogey on that
(Also if its going to be used, make the hole in the back sights bigger) Highpolys look all pretty sweet
@Shrike Yeah, I realized a bit too late that my silhouette is too jagged, especially on the front of the stock. I've already gone back and added more segments to smooth it out. Thanks for the crits, and I'll definitely change the size of the hole on the sights.
Edit: (kind of) what it would look like when preparing to fire a rifle grenade:
Everything is unwrapped. Base mesh, folding stock, M8 launcher and HEAT grenade are all baked. I have to tweak some stuff before I bake the other models.
@Pedro Hm, I added a lot of geo a few days ago because I got the same crit, so I'm not seeing where the silhouette isn't good enough. Where exactly should I add geo? A few days ago I added geo to the pieces that are close to the player in FPV, but maybe I missed something.
Hey dude, sure thing. I'm not sure how much these will help you but anyways, HP on left, LP on right:
Knowing that the receiver needs to fit into the cavity, I used the shape of the receiver (from a top-down ref) to trace the hole. I didn't bother creating an actual base inside of the cavity since that's never seen and it'd be a waste of time. Make sure you have a support loop on both the inside and outside of the cavity. If you're doing a gun like this, you'll want to make a cavity for the trigger guard as well. I'm not sure I understand your question with the cage
Let me know if you need any clarification
I'm surprised you would model the lowpoly this way. It looks like every single detail in the high poly is matched in the low, even stuff that would never be seen in game. Really, the low poly mesh should just be a shell of the out areas that are visible. If you model in all the internal faces, you waste a lot of triangles and texture space as well.
Unless you plan on having an ingame animation where the model is disassembled, modeling the low this way is quite inefficient.
@EQ Yeah, that model on the right isn't the LP, it's the unsmoothed HP. I was just showing that to show where my supports were. I did have to leave in the actual cavity so there isn't geo in the way of the chamber, but I took out the walls on the inside completely.
@EQ Yeah, that model on the right isn't the LP, it's the unsmoothed HP. I was just showing that to show where my supports were.
i think you should try using a lot more support loops. there are a lot of hard plane changes with no support (like where the stock curls in around the cutout for the action) and it makes for a soupy model when subdivided. also it's usually a bad idea to use triangles around actual plane changes in an HP (they're fine on flat surfaces but usually not what you want on a curve).
@Amsterdam Thanks, I'll keep that in mind! I did bring the HP into mudbox and I smoothed some issues out, and I also added some scratches/gashes, so there shouldn't be any noticeable errors.
@Pedro Thanks for the pic! For the front part (just above the chamber) I actually did already add some geo. I guess I forgot to make a progress pic. However, I didn't think I needed any more geo on the piece in the back, but I'll add some and rebake. Thanks for the tips!
Edit: And I almost forgot the progress pic...again:
Yeah, really anything that can be seen up close from FPV shouldn't have any visible jagged edges. Modern GPUs can push a lot of triangles so it doesn't make much sense to go super optimized lowpoly for a gun that would take up 20% of the screen.
Thanks for your crits everyone. I went all the way back and chamfered the edge around the top. I also added segments to the hinge for the stock. I totally remodeled the recoil plate cover (that thing with a screw in it), and I also remodeled the screw as it was giving me some weird shading before. Lastly, I added a couple segments on the back piece of the stock (just above the back of the hand grip) to make it smoother. The corner on the stock is now much smoother, and more closely matches the HP, which gave it a cleaner bake.
Quick update: I'm baking all of the grenades. The MK2 frag is turning out okay except for the smoothing errors on the body of the grenade. I'm not sure how to get rid of them. I know I could separate the UV shells and put everything on different smoothing groups, but that would be hell to texture- right now I have the bumpy part of the body as one UV shell, and therefore one smoothing group. Will these errors even be visible when it's fully textured? If so, I gotta figure out how to fix this.
@EQ Thanks. Hmmmmm. I already tried doing all of the things you listed. I think it's because those grooves on the body are almost at a right angle, so they should be on different UV shells. But doing that would be extremely difficult to texture, and would increase the vert count due to all the double verts. Not sure what tado here
Not sure if it's needed, but here are my UVs for the grenade:
Edit: I just did all of the xView checks in Max. Nothing seems to be wrong with the mesh.
Update: I'm texturing the HEAT rifle grenade. Progress so far:
heres the material I'm trying to emulate. I'm trying to make it a little less antique looking so it doesn't look like it was dug up from the ground. The texture isn't done.
Edit: If anyone is confused, I'm doing the early WW2 version of the M9A1 HEAT grenade. They changed the color scheme to olive drab with yellow markings later during the war, but yellow looks a lot more interesting compared to olive drab, which is seen everywhere in older WW2 assets. The yellowness also allows players to see the projectile more easily.
I'm not sure why I'm getting those jagged edges on my shadows. I have high res shadows on, and I'm supersampling from 4k to 1440p. I'd love some input on the grenade.
you have a great ref from that pic, try to emulate the dirt and scratches and paint wear placement exactly like it , right now it seems someone has been using this grenade to polish walls.
Replies
And texture
wood texture is pretty good (what kind of wood was used for this weapon in ww2?)
edges are too bright imho(look for more references), and with this kind of scratches bayonet is looking like it was damaged right after painting (when the paint was still fresh) also i would change metal base color (under the paint) for something darker
mozilla firefox has some programs for bookmarks backup, maybe chrome has something familiar (i'd like to model and texture that gun later )
Thanks for the crits! I went back and made that contour a little pointier. I also elongated the op rod (the middle circle on your picture), since it was a bit too short. I also made the curve of the hand guard a bit less square. Now it looks more like the reference. I also did the folding stock. Here's my HP
progress so far:
Soon I'm gonna bring the wood pieces into Mudbox to add some damage, but I've never used Mud before so it'll be an adventure. I also took a look at the bayonet and adjusted the textures following you crits.
]
Here's the bayonet so far:
As you can see, it's not much different from my previous one, but I did reduce the brightness of the scratches, and I darkened the base metal. I also took away some of the blue tint to the metal as I thought it was a little too much. Lastly, I reduced the amount of dirt on the wood to make it less cloudy/chaotic.
Thanks again for your crits!
@Odeca Thank you! I did model the original flip sight but I was told to also model the adjustable one.
Yeah it will be a little low res in the viewport, when you export out a rendered image it super-samples and improves the quality though. If you export crazy big like 3840x2160 and then resize to 1080 it looks better as well.
@Odeca I feel like an idiot for googling "abitious", thinking it was a word I didn't know
The project is a multi-era FPS called "World at War", not to be confused with Call of Duty: World at War. I'm just making some guns for them since I have no experience with a team. I'm not sure where it'll go, but it's a lot of fun, so I'll keep doing it.
Edit: I enabled local reflections and downsampled from 3840x2160 to 1080p. I could've used a scene with more shiny metal, but I think it looks better:
dat inter-object reflection
So basically, I'm wondering how guns are split up in video games. I was thinking of doing one texture for every one of the elements on that image (excluding the full gun on the bottom). Then I could utilize the most texture space no matter what gun config I'm using. All of the elements would be:
-5 rifle grenades
-MK2 grenade for use alone, as well as use with the adapter as a rifle grenade
-Base mesh that never changes (hand guard, receiver, etc) I included the small flip sight in the base mesh since that's what the user would get by default, and it takes up a very small amount of UV space.
-Adjustable sight attachment
-Rifle grenade mount
-Bayonet
-Full stock assembly
-Folding stock assembly
So 12 totally different textures in all. The resolution could range from 2k to 512, depending on the size of the asset. I'm just not sure if this is the right way to do this. Should I be jamming all of the accessories into one large texture? I don't want to unwrap all of the models, bake, and then figure out that my method is dirty/inefficient.
So let's say you are going to split these 3 I mentioned: assuming you are going to make Diffuse,Normal,Specular,Gloss it's about 12 different textures in total.
Having them in the same sheet makes them 4 instead which is kinda less confusing IMO
I just find it more pratical to avoid split things that ain't going to be re-used on other models as well
I was just worried that using all those textures would be inefficient or something, but since it's just a matter of making the texturing process a little more confusing (having to switch between files and whatnot) I think I'll just do totally different textures for each element since that way I'll utilize the most UV space. Starting the LP process right now.
Knowing that the receiver needs to fit into the cavity, I used the shape of the receiver (from a top-down ref) to trace the hole. I didn't bother creating an actual base inside of the cavity since that's never seen and it'd be a waste of time. Make sure you have a support loop on both the inside and outside of the cavity. If you're doing a gun like this, you'll want to make a cavity for the trigger guard as well. I'm not sure I understand your question with the cage
Let me know if you need any clarification
I tried doing the outside first, but it got too messy when I got to the chamber, so I redid it, this time making the chamber first priority, and then I worked my way outward. The rear of the receiver is the last thing I did, and since there were some flat faces, I was able to get away with some ngons, which I wouldn't be able to do if they were in the chamber. Hope this helps. I'll clarify anything, just ask!
As for the blade, I'm using a metalness workflow for UE4, so I can't edit the spec level of nonmetals. Do you think taking the gloss of the wood down would help? As for the grain, I do have some coming through in the normal, but I could sharpen it a little bit. Thanks for the crits.
(Also if its going to be used, make the hole in the back sights bigger) Highpolys look all pretty sweet
Folding stock:
Full stock:
I added some geo to the full stock so it's smoother for the FPV.
I wanted to add some gashes and deep scratches using Mudbox, so I did that. Here's a bake with the sculpted details:
I've never sculpted before, so any pointers would be appreciated!
Getting bakes done right now:
Edit: (kind of) what it would look like when preparing to fire a rifle grenade:
Everything is unwrapped. Base mesh, folding stock, M8 launcher and HEAT grenade are all baked. I have to tweak some stuff before I bake the other models.
I'm surprised you would model the lowpoly this way. It looks like every single detail in the high poly is matched in the low, even stuff that would never be seen in game. Really, the low poly mesh should just be a shell of the out areas that are visible. If you model in all the internal faces, you waste a lot of triangles and texture space as well.
Unless you plan on having an ingame animation where the model is disassembled, modeling the low this way is quite inefficient.
Here's my LP of that area:
i think you should try using a lot more support loops. there are a lot of hard plane changes with no support (like where the stock curls in around the cutout for the action) and it makes for a soupy model when subdivided. also it's usually a bad idea to use triangles around actual plane changes in an HP (they're fine on flat surfaces but usually not what you want on a curve).
@Pedro Thanks for the pic! For the front part (just above the chamber) I actually did already add some geo. I guess I forgot to make a progress pic. However, I didn't think I needed any more geo on the piece in the back, but I'll add some and rebake. Thanks for the tips!
Edit: And I almost forgot the progress pic...again:
This edge?
LODS are the magic touch, so fuck the tris count in FPV
Triangulate before exporting and making sure you're exporting normals and you don't have any unwelded uvs may help as well.
Remodeled fpv area looks way better btw
Not sure if it's needed, but here are my UVs for the grenade:
Edit: I just did all of the xView checks in Max. Nothing seems to be wrong with the mesh.
heres the material I'm trying to emulate. I'm trying to make it a little less antique looking so it doesn't look like it was dug up from the ground. The texture isn't done.
Edit: If anyone is confused, I'm doing the early WW2 version of the M9A1 HEAT grenade. They changed the color scheme to olive drab with yellow markings later during the war, but yellow looks a lot more interesting compared to olive drab, which is seen everywhere in older WW2 assets. The yellowness also allows players to see the projectile more easily.
I'm not sure why I'm getting those jagged edges on my shadows. I have high res shadows on, and I'm supersampling from 4k to 1440p. I'd love some input on the grenade.