The BRAWL² Tournament Challenge has been announced!
It starts May 12, and ends Oct 17. Let's see what you got!
https://polycount.com/discussion/237047/the-brawl²-tournament
It starts May 12, and ends Oct 17. Let's see what you got!
https://polycount.com/discussion/237047/the-brawl²-tournament
3DS Max Crazy Normals
I'm not 100% if this is caused by normals,
I'm using 3ds Max 2011 and I have some really crazy problems going on.
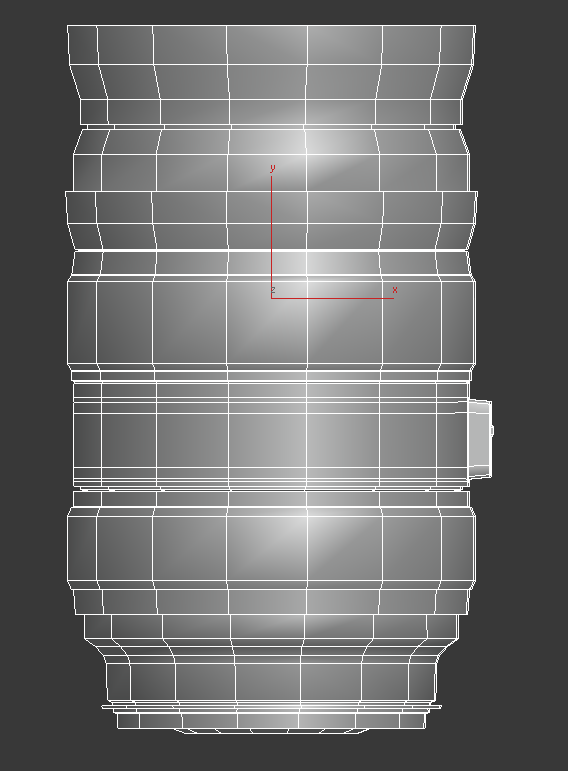
I started with this low poly mesh:

I UV'd it in Headus UV layout
I worked on the high poly in ZBrush but this particular model didn't end up there, I intended to bake down.
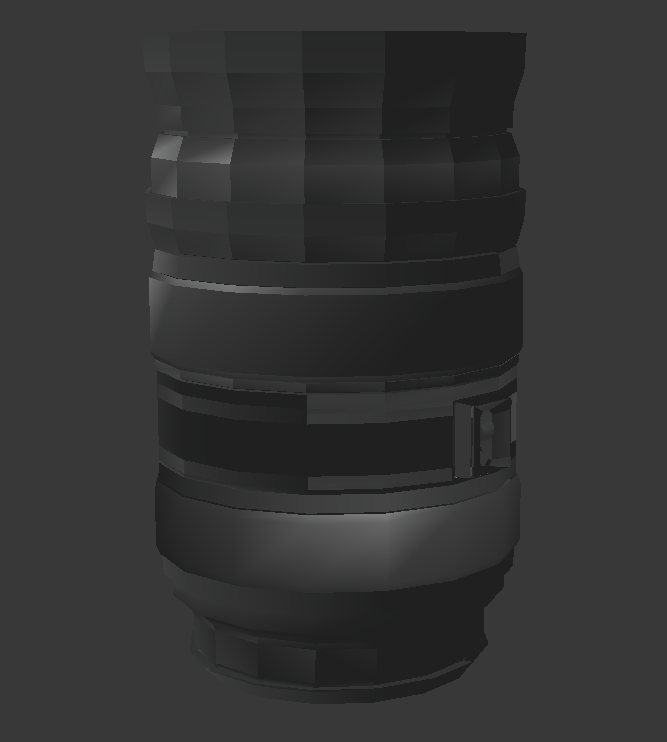
I decided that I didn't need most of the little grooves and indentations and that a normal map would be sufficient so I converted to editable poly and tried to remove them, when I started removing them I got this result:

It looks like the smoothing groups are different but that entire row plus the rows above and below are set to 4.
The weirder part is when I undo this it gives me an even crazier result:

I'm honestly not sure what's causing this, things I've tried:
Resetting XForms,
Checking Polygon Smoothing Groups (several times),
Putting a Normal modifier on and unifying/flipping and checking etc.
I've also tried resetting UV's and even an older version of my model before UVing in case Headus was the culprit.
Furthermore the OBJ exports with this problem as well so it doesn't seem to be Max specific it might be my geometry.
However, my friend who had access to this model managed to do the same thing I was attempting without any issues, so could my Max version be bugged?
If not does anyone have any explanations for why this might be happening?
EDIT:
Tried in Max 2014 student too, same problem so I assume it's my geo although with the amount of problems I've been having I'm starting to warm to the idea of starting again, it's currently halting me at the moment
I'm using 3ds Max 2011 and I have some really crazy problems going on.
I started with this low poly mesh:

I UV'd it in Headus UV layout
I worked on the high poly in ZBrush but this particular model didn't end up there, I intended to bake down.
I decided that I didn't need most of the little grooves and indentations and that a normal map would be sufficient so I converted to editable poly and tried to remove them, when I started removing them I got this result:

It looks like the smoothing groups are different but that entire row plus the rows above and below are set to 4.
The weirder part is when I undo this it gives me an even crazier result:

I'm honestly not sure what's causing this, things I've tried:
Resetting XForms,
Checking Polygon Smoothing Groups (several times),
Putting a Normal modifier on and unifying/flipping and checking etc.
I've also tried resetting UV's and even an older version of my model before UVing in case Headus was the culprit.
Furthermore the OBJ exports with this problem as well so it doesn't seem to be Max specific it might be my geometry.
However, my friend who had access to this model managed to do the same thing I was attempting without any issues, so could my Max version be bugged?
If not does anyone have any explanations for why this might be happening?
EDIT:
Tried in Max 2014 student too, same problem so I assume it's my geo although with the amount of problems I've been having I'm starting to warm to the idea of starting again, it's currently halting me at the moment
Replies
It's not that they are unwelded but that it causes max to rewrite a portion of the file that isn't being updated. Sometimes it clears it up right away sometimes you have to export as obj and import again.
I think the problem comes from the OBJ exporter so if you can, avoid using it, stick to fbx or some other format =/
Thanks so much I'm trying this now!
My friend said the same to me but in my past I've only experienced bugs with FBX and not so many with OBJ, I'm just going to have to experiment to see where each works best it seems
Is there another weld option in Max's Uv editor? The only one I know of is Weld Selected which unfortunately turns the whole thing into a garbled mess with no threshold options.
Or do I weld them on the model behind while the uv editor is open? should I weld just my shells or just ctrl + a and weld that way?
Aha sorry about that I really didn't know what else to call it, I assumed it was a normal problem but I haven't seen any normals this catastrophic before haha
basically its split and locked all your vertex normals - what i like to call maya simulation mode - you just need to force them back to something you can edit.
definitely onto something there, the troublesome polys are showing blue normals not green.
Unfortunately I don't know much about the edit normals modifier and don't know how to change it.
EDIT:
Didn't notice this before but I seem to have normals pointing upwards, all around here, not sure I'd like going around changing all these normals but its all I can do for now, thanks.
I hope someone can help me with a quicker fix though but it'll do for now (:
check out: 3ds max help edit normals for more info
Thanks for the help man (:
A whole new side of normals for me to explore haha
This covers it in greater detail:
[ame="
Thanks for the heads up!
Definitely useful in case I come across a similar problem, in this case though poopipe and MaD were spot on about the edit normals