The BRAWL² Tournament Challenge has been announced!
It starts May 12, and ends Oct 17. Let's see what you got!
https://polycount.com/discussion/237047/the-brawl²-tournament
It starts May 12, and ends Oct 17. Let's see what you got!
https://polycount.com/discussion/237047/the-brawl²-tournament
Learning Zbrush
I would post this in P&P or something, but I'm hoping by making a thread I can get some peoples feedback and critique on what I'm doing / if I'm doing anything in a silly way. Hopefully anyone else learning Zbrush may be able to pick up some things too?
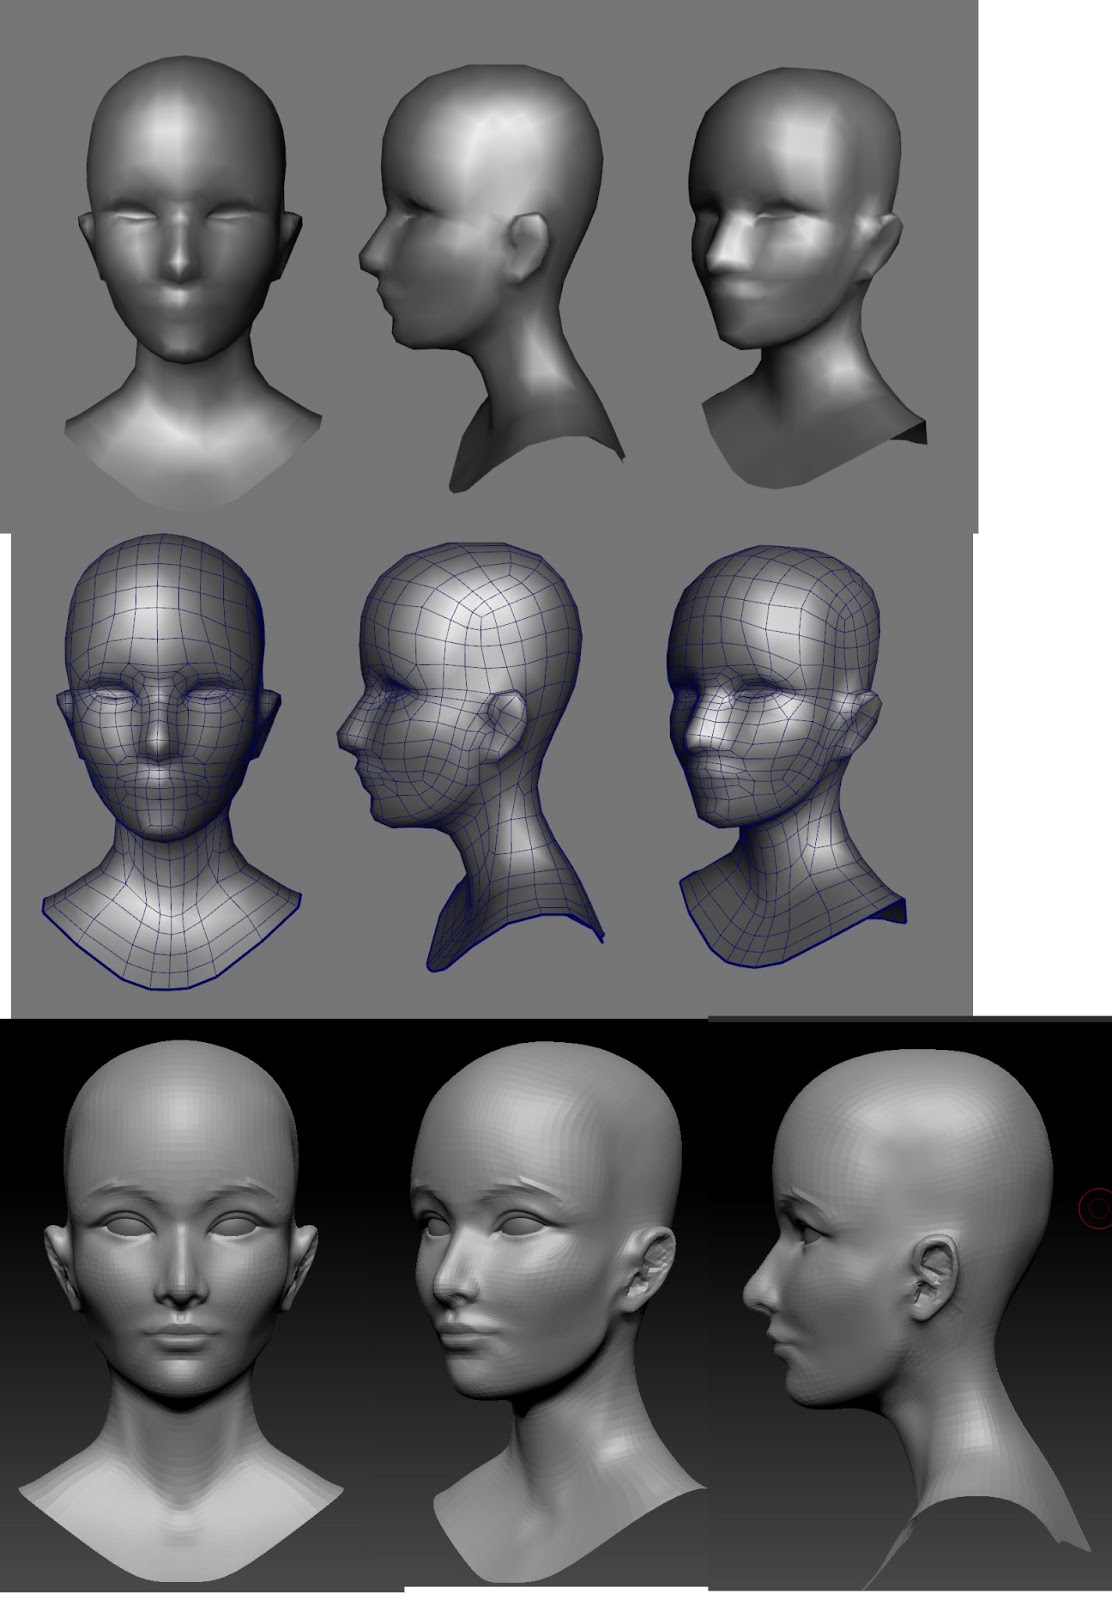
Here is my first real attempt at sculpting a head model. (I've been using Maya for some 5 years or something; but I was always scared to just learn Zbrush - The UI and the hotkeys alienated me)
I've found that by using the GoZ feature I can implement my Maya modelling knowledge a lot into the Pipeline. Below is a couple of hours sculpt (which I'm sure people can do WAY faster) but considering to model this would take maybe a day or so at a push that's not bad!
The way I approached it is this:
-I created a sphere in Zbrush, turned it to an editable poly and just used the Move brush to move bits around as much as I could to create the main shapes of the face. I did this until I was fighting against the spheres topology.
-I decimated the sphere in Zbrush at this point to quite a small polycount, it was a mess of geometry; I GoZ'd this to Maya.
-In Maya I set up a lot of the topology and then sent it back to Zbrush with GoZ.
-I continued with the move and clay brush tool, bouncing between zbrush and Maya with GoZ.
-The brilliant thing with GoZ here is that it sends back the SubDiv level 1 mesh (the base mesh) which you can adjust the flow of, send it back to Zbrush with GoZ and it updates the level 1 mesh, retaining all of the sculpted details in the upper div levels. *ramble ramble* - this is awesome!
-Here's where I'm up too. Still a work in progress.


Replies
The shoulders seemed quite prominent on the previous quick sculpt of the girl, but i see that your changes to the bust have solved that.
Looking really good
Would love to see the sculpt without the glasses though for a closer look.