Udk Bloom Effects, Dirt, and image based lens flares
polycounter lvl 7
Hey folks. I've had a thread running over at the UDK Forums for a while regarding my quest to get true shaped anamoprhic bloom in the Unreal engine. While my original technique only proved to be so useful, I recently was talking with a friend from work, who suggested a new way of doing so which, once I got working, has allowed me to start doing much more advanced work. Figured I can keep an update here if anyone is curious.
Originally I started working with a rough prototype for dirt on the screen and lens flares blurred across the screen. Here was my result:
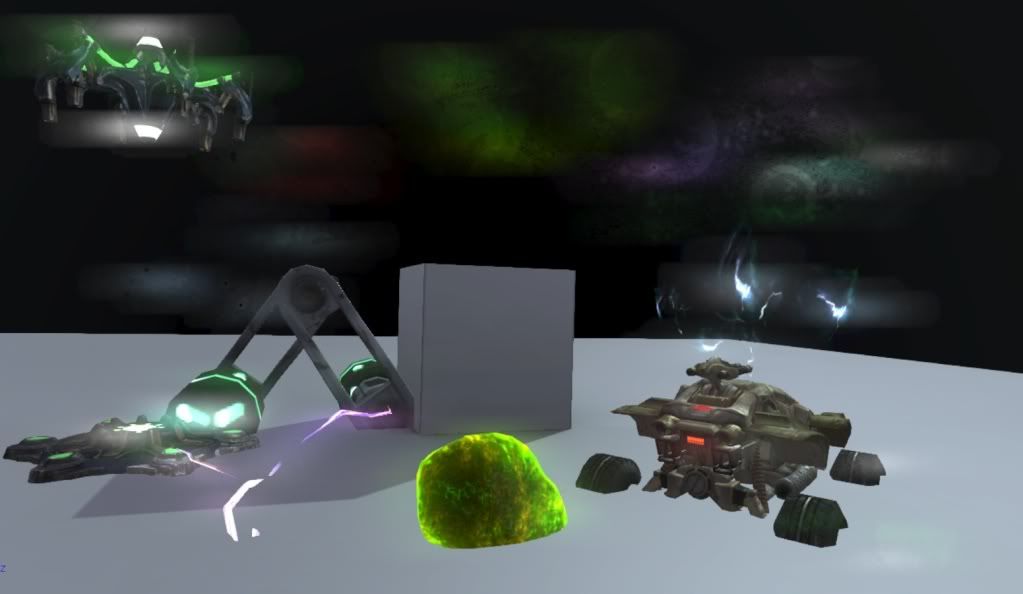
Now, I am going through and creating a much more accurate set of features:
-Weight controlled horizontal bloom
-Weight controlled traditional bloom
-Dirt on the screen from both bloom sources, And from...
-Real image based lens flares
For the dirt on the screen I have been looking at battlefield, as well as John Chapman's demonstration here http://www.gamedev.net/topic/620699-bf3-lens-flares/
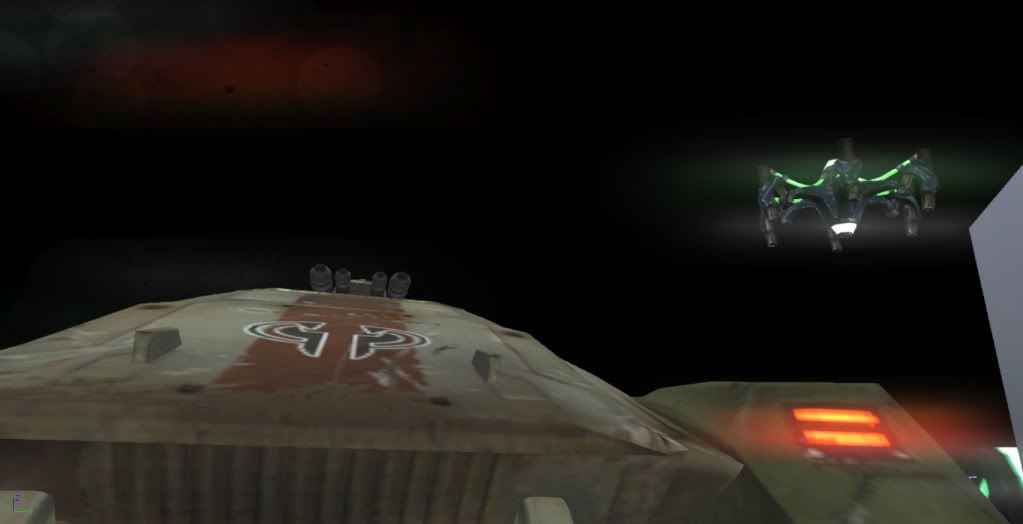
Yesterday I finished tweaking my anamorphic bloom, and rebuilding my process from the ground up to be way more organized and to make this process easier.
Here was my result for a new, much cleaner bloom
Finally I wanted to add that I do have plans for making this completely available to others, pending some checks that have to be made, and this technique is for demonstration purposes. While it can be optimized quite well, it would not work in an actual game, and probably not even in a real environment demo due to some restraints the UDK has
Originally I started working with a rough prototype for dirt on the screen and lens flares blurred across the screen. Here was my result:
Now, I am going through and creating a much more accurate set of features:
-Weight controlled horizontal bloom
-Weight controlled traditional bloom
-Dirt on the screen from both bloom sources, And from...
-Real image based lens flares
For the dirt on the screen I have been looking at battlefield, as well as John Chapman's demonstration here http://www.gamedev.net/topic/620699-bf3-lens-flares/
Yesterday I finished tweaking my anamorphic bloom, and rebuilding my process from the ground up to be way more organized and to make this process easier.
Here was my result for a new, much cleaner bloom
Finally I wanted to add that I do have plans for making this completely available to others, pending some checks that have to be made, and this technique is for demonstration purposes. While it can be optimized quite well, it would not work in an actual game, and probably not even in a real environment demo due to some restraints the UDK has
Replies
Quick question, how did you get the Flare to respect the position of the light source from only an emissive?
I did mine by masking out the 'glow' in Post and down-scaling my SceneTexture on the X axis, but they always churned around the corners.
I know you're going to make this available as you said, but I'm so excited to see what looks like a robust solution without placing billboards everywhere.
Well its hooked up like a regular bloom, so I start with a threshold, recolor it, blur it, then for the flare part (which is going to be tonights goal) I flip it over the both the x and y axis. Hopefully that answers your question. Also, again this wont be as robust as you think :P The biggest problem right now is a delay between camera and when the post shows up. Not super long, but enough to be a small problem. Working on fixing that, but itll probably get longer as the effect is only going to get more expensive the more features I add.
[ame="
So yeah forgive the quality, and forgive the shitty flickering.
It also clipped a bunch of the video off, so Ill fix that...
Also if anyone is interested in the steps I took in my long road here, the thread is over on the UDK forums here:
http://forums.epicgames.com/threads/782846-My-Anamorphic-Quest/
Glad ya dig it. The bloom (non anamorphic needs work) and the flare is based off of the anamorphic shape which is incorrect. I need to get the regular bloom to a bigger shape then use that for both the dirt on screen and the lens flare
Going to post some features and notes, then some images
-True Anamorphic (shaped Bloom) Giving that awesome JJ effect on the screen
-3 Separate bloom passes at various strengths (small large, and medium, the last of which is kinda hard to see but is there)
-Image based lens flares. Everything that blooms, can give a true across the screen flare
-True image based Dirt on the screen. The bloom dictates what dirt appears and where
Some other notes
- How customize able is it? Very. Every Bloom can be controlled, weighted, tinted, and magnified. Every aspect of the lens flare can do the same, as well as move up and down the line from source to the opposite side of the screen. Every Influence on teh dirt on the screen can be controlled individually or separately. So if you want just the large bloom to affect the dirt, but not the flares, you can do that, and vice versa. Each element when compiled can be also controlled by itself. (Want less bloom overall? you can do that).
- How optimized is it. Not that much. It should run ok (the final material is around 15 textures, 160 instructions) but there are over 25 other materials that all form up this process, each varying between 5 and 40 instructions (most on the lower side). There is a delay if I fraps footage but I will be taking a closer look at that and gettinga nice render video out for everyone to see. I should note that I could probably optimize it down farther but I went for customizablility over anything. If you understood what I was doing and was tweaking it yourself you could easily drop the cost in half, maybe far more.
- Is this the same effect that Unreal 4 and Killzone 2-3 have? Yes.
- Can I use this with my own scene? Yes, the entire thing can be copy pasted into other scenes. However....
- What are the downsides? Mostly difficulty to set up. There are around 40 scalar parameters (all clearly named) and 10 Vector 3 Paramaters for tinting. There are 2 HUGE downsides to this post effect though. First, it only works from a Camera placed in the scene, not from the main player camera. This could be tweaked in code I have no doubt. Second, it (as far as I know) cannot read values over 1. This means that if you balance your lighting it will be fine, but if you blast everything out, cough cough foliage demo map cough cough then it will fall apart. There is also, at this point, only 1 threshold for the entire set of effects. Separating them out could be very expensive.
-Will you share? Hell yes I will. I want to document this, and explain how I am achieving this in a future post, then post a basic how to use document to fall into my previous writeups. I will also be editing part 1 of my writeup for this new technique.
-Whats left? Possible optimization, documentation, and maybe some minor tweaks. I may separate the final compilation into more than 1 material. Also making a better dirt on the screen texture.
Anyway guys this has been an awesome path. Thanks to everyone who supported me. Post effects rock. Below are some images with the threshold, and then the full image. Some are for showing functionality, some are for fun
Haha thanks m8. Not a wizard (A man can wish). Just know some highly educated people that made this possible. Its been one crazy learning experience.
Great work dude
Alex
Can't wait to see how you did it
Cheers
Lucas
I don't know if this thread is dead, i've been waiting a long time to see how dralex did this (it's just amazing to me) but i think he moved on so i gave it a shot and came up with something not as good but it could get people started, i shared it on the imbuefx forum.
https://www.imbuefx.com/forum-wp/#/discussion/231/yanns-wip-udk-image-based-anamorphic-lens-flares
I hope it helps
The thread may be dead but I am not. I know I have been insanely silent on here for a LONG time, and I can now give a hint as to why. Right before I was about to share my "how to" I was given the potential opportunity to include the tutorial in an unnamed 3D publication which will be out sometime in the future. I did this a long time ago, so perhaps time is drawing near, however I am not in the know.
For now, keep up the awesome work, and eventually I can share more. Still around to answer specific questions though.
Alex
Any idea?
Probably a problem with the syntax, could you post a screenshot?
And Dralex, i'm really impatient to see your tutorial! Hope it's coming soon!
How did you setup the otput of your custom node? It should be "Float3".
Maybe you should also try a value above "0" for the "steps" input
Hi there,
So where can I get your image based lens flares tutorial in depth?
Cheers
Hey man,
So the write up that I ended up doing wasn't a full in depth tutorial on the image based lens flares, but a write up on getting a custom bloom (the important and hard part of what I figured out how to do). Once you have your own custom bloom, it's a simple matter of flipping the image of the bloom across the axis of your image and scaling it
My Image based lens flares are all shaped blooms of different types, then manipulated in various methods. If you have any specific questions about the last part I would be more than happy to chat about it
Alex