It starts May 12, and ends Oct 17. Let's see what you got!
https://polycount.com/discussion/237047/the-brawl²-tournament
The Polycount Newsfeed


Re: Show your hand painted stuff, pls!
Hey Guys,
This is my last art, a fanart of game Stray.
If you want see more , please, check out my portfolio,
Thanks! ☺️

 matheusoliveira
Re: [UE5] Stylized watermill
Hello!
I started to tweak some luminosity and contrast and also started the work on the foliage; still a lotttt to go but I really like that first pass altough mayeb a bit too cartoony! I think some more grass variation with details and flowers, plus little rock will help to unitize a bit everything.
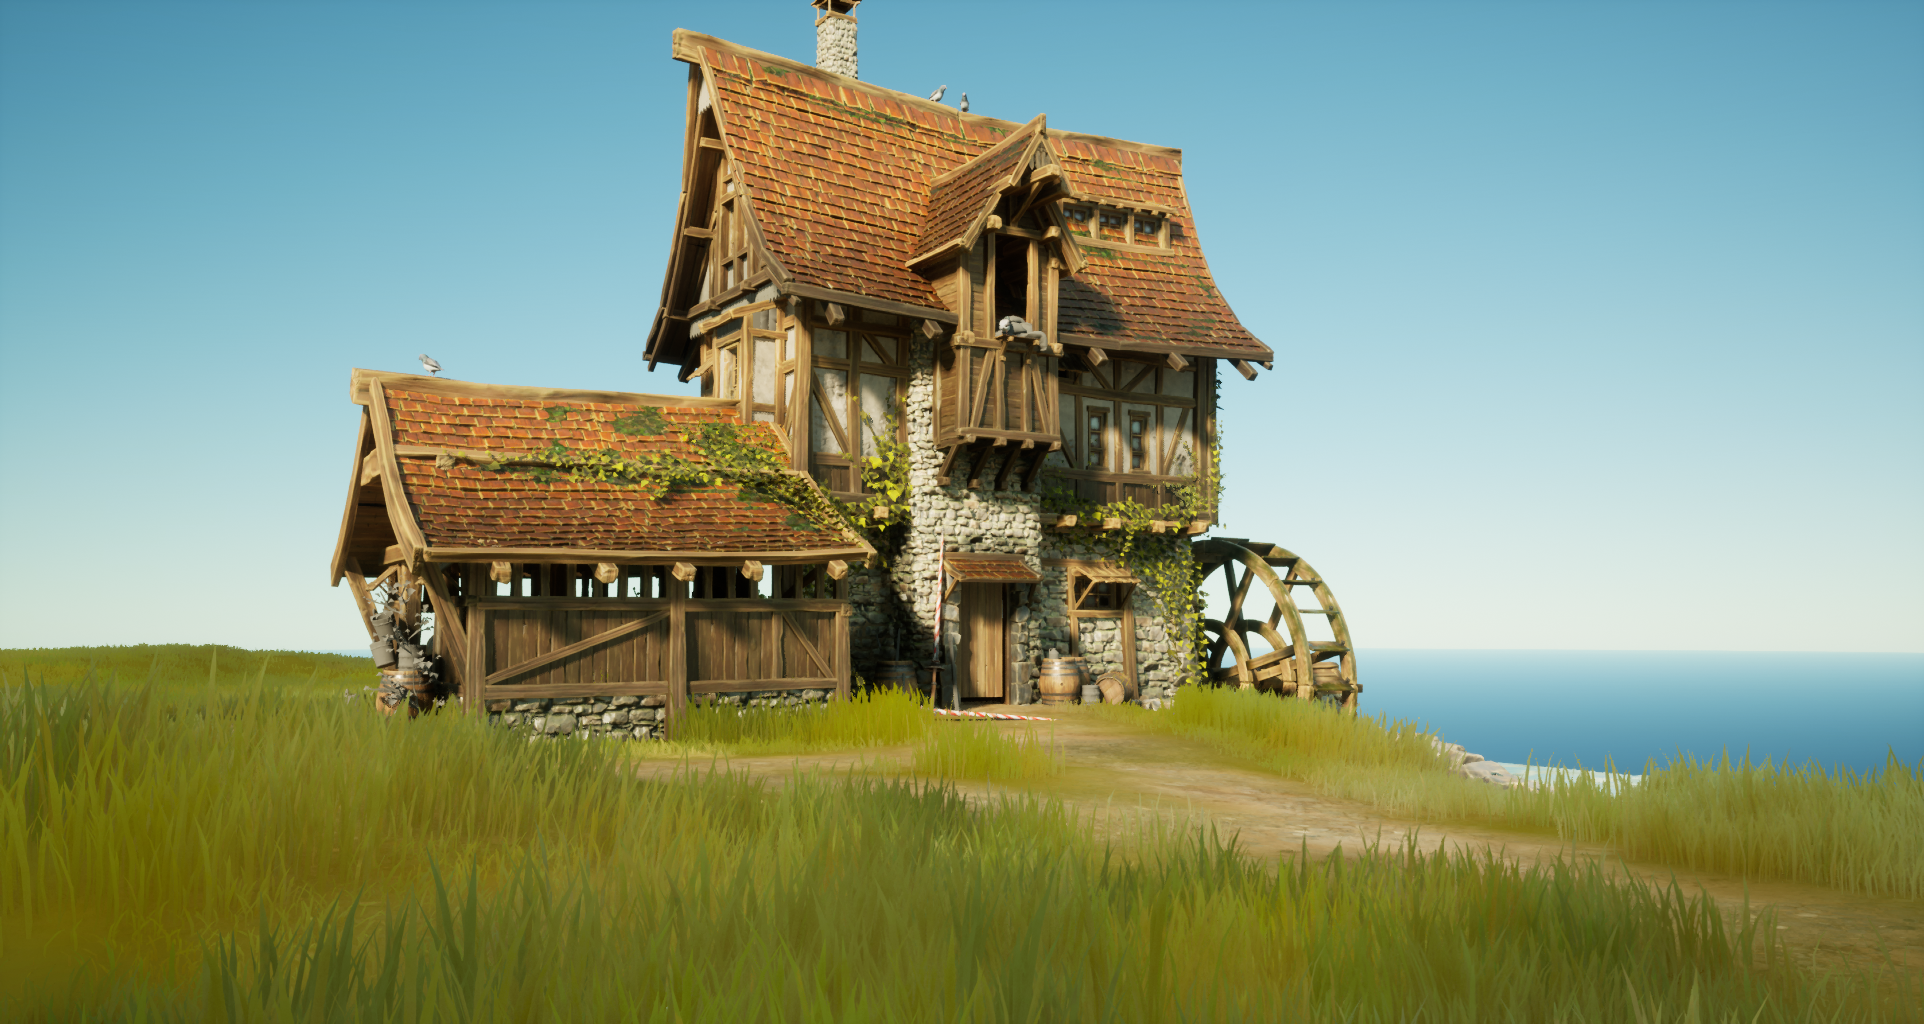
For anyone that might be interested, the account and videos of Victoria Zavorodhnia is a real gold mine! ( https://www.artstation.com/akbutea )
 Olingova


Re: Airbørn
the fuzz was something we experimented quite a bit with. while i am not perfectly happy with what we have in the end, i am pretty happy overall.
we thought about doing it similar to how we did fur on crash bandicoot. with planes placed by hand, transferring normals and UVs. but with that you usually have these weird spots where you can look flat on the plane, which i didnt wanna have here. you can do the best job in the world placing these, but you will always have these moments where the illusion breaks, no matter how much time has been spent
like here on the chest of crash:

So i thought it would be nicer to have this done with particles. It was a bit tricky to set up the shaders but @katzeimsack found the solution for it.
So what we do is spawn 3 different particles on the mesh, based on a RGB mask that tells the particle system "spawn particle A here, B here and C there"

I used to paint these masks but turned out, some randomized camo patterns work just as well.
then we grab the normals, roughness, metalness etc from the mesh it spawns on and apply this to the particle


blend them into the mesh using dithered pixel depth offset (like the moss above)

after that we apply one of the 3 different alphas to the particle UVs, randomize rotation and scale within some boundaries and

the result is this:

the downside is, the particles are spawned at random locations. An alternative would be placing them by hand in your dcc like the fur but orienting them to the camera like the particles in unreal. so we have perfect control over placement. but yeah, lot of manual work for that :)

for the future i would limit the random rotation as well so we do not have occasions like above where a shape floats on top. but it was good enough and we are never thaaaat close.
Sketchfab Spotlight | November 2022

A collection of the latest and greatest pieces from Sketchfab users
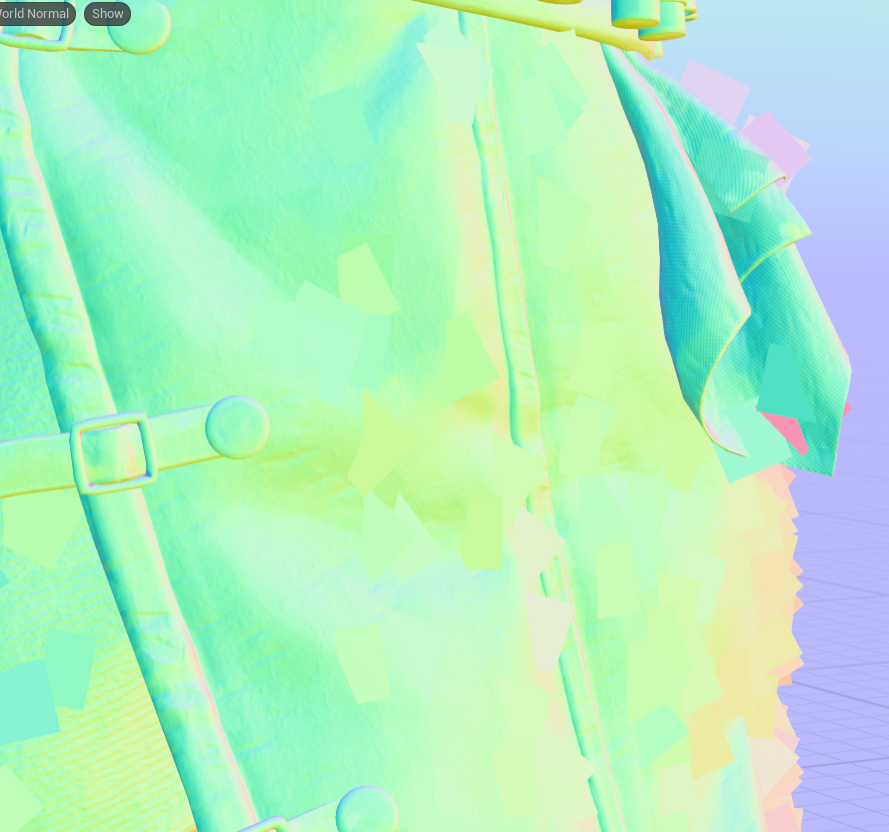
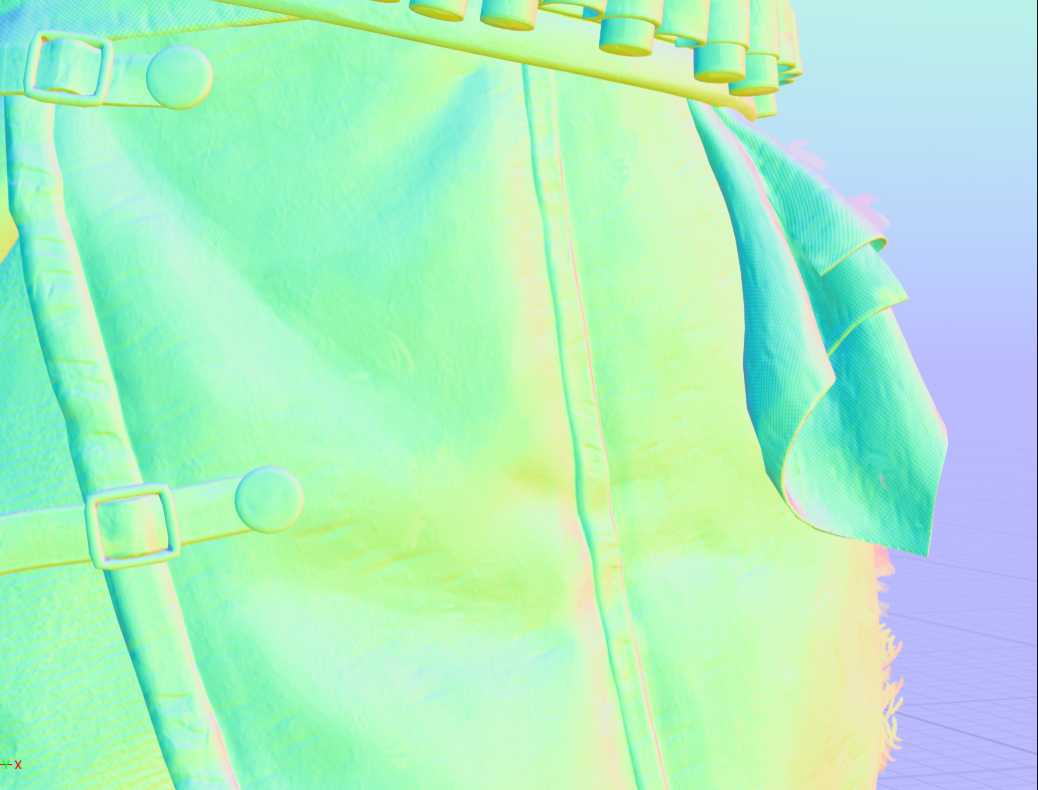
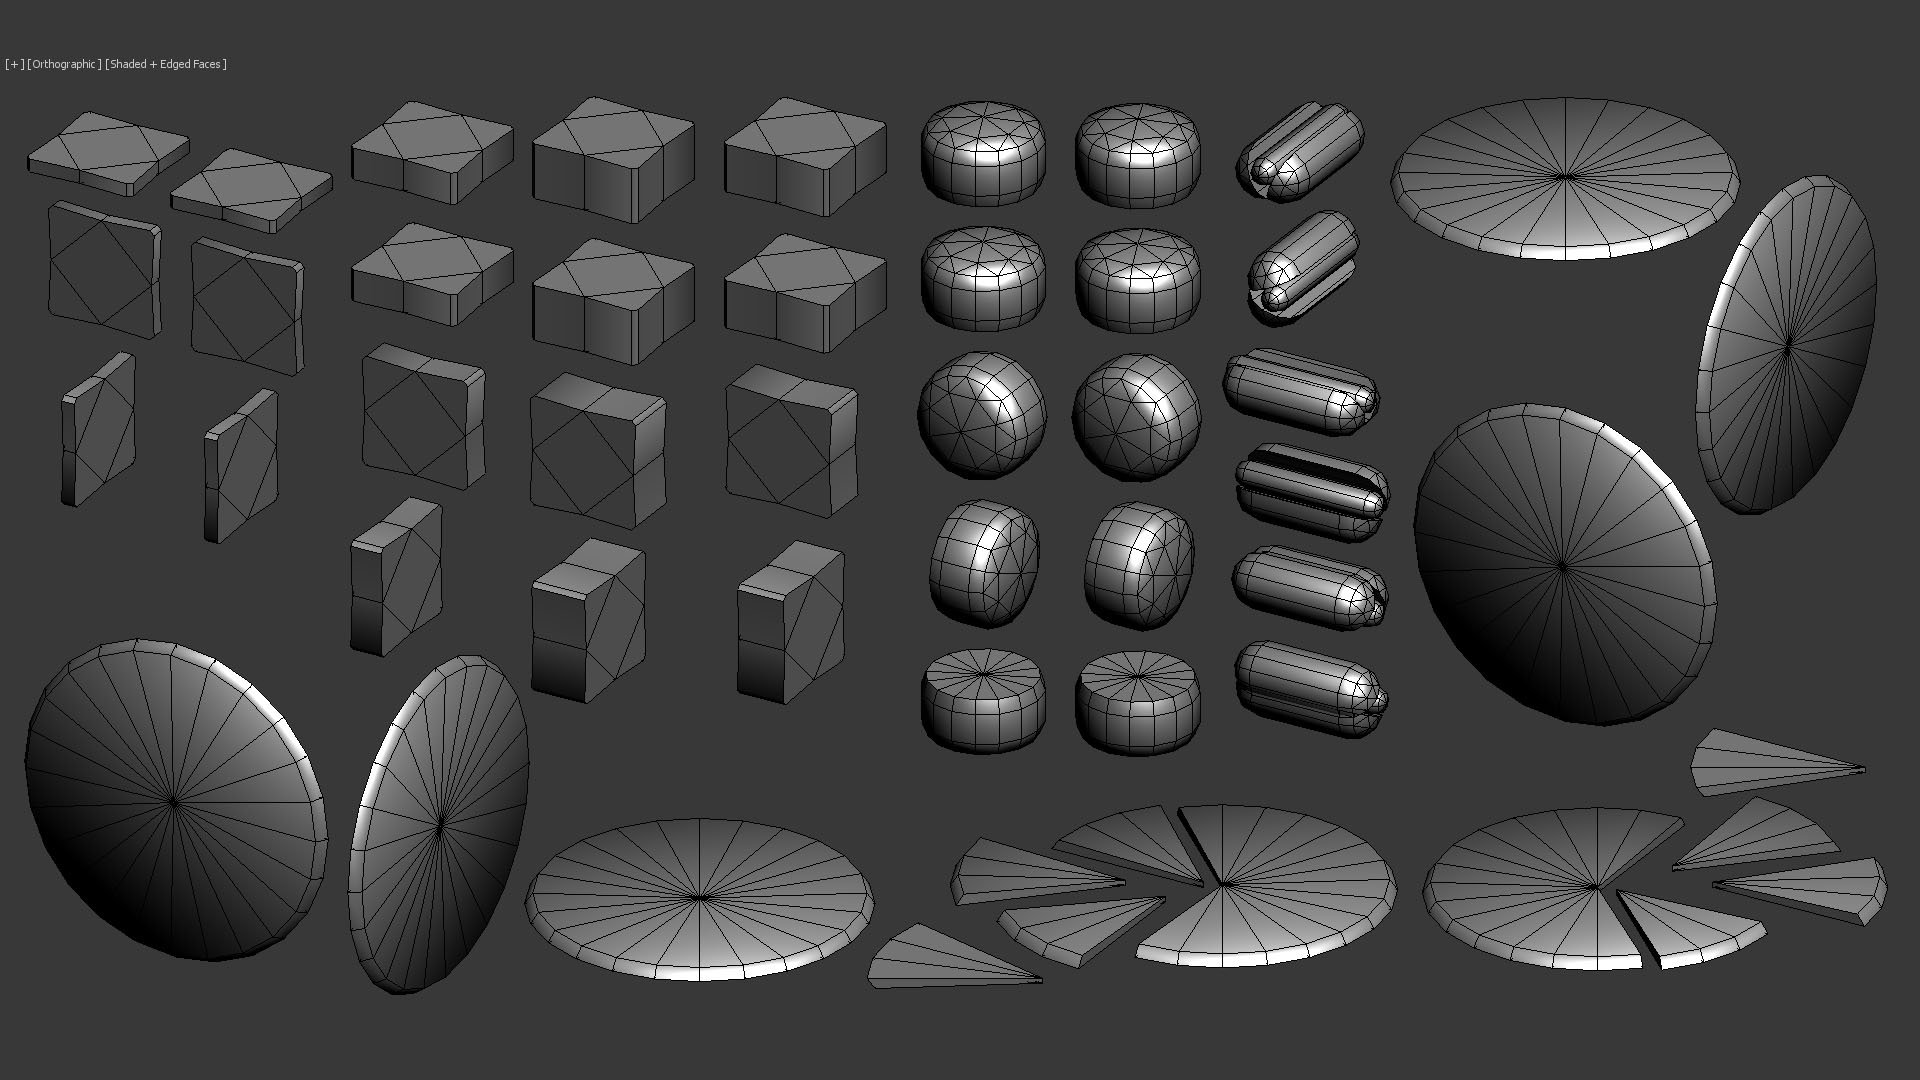
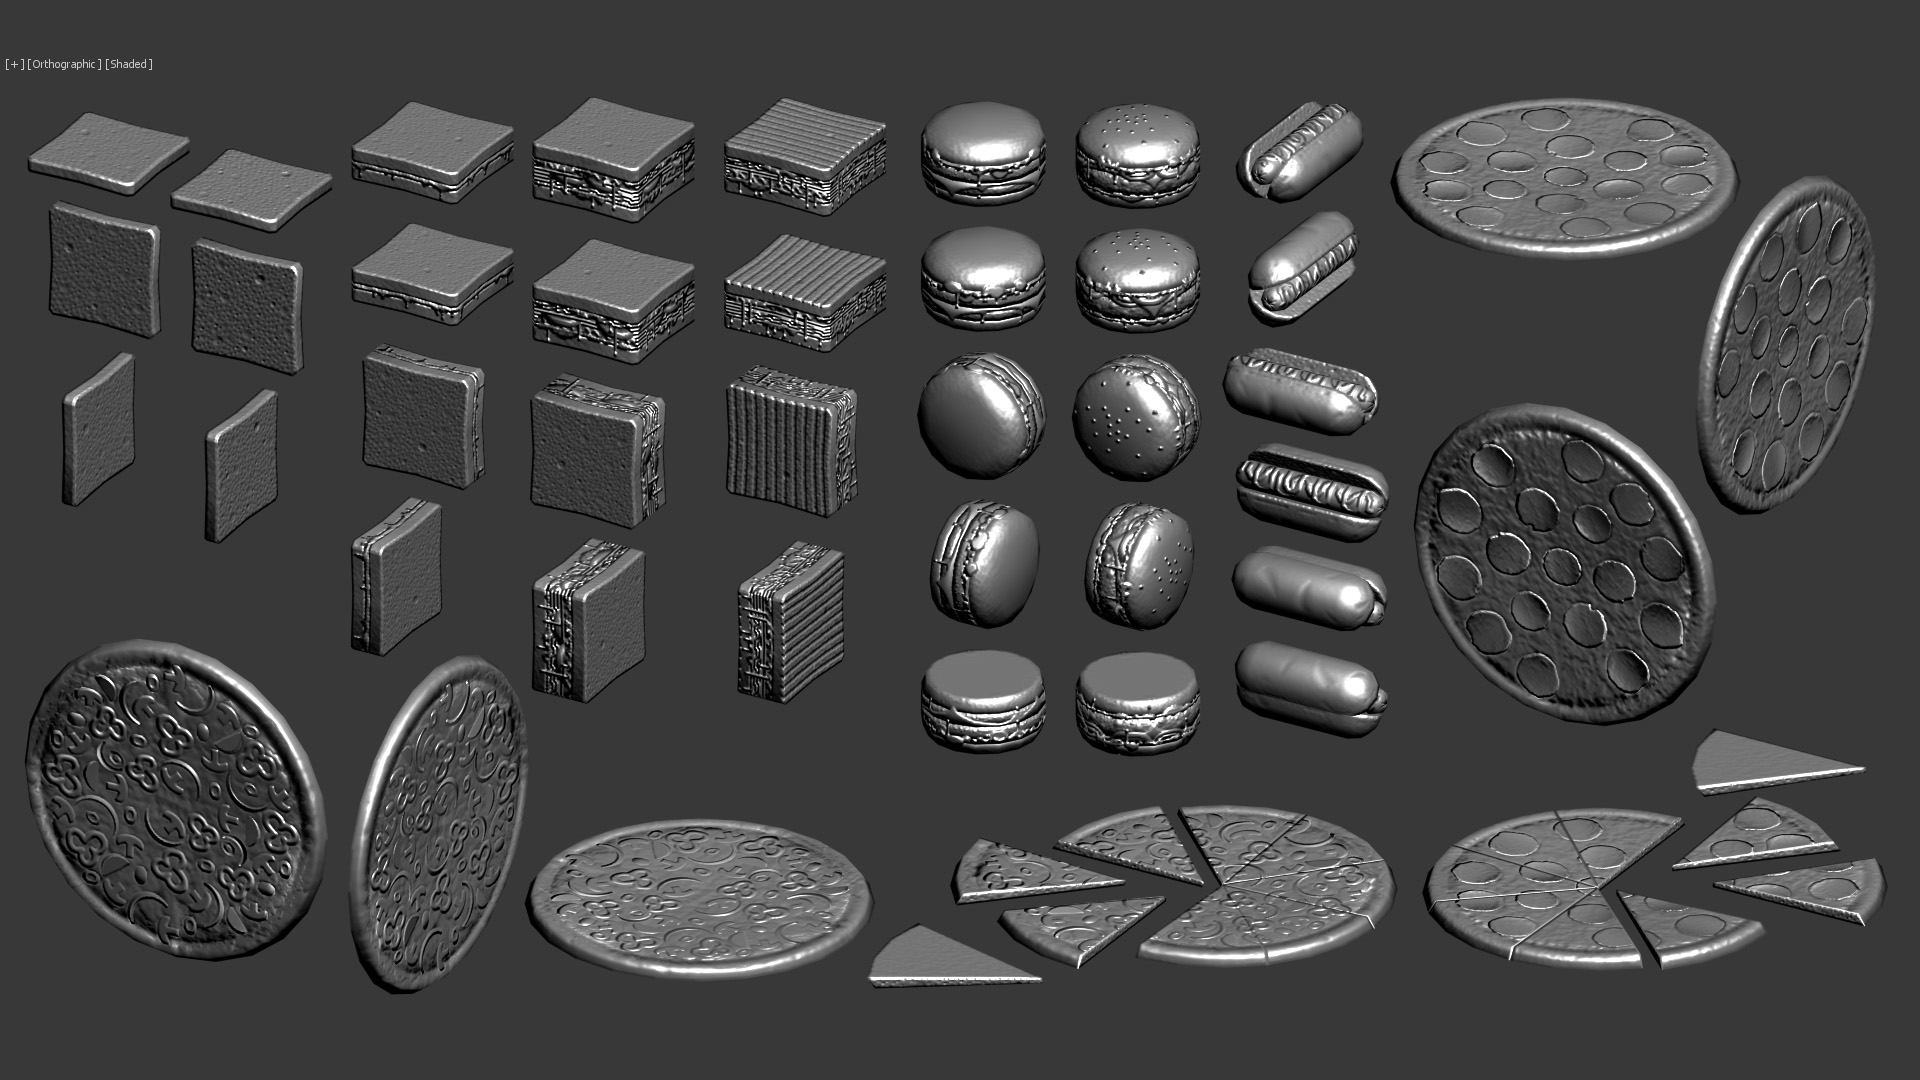
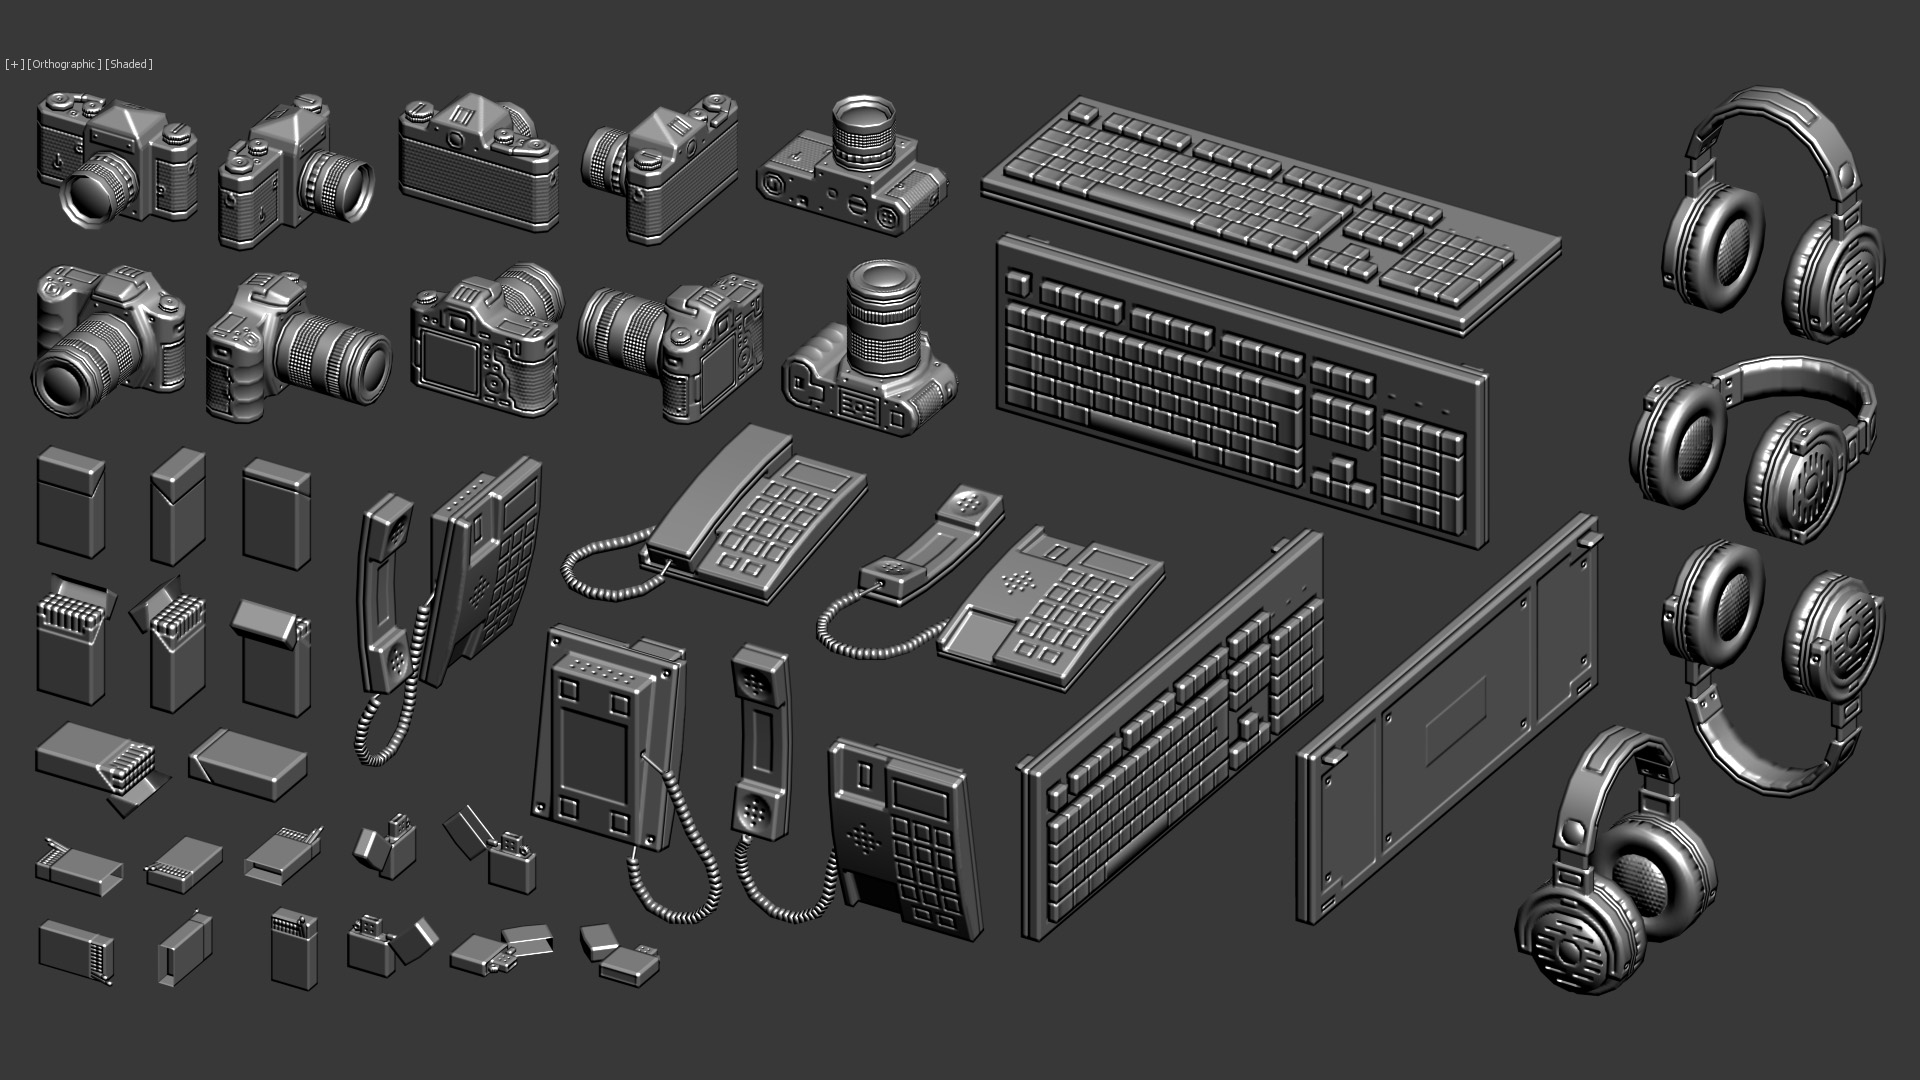
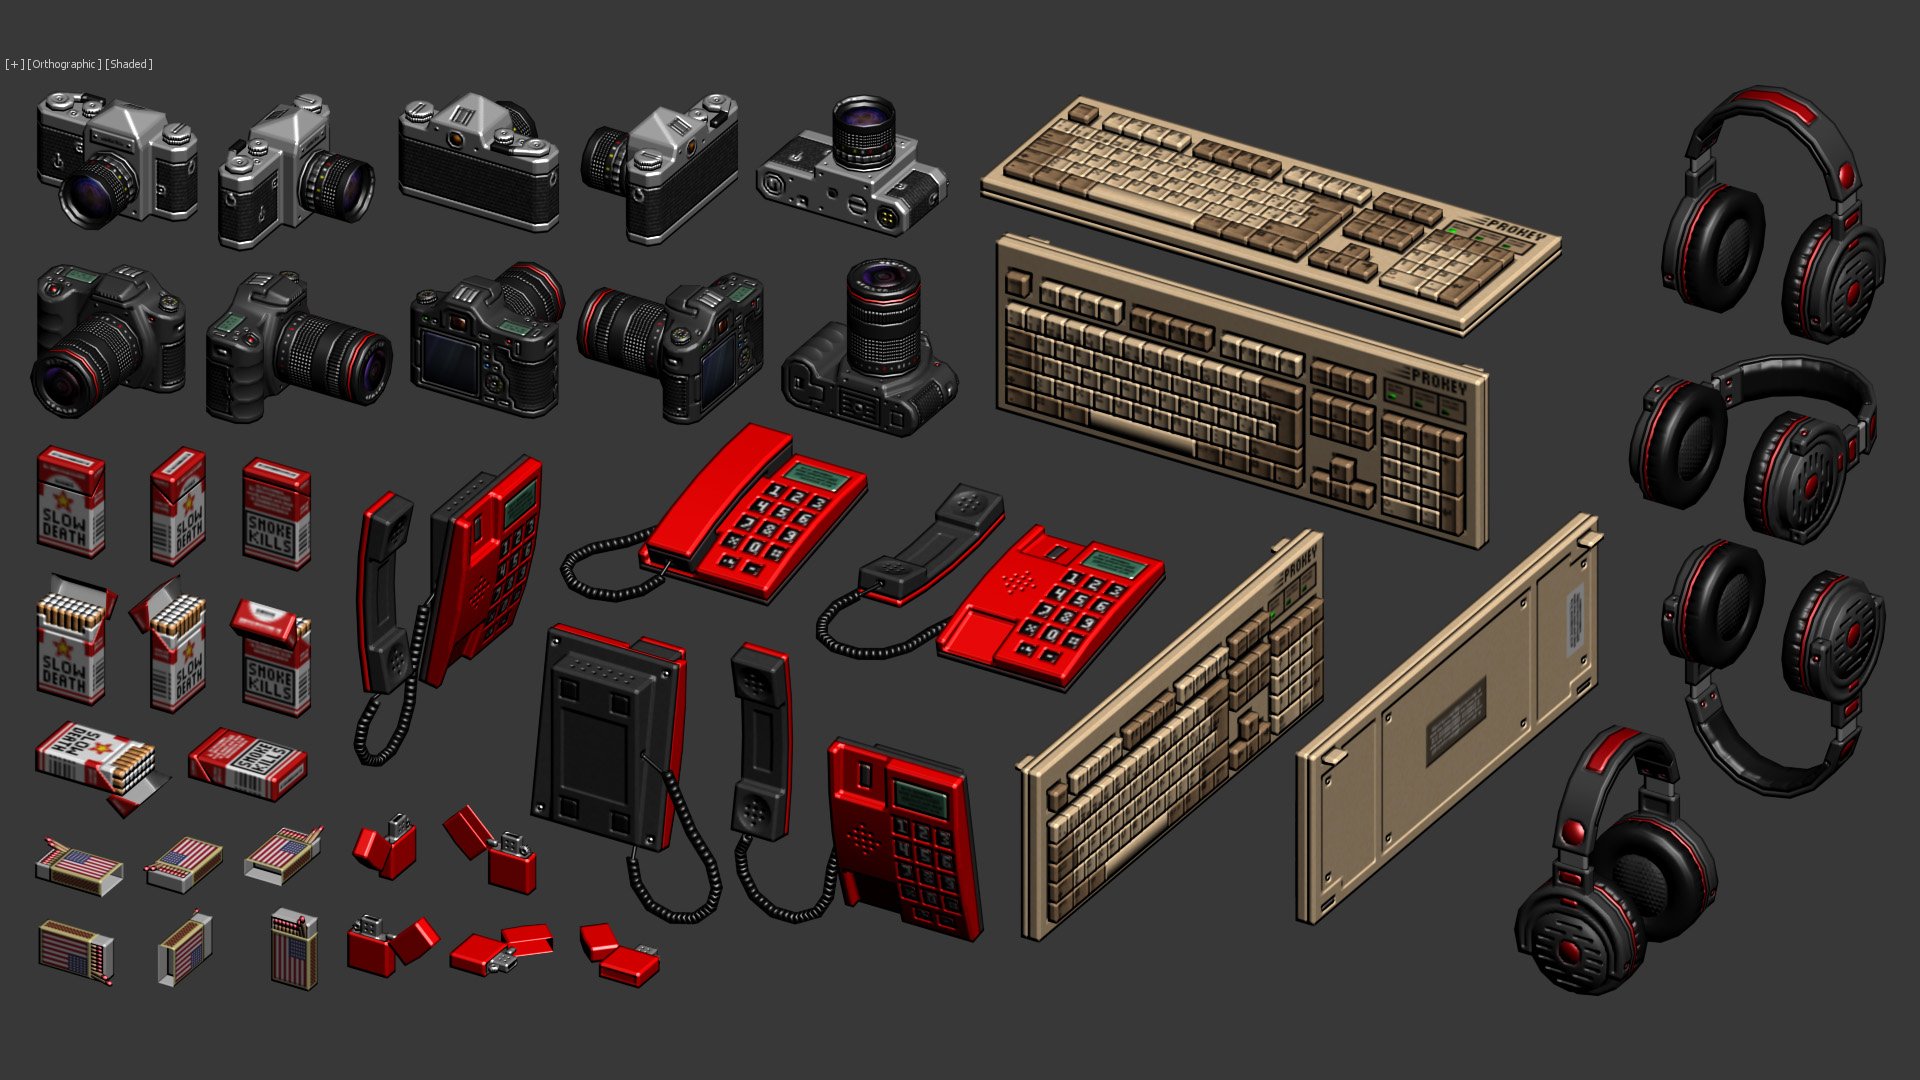
Handpainting Normal Maps pixel by pixel (100% Photoshop - 0% HighPoly)
Hi everyone,
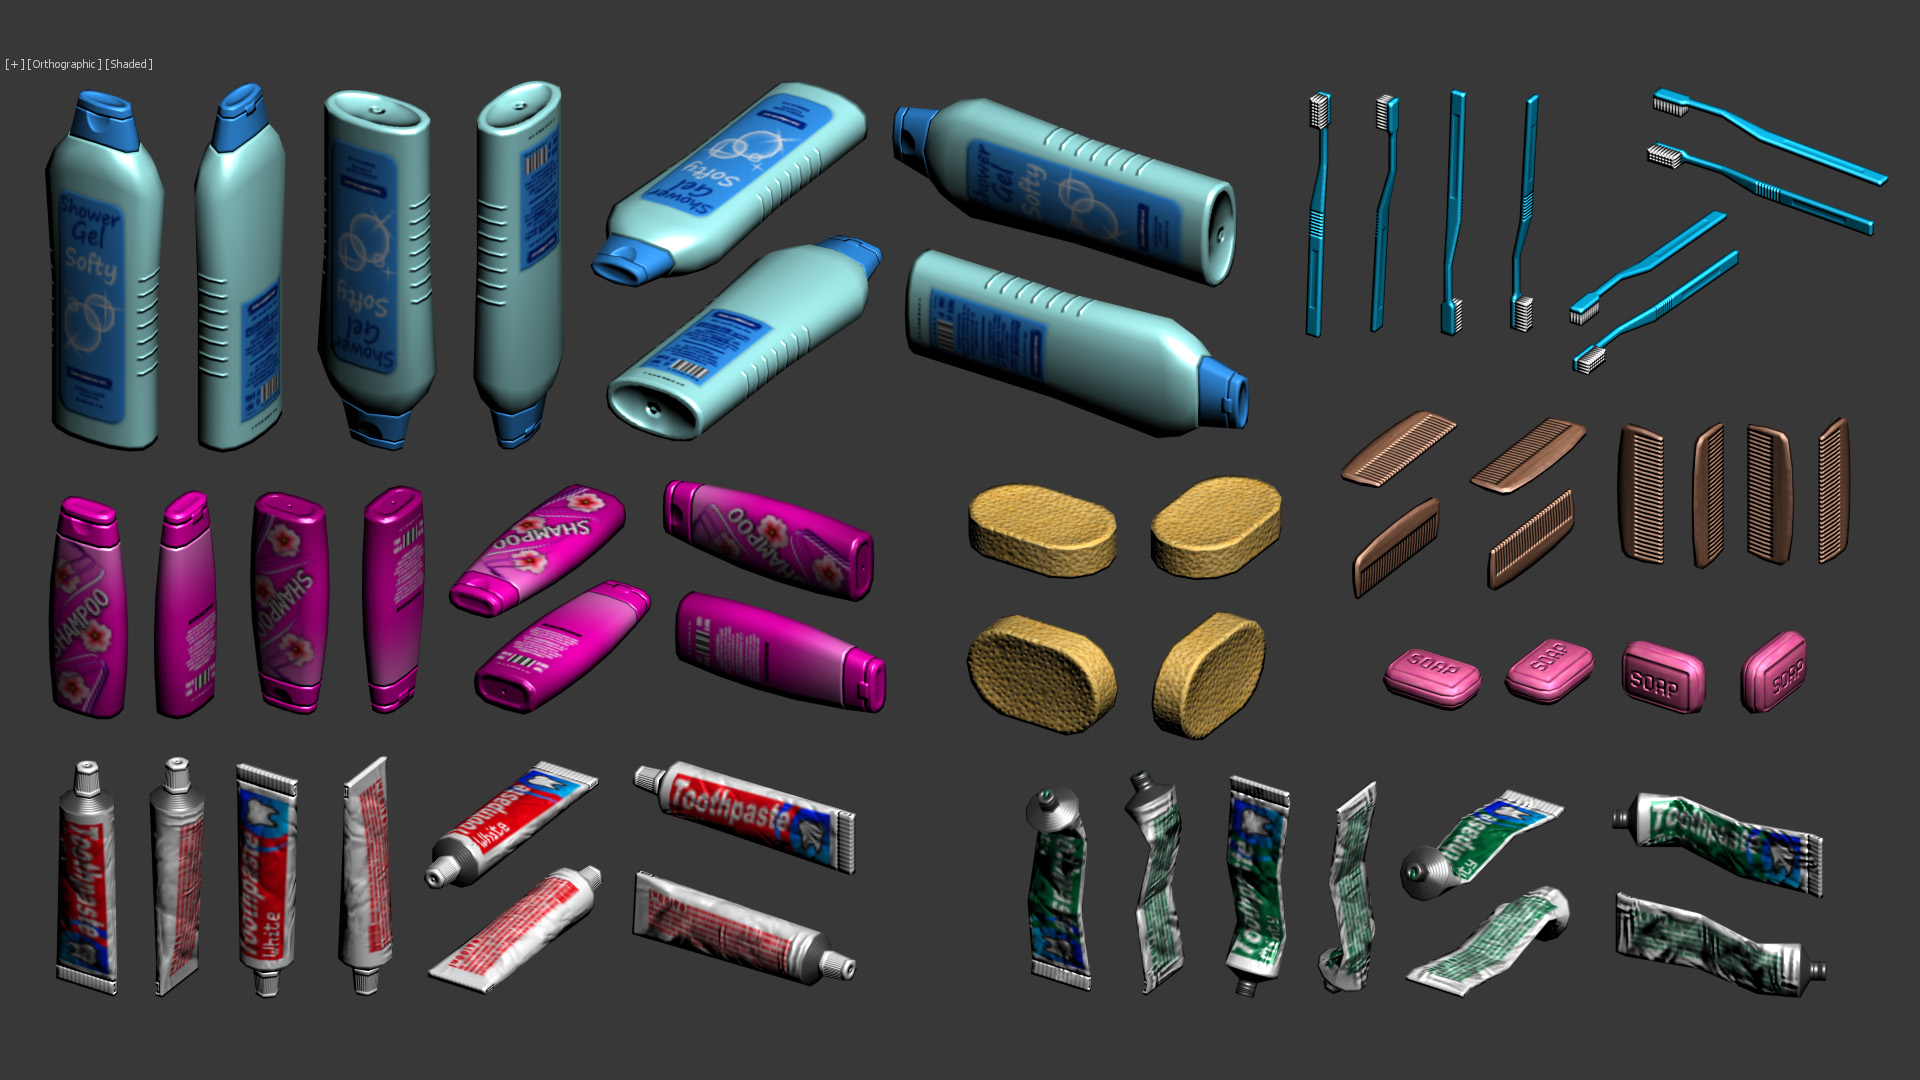
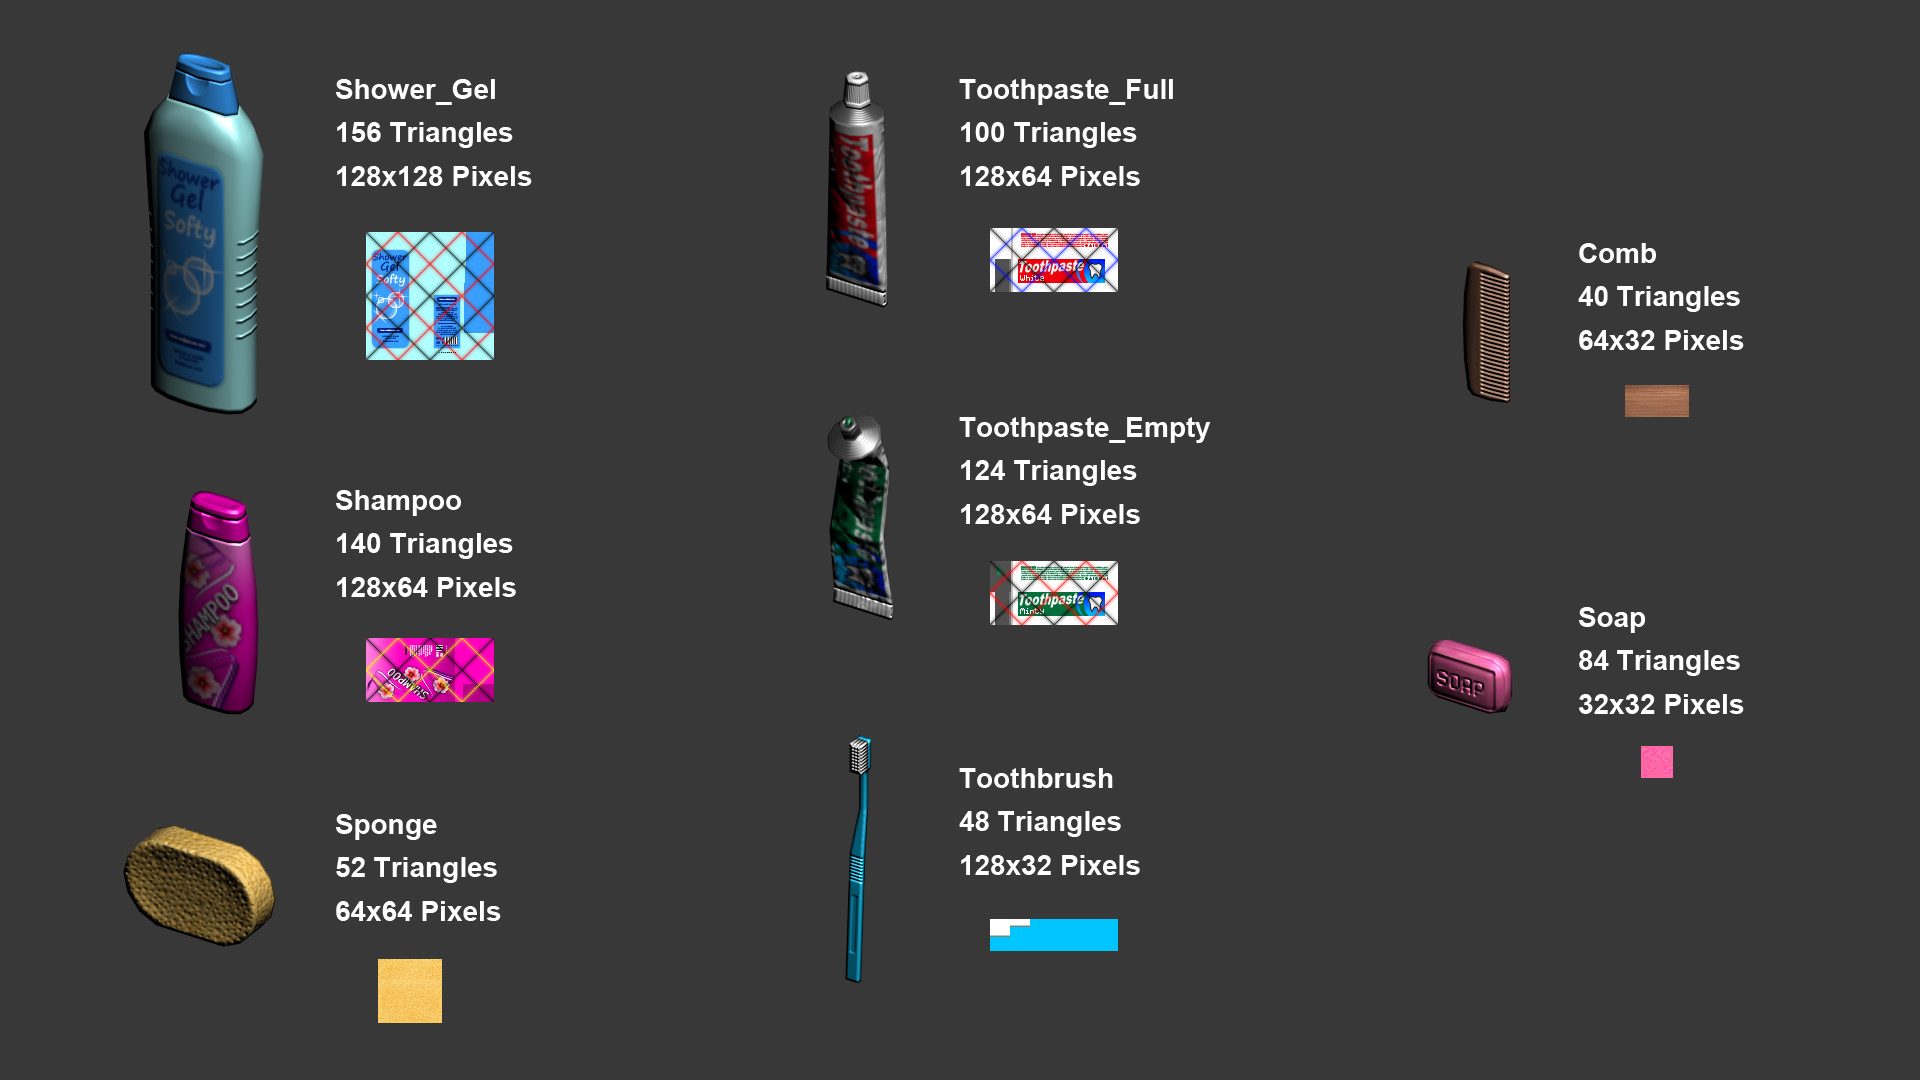
I love to handpaint normal maps using just photoshop without doing any highpoly at all. I only do this when the polycount is kept quite low and the texture size is as small as possible.
When I work like this 90% of the work is done with the pencil tool in one pixel size (not the brush tool). The rest 10% of the work is done using any tool that photoshop can provide. I also have the "NVidia normal map" filter, but I barely use it. I only use it when I handpaint an organic "height map" and I whant its normal map, or when the UVs contains alot of diagonals. But when I use this filter I never use the resulting image, because with the texture sizes I'm working on are very small, the resulting image that the filter produces usually is quite blurry and messy. So, whenever I use the filter, I only use the resulting image as a reference to then paint my own normal map.
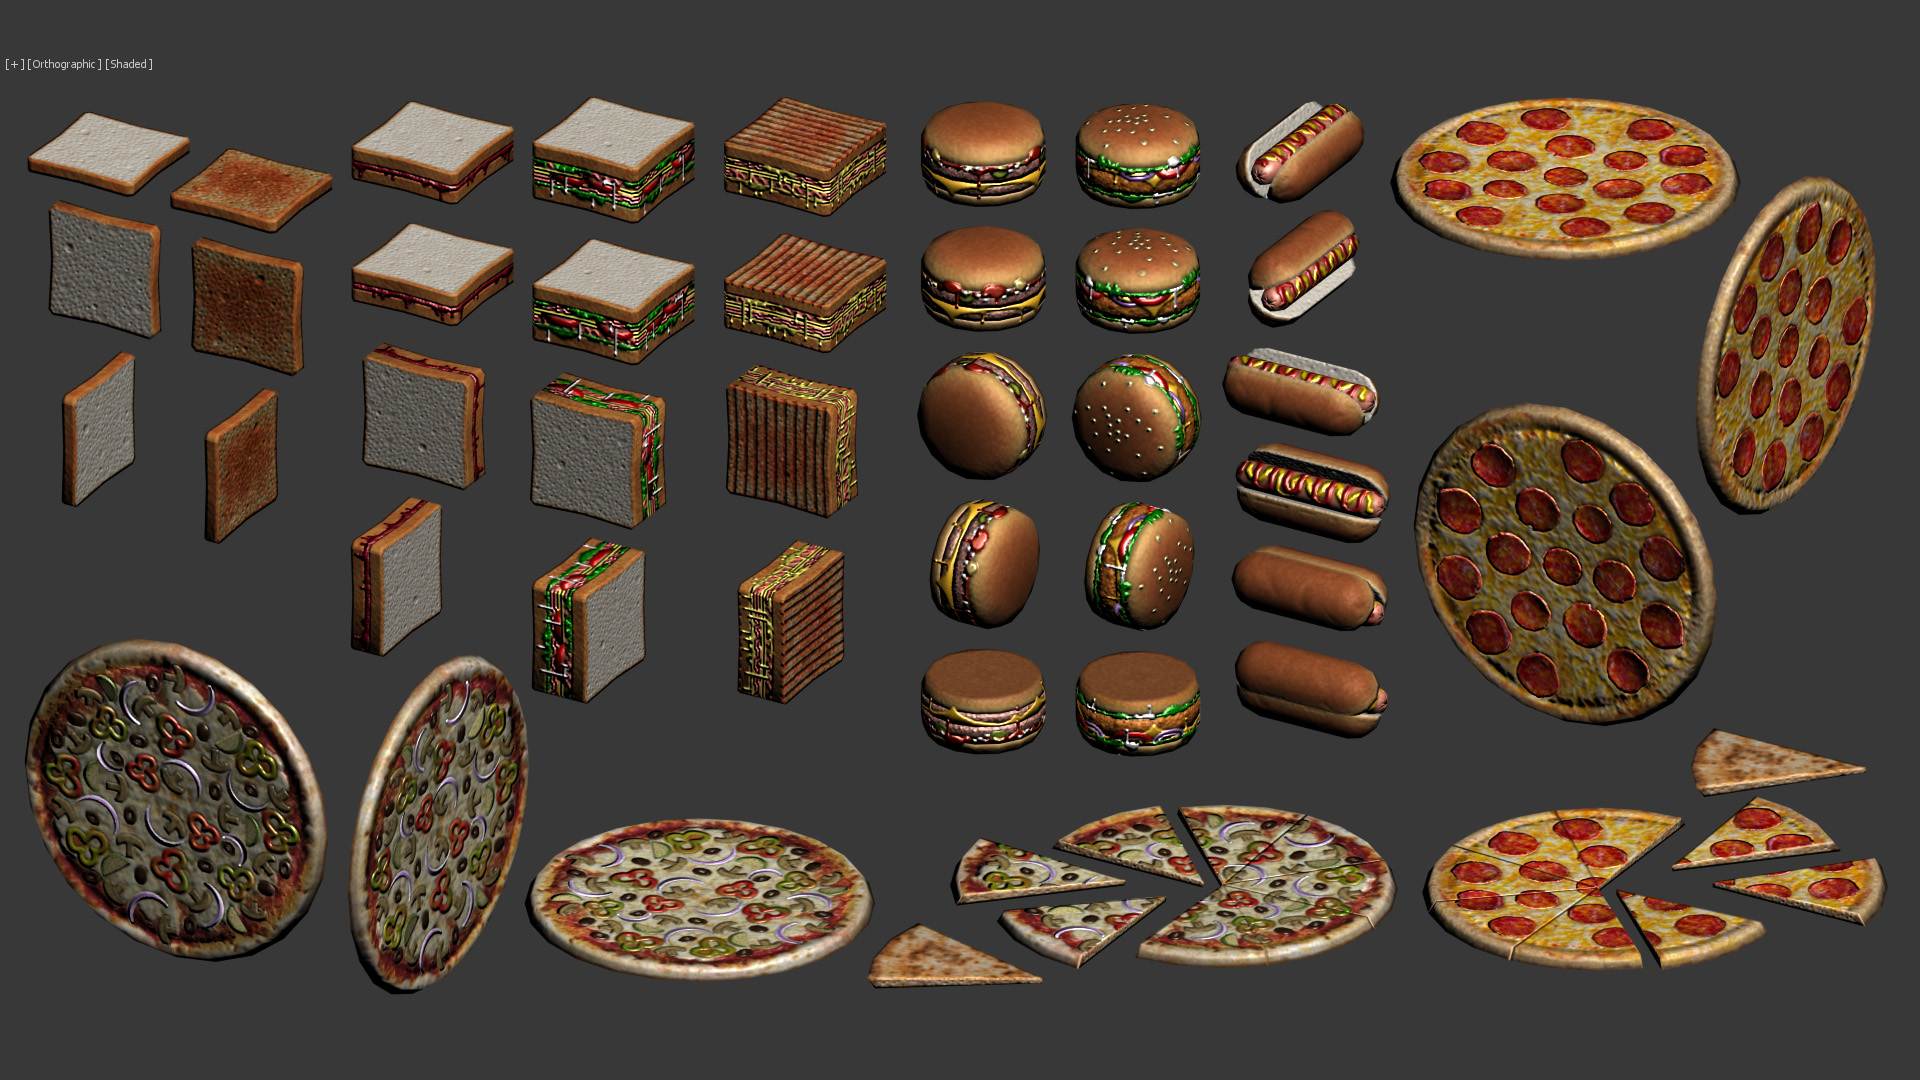
The images I'm going to show you are my own projects, they are not done for any actual game or anything. I just do them because I enjoy it so much. The first images I'm going to show are basicaly simple objects, and then I will show more complex objects at the end. The shaders I use for this are very simple, they only use difuse map, normal map and specular map. The screenshots are taken directly from 3dsMax, not using any game engine.
I hope you like it!
Bathroom:
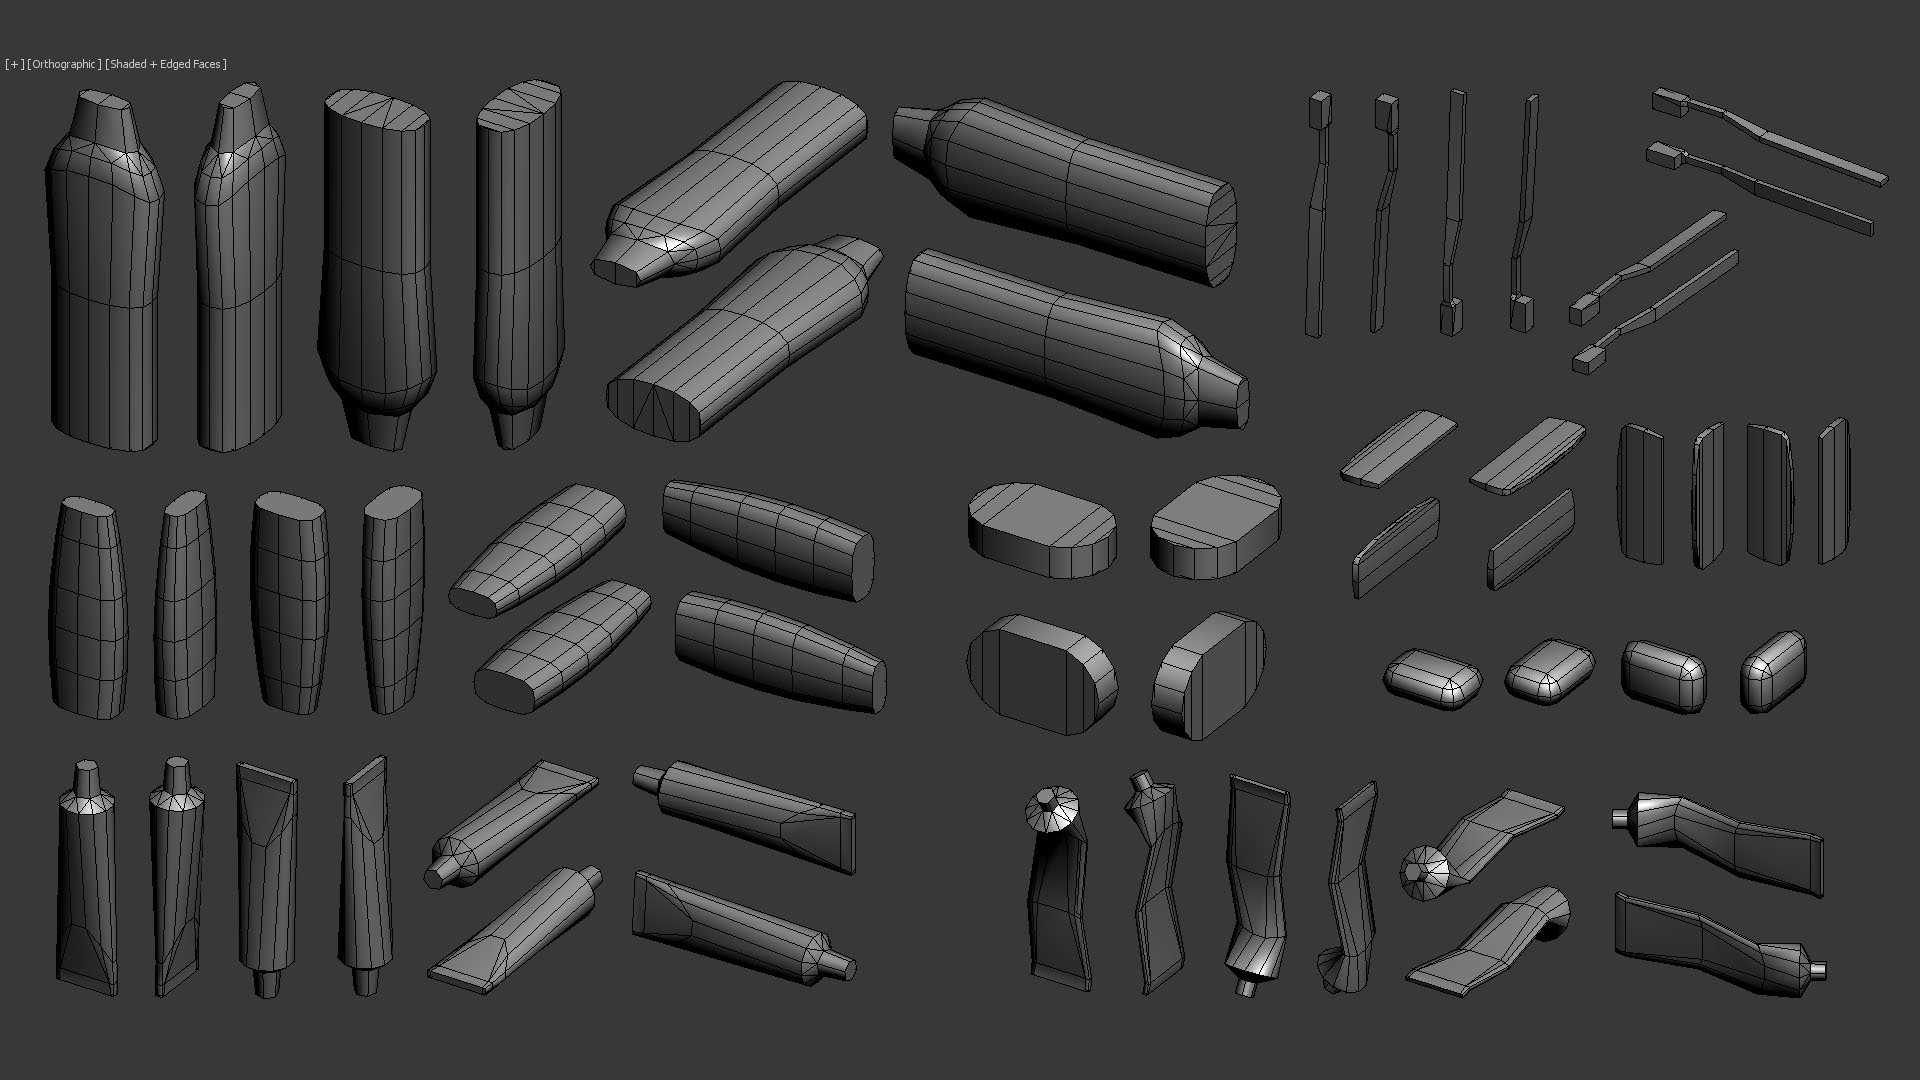


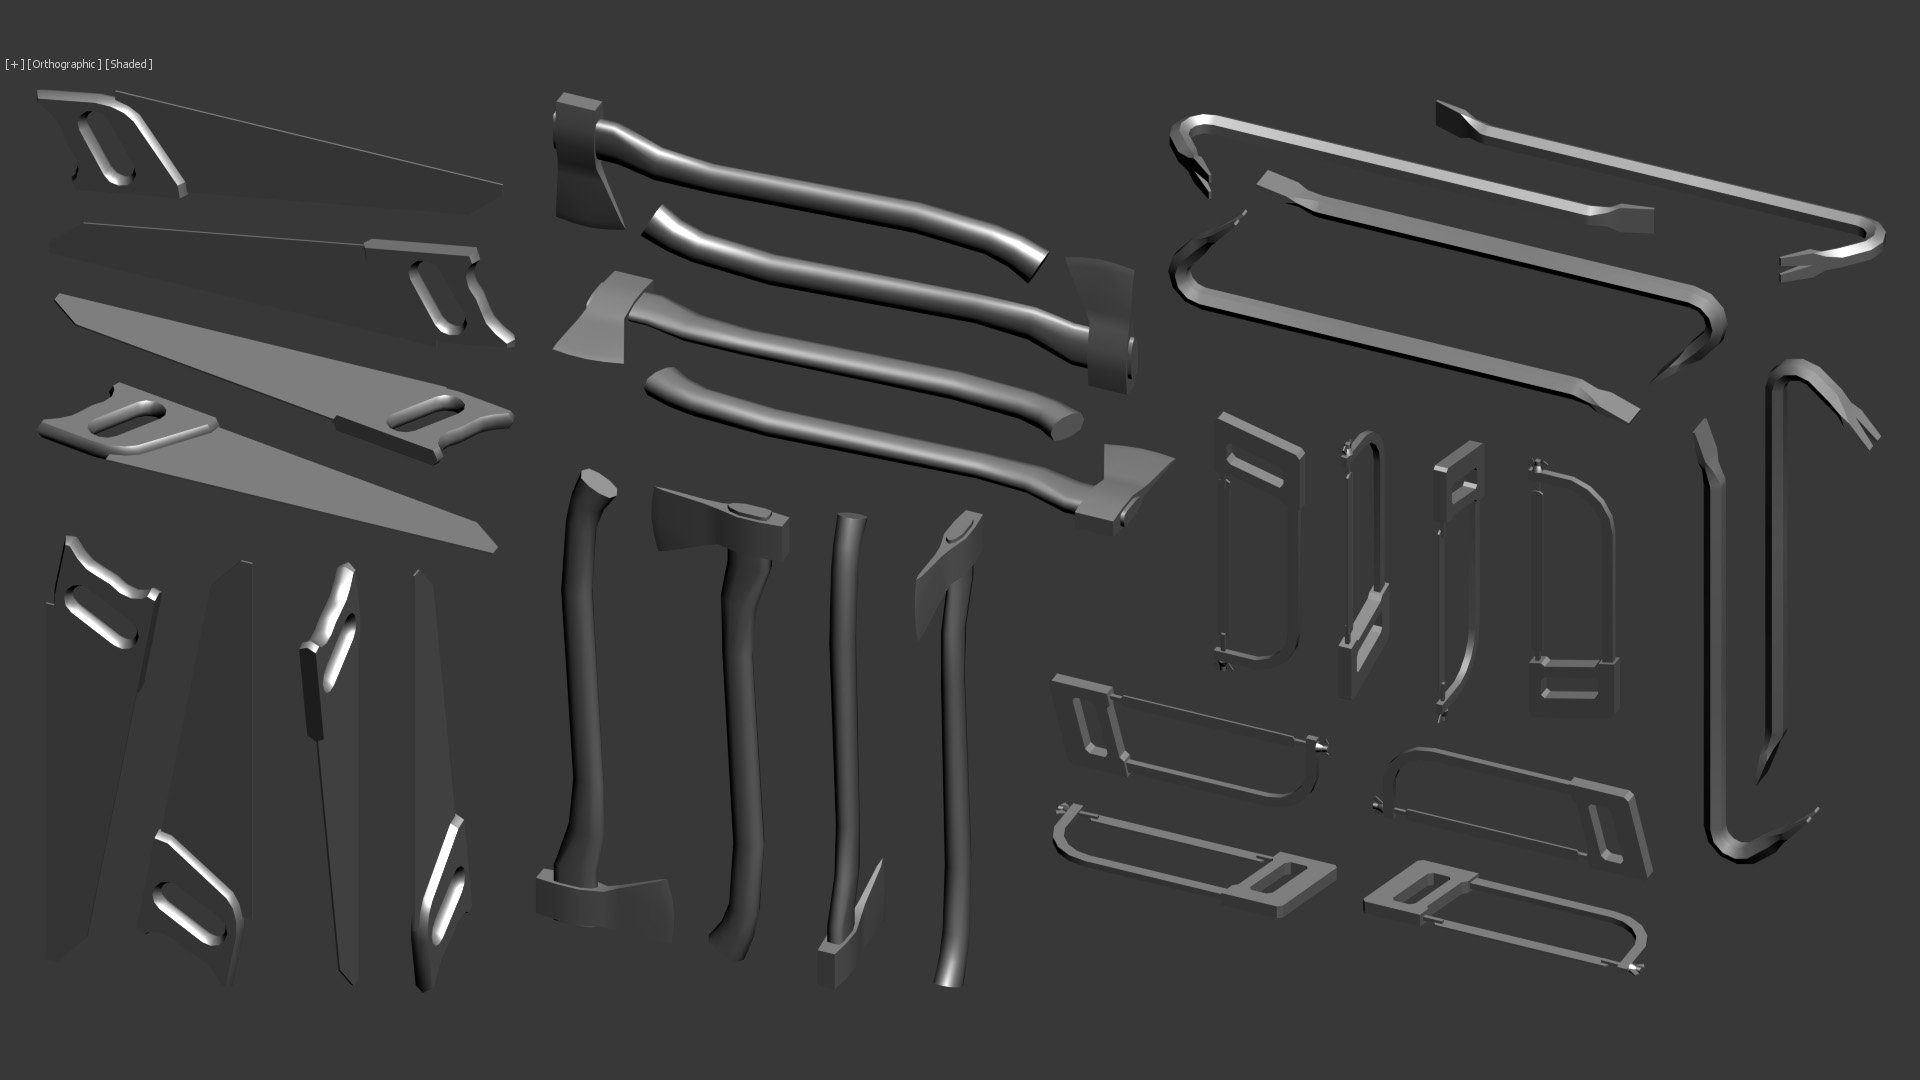
Tools 1:


Tools 2:


Food 1:


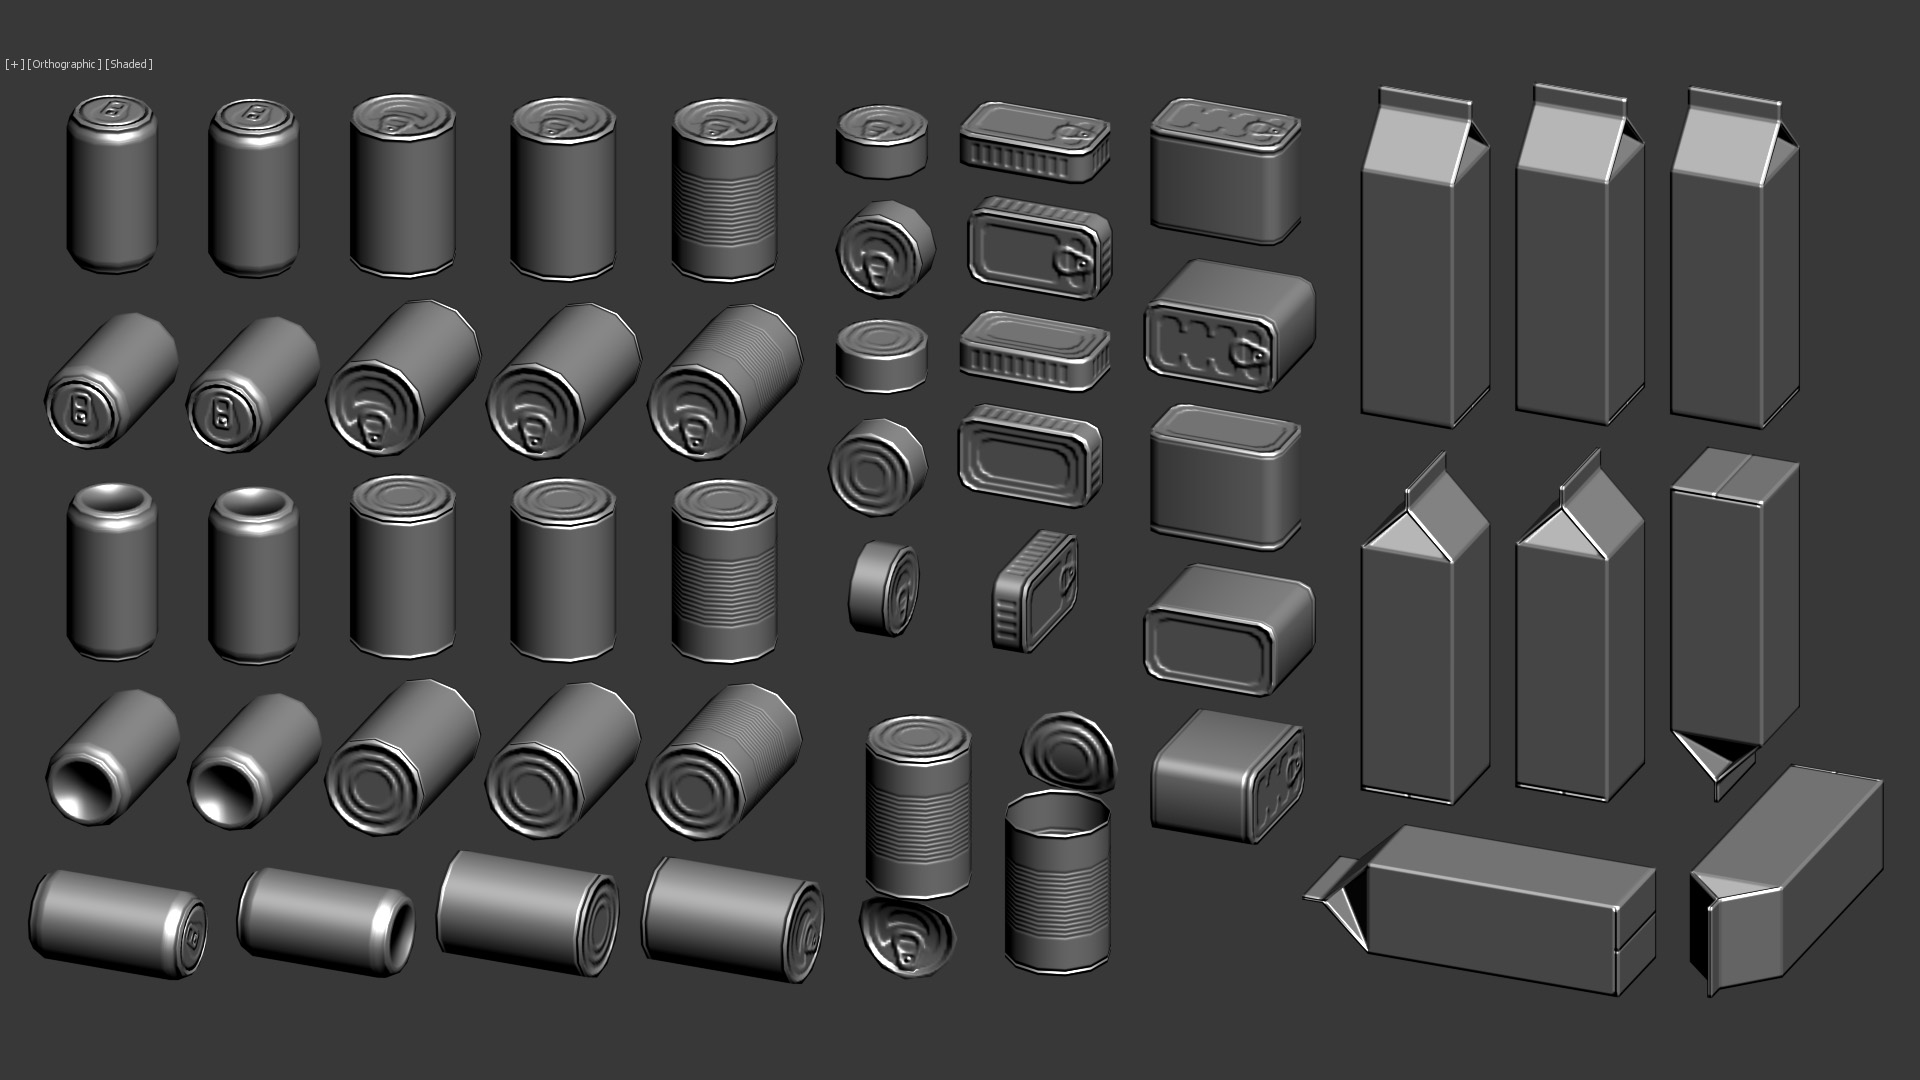
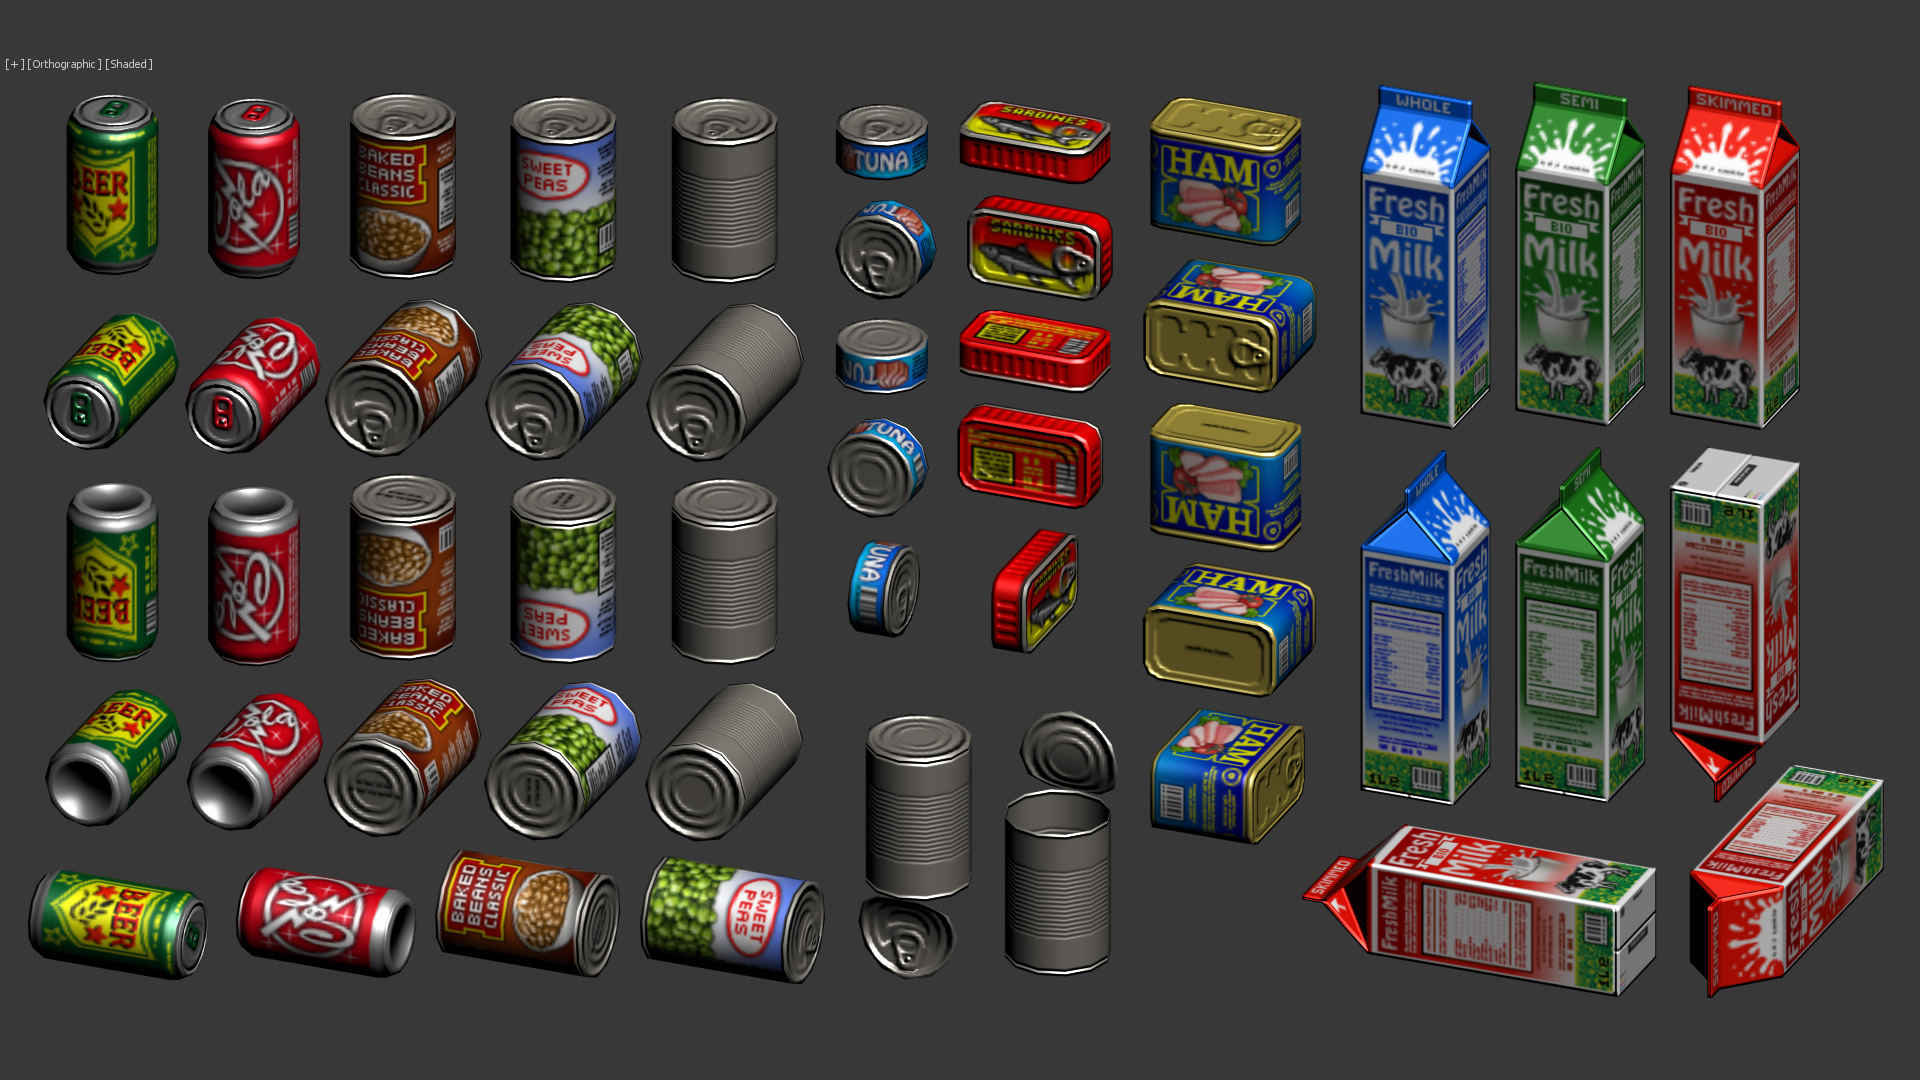

Food 2:


Livingroom:


Scorpion Evo3 :


H&K MP5:
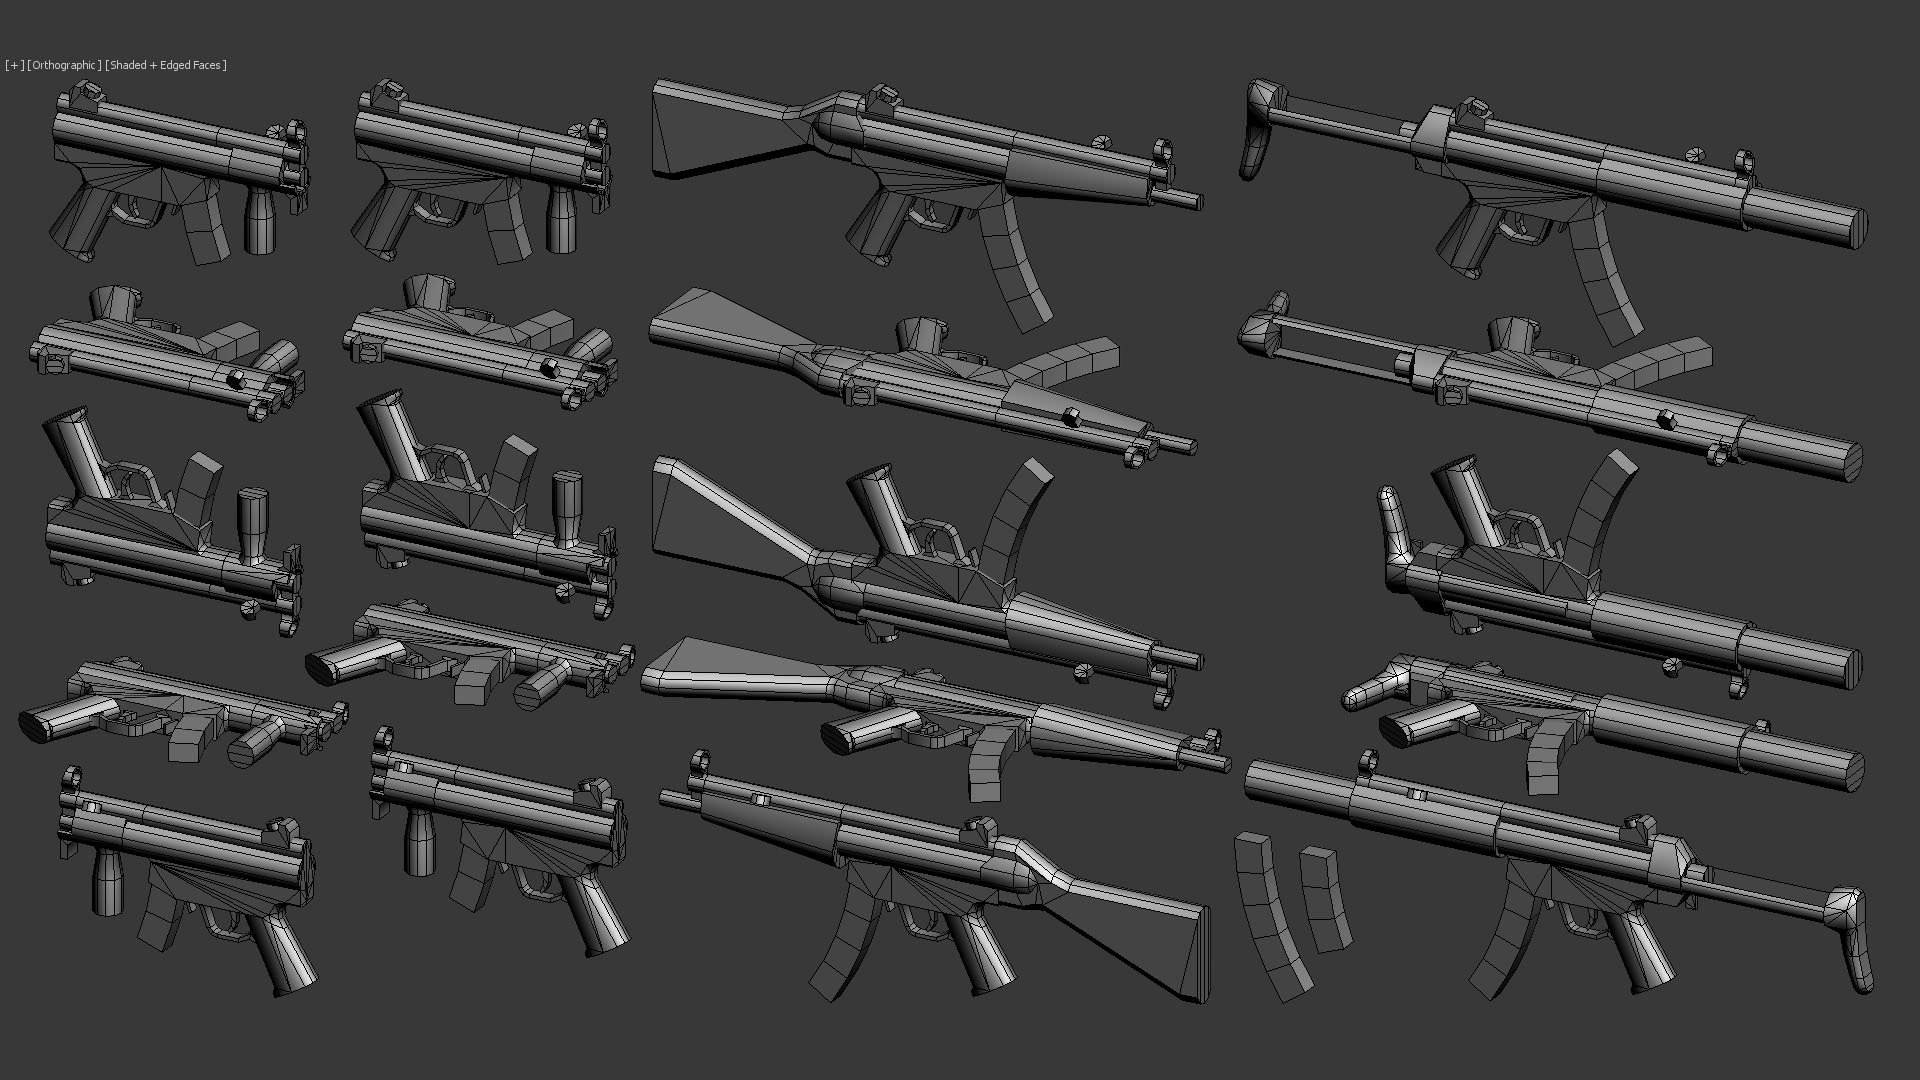


More guns:
I like guns, so I made a few. Polycounts and texture sizes are consistent with the rest of the objects.

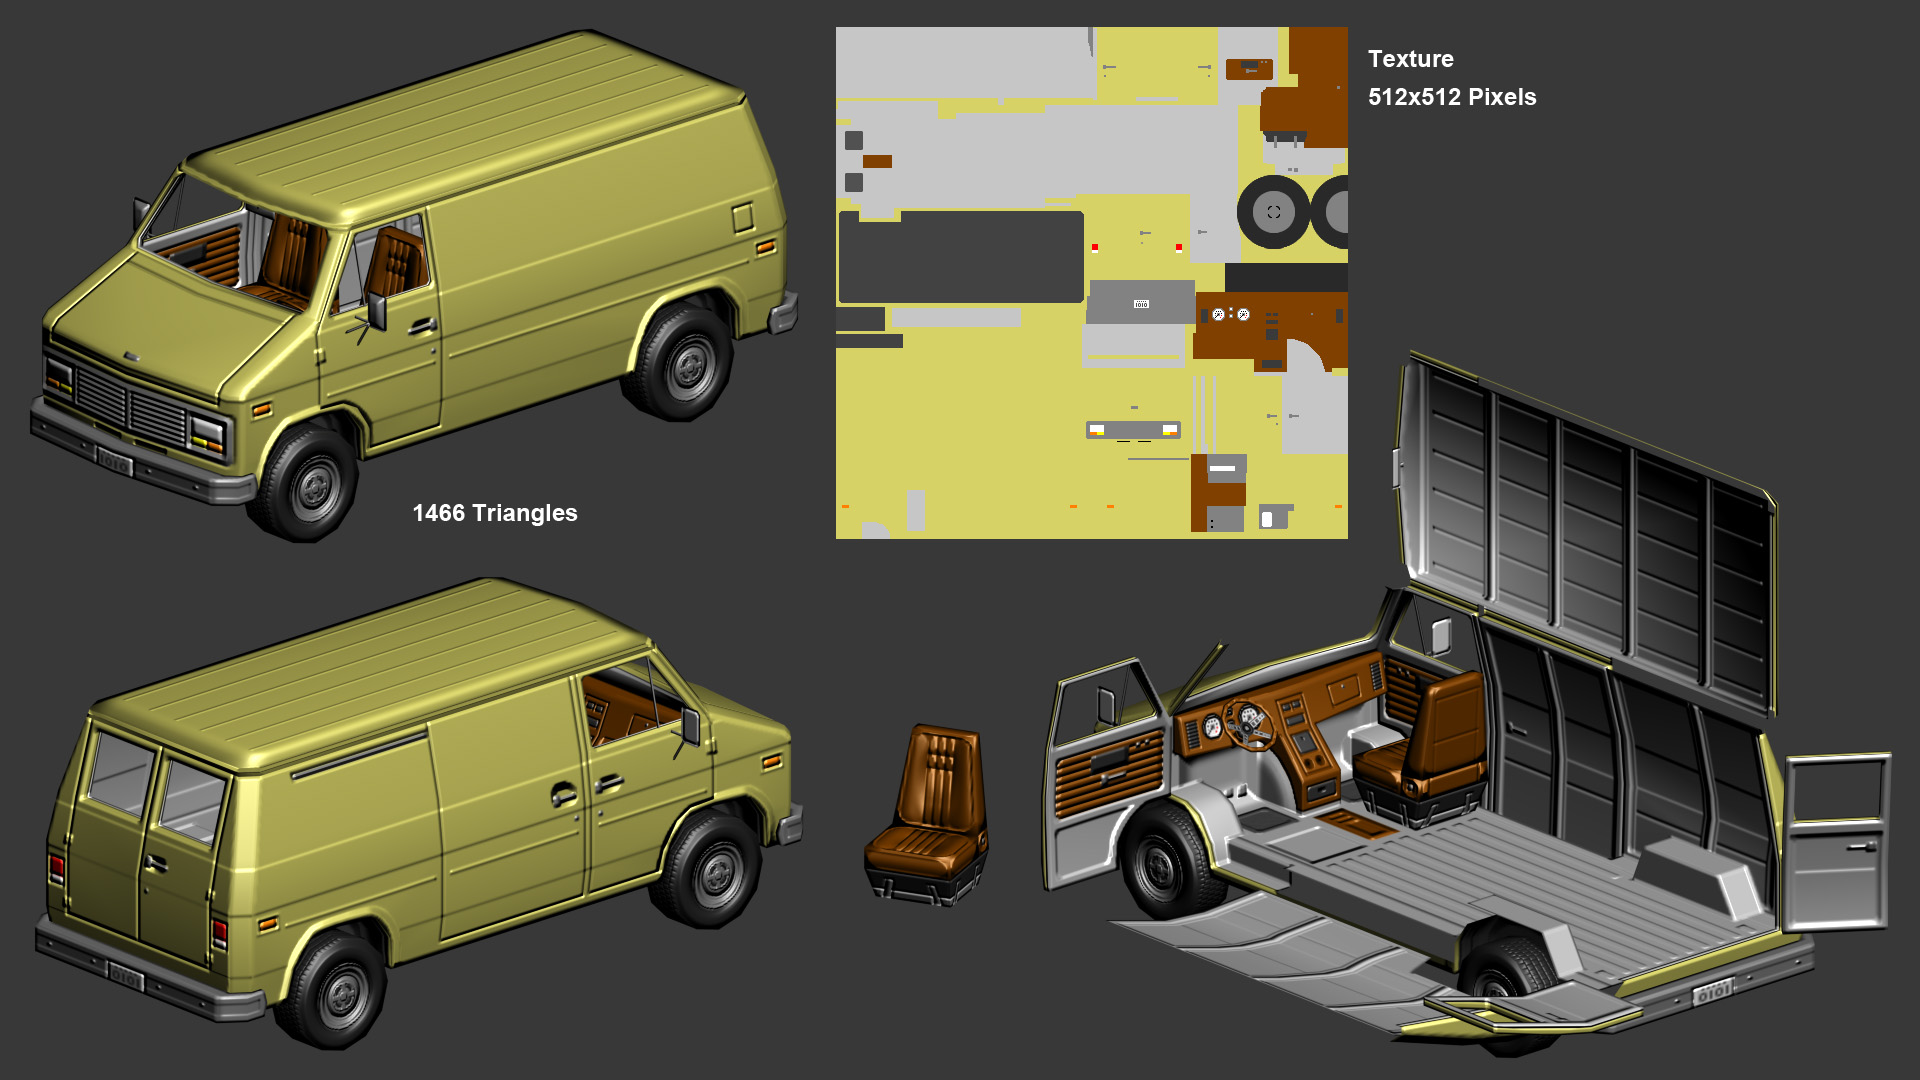
Vehicles:
There is something I whant to say for the last object. I did this object and the normal map back in 2011. Since then I have improved alot, so today I would have done things quite diferent. I'm not particularly pround of the underneath part of it, but at that moment I was already too bored with the object, so I kept it as it is. Also, I never did the difuse texture, so I've created a very simple one just to show you how it could look (No specular map here). Still I think is good looking enough to show you.


Re: [WIP] Horizon FW prop: paper cutter
I've been reworking this piece a bit based on some other feedbacks I've received!

Been working on the rendering in unreal and tweaked my roughness and metallic values a bit to have less harsh variations in the metal. I also lighten the metal albedo up a bit and homogenized the values between the different metal parts so it doesn't seem so different. I also cleaned up my topology a bit.
I feel like this is in a good enough place to let it off for a bit now! Here's my final artstation post for the showcase video, mesh and high rez screenshots: https://www.artstation.com/artwork/xYnWG2
 simonBreumier
[WIP] Transport Miniverse
Hey Everyone!
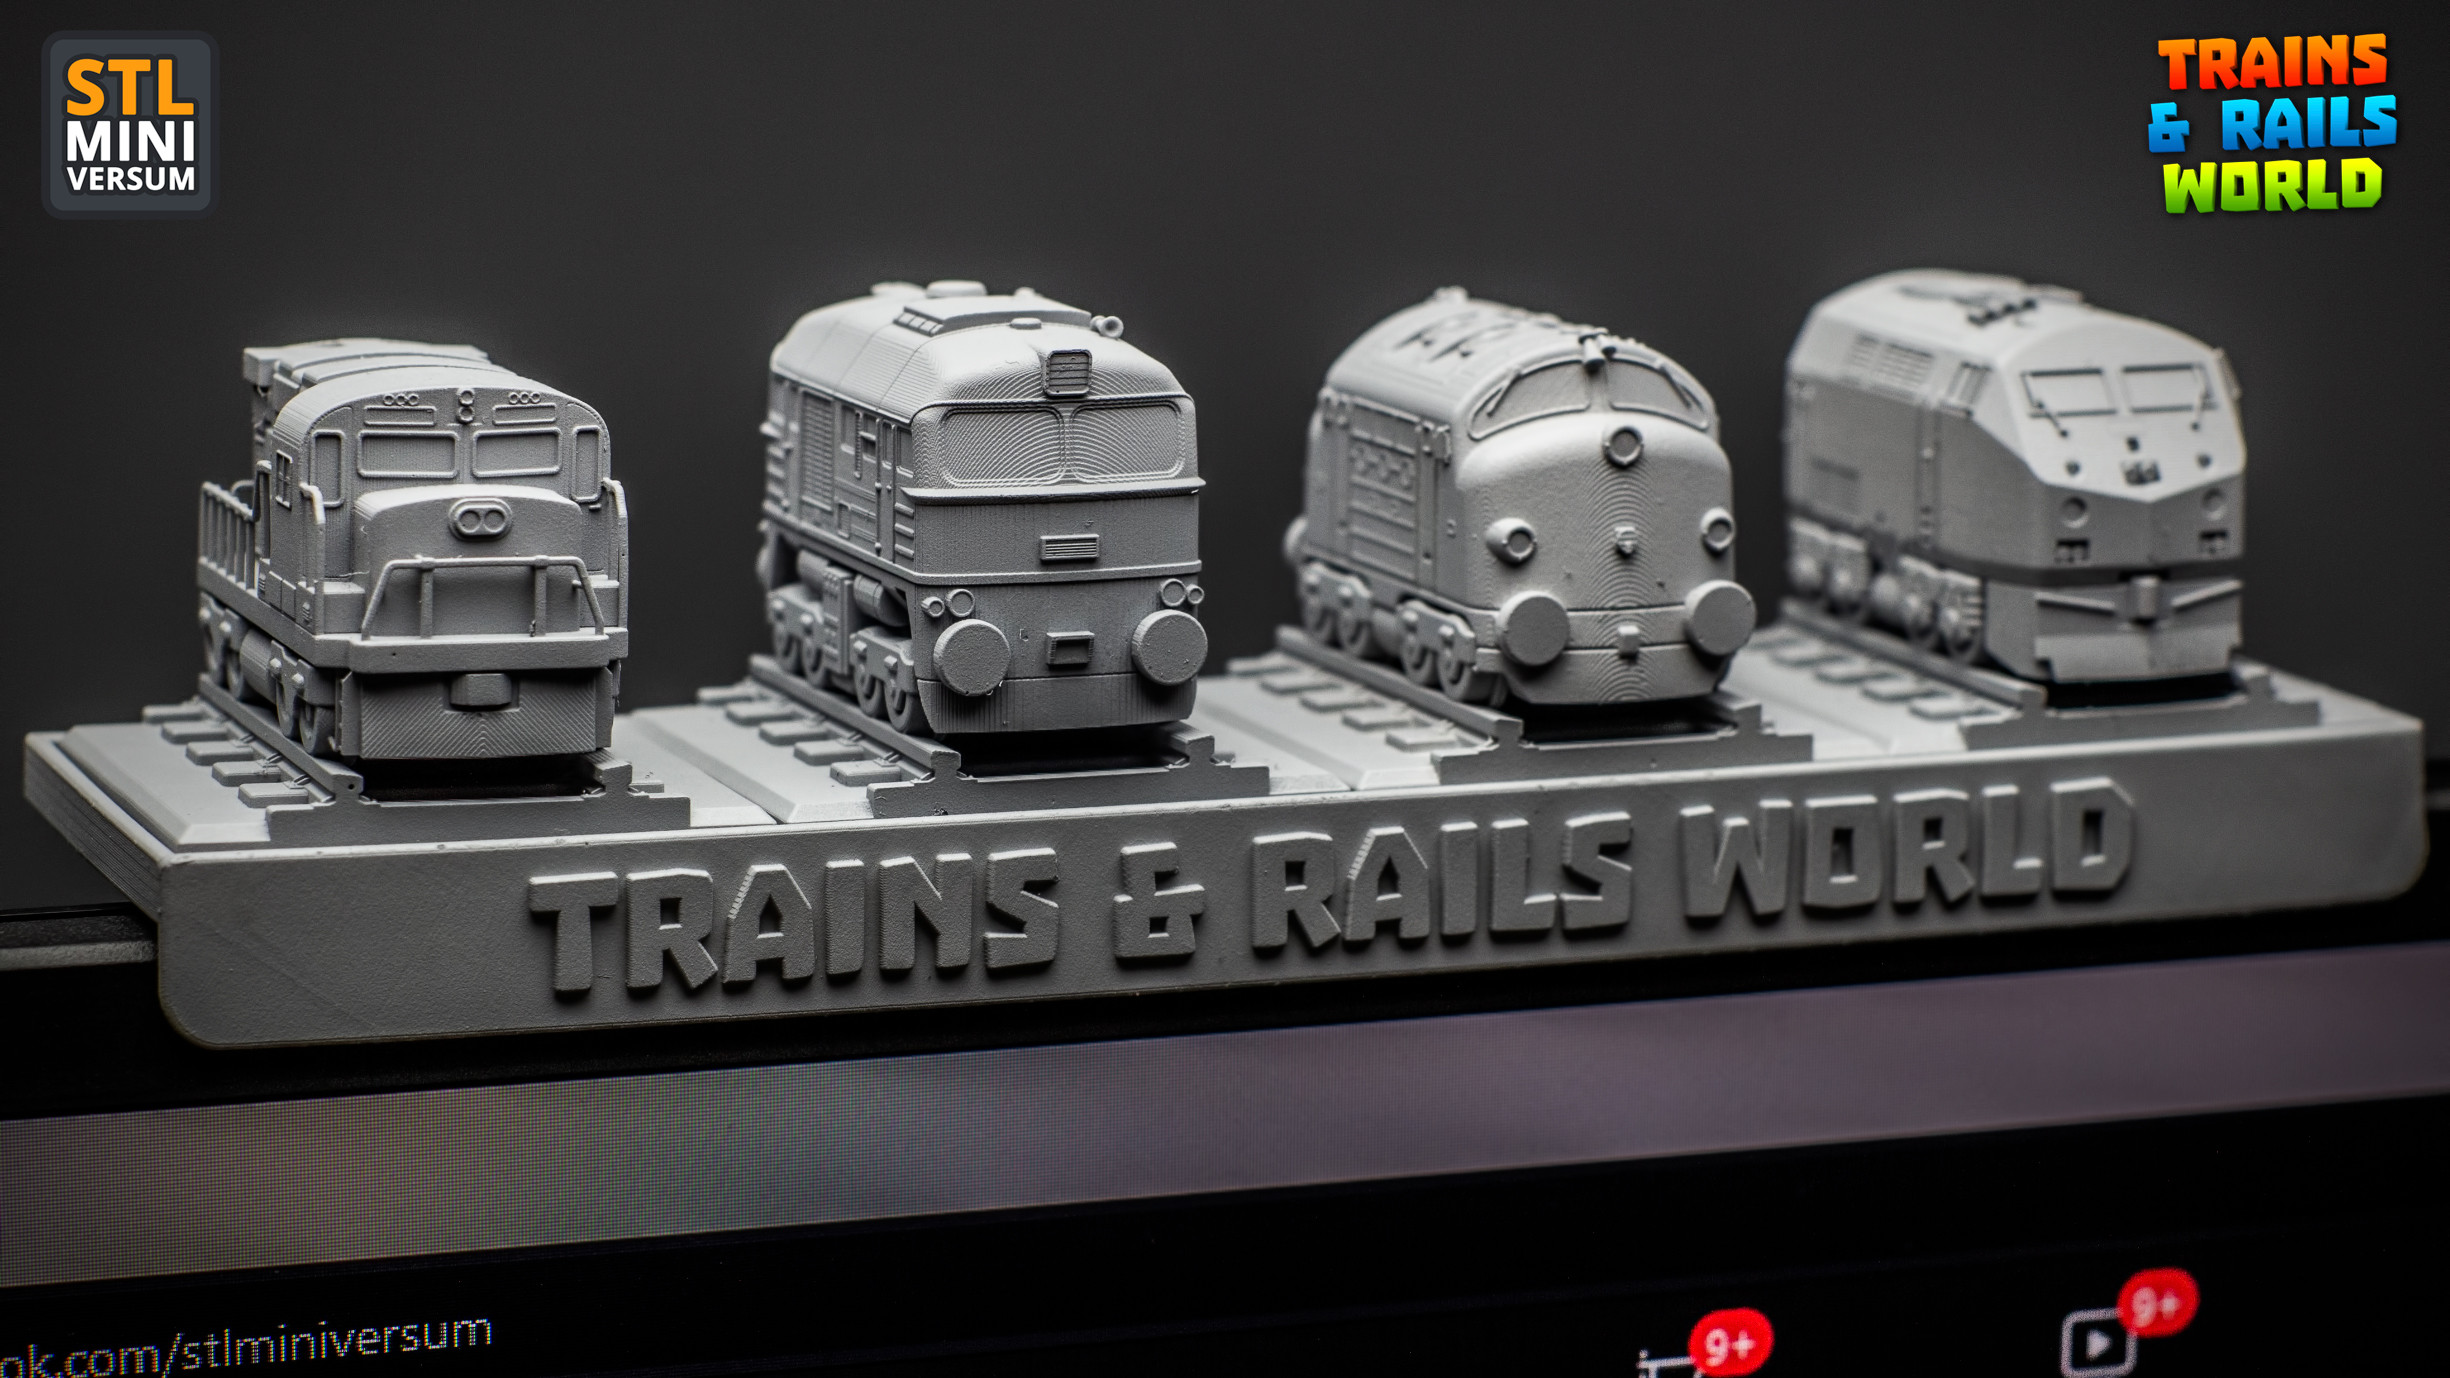
Some time ago I created a series of mini trains for 3D printing in my free time and it was a ton of fun!
You can read a bit of backstory about that here:
Or check a few more photos here:
Few weeks ago during the 2022 Game Industry Conference I had the chance to look around at the Poznań Game Arena too, and I’ve just fallen in love with all those great indie games. Some of the developers were giving away free stickers and after grabbing the first few I had the urge to collect as much as I could. :D I guess childhood memories kicked in, does anyone else remember those albums with the collectible stickers?
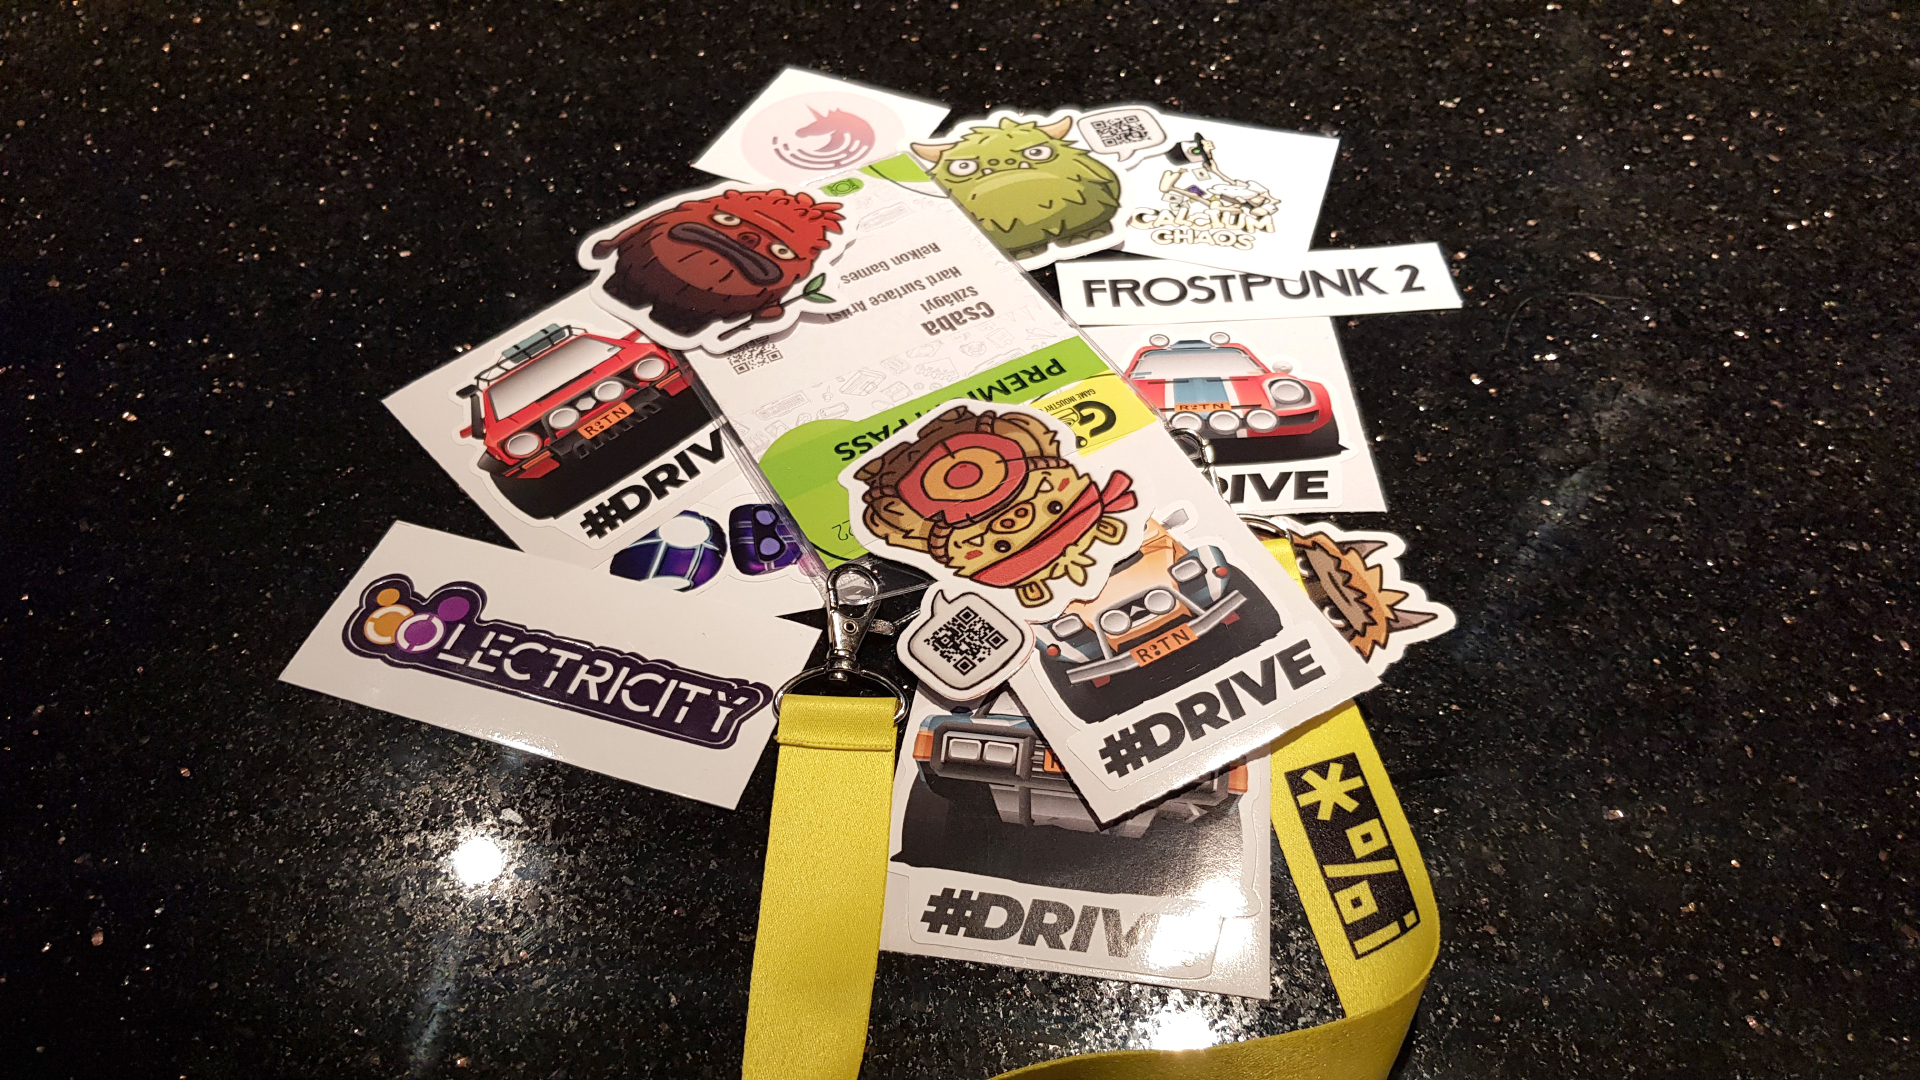
So these little stickers got me thinking, how cool would it be to have my train series as colorful stickers!
But unfortunately the models were for 3D printing, STL files from CAD program, messy topology, no UVs, never been painted.
Anyway, fast forward to the boiling point when I could not resist anymore and I sat down to remodel one with UVs and textures.
This was inspired by the hungarian M62 Szergej. (These are my childhood favorites. I remember standing next to the train tracks close to my grandma’s house and watching these massive iron horses pulling 50+ fully loaded cars behind them.)
It's using this texture:

(I know, I know, so much wasted space, could be more compact. :) )
If you are a train fan, you can spot right away that the M62 locomotive has 6 axles and this one only 4.
The reason behind it is that when I came up with the first designs I made an art decision to fit all of the models to a 1x1 base plate. This limitation made designing quite challenging. I could fit all 6 axles under the train, but then the body/wheel ratio would be something that I don’t like. So… I did my best to make it look okay even if it’s wrong, focusing more on the recognizable silhouettes and main forms. And this example is not even close to what I had to sacrifice with my very long steam locomotive designs. :)
I am also not making a difference between the american and european couplers and every model is using the same, kinda cartoonish buffers. I made this decision to make the 3D printed models “compatible” with each other regardless of what locomotives and cars you put together.
I still have not ordered sticker papers to print the first test versions :) But what I did is that I exported it to Unreal Engine 5, out of curiosity, and quickly made a few more models around it.
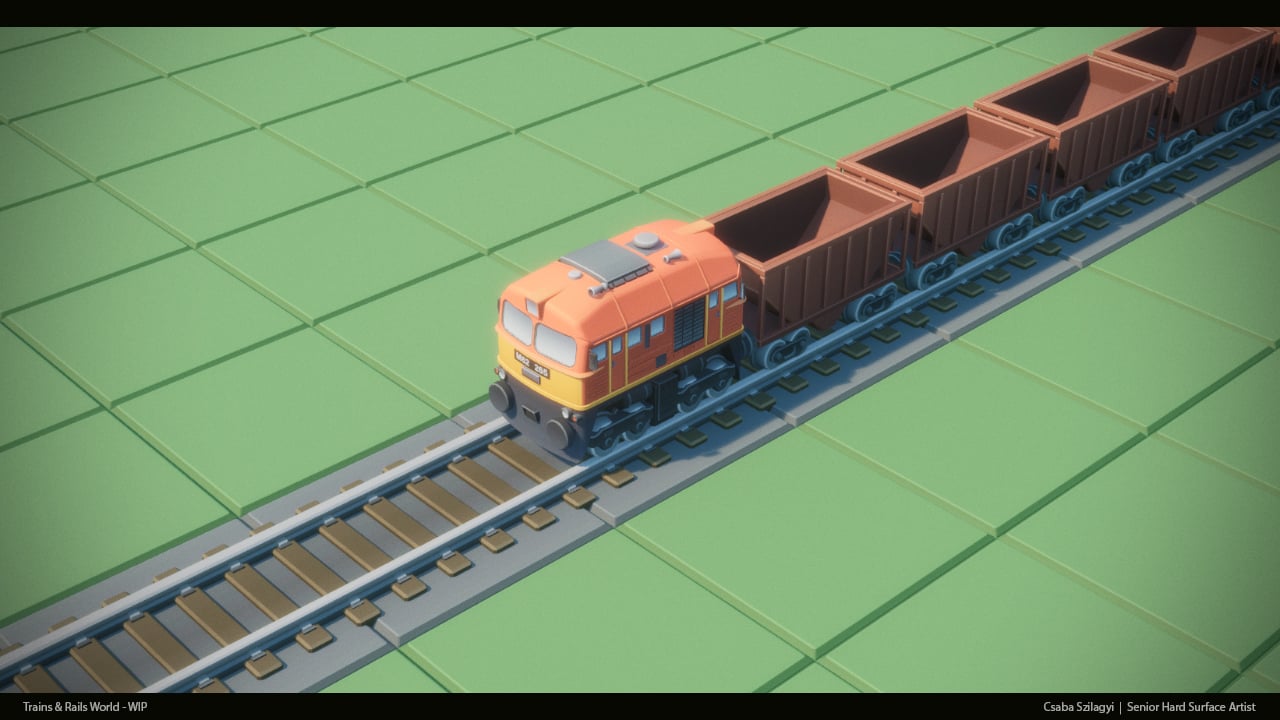
At this point I was like, what the hekk, why not… And made one more locomotive.
It’s pretty easy to model and texture them with this art style. This one took me like 7-8 hours to finish. And this is a brand new one, there is no 3D print ready base model to work with, which means some of the time was spent on checking references, proportions, forms etc.

As you can see I was fine tuning the proportions and details until the very last step, and still made a few adjustments after recording these steps.
And this is where I am now:

Still not sure where this is going...
...but 2 things I know:
- I will remodel more of my previous models to in-game models.
- I will dig deeper in Unreal Engine (spent almost the whole last decade working with RED engine, kinda forgot what is what in UE :) ) and make them move, maybe even I will try to make a mock up video about how a game would look like what I have somewhere in my head.
I’ve figured I will make posts like this to keep record of the progress. Whenever I have something to show, there will be a bigger post about it. As for now I go back and try to figure out how to make DoF in UE5. :) This is Photoshop DoF on the last shot, somehow I can not make it work on the simple CameraActor, no matter how I change the parameters…
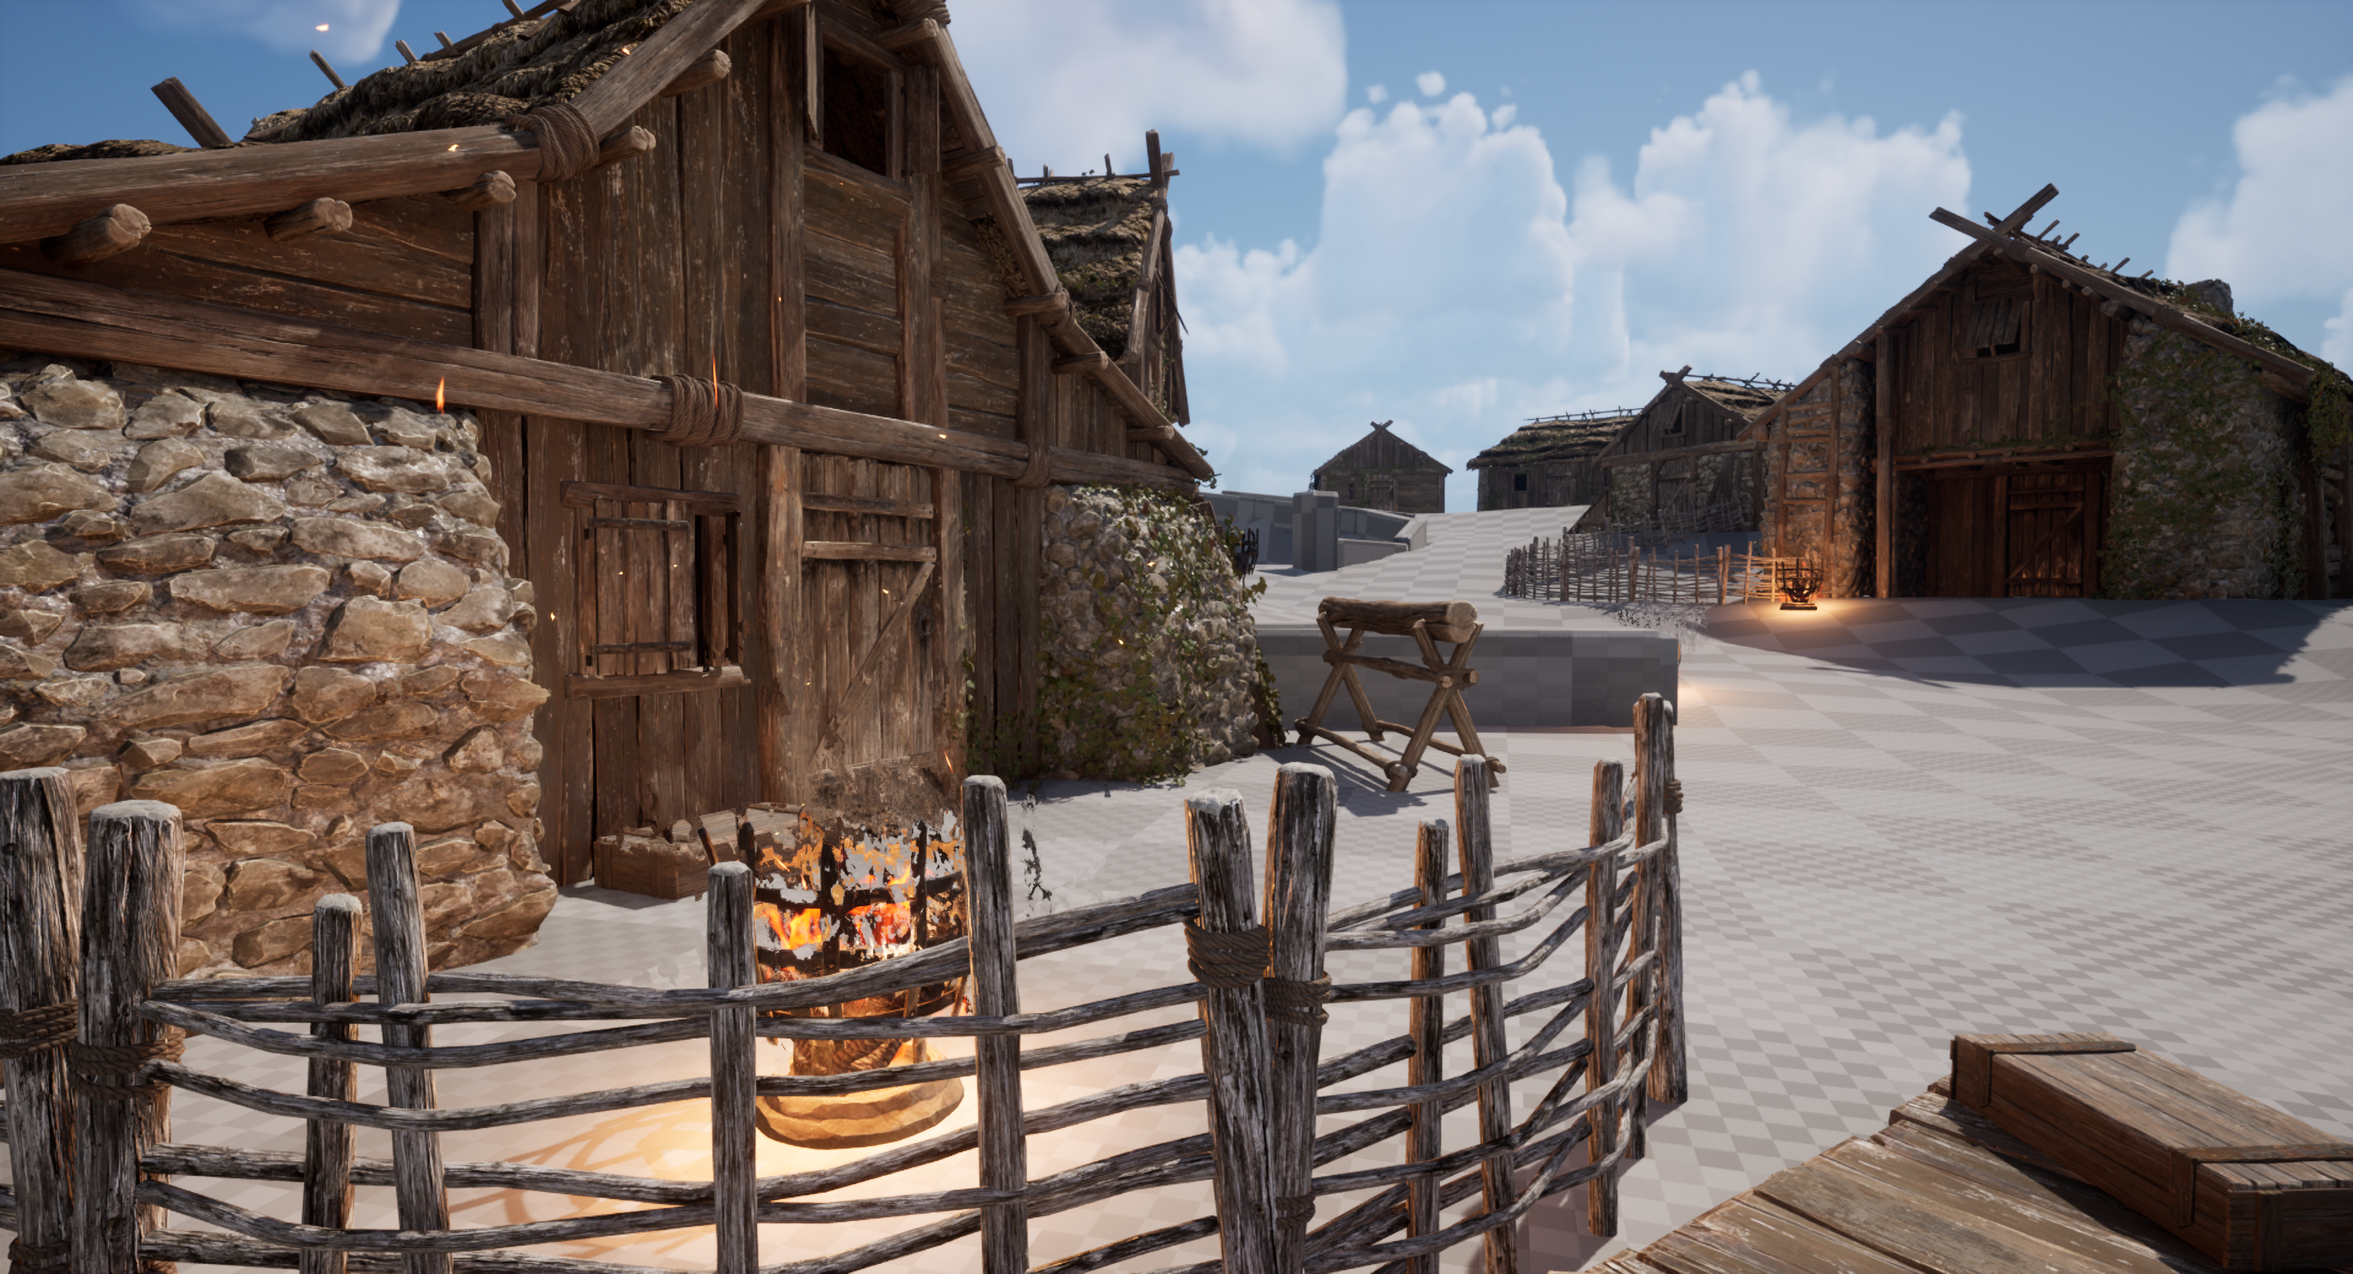
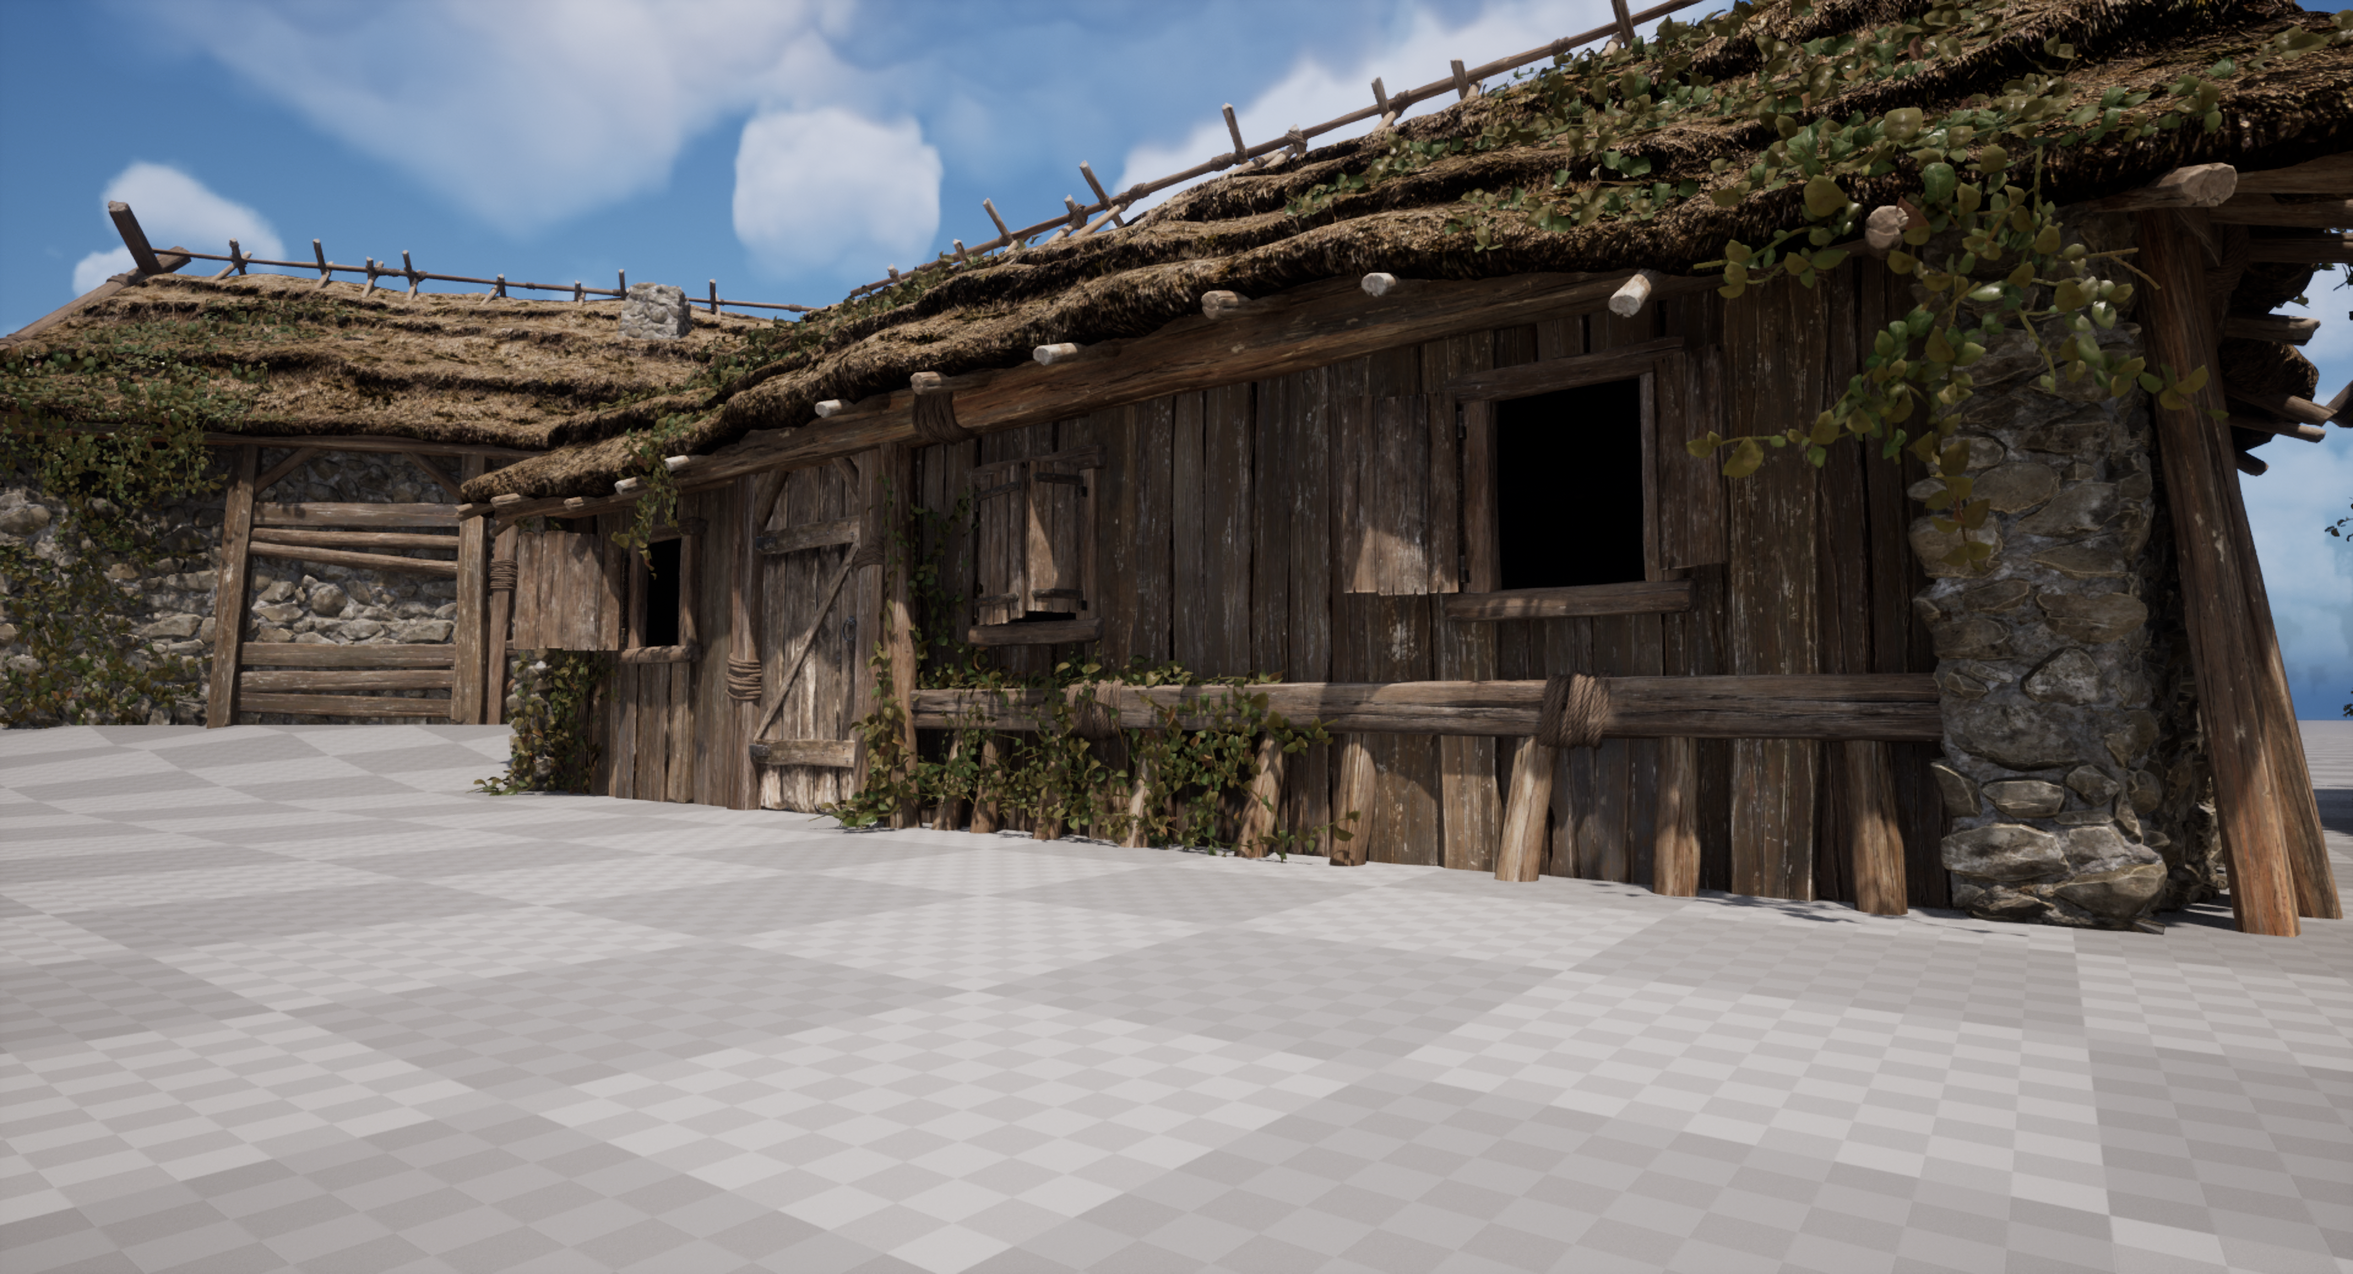
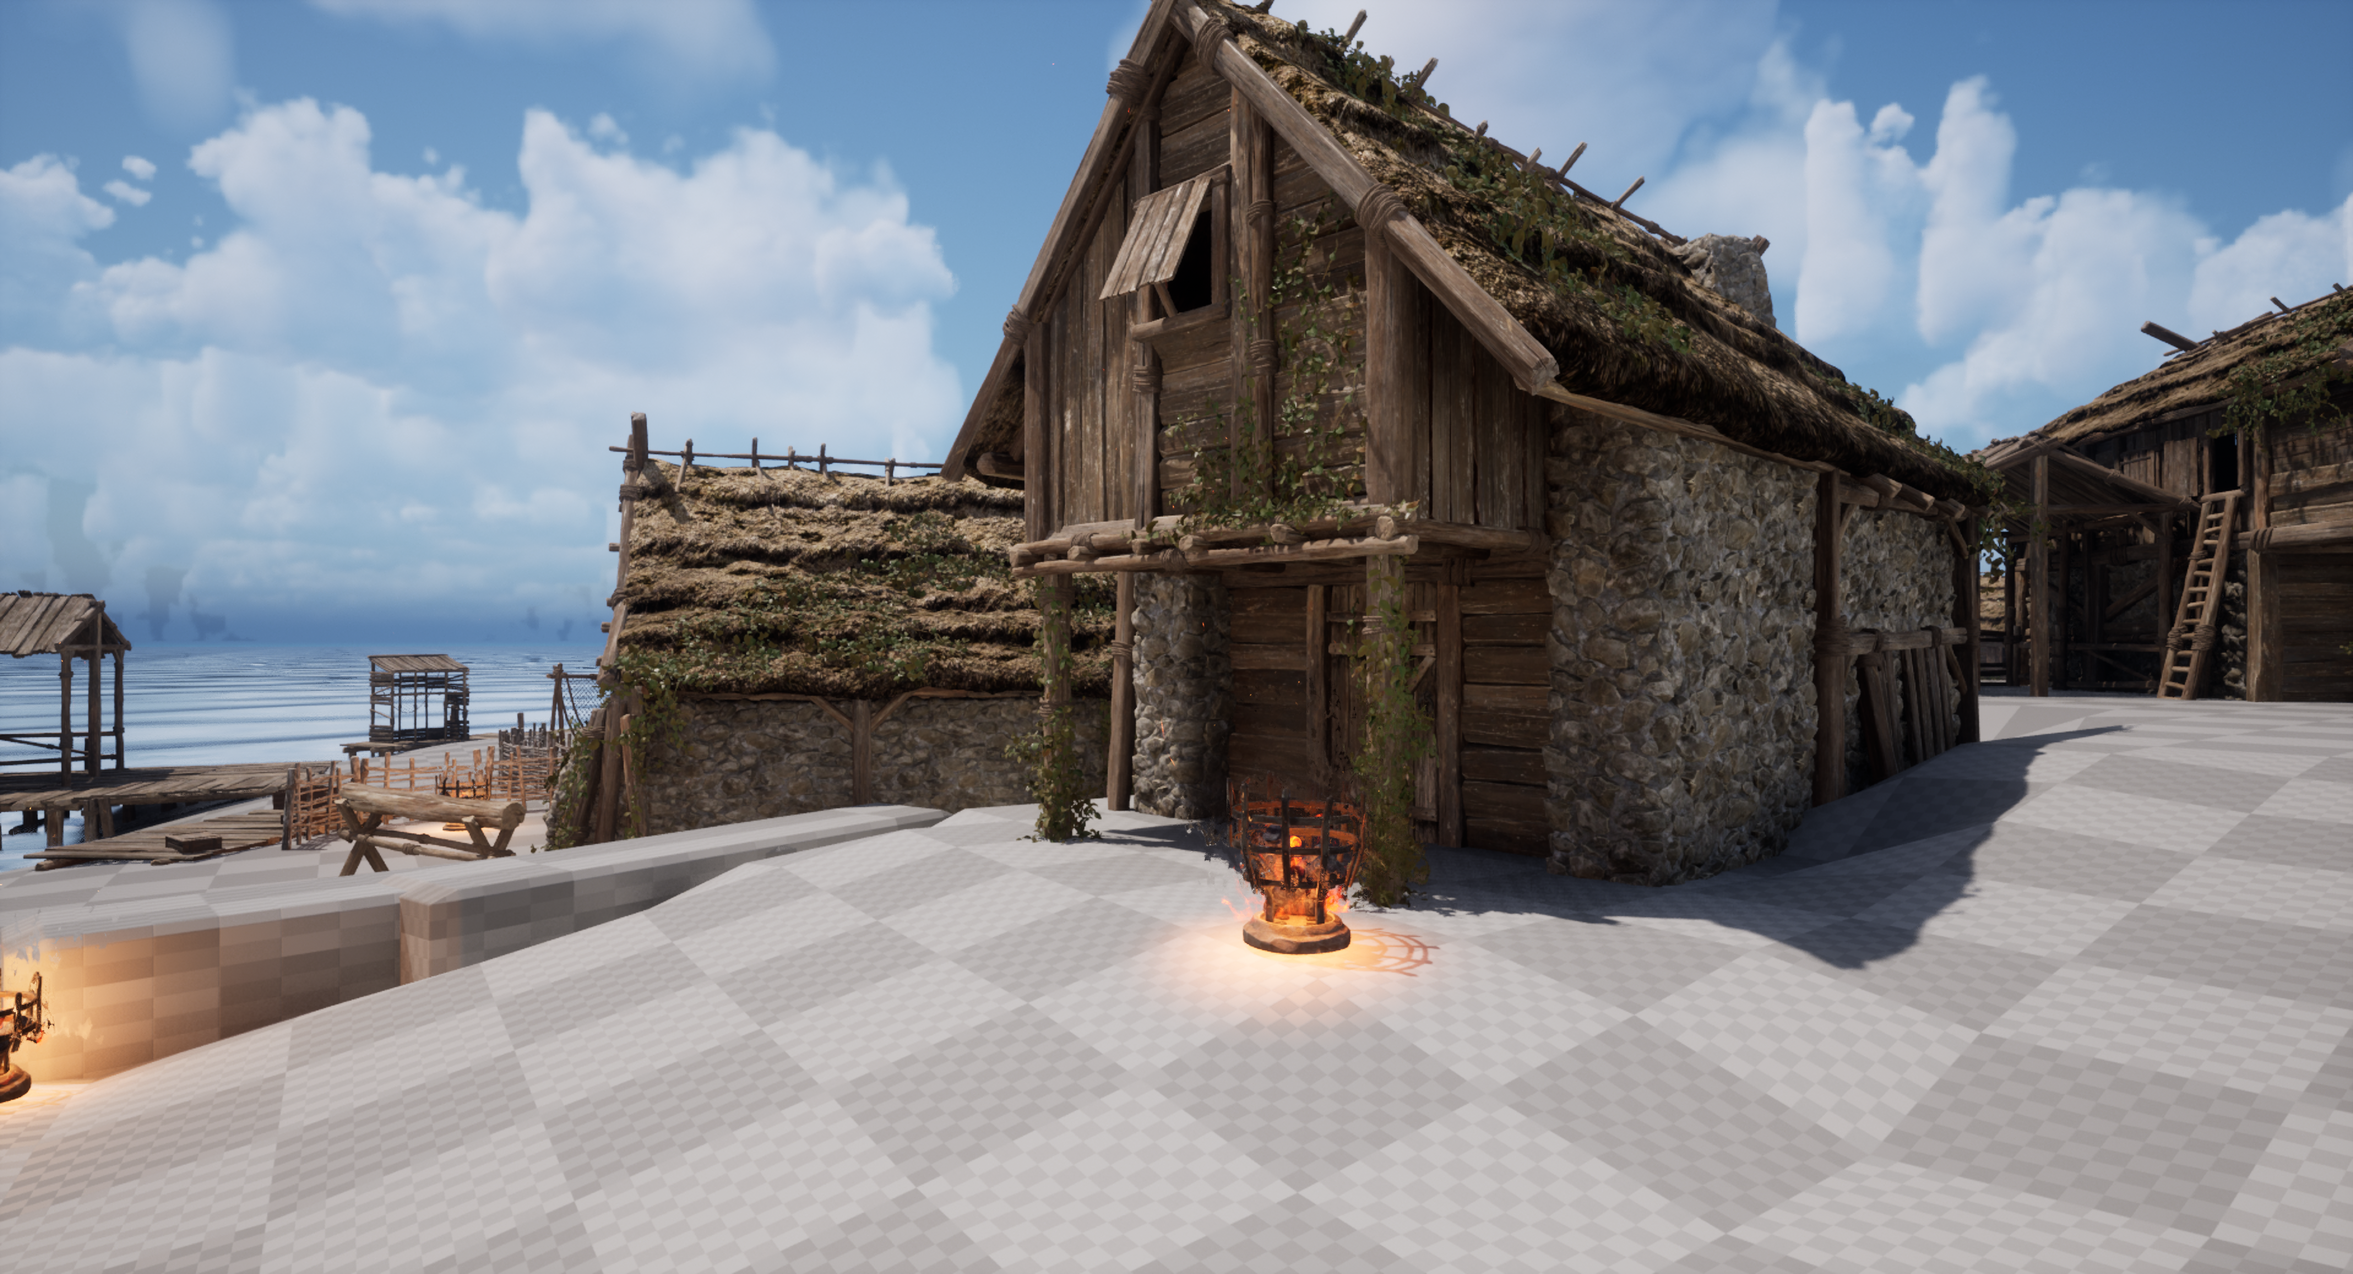
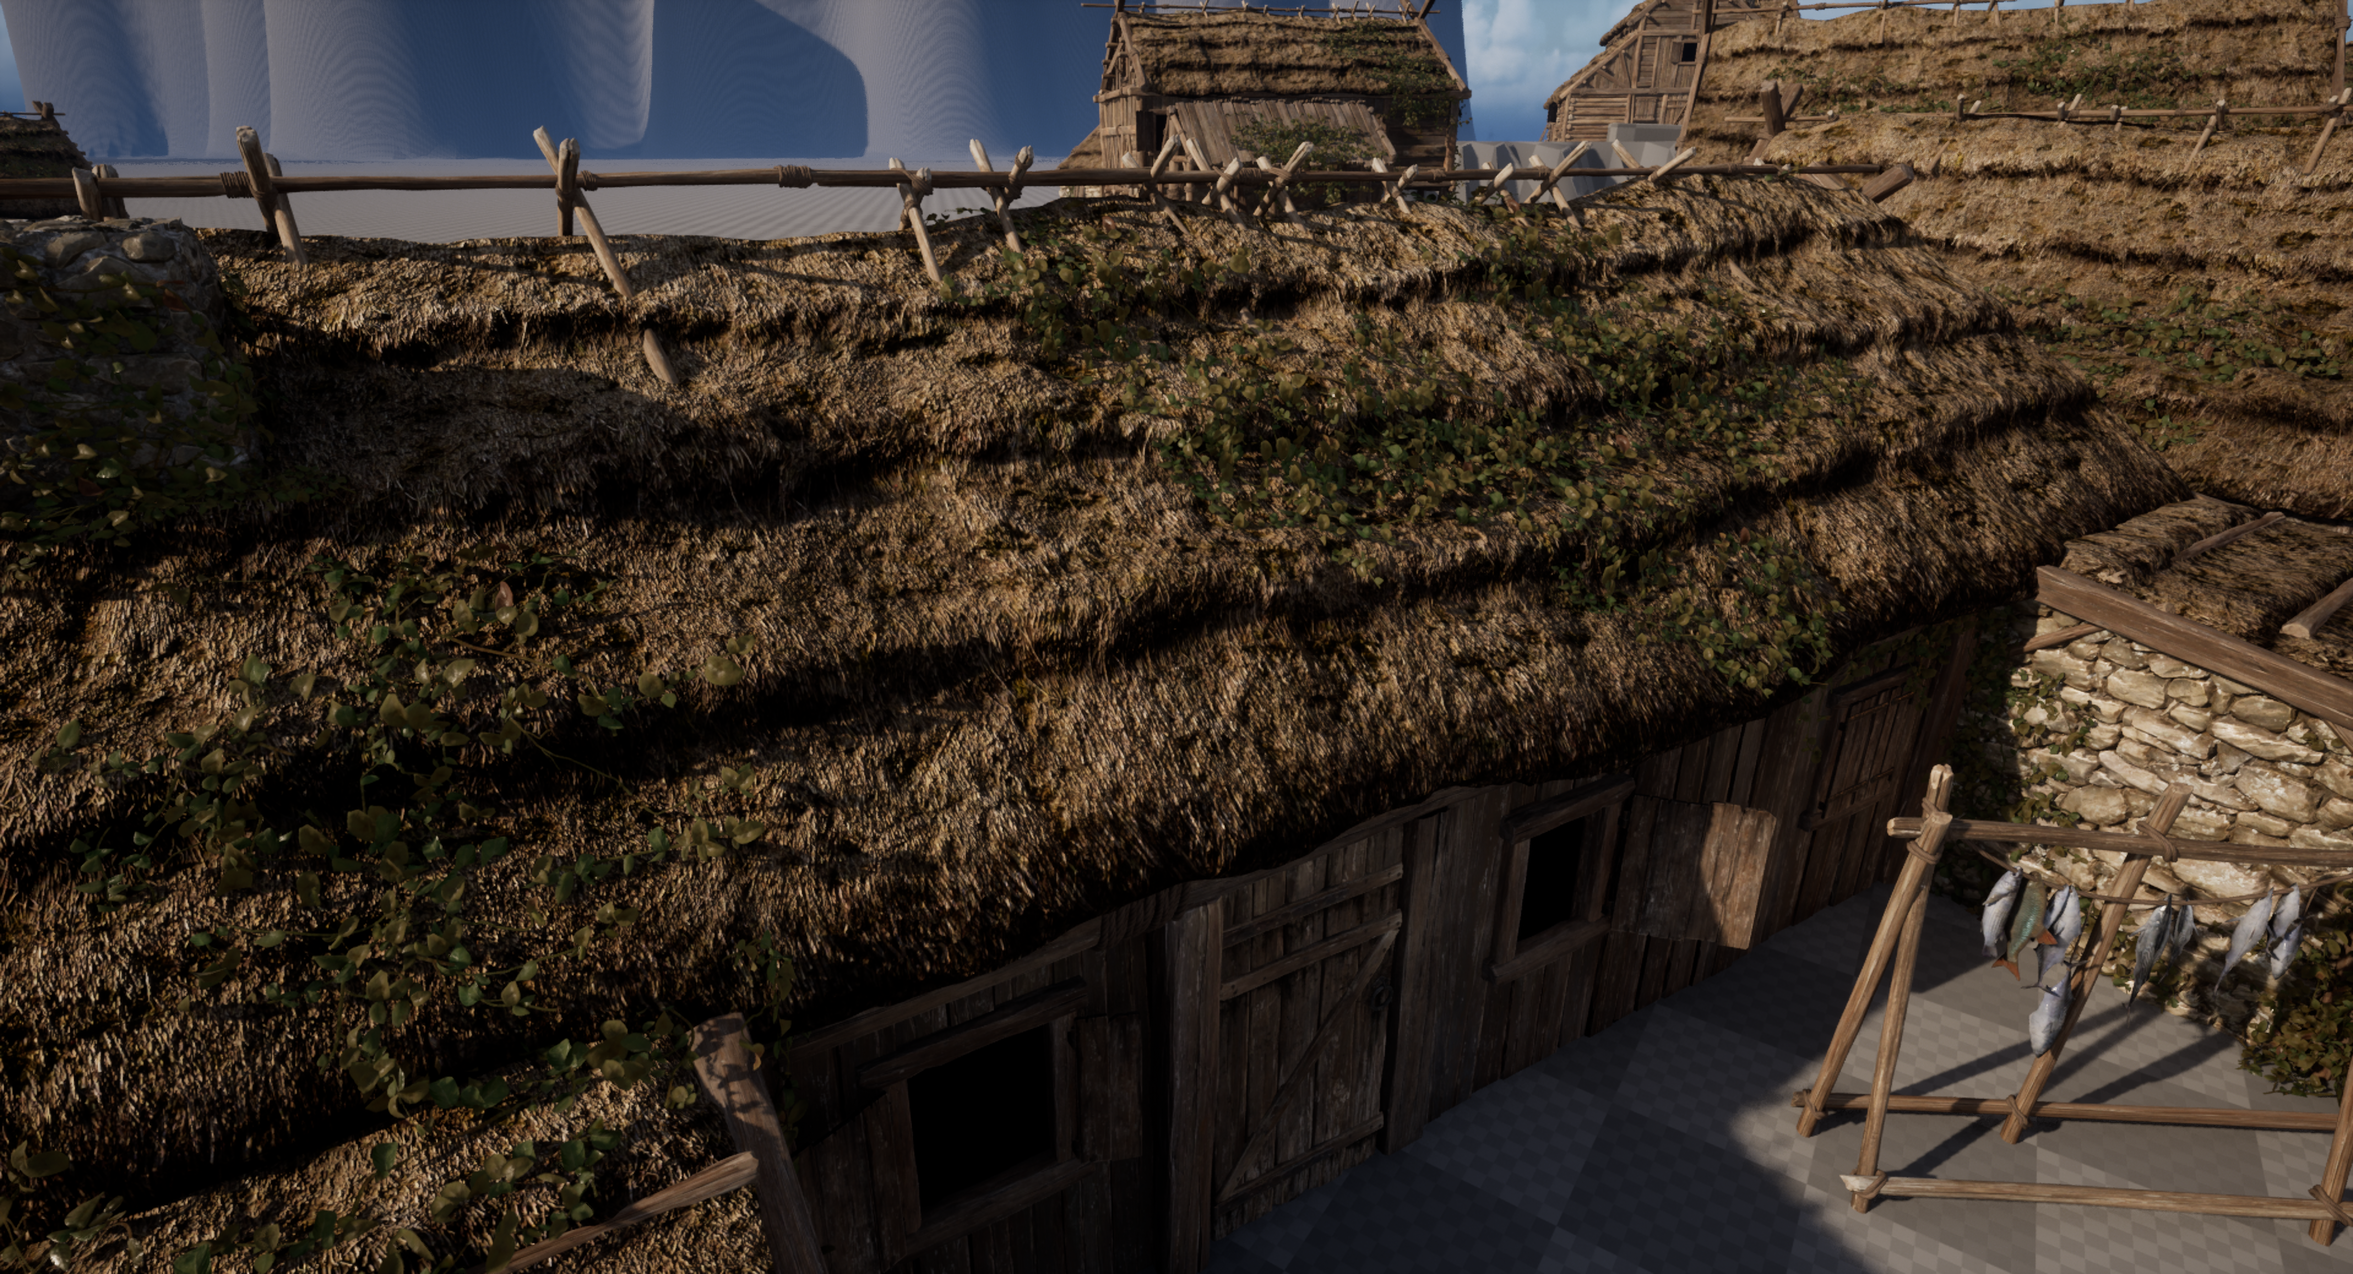
Witcher Fan Art - Skelige Island
Hey all. I have some images to show of the project im working on since quite some time now. Its Witcher fan art, specifically Skelige islands. Still early WIP but its enough to show to people :D
Aim here is to achieve very high quality visuals and trying not to kill engine completly :D UE5 is brialiant for that, a lot of annoying procceses were cut out of production.
Hope you enjoy and have some feedback.
High Res sculpts for most of this stuff is on Artstation here : https://www.artstation.com/damian94


 Hallazeall