The BRAWL² Tournament Challenge has been announced!
It starts May 12, and ends Sept 12. Let's see what you got!
https://polycount.com/discussion/237047/the-brawl²-tournament
It starts May 12, and ends Sept 12. Let's see what you got!
https://polycount.com/discussion/237047/the-brawl²-tournament
I fail copying this Tutorial-Material-Network and getting the same results
interpolator
Hi Friends!
I'm trying to copy this simple material network but I'm just not able to get the same results as this guy here in this video: https://www.youtube.com/watch?v=gOdTrIB5te0&feature=youtu.be&t=12m16s
BEFORE YOU ASK: This guy refuses to help by disabling the comment function below the video and having t his in its about:
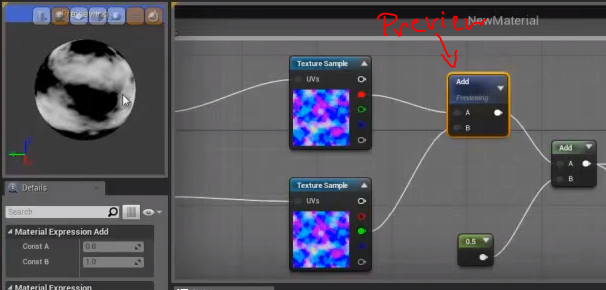
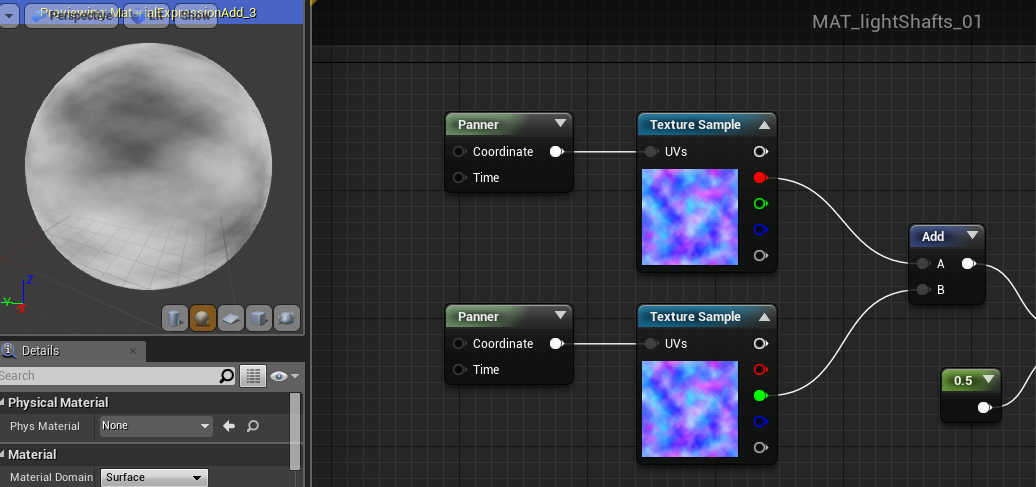
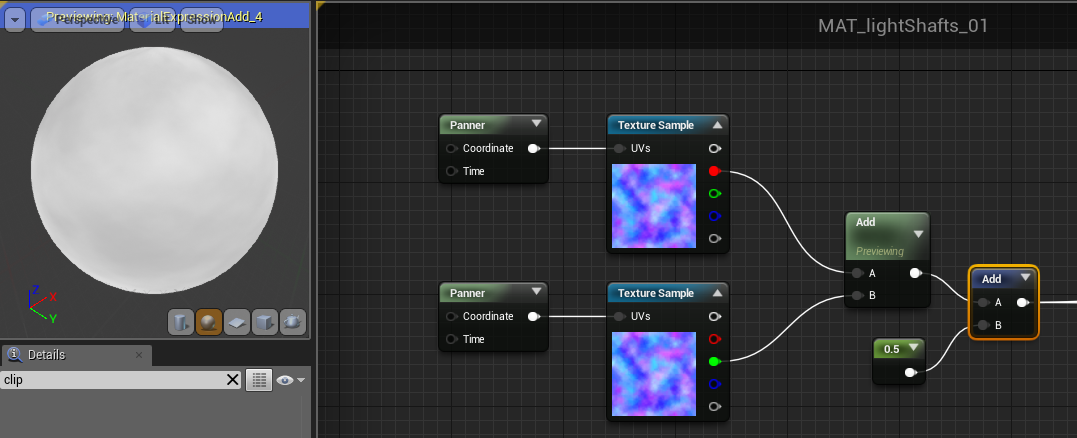
Here you can see, that he uses pretty simple cloud textures and by adding them, he get's this pretty strong contrast between black/white in his material (the left connection only direct to texture-panners).
My first problem is, that when I make such a texture like he explains (https://youtu.be/gOdTrIB5te0?t=10m) and add them, it looks like this (texture has SRGB set to true, if it's set to false, it's even brighter):
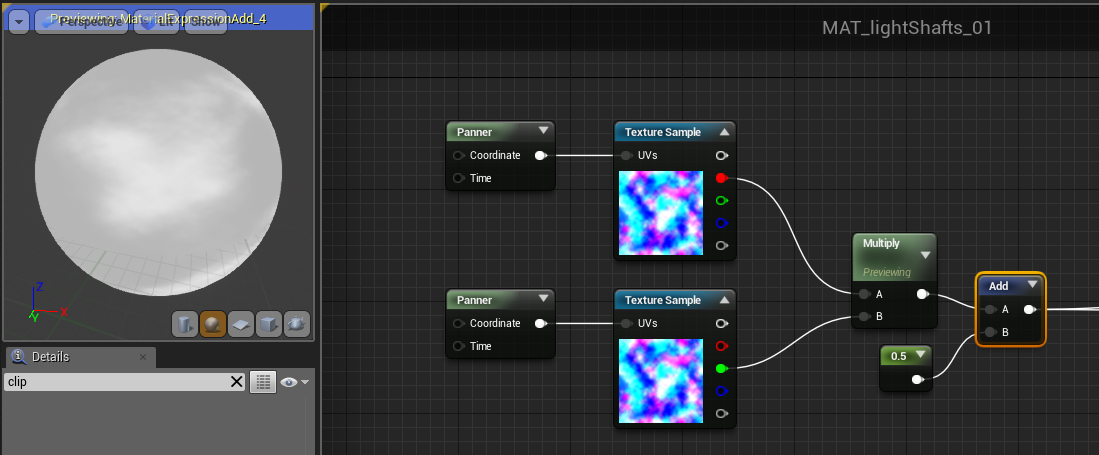
But it get's more weird. He then previews the 2nd ADD-Node and adds 0.5 which SHOULD make everything brighter (like I would expect it from ADD) but in his case the blacks stay black:
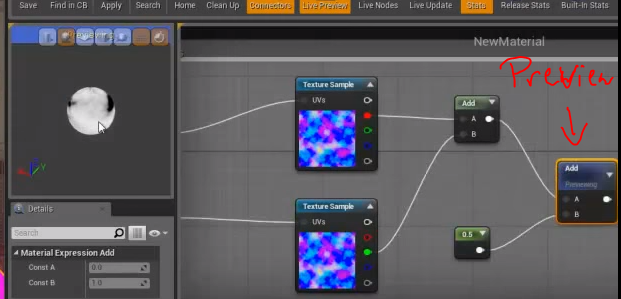
In my case it now looks like that:
The only way I could copy this effect was to extremely increase the contrast of the cloud textures and use MULTIPLY instead of ADD:
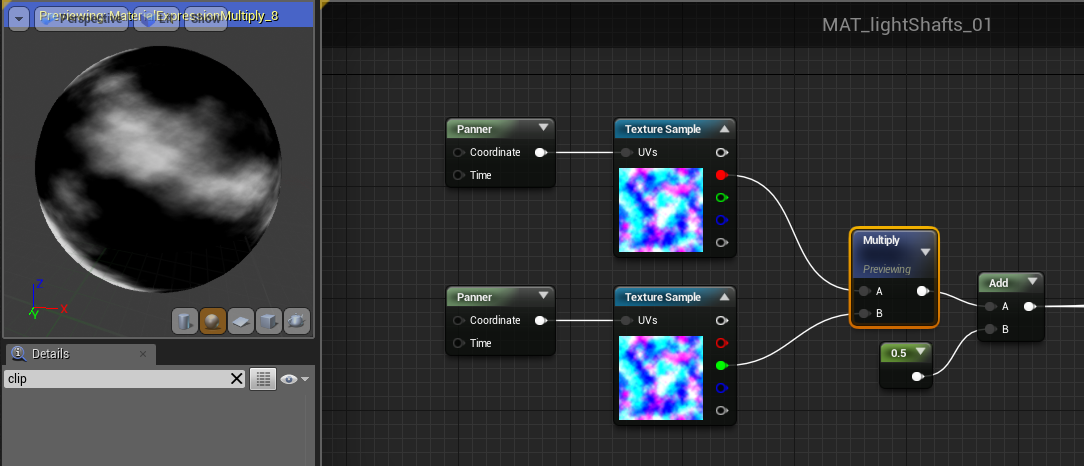
But even then: When I lader ADD 0.5 i get brightness everywhere and nothing stays black like in his example:
Does anyone has an Idea? Do I miss a setting somewhere?
I'm trying to copy this simple material network but I'm just not able to get the same results as this guy here in this video:
https://www.youtube.com/watch?v=gOdTrIB5te0&feature=youtu.be&t=12m16sBEFORE YOU ASK: This guy refuses to help by disabling the comment function below the video and having t his in its about:
If any of this is useful to you then great however I dont respond to comments or offer help.
Here you can see, that he uses pretty simple cloud textures and by adding them, he get's this pretty strong contrast between black/white in his material (the left connection only direct to texture-panners).
My first problem is, that when I make such a texture like he explains (
https://youtu.be/gOdTrIB5te0?t=10m) and add them, it looks like this (texture has SRGB set to true, if it's set to false, it's even brighter):But it get's more weird. He then previews the 2nd ADD-Node and adds 0.5 which SHOULD make everything brighter (like I would expect it from ADD) but in his case the blacks stay black:
In my case it now looks like that:
The only way I could copy this effect was to extremely increase the contrast of the cloud textures and use MULTIPLY instead of ADD:
But even then: When I lader ADD 0.5 i get brightness everywhere and nothing stays black like in his example:
Does anyone has an Idea? Do I miss a setting somewhere?
Replies
Sure, here are the textures. I already increased the contrast a lot. Before it was the standard Photoshop > Filter > Render > Clouds. The blue channel is used a smask but in the example i only used R + G.
I used "masks" compression mode and disabled sRGB. Switching to masks compression mode require your samplers to be in that mode. Also, you can give more contrast to your textures with the RGBCurve when you open a texture in the content browser.
https://www.youtube.com/watch?v=Eu6KBPhQ_iQ&feature=youtu.be
Clearly you know that a standard texture has values from 0-1 for black to white. so if you add 0.5 there should be no black at all, especially with the additional add of the textures to each other. Given his example, and that there is black after all that addition, the only option is that the blacks you're seeing start out with a negative value.
Also telling is that his blue channel is a solid color yet appears very dark in the thumbnail.
The image he's using is most likely being imported as a normal map, so its unpacked from -1 to +1. So when you add the channels you're getting a range of -2 to +2, which is actually very much what you want when you want cloudy interference patterns like this. However, by adding the 0.5, he's bumping up the median value (altering the range from -1.5 to 2.5).
You can set your own texture import range by opening up the texture itself in Unreal. There are a large number of little options you can alter there.
Your output will look more like this:
The cloud texture will change much more organically that way also.
Yes you can do procedural clouds for a skydome this way, you'll just need to choose your Perlin noise textures carefully and likely add a number of them at differing scales.