CryEngine Portfolio level + custom assets: Lab X2

A S.T.A.L.K.E.R. inspired singleplayer map and mini-mod.
Level Design and 3D Art: 3DLee
Scripting, Flowgraph, and 3D Art: EmAr
As you can see, Lab X2 is now a single-player mod. While a multiplayer map version is still an option for the future, I decided that a single-player experience would better display the level design and concepts that I have in mind.
To help me accomplish this, long-time modder EmAr will be joining with me to create this level. Many of you already know him from his terrific work on his Lamborghini Reventon model for CryEngine. While we are still planning what exactly we are going to accomplish with this mod, we do have some general goals:
- Create a large level using custom assets and characters that are inspired by the 1972 Russian sci-fi novel Roadside Picnic by Arkady and Boris Strugatsky , the 1979 film Stalker by Andrei Tarkovsky which took inspiration from Roadside Picnic, as well as the S.T.A.L.K.E.R. series of games by GSC Gameworld which took inspiration from both original sources.
- Create this project using nothing less than professional standards. We want the work seen in this thread to be of portfolio quality, and we welcome all critiques and suggestions.
A few features that we are planning include:
- Large, open world map with lots of exploration, and some underground areas.
- Several kinds of enemies, both from the S.T.A.L.K.E.R. game series as well as original enemies.
- Dangerous anomalies and zones of high radiation.
- Artifacts and artifact collection, including common and very rare artifacts.
The Setting and Storyline
As mentioned earlier, Lab X2 takes inspiration from a number of sources, especially the S.T.A.L.K.E.R. series of games by GSC Gameworld . With this in mind, we want to create a level that fits in well with the official S.T.A.L.K.E.R. game storyline.
If you're not interested in hearing the back story for the level, just skip on down to the images blow.
Possible spoilers if you haven't played S.T.A.L.K.E.R.!
Background (S.T.A.L.K.E.R. Storyline):
In the game, the eerie Zone, the anomalies and artifacts and the mutants were created by rogue Soviet scientists using the Chernobyl exclusion zone as a safe base of operation. In the original game, you visit labs X8 and X16 where you learn of the psychic and other experiments being done on people and animals in the lonely exclusion zone by the group of rogue scientists ( the scientists called themselves the "C-consciousness"). Later experiments would cause a massive radioactive and "noosephere" explosion that creates "The Zone".
Full storyline info: http://en.wikipedia.org/wiki/S.T.A.L.K.E.R.:_Shadow_of_Chernobyl#Plot
The Map's Setting:
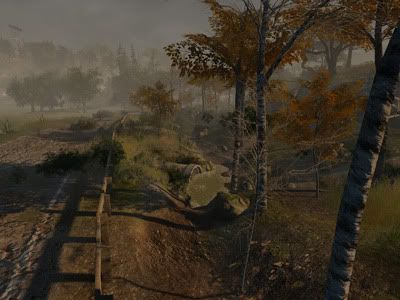
I have sketched out a setting based in the S.T.A.L.K.E.R. universe that could still fit in with the main storyline. The map will focus on one of the earlier labs that was built just off of the Kiev river, known as "Lab X2". The original purpose of this lab complex after the initial 1986 Chernobyl disaster was research into the effects of radiation on the area, sanctioned by the government. Members of the scientific staff at Lab X2 make plans to begin psychic and other unsanctioned experiments, and they form a group known as C- Consciousness. As the C- Consciousness begins their experiments, the lab is used for transporting political prisoners and animals for experiments underground. A man-made swamp/inlet from the Kiev River is located at the entrance to the underground labs, originally used for cooling the equipment for a massive RADAR on the hill above the lab. It was later used to cool the psychological equipment used by the C- Consciousness. Another prominent feature will be two railways which were used for transporting the prisoners for the experiments.
End spoilers!
_____________________________________________________________________
Screenshot Gallery
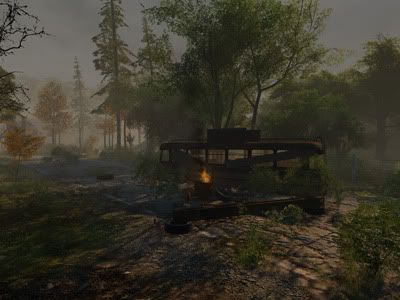
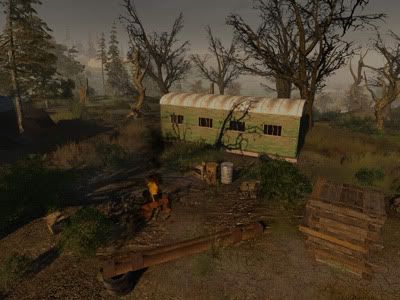
This section contains a selection of screenshots from the map. To see more, be sure to browse through all of the pages!


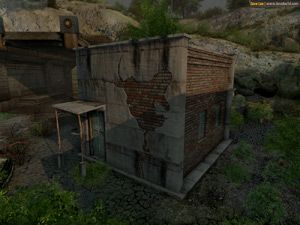
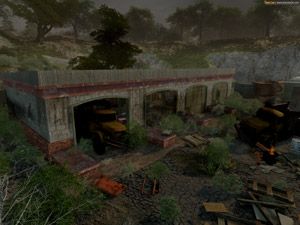
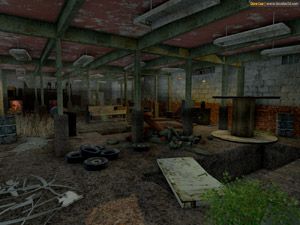
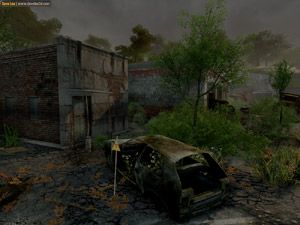
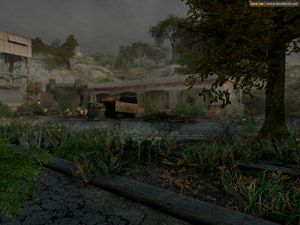
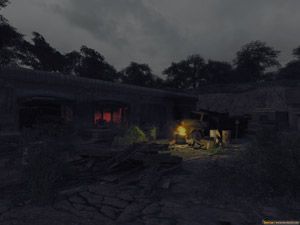
ORIGINAL POST:
Once again, thanks for all the great comments over in the "First FPS level - What 3D Engine should I use?" thread. All of the info was extremely helpful, and I've decided to create my first FPS level using CryEngine's Sandbox 2, for its relative ease of use, powerful lighting and vegetation systems, and the extensive amount of pre-made assets. I'll be using this thread to document my progress and get critiques and suggestions.
My goal:
1. Create either a small piece of a level or an complete small-sized MP level using Sandbox for my portfolio.
2. Create custom assets using 3ds Max for this map as needed, while also making good use of the pre-done assets.
The setting:
My all time favorite FPS's are the two S.T.A.L.K.E.R. games. I'm hooked on their pseudo-Cold War/disaster/horror/other-wordly setting. I've also recently watched the 1979 Russian sci-fi movie that the games are (very) loosely based off of, and with all of the above in mind, I want to create a level that fits in well with the official S.T.A.L.K.E.R. game storyline.
I also read a PDF that someone posted on here a few weeks ago that described perfectly a goal that I've always had with my levels: "Every scene needs to tell a story". That nails it! I've always loved adding in that extra set of tire tracks, or the car turned over in a strange way, etc, that makes the player feel as if there is a history to the level that they're playing.
If you're not interested in hearing the back story for the level, just skip on down to the images.
Possible spoilers if you haven't played S.T.A.L.K.E.R.!
General setting:
In the game, the eerie Zone, the anomalies and artifacts and the mutants were created by rogue Soviet scientists using the Chernobyl exclusion zone as a safe base of operation. In the original game, you visit labs X16 and X16 were you learn of the psychic and other experiments being done on people and animals in the lonely exclusion zone by the group of rogue scientists known as the "C-consciousness". Later experiments would cause a massive radioactive and "noosephere" explosion that creates "The Zone".
Full storyline info: http://en.wikipedia.org/wiki/S.T.A.L.K.E.R.:_Shadow_of_Chernobyl#Plot
The Map's Setting:
I have sketched out a setting based in the S.T.A.L.K.E.R. universe that could still fit in with the main storyline. The map will focus on one of the earlier labs that was built just off of the Kiev river, known as "Lab X2". The original purpose of this lab complex after the initial 1986 Chernobyl disaster was research into the effects of radiation on the area, sanctioned by the government. As the C- Consciousness begins their experiments, the lab is used for transporting political prisoners and animals for experiments underground. A man-made swamp/inlet from the Kiev river is located at the entrance to the underground labs, original used for cooling the equipment for a massive RADAR on the hill above the lab, but later used to cool the psychological equipment used by the C- Consciousness. Another prominent feature will be two railways which were used for transporting the prisoners for experiments.
Getting started:
I've been laying down the basics of the level while learning the ins and outs of the editor. So far I've figured out the time of day basics, custom textures (mostly), importing custom assets (the community released some very helpful pine trees), terrain modification/heightmaps, terrain painting, vegetation, using the grid system, using geometric presets, etc.
I'll also be using a good bit of Crytek presets, but some are just placeholders for assets that I am planning on creating myself.
Without any further rambling, here is what I have so far:
<old screenshots removed>
Replies
You might be making it harder on yourself if without these.
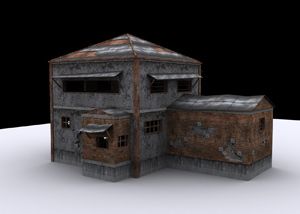
For example, this will be my first custom asset, an administrative building at the edge of the complex - nothing too complex.
I really like your goals - I've been thinking about doing something similar, as my current project won't be released for a while and having something to put into a portfolio would be nice.
I don't have many crits at the moment since you have obviously just started using Sandbox 2, but I think I might be able to give you some tips, that you might find useful.
Your terrain looks quite low-res, would you mind telling me what kind of settings have you used? I assume the map is 1kx1k in size, but I'm more interested about the Meters Per Unit. What I am saying is, that you should always use the lowest unit size possible, as this gives you a higher-res heightmap and better transitions between terrain textures. If you have used 2 meters per unit by any chance it's better to change it now, before it's going to be too late, as changing it midway through can mess up your map.
Another thing that keeps bugging me. What kind of trees are you using right now? Are these trees in the background jungle_trees by any chance? If yes, you should use hill_trees for the non-playable areas (once again, I only assume they are not playable) as they are very nicely optimized and you can put literally thousands of them, with no performance loss (just remember to tick Use Sprites setting in the vegetation tab).
That's for the crits. You will probably come across a few problems, so I think it will be better if I state them on beforehand.
1. You can use up to 14 surface types in your level (and unlimited number of Terrain Layers) - so it's good to figure out first what kind of textures you want to use on your terrain.
2. CryEngine does not support real-time reflections. You can use cubemaps instead, but I think that cubemap generation utility is not working properly. You will probably find more about that on the Crymod forums.
3. Try to keep the scale of your vegetation lower than default. If you press F1 (TPP camera in the editor) you will notice that they are bigger than the player on default.
4. Changing the skybox can sometimes make your sun disappear. If it happens, simply revert to the default one and then use a custom one once again.
5. Some tools require very small number to be used in order to achieve desirable effects. GlobalDensity setting in the FogVolume entity, for example requires numbers between 0.001 and 0.1. Above that it's going to be too dense. Many of the TOD settings have the same problem and you will have to type the desired number manually, instead of using the sliders.
6. Don't use Solids for anything else than placeholders. This tool is completely broken. You will find that some people are making whole maps with them, but they suffer in the performance department. Solids don't have occluders built in and you can use only cubes. I am afraid you will have to use 3d modelling app even for the most simple objects.
That's a couple of things for the top of my head. If I remember something else, I will post it later.
If you have any questions, feel free to PM me. I will be available for about 3 days, as I am moving to the UK later.
Anyway, keep it up
michi.be, thanks for your work on the vegetation set, without it, my map would look terrible - plain & simple. Spiffy portfolio as well (I'm partial to the Pripyat map myself, heh-heh), bookmarked for sure!
Unfortunately, to change that, you have to create the map again since changing that midway through will brake it. But it is possible to transfer some things from your current map to the new one.
First, select all your objects (brushes, geom entities, entities, etc.) on the map and make a prefab out of them. Then, export your prefab to the .xml file.
You can also export your heightmap I believe (I have never done that, but it should work) and apply some adjustments later.
There is no way to transfer your vegetation however, as coordinates on your new map will be different. However, you can export your vegetation settings (export vegetation in the vegetation tab) and terrain layers (export layers in the terrain layers editor).
After everything you need is exported, create a new map, set the meters per unit setting to 1 and double the value of your heightmap resolution compared to your current one - ie. if you previously used 1024x1024 then use 2048x2048 now, so the size of your map will remain the same.
Now you can put your objects back, import your heightmap (I think you will have to resize it in photoshop first) and put your vegetation back manually.
This whole process is a little bit lengthy, but I can assure you that using the default, 2 meters per unit setting is pretty annoying. Unless your map is almost completely covered with vegetation you will easily notice the low terrain resolution, so I believe it's better to take care of it now.
Don't forget to back up your old map previously
I can't assure you that everything I mentioned in this post is right(I have not went trough that process) so it will be better if you take a look at the Crymod forums first. This problem has been discussed many times in the past, so I think that finding it should not be a problem.
Hope that helps. Cheers
I've also gotten some experience with the materials system (after much frustration), and I got my first custom texture into the editor (it's the rough gravel under the tracks):
(I also noticed that my vegetation re-appeared after I imported the vegetation set files. Weird?)
On my to-do list for the next 2-3 days:
- Get all the way through the "Import test cube from 3ds Max" tutorial without screwing anything up, then move on to more complicated geometry
- Start planning what custom assets are most needed
- Get to work on said assets
It's normal that the vegetation appeard, however I have been worried that it might appear in different places due to different map coordinates.
The import process might be quite complicated at first, but once you get used to it it's really quick and simple.
Anyway, I am moving to the UK tomorrow as I am starting my uni,so I will try to keep an eye on this project once I get my stuff moved. Good luck with it
To start out, here are some shots of the level itself. I've been working on the mountain on top of the base, as well as a small underground section that will connect the back/top of the map to the middle area.
In other news, I had forgotten how incredibly rusty I was in 3ds Max. The last real game assets that I did using Max were back in 2006 when I was doing low-poly (300-700) models for a Command & Conquer Generals (2003) mod! With the help of a copy of the 3ds Max 9 Bible and about a trillion tutorials, I have my first custom asset in-game, if not bug free:
(Concept image from Chernobyl Exclusion Zone)
And here is the shading error that I'm getting on the hole in the wall:
I'm still stumbling my way around Max, so if anyone has any suggestions on a good way to rebuild that wall, and then maybe a better way to punch the hole out without leaving stray vertices running around, that would be a huge help.
I'm also trying to figure out the best way to keep the sunlight from filtering down into the underground section. With no back face, the sunlight goes right through those lower walls:
Or just do it again. I think it will cost you the same time.
I think the terrain looks a bit blotchy with to much mixed up ground textures. I'm missing some kind of a "theme" there at the moment.
You did the shoots on high settings or medium? CE2 looks like crap if you run it at mid/low settings because of the realtime stuff turned off then.
Maybe look into the TOD editor and try to get some shadows and saturation in there.
I'm getting a weird error where when I press CTRL+G to drop into the game, the TOD instantly reverts to this.... any ideas? Changing the hour slider on the TOD resets it, but then it just happens again.
As far as assets go, before I got any further I decided to get back to the basics and learn the correct workflow and some more in-depth techniques to save me some frustration. I picked up [ame="https://www.amazon.com/gp/product/0240810619/ref=ox_ya_oh_product"]this book[/ame], and I'll be going through it before I get any further into asset creation.
On the Sandbox side of this, I've been working on the new TOD (couldn't fix the last one) as well as a new road texture for the main asphalt roads in the map, and a new skybox texture with Chernobyl visible in the distance:
TOD:
Road:
Skybox sample (the DOF makes it hard to see):
This shot:
is godlike though. I thought it was the original for a sec.
Apologies if constant thread updates are getting annoying, I'm kind of using this thread to keep tabs on my progress each week.
It's been a busy week in the personal life/real classes/work department, so I'm behind on digging into the 3ds max book. I've been trying to spend at least one hour a day in Sandbox though, and I've managed to stick to it. On a random note,I do plan on making all of the custom assets from this map publicly available once it is finished.
Accomplished since the last update:
- Went through TOD guide and finalized the TOD
- Finished texturing the mountain, adding in more details
- Set up auto population of grass vegetation on grassy texture areas, and Procedural forest vegetation on Forest Floor texture areas & optimized the density
- Added more roads
- Optimized the vegetation on the mountain. I went a little nuts the first time, some areas were approaching 3 million polys! The mountain forest now runs smoother, and looks better.
- Added Solid Tool placeholders for large buildings, many of which are going to be custom props. As you can see below, this is a long-term, multi-month project for sure.
Here are a few screenshots:
This is my first attempt at creating one of the many class "campfire scenes" from the S.T.A.L.K.E.R. series:
An overview of the base entrance, with the lower entrance to the underground section:
An overview of the main base area:
A low-quality zoomed out look at the map, with playable areas marked in red:
This week, I have almost finished the next two props. First up is the classic S.T.A.L.K.E.R. barbed wire fence, which will border sections of the map not covered by natural boundaries and keep the player in check. Why can't they jump over? Radiation and the anomalous dangers of the Zone lie uncharted behind these fences...
18 polygons for each section (1 post and fence section), 1x 512x512 and 1x 256x512 textures
Next up is my take on a classic S.T.A.L.K.E.R. staple, the yellow/red hand stenciled radiation sign. I added my own twist with a second sign addition based off of an early S.T.A.L.K.E.R. marketing image.
...also, this is my first 3ds max UVW Unwrap in 3+ years! :poly121:
30 polygons each, 1x 512x64 and 1x 512x256 textures
And finally, here is a shot of it all together at the edge of the map:
(Click to enlarge)
A few final notes:
- There are specular maps for these textures, I just didn't bother posting them as well.
- All normal maps and specular textures created using Crazybump. I love it!
- I still don't have the 3dsmax texture -> Sandbox material system worked out. It takes me re-creating the SB2 texture from scratch 2-3 times to get it working right. I need to work on this.
- I'm having trouble getting Proxy objects working correctly. Maybe it's a SB2 texture issue?
First up, a new prop WIP! This is an old garage based off of the one in this screenshot (my only screenshot of it unfortunately):
726 polys so far, still not quite finished detailing it. I'm really looking for feedback on this from you guys, as I'm very new to FPS building modeling, and I'm extremely rusty in Max:
And wires:
I'm also considering using the Crysis Ruins church to accent the map. For now, I have it placed at the edge of where the village will be:
I've also redone the "Southern" border of the map, near the church and the village. The edge of the map will be cut off by a small river, as well as some natural cliffs. There will be a barbed wire fence running along the top of the ridge-line, as well as the radiation warning signs. (see previous update)
Between the barbed wire fence (the true edge of the map) and the church and village there will be a pine forest area with a few small outbuildings. This will provide a wider "near edge" area to the map, as well as providing a sneaky back assault route for this side of the map.
I'm also working on the "Western" edge of the swamps, but my dead trees keep disappearing:
Here are some desktop-size (22"-ish) beauty renders of some of the areas that I have been working on. Enjoy!
Finally, I'll end with another very zoomed-out overview of the map:
To start things off, I have two new ground textures to show you:
New grass texture:
New rock/mud/debris texture. This is a 2048x2048 texture with a 1024x1024 normal map and parallax occlusion mapping for depth, as well as a 512x512 specular map:
I have also updated the road texture to help remove some of the noticeable tiling. I redid the normal map to remove the paint lines from it, and I also added parallax occlusion mapping to help add depth:
Next up I have a new prop/building that should be familiar to S.T.A.L.K.E.R. players. This is the portable/mobile barracks seen abandoned by government and military forces all over the Zone. These are screen captures from the Crytek map "Shore" so that you can see them better:
Wireframe: (1,076 polys, 3 unique texture maps [one 1024x1024, one 512x512, and one 512x256] as well as 2 re-used texture maps from other assets I'm working on)
Testing out some prop placement in the map:
I added a little detail on the main road near the lab base entrance:
For the last part of the update, I am posting a good sized screenshot gallery of the area of the map that I have been working on the most in the last 2-3 weeks. This area is a radiation-deadened wasteland above the main road that leads to Chernobyl. It lies at what would be the lower-right of the map near the border if you looked at some of the overhead screenshots I have posted before.
These monsters weigh in at 1.2mb each, so only bother if you're really interested. :poly136:
And if you're lost, here is an overview of this "wasteland" area of the map:
Example from another building I'm working on:
Windows can be easily made using the Inset tool.
Divide your wall first using the Connect tool - depending on the number of windows you will need more faces. Then, use Inset tool on both sides of your wall, this will create 2 quads in the middle of your wall. Delete them and use bridge to connect the edges of the window.
Alternatively, you can use the Connect tool to create the windows.
The Zone Guard Outpost:
Renders
In-Game:
And here are some wires:
If anyone can translate those Russian signs for me, that would be great! I actually have a whole texture sheet of them, and I probably should figure out what they mean before I keep using 'em. :cheesy:
Next up I have a new ground texture that I've created. This uses a diffuse, specular, and normal map with parallax occlusion mapping. The normal map has a bit of a pattern in it at the moment, so I'll be working to remove that:
And a simple brick wall asset:
Always looking for critiques!
http://s209.photobucket.com/albums/bb134/EvilViking13/CryEngine/Lab%20X16/guardtower1/
And now the new stuff:
Lab X2: Time of Day Test 1
Hey folks, I've managed to get a bit of work done on my map's TOD. I'm working on creating a 24-hour TOD that works with the custom skybox I have created. I'm aiming for a S.T.A.L.K.E.R. like atmosphere, with lots of overcast clouds and strange lighting. The atmosphere is somewhat realistic, but some of the lighting (like the eerie glow at parts of the night) is strangely off.
I have a 800x600 slideshow:
http://s209.photobucket.com/albums/bb134/EvilViking13/CryEngine/Lab%20X16/TODtest1/?albumview=slideshow
...as well as an HD video:
[ame="
Any suggestions are welcome!
I'm currently working on a derelict garage model, which I'm detailing in this thread: http://boards.polycount.net/showthread.php?t=68112
Saturday night I grabbed some reference images from S.T.A.L.K.E.R. and decided to do a speed challenge model. This is a simple outbuilding with no interior, 3x tiling textures (diffuse, spec, normal) and one unique sheet for the doors and windows with no spec or normal that will be used for parts of other less important buildings. Total time from start to model in-game: about 2 hours. I added a few decals in-game as well.
Oops, forgot to post wires/poly count as well:
Tis my goal to complete S.T.A.L.K.E.R. by the end of the year. lol
G
I broke it down to help me remember the process for more complicated models:
I also agree Gerasimimumu about the crack webs. I'd make some decals and place over the walls with varying scale and orientation.
We're still planning, but a few features that we are thinking about include:
This being a small scale mod, we don't plan on implementing large variations of the above content, but rather we plan on creating a very specific set of new assets that best meets our needs for this level. For instance, rather than trying to create 30 kinds of artifacts and never finishing this project, we will focus on creating what we need and what we can re-use throughout the level.
After my experiment with baking a normal map for the wooden door prop (see previous page), I decided to do the same thing for the derelict garage's doors. Here's my high poly setup:
And the final normal map combined with high frequency details in CrazyBump:
The final in-game result:
As you might have noticed, I also added a few more final details to the garage, including some Ukrainian signs:
It's time for another sign prop! This sign is based off of an actual sign for the real Chernobyl Exclusion Zone. It says in Ukrainian, "Picking mushrooms and berries prohibited!". But, honestly, if you want to eat a mushroom that contains 50% of your average lifetime dose of radiation, go for it.
To wrap up this update, I'm excited to show several flowgraph concept videos. These flowgraphs were created by EmAr, and feature some experimentation with possible enemies for Lab X2. The models are placeholders, and these are works in progress of course:
Morphing mutant attack:
[ame]
Poltergeist style mutant that uses barrels to attack the player:
[ame]
Notice that if you get too close things get a bit... chilly!
Finally, here's a warehouse that I'm currently working on based off of Bober Station in the real Chernobyl Exclusion Zone (inspiration: http://i209.photobucket.com/albums/bb134/EvilViking13/CryEngine/Lab%20X16/bober_01.jpg ) :
Note that a lot is missing at the moment, including some door frames and cuts. I haven't decided what the second floor is yet (just storage, or some sort of open office space maybe?), but I'm wondering if I have too many windows on the second floor?
I love the cryengine
I'm currently UV mapping and texturing that warehouse building, but I'm a bit stumped. What's the best way to UV map this circular window up top? I want to re-use the vertical brick ends that I have at the top of the texture below. I think there is a way to take sections of the curve shape and flatten them to fit the horizontally tiling texture. Any advice is appreciated!
Here's a mutant sketch I did today BTW
Any C&C are more than welcome as always.
EDIT: This is supposed to be the levitating/teleporting mutant but I wanted to start with a sipler pose
I got hammered with over 20 hours of Excel homework over the weekend, but I still managed to get some work done on the warehouse. Stuff I'm going to add later:
- A lot of the detailed brickwork has yet to be UVWMapped, I'm just going slow
- Props & decals. This has to wait because my building scale is off, and I have it scaled in the editor to the correct size. Once I get it textured, I'll be resizing it in Max.
- Railings for the stairway areas
- Probably a separate texture for ceilings rather than re-using the floor texture
- Breakable window panes in some windows
- I'm going to turn the room under the stairs into a bathroom
- Two plaster decals to break up the tiling on the inside walls (from the same photo shoot as the main texture)
- Metal sheeting on the roof as separate props. Some sections will still be lined up on the support beams, some will have fallen into the attic, and some will be no the ground.
I'm also planning on modeling some simple furniture to go in this and other buildings including desks, wooden chairs, cabinets, and shelves. Maybe some scientific-looking shelf units as well, we'll see. Anyway, here's what I have so far, suggestions would be great!
Current polycount: 4,441
Other than that nice going on project of this scale.
Regarding the texture, the normal map actually has parallax occlusion mapping applied which might be what you're referring to. Is it too extreme? As far as the texture mapping on the outside goes, it's very WIP. I still have lots of brickwork details to add (see the texture in my earlier post) along with plenty of decals.
Anyway, if you has some specific critiques that would be awesome!
I'm experimenting with 3ds max based decals thanks to some neat stuff Buddy posted on the second page of his thread:
I still have a lot to do for this building yet. Buddy sent me a sweet paintover a few days ago and I'm currently working on detailing and tweaking the building.