Search
-
Re: What Are You Working On? 2015!!!
 YES, more faces for everyone! or by everyone, anyways ima get my face in here too ;)
 -
Re: Realistic Character: Reimu Hakurei Bust
 Might want to do woman face before making her Asian. Or start with planes of face.
 -
Maya face Selection
 In maya 2012, I'm getting a problem. When I select a face, it looks like that, with the vertices highlighted. When I try to extrude from the face, It's completely messed up, I can't quite explain it. How do I get rid of this pesky setting that I somehow activated?
 -
[3ds max, Textools] unify UV faces
 should be an easy question, how do I get all of these seperate faces to overlap and occupy the exact same coordinates (and fill the uv map boundary)? I think there was a shortcut or something in Maya when uv unwrapping called Unify faces but I barely remember
 -
Re: Unreal Developer Kit - MASTER THREAD
 Probably a silly question with an obvious answer but...previously I'd select some BSP faces and click a material in the browser to apply that material. Now, it only seems to apply a material to a face if I drag it from the content browser on to the face in the editor...one face at a time only. What am I missing?
 -
Re: UVW Trouble
Well that face is probably flattened into a line in your uv layout. Just select that one face thats giving you problems, and it will probably look like a line rather than a face in your uv layout. Either reshape it out manually, or reproject that face and weld it where its supposed to go. -
Re: Paddle Frigate
 Try flipping the normals of the faces, then flipping them back. Turn on visible normals and see if your blue lines face the right way. The other thing that works for me sometimes is to delete the face, then recreate it.
 -
Re: 3DS Max unwrap
 down the bottom of the UV unwrap window there's a button with a triangle on it. It's next to the lock selection button. This is the filter selected faces button. If you select some faces in the viewport, and then hit this button, it will hide the other faces.
 -
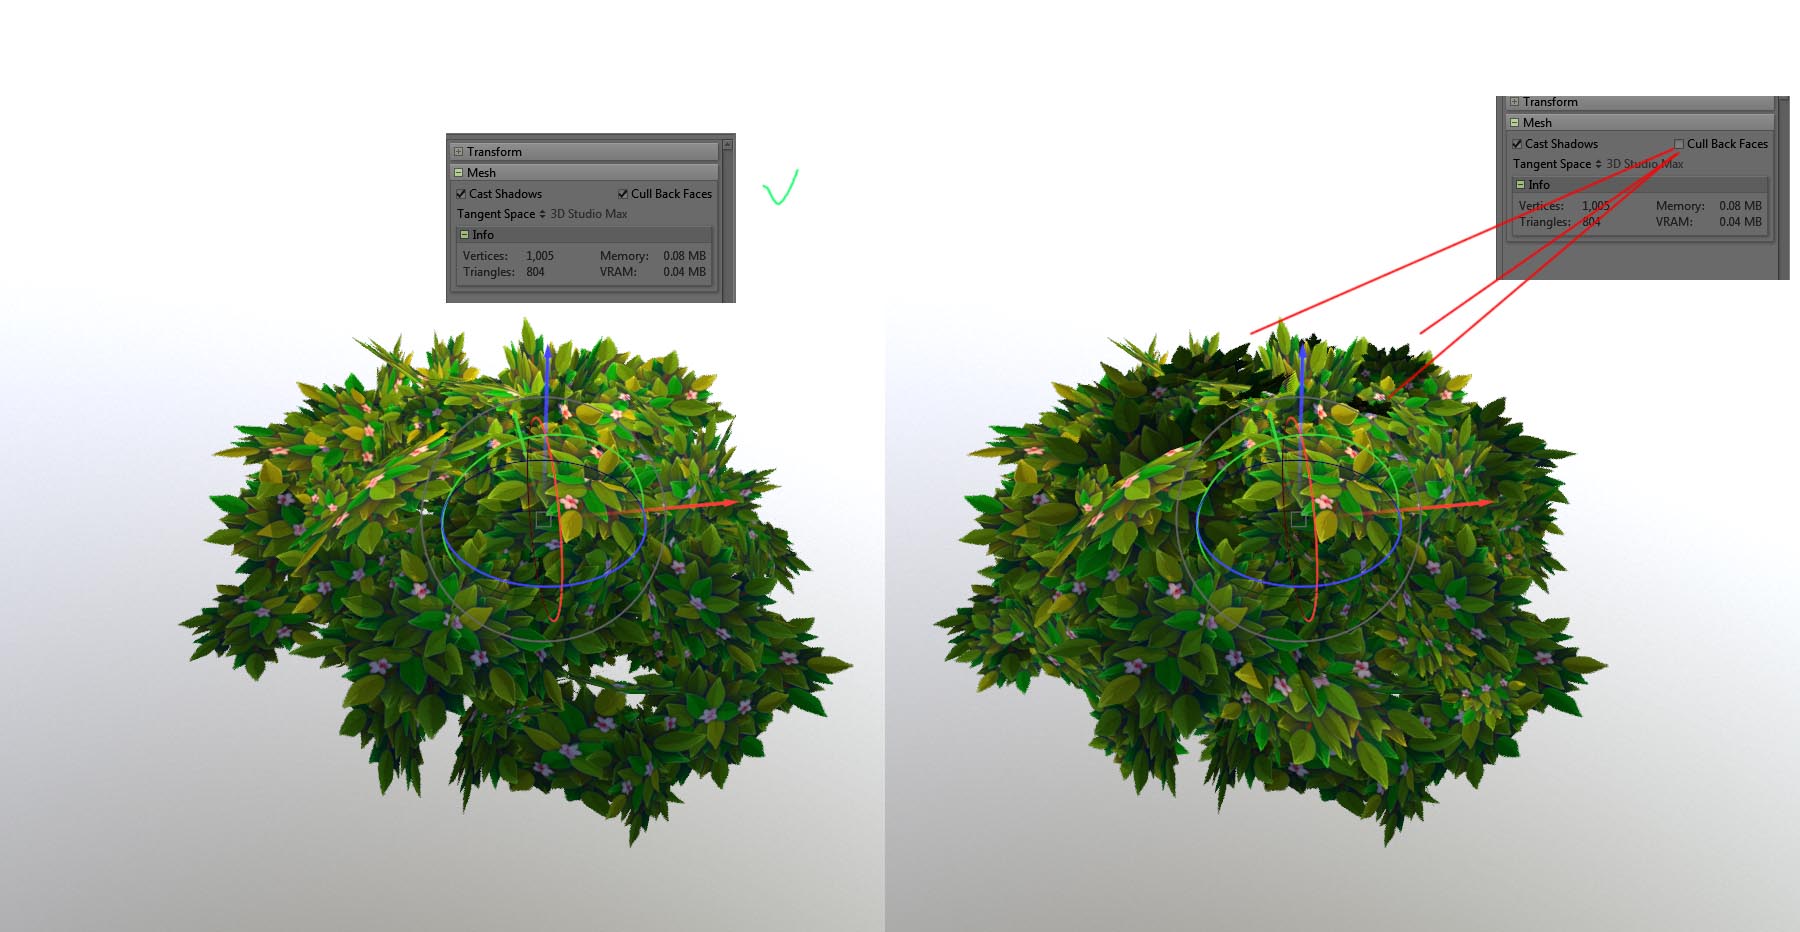
Re: Foliage normals problems
-
Re: The Old Warrior's Song
 Some slightly updated work on the face and body. I have a lot of work to do on the skinning and the hair, the god damn hair, and the face morph, the god damn face morph. 2.09am! go to bed!!

>25061 results