Search
-
Re: Looking for 3D Game Character Tutorials

 This tutorial shows how to create a Stylized character and a PBR character: https://cubebrush.co/marketplace?product_id=1jur3a On Youtube he explains the full workflow: Stylized: https://youtu.be/b4CQ99--XAA PBR: https://youtu.be/UcgZcdPHSRI For character sculpting and anatomy I suggest you the tutorials from CGMakers:…
 -
Re: Deadspace Door
 I'm resurrecting this thread a couple months later. I have studied PBR, installed UE4 and am now doing my first PBR work ever. My primary concern at this point is of course, material definition. It needs to be clear what you are looking at. Above is my starting point. I usually don't get good results by starting with a…
 -
Re: Pilot Girl - Noob Challenge continued...
 Should have said, the lerps on the left aren't doing anything, just there to show the outputs from each channel of my AO/metal/rough map (Not sure if there's a different node I could have used). There is certainly more of a range in the metalness map than I would expect, but that's how it came out of Substance Designer so…
 -
Re: Need some help with roughness maps
 roughness represents microsurface detail that cannot be represented by a pixel, it is an average over an area. There is no correct roughness value for a surface - any charts or reference that you see must be taken with a pinch of salt. in practice you need to eyeball it under the lighting conditions you'll be working with…
 -
Re: Texturing with softwares such as quixel/substance vs manually in the Photoshop
 The principle advantage of tools like QS and SP is that you're painting across all channels of a material in a purpose built PBR environment. You can still create PBR textures in PS as they're still just textures, but being able to view the end result of your in-game asset, pretty much 1:1, while you're texturing is…
 -
Re: Sketchbook: Kristopher Twum
Update 6/17/16 - Vespa is back on Hiatus - Spent too much time noodling on the vespa that I ultimately just got bored and dropped it. Finally Back from school/hiatus. The last couple of days I've gotten a chance to work on the low poly of the model and read up more on the PBR… -
Re: Getting in Texturing, having a hard time with this.

 PBR workflow is the same everywhere. *No shadows in Albedo *Most surface detail is handled by roughness/reflectivity channels. You don't want your albedo to be noisy. *Accurate material definition and layers. Wood, metal, skin, or plastic etc all have unique properties. *Use calibrated values so your prop can be lit under…
 -
Moh's Texture Sketchbook
 Hi everyone! I wanted to learn more about texturing and been watching some tutorials on zbrush/substance designer. Here's the first one for the sketchbook, a ceramic bathroom floor, part of an abandoned environment setting done in substance designer for practice. Learning my way around substance designer while I was doing…
 -
Re: Cassette Radio Recorder

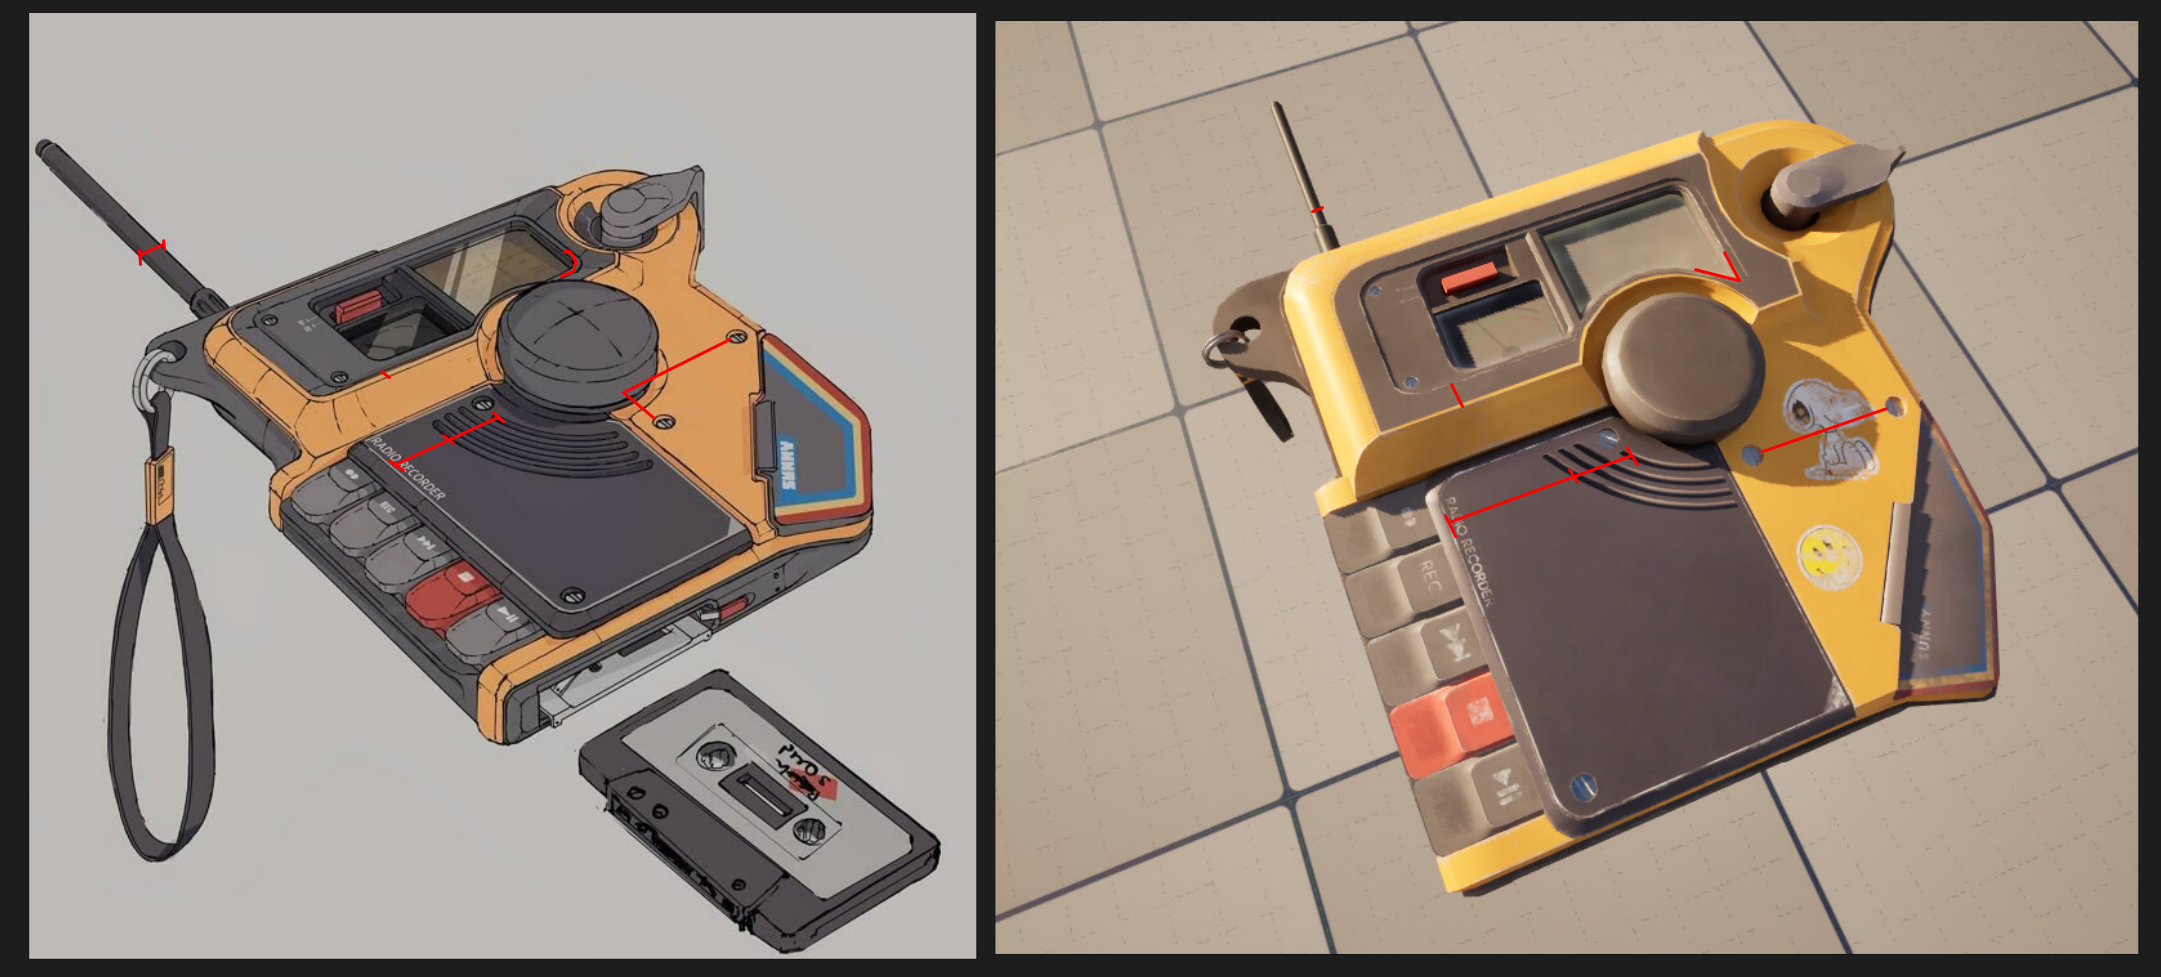 Nice project! In terms of modeling you have a fairly clean lowpoly mesh, good work here. I think it could use more polys all around since you have very visible facetting, especially on the big round dial in the middle and on the corner piece with where the lanyard is attached. In terms of proportions you have a few errors,…
 -
Re: Retopology: What Do I Do?
 Ah ok. Right. This is what I am doing for the first time using Blender (with a character that has some mechanical parts like a shovel). Blender, ZB and SP is all you really need. This is what I do: Forget remesher, it shines when you want to up your detail of the main sculpt. -Separate the chest from the lock. Clown paint…
>15786 results