Search
-
Re: [MAYA] How to convert Python 2 script to Python 3 [CREASE+ As an example]
 https://matiascodesal.com/blog/how-to-convert-maya-python-2-code-to-python-3/ there's a bit more detail on that link If you follow the instructions in the post above as written you'll be running the default windows python interpreter (whatever version that is) which won't have the 2to3 library installed. Instead you need…
 -
Re: Maya SSS Fast Skin Shader
 Diffuse - This is your overall color. Use this with the diffuse amount variable to determine how much of your diffuse shader sits on top of your SSS contribution. Overall - This map is determines where the SSS contribution will show. Where the map is white, like the skin of the cheek, you have full SSS. Where the map is…
 -
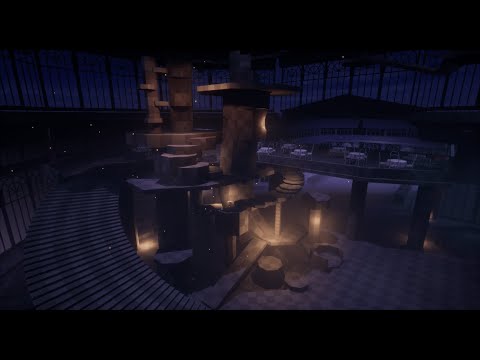
Re: [UDK] The Riddler's Den
 No worries, Neil. I find that critiquing keeps me sharp, so I'm happy to do it! It might be helpful to do a screen of the scene with the lights in it (not in game-mode) so I can see what you're using. BUT, just making a guess, you have a light over by the monitors that is having a pretty big influence on the scene. Couple…
 -
Re: SDK Edit Surface Type Button not working!!
I'm trying to get my head around this stuff as I type, pretty much, so I hope this doesn't come out as a sprawling mess! Im at a similar stage to you but I have managed to get a little further. The main problem for me is that the Crysis Wars editor is different from the main Crysis one. I only found a small mention of this… -
Re: Zbrush 3.1 related
 For skin tight stuff you'd be better off just making a new layer and sculpting up the fabric from the original torso mesh - or, if you want to keep polygon counts more manageable (especially with a fully limbed base body), mask off the appropriate area on the torso mesh for the skin tight fabric and do a mesh extraction.…
 -
Re: [WIP] Pounce! - A cute cat party game

 Short(ish) playthrough of our first greybox pass submitted for today: https://www.youtube.com/watch?v=RU3M_fI2S5c The movement blueprint for the cat as well as the lighting for the scene are very much still a WIP - the cat placeholder we're using is currently substituted into the default Unreal third-person character BP…
 -
Re: This is how good you can get at hard surface in 30 days|Challenge
 Ponte Ryuurui as an example, is big on generating appropriately variable radius bevels for most of his hard edged objects, especially his course content models made with HardOps - I mean your picatinny rail looks so sharp I'll be able to shave my beard, with it. ...if this is an improvement thread based on hard surface…
 -
Zbrush Help! Dynamesh Master
 Hello friends, I am running into trouble going about a workflow using 3Ds Max to model a hard surface prop with smoothing groups and then transitioning to Zbrush to use those smoothing groups for gaining more control on smoothing and refining the sharp edges. So I have seen a tutorial where a model with well defined…
 -
Max 2011 questions
 Just started to try out 3d max 2011, I'm very happy that all my favourite scripts/plugins work fine so far... but have ran into a few annoyances; 1) Is it possible to disable the menu bar by default? There is an option to disable the menu bar along with the track bar and stuff, but it seems every single time I restart max,…
 -
Re: Please tell me how to assign weights to this hat neatly and quickly in Maya.
 just default settings for the bind and closest distance should do the trick. it is likely that the bind achieves what you want, but if it does not, then you'll use the skin weight tools to fix things up.
>10219 results